How Much Sunlight Does Spinach Need?

There’s something incredibly gratifying about gardening: when your hard work begins to show results! Gardening is a joyous hobby that anyone can enjoy and reap the rewards of.

While there are many different kinds of vegetables, one prominent go-to among gardeners is spinach.

Before you jump into planting that packet of seeds, however, it is essential to ask yourself, does spinach need full sun to grow?

The answer may surprise you – while most plants do require full exposure to sunlight during the growing season, with proper care and knowledge it’s possible to successfully grow spinach in more shaded areas as well!

Let’s dive into what makes spinach unique and how you can adjust your gardening strategies to reap the greatest, most flavorful harvests from your garden.

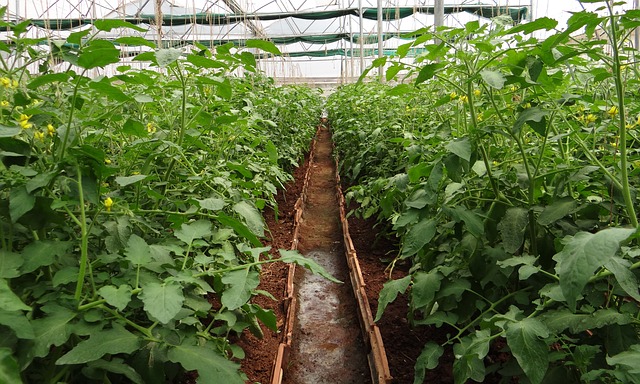
Growing Requirements of Spinach Plant

Knowing about the essential requirements of spinach will help you decide whether or not it’s suitable for your garden. And you can accordingly prepare the planting spot or container.

Soil Requirements:

Spinach thrives in a slightly acidic soil with optimal pH levels between 6.0 and 7.5, as well as moist yet drained soils that are nutrient-rich..

Incorporating ample organic matter into the soil such as compost or aged manure prior to planting is a critical step in promoting its fertility.

Sunlight Requirements:

Depending on the variety and climate, spinach needs at least 6 hours of direct sunlight to thrive – however this can alter.

If you’re in an area with intense sunlight or soaring temperatures, choosing a spot that only gets partial shade during the day is your best bet.

Water Requirements:

To ensure Spinach’s optimal growth, it is essential to provide a sufficient amount of moisture throughout its growing season. Doing so will promote the overall health and happiness of this vegetable.

For optimal growth, strive to provide your plants with 1-2 inches of water per week either through rainfall or manual watering.

Even though spinach can tolerate some drought, it is essential to keep the soil moist and never let it dry out completely.

Also Read: How Much Water Does Spinach Need to Grow?

Nutritional Requirements:

Not only does spinach need abundant sunlight, water, and soil to flourish; it also needs essential nutrients in order to reach its full growth potential.

Nourish your plants monthly with a 10-10-10 balanced fertilizer or an organic compost solution to create flavorful, healthy leaves.

With the correct nutrients supplied, you will be able to witness their growth and reap their delectable benefits!

How Much Sunlight Does Spinach Need?

Spinach stands out from other veggies, as it is not reliant on direct sunlight exposure. Rather, a semi-shade tolerant plant, spinach can be grown in partial sunshine or with diffused light.

Planting spinach requires ample sunlight, at least 4-6 hours of direct sunlight throughout the day with some shade from afternoon light if needed.

Note: However, for optimal growth and yields, spinach should be planted in an area that is exposed to full sunlight throughout the day.

  • One thing that sets spinach apart from other leafy greens is its ability to tolerate cooler temperatures and soil conditions than most plants.
  • In fact, this leafy vegetable prefers temperatures as low as 40 F, making it an ideal choice for early spring plantings.
  • Additionally, spinach thrives in moist soil, ensure to water your plant at regular intervals and protect from drying winds or direct sun if needed.

Also Read: How to Grow Spinach Microgreens?

What are Spinach Sunlight Requirements?

As mentioned above, spinach does well in full sun or at least 4-6 hours of direct sunlight.

To ensure your plants stay healthy, make sure to provide them with plenty of water and protection from strong winds or direct sunlight.

With the right care and expertise, you can cultivate this leafy green in even shadier spots.

When selecting spinach varieties, it is imperative to keep in mind that each type requires a unique amount of sunlight – some may require more than others.

When planting your garden, it is essential to read the package instructions thoroughly before selecting varieties so that you know precisely what conditions will ensure their growth and success.

It is noteworthy that spinach generally has a brief lifespan in the garden, with most varieties only present for 2-3 months.

Therefore, to ensure a steady yield throughout the season, it is wise to sow seeds periodically every couple of weeks.

Check this out: Why Are My Spinach Leaves Curling?

Does spinach need full sun?

No, spinach does not need full sun to thrive. Although many plants must have full sun to grow, spinach is unique in that it can thrive with only semi-shade.

Although partial sunlight or filtered shade will suffice, ensure that your plant receive a minimum of four to 6 hours of direct sunlight daily for optimal growth..

Will spinach grow in shade?

Yes, spinach can be successfully grown in more shaded areas. When planting this leafy green, aim to give your crop at least few hours of initial sunlight.

Does malabar spinach need full sun?

Malabar spinach is a heat tolerant variety that does best in full sun. It prefers temperatures between 60-85 F..

To ensure your plants are receiving the best care, choose a location with six hours of direct sunlight each day.

Also Read: Why Are My Spinach Leaves Turning Yellow?

Spinach Growing Tips

1. For the best results, plant spinach seeds early in the spring when temperatures are comfortably between 40-60 degrees Fahrenheit.

2. Spinach needs direct sunlight for at least 4-6 hours every day, but taking a break from the heat by giving it some shade in the afternoon can prevent wilting and other sun-related stress during warmer months.

3. Choose a spot in your garden that is blessed with abundant sunshine for the majority of each day to ensure optimal growth and bountiful yields.

4. Water spinach frequently to keep the soil moist, but not waterlogged; otherwise, root rot and other fungi may occur..

5. Spinach has an acidic nature, making it prone to nutrient deficiencies. To ensure your plants are receiving the nutrients they need, you should frequently add compost or fertilizer enriched soil for optimal nutrition absorption..

6. To safeguard your spinach plants from windy gusts and harsh sunlight, place a layer of mulch consisting of straw or light-hued wood chips around the base of each plant..

7. To ensure the health and quality of your spinach, be certain to examine the package instructions before sowing. This is integral for multiple types of spinach, as it will provide insight on what conditions each variety needs in order to thrive within your garden’s climate and soil type..

8. For a consistent harvest, it is important to consistently sow new seeds every few weeks. This is particularly relevant with spinach due its short-lived nature of 2-3 months before bolting and turning bitter in flavor.

9. To gain the greatest flavor and texture, pick spinach leaves when they are still young and delicate before blooming.

10. Protect your leafy greens from uninvited visitors such as aphids by utilizing companion planting and natural insect repellents! Herbs are a great option, or you can opt for neem oil or garlic spray- both of which will protect your plants without jeopardizing any helpful bugs like bees.

Conclusion

Spinach needs some shade to thrive, but still requires a good amount of sunlight. For the greatest success and yield, it should be exposed to 4-6 hours of direct sunshine daily.

Ultimately, it’s essential to meticulously adhere to the instructions for each spinach variety and utilize recommended growing techniques such as companion planting and mulching for maximum harvests!

How Much Water Does Spinach Need to Grow?

Potted spinach plants are prone to over-watering problem.

As excess water can result in root rot gardeners should avoid it.

It is essential to determine how much water does spinach need to grow?

Expert team from Plant village states, spinach plant should be watered 1 inch or 2.5 cm of water for every 7-10 days.

If you’re like many gardeners, spinach is a go-to crop for your home garden – and with good reason. Not only does it provide a range of health benefits, but it is also relatively easy to grow.

Before planting spinach patch this season, read on to learn what kind of watering practices are best for providing the care that spinach needs during its peak growing months.

Growing requirements for spinach

Let me keep things simple and to the point.

Sunlight

To ensure optimum growth, spinach should be planted in a sunny spot with fertile soil that has a pH between 6-6.8.

Although it does tolerate some shade, full sun is preferable for the best yield of leaves and flavor.

But, too much sun can make spinach leaves to curl.

Water

But when it comes to water, your spinach needs consistent moisture levels throughout the season – so try to aim for an inch of rainfall or irrigation per week.

Keep in mind that spinach has shallow roots, so avoid over-watering which can lead to root rot.

During the hottest months of summer, you may need to adjust your watering schedule accordingly as hot temperatures and direct sun can cause soil to dry out more quickly.

Note: While watering your spinach plants ensure you don’t water directly on the leaves – as wet spinach leaves can lead to fungal and bacterial diseases.

Soil

Spinach loves to grow in fertile and well-drained soil.

It should drain excess water, but should be able to retain required moisture to the plant roots.

Fertilizing

Spinach plants are heavy feeders.

Right amount of nutrients supply will encourage them to produce bigger and quality leaves.

Apart from adding compost while potting, you should fertilize spinach with balanced fertilizers.

Also Read: Is Eggshells Good for Pepper Plants?

How Much Water Does Spinach Need to Grow?

Watering your spinach is essential for its growth and development. Proper water levels make sure that the spinach plant receives the right amount of hydration needed to produce healthy leaves.

Spinach should be watered about once a week, providing 1 inch of water as mentioned above.

However, during hot summer months, you may need to regulate watering frequency according to plant needs.

Check soil moisture by inserting your index finger in the soil.

What does an overwatered spider plant look like?

Signs of overwatering: An overwatered spider plant will have yellowing, wilted leaves and stems. It may also develop brown spots or root rot. The soil may also become waterlogged and mushy.

If your spider plant is showing signs of overwatering, reduce watering frequency and allow the soil to dry out completely between waterings.

Additionally, make sure that the pot is draining properly and not retaining too much water.

How to tell Spinach Plant is Underwatered?

Signs: If your spinach plant is under-watered, the leaves will become limp and wilt, and the soil will look dry and dusty. The leaves may also take on a yellowish hue.

In extreme cases, the leaves may even become crispy and grey-brown.

If you suspect your spinach plant is under-watered, give it a thorough watering and check the soil moisture levels every few days to ensure consistency.

Additionally, you may want to add a layer of mulch around your spinach plants to help retain moisture levels in the soil.

Does spinach need water everyday?

No, spinach does not need to be watered every day. Spinach should receive about 1 inch of water once a week during peak growing season.

In particularly hot and dry climates, you may need to adjust your watering schedule accordingly and water more often.

How often do water potted spinach?

Potted spinach should be watered about once or twice a week, depending on the size of the pot and climate.

You may need to water more frequently during particularly hot summer months. When watering potted spinach, make sure to thoroughly drench the soil but avoid over-watering which can cause root rot.

Allow the surface of the soil to dry out between waterings.

Additionally, make sure that the pot is draining properly and not retaining too much water.

Important Tip:

Finally, consider adding a layer of mulch around your spinach plants to help retain moisture levels in the soil. These simple steps will ensure that your potted spinach thrives during its peak growing season!

Watering Tips for Growing Spinach

1. Spinach is an easy to grow, cool season vegetable that thrives in moist soil and cooler weather.

2. When planting spinach, sow the seeds at a depth of 1/4 inch in light, well-draining soils. The ideal soil temperature for germination should be between 45 to 75 degrees Fahrenheit.

3. Once the seedlings emerge above the ground, water frequently and thoroughly to keep the soil moist and provide them with sufficient water to continue growing.

4. During hot dry weather or during periods of extreme temperatures, you will need to water your spinach plants more often than usual in order to keep them from wilting or drying out.

5. For optimal growth and health, spinach should be watered deeply about 2-3 times per week depending on your climate and soil type, amount of rainfall and other factors like extreme heat or strong winds that can cause excessive drying out of the soil quicker than usual.

6. To tell if your spinach needs watering, insert your finger into the soil up to about knuckle deep – if it feels dry then it’s time to give them a good soaking with a garden hose or watering can until water starts running out of the bottom of the pot or container you’re using for gardening purposes.

7. If possible avoid getting foliage wet while watering as this can lead to diseases such as downy mildew which is known to affect growing spinach plants quite severely sometimes even leading them to die prematurely from infection or destruction by fungal spores .

8. Compacted soils should also be avoided, as it can reduce drainage resulting in poor root development due to lack of oxygen supply which further contributes towards inadequate nutrient uptake abilities by the plant itself.

By following these simple watering tips, your spinach will have a better chance at thriving this season!

Conclusion

You should avoid over-watering your spinach plants as this can lead to root rot and other diseases.

Most important tip to remember is that the soil should remain moist not soaked. Water your spinach 2-3 times each week, depending on the weather in your area. If you give it enough water consistently, it grows healthy.

Why Are My Potato Plant Leaves Curling?

Potatoes and other nightshade plants are susceptible to several diseases. As a result, the curling of leaves is a frequent problem for potato growers. To begin with, finding out what’s causing the problem is the first step in solving it. Any of the numerous potential causes could be the reason if you realize this side effect on your potato plants. You’ll learn about the various possible causes of potato plant leaves curling in this post, along with helpful advice on managing it and restoring the plant’s health.

What causes this leaf curling disease?

The Curculifer tenellus, a beet leafhopper, spreads the pathogen. The leafhopper pest spreads the disease to many crops and weeds, such as Tomatoes, Beets, Peppers, Beans, Spinach, Squash, and Cucurbits.

Both leafhoppers and the virus can be found on a wide variety of weeds and wild plants. The leafhopper ingests the virus in the form of the cell sap, which nurtures in the leafhopper for 4 to 21 hours until being transmitted. The illness is then spread through the tissues of the plant.

The potato plant’s leaves can curl for several different reasons. The following list includes some of the illnesses:

Also Read: How Much Sunlight Does Broccoli Need?

Curly pinnacle virus of potatoes

The illness known as potato curly pinnacle bacterial infection is brought on by a group of closely related pathogens known as circovirus. The name of this disease, which derives from the vegetable itself and is also frequently found in beets, is the beet curly pinnacle virus.

Stunted growth and curled, yellow leaves are symptoms of the potato curly pinnacle virus. In addition, the symptoms of the illness have been transformed into tubers, which are aerial tubers and cutting, elongated tubers.

By using certified seeds, you can reduce the likelihood of contracting the disease and lessen its effects. To prevent leafhoppers and the spread of disease, control the weeds and cover them with mesh barriers. Additionally, it will cover the plants that are positioned next to them.

The best way to protect your plant after those who start showing symptoms is to pull it out entirely and damage it, as this will prevent it from stunting its growth and harming them.

Potato Virus Y

A disease called the Potato Virus Y, or PVY, has an effect on commercial potato production. The disease is caused by a virus that belongs to the Potyviridae family and is a pathogen to many plants, including potatoes, tomatoes, and capsicum. It frequently spreads by way of aphids. It may remain latent in the seeds and spread the disease to the plant that develops from its fragments.

Mild and dark patterns that crinkle the leaves surfaces and the untimely death of the plant are the symptoms that are visible on the leaves.

The plant’s development is stunted, and the leaves fall off when the illness reaches a critical stage. As a result, you may find light brown rings on the surface of the tubers once the disease has spread to them.

Plant only authorized seed potatoes, choose PVY-resistant potato varieties, and immediately dispose of old plant residues after harvest to prevent the spread of disease to the new plants. To prevent it from spreading to the contrary plant life, destroy and remove all of the potato plant life that exhibits symptoms of the virus.

Also Read: What Does Blight Look Like On Cucumber?

Potato leafroll disease

The potato leafroll disease, also known as PLRV, is a dangerous virus that follows PVY in the sector. It is brought on by an epidemic within the Solemoviridae family and is additionally spread by aphids, primarily peach aphids.

The pathogen affects plants that are members of the Solanaceae family, including potatoes. Severe infections have the potential to stunt a plant’s growth and even cause its demise.

The initial symptoms of this illness are yellow leaves with an upward spinning of the rims. As the disease progresses, the leaves become wrinkled and crunchy, and plant growth is slowed.

Planting certified potato seeds can reduce the likelihood of the disease spreading. In addition, keep the lawn bed free of weed growth and self-sown potatoes, and use chemical pesticides early in the season to keep aphids away from the plants.

Potato Leafhopper

The potato leafhopper, also known as Empoasca fabae, is an infestation that attacks a variety of plants, including potatoes. These minor, inexperienced bugs move around a lot. The winged insects eat the potato leaves with the aid of piercing, sucking mouthparts.

Because the potato leafhopper feeds on the molecular saps, necrosis inside the leaflets starts at the tips and progresses to the margins before impacting the entire leaf. In extreme circumstances, it might lead to defoliation.

When the weather is warm and dry, the symptoms appear more quickly. Some indications that potato leafhoppers afflict your plant life include upturn curly yellow leaves and very little plant life.

The practical measures that can be taken include avoiding planting potatoes near alfalfa areas because those fields are infested with pests that could help timely the potato crop once the alfalfa has been harvested.

To put up a higher defense against pest damage, keep the plants well-fed and well-hydrated. Pesticides applied to the leaves can also be used to control leafhoppers.

Also Read: How to Grow Spinach Microgreens?

Herbicides

Herbicides are chemical substances that can be used to avoid adverse flora in gardens. While directed herbicides are most effective at eliminating a few specific plant species from the lawn, they can also have an impact on other plants.

When herbicide residues are found in the soil, the chemical substances accidentally hit the plant, causing the potato leaves to curl. In addition, chemical compound strains from nearby fields can also be transmitted to your potato crop.

Herbicides can cause twisting, creasing, yellowing, and withering of leaves and stunted plant growth. Avoid using herbicides in your gardens; they harm plant life and can be very damaging to the plant’s health.

Even if you have to, add those different chemicals during autumn. Please don’t add them while they’re still developing.

Inadequate Water Retention of the Plants

Potato leaf curling is frequently the result of improper watering. The shape and form of the leaves can be harmed by too much and too little watering.

Avoid overwatering the crop while watering it frequently to keep the soil moist. Ensure that the soil has good drainage and that there is no longer any standing water near the roots. Mulch the plant’s surroundings to help the soil retain water until the next watering.

How can you grow healthy potato plants?

When planting potatoes, there are a few recommendations and requirements for such potato plants that must be kept in mind. The following are listed either for commercial use or home gardens:

Planting the Licensed Seed Potatoes: Planting certified seed potatoes ensure that you start with disease-free potatoes. Avoid growing from potatoes because they might have diseases that could spread the infection to the new plant; if you must, check the potato for any diseases.

Pre-sprouting Potatoes: It’s a great way to give the potato seedlings a head start prior to planting them on the ground.

Grow in Full Sun: Plant your potatoes in full sunlight, where they will receive 6 to 8 hours of sunshine if planted in acidic, well-tired soil.

Plant potatoes in the springtime because they thrive in cooler climates. They are best planted in the spring. The potato seeds will rot in wet, waterlogged soil. The plantation of the seeds depends on the soil’s moisture and condition, as is the plant’s growth.

Maintain Soil Moistness: Keeping the potato bed’s soil moist is crucial, so watering frequency should be monitored for a week.

Protect your potatoes from developing tubers on the soil by mulching closely and keeping the soil away from the tubers.

After the plant blooms, you can begin reaping new potatoes as required for food. However, it would help if you let the potatoes grow ultimately for food storage. Allow the tubers to mature on the ground if you are growing potatoes for storage.

Unwashed potatoes should be cured before removal, allowing the skin to thicken and heal. Cured tubers should be kept in the dark, airtight containers or packing containers.

For Healthy Soil, Rotate Your Potato Crop: Potatoes on the lawn need to be rotated every three to twelve months. Potatoes should appear in a different location for three to four years. Beans, leafy green vegetables, and any other crop other than potatoes should be planted after potatoes.

Also Read: Why Are Sweet Pea Leaves Turning Yellow?

Conclusion

Once you understand the fundamentals, developing potatoes is very simple. You can give your family and close friends a delicious, natural, and nutrient-rich meal from homegrown potatoes. The satisfaction of knowing that you began growing them yourself is also fulfilling.

Growing something unique on your lawn elicits very different emotions. First, it gives you a sense of joy because it is something you have worked so hard, patiently, and difficulty to grow.

As long as you have your production, you can eat whenever you want, whether mashed, fried, or boiled. Please pick them up off the grass, wash them, and prepare them as you see fit. You could grow potatoes in your garden or your garden while taking into account the guidelines and requirements for the plantation.

How Many Green Peppers Per Plant?

The biggest question when it comes to growing fruits and vegetables in your house garden is how many plants you must plant to get enough harvest to feed your entire garden; however, you can figure it out by learning about the average yield of each crop.

Green peppers are common vegetables that most people grow in their house gardens. Learning about bell peppers and how many bell peppers a plant can reproduce saves you a lot of time and clarifies how many plants you must plant to have a full season of tasty green peppers.

Some varieties are found in peppers, including hot peppers, sweet peppers, banana peppers, bell peppers, and more. As a result, the yield varies greatly with every other variety.

How many green peppers can be grown in a single plant?

On average, a single bell pepper plant produces 5 to 10 peppers. However, this variable can be affected by several factors, such as growing season, temperature, watering, soil quality, and soil health. With all these factors, the variety of paper also affects the plant’s yield.

Also Read: Is Cow Manure Good For Chili Plants?

The growing season of bell peppers!

It is good news for people living in warmer climates to know that pepper plants will keep producing fruits all season long. These are warm-loving plants that grow faster in hot climatic conditions instead of in low temperatures. The climate affects the growing season of bell peppers as the people living in hotter climates will have all season-long production compared to the short growing season of the people living in cooler climates. In cooler conditions, bell peppers are usually planted indoors and transferred to the greenhouses for maximum harvest.

One more thing that can encourage increased production and growth of fruits is regular harvesting. And you must also know that as the fruits of the bell pepper plant mature, they change color, starting from green to red and yellow. You can harvest the pepper in the color you prefer.

Do you want to learn how to make your pepper plant produce more peppers? Following the article, we are discussing 8 more ways you can achieve greater peppers from your house garden production.

Peppers and how to increase their production

As we mentioned above, several factors, including the varieties of bell pepper sown, can affect their growth and harvest. But there are ways you can get the most productive yield every year by planting pepper consciously. Follow the article to learn more.

1. Plant a variety suitable for your location.

Location plays a huge role in farming and agriculture. Seasonal changes can affect crop production and yield by boosting their production or deteriorating the entire crop bed. Pepper is a summer plant and needs a long growing season for perfect production. Most varieties of paper are grown in warm conditions, including green pepper. However, if you live in cooler areas, you can choose specific varieties of pepper that mature quickly and are suitable for cold weather to maximize your yield.

2. Rework the soil to enhance its nutritional value.

Soil with less nutritional value can affect the quality of the plant and fruits that it bears and smaller fruit. At the same time, healthy soil will produce healthy fruit. That is why you must rework your soil before planting. You must dig your soil deep to make the organic matter into the soil before planting the seed. You can add Epsom salt to the pit at the plantation time for extra nutritional content. Peppers need tons of nitrogen and are heavy feeders during their initial growth phase. However, the nitrogen content must be reduced in the fruiting phase to increase fruit production instead of a bunch of leaves.

3. Start planting early.

As we mentioned, peppers require a long growing season, and therefore it is best to start the planting procedure 7 to 8 weeks before the last frost date as it will significantly maximize the harvest for each plant. If you live in a warmer climate area, pepper plants must be grown early to be matured as long as they meet the ideal conditions. You can extend the season long enough just by starting the seeds early. Ensure that the soil temperature has warmed to at least 70 degrees Fahrenheit; below that, you should not plant pepper.

Also Read: Do Asparagus Need Full Sun to Grow?

4. Proper spacing is essential.

Planting as many paper plants as you want without considering proper spacing does more harm than good. It prevents the plant from reaching its full size by making the space congested and suffocating for the plant. It also reduces the airflow posing a risk for plant diseases.

5. Watering must be manageable and manageable.

Due to peppers being warm-season vegetables, it is often mistaken for needing less water. It must be taken into consideration that hot right temperatures can adversely affect flower production, including the yield, if not watered enough. You can achieve proper watering management by setting up a drip irrigation system to ensure sufficient watering at the soil level. You must also be aware that excess water can harm the plant and impose a number of diseases which can be prevented by setting up a good drainage system so that your plants are not accumulated around the standing water.

6. Prevent the shade

Peppers need sunlight so give them as much as you can. Planting them in the shade will likely yield you smaller and vehicle plants, whereas allowing them to get at least 10 hours of sunlight per day will considerably change the taste, quality, and production of peppers.

7. Prevent stress

The stress of disease, weeds, weather conditions, or too much or too little water can affect the plant, resulting in poor fruit production. Managing diseases, weeds, and water is essential to reduce the stress on the plants and make them produce effectively. Stress can also occur with temperature or climatic changes. The striving temperature for peppers is between 70 to 85 degrees Fahrenheit during the daytime and 65 to 70 degrees Fahrenheit at night.

The plants may appear stunted and not bear the flowers in cooler temperatures. They can also be affected badly if the temperature rises above 90 degrees, and they may drop flowers resulting in a bad harvest. The temperature stress can be avoided by choosing a variety of appropriate peppers for your weather conditions.

You will also be required to keep the pests and weeds in check with the help of proper preventive measures to promote your plant’s healthy growth.

Check this out: Why Are My Pumpkin Plant Leaves Turning Yellow?

What could be the reasons for your pepper plant not producing?

So many reasons can affect the yield of your house garden pepper plants. With the number of factors, there can be difficulty in pinpointing what factor is affecting the growth of your plan. Here are some common reasons to look out for that can affect your plant’s growth.

Weather

Ignoring the weather conditions can be harmful to your plant’s health. It can affect not only the flower but fruit production. Therefore, you must choose a variety of pepper suitable for the climatic conditions where you live.

Too much or too little fertilizer

Adding fertilizers can enhance the quality of your soil by enriching it with several essential nutrients that result in a good yield. However, adding too much fertilizer or too little can be damaging. Phosphorus and potassium are required for peppers to wear fruit, and calcium deficiency can result in blossom end rot. Similarly, too much nitrogen in the fruiting phase will produce more leaves than flowers. Magnesium can effectively add the appropriate nutritional value to the soil for the plants to become properly fit and healthy for harvest.

Inadequate pollination

Fruit development occurs after fertilization which is a result of pollination. Inadequate pollination can also result from inferior growth of your pepper plant. If you do not see many pollinators around your garden, try adding some bright flowers, or you can also try hand-pollinating your papers to see if it works.

Bad companions

One last issue that can affect the growth and production of pepper plants in your garden includes the companionship of discouraging plants. For example, fennel is one such plant that tends to inhibit the growth of other plants planted around it. The best companions for growing alongside the pepper plant include peas, basil, carrots, tomatoes, lettuce, spinach and more.

Also Read: Should I Cut Off Yellow Cucumber Leaves?

Conclusion

We have provided you with a clear idea of how many green peppers can be grown per plant and how many plants you can plant in your house garden for a full season of delicious peppers to treat your appetite. Now it is all on you to eat them fresh in a salad, freeze them, or make a finger-licking pickle to enjoy as a side dish with a main course!

How Much Sunlight Do Chives Need?

If you are a big fan of growing culinary herbs in your home garden, chives are one of the best help. It is so easy to maintain them, and the fresh seasonal flavor you get can add a real twist to your favorite dishes. Easy maintenance, high yield, and versatility make chives the best culinary herb to grow in your garden.

This article will discuss everything you must know about chives, from how to plant, cultivate, harvest, and store them. But first, let’s examine why you should even consider growing a herb as a chive in your garden.

Why Chives?

If you are a beginner in gardening or have never planted a herb before, then consider chives as the gateway herb. Despite being so easy to grow, chives can boost your curiosity for further exploration and make you confident in your work. These are perennial herbs and grow back each spring. Chives can be seen quite early during the cooler season for the same reason.

With a light onion-like flavor, these hollow green leaves are the perfect seasoning for your salad, omelet, soup and many other flavourful delicacies to elevate the taste with a herbaceous punch. Potato salads are the first and foremost classic to be seasoned with chives, but their versatility makes them suitable for almost any cuisine.

The unique quality of the plant is that it is entirely edible. The leaves, blossoms, bulbs, and all the content can be used in your kitchen very efficiently. Also, adding chives can be a good call to attract pollinators through its vibrant purple blossom if you have a house garden full of several different vegetables.

Also Read: How to Grow Spinach Microgreens?

Here are some more quick facts about chives!

  • Chives are summer herbs and require full sun with a soil adequately rich to provide all the organic matter required for them to survive.
  • One of the easiest ways to grow chives in your house garden is by planting clamps in spring that have been rooted after the Frost danger has already passed.
  • Chives can be harvested by snipping the leaves from the base of the plant.
  • The taste gets adversely affected when chives are kept stored for a long time; these versatile herbs taste better when fresh.

How many hours do chives need sunlight?

Chives need exposure to at least 7 to 8 hours of sunlight per day. This time can extend to 10 hours if the environment is not warmer. This is because the extremely hot climate can make The herbs die out of dehydration. Exposure to at least 6 hours of sunlight is essential for the proper growth of the chives plants. You can also notice sun deprivation in chives plants when they lose color and start dropping off. They may appear more yellowish brown, which is not normal for healthy chives growth.

Even though chives are sun-loving plants, keeping them under proper shade during the highest temperature will protect them from dying out. More than 90 degrees Fahrenheit has the brightest sun, which should be avoided for longer to reach the plants directly.

Planting Chives

When planting outdoors

If you are planting the chives outdoors, you must remember that after the passing of Frost danger, when chives are planted as rooted clums in spring, it is the most successful way of growing them to get a healthy yield. Every 3 to 4 years must be the time to divide the established plans, and the division must be done in spring as it is the best time. You must plant the seedlings on an appropriate spacing of 6 to 12 inches apart. When planting new clums, remember to enrich the soil by reworking it to get the richest soil inorganic matter. Fine compost can be used for the same.

When planting indoors

Bright Sunny location is most suited to grow shapes indoors in your house gardens. These herbs are summer loving and require 7 to 8 hours of sunlight to flourish. When planting them in pots, make sure they have holes in their bottom for drainage. Also, a good house plant potting mix with light and well-drained soil must be used for the healthy growth of the plant. Chives do not grow effectively during winters as the sunlight is poor. And you can even see the plans of chives dying because of the reason. However, with the arrival of a brighter sun again in the spring, the plants will also be rustling back.

What to remember!

  • A common mistake many people make during the winter season on seeing the plants dying is adding extra fertilizer. However, it is not appropriate and required by the plant during winter to get fertilized, which will do more harm than good.
  • The best yield of chives occurs in container gardens, and they thrive on a Sunny windows cell when planted indoors.
  • Let the ground temperature reach at least 65 degrees Fahrenheit to set the chives seeds. Start the planting process indoors if you are planting them from seeds. This is because when the growing season arrives, they will have a head start organically so that you can set them in the ground.
  • You must sow the seeds at least 4 to 6 weeks earlier than the last projected frost. The transplantation of the seedlings must be done when they have grown about 2 inches tall.

Check this out: How to Grow Lemongrass from Scraps?

Cultivating procedure

Soil health and fertility

Planting shares in fertile, well-drained soil is a crucial step for a healthy and good yield. Organic fertilizer and a healthy composition in the soil to enrich the nutritions also add value to the plant’s health. You must also remember not to over-fertilize the plant, which will affect it negatively. Over-fertilizing your soil can lead to slower growth of chives leading to a strong and intense flavor. You can also get your soil tested for pH accuracy. A pH level of 6 to 7 is the best for chives to thrive.

If you see the plant becoming weak from continuous harvesting every year, a light application of 5-10-5 fertilizer will enrich the soil with good nutritional content.

Sunlight

As we have discussed above, chives thrive in strong sunlight. However, you can grow chives indoors by placing them at a specific location where they can receive at least 7 to 8 hours of sunshine.

Watering

If you receive frequent rain, you must water the plants deeply enough, so the soil around the roots does not dry out. You can also use compost, grass clippings, or a light mulch of ground-up leaves for the soil to retain its moisture. Moist soil is the key to a healthy chives plant. Your plants will strive to be healthy if there is a proper drainage system.

Alongside companions

Chives thrive alongside the plants, including cabbage, mustard, carrots, and tomatoes. Chives are also good for repelling carrot flies, cabbage worms, and aphids that may destroy crops. They also can be planted near apple trees as they prevent Apple scabs.

Also Read: Is Lawn Fertilizer Safe for Vegetable Garden?

Harvesting Chives

Harvesting leaves

Clip the chives leaves using the garden shears from above 2 inches of the soil. You will be required to clip the leaves from the outer portion of the plant instead of clipping all the plants at once. However, if you mistakenly cut back all of the plans, they will grow back again the following here, so there is no need to worry about that. Harvestation must be done when your chives plant is at least six inches tall.

Chives flowers between May and June can be used as a delicious ingredient in salads or as infused in the chives blossom vinegar. Once the flower stocks finish blooming, you must cut them off from the soil line. This will keep the plant productive by preventing it from forming seeds. You can also keep the extra chives by chopping them into small pieces and freezing them in an air-tight container.

Also Read: How Much Sunlight Does Broccoli Need?

Conclusion

Chives can grow almost anywhere, even if they do not receive sunlight directly. However, in this situation, the duration of sunlight is certainly increased to keep them flourishing. It is easier to grow chives in warmer temperatures. If soil conditions are also properly managed, chives will thrive without direct sunlight.

Chives are the most commonly used herb in any kitchen, and with your chive plants thriving in your home garden, you can get satisfaction from chopping the leaves right away when you need to add a hinge of flavor to your freshly prepared dishes and salads. Happy cooking!

How Many Broccoli Heads Grow On One Plant?

Do you know that a super healthy and tasty vegetable, broccoli, can be easily grown in your house garden? And if you have a long growing season, you can get two harvests each year. That is why broccoli is also known as a biennial plant.

Suppose you plan to grow broccoli in your house garden and want to learn more about it. In that case, you are at the right place because, in this article, we will discuss every basic detail, from the growing process of broccoli to how long it takes to get fully grown. Let’s continue reading to find more.

Broccoli – The Basics About It

broccoli

Besides being rich in several vitamins and minerals, broccoli, part of the cabbage family, is a cool-season vegetable that grows best when the daytime temperature is under 60 degrees Celsius. The best time to plant broccoli is, therefore, spring or fall season.

What is so cool about broccoli as a cool-season vegetable is that unlike carrots, beets, and other root vegetables, broccoli grows upright above the ground.

Broccoli are often used in edible landscaping, in which the most popular variety that shines out in ornamental plantings comes out the Romanesco varieties. The yellow flower grows with broccoli that you can harvest before it blooms for eating.

After learning about the basics of Broccoli, we arrive at the question of how many broccoli heads grow on one plant and how big the plant gets. So let’s find out.

Also Read: How Much Sunlight Does Broccoli Need?

Broccoli Heads on one plant…1, 2, 3, or more?

The popularity of broccoli as a winter vegetable eaten worldwide has risen compared to its closest relative, cauliflower because it is easily available and easy to make. And to answer the question, broccoli plants, in general varieties, produce one primary head per plant. A head weighs around 8 ounces.

One exception can occur if you plant sprouting broccoli that does not produce the primary head; instead, several small florets are produced in its plant. Calabrese, another most common type of broccoli grown commercially in the world, is majorly produced. Its popularity is because the plant size is significantly smaller than the Romanesco varieties.

Calabrese can be a perfect variety of broccoli to plant for home gardeners, and this is because it not only produces the primary head but also produces several smaller florets on the shoots of the plant. Varieties of broccoli are in flavor and texture; some even differ in color and spiral patterns.

What is the best variety of broccoli for your garden?

Calabrese broccoli is recommended for home gardeners because it produces a significantly larger crop and accommodates comparatively smaller space to get planted. You can plant 50% more Calabrese broccoli plants than the Romanesco variety.

Other than that, sprouting broccoli is also a good and feasible variety of broccoli to be planted in the home garden.

An advantage of growing sprouting broccoli is that it can be harvested in early Spring by being overwintered, which fills the hungry gap in the early Spring when other vegetables have not yet arrived in the market.

As we have learned much about the size and number of broccoli heads, we must go on to learn how you can grow broccoli effectively.

Check this out: How Often to Water Broccoli?

How to grow Broccoli in your home garden?

Broccoli is a winter vegetable and tends to set seeds in hot climatic conditions. You must start planting it in late winter or early Spring, or you can move it to late summer, early autumn, or fall.

Your local climate conditions can vary the plantation process of the seed. Broccoli can not tolerate temperatures below – 2 degree Celsius or 28 degrees Fahrenheit and even lower if they get protected under a row cover.

For a continuous harvest, you can plant broccoli at least three times a year with proper scheduling.

You can do this by planting the main crop in late winter to be harvested in late Spring, and then a smaller crop can be planted in late summer for a winter harvest, followed by a third sowing in autumn for broccoli that you can enjoy during the spring season with early spring harvest. This way, you can have your favorite vegetable available for tasty salads and delicacies throughout the year.

Sowing of the seeds

You can use seed trays or directly sow the seeds of the broccoli plants into the soil. A seed tray is recommended to protect the seedlings from attacks by insects, snails, or slugs.

You can use a specialized seed-raising mix easily available on Amazon with sowing seeds in the trace.

Plant the seeds at a depth of 0.5 inches, which is approximately 1 to 2 cm in the seed mix, and store the trace in a warm place if you are planting it in early Spring to provide the plant with the required warmth.

Check this out: Why do my broccoli leaves turn yellow?

Transplanting the seedlings

4 to 6 weeks will be enough for the seedlings to reach enough size and be planted in the garden. However, you must remember that transplanting the seedlings must occur at a temperature greater than 5 degrees Celsius.

Plant the seedlings with a proper spacing of 40 cm apart and use commercial snail pallets to protect them from getting attacked by the snails. You can also use homemade remedies such as coffee grounds or wear traps to protect your plants from insect attacks.

Soil type

The soil you will grow the broccoli in needs to be moist and rich in essential nutrients and organic matter.

You can prepare the soil by using the no-dig method, as this type of soil will provide all the essential nutrients to the plant in an inadequate amount for the whole year and will surprise weeds to grow a healthy plant.

Also Read: Growing the Microgreen Broccoli

Harvesting of the plant

Harvesting of broccoli can be done at any stage. However, it is best to let the plant reach the size of two fists for a flavorful delicacy.

Things you must know to take care of your Broccoli plant!

  • The root system of broccoli does not grow deep inside the ground, so precautions must be taken not to disturb the soil of the plant’s base.
  • If you are investing in row covers, then make sure to buy a relatively taller one, as broccoli can grow significantly tall.
  • To get fresh broccoli during the winter season, make sure to plant the seas early enough so that the plant gets mature when the winter arrives. Missing the planting window for a winter harvest will make your broccoli plant flower when the Spring season arrives.
  • The snail pallets must be applied on the same day as planting the seedlings in the outside garden, as slugs and snails can destroy the crop in a single night.
  • If there are any signs of the broccoli head separating or producing flowers in warmer weather, then it must be harvested immediately. This is because its quality can deteriorate more quickly in summer, which is why summer harvesting is avoided.

How long can you store the Broccoli in your house?

For the short term, broccoli can be stored in a cool or moist place below the temperature of 4 degrees Celsius. It will not get spoiled for 1 to 2 weeks.

However, if you have it in larger quantities and need to store it for longer, then you must blanch the broccoli before freezing it at a specific temperature. Blanching stops the enzyme activity within the vegetable, which can prevent it from getting spoiled for a longer period.

To Blanch the broccoli properly, follow the given steps mentioned below:

Step 1: Wash and cut out the leaves.

Cut the broccoli into smaller pieces after washing them. The size of the broccoli pieces must be the same as you would use them in the recipes so that they are ready to use once taken out from the freezer.

Step 2: Blanch Blanch Blanch

Bring a large part of the water to boil before feeling another bowl with ice water to start the blanching process. Once you have boiled the water, add your Broccoli into the boiling water and cook them for 2 minutes. After the broccoli have been cooked in boiling, remove them from the pot and immediately pour them all into the ice water to freeze. Let them cool for about 2 minutes, and drain the water.

Step 3: Freeze

Bring a zipper bag or a suitable airtight container and pack all your blanched broccoli into the bags to use later.

We will conclude our article with all this information and hope you find it useful. Happy planting!

How Long Does It Take to Grow Peppers from Seed?

Peppers are a warm-season crop in various hues, forms, and sizes. Good news: Most types are resistant to typical garden diseases and pests!

Most home gardeners buy starter pepper plants at the garden nursery rather than starting them from seed since peppers have a long growing season (60 to 90 days). However, if you wish to cultivate your peppers, you can start the seeds indoors.

Planting Bell Peppers

Peppers should be grown in a location with full sun and moist soil but not soggy. The soil will drain efficiently and warm up fast if there is a good mix of sandy and loamy soil.

If you’re working with dense clay, incorporate a lot of organic matter (like compost) into the soil.

It is best to avoid growing peppers where you have recently produced other nightshades, such as tomatoes, potatoes, or eggplants, as this may expose the peppers to illness.

Pepper Planting Season

8 to 10 weeks before your last spring frost date, sow pepper seeds in pots.

About two to three weeks after the fear of frost has passed and the soil has reached 65°F, plant pepper seedlings or transplants outside.

Also Read: Why Are Eggshells Good for Pepper Plants?

How to Begin Peppers Inside?

To begin inside: Three pepper seeds should be planted in a pot of potting mix at a depth of 1/4 inch.

Keep the soil at 70°F (21°C) or higher for quicker germination. You’ll likely need a heated propagator or heat pad and some grow lights to reach these temperatures.

Although seedlings should appear under ideal circumstances in around two weeks, some types can take up to five weeks, so keep going!

Remove the seedling that is the weakest and allow the remaining two pepper plants to develop as a single plant. The leaves of two plants, which are frequently more protective than those from two independent plants, help to shield the peppers.

Replanting seedlings in a larger container up to their lowest leaves, like tomatoes, will help support them if they grow skinny or too tall before it’s time to plant them outdoors up until the time to plant, keeping seedlings warm and well-lit.

Moving the plants up a container size is necessary if they have between five and eight leaves, and you can see roots in the drainage holes.

Because peppers are susceptible to chilly temperatures, hardening off seedlings for about ten days before transplanting them outdoors is essential. 

How to Outdoor Plant Peppers?

Choose pepper that starts with straight, firm stems, 4 to 6 leaves, and no blossoms or fruit if you’re buying them.

Set pepper plants outside a week or longer after the last frost date or when the average daily temperature reaches 65°F (18°C) to harden them off.

Mix aged manure or compost into the soil 8 to 10 inches deep before transplanting in the garden. Then, rake the soil several times to break up any large clouds.

Plant transplants after the soil reach a temperature of 65°F (18°C). About a week before planting, cover the soil with black plastic or a dark mulch to hasten the soil’s warming.

Peppers should be transplanted in the late afternoon or on a gloomy day. By doing this, the plants won’t dry out too much and wilt.

Create a row of transplant holes 12 to 18 inches apart and 3 to 4 inches deep. Space your rows 2 to 3 feet apart.

Before planting, fill the gaps with liquid and let it soak in. Put two to three wooden matchsticks (for sulfur) and one teaspoon of low-nitrogen, high-phosphorus fertilizer into each planting hole (too much nitrogen will reduce the fruit set).

Be cautious when removing the transplant from its tray or pot, leaving as much dirt around the roots. The transplants should be placed about an inch deeper than in their original container.

Soil should be poured into the hole and lightly surrounded by the plant. Each plant should have a slightly recessed area for water storage.

After planting, water the plants. This is an excellent time to use liquid fertilizer, such as starting fertilizer or manure tea.

To prevent upsetting the roots later, stake now. Plants should be supported, if necessary, with cages or stakes to avoid bending.

Try purchasing professional wire tomato cages in the shape of a cone. They might not be the best choice for tomatoes, but they are perfect for peppers. Or construct your garden stakes.

Check this out: Why My Pepper Plants Leaves are Wrinkled?

Growing Bell Peppers

1 to 2 inches of water per week should be used to water regularly. This does not imply sparing watering; peppers enjoy a thorough soaking, but they require a time of relative dryness in between watering.

Watering slowly and profoundly promotes strong root development. Avoid allowing pepper plants to wilt, lowering fruit yield and quality. In addition, pepper is more prone to blossom-end rot when it receives inconsistent irrigation.

You should water your plants every day if you live in a warm, arid region or it’s the height of summer.

Be aware that sweet bell peppers frequently fail to produce a thick, meaty wall in desert regions at roughly 4,000 feet.

Peppers are pretty sensitive to heat. When plants are stressed, such as when it’s too hot (above 85° to 90°F during the day), too cold (below 60°F at night), or when there isn’t enough water, blossoms may fall off. To prevent sunburn or heat exhaustion, use row coverings or shade cloth.

Mulch helps keep the soil wet and keeps weeds away. To prevent upsetting plant roots, weed carefully around the plants. Contrary to common opinion, spraying Epsom salts on pepper plants is not advantageous. 

Recommended Bell Pepper Varieties

The most nutrient-dense peppers are fully mature and taste better, so look for kinds that soon ripen to their full color.

  • Green peppers named “Lady Bell,” “Gypsy,” “Bell Boy,” and “Lipstick” become red when ripe.
  • Citrus: “Milena” and “Orange Sun”
  • Golden California Wonder in yellow

Check this out: Is Cow Manure Good For Chili Plants?

Harvesting Bell Peppers

Pick the fruits as soon as they reach their full size and color as the plants start to produce them.

Picking regularly stimulates plants to produce more fruits and blossoms naturally. However, bell peppers are sweeter and contain more vitamin C the longer they are left on the plant.

Use a sharp knife or scissors to obliterate peppers off the plant.

How to Keep Peppers Safe

  • After harvest, peppers can be stored in the refrigerator for up to ten days in plastic bags.
  • For later use, bell peppers can be frozen.
  • Examine the freezing of peppers.
  • You can also dry peppers: Set the oven temperature to 140 °F. Wash, seed, and core. Make 1/2-inch wide strips.
  • Spread on a baking sheet after a ten-minute steaming. Dry in the oven for 4 to 6 hours, rotating the trays occasionally.
  • Cool, then put them in bags or containers in the fridge.

Pests/Diseases

Temperatures below 60°F (16°C) and over 90°F (32°C) can inhibit pollination. Although it can result in good foliage development, too much nitrogen in the soil can prevent fruit from ripening.

High heat OR very low humidity both contribute to flower decline. If the air is too dry, moisten the soil and spritz the plants liberally.

Two typical pests of peppers, particularly plants cultivated under cover, are spider mites and aphids. In hot, dry weather, spider mites thrive. The fine webbing can recognize them on the underside of leaves.

At the first indication of an assault, mist sprays these regions often to create an unfavorable environment for the mites.

Although they can be found in other areas of the plant, aphids also favor the undersides of leaves.

Squish lone clusters, or if the infestation is severe, move the plants outside and away from other pepper plants. Carefully turn the plant’s upside down so you can brush them clean.

Two typical pests of peppers, particularly plants cultivated under cover, are spider mites and aphids. The fine webbing on the underside of leaves, which identifies spider mites, is a sign of hot, dry weather.

Therefore, at the first indication of an assault, mist sprays these regions often to create an unfavorable environment for the mites.

Although they can be found in other areas of the plant, aphids also favor the undersides of leaves.

Squish individual clusters of aphids, or for more severe infestations, move the plants outside and away from other pepper plants. Carefully turn the plant upside down so you can brush or rinse the aphids.

Final Words

Vitamin C, some vitamin A, and trace levels of numerous minerals are all in reasonable amounts in red and green peppers. They taste fantastic when raw in salads or as a snack with hummus or dip.

Additionally, you can bake peppers stuffed with meat or seasoned bread crumbs. The real fun is doing everything from the goodness of your backyard or kitchen garden. Follow us for more gardening tips!

Should I Cut Off Wilted Tomato Leaves?

It is generally recommended to cut off wilted tomato leaves as they can be a sign of disease in the plant.

Removing wilted leaves can help the plant concentrate its energy on healthy growth and fruit production. This can happen because of fungal or bacterial infection.

However, if the wilted happens because of water or stress, then cutting off one leave can’t help much.

Tomatoes are a staple in many home gardens, and for good reason – they are delicious, versatile, and relatively easy to grow.

However, even the most seasoned tomato growers may encounter problems with their plants from time to time. 

There are several potential causes of wilted tomato leaves, including overwatering, underwatering, pests, and diseases.

Wilting is a natural process that can occur for a variety of reasons, and not all wilted leaves need to be removed. It is necessary to identify the cause of the wilting in order to take appropriate action to address the problem.

Why Tomato Leaves Wilted?

There are several potential causes of wilted tomato leaves. Some of the most common include:

  1. Overwatering: Tomato plant needs a constant supply of moisture, but they can be sensitive to excess water. If the soil is too wet, the roots may become oxygen-deprived, leading to wilted leaves.
  2. Underwatering: On the other hand, insufficient watering can also cause tomato leaves to wilt. When the soil is too dry, the plant may not be able to absorb enough moisture to keep the leaves hydrated.
  3. Pests: Certain pests, such as aphids and whiteflies, can feed on the sap of tomato plants, causing the leaves to wilt.
  4. Diseases: Some diseases, such as the tomato spotting wilt virus and fusarium wilt, can cause tomato leaves to wilt and become distorted.
  5. Environmental factors: Extreme temperatures or exposure to direct sunlight can also cause tomato leaves to wilt. Also, the black walnut tree can stunt the growth and wilt the leaves of the tomato. It’s advised not to plant tomatoes near the walnut tree.

It is important to identify the specific cause of the wilting in order to take appropriate action to address the problem. This may involve adjusting watering practices, applying pest control measures, or taking other steps to improve the plant’s overall health.

Also Read: How Deep Should a Raised Bed Be for Tomatoes?

Signs of Wilted Leaves on Tomatoes

Here are some signs to look for to identify wilted leaves on your tomato plants:

  • Drooping leaves: Wilted leaves may appear droopy or limp, hanging down from the stem rather than standing upright.
  • Yellow or brown leaves: Wilted leaves may turn yellow or brown, indicating that they are no longer receiving adequate moisture or nutrients.
  • Dry or crisp leaves: Wilted leaves may feel dry or crisp to the touch, rather than being pliable and moist.
  • Curling or distorted leaves: In some cases, wilted leaves may curl or become distorted in shape, rather than maintaining their normal appearance.

If you notice any of these signs of wilted leaves on your tomato plants, it is important to identify the cause of the problem and take appropriate action to address it. This may involve adjusting your watering practices, applying pest control measures, or taking other steps to improve the plant’s overall health.

Check this out: Is Chicken Manure Good for Tomato Plants?

How Often To Water Tomatoes?

The frequency of watering tomatoes will depend on several points, including the type of soil, the climate, and the size and age of the plant. Here are a few guidelines for watering tomatoes –

  1. Water regularly: To ensure that your tomato plants receive an adequate supply of moisture, it is important to water them regularly. In general, tomato plants will need to be watered once or twice a week, depending on the weather and soil conditions.
  2. Check the soil moisture level: The best way to determine whether your tomato plants need watering is to check the soil moisture level. Stick your finger about an inch into the soil; if it feels dry at that depth, it’s time to water.
  3. Avoid over-watering: Over-watering can be just as dangerous to tomato plants as under-watering. Too much water can cause the roots to become oxygen-deprived, leading to wilted leaves and other problems.
  4. Water at the base of the plant: To ensure that the water reaches the root zone, it is best to water the tomato plants at the base of the plant, rather than watering the leaves.

Must read: Should I Cut Off Yellow Leaves on Tomato Plants?

Pros and Cons of Cutting Off Wilted Leaves

There are both pros and cons to cutting off wilted leaves on a tomato plant. Some of the potential benefits of removing wilted leaves include – 

Pros:

  1. Improved plant health: Removing wilted leaves can help the plant focus its energy on healthy growth and fruit production, rather than trying to support weak or damaged leaves.
  2. Reduced risk of pests and diseases: By removing wilted leaves, you may be able to reduce the risk of pests and diseases spreading to other parts of the plant.
  3. Increased energy production: By allowing the plant to focus its energy on healthy leaves, you may be able to increase the plant’s overall energy production and improve its growth.

On the other hand, there are also some potential drawbacks to cutting off wilted leaves, including:

Cons:

  1. Risk of damaging the plant: If the wilted leaves are not cut off properly, you may accidentally damage the plant or expose it to additional stress.
  2. Loss of leaves: Removing wilted leaves will result in a loss of leaves, which can affect the plant’s overall appearance and potentially impact its health.

Overall, it is important to consider both the pros and cons of cutting off wilted leaves and make a decision based on the specific circumstances of the plant.

Check this: Why Tomato Branches Curling Down?

When To Cut Off Wilted Tomatoes Leaves?

Deciding when to cut off wilted leaves on a tomato plant can be a tricky balancing act. On the one hand, removing wilted leaves can help the plant focus its energy on healthy growth and fruit production. On the other hand, removing too many leaves can stress the plant. Here are a few factors to consider when deciding when to cut off wilted leaves –

  • The severity of the wilting: If the wilting is severe and affects a significant portion of the plant, it may be necessary to remove the wilted leaves to prevent the problem from spreading. However, if the wilting is minor and affects only a few leaves, it may be best to leave the leaves in place.
  • Growth stage of the plant: The timing of leaf removal can also depend on the growth stage of the plant. During the early stages of growth, it may be best to leave the wilted leaves in place to allow the plant to establish itself. However, as the plant matures and begins to set fruit, it may be more beneficial to remove the wilted leaves to allow the plant to focus its energy on fruit production.
  • The overall health of the plant: If the plant is otherwise healthy and producing fruit, it may be best to leave the wilted leaves in place until the plant has finished producing fruit. However, if the plant is struggling or showing other signs of stress, it may be necessary to remove the wilted leaves to help the plant recover.

Also Read: Best Potting Soil For Tomatoes?

How to Cut off Wilted Tomato Leaves?

If you have decided to cut off wilted leaves on your tomato plant, it is vital to do so carefully and correctly to avoid the risk of damaging the plant. Here are some steps to follow when cutting off wilted leaves –

  1. You will need a pair of clean, sharp scissors or pruning shears to cut off the wilted leaves.
  2. Look for leaves that are yellow, brown, or drooping, as these are likely to be wilted leaves.
  3. Use your scissors or pruning shears to cut off the wilted leaves at the base of the stem, as close to the main stem as possible.

Must Read:

Conclusion

Wilted leaves on a tomato plant can be a sign of stress or disease, and it is important to address the problem promptly to minimize any negative impacts on the plant.

In general, it is recommended to cut off wilted leaves as they can drain energy and nutrients from the plant, reducing its overall health and productivity. However, there may be situations where it is beneficial to leave wilted leaves in place, such as if the plant is still producing fruit or if the wilting is only temporary.

When deciding whether to cut off wilted leaves, it is important to consider the severity of the wilting, the growth stage of the plant, and the plant’s overall health.

It may also be helpful to consult with a local gardening expert or extension service for guidance specific to your situation. 

By following best practices for caring for your tomato plants, you can help them stay healthy and productive throughout the growing season. With proper care, your tomato plants can thrive and provide you with a bounty of delicious, nutritious fruit.

How to Grow Spinach Microgreens?

Growing your own microgreens is a fun and rewarding hobby that anyone can do, even if you don’t have a green thumb! Not only will you have a regular store of fresh, flavorful greens, but you’ll also have the satisfaction of knowing that you grew them yourself. Plus, microgreens are packed with nutrients, so you’ll be getting a health boost every time you munch on them.

What are microgreens?

Simply put, they are young plants that are harvested when they are about 1-2 inches tall and have their first group of proper leaves. That includes vegetables like kale, radish, and, of course, spinach. Spinach microgreens have a mild, slightly sweet flavour and are great for adding a pop of colour and nutrition to salads, sandwiches, and more.

What are Spinach Microgreens?

Spinach Leaves Turning Yellow

Spinach microgreens are young spinach plants that are harvested when they are about 1-2 inches tall. They have a mild, slightly sweet flavour and are packed with nutrients, making them a tasty and healthy addition to any meal.

In terms of nutrition, spinach microgreens are a superfood. They are rich in vitamins A, C, and K, as well as minerals like iron and calcium. They also contain antioxidants, which can aid against chronic diseases such as cancer and heart disease.

What Materials are Required to Grow your Spinach Microgreens?

Growing spinach microgreens is easy and only requires a few basic materials. Here’s a list of what you’ll need:

  1. Seeds: You’ll need spinach seeds, which can be found at a local gardening store or online.
  2. Soil: It’s important to use soil that is specifically formulated for microgreens, as it will have the right balance of nutrients and drainage. These can also be found at a local gardening store or online.
  3. Containers: You’ll need a container to grow your microgreens in. You can use plastic containers or seed trays with drainage holes, or you can get creative and recycle items like yogurt cups or egg cartons as long as they have drainage holes.
  4. Tray: You’ll need a tray to catch excess water and keep the soil from becoming waterlogged.
  5. Light: In the process of growing spinach microgreens, light plays an important part.

How to Grow Spinach Microgreens?

Growing spinach microgreens is easy and can be done year-round, indoors or out. All you need is a container, some soil, and some seeds. Here are some points to help you get started:

1. Soaking

Soaking seeds before planting is a common practice that can help to improve germination rates and speed up the growing process. When seeds are soaked, they absorb water and begin the process of germination, which is the process by which a seed grows into a plant. 

Soak seeds overnight, simply place the seeds in a bowl and cover them with water. certain that you use enough water to fully dip the seeds. The seeds should be left to soak for 6-8 hours.

2. Choosing the Right Soil and Container

When it comes to soil, it’s important to use soil that is specifically formulated for microgreens. These soils will have the right balance of nutrients and drainage, ensuring that your microgreens have everything they need to grow. You can find these soils at a local gardening store or online.

As for containers, it’s important to pick a tray with drainage holes to control the soil from becoming wet for a long. Use the tray one with drainage hole and one without. Take the sifted soil and then fill your tray with it. After it, drench the soil in the tray with the help of water and let the soil be soaked. 

Also Read: Growing the Microgreen Broccoli

3. Planting the Spinach Seeds

  1. Sow the seeds thinly and evenly on the surface of the soil.
  2. Press the seeds gently into the soil, but don’t cover them with soil as they require light to germinate.
  3. Use a seed sower or a spoon to evenly distribute the seeds.

4. Cover It and Leave It

Now all you have to do is cover the tray and leave it in a cool, dry, and dark place. You can use some other thing to cover the tray to make a dark environment. It may take a few days for the seeds to germinate, but with a bit of patience, you’ll soon see little sprouts emerging from the soil.

5. After the Germination, Place the Tray in the Light

After some time, like 4-6 days, your seeds will be fully germinated. When it germinated, remove the tray from the dark place and place it under artificial light. You can use the LED lights for spinach microgreens as sunlight is too extreme for the microgreens and can distort the taste and flavours.

6. Watering

After placing the spinach microgreen in the light, water it. You have to know that it’s the first time to water them. But how do water spinach microgreens? while watering it, you have to take care of one thing that is when growing microgreens, mold is a problem.

Avoid it by bottom watering. Place the grow tray in another tray that is filled with an inch of water. Continue the watering until the harvesting in about 7-10 days.

Also Read: How Long Does it Take for Kale to Grow?

7. Harvesting

After 10 days, when the microgreens are about 1-2 inches tall and have their first group of proper leaves, they are ready to be harvested. To harvest the microgreens, use a sharp knife or scissors to cut them at the soil level.

After harvesting, gently blot the microgreens dry with a paper towel or cloth. This will help to remove excess moisture and keep the microgreens fresh.

8. Storing the Microgreens

Once the microgreens are harvested, they should be stored in a plastic bag or container in the refrigerator. You can keep them for about a week. You can wash and spin dry the microgreens before storing them.

9. Using Spinach Microgreens

Spinach microgreens make a beautiful garnish for any dish. Try using them to top off soups, salads, and sandwiches for flavour. Spinach microgreens can be added to smoothies for a nutrient boost. Spinach smoothies have a mild flavour that won’t crush the other ingredients. Also, Add a handful of spinach microgreens to your omelettes for a flavour and nutrition boost.

Check this out:

Conclusion

Growing spinach microgreens is a fun and rewarding way to add flavour and nutrition to your meals. It’s easy to do and requires minimal space and materials. All you need is a container, some soil, and some seeds.

Spinach Microgreens are a mild, slightly sweet flavour and can be used in a variety of dishes. There is some evidence to suggest that consuming spinach microgreens may have potential health benefits, including improved eye health, blood pressure control, and antioxidant activity. 

To grow your own spinach microgreens, you’ll need a container or tray, soil, and seeds. It’s important to use soil that is specifically formulated for microgreens, as it will have the right balance of nutrients and drainage. You’ll also need a light source to provide the necessary light for your microgreens to grow.

With a bit of care and attention, you’ll be able to enjoy your own homegrown spinach microgreens in no time. So why not give it a try? Happy growing!

How Much Sunlight Does Broccoli Need?

Well, broccoli is a cool-season crop, which means it grows best in temperatures between 60 and 65°F. It also requires a minimum of 6 hours of sunlight per day to grow and develop properly. However, broccoli can tolerate up to 8-12 hours of sunlight per day, so if you have a sunny location with plenty of sunlight, your broccoli plants will be happy and thrive well.

Broccoli is a healthy and tasty vegetable that is enjoyed by people all around the world. It’s packed with vitamins and minerals, and it’s a great source of fibre and protein. But like all plants, broccoli needs certain conditions to grow and thrive. One of the most important factors for the growth of broccoli is sunlight. 

So, if you want your broccoli plants to reach their full, leafy glory, it’s vital to give them the right amount of sunlight. But how much is the right amount? Here you will know the exact information in detail.

Importance of Sunlight for the Growth and Development of Plants

broccoli

Sunlight is an essential element for the growth and development of all plants, including broccoli. Sunlight is important for the synthesis of other vital plant compounds, such as chlorophyll, which gives plants their green colour and helps absorb sunlight for photosynthesis. 

In addition, sunlight helps plants grow taller and stronger. Without sufficient sunlight, plants can’t produce the energy they need to grow and develop properly. They may become stunted, with small, pale leaves and a lack of flowering or fruiting. In severe cases, plants may die if they don’t receive enough sunlight.

How Much Sunlight Does Broccoli Need?

As already mentioned above, broccoli needs a minimum of 6 hours of sunlight per day to thrive well. It thrives nicely in temperatures between 60 and 65°F. Also, can tolerate up to 8-12 hours of sunlight per day. 

Moreover, there are several factors that can influence the amount of sunlight broccoli needs. For example, the type of soil, the climate, and the age of the plant can all affect the amount of sunlight that broccoli needs. 

In general, broccoli grows best in well-draining soil with a pH level between 6.0 and 7.0. It also prefers a sunny location with plenty of light, but it can tolerate partial shade as well.

Check this out: How Often to Water Broccoli?

Can Broccoli Tolerate High temperatures?

As a cool-season crop, broccoli is best suited for growth in temperatures between 60 and 65°F. At these temperatures, broccoli can grow and develop properly, producing healthy, flavorful florets. However, broccoli is also fairly tolerant of cool temperatures and can withstand temperatures down to 20°F if properly acclimated.

But what about high temperatures? Well, like most plants, broccoli can be affected by high temperatures, especially if they are prolonged. High temperatures can cause a number of problems for broccoli, including:

  • Reduced growth: High temperatures can cause broccoli plants to stop growing or grow more slowly.
  • Poor quality: High temperatures can lead to smaller, less flavorful florets.
  • Heat stress: Prolonged exposure to high temperatures can cause heat stress in broccoli plants, leading to wilting and yellowing leaves.

Therefore, it’s vital to keep an eye on the temperature and ensure that your broccoli plants aren’t exposed to prolonged periods of high heat. If you live in a hot climate, you may need to provide some shade or water your plants more frequently to help them stay cool and hydrated.

The Best Location For Growing Broccoli Plant

When it comes to growing broccoli, choosing the right location is the key. Picking the right location for your broccoli plant can make a big difference in their growth and development. Here are some points to consider when selecting the best location for growing broccoli.

  • Sunlight: As mentioned earlier, broccoli needs a minimum of 6 hours of sunlight per day to grow and develop properly. Look for a location that gets plenty of sunlight, but avoid areas that get too hot or are exposed to strong winds.
  • Soil quality: broccoli grows best in well-draining soil with a pH level between 6.0 and 7.0. If your soil is too sandy or too clayey, you may need to add compost to improve its quality.
  • Temperature and humidity: As a cool-season crop, broccoli grows best in temperatures between 60 and 65°F. It can tolerate cool temperatures, but prolonged exposure to high heat can cause problems, as mentioned above. In addition, broccoli prefers a location with moderate humidity levels. Too much moisture can lead to fungal infections, while too little can cause the plants to dry out.
  • Pest and disease control: Choose a location that is free from pests and diseases, as these can be harmful to your broccoli plants. Consider planting your broccoli near plants that can help deter pests, such as marigolds or basil.

Check this out: Growing the Microgreen Broccoli

How Often Should you Water your Broccoli Plants?

Water is an essential element for the growth and development of broccoli, as it helps plants absorb nutrients and maintain proper growth. However, it’s important not to over-water broccoli plants, as excess moisture can lead to fungal infections and other problems.

The frequency of watering the plant depends on several aspects, including the age of the plants, the type of soil, and the weather conditions. Here are some factors for watering broccoli plants.

  • Water your broccoli plants regularly – During the first few weeks of growth, broccoli plants will need regular watering to help them establish strong roots. Water the plants deeply once or twice a week while taking care of the soil moisture.
  • Monitor soil moisture – The best way to determine when to water your broccoli plants is to monitor the soil moisture. Stick your finger about an inch into the soil to check the moisture level. If the soil is dry, it’s time to water. If the soil is moist, hold on watering until it requires.
  • Use mulch to retain moisture – Applying a layer of mulch around your broccoli plants can help retain moisture in the soil and reduce the need for frequent watering. Just be sure to leave a few inches of space between the mulch and the base of the plants to prevent moisture from accumulating around the stems.

Fertilizing Broccoli Plant

Fertilizers help broccoli plants to grow and develop to their full potential. By providing plants with the nutrients they need, fertilizers can help improve soil quality and promote healthy growth. But how do you fertilize broccoli plants? Here are some points to follow – 

  • Select the correct fertilizer – There are numerous kinds of fertilizers available, and it’s vital to choose one that is suitable for broccoli plants. Look for a balanced fertilizer with a ratio of roughly equal parts nitrogen, phosphorus, and potassium (NPK). That will provide your broccoli plants with the nutrients they need for healthy growth.
  • Apply fertilizers at the right time – The best time to fertilize broccoli plants is during the active growing season, typically from early spring to mid-summer. Avoid fertilizing during the heat of summer, as high temperatures can cause the fertilizer to break down more quickly and may burn the plants.
  • Follow the application instructions – Be careful while following the application instructions on the fertilizer label. Over-fertilizing can lead to excess foliage growth at the expense of floret development, and can also kill your plant.

Also Read: Why Are My Potatoes So Small?

Common Problems with Broccoli Plant

Like all plants, broccoli can be prone to a variety of problems that can affect its growth and development. Some of the most common problems that can affect broccoli plants include-

  • Pests: Pests such as aphids, cabbage worms, and cutworms can be a problem for broccoli plants. These pests can feed on the foliage and stems, causing damage and reducing the yield.
  • Diseases: Broccoli plants can also be affected by a variety of diseases, including clubroot, blackleg, and downy mildew. These diseases can cause wilting, yellowing leaves, and reduced yield.
  • Nutrient deficiencies: Broccoli plants can suffer from nutrient deficiencies if the soil is not properly fertilized. Common nutrient deficiencies include nitrogen, phosphorus, and potassium.
  • Poor soil quality: Poor soil quality can also be a problem for broccoli plants. If the soil is too sandy or too clayey, it can affect the plant’s ability to absorb water and nutrients.
  • Poor drainage: Excess moisture in the soil can lead to fungal infections and other problems for broccoli plants. Poor drainage can also cause the roots to rot, leading to reduced growth.

Also read: What Does Blight Look Like On Cucumber?

Conclusion

Sunlight is an essential element for the growth and development of broccoli. To ensure that your broccoli plants grow and develop properly, it’s important to provide them with the right amount of sunlight. As a cool-season crop, broccoli needs a minimum of 6 hours of sunlight per day but can tolerate up to 8-12 hours of sunlight per day. 

However, prolonged exposure to high heat can cause problems for broccoli plants, such as reduced growth and poor quality. By providing your broccoli plants with the right amount of sunlight and protecting them from extreme heat, you can help them grow and develop to their full potential.