How to Grow Spinach Hydroponically?

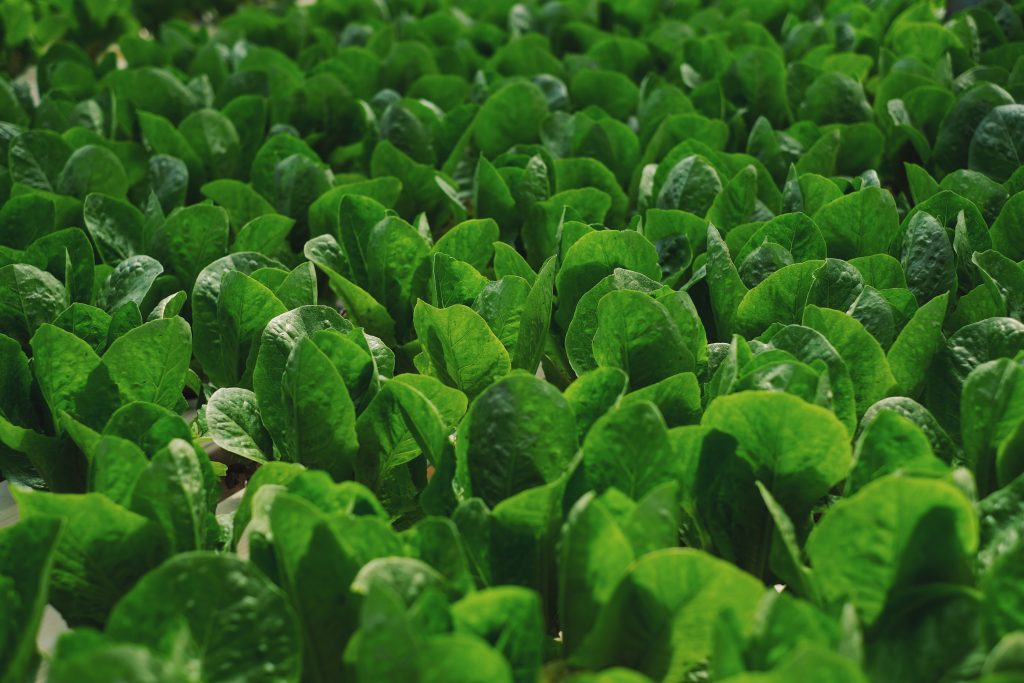
Spinach is not only a leave but it has the source of exceptional nutrients and has many health and beauty benefits. It was regarded as a plant with evident abilities to restore energy, increase liveliness and refine the quality of blood.

It has a rich amount of iron, vitamin K, vitamin C, vitamin A, and it is a reliable source of magnesium, manganese, and vitamin B2. Spinach is best vegetable which contains rich amount of vitamin K and it helps to maintain bone health. With these indefinite qualities, spinach is easy to grow at home with more desirable efforts.

The preference of high quality vegetable and fruit to harvest fresh for the part of healthy food is often decided when stepping first into hydroponic gardening.

Delicious, crispy, and high nutritious leafy green just pick off from an indoor garden have the most rewarding aspect by growing your own plant hydroponically without put down any efforts.  Now, we can discuss how to grow spinach hydroponically at home.

Spinach is a existing family member of Chenopodiaceous family, a family of dietary power houses along with plants like chard, beets, and quinoa. Growing spinach hydroponic is easy and there are many immense reasons for it. When you grow hydroponic spinach, you can harvest delicious and nutritious plants from seeds very quickly, over and over again.

Spinach germination

The first step for growing spinach hydroponically is to obtain the spinach seeds to germinate. Before germination soak spinach seeds for 5-10 hours in water to speed the germination process. For instance spinach seeds germination takes place in three stages: soaking up moisture, developing new cells inside the seed, and the visible emergence of the sprout.

Germination of spinach seed occurs between 32 and 65F. it is a cool weather crop so keep away from heating pads when germinating spinach seeds.

For hydroponic garden, it’s better to germinate the seeds without soil such as paper towel germination. In this method it controls the moisture easily, we can know easily when the seeds are germinated, and damp the paper towel retains the seeds cool.

Give 12 hours of light daily for your seeds. Blue light increase the production of chlorophyll and facilitate leafy growth. It is good for spinach.

Within 4 days start to sprout with germinated pre-soaked seeds. If you don’t soak the seeds, you have to wait for 10+ days for germination. If the spinach seedlings are about 2 inches tall then they are ready to transplant into your hydroponic system.

Once the seeds began to germinate, I placed the seeds in a starter soaked in 0.6 EC nutrient solution before they had time to develop most of the root system. My favorite launcher plug-in is called Rapid Rooter. They are particularly useful because they are suitable for hydroponics and ground cultivation.

Also Read: How To Plant Spinach? Here Is Everything You Need To Know

How to germinate spinach seed hydroponically?

For the germination of spinach seeds hydroponically, you have to grow a medium the seeds can start in.

Familiar seed starter plugs are coconut coir, Rockwool, or product like Rapid Rooter from general hydroponics.

While using Rockwool, before planting seeds make sure to balance pH. For this, you need to soak the plugs in 5.5 pH water for 20 seconds. 

Rapid Rooter Plugs need to soak for a few hours before planting seeds. Okay, honestly, I never soaked them for more than a few minutes and always had great results. If you want to give them a 3 hour bath, do it. These plugs are designed to hold a certain amount of water that is ideal for germination. So don’t water them unless they dry out.

  • Put 2-3 spinach seeds in each starter plug and place the plug in a bowl.
  • Cover the starter seed pan with a moisture dome. Moisture helps start the germination process.
  • Once the seeds begin to sprout and develop their first leaves, remove the moisture dome to keep mold and mildew at bay.
  • The first set of real leaves will begin to develop, the seedling is ready to be transferred to your hydroponic system.

Bottom watering with Rock wool

Bottom watering refers to adding water to the seed bowl and not directly above the seed plug. This method will help to reduce the mold growth and keep the seeds healthier. To water your Rockwool starter plugs, simply add water to the bowl that the plugs are in. Just enough water to soak the underside of the plugs. The stoppers suck the water down to the seed.

Growing tips for hydroponically spinach

Use fresh seed

Spinach will take 5 to 15 days to sprout. It’s disappointed to wait nearly three week to have poor germination rates due to old seeds usage. So, use fresh seed for the improvement of better germination rate and it gives better results.

Sow 5 to 6 seeds per hole

For commercial growers each of them has their favorite germination medium. In which medium heavy sowing guarantees at least one strong , healthy seedling per hole.

Cold stratify seeds

Few commercial growers believe that before sowing the spinach seeds place it in a refrigerator for 1 to 3 weeks. They trust that the period of cold stratification produce the healthier plants.

Keep spinach seeds moist

While germination process takes place sowing seeds are allowed to dry out due to poor germination rate.

Don’t use seed heating mats

It is a cool weather crop, in which germination takes place between 5 -25C. In higher temperatures poor germination occurs.

Stagger planting

Sow seeds for every two weeks  to have a fresh spinach to harvest continuously.

Also Read: Why Are My Spinach Leaves Turning Yellow

Control the temperature

As we know it’s a cool weather crop, spinach grow in day light temperature between 15 to 20C  and in night temperature between 12 to 18C. In warmer climatic conditions, causes spinach to bolt which increase in its bitterness.

Don’t over fertilize spinach

Start to feed  spinach seeds when they are transplant into hydroponic system. Commercial growers recommends that start with weaker solution of hydroponic nutrients and increase their strength gradually. Indication for nitrogen level is too high then leaf tip burns.

Reduce fertilizer strength and temperature prior to harvest

The simple trick to produce sweeter taste in spinach is to reduce ambient temperature for few degrees and decrease the strength of hydroponic  nutrients as spinach plants are matured.

While growing hydroponic spinach at home requires more attention than other plants, it is well worth the effort to produce an edible plant from seed to harvest in just five and a half week.

Also Read: Growing Different Types of Beans-Bean varieties

How to Prune Mint to Keep it Healthy?

Mint is a one of the best plant with many uses. If you are not planted properly it can grow easily. Here we are going to learn about to take care of your mint plant which saves you a lot of times and headache in future.

1. Pruning a large harvest of mint

After flowering  one third of prune mint back

Pruning can really encourage growth. This is not a negative thing to do with your mint plant. if you don’t like to shear to use them you can prune mint through your fingertips. Its take more time but it  is quite effective. With the help of your fingertips cut off about one third of length of the stem. Small amount mint should be pruned at indoor use fingertip is easier than scissor or a sharp knife.        

Shape your mint plant

Consider what shape you like to your plants to be trimmed. You want to shape your mint plant in the direction that grow, which confines the pot without getting out of control. It can grow fast in various directions, trim your plant in a shape which is comfortable or compatible with the pot.

Shape the plant it doesn’t have excess leaves and shoots pour over the plant.

Must focus on trimming over the plants. Ensure that plant is not sprawling around the side of the pot.

Also Read: Things you should know How to Grow Mint

Store your mint for future use

After a big harvest store mint properly for usage in future is really important. There are various methods to store mint for future purpose in that the most famous method is drying mint. For this dry mint various techniques are used such as hanging it to air-dry, dehydrating and baking it on the oven.

Mint can be freeze. Pick your mint leaves and remove damaged leaves. Pat it dry with a cotton cloth. Cut off the mint leaves and withdraw stems. Place few amount of leaves in the  various compartments of ice tray, fill with water and place them in freezer. If cubes are frozen keep them in container or bag and then leave in the freezer.  

Harvest a fresh mint throughout year

Avert harvest plants are not growing good due to bad and cold weather conditions.

2. Trimming a small amount of mint

Regularly trim your mint plant

Mint is grown up now it begins to bloom (after 90 days), after it grows 3 to 4 inches tall. Trim it regular basis with that the plant should be healthy and strong. You can also use fresh mint after a mint harvest.

Make certain to trim your mint cautiously on every occasion it wishes to be reducing back. Remember to trim the mint so it grows with inside the difficult form of the pot you are the use of. If you are trimming mint outside, make certain to trim mint so mint plant life does now no longer overgrow your garden.

While you could use shears to prune mint, small plant life can effortlessly be pruned simply the use of your fingers.

Use mint for cooking

In most of recipes mint must be used to add a stronger mint flavor. Try to use fresh mint instead of dry mint. For beverages like lemonade or mojitos the mint leaves should be add for flavor purposes.

Turn small harvest into new mint plant

For more mint plant, with help of trimming you can create a new mint plant from the existing plant. Cut off the 5 inches stem from existing mint plant and placed in a pot which is filled with potting soil. The stem will develop into its own plant with sunshine and water.

Fill the pot with the mixture of large amount of compost with potting soil and take the stem which is cut from its original mint plant and place it into the soil.

In a glass of water you can place the stem cutting, remove all leaves that are below the water line. Evenly roots will starts to grow in the water.

3. Growing mint

Plant your mint in a pot

Mint plant is a best to plant in a pot because it has fast growing root system. If you plant in a garden without container it will fastly spread all over the garden.

If you want to plant inside, take a pot fill the garden soil in it and then plant your mint in it. Keep this pot at the window where the sunlight gets throughout the day. Towards the heat source don’t place it.

If you plant outside then dig a 5 inches hole in the ground and place the container inside the hole and place mint inside the container and covered with dirt on top of it. Then the roots of mint plant will spread entire the garden.   

Select right time to plant

 If you are planting at outdoors then the correct time to plant the mint in the spring, if you are experiencing the climate as winter. In frost free climate, it will plant in mid fall.

Water your mint plant often

    Mint plant can be grow in different soils, but it fail to grow in dry environments. It will grow in moist soil. So ensure to water the mint frequently in required condition.

    Also Read: 7 Houseplants that Reduce Dust and Particulate Matter

    Plant your mint properly

    While planting the mint it should be placed under the ground of about 1/4 inches from the surface of ground. If you are planting single seed, plant in the pot and place the pot to expose sunlight on it. If you are planting in the garden then plant each seed about 2 feet distance among them. Ensure that each seed will be in its own container.

    Do not use the container or pot with damages or cracks because mint is a fast growing root so it spread over the entire garden from the damages and cracks of the pot or container.

    And do not place near the heat source or near the furnace, mint can dry out.

    9 Inventive Ways to Use Coffee Grounds in Your Garden

    Most people probably enjoy a fresh cup of coffee every day. But what are doing after the preparation of coffee are you throwing them into the trash, you’re wasting money. There are few ways in which you can reuse the coffee grounds in the garden around the house.

    Plants, soil, or even worms love Coffee grounds -different methods to apply for the usage of coffee grounds on your gardening.

    Coffee grounds have many advantages in your garden, so when you have coffee grounds at home, or can take out them up from your neighborhood cafe for gardening.

    The best tips for coffee grounds usage from your favorite cup. Here’s a way to use them in your garden.

    How to Use Coffee Grounds in the Garden?

    1. Coffee grounds are used to eliminate bad odors

    The coffee grounds will contain nitrogen that will absorb the bad odors. The Brooklyn-based coffee company recommends inserting coffee grounds in an open container inside a cupboard or freezer or anywhere else that smells funky to neutralize the odors.

    When nitrogen combines with carbon it removes the sulfur content from the air. Instead of using them in other ways if you toss your ground, it will neutralize your garbage. 

    2. Fertilize your garden with the coffee ground

    Coffee grounds are rich in crucial minerals such as chromium, phosphorus, potassium, calcium, nitrogen, iron, and magnesium which are needed for plant growth.

    Sprinkling coffee ground minerals into your garden soil will make wonders for your crop. It will absorb heavy metals from soil and also attracts worms which are beneficial for your garden.

    Also Read: How To Grow Cilantro

    3. Deter cats from your garden

    Take used coffee grounds with chopped orange peels mix them well and sprinkle the mixture generally around the garden and flowerbeds. The smell of citrus and coffee grounds will help to deter the cats around the neighborhood which are used as a private litter box.

    coffee grounds for garden

    4. Composting

    The basic and crucial way to reuse the nutrients in your garden with the help of compost coffee grounds later on. There is a tad acidic and as they humiliate they release nitrogen which makes for particularly rich compost. Due to this unnecessary material won’t be allowed to add to landfills.

    5. Change soil pH

    If you want to get your garden soil to become acidified. Just you need reached coffee grounds, you have to dig your garden soil for 7 to 8 inches and sprinkle the coffee grounds inside the soil. Later you will observe the acidity of your garden soil will begin to rise naturally.

    Also Read: How to Grow Sweet Potatoes?

    6. Repulse snake and slugs

    Snails and slugs are familiar garden pests, commonly targeting plants such as kale, broccoli, and lettuce in their desirous journey. Around the garden sprinkle the coffee grounds to make them away from plants. They escape from those areas where coffee grounds will be sprinkled or found.

    7. Mulch

    With the help of wood chips or sawdust, you can prepare your mulch in addition to coffee grounds. The mulch does not dry because the coffee ground will regulate the moisture content in it and also helps to keeping it oxygenated, maximizing usage.

    8. Foliar spray and fungus prevention

    Soak coffee ground in water and make the mixture of soak coffee ground in water spray over the plants, including the underside of the leaves.

    It will boost the strength of your plants with the help of nutrients produced by the help of coffee grounds in water. It will also be known to keep your plants healthy and strong with the prevention of fungus infection. 

    9. Suppress weeds

    Fresh coffee grounds are considered to have a few allelopathic properties. Therefore, you’ll be able to use them to suppress weeds and diverse fungal pathogens, too.

    Carrot Farming 101 – Unleash Your Carrot Farming Potential

    Carrot is one among the popular root vegetables and can be grown easily in your backyard. It needs well-drained and fertile soil with 8 hours of sunlight. It takes about 70-80 days to grow carrot at home. Regular inspection is needed to avoid pests and diseases.

    If you can grow carrots in the garden, you will get the best of the varieties, full of flavor and texture! Carrots are very popular, loved, long-lasting vegetables. And you can grow them in almost any climate. Here is everything about carrot farming methods, planting growing, and harvesting.

    You can grow carrots pretty easily if you can use loose, sandy soil during cold days of the growing season – fall and spring, and carrots can tolerate frost as well. Depending on the local conditions and variety, carrots may take two to four months for proper growth. Plant them in summer and spring and harvest them continuously through the fall!

    Why is the Type of Soil Very Important?

    carrot farming

    It is massively important to choose the most suitable soil for profitable carrot farming. If the roots of the carrot don’t grow easily, you may end up getting misshaped crops – of course, the last thing you would want!

    Here is how to prepare the soil for carrot farming:
    • Till down 12 inches and remove all the stones, rocks, and even the clumps of soils – ensuring the soil is very smooth and sandy.
    • Don’t amend the soil with material rich in nitrogen like manure and fertilizer, which can disrupt the healthy growth of carrot roots. Working in cold coffee grounds is a great idea.
    • If there are a lot of clay or rocks in the ground, you should think about planting carrots in a raised bed with 12 inches deep trenches filled with airy, loamy soil.

    Climate Requirement for Carrot Farming:

    Cold weather is ideal for growing carrots but does well in warm climates too.

    The optimum temperature for healthy growth is 16 degrees Celsius to 20 degrees Celsius, while temperature more than 28 degrees can drastically affect the production. Temperatures below 16 degrees Celsius may affect the natural colour of carrots, and may even lead to slender roots, while there are shorter and thicker roots in warm climates.

    The temperature range of 15 degrees Celsius to 20 degrees. Celsius is very, very good for growing carrots, as you will get attractive roots with decent colour and quality.

    Planting Dates for Carrots

    Fall Carrots Planting:

    Usually, the first frost occurs at the end of September in the USA

    • For carrot harvesting in summer, you should sow the carrot seeds outdoors three to five weeks before the end of spring frost.
    • To ensure productive carrot harvesting, you should plant a fresh round of seeds every three weeks continuously through the spring.
    • If you want to harvest carrots during fall, ensure sowing seeds in mid to late summer. Start approx ten weeks before the first fall frost.

    Choosing the right planting site

    • Location with proper, direct sunlight is the best site for carrot farming, though they survive in partial shade as well.
    • As already discussed, you should opt for loose, loamy or sandy, airy soil, so that the roots can easily go through the soil.

    Propagation of Carrots

    Propagation of carrots is done using the seeds. Depending on the variety, the seeds that are broadcast or sowing in the filed with a seed rate of 5 to 6 kg/ha or 6 to 9 kg/ha.

    Seeds are smaller in size and count approx. 800 per gram. And they remain lively for as many as three years with up to 80% chances of germination. However, the germination may be inadequate in some local varieties.

    Therefore, you should not forget to get a rough calculation of germination percentage while calculating the requirement of seeds.

    For best results, procuring clean, healthy and viable seeds from a reliable source is very important. Usually, the carrot seeds take up to 7 to 20 days to germinate properly.

    The atmospheric temperature of 20 to 30 degrees Celsius is ideal for seed germination (different from the growth of carrots).

    Also Read: Sweet Potato Farming Information Guide

    How to Plant Carrots?

    Carrot planting from seeds is the best option, instead od transplanting. It would be best if you sowed the seeds directly in the field, keeping in mind that they don’t like any disturbance whatsoever.

    Sow the seeds 2 to 3 inches apart in rows, ¼ inch deep, and 1 foot apart.

    A useful TIP: Ensure distributing seeds equally so that they don’t grow together at the same place. You can use a seed-sower for proper distribution.

    Again, maintain enough moisture in the soil with frequent shallow watering. Small carrot seeds don’t like hard crusts or lumps for their growth. Covering the seeds with fine compost or vermiculite is also a decent idea to prevent the formation of crusts.

    You can check the moisture by putting a finger in the ground – the soil should be moist, but not wet.

    At times, carrots germinate very slowly, and it may take two to three weeks to show any sign of life. So, being patience is also very important. If you have maintained the right carrot planting distance, there are very high chances of timely, healthy and productive germination.

    Tip: You can add radish seeds to carrot seeds to track the growth of carrots. As radish grow quickly, you can harvest them, and the carrots will also start to grow.

    Fertilization Management in Carrot Farming:

    You should choose the fertilizers after proper analysis of the soil.

    Farm Yard Manure with the distribution rate of 30 tonnes per hectare is recommended at final ploughing with a dosage of 40 to 60 kg nitrogen, 90 to 110 kg potassium, and 25 to 50 kg phosphorus for every hectare.

    Add about three tons of farmyard manure while preparing the land, mixed with 40 kg phosphorus, 50 kg nitrogen, and 50 kg potash for each hectare.

    Add a full dose of phosphorus and potassium, and half the dose of nitrogen before sowing the seeds. You should add the remaining nitrogen at the 56th week of germination.

    Carrots love feeding on potassium, deficiency of which can severely affect the roots as well as the overall metabolism of the plants. Carrots with low potassium quantity are not good to taste and don’t last long too.

    Irrigation Management for Carrot Crops

    The first carrot farming irrigation should be light, and you should do it immediately after sowing. Carry out the subsequent irrigations as per requirement.

    As discussed, too much moisture is not ideal for carrot crops, and you may end up getting light-coloured, short carrots with a larger diameter. Types of soil, season, and variety of carrots play key roles in deciding the requirement of irrigation.

    carrot farm

    Usually, irrigation in every 5 to 6 days in summer and 10 to 15 days in winter is ideal for adequate moisture for the carrot crop.

    Only occasional irrigation is needed during the rainy season. It would help if you avoided water stress around the roots, especially while they grow, to prevent from cracking.

    Carrot Care Tip

    While Carrots Are Growing

    • Mulching carrots gently is a decent option to maintain moisture, speed-up the germination, and stop direct sunlight to the roots.
    • When seedlings are of one-inch height, they will usually stand 3 to 4 inches apart. You should trim the tops with a farming scissor instead of plucking them to avoid certain damage to the fragile roots.
    • One-inch water every week is recommended in the beginning, then two inches with the growth of roots.
    • Weeding is an important aspect of carrot planting care, but ensure you don’t disturb the young roots while doing so.
    • Fertilizer with low-nitrogen quantity but high potassium and phosphate after 5 to 6 weeks of sowing is recommended. Excess nitrogen in fertilizer works on the top of carrot plants, not on the roots.

    Managing Pests and Diseases

    There are some common pests and diseases associated with carrot planting. They are:

    • Black (Itersonilia) canker
    • Flea Beetles
    • Carrot rust flies
    • Root-knot nematodes
    • Wireworms, and
    • Aster Yellow Disease:Causes discoloured and shortened carrot tops with hairy roots. You can invest in a control plant to control the pests like leafhoppers.

    Carrot Harvest and Storage:

    Harvesting

    • Small-sized carrots taste best, so you should prefer carrot harvesting when they are still young.
    • You can decide to harvest, depending on your priority. Carrots with the width of a thumb or at least ½ inch of diameter are very good for harvesting.
    • Suppose you are planting carrots in the early summer or spring. In that case, harvesting before the arrival of hot days is the best idea, as carrots may get fibrous under high atmospheric temperature.
    • Harvesting carrots after one or more frosts are linked with better taste, as the plants store more energy (sugars) in the roots for later usage.
    • You can also preserve the carrots after first frosts by covering the 18-inch layer of shredded leaves for late carrot harvesting.

    FYI, Carrots are biennial crops. If you don’t harvest due to some reason, the tops will start flowering and producing seeds after the first year.

    Storage

    Once the carrot harvest season is at its end, storage is the next big task.

    • Twist or cut the ½ inch off the tops of carrots to store them fresh.
    • Don’t forget to remove any dirt under cold, running water, and dry in the air.
    • Refrigerate only after sealing them in airtight plastic bags; otherwise, they will get limped within a few hours.
    • For temporary carrot storage, you can leave the mature ones in the soil, if there are not freezing or pest’s problem with the soil.
    • Tubs, sand, dry sawdust with the cool, dry atmosphere are also some other options for storage.

    Recommended Varieties

    There are plenty of different carrot varieties. They are of rainbow colors, shapes, and sizes!

    • Bolero: 7 to 8 inches, slightly tapered, resists most leaf pests as well as blights.
    • Danvers: One of the classic heirloom carrot varieties, tapered at the end, and has a dark, rich orange color, suitable for heavy soil.
    • Little Finger: Another heirloom variety, looks like Nantes as they grow only 4 inches long, and one inch thick; one of the best varieties for storage.
    • Nantes: Cylindrical, 6 to 7 inches tall, sweetest of them all; with a crisp texture.
    • Napoli: One of the first-rate sub-types of Nantes variety, grown in spring, known for bright orange roots, mild, juicy, crunchy, and fine texture.

    Some common varieties of UK carrot:

    Altrincham: Long and slender roots with good flavour. The neck is purple, where it is exposed to sunlight.

    Amsterdam Forcing: Bouncing, small, finger carrot.

    Autumn King: One of the most common commercial carrots, flaky type, with strong tops and heavy yields. A true winter carrot, which is fairly colourful and smooth.

    Baby Bell: Small, tender type, matures earlier than most of the other varieties.

    Belgian White: Large roots with white skin, very popular in Belgium as well as France.

    Crusader: One of the Nantes types, good colour, smooth skin, ready to harvest in autumn, summer and late spring.

    Wit and Wisdom

    • There are so many different colors of carrot, including orange, purple, red, and white, and only some of them are resistant to pests and diseases.
    • Long-lasting carrots contain a rich quantity of sugar and are a very good source of carotene and vitamins.
    • Carrot is also called as “underground honey” in Ireland due to its sweetness.
    • FYI, carrots are the first vegetables to be commercially canned.

    That’s all about our guide on “how to do carrot farming”.If you are planning to start carrot farming, we would suggest you go ahead. It’s easier; it’s full of fun, and very, very productive too.

    Hopefully, you liked it, and you are not better prepared to start your own carrot farming. Do write to us if you have found it helpful, or if you have some questions. Share the guide with your friends who are interested in carrot farming.

    References:

    https://www.almanac.com/plant/carrots

    https://agricultureguruji.com/carrot-farming/

    How Often to Water Chilli Plants?

    Gardening experts recommend watering chili plants only when the top 1-2 inches of soil is dry. In other words, water this plant every 2-3 days, but frequency can vary based on factors like climate, pot size, and plant size. It’s important to keep the soil consistently moist, but not waterlogged, to promote healthy chili plant growth.

    Grow chili plants in your garden. They are easy to take care of and you can use their fruits in many recipes.

    Watering chili plants needs to be done correctly. Too much or too little water can damage the plant. How often should you give your chili plant water? Let’s find out!

    Chilli plants need different amounts of water. This depends on their age and size, the type of soil they are in, the temperature, light levels and humidity. Generally, chilli plants should get a lot of water once a week if planted outside or twice a week if in a pot.

    In the summer, chilli plants need more water. You should give them water three times each week.

    Water chili plants early in the morning. This gives the soil time to absorb the water before it gets too hot outside and all of water disappears.

    Watering Needs of Chili Plants

    It is important to know how much water your chili plants need. Not enough water can make the leaves wilt and fall off. Too much water can be bad for the roots. Find out how much water they need so they stay healthy.

    Chili plants need different amounts of water. Depending on its size, the amount of sunlight it absorbs, and what kind of soil surrounds it; irrigation for plants can vary.

    • Chili plants need different amounts of water. When they are small, give them more water. When they start to make fruit, give them the most water.
    • The amount of water your chili plant requires is heavily dependent upon the kind of soil it resides in. Sandy soil dries out faster than clay soil, so a chili plant in sandy soil may need more water more often.
    • Depending on the weather, your chili plants may need different levels of water; for instance, dry and hot conditions necessitate more hydration than cooler and humid environments.
    • Cultivating chili plants in pots can determine the amount of water they require, and it all depends on their size.
    • Owing to the fact that they dry out more rapidly than their larger counterparts, miniature planters require frequent hydration.

    How Often Should You Water Your Chili Plant?

    watering chilli plants

    Chili plants need a lot of water. To figure out how often to water them, check the top inch of soil. Parched soil requires one or two thorough watering each week to ensure the plant’s health. This might change depending on things like light and temperature.

    To check if your chili plant needs water, stick your finger into the soil. Go in up to the first joint on your finger. If it feels dry, give it some water. If it feels wet, wait a day or two and then check again.

    Also Read: Is Cow Manure Good For Chili Plants?

    Overwatering Chilli Plant

    Don’t give your chili plant too much water. If you do, the leaves might turn yellow and fall off. Water your chili plant one or two times a week. Look at your sprinkler system to make sure it is not using too much water.

    Take care of your chili plant by following the tips. Give it enough water and it will stay healthy. With good care, your chili plant can last a long time.

    Under-watering Chilli Plants

    Without adequate watering, your chili plants will struggle to reach their full potential. Feel the soil to see if it is dry. If yes, give them a lot of water. If their leaves are droopy or yellow, give them more water. Keep the soil damp so they stay healthy.

    Take care of your chili plants. Give them enough water to stay healthy and keep growing. This way, you can have a chili plant for a long time!

    Best Soil for Chilli Plants

    Chili plants need soil with lots of nutrients and the right pH balance. The soil should be light and airy so the roots can get water before it disappears into the air.

    To help your chili plants grow, add compost or mulch to the soil. This will give it more nutrients and help water get to the plant. Change where you put the plants sometimes so they stay healthy.

    Check this out: How Long Does It Take to Grow Peppers from Seed?

    Mulching Chilli plant to Avoid Underwatering

    Use mulch to help your chili plants get water. Mulch is things like straw or leaves. It will help keep the soil wet and stop water from going away. The roots of the chili plants will have enough water, so you don’t need to water them a lot. Mulching also keeps weeds away and makes sure that the soil stays in one place.

    Take care of your chili plants by giving them enough water. This will help them stay healthy and grow bigger. With proper care, these plants will thrive in your garden for years to come.

    Tips for Watering Chili Plants

    1. Water your chili plant in the morning. This way it can get water before it gets too hot outside.
    2. Chili plants don’t like cold water. Use water that is the same temperature as your room when you give it to the chili plants.
    3. Do not water the leaves of chili plants. Watering the leaves can give them a sickness. Instead, water the soil near the plant.
    4. Spreading a layer of mulch around your chili plant can be an effective way to retain moisture in the soil, meaning you won’t have to water as frequently.
    5. It is important for water to get down deep into the soil around your chili plant. To help with this, use a watering can that has a long spout. With this tool, you’ll be able to precisely direct the water exactly where it has to go.
    6. Remember that chili plants need more water when it is hot outside or when there is little or no rain.

    How often should I water my chili plants?

    Chili plants need to be watered once or twice a week. Check the soil to see if it is dry and then water your plant. When temperatures soar or a dry spell strikes, frequent watering may be necessary. Don’t give too much water because that can hurt the roots.

    Also Read: Chilli Flowers Dropping Off – Plant not flowering

    What is the best time to water my chili plants?

    Water your chili plants in the morning. Use water that is not cold or hot, just room temperature. Don’t water the leaves, only the soil around the plant. This will help keep it healthy.

    Can I use cold water to water my chili plants?

    Don’t use cold water to water your chili plants. Cold water can hurt the roots. Use room temperature water instead so that the plant can get the most out of the watering.

    Should I water the leaves of my chili plant?

    Do not water the leaves of chili plants. This can give them fungi diseases. Only water the soil around the plant instead. Put mulch on the soil around your chili plant to keep it moist and help you water it less often.

    What is the best way to keep soil moist for chili plants?

    Mulching can help your chili plants get more water. Put straw or leaves around the soil to prevent water from evaporating quickly. This will help the roots of your chili plants get enough water and you won’t need to water them as often. Mulching also stops weeds from growing and keeps the soil in place.

    How do I ensure that the water penetrates deeply into the soil around my chilli plant roots?

    Make sure the water gets deep into the ground near your chili plant. A watering can with a long spout can help you water the plants in hard to reach places.

    Do chili plants need more water in hot weather or during dry periods ?

    Chili plants need more water when it is hot or when there are droughts. Check your chili plants often and give them water if they need it. With good care, the chili plants will stay healthy and last a long time in your garden.

    Conclusion

    Watering a chili plant is important so it can stay healthy and grow. Too much water can hurt the plant. Check the top inch of soil before you water it. Depending on the temperature, water your plants one or two times a week to ensure optimal growth.

    Water chili plants with room temperature water. Mulch around the plants to keep the soil moist for longer. Give extra water during hot and dry weather.

    How to Increase Female Flowers in Cucumber?

    To boost female flower production in cucumbers, maintain temperatures between 40-60°F, ensure consistent watering to prevent stress, use fertilizers rich in phosphorus, and encourage pollination by introducing bees to your garden.

    Growing cucumbers in your garden can be easy and they’re effortlessly grown from seeds, rapidly maturing in just 50 to 70 days. If your goal is to harvest cucumbers for pickling or snacking, you might be curious about maximizing female flower production in cucumber plants to enhance your garden’s productivity.

    Studies show that high temperatures can reduce the production of female flowers, whereas cooler temperatures have the opposite effect. Extended exposure to light hours also promotes the development of female flowers. Maintaining sufficient levels of potassium, phosphorus, and calcium has a positive influence on the abundance of female flowers.

    Here are some useful points to help you increase female flowers in cucumber are:

    1. Give them Sunshine

    Cucumbers thrive in warm, sunny conditions, so for optimal growth, plant them in full sun if you’re in a cooler climate. In hotter areas, choose a spot where they can bask in the morning sun but enjoy dappled shade in the afternoon for cooling. Sunlight is essential for cucumbers as it helps proper photosynthesis, ensuring they generate enough energy to produce flowers. Insufficient light can hinder this process and lead to a lack of energy for flower development.

    2. Choose the right Varieties

    To increase the number of female flowers on your cucumber plants, opt for a combination of Gynoecious varieties (exclusive female flower producers) and Monoecious varieties (bearing both male and female flowers). Relying solely on Gynoecious types might result in a shortage of male flowers, essential for fertilization.

    3. Grow at Optimal Temperatures

    As the chilly winter months come to an end, the excitement to start your seedlings early may begin. However, it’s advisable to wait until late spring or early summer to start your cucumber plants. 

    Maintaining a warm environment, not excessively hot but definitely not too cold, is crucial for promoting the growth of female flowers.

    Cucumbers thrive in mild temperatures ranging from 40 to 60 degrees Fahrenheit, encouraging the production of more female flowers. On the other hand, higher temperatures, reaching 70 degrees and above, can lead to an abundance of male flowers on the plants.

    4. Ensure Adequate Watering

    Ensuring proper hydration is vital for the growth of plants. Regular watering prevents issues like root rot or drought stress, but overwatering can harm roots. Conversely, insufficient water leads to plant dehydration, resulting in small, tough-skinned cucumbers.

    Use your fingers by pressing 2 inches into the soil. Water the plants if the soil feels dry; refrain if it’s moist. When watering cucumbers, go for the morning or early afternoon to allow plants to absorb water and nutrients before daytime heat evaporates moisture.

    5. Apply Fertilizers

    Similar to other vegetables in your garden, cucumbers depend on nutrients for flowering and fruit production. Insufficient vitamins and minerals in the soil can limit flower formation. To enhance female flowers in cucumber plants, establish and stick to a fertilizing schedule.

    For good outcomes, start feeding your cucumber plants early in their growth. About 4 to 6 weeks after the seeds sprout and the plants have developed several sets of true leaves, apply a vegetable fertilizer. This promotes quick growth once the plants are in your garden.

    Also Read: Should I cut off yellow leaves from Cucumber?

    6. Manage Weed Growth

    Dandelions, stinging nettle and other weeds can rob essential nutrients from your cucumber plants. Regularly weed your cucumber patch to prevent these unwanted plants from depleting minerals in the soil. Use a weed fork and hand trowel to get rid of weeds without disturbing the shallow root system of your cucumber plants.

    Carefully handle the foliage to identify and remove hidden weeds. Weeds can increase rapidly, so ensure you weed your cucumber patch every few days to address the issue before it becomes unmanageable.

    7. Provide Adequate Space

    A common mistake when growing veggies is planting cucumbers too close together. If they’re crowded, some of the female flowers might fall off. 

    Let your plants have some room to grow. Depending on the kind of cucumber, plant them about 18–24 inches apart. This helps them make more female flowers.

    Having enough space between plants lets air move around, gives growing fruit room, and lowers the chance of diseases. Good air circulation keeps the cucumber plant healthy overall.

    8. Harvesting Quickly

    Plants need a lot of energy to both flower and make fruit simultaneously. It’s beneficial to harvest ripe cucumbers quickly so that the plants can use the extra nutrients to produce more female flowers.

    Early picking offers another advantage: you get the tenderest, sweetest cucumbers. The longer they stay on the vine, the tougher their skin becomes and the mushier their texture gets. Older cucumbers also tend to have a watery taste that isn’t as tasty as the smaller ones.

    Also Read: Why You Should Not Plant Cucumbers Near Tomatoes?

    9. Pest Control

    Pests have the potential to harm and ruin female cucumber flowers. Some pests may nibble on flower petals, while others might devour entire flowers and small fruits. On the flip side, certain pests may feed on plant juices, hindering the complete emergence of both male and female flowers.

    The most straightforward method involves spraying pesticides, but this can negatively impact cucumber productivity. Beyond pesticide use, there are alternative options too. Consider using fine netting or woven materials. Cover the cucumber in the morning and remove it later in the day to handle both heat and pest concerns.

    Ensure the fabric allows air passage, supporting photosynthesis during the covered period. 

    10. Cucumber Pollination

    While cucumber plant pollination doesn’t directly boost the count of female flowers, it does enhance fruit production. Unexpected falling of female cucumber flowers can occur when insufficient pollinators are available for fertilization. To address this, it’s essential to increase the presence of pollinators in your garden.

    11. Pruning increases female flowers

    Cucumbers that spread on the ground tend to produce fewer female flowers due to restricted air circulation. To encourage better air flow and boost female flower production, consider pruning your cucumber plants.

    Using a stick or a sturdy 4-foot wire cage, prune the cucumber by pinching off the fully grown tip. This method allows the plant to spread naturally while ensuring the wire can support its weight as it expands.

    Pruning not only increases the number of female flowers but also aids in straightening fruits that would otherwise bend on the ground. It’s a beneficial practice for overall plant growth.

    Also Read: How Deep Should a Raised Bed Be for Cucumbers?

    Conclusion

    Enhancing the presence of female flowers in cucumber plants involves a combination of factors. Providing good temperature levels, adequate nutrients, and managing pests to promote proper pollination through the presence of pollinators, each aspect plays a crucial role. Additionally, strategic planting, spacing, and timely harvesting contribute to the overall presence of female flowers in cucumber plants. 

    Moreover, the greater the number of female flowers your cucumber produces, the more abundant your fruit harvest will be. Boost your cucumber yield by enhancing the presence of female flowers.

    How to Fix Calcium Deficiency in Pepper Plants?

    To fix calcium deficiency in pepper plants, amend the soil with gypsum. Ensure a balanced fertilizer with sufficient calcium, and maintain consistent watering. Mulching helps regulate soil moisture. Consider adding eggshells or bone meal for a natural calcium boost.

    Plants need calcium to grow well and stay strong. For peppers, if they don’t have enough calcium, they might not grow as much fruit.

    If your plants grow slowly, it might be due to a lack of calcium. To fix this, you must address calcium deficiency on time, or your plants could become stunted and weak. While calcium deficiency means your plants lack this nutrient, solving the issue isn’t just about adding more to the soil or solution—it needs other things as well. Let’s see what other things will be.

    What causes Calcium Deficiency in Pepper plants?

    You might be assuming calcium deficiency comes from not having enough calcium. While that’s part of it, it’s not the whole thing. Simply having sufficient calcium in your soil doesn’t guarantee your plants get all they need. Various factors play a role in causing calcium deficiency, and they are below.

    1. Loss of water

    Insufficient water can restrict your pepper plants from taking in calcium, even if it’s available in the soil. When the soil is overly dry, the roots struggle to draw up nutrients, leading to plant distress. This often results from an irregular watering routine, but it can also be influenced by the soil type.

    2. Plant get a lot of nitrogen

    The plant directs calcium to the leaves instead of the fruit. When a plant receives ample nitrogen, its leaves grow quickly. Fast-developing leaves have a higher ability to compete for calcium ions compared to the fruit.

    3. Type of soil

    Often, the root cause of your pepper plant’s calcium deficiency lies in the soil type. Soil colloids retain calcium, but when it combines with released hydrogen ions, the soil turns excessively acidic. Sandy and coarse soils, common culprits, are usually highly acidic, and unable to retain sufficient nutrients like calcium. Conversely, alkaline soil types generally contain higher levels of calcium.

    4. Too much fertilizer

    Applying a phosphorus-rich fertilizer during the growth stage promotes plant growth. However, improper fertilization of your pepper plants, whether excessive or insufficient, can result in calcium deficiency. Excess phosphorus can interfere with the plant’s absorption of various nutrients, including calcium and in the end contribute to deficiency. As well as insufficient fertilizer can hinder the plant from absorbing essential nutrients. Adequate phosphorus is crucial for efficient plant root function. When phosphorus is insufficient, the plant may also struggle to absorb required nutrients.

    5. Plant stress

    Growing pepper plants in unfavourable conditions can cause stress and hinder their normal growth processes. Overcrowding restricts proper air circulation and triggers competition for nutrients among the pepper plants, resulting in root problems.

    6. pH level

    The availability of calcium is significantly affected by pH levels. If the pH of your soil or solution is below 6.0, it creates a challenging environment for plants to efficiently take up this vital nutrient. Maintaining a balanced pH is key to ensuring that your plants can readily absorb and benefit from the calcium they need for strong growth and development.

    Check this: Bell Pepper Farming Guide

    How to Fix Calcium Deficiency in Pepper Plants?

    To fix calcium deficiency in pepper plants, start by selecting suitable soil and a favourable location for optimal growth. Evaluate nutrient levels, ensure proper watering, and provide adequate fertilization to prevent deficiencies. Let’s see further in detail how to fix it.

    1. Water regularly

    Make sure the soil isn’t overly dry, as insufficient watering may be the reason for the plant’s inability to draw up nutrients. Pepper plants require watering when the soil feels slightly dry. The frequency can vary, with a need for daily watering in hot summer months and less frequent watering as temperatures decrease.

    Mulch proves to be a valuable asset in preventing soil from drying out. Applying a layer of mulch not only retains moisture but also helps maintain the ideal temperature for pepper plants

    2. Choose the right fertilizer

    Ensure to steer clear of ammonia-based or nitrogen- and potassium-rich variations of fertilizers. Although nitrogen aids soil improvement, it can stress pepper plants during droughts. Excessive nitrogen, whether from manure or chemical fertilizers, hinders calcium absorption and stunts plant growth. Instead, go for a liquid fertilizer and apply it by spraying it onto the leaves.

    3. Check the soil

    It’s a saying that “prevention is better than cure”. So, before you start growing peppers, test your soil. This not only helps with calcium but also other nutrients. Knowing what your soil needs lets you take the right steps to keep your plants healthy from the start.

    4. Add calcium

    If your soil lacks calcium, you can improve it by adding calcium nitrate or a fertilizer rich in calcium chloride to your pepper plants. If you prefer avoiding chemicals, you can enhance the soil organically by using bone meal, eggshells, dolomite lime, or gypsum. These natural alternatives work well to amend the soil and boost calcium levels for your pepper plants. But, be careful not to overdo it.

    5. Conditions for growth

    Excessive humidity can impact the transpiration process and ultimately lower calcium levels in your pepper plants. It’s recommended to grow your pepper plants in moderately humid conditions to ensure efficient nutrient absorption.

    6. Give them space

    For good root development, pepper plants are ideally spaced around 18 inches apart. Yet, if the temperature drops below 60 degrees Fahrenheit, then bring them closer together.

    7. Nutrient Levels

    While enhancing your soil to boost calcium levels, ensure you’re not neglecting other essential nutrients. Calcium forms bond with both micro and macronutrients through ionization, and a deficiency in these nutrients can impact its absorption.

    Also Read: How Many Green Peppers Per Plant?

    What are the Signs of Calcium Deficiency in Pepper Plants?

    Here are some signs you can look out for in your pepper plant –

    1. Discoloration of leaves

    Brown spots, particularly tip burn on leaf margins, can signify calcium deficiency, alongside overall yellow chlorosis across leaves. If neglected, this deficiency may progress, leading to complete necrosis of leaves.

    2. Rot

    The occurrence of various types of rot on new leaves, fruits, and flowers could be an indication of a calcium deficiency. If you observe blossom end rot above ground, it may show you the presence of root rot below ground as well.

    3. Leaf Curling

    Insufficient calcium can lead to the curling of new growth in plants. If you observe new leaves curling inward, is likely to be a calcium deficiency.

    4. Stunted Growth

    If your plants are noticeably slow to reach maturity, it’s best to examine your soil for potential calcium or nutrient deficiencies. While it might not be the only cause, curing this possibility will help in identifying and resolving the underlying issue.

    Also Read: Why Are Eggshells Good for Pepper Plants?

    How to Prevent it from Beginning?

    Here are some tips you can follow to prevent calcium deficiency in pepper plants from the beginning.

    1. Before planting peppers, perform a soil test to identify calcium deficiency.

    2. Adjust fertilizer mix based on soil test results.

    3. Choose organic options like gypsum and bone meal to boost calcium without putting in excess nitrogen.

    4. Enhance future calcium levels by including eggshells in your compost.

    5. Ensure pepper plants receive sufficient water, especially during dry periods and fruit growth.

    6. Adjust watering practices based on seasonal needs to maintain good soil moisture.

    7. Prepare the soil thoroughly to prevent compaction.

    Avoid soil compaction to promote efficient water uptake by pepper plant roots.

    Conclusion

    Addressing calcium deficiency in pepper plants involves a thorough process—from selecting the right soil to monitoring nutrient levels, practising effective watering, and considering environmental factors. 

    Organic amendments like bone meal and eggshells offer sustainable solutions. Moreover, there are various homemade remedies also available. You can try them too.

    Why My Tomato Plants Growing Too Tall and Leggy?

    Tomato plants may become too tall and leggy for a variety of reasons, but the most common cause is a lack of sunlight.

    Tomatoes require full sun (at least 6-8 hours of direct sunlight per day), otherwise they can become ‘stretched’ in an attempt to reach more light.

    If your tomato plants are in partial shade or not getting enough sunlight, try moving them to a sunnier spot in the garden.

    Additionally, over-fertilizing with nitrogen can make tomato plants grow too tall and leggy as it encourages rapid foliage growth at the expense of fruit production. Try reducing or eliminating fertilizer applications until the plant produces fruit.

    Why Are My Tomato Plants Too Tall and Leggy?

    #1. Lack of sunlight

    When tomato plants lack adequate sunlight, they will attempt to reach for more light by growing too tall and leggy.

    Tomato plants require full sun (at least 6-8 hours of direct sunlight per day) in order to thrive and produce the best quality fruits.

    If only partial sun is available, then tomato plants will become ‘stretched’ as they attempt to reach out for needed sunlight.

    These plants will have weak stems that are unable to support their own weight and may also display an overall unhealthy appearance.

    Without enough light, the foliage of a tomato plant will become thin and sparse, with fewer blooms or flowers than usual.

    Overall growth may be stunted and fruit production reduced.

    To avoid this problem, make sure to provide your tomato plants with the right amount of natural sunlight every day.

    #2. Over-fertilizing with nitrogen

    Over-fertilizing with nitrogen can cause tomato plants to become too tall and leggy.

    Nitrogen is a vital nutrient for plant growth and development, however too much of it can be detrimental.

    Too much nitrogen causes rapid foliage growth at the expense of flower and fruit production, resulting in tall and leggy plants.

    The excess nitrogen encourages the plant to focus on foliage growth instead of producing fruits and flowers, leading to weakened stems that may not be able to support their own weight without additional support.

    The symptoms of over-fertilizing with nitrogen include yellowing leaves, poor root development, poor flower set, low yields of fruit, stretched growth habit (leggy plants), and weak stems.

    To prevent this from happening, try using a balanced fertilizer formula or reducing the amount of fertilizer applied to the tomato plants.

    It’s also important to avoid top dressing or side dressing your plants with fertilizers as these contain higher concentrations of nitrogen than what is needed for optimal growth.

    Additionally, make sure to apply only enough fertilizer so that the majority is absorbed by the soil rather than left on top which could burn or damage your tomato plants.

    #3. Poor soil quality

    Poor quality soil is typically lacking in essential nutrients and organic matter, which are necessary for the healthy growth of tomatoes.

    If the soil is depleted of these important components, then it will be unable to provide adequate nutrition to the plant, resulting in weak and leggy growth.

    In addition, poor soil quality can cause poor drainage and water retention, leading to over-watering or under-watering of the tomato plants which can further exacerbate the problem.

    #4. Too much water

    Too much watering can cause tomato plants to become tall and leggy.

    When tomato plants are overwatered, their root system becomes overloaded and cannot absorb the excess moisture.

    As a result, the plant will attempt to reach for more light by growing too tall and thin in an effort to find the oxygen and nutrients it needs for survival.

    Additionally, moist soil can also encourage the growth of fungal diseases that can weaken and damage tomato plants, resulting in stunted growth or even death.

    Overwatering can also cause nutrient deficiency in tomato plants as excessive moisture can dilute the essential minerals in the soil.

    This is because water flushes out important nutrients like nitrogen, phosphorus and potassium, leaving the plant without an adequate nutrient source.

    Without these essential nutrients, tomatoes will not be able to grow properly leading to weak stems that cannot support themselves.

    This can make them susceptible to collapse or damage due to wind or other environmental factors.

    Furthermore, overwatering may cause too much foliage growth at the expense of fruit production which leads to leggy plants with fewer blooms or flowers than usual.

    Also Read: Is Chicken Manure Good for Tomato Plants?

    5. Insufficient pruning or staking

    Not pruning or staking tomato plants can cause them to become too tall and leggy.

    Pruning or staking not only helps to direct the plant’s energy into producing more flowers and fruits, but it also helps to keep the plant upright and prevents it from becoming top heavy and falling over.

    When tomato plants are allowed to grow unchecked, they tend to become too tall and thin as they reach for more light.

    This can result in weak stems that cannot support their own weight and may even break off or cause the plant to collapse under its own weight.

    Check this out: Should I Cut Off Yellow Leaves on Tomato Plants?

    How to stop tomato plants growing too tall?

    It is important to take the necessary steps to prevent tomato plants from growing too tall and spindly, known as legginess.

    The most effective way of achieving this is by pruning the plant regularly.

    Pruning will encourage bushier growth and discourage the plant from continuing to grow upwards.

    To prune a tomato plant, pinch off any stems that have grown beyond six inches in length.

    The pinched off section should be between two sets of leaves. Additionally, pruning off any side shoots or suckers that appear below the main stem can help keep your tomato plants healthy and compact.

    Another useful technique for controlling height is staking or trellising tomatoes as they grow; this encourages vertical rather than horizontal growth.

    When done correctly, staking or trellising can provide a tomato plant with increased support and allow for better air circulation.

    Finally, providing adequate amounts of light is essential for keeping tomato plants from becoming leggy.

    Tomato seedlings should be exposed to at least 6 hours of sunlight a day. If the seedlings are not getting enough light, they will stretch towards the source in an effort to find more.

    To prevent this, it’s important to move them into brighter spots as soon as possible.

    Also Read: Why Tomato Branches Curling Down

    Can you trim the height of tomato plants?

    Yes, you can trim the height of tomato plants by pruning. Pruning helps remove excess growth and encourages bushy, healthy plants that produce more tomatoes.

    To prune a tall tomato plant, start at the top and look for any spindly growth or leaves that are misdirected.

    Carefully snip off the stems with sharp scissors or garden clippers as close to the main stem as possible. Be careful not to damage nearby foliage while pruning.

    How do you keep tomatoes short and Bushy?

    In addition to pruning, there are a few other ways to help keep tomato plants short and bushy.

    Planting in well-draining soil with plenty of organic matter can help provide the root system with adequate nutrition for healthier growth.

    Staking or tying the plant as it grows is also important for providing stability and support that reduces potential damage from strong winds or heavy fruit production.

    Pruning off any leaves that touch the ground will also discourage disease, while mulching around the base of the plant can ensure proper water drainage and reduce weed competition.

    Finally, regular fertilizing throughout the season helps encourage healthy development by providing essential nutrients like nitrogen and potassium which aid in photosynthesis, leaf development and flowering.

    With these simple steps, you can ensure that your tomato plants stay short and bushy, producing many delicious fruits!

    What can you do with leggy tomato plants?

    Leggy tomato plants are not ideal for fruiting, as they may produce fewer tomatoes than their shorter counterparts.

    However, there are a few things you can do to make the most of these tall plants.

    First, prune off any excess growth at the top to reduce the overall height and encourage branching further down.

    You can also use stakes or cages to provide support while the plant is still growing so it doesn’t succumb to heavy winds or fruit production.

    Finally, you can cut off some of the side branches from leggy tomato plants and use them for propagation in order to grow more plants from cuttings.

    Tomato plant Care tips

    • Plant in well-draining soil with plenty of organic matter.
    • Stake or tie the plants as they grow for stability and support.
    • Prune off any leaves that touch the ground for disease prevention.
    • Mulch around the base of the plant for proper water drainage and weed control.
    • Regularly fertilize with essential nutrients like nitrogen and potassium to promote healthy growth and flowering.
    • Prune tall tomato plants from the top, removing up to two-thirds of their total height when necessary.
    • Cut off side branches from leggy tomato plants to use for propagation if desired.
    • Provide adequate sunlight and water to keep your tomato plants thriving throughout the season!
    • Inspect plants regularly for signs of disease or pest infestations, and take action as needed to protect your crops.
    • Use neem oil to get rid of aphids from tomato plant. It has pesticide and fungicide abilities to deter pests.

    Read these articles:

    Conclusion

    Tomato plants that become too tall and leggy can be trimmed to reduce their height and discouraged from growing further.

    Pruning, staking or tying the plant, removing leaves that touch the ground, mulching around the base of the plant, and regular fertilizing can help keep tomato plants short and bushy for a better harvest.

    Additionally, leggy tomato plants can still be used for propagation in order to grow more plants from cuttings.

    Can You Eat Radishes with Black Spots Inside?

    Yes, you eat radishes with black spots inside as long as the radish is not severely affected and has not spoiled. 

    If you’re someone who loves radishes in your meals, you may have seen the radish with black spots inside. This can be concerning, and you might be wondering if it’s safe to eat the radish or if you should throw it away.

    Black spots in radishes can be caused by a variety of factors, including pests, disease, and environmental conditions. 

    While the appearance of black spots may not be ideal, it does not necessarily mean the radish is unsafe for consumption. In fact, if the spots are not too severe, you can easily cut them away and still enjoy the rest of the radish.

    What causes black spots in radishes?

    Black spots on radishes can be unsightly and concerning, but understanding the causes behind them can help put your mind at ease. 

    There are several factors that can contribute to the appearance of black spots on radishes, and it’s important to identify these factors to prevent further occurrences in the future.

    The fungus can be a problem in radishes causing black spots. This fungus can thrive in moist environments, such as in soil that has not been properly drained or irrigated. 

    When radishes are grown in these conditions, they may become infected leading to the appearance of black spots on the roots.

    Another common cause of black spots in radishes is damage from pests, such as flea beetles or root maggots. These insects can cause small wounds on the radish roots, and become infected with bacteria or fungi. 

    The resulting black spots may be a sign of this infection, and if left unchecked, can cause the radish to rot and become inedible.

    Environmental factors can also play a role in the development of black spots in radishes. If radishes are grown in soil that is too compacted or lacks sufficient nutrients, they may not be able to develop properly. 

    This can weaken the radish roots and make them more susceptible to infection and disease, leading to the formation of black spots.

    Check this out: Why Are My Radishes Long and Thin?

    Are radishes with black spots inside safe to eat?

    It’s a common question that many people ask: are radishes with black spots inside safe to eat? The answer is not a simple yes or no, as it depends on the severity and cause of the black spots.

    If the black spots are minor and do not cover a large portion of the radish, they can still be safe to eat. Simply cut away the affected area and enjoy the rest of the radish. 

    However, if the black spots are widespread or have caused the radish to become mushy or slimy, it is best to discard them.

    Moreover, if you’re not sure what caused the black spots, it’s best to be cautious and avoid eating that radish.

    To prevent black spots and other issues with radishes, it’s important to properly inspect and store them. Look for radishes that are firm and free of any spots, and store them in a cool, dry place away from moisture. 

    Additionally, make sure to wash your radishes thoroughly before eating them to remove any dirt or bacteria.

    Also Read: How Long Does Horseradish Take to Grow?

    Can radishes with black spots be used for cooking?

    If you’ve found radishes in your fridge with black spots, you might be wondering if they can still be used for cooking. The answer is yes, you can by simply cutting the affected area.

    Radishes with minor black spots can still be used for cooking. Simply cut away the affected area and use the rest of the radish as you normally would.

    However, if the black spots are widespread or have caused the radish to become mushy or slimy, it’s best to discard them. Cooking the radish will not make it any safer to eat if it has gone bad.

    Note: Similarly, you can eat tomatoes with black spots.

    What are the Health Benefits of Radishes?

    Radishes are not just delicious, but also incredibly nutritious. These root vegetables are a great source of vitamins, minerals, and antioxidants, making them a healthy addition to your diet. Here are some of the health benefits of radishes –

    • Rich in vitamins – Radishes are a great source of vitamins C and K. 
    • Good for digestion – Radishes are high in fibre, which can help promote healthy digestion and prevent constipation. 
    • Low in calories – If you’re looking to lose weight or maintain a healthy weight, radishes are a great choice. They are low in calories but high in fibre, which can help you feel full and satisfied.
    • Good for the skin – Vitamin C, which is abundant in radishes, is important for skin health. It helps promote the production of collagen, which is essential for maintaining healthy skin.
    • May lower blood pressure – Radishes contain potassium, which is important for maintaining healthy blood pressure levels.

    Also Read: Why Are My Radishes Growing Above Ground?

    How to store radishes properly?

    Radishes are a delicious and nutritious addition to any meal, but they can be tricky to store properly. If you’re not sure how to store your radishes, they can quickly go bad and become inedible. Here are some tips on how to store radishes properly –

    Remove the leaves – Radish leaves can suck moisture from the radish, causing it to dry out and become shrivelled. To prevent this from happening, remove the leaves from your radishes as soon as you bring them home.

    Keep them dry – Moisture is the enemy of radishes. To keep them fresh, store them in a dry place like a paper bag or a cloth bag. Avoid storing them in plastic bags, as this can trap moisture and cause them to spoil.

    Refrigerate – Radishes are best stored in the refrigerator. They prefer cooler temperatures and will last longer in the fridge than at room temperature.

    Don’t wash until they’re ready to use – Washing radishes before storing them can cause them to become mouldy or slimy. Wait until you’re ready to use them before washing them thoroughly.

    Check for spoilage – Before using your radishes, inspect them for signs of spoilage. Look for black spots, slime, or a foul odour. If you notice any of these signs, it’s best to discard the radish.

    Conclusion

    Radishes are a great vegetable for your diet. They are not only delicious but also packed with nutrients that can help improve your health in a number of ways. Plus, they’re low in calories, making them a great choice for weight management.

    Also, black spots inside in radishes can be edible by cutting them from that affected area. Ensure that the infected area in radishes is not that extreme.

    Moreover, when it comes to storing radishes, remember to keep them dry and cool in the fridge, and avoid washing them until you’re ready to use them. By following these simple tips, you can ensure that your radishes stay fresh and tasty for longer.

    How to Grow Boston Fern Indoors?

    The perennial herbaceous plant is also known as the sword fern. Boston fern is native to the tropical region in the world. It is the species in the family of Lomariopsidaceae and it is consists of 30 tropical varieties. Boston fern is used to decorate the balcony and it can grow quickly.

    Boston fern is a popular houseplant and it is essential to take care of Boston fern to keep healthy. Let us know how to take care of Boston fern is not difficult but it is specific. Here we have few care tips for Boston fern to keep happy and beautiful.

    Also Read: 15 Healing Houseplants That Can Improve Your Health

    How to take care of Boston fern?

    First of all, you need to check the right kind of environment for the proper Boston fern care and it requires cool space with high humidity and indirect light

    Especially in winter, you need to provide additional humidity for Boston fern, when you care for Boston fern indoors. Additional humidity care tries lightly misting your fern once or twice a week which helps it to get the humidity it needs.

    Another method to take care of Boston fern is to make sure about the fern soil remains damp. Dry soil is the main reason for Boston fern die. Check the soil regularly and give it some water if the soil needs it to become moist. Boston fern should be planted in potting mixture with high peat moss because peat moss is fully hydrated or soak the pot once a month.

    Due to lack of humidity, the leaves of the Boston fern turn yellow. Therefore you have to increase the humidity around the plant. it doesn’t require any fertilizers. Fertilizers can be used few times a year.

    If your plants are infested be sure to treat them as quickly as possible to keep them healthy because they can be susceptible to some pests such as spider mites and mealybugs.

    Here are the few essential requirements to keeping happy, healthy, and beautiful.

    Light:

    Boston fern loves bright, indirect sunlight. Excess of shade can results in the leaves of Boston ferns aren’t typical bright color and excess of the sun can burn leaves. So, be sure direct sunlight won’t be able to hit your plant.

    Soil:

    These Boston fern needs organically rich loamy soil with good drainage. Poorly drained soil becomes root rot and finally kills the plant. Therefore, peat moss is used for the potting mixture.

    Water:

    To quick growth of Boston fern, it is key to keep the soil moist at all times but not soggy. If the soil begins to dry out then the leaves of the plant also dry and drop off. The winter and fall months slightly reduce the watering as the plant not growing actively. If you notice that the fronds are dries, increase the water quantity you are giving to the plant regularly.

    Temperature and Humidity:

    The Boston fern cannot tolerate extreme heat or extreme cold. It can prefer mild temperature 65 to 75 Fahrenheit. The above 95 degrees Fahrenheit can harm the Boston fern and below 35 degrees Fahrenheit also harm them. High humidity is also critical for Boston ferns but they thrive in humidity levels above 80 percent. If you need to raise your humidity level around the surrounding of your plant, try to fill the tray with water and pebbles and also mist the plant regularly. If it is not getting enough humidity the tips of leaves will begin to turn brown and slowly overtake the whole plant if the humidity does not increase.

    Also Read: 8 Edible Flowers You Should Grow In Your Vegetable Garden

    Propagation:

    The Boston fern is very easy to propagate by division. When transplanting in spring, carefully cut off the section from the fern to which the healthy roots are attached. Even very small parts can grow new plants on their own with proper care. Grow your division in fresh potting soil and make sure the soil remains slightly damp at all times. Also, keep the plant in a warm place, away from drafts and temperature extremes, and in direct sunlight. When you feel resistance by gently pulling on the base of the leaf, you will know that it is rooted.

    Repotting:

    Repot the Boston fern in the spring every year or two when the roots fill the pot. Your fern wants to be in well-drained soil mixed with peat and perlite. Choose a pot with drainage holes and increase the size of the pot in which the fern grew. Keep the tree at the same original level. Don’t plant it too deep in the ground. You want the crown to be higher than the ground to avoid crown rot. Avoid fertilizing for several weeks after transplanting to allow the roots to recover.

    Is it Boston fern poisonous?

    I am happy to inform you that Boston fern is non-toxic to humans, cats, and dogs, so if you have a furry friend who loves to chew vegetables in your home, Boston Fern is a safe choice.

    Where to buy a Boston fern?

    You can start at your local garden center or botanical store. Buying new plants is fun and allows you to choose the healthiest and most beautiful plants for yourself.

    At home, your new fern will take a few days to acclimate to its new location. Don’t worry if you may drop a few leaves or look thoughtful during acclimatization. If you can’t find a Boston fern nearby, there are several tree vendors on Amazon and Etsy who will deliver it to your door! There are many artificial ferns for sale online, so check the listing to make sure you are buying a live plant and not a fake one.