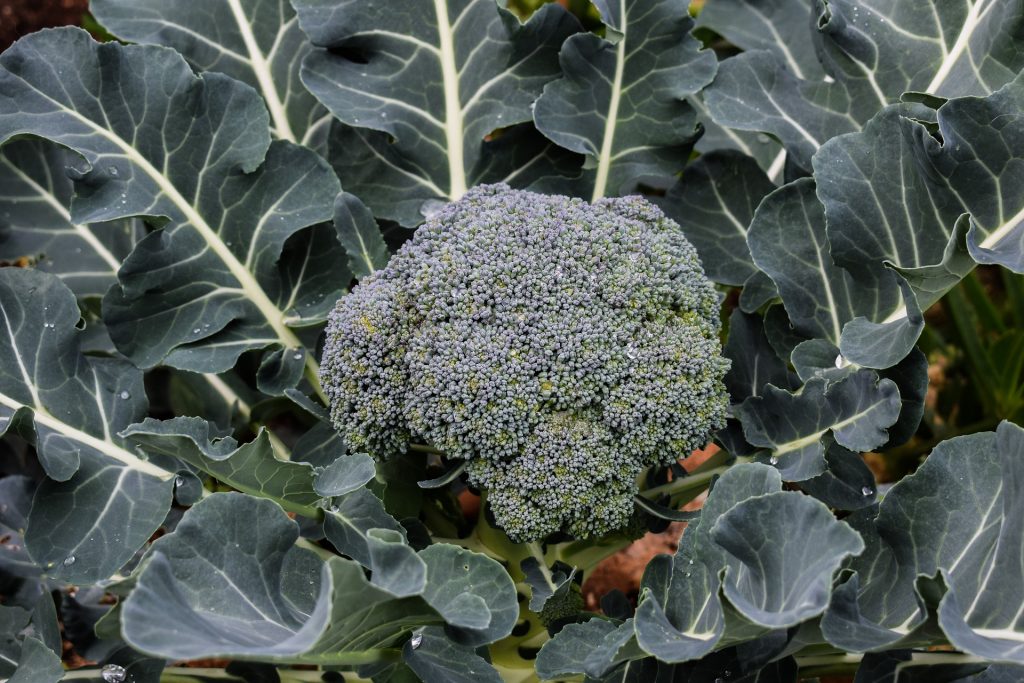
15 Healing Houseplants That Can Improve Your Health

Discover the names of 15 proven indoor plants that can improve your health and start growing indoors. There are some indoor plants that not only look good, but also promote a healthy lifestyle. Stress levels and improved sleep quality are some of these benefits.

  • Some houseplants are recognised to assist purify the air.
  • A horticulturist informed INSIDER that retaining a plant is likewise connected with healing benefits.
  • There are lots of low-maintenance plants you may hold that would suit your lifestyle.

Eating plants isn’t always the most effective manner to attain their benefits. Science has proven that retaining an easy houseplant can do wonders in your health.

Healing Houseplants That Can Improve Your Health

1. Jasmine

Jasmine plant can effect on your mental health and remove anxiety with the help few chemicals, treat mood swing, improve air quality, improve immunity in larger quantity, and improve sleep quality.

2. Spider Plant

It is good for fighting pollutants. One type of spider plant can absorbs 90% of carbon monoxide, formaldehyde, two chemicals found in cigarette smoke. This plant need to allow indirect sunlight and watered once a week for growth.

Also Read: Growing Spring Onions From Seeds

3. Peace Lily

The peace lily plant removes the formaldehyde, benzene, and other chemicals discharged from harsh cleaning products. It is a one of the best plant that can bloom indoors. Keep your peace Lilly in indirect sunlight near a window and water it only when the soil dries up and be cautious not to over water.

4. Snake Plant

In bedroom you can keep snake plant. It has a many benefits; it removes benzene and formaldehyde and also absorbs carbon-di-oxide and release oxygen at night.

5. Rosemary

Rosemary can boost the immune and circulatory system; it is used to ease of muscle pain and it is also known as an herb that improving of concentration and memory. The small fresh leaves of this Rosemary plant can be used in cooking.

6. English Ivy

According to Huff Post, English ivy has filtered out formaldehyde and other chemicals; it is one of the best air filtering houseplant.

According to CNN report especially it is best for the people who are sensitive to smoke.

According to spruce, ivy prefers indirect sunlight, and you shouldn’t let the plant dries out then it grows best.

7. Lavender

It is a plant which is used for relieves stress and insomnia; soothe restlessness, nervousness, anxiety, and depression.

8. Aloe Vera

This plant can do two functions, it removes formaldehyde from air and gel inside the plant can help sunburns and psoriasis. Place this plant in a sunny location and water for every three week.

9. Golden Pothos

According to the NASA clean air report though this plant is not good at removing formaldehyde but it removes other chemicals like trichloromethyl and benzene from the air. Benzene is present in glue, paint, and detergent.

According to Rodale’s Organic Life, making golden pothos as a great starter plant for horticulture newbie’s. Especially this plant is hard to kill.

According to spruce, this plant permits low-light conditions and irregular watering.

Also Read: How to Grow Beans: Planting, Care, Yield, Harvesting

10. Rubber Plant

Rubber plant can easily grow up though it is not difficult to care for, the big leaves are absorbs all bad things from air. So, don’t forget wipe out their dust from leaves.

11. Bromeliads

Bromeliads can absorbs the 90% of chemicals and purify the air of benzene. This plant grows in bright and sunny spaces which are ideal for the bromeliads and it can withstand in drought so be cautious while watering not to over water it. 

12. Gerbera

Recently according to NASA gerbera is the great plant in removing the benzene from air and produce oxygen at night. It also helps to those people who suffer from insomnia and sleep apnea.

13. Boston Fern

Boston fern can increases air humidity; this boost of moisture never dries up your air and your skin according to health essential reports. This plant soil should be wet but never humid and it flourishes in indirect sunlight

14. Azalea

Azalea is a one of the gorgeous colourful flower; it improves indoor air quality by absorbing the harmful chemical. Be sure to place azalea misted, because it likes humid environment.

Also Read: Blossom End Rot On Watermelons

15. Philodendron  

Are you looking for long lasting decorative plant, a philodendron, According to Huff Post this plant is better for  absorbing  xylene which is present in paint tinnier and gasoline. The plants need to grow some fruits then it requires some sun light and moderate amount of water.

How to use Epsom salt for cucumbers

Using Epsom salt for cucumbers it gives better results for you when use it in a correct way.

If your plants have sufficient magnesium it will boost seed germination by strengthening cell walls and produce energy for growth. Sulphur can be lost during germination process, so you have to apply one tablespoon of Epsom salt per gallon of water to the soil after seeding.

If you overdo, it can harm them.

Here you have to know why, how and when you should use it.

Also Read: How To Grow Squash

Why should we use Epsom salt for cucumber plants?

Epsom salt chemical name is magnesium sulphate (MGSO4). It contains magnesium and sulphur when you add to the soil it will cure the deficiencies in one or both two elements. It’s important to know without these essential nutrients your plants will grow health problems.

Let’s see what these nutrients can do and why Epsom salt can help your plants to grow successfully.

Magnesium

Magnesium has a key role in photosynthesis and essential for the production of chlorophyll, which gives green colour to its leaves.

Therefore, it is necessary for the normal growth. If the plants can’t get as much as required then you can see reduction in your cucumber yield.

The first symptom of deficiency in plants are older leaves can turn yellow as they lose chlorophyll is known as chlorosis. As new growth consumes magnesium, the lower leaves are first affected. You will notice a yellowish colour between the main veins of the leaves, which eventually results in light brown burns, which can lead to tissue death in severe cases.

But the green stripes are still visible. Magnesium deficiency is common in areas with light, sandy and acid soils. Especially in areas where heavy rain washes from the ground. Be vigilant in tunnels or containers, as defects are common and often appear in the middle of the season.

Top level potassium and ammonia lead to reduction in magnesium in the soil. So be careful while adding fertilizers.

Sulphur

Sulphur is essential need for amino acids and coenzymes in your cucumber plant. Lack of sulphur becomes evident in new leaves and observed as yellowing of the foliage.

If you can difference it from other deficiencies cause chlorosis due to leaf veins doesn’t stay green.

When you apply Epsom salt to cucumber plant?

Few people have tested their soil so they can find accurate mineral composition and whether they need to know add any nutrients are not.

But most people are not accurate about things and simply add a bit of fertilizers to their plants and watch for their development.

In growing season, if you observe the symptom of lack of magnesium or sulphur as your plant grow, then you add few amount Epsom salt.

Even if they are not getting the sign of deficiency, give the soil boosting with Epsom salt which can improve your results. As far as you will don’t overdo it.

Also Read: Easy to grow the Fresh and Pure Cucumbers

How do you treat cucumbers with Epsom salt?

Consequentially, give one dose of Epsom salt is needed to place your cucumber plant happy, until it will shows the sign of deficiency.

If you are planted in a pot give a dose for each 4-5 weeks when you notice the symptoms.

If you are planted in your garden then use it one dose for every 4-6 weeks.

Can you use too much?

If you use regularly it will damage your plants or kill the plant.

You will start to wilt, and then a visible sign of salts appears on the leaves as they dry out.

How you use Epsom salt for cucumbers?

They are 4 types of using Epsom salt for cucumber plants:

  • Watering
  • Foliar spray
  • Side dressing
  • First planting

Let’s check how you will use Epsom salt in each type:

Watering

The simplest way to add Epsom salt to your plant is combining with your water and uses it while you’re watering the plants.

For 1 gallon of water add 1 tablespoon of Epsom salt. Combine it together that the Epsom salt totally dissolves in water.

To watering container or can add Epsom salt solution and use it when to water your plants.

Foliar spray

You will need handheld garden sprayer to use Epsom salt as a foliar spray.

The idea is that plants get their nutrients through leaves instead of roots. So you should get close and make sure they have good contact with the solution. This is not a substitute for watering the plants regularly, but just a way to help the plants get the nutrients they lack.

Add 2 tablespoons of Epsom salt in a 1 gallon of water

Combine it together well and pour it into spray bottle.

Side dressing

It is uncomplicated achievement than the previous two, but it is not easier and quicker.

Allow to sprinkle a couple of tablespoons of Epsom salt near the base of the plant. It’s the best to give boosting for your plant in mid season.

Also Read: Snake Gourd Farming

When first planting     

If you know the magnesium deficiency in the soil. You can add Epsom salt while planting the seedling of your cucumber plant.

Mix 1-2 tablespoon of Epsom salt with the soil when you plant them. Otherwise you can combine with your fertilizers before applying it.

The bottom line of cucumber is to ensure that the plant is healthy and yields the best. Epsom salt is one of the easiest and cheapest methods.

How long can a tomato plant go without water?

Solanum lycopersicum is chemical name of tomato is a healthy interpolation into our regular life. Tomatoes are native to central and South America and they are more nutrias berries to humankind. They can also produce in your backyard or in the garden or container.

Hence it is not easy to deal with a lot of unique requirements, especially when there is a water stress. If you want to go for a vacation while you planted the tomatoes in your backyard. You cannot put them destitute of water throughout. Although hiring anyone for watering in your backyard is not the best idea and it is expensive. So, now how long the tomato plant go without water?

What do you do to be sure that they remain consistently good? Now we present you with the most applicable and dependable tips to help you to ensure that they are growing.

Can tomato plant can go without water?

Tomato plant can be stable or sustainable for about 36 hours without water. Tomato can be store with some stock of water present in the form of moisture in their cells. It will cater all the needs of planter.

Also Read: How To Hand Pollinate Tomato Flowers To 3x Tomato Yield?

Some factors that impact the water reserves of tomato plants are

Where are they grown?

Where your tomato plants are flourishing? Are they are in container then the soil get moist for every day, make it easy for the plants to extend out for the water and when it need directly. As an average the tomato plants can survive without water is about 36 hours but you can easily transfer them up to 3 to 7 days with self watering pots. With the deep hydration it will be done.

If you move to garden plants, the soil dries up quickly and need water to them. And the pots have the necessary facilities to move them from high sunlight to low sunlight but the gardens don’t move. So the evaporation control rate cannot be any more in your hands.

Also Read: Growing Mushroom for Your Diet

Presence of soil

What are you thinking if plant will survive if you are exposed to direct sunlight? If the evaporation increases, it makes difficulties for plants to maintain moisture from the soil. If you exposed it with sunlight it will shows destruction if not watered. Hence, it is necessary to keep eye on your tomato plant and keep watering about 2 days.

Type of soil

The ability of cells holding water by keeping it from the soil. To provide maximum protection for your tomato plants, choose potting soil with the highest clay content, least sand, or no sand. Sandy soils tend to resist the evaporation process, thereby accelerating the evaporation process. However, clay can retain moisture for longer. , Sometimes even for 14 days, when precipitation continues and exceeds the 24-hour mark. In future, purchase loam soil for watering needs and escape from sandy soil mixture.

Condition of stem and leaves

Leaves and stem are the reflector of the inner plant condition and take a look at texture of stem and leaves colour then you can tell tomato plants requires watering or not.

Flawless, green and potent plant stems are reflected to healthy tomato plants. Weak brittle and discoloured leaves are the indication for strict action taking to save your tomato plants.        

Condition of fruits

Why do plants need water at all? Keep tomato fruits healthy. Studies have shown that about 95% of the water in tomatoes enters the tomato fruit. You can judge whether your plant needs water by observing the fruit. When the fruit is round, smooth and red, watering is no longer necessary. However, if the fruit looks crumpled, splayed, or shapeless, speed up the watering process.

Also Read: Why Are Bottom of Tomatoes Turning Black: Blossom End Rot

Some of the good times to water the plants are

In morning

Why is it daytime? This is because at dawn, your tomatoes are more likely to accumulate water. Because of the sunlight, it gives the plant the longest time to absorb water and start photosynthesis. In addition, with the help of sunlight, the evaporation process proceeds normally at the most suitable time.

In afternoon

Check the soil moisture sometime in the afternoon. In midsummer, water usually evaporates so fast that plants cannot use it. In this case, please consider a second watering keep pouring it seems that. Remember, you don’t want the water to settle overnight and cause problems. If the humidity is good in the afternoon, you can reduce the frequency of watering. In temperate climates, you can water the plants once every two to three days. Before watering the plants, be sure to check the soil to make sure not to overwater.

Are you looking for interesting additions to your garden? Tomatoes are definitely the right choice. However, it is very important to keep them in the best size, shape and quality. Your growth needs are specific and do not require much effort or time. Proper care, equipment, and techniques (as above) can also protect your beautiful tomato plants from weeds, bacteria, pests, and other unwanted items.

What Happens If You Use Vinegar in Your Garden: 19 Miracles of Vinegar

Vinegar is an herbal product and it has tonnes of uses in the home. But do you be aware of that you can use it in gardening too? Have a look at the pleasant Vinegar Uses in the Garden that you should have not heard before!

19 MIRACLES OF VINEGAR IN YOUR GARDEN

1. Clean clay pots:

Although we know that clay pots are perfect home for our plants, but the issue is that they don’t age well. The several salts and minerals from the supplements with these usages start turning them crusty and white. So, if you are clean them with vinegar it gives shining like bright and new!

Also Read: Custard Apple Farming Was Never So Fruitful – Read This Guide Till The End

2. Remove weeds on walls and walkways:

The weeds can be irritating the gardeners, but we can’t able to use large amount of artificial pesticides on them. Using vinegar is a great path to eradicate weeds that pop up on the walkways and the walls of your garden. By simply spraying the pure white vinegar at the corner and by the border of walls of your garden.

3. Get rid of ants:

To get rid of ant’s vinegar is effective and it will repel the ants, mix equal amount of water and vinegar, spray the solution on the ants in your garden.

4. Keep animals away from garden:

Most of the animals including daily garden like moles, cats, dogs, rabbits, rodents, and deer loathe the powerful scent of vinegar.

You can avoid these unwanted visitors from the garden by soaking several old clothes in white vinegar and keeping them on stakes around your garden where they usually come most.

5. Extend the life of cut flowers:

To extend the life of cut flowers per liter of water add 2 tablespoon of vinegar and a teaspoon of sugar.  

Also Read: Ivy Gourd Farming: Planting,Care, and Harvesting

6. Kill weeds:

For effective weed control use vinegar as a weed killer. Spraying it within 2-3 days after application it will kills weeds.

7. Vinegar garden insect spray:

To make vinegar spray that works on garden insects, in a spray bottle combine three part of water with one part of vinegar and add 1/2 teaspoon of liquid dishwashing soap. Before using in the garden shake it thoroughly.

8. Deter fruit flies:

To save your fruit crop from fruit flies, make attraction by using vinegar. To make that solution combine cup of water,1/4 cup of sugar, 1/2 cup of apple cider vinegar, and 1 tbsp of molasses. Keep in a empty container or tin can and hang it on fruit tree where it will be effected then you will see how it will attract and trap them.

9. Make acid loving plants happy:

Place the acid loving plants such as gardenias, rhododendrons, or azaleas happy with vinegar. Though is temporary effect, you can offer a fast acid boost to plants with vinegar. Combine a cup of white vinegar to a gallon of water and water acid loving plants with this solution.

10. Clean rust from the garden tool:

To make the garden tools rust free use vinegar as a solution. To clean the tool just spray or soak the tools in undiluted vinegar and leave them for few minutes and then rinse it off.

11. Save plant from fungus:

With the help of vinegar fungicide recipe, you can protect the plants suffering from fungus and mold. In brewed chamomile tea add 2 tsp of vinegar and spray this on affected plants in your garden. Its organic and safe!

12. Kill slugs and snails:

There are many of uses of vinegar, this one is most popular among gardeners. With the help of vinegar, you can kill snails and slugs. Directly spray on them and in that area where you spot it.

13. Facilitate germination:

For the facilitate germination, soak the seeds in water about 12 hours and vinegar solution. Just add few drops of vinegar in the soaked seeds in water. Then seeds will germinate quickly but the probability of it will also increase.

14. Outdoor furniture cleaning:

Outdoor furniture is permitting to degradation, buildup and damage while comparing to indoor one’s. though it exposed to all diverse conditions like sun, dust, rain, frost and so on…

The scrubbing will take by wiping the furniture with a cloth soaked in the vinegar solution to clean it with that you can save the time and effort. For good results, regularly use vinegar for effective cleaning to get rid of germs and buildup at same moment.

15. Clean birdbath:

If you are not cleaning the birdbath it turns your act of kindness into disaster. With the harmful pathogens the water might be contaminated which effects the health of the bird. Every week scrubbing with white vinegar keeps the birdbath in best condition and good as new. Also, it places the germs, unwanted odors, and algae growth at bay.

16. Get rid of berry strains:

If the harvesting berries grab a toll on the hands as they get stained. If you stained with berry on your hand, already you know how hard it is to clean up. Use distilled white vinegar to wash hands to get rid of berry stains quickly and without getting the skin dry, dull, and bruised. 

Also Read: How to grow cherry trees- A complete guide

17. Refresh wilted harvest:

After harvest your green leafy vegetables are lying around for some time and start to wilt away, combine cold water and 2 teaspoons of vinegar and toss the green leafy vegetables in that. Wait for few hours and watch them perk right up.

18. Make your alkali soil neutral:

In neutral soil most of the plant can be grown, if you are soil is alkali try this hack. In a gallon of water add 2-6 tablespoons of plain vinegar. After testing the water using pH meter you will get the exact quantity which depends on result. Once acidify successfully your water pour it in a watering container or can and water the plants.

19. Run a soil test:

If you want to check your soil in the garden whether it’s acidic or alkaline? Here is a one simple hack with vinegar- Run a quick test by keeping a little soil in a container and 1/2 cup of vinegar to it. If you observe that the vinegar is producing bubbles, the soil is alkaline. It occurs because vinegar is too acidic in nature.

How To Hand Pollinate Tomato Flowers To 3x Tomato Yield?

Pollination is the process in which transferring pollens from male part(anther) of a plant to female part (stigma) of a plant, it enables fertilization and production of seeds must happen by animals and winds.

Most plants are self pollinating like fruits and vegetables, it also refers as self fruitful. If you have  a variety of plant it will gives crop from it.

Flowers are have both male and female parts like that tomatoes are self fertilizing plant and produce crop of fruits  by its own without planting another one.

How to Pollinate Tomatoes by Hand?

1. Shake them up

To promote pollen shed simply tap or shake the plant is enough to imitate a breeze but it can be done gently and rapidly top of the each flower, flick the flower in short.

2. Art brush

To gather and distribute pollen in a manner a small art brush is an effective tool similar to nectar gathering insects. The brush has natural bristle with that pollen clings better than plastic ones.

To collect and transfer pollen, gently lift the flower and brush the petals back and forth along the top of the pistil stigma.

 Use different brushes for different tomato varieties to avoid cross-pollination.Before going to another variety wash your brush in isopropyl alcohol.

Also Read: How To Grow Squash

3. Cotton swab

The cotton swab has a fine cotton surface and is an effective and ideal tool for collecting and distributing pollen. Use swab also as like as the art brush.

 The pollen can be collected on a small plate and then carefully applied to the tip of the scar with a cotton swab (or brush).

4. Battery operated tooth brush

A new technique is employed i.e., simple battery operated tooth brush is a most effective and fastest method for pollination.

Here the child toothbrush has done the good job for the home gardeners. The vibrating head imitate buzz pollination and cause the male anther of the flower will release the pollen onto the stigma.

Just once keep the vibrating head of the tooth brush on the flower base, and wait for second or two before going to the next blossom.

Also Read: Growing Tomato for Your favorite Cuisines

5. Wire tomato cages

For tomato cages, reduce the need to use wires, ropes, or skeletons to tie stakes or stems. Due to the uneven distribution of the fruits, in some places, the fallen branches are tied to the cages with  wires or ropes.

Customize a personalized tomato wire cage and cut the wire to the desired length, from 5 to 6 feet high.

Commercial tomato cages are commonly tapered cylinders of twine, cone-shaped, with the narrow end towards the ground; this arrangement helps the shorter branches of younger flora. Your home made cage may be a directly cylinder that won’t be as handy for tying the lower branches, however as soon as the mid- and top branches are supported the lower ones are commonly lifted nicely off the ground. We’ve had better results outcomes with this sort of cage.

6. Concrete mesh

After many observation with different frameworks for our indeterminate tomato crop, now we adopted the inexpensive system for all our relative veining tomatoes. It will manufactured with 9 gauge wire crafted into 6 inch square. The product gets rust but gives enough support to it and it cannot cut without special tools.

How often should I pollinate by hand?

Hand pollination is easy and quite effective. In afternoon it’s most optimal time to pollinate in warm, sunny days.

If the climatic condition is less than ideal, you can simply disturbed the pollen by shaking the plants. 

The different techniques are used for pollination, in which try the best method works for you . few people keep the vibrating device behind the flowers and gently shake or blow the plant to create disturbance, with that release the pollen. In other method they use cotton swab ,in that they collect pollen in a box or container and rub it smoothly at the end of the flower stigma. Hand pollination should be done thrice a week , it gives maximum results.  

Also Read: Why Are Bottom of Tomatoes Turning Black?

More ways to pollinate tomatoes in a green house

1. Open doors and windows

Open doors and windows if the conditions allows lets the wind and natural pollinator will help you to get pollination efforts.

2. Play that funky music

In your green house just play a radio with full volume can help pollinate tomatoes. The micro-vibrations will motive to drop the pollen.

3. Blossom set spray

It contains cytokine hormone which promotes cell division. It will help tomato plants to grow in healthy condition as like in green house there are no natural pollinator.

Ensure that its only used when the first blossom starts to open. Attach the leaves until sprayed blossom is  dripping. Use this once a week until all the blossom have set fruits. 

How to grow cauliflower: All The Information Regarding It

Everyone should maintain their healthy fitness. People like to have many vegetables in their diet and soups. After this, they also tend to make all of the special variety. But because of the increase in chemical usage, people cannot afford to eat vegetables.

One can make observance of many harmful effects. Hence, to avoid such circumstanced with their family, many people grow it on their own. Are you among those who like to eat cauliflower but do not know how to grow cauliflower? You can some interesting steps for how to grow cauliflowers in this article. 

What are the different types of cauliflower? 

Cauliflower needs much of the care to grow. People can find many of the difficulties while growing it. Therefore people need to satisfy all of their requirements in a succulent manner. Cauliflower needs the perfect Temperature to get fully flourished. One can enumerate a bit of TLC in it. After this, cauliflowers can easily grow on your lawn. You can assemble your cauliflower into diversification if you inaugurate from seeds. 

There seem different types of cauliflower. Firstly to grow the common white type of cauliflower, you can make a leaf shade over it. You can enumerate a specific kind of colouring growth hormone called anthocyanin. It can give your cauliflower a purple colour. Scientists have discovered the orange-coloured cauliflower accidentally. They can maintain it with the help of a better amount of Beta-carotene. You can grow these types of cauliflower accessibly on your lawn. 

An overall view for cauliflower plant 

You have added cauliflower to your diet. But do you know its edible parts? Cauliflower possesses its leaves and stems as eatable parts. It has oval leaves with parallel venation. Cauliflower seems to belong to the cruciferous family.

Do you know the scientific designation of cauliflower? It seems like Brassica Oleracea. It possesses a large number of curds on its head. Cauliflower growing season seems like spring. There possess many people who like to grow it throughout the year. Therefore one has to take special care for cauliflower growing stages. 

Cauliflower spacing in cm as 12 to 30 after growing fully in soli. People can tend to grow any type of cauliflower in their garden. Please grow them to enhance your lawn area. But all the colours of cauliflower fade away after cooking it. This might occur because of the limited tolerance level of chemicals for temperatures.  

How to plant the cauliflower? 

There seem many specific steps to plant the cauliflower. You can follow each of them in this article. 

  • It would help if you took a pot for growing a healthier cauliflower plant. 
  • You might admire the first question that how deep to plant cauliflower seeds? 
  • One has to lead it 0.5 inches deeper from the soil surface. 
  • You have to keep the temperature of the surrounding cauliflower pot much warmer. 
  • One should make sure that seeds should particularly get hard. This might seem like an influential consideration. It possesses because seeds cannot bear much of the moisture in them. 
  • You should keep the particular space of around 18 inches in between every plant. 
  • This can help them to get a good place for growing the leaves of the cauliflower. 
  • Within two or three months, you can make observance of the sprout of cauliflower. 

How to grow cauliflower from seeds? 

There possess many people who admire this question. You can make accessibility with two types of seeds. Firstly that seems readily provided in the market. After this, you have to follow the steps mentioned above. Secondly, you can expect your seeds from one planted already. It would help if you had the patience to pass the winter season. 

After this, cauliflowers get to emit the seeds out of it. Therefore successfully, without any investment, one can enjoy the cauliflower. Many people also prefer to do organic farming at home. You can get the best quality and taste of cauliflower after following such methods. 

What should one consider to avoid problems with growing cauliflower? 

You have to consider the following points to grow cauliflower accessibly. You can tend to implement all such steps as follow: 

Sunlight 

Cauliflower plants need ambient Temperature to flourish. It can grow efficiently in sharp sunlight. But following sources, one should place it under partial sunlight. Direct sunlight might harm the growing neophyte of cauliflower. 

Sand 

Cauliflower essentially requires sand of organic type. It doesn’t flourish well with the loading of fertilizer. Also, one should have a look at the PH of sand. It should be maintained to the six to seven. Cauliflower needs slightly damp, containing soils. This can help them to maintain diversified curds of cauliflower. In case if humid retain from sand, then you will lead with single huge curd. Therefore to avoid such problems, one should maintain the need for cauliflower with sand. 

Also Read: Growing the Microgreen Broccoli

Ambient Temperature and moisture 

 One should try to maintain the ambient temperature under 70 degrees. Cauliflower nourishes well under colder surroundings. But this cold doesn’t mean having the frost. You can accessibly obtain a better quality of cauliflower in the spring season. This season satisfies all results out of it. One should try to retain moisture in soils for growing flowers. 

Amount of fertilizer 

One should well notify that cauliflower takes a longer time to nourish up well. Also, you can make a note of the essential points of hormones need for cauliflower. According to it, you can enumerate the fertilizers. One should try to make results out of it. People can maintain all their areas with better consistency of fertilizers. You can inspect the soil that you seem to enumerate in it. 

One should never try to over-dose the fertilizers in it. If so, then the plant might rise as toxic. Also, one should try to focus on the quality of the fertilizer that it seems to use. One should pour the fertilizer every two to three weeks. Also, it would help if you enumerated only organic types of fertilizers. 

Conclusion: 

If you follow all steps to grow cauliflower, you can get many benefits out of it. Many people like to maintain their fields on a commercial basis for cauliflower. Therefore you can maintain sufficient cauliflower yield per acre. 

How to Germinate Chilli Seeds

Chillies are so versatile and easy to grow at the same time. It is full of flavor, heat, and colours. These bright-colored chilies can be delicately mild or fiercely hot depending on their variety. They can be easily grown in home gardens and even in sunny windows by your kitchen. Containers can easily hold chilli plants

It is very commonly grown in houses and the main thing that people talk about is the starting. And starting refers to the question, how to germinate chilli seeds? 

If you want to plant chillies at home, first you must be aware of popular varieties of chilli seeds. A variety of chilli seeds can be rated based on their hotness. 

Chillies contain capsaicin, a material that determines the hotness in chillies. They get their characteristic pungency from capsaicin. Capsaicin stimulates nerve endings in mucous membranes in the body of organisms. That is the reason why it feels hot when you bite chillies. 

The amount of heat in a chilli varies with different varieties. Further, it is also affected by maturity and growing conditions. Few varieties of chilli seeds are sizzling hot while few can be very mild or delicate. 

The heat of chillies can be measured by the Scoville scale. In 2017, a welsh fruit grower named Mike Smith grew the hottest variety of chilli, accidentally. The value of hotness on the Scoville scale was 2.48 million. The name of that variety is ‘Dragon’s Breath’. One bite of this chilli variety is enough to give the person an anaphylactic shock. 

Few varieties of chilli seeds are mentioned below- 

  • Big Bomb F1- it has medium heat and is round in shape. It is great for stuffing and baking. 
  • Jalapeno M- Medium heat is observed in this variety. It is great for salsa and toppings on pizzas. 
  • Padron- these chillies are generally picked when they are small and green. It is because greener chillies are at lower stages of hotness. To obtain hotter and red chillies, you can wait for some time and then pick them. It is great for stir-fries. 
  • Hardware improved mix- these beautiful looking chillies are hot and ornamental too. 
  • Demon red – they are hot and dwarf chillies. They are bred for making them suitable to grow on windowsills and containers. 
  • Tropical heat- this variety is extremely hot. It is a mixture of red and orange Caribbean and yellow and red Scotch Bonnet. 

Bright color combinations in chillies make them ornamental. These beautiful looking plants can be a perfect decorative piece.

Varieties like black pearl pepper and bishop’s crown pepper are beautiful and can be used for decorative purposes. 

Now that you are aware of what variety suits your needs, you need to be aware of further steps. 

So, January and February are the best months for sowing seeds of chillies. They grow best in hotter climates. 

You can easily sow them indoors in Jan and Feb. It gives your plants plenty of time to mature before the end of summer. Longer growing periods make chillies hotter and spicier.

How to germinate chilli seeds?

It is very easy to grow chillies and begin their growth at home too. 

The first step is to use well-drained and fertile soil for the best chillies. Place soil in a seed tray or a 10cm small container. The main point of planting seed indoors is to give them plenty of time to ripen before hotter months end. in colder months, yield decreases dramatically. 

Soil can be mixed with moist compost to increase its nutritional value. Sow seeds on top of the soil and cover them with a layer of vermiculite in compost.

Now, you must know that the germination of chilli seeds occurs best at warm temperatures. Therefore, either place them in a propagator with temperatures ranging between 18-25C or can cover pots with polythene to retain heat. 

It takes around 7-10 days to germinate chilli seeds. Warmer climate fastens the germination process. Germination time for chilli plants can be as long as 6 weeks depending on the variety of chillies. 

Jalapeno takes 1-3 weeks for germination. However, habanero seeds take 6 weeks to germinate.

When it germinates and grows into a seedling, you can keep them in a sunny window and give your chilli plants a dose of sunlight every day. 

The soil used should not be too wet or too dry. Ensuring proper moist soil for chilli plants is appreciable. 

Chilli seeds not germinating. 

Here are a few reasons why your chilli seeds are not germinating. 

  • Poor seed quality- As seeds age, their ability to germinate quickly decreases. After 3 years or more, seeds become almost useless.
  • Lack of moisture- water is necessary for seeds to sprout. If you do not provide water to them regularly then do not expect any germination. 
  • Very Hot weather- very high temperatures can kill seeds. 
  • Very cold temperature- cold temperatures do not let seeds germinate. 

Heat and moisture requirement for germinating seeds

Heat and moisture are the basic two things which if changed can damage seeds and even kill them. Therefore, creating optimum conditions is necessary. 

The germination temperature for chilli seeds is 27-32C. As we are opting for germination indoors, keep them on the airing cupboard or top of the fridge to provide additional heat. More Heat will fasten the time of germination. But keep in mind that increasing temp above 38C will damage them severely. 

Must Read: Chilli Flowers Dropping Off – Plant not flowering

You can also buy a heating pad for your chilli seeds. 

Moisture makes the pods soft and sprouting easier. It speeds the process of germination. Do not add too much or too little water to seeds. Both Of these conditions can lead to the death of seeds. 

Get a mister or spray bottle for watering seeds. 

Germination of seeds using a towel

You can also germinate chilli seeds with the help of paper towels. This way if germination is functional and simplest at the same time. It speeds the process of germination. 

Process of seed germination-

  • First, take a damp paper towel. You take a clean and dry one and then spray it with water. Do not just dip it in water, it will make the whole process useless.
  • Scatter seeds on a damp paper towel and then place another one at the top of it. The damp paper provides enough moisture to seeds for completing germination easily.
  • Seal the paper towels in a plastic bag with a zip lock to seal them.
  • Leave them from 2-5 days in a warm place with temperatures from 23-30C.
  • If you are performing in this warm climate, you can even leave them outdoors. 
  • After germination is completed, take seeds and place them in seed trays or pots with compost filled in it. Avoid using garden soil. It contains pests and fungus and causes diseases. Fertile and good quality compost is preferred. 
  • Further, spray it with water or use a mister for the same. 

Transplantation of chilli seedlings and growth

Before transplanting, you must be sure about the condition of the plant. You can transplant chilli seedlings when they are strong enough to handle and do not break when touched. 

Make sure the temperature conditions must be favorable for their growth. Frost can harm chilli seedlings. Therefore, waiting till frost ends can be better. 

You can place seedlings in pots or grow bags too. Before directly planting seedlings into the ground, you should give them a taste of outdoor conditions daily by placing them outdoors for at least an hour for a few days. 

Now when they are completely prepared for outdoor conditions you can place them in a field or your home garden. Make soil fertile by the addition of compost or fertilizers. Soil should be moist and well-drained. Loamy soil is not suitable for growth of chillies.

Next plant them 50 cm apart from each other. Overcrowding can lead to stress in chilli plants and it also affects crop yield. 

In the growing season, regular watering should be ensured. However, when they mature, you keep them a little dry to make chillies a little hotter. Further, the addition of potash tomato fertilizer is preferred weekly after the appearance of chillies on the plants. 

Tip- tips of the first flowering shot should be pinched to promote branching. Moreover, it also makes crops better and more flavourful. 

To add to this, staking of taller plants is advised. Weeds can challenge plants and be competitive. Therefore, use a mulch to suppress weeds near plants. Plus, mulch retains moisture in the soil and this is beneficial for chilli plants. 

If you are practicing chilli farming indoors then keep windows open for sometime in a day. First, plants love air circulation and moving a little every day. Opening windows will cater to their need for wind. Second, it will attract insects and ensure pollination. 

Next, you can also perform hand pollination from flower to flower by yourself. You can use a painter’s brush and brush flowers a little to collect and transfer pollen from one to another. 

Harvest of chilli plants

Chilli plants must be harvested before colder months. Chilli Plants favour long sunny days for better growth. Cold temperatures can spoil hotness and the whole crop in total. 

Early sowing in January or February gives plenty of time for chillies to mature before cold seasons arrive. You can sow them directly into the soil in March or early summers.

In the UK, sowing late is not good because summer does not last long. If your region experiences a short summer too, then plant in Jan and Feb. 

Chilli plants are ready for harvesting in July. You can pick chillies whenever you wish and wait for your chilli plants to grow more of them. Isn’t that amazing. You will be surprised by how much crop yield you get with this method. 

Further, if you want dry and hotter chillies, then leave them for more time on chilli plants. Let them turn red and wait. In this way, they will mature and produce more intense flavours.

If the colder season arrives and your crop does not ripe, transfer them into pots and take them indoors. Place them in warmer conditions like sunny windowsills or the greenhouse for good results.

Harvesting can be done by picking chillies or cutting them using secateurs. 

How to store chilli seeds?

You can follow two steps for storing chilli seeds. Either dry them out or freeze them. 

  • Drying chillies- take a thread and pass it through stems of chillies. Make a chain of it and hang them in a warm and ventilated place. Leave them there for 4-5 weeks. During this time, they will dry completely. Then, place them in containers or bags and use them as you wish. 
  • Freezing chillies- freezing chillies can preserve them without loss of flavour. Though it will lead to softened flesh flavour and taste stay intact. Put chillies in plastic bags and close them properly, then place them in the freezer and use them when necessary. 

Health benefits if chillies

Chillies contain a lot of nutritional components and are rarely harmful. Red chillies contain large amounts of vitamin C. Provitamin A beta carotene is present in other species of red chillies. 

Vitamin B6 is also found in chillies. 

Next, they help treat nerve disorders and alleviate pain in arthritis, psoriasis, and diabetic neuropathy. 

Cholesterol levels and triglyceride levels can also be controlled with the help of it. Also, it increases our ability to dissolve fibrin. Fibrin leads to clotting of blood and that can even lead to a heart attack or death. 

Next, the spiciness of chillies can help clear mucus secretions from stuffed up nose or congested lungs. 

The high content of vit A and C can help in increasing immunity in organisms. 

Eating hot chillies takes energy which forces you to burn calories. So it can be a great way to lose some weight. 

Therefore, it is evident that eating these spicy and hot chillies won’t go in vain. 

Planting and growing these versatile chillies is so fun and an easy process. Who knew one could find peace in looking at these beautiful plants grow. Growing chillies is interesting and easy at the same time. Getting benefits for harvest can’t be matched. So do not wait and start planning. These chillies will make your home garden look more beautiful than ever. 

Why Are Bottom of Tomatoes Turning Black: Blossom End Rot

If you are worried about why your tomatoes are rotting on the bottom then you have come to the right place. Let us discuss this issue of tomatoes turning black that many people are facing nowadays, and let us provide you the best solution to this problem.

The classic symptom of blossom-end rot is a water-soaked spot at the tomato fruit blossom ends. This relatively common issue with the garden is not a disease but rather a physiological condition induced within the plant by a calcium imbalance. It can occur in fruits such as pepper, squash, cucumber, and melon, and tomatoes.

When the growing season starts wet and then becomes dry and the fruit is set, then the ‘blossom-end’ rot is most common. Damage occurs first when fruits are around half their full size. The water-soaked areas enlarge and turn dark brown and leathery. Eventually, these areas may start to rot, so the fruit should be picked and discarded.

My tomatoes have black bottoms but why?

Several factors can restrict a plant’s ability to absorb enough calcium for correct development. These include soil moisture variations (too wet, dry), soil nitrogen abundance, cultivational damage to the root, soil pH too high, soil pH too thin, salt cold, and high soil.

How to prevent and control this problem?
  • Keep constant soil humidity levels throughout the growing season. Water once or twice a week, when the weather is dry, to damp the field to a depth of 6 inches or less.
  • Prevent Tomato Rot Avoid calcium deficiency.
  • Enable soil to warm before seeding in cold climates; cold soils restrict the intake of nutrients.
  • Keep soil pH at or close to 6.5.
  • We are using nitrogen-free and phosphorous-high fertilisers like our GSC Organic Tomato Fertilizer.
  • To get water down to the root field, use watering cones (Aqua Cones).
  • To mitigate evaporation and to maintain consistent soil moisture, add mulch, such as Red Tomato Mulch.
  • Keep your garden records: Some crop varieties are more receptive than others to blossom-end red.

Whether it’s just minute black spots in the field or if it’s even worse, it makes your tomatoes look like rotting, the name of this disease is ‘blossomed tomatoes and red’.

It’s a disease that is not caused by some kind of pathogen, despite its pretty scary name; It is caused by a lack of calcium primarily because the nutrient does not enter the fruit even though the plant has enough calcium. Only by applying calcium fertilizer to the soil, this issue can be fixed in serious cases. Preventing blossom end rot on tomatoes can give you a tough fight. 

We’re going to take a look at the root cause (no pun intended) of the problem in this post, in reality, there are three potential causes, each of which is very easy to address. Therefore, within minutes of reading this post, you can stop any additional blossom end rot in your tomatoes.

If you know for a fact that one of the following three conditions affects your tomato plant, you can skip to the related section to learn more about it:

Get to identify the cause of the issue

We’re going to take a look at the root cause (no pun intended) of the problem in this post, in reality, the three potential causes, each of which is very easy to address. Therefore, within minutes of reading this post, you will stop any additional blossom end rot.

If you know for a fact that one of the following three conditions affects your tomato plant, you can skip to the related section to learn more about it:

What is the main causes of blossom end rot in tomatoes?

This condition is induced during its growth and development by a lack of calcium that enters the fruit. For the nightshade family, calcium is an essential micronutrient that includes, among others, tomatoes, eggplants, peppers, and okra. You might also face blossom end rot on tomatoes in containers. 

Must Read: Planting and Growing Okra Step by Step

It plays an essential part in the epidermis, that is, the fruit’s surface. There is no protective covering that can be formed when the fruit does not receive its due number, and the fruit grows without this cover and thus becomes black and hard. This occurs at the bottom of the plant, as the plant develops outward from the tip in this family.

Moisture

Moisture plays a vital role in creating this problem, excess or less of moisture can affect the plant and thereby cause blossom end roots.

Soil too Cold at Planting –

Cold soil will interfere with nutrient absorption to the plant, which is more of a concern for northern gardeners.

Root damage from cultivation –

The roots can be harmed by vigorous digging around your plants (for weed control, for example). It will also conflict with the taking up of nutrients.

Soil pH too high or too low –

Any extreme pH will make your tomatoes difficult to thrive

Susceptible varieties –

Some tomatoes varieties are more resistant to blossom end rot than others.

Too much Nitrogen –

Dump a load of fresh manure onto your tomatoes, and you can be rewarded with loads of green growth and black bottomed berries. The nitrogen salts can make the tomatoes less accessible to the calcium in the soil.

Also, you can try water cones or soaker hoses to offer slow, steady water supply. If caught in heavy rain, drain the trench away from the tomatoes (if possible). Fresh roots above the sodden ground may also be promoted by heaping compost around the tomato plant’s foundation. (When the soil is too saturated, roots will drown.)

Pot grown plants in particular, due to difficulty keeping the soil moist enough, may be more vulnerable to end rot in bloom. Try the self-watering containers in your jar or water the spikes.

Temperature

Tomato plants love the sun and prefer temperatures above 65 ° C (18 ° C). If you plant your crop late in the season, the soil will probably drop below this temperature during the fruiting time of your plants. They are not performing at their best at lower temperatures, and their roots do not absorb nutrients very well from the soil.

For plants in a greenhouse, painting with straw or leaves will reduce the temperature, thus putting black plastic sheets around your plants will help to warm the area and preserve the heat compared to the exposed soil. This is beneficial if your plant is late and the temperature has dropped.

If you have black container plants, you can paint them white to absorb less heat or instead cover them in aluminium to reflect the sun’s rays. As in a greenhouse, you’ll want to use a mulch to hold moisture and not lose it because of the sun.

The way of watering

Watering abnormalities is the most common cause of the blue end of your tomatoes. Perfect water conditions in containers are extremely difficult. The field needs to be moist enough and not damp until a few centimeters below the soil. This helps the plant to retain water when transpiring and thereby retain nutrients in the soil so that they are able to grow and spread around the plant.

If the roots become too dry, calcium, in this situation, will not absorb nutrients. The roots do not work as they cannot respire while the soil is soaking. The roots can also start to rot in prolonged cases.

Stress from other sources

The other reason the plant should be stressed is the chemical composition of the soil, other than temperature. Overfertilization or calcium deficiency in tomato plants causes a lot of stress on the plant and roots may totally stop the lockout of absorbing nutrients so that concentrated nutrients which could destroy a plant are not absorbed.

A lack of nutrients is not the cause of blossom end rot even though it is a concern unless it is due to a very rare situation of lack of calcium in the soil. You’ll have to have your soil tested, to know for sure. Using any calcium fertiliser in small amounts does not cause any damage.

A lack of enough calcium results in weaker cell walls that can cause the fruit to crack until it is completely ripened. You can try adding calcium to tomato plants for a better blossom. 

If you are considering the addition of fertilisers, other than the above points, it is helpful to know at this stage of growth, what kind your plant should use. You should read my manual on fertilising tomatoes to learn more about this.

High nitrogen consisting fertilizers are the reasons

behind your tomatoes suffering from blossom end rot. It will take some time before you can fix this problem because calcium takes time to climb up to the entire plant system.

Does adding calcium to tomato plants help?

There are two separate tissues in plants, the xylem, and the phloem. The first is for the transport of water and nutrients, while the second is for the transport of molecules of food or energy produced during photosynthesis.

Also Read: Growing Tomato for Your favorite Cuisines

Leaves do not have xylem tissue, and calcium is an essential resource that is picked from the soil and passes through the xylem tissue and not through the phloem. This calcium would not move to the fruit if sprayed on the leaves.

Unlike the leaves, the fruit has no stomata (used during transpiration to exchange water and air) and thus has no real openings for something sprayed to get into the plant and pass through it.

More about blossom end

As Blossom end rot (BER) occurs, you can notice some dark spots on the bottom of the tomato as it grows. Gradually it starts becoming leathery and black and may even cover the entire bottom of the fruit. 

Blossom end rot is often attributed to a lack of calcium in tomatoes, either due to exhausted, poorly drained soil or simply of displacement due to transpiration, especially when plants are under stress. Technically this lack of calcium causes brown spots on blossom end rot tomatoes. For this reason, it is always recommended that you add calcium to the soil or substitute, the calcium in the plant with a foliar application will help to fix the issue. But it’s rare for calcium to be absent from soil. Instead, there may be a variety of other environmental causes of end rotting of the tomato bloom, from uneven watering due to drought, heavy rainfall, or overcare of a gardener.

It is also crucial to provide sufficient and even quantities of water for tomato plants. While keeping the soil and plant roots insulated, the addition of mulch will help maintain moisture. Although it may or may not be effective, and is a widely debated topic, it may not necessarily hurt to add crushed eggshells, limestone, or calcium carbonate to the soil, but it may not help much either.

Quick tips for a great blossom

  • Try to apply calcium to the soil before planting the plants in the field or containers, using lime or gypsum. When Blossom End Rot occurs on the fruit, Calcium nitrate, water-soluble lime, hydrated lime, and very fine lime can be applied (top-dress and light raking) to help correct potential fruit from being affected. 
  • Increase timely irrigation to establish healthy soil moisture. Apply mulch to tomatoes which will help to preserve soil moisture.
  • Do not overfeed the plants, particularly with a fertiliser high in nitrogen.
  • Use all-purpose garden foods that are lower in N and higher in potassium and phosphorus, and other nutrients, including calcium, that are required.
  • Verify the levels of its pH. –
  • The movement of calcium/water into the plant and fruit would also be influenced by cold temperatures (soil and air). Another good excuse for not planting tomatoes in the season too early! When temperatures get colder, plant them.

Conclusion

At some point of time in the entire life-span of the tomato plant, it does go through blossom end rot, no matter which variety of plant it is. Although when the weather condition starts changing, this disease in the plant will clear up on its own. And yet if you find a plant deteriorating due to blossom end roots disease, then simply pluck and discard it. 

Reference Links

https://commonsensehome.com/blossom-end-rot/

https://www.gardeningknowhow.com/edible/vegetables/tomato/tomato-blossom-rot.htm

https://dengarden.com/gardening/Blossom-End-Rot-Tomatoes-Turning-Black-on-the-Bottom

https://www.gardeners.com/how-to/blossom-end-rot/5354.html#:~:text=A%20water%2Dsoaked%20spot%20at,calcium%20imbalance%20within%20the%20plant.&text=The%20water%2Dsoaked%20areas%20enlarge%20and%20turn%20dark%20brown%20and%20leathery.

Growing the Microgreen Broccoli

The 
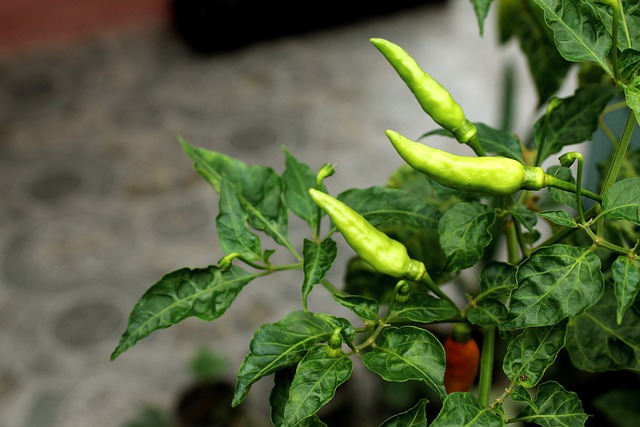
broccoli is a dark green plant that appears like a green miniature tree and belongs to the cabbage family. It is loaded with vitamins, minerals, and bioactive compounds. 

Apart from nutrition values, the broccoli is a cash crop due to its demand in the daily diet. And, broccoli farming is picking the trend nowadays.

Broccoli has the greatest content of essential nutrients, including magnesium, iron, and calcium.

 Being a nutritious vegetable, broccoli is growing in consumption. Besides its use in a variety of cuisine, it is quite popular in green salads.

As broccoli is a cold season crop, it is wise to grow broccoli in the winter so that at the time of harvesting the temperature should not be above than 23-degree Celsius.

Also Read: Cabbage Farming: Planting, care, Harvesting- A complete guide

This is interesting that the broccoli thrives best in the climate condition that varies from 7-degree Celsius to 23-degree Celsius. Besides, broccoli is frost-resistant and can tolerate temperatures below the freezing level for at least one week. 

Understanding how broccoli grow

It is recommended to sow broccoli seed month before the spring’s last frost. Because now you get enough time to move the seedlings to the field in broccoli farming, after hardening off them for some time so that they can bear the hardest of climate conditions.

On the other hand, it is worth sowing the seeds indoors in the case of the late summer, for the regions that have mild winters. Later you can put them in the greenhouse, once autumn starts and so it can be harvested in the winter.

In both the cases, temperature hitting the freezing level for quite a time or rising beyond the 25-degree celsius can hamper the growth of the head of the broccoli.

While in areas that have cold winters, it is recommended to sow the seed in the summer so the crop can mature in autumn, just before the cold.

Soil Preparation

To make the soil fertile for broccoli farming, it is worth adding well-mixed compost containing the manure. Once, the manure is spread over the soils. Then plow the field for three or four times before starting the main planting.

The crops of Broccoli may be grown in a variety of soils. Besides, the sandy and silt loam soils are ideally used to achieve a higher yield from broccoli crops.

When considering the pH value of soil, it should be between 6 and 7 if soil can have the best moist conditions throughout the crop. 

In some cases, aging manure can be applied to soil to replace soil nitrogen in areas of heavy rain or sandy soil.
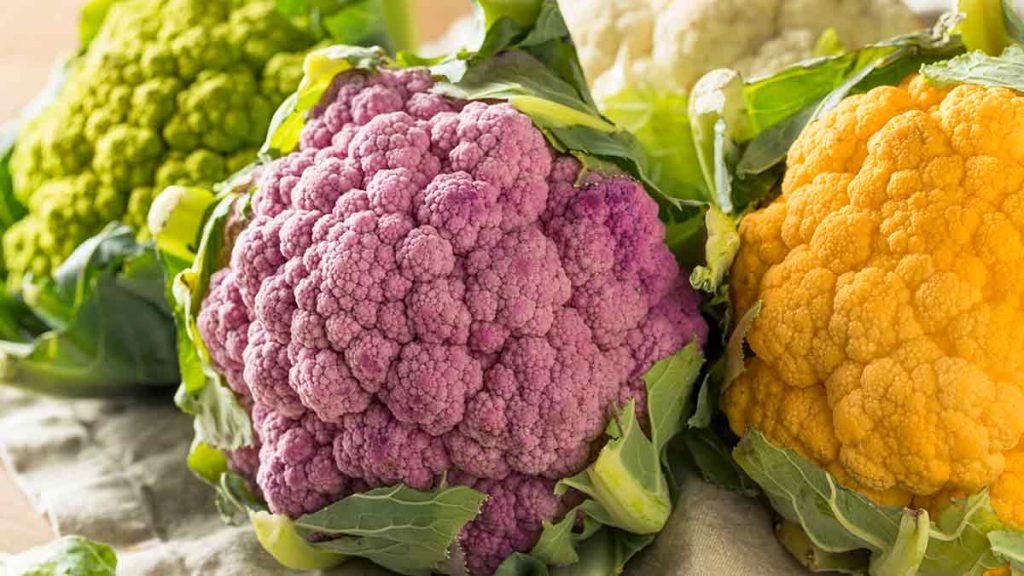
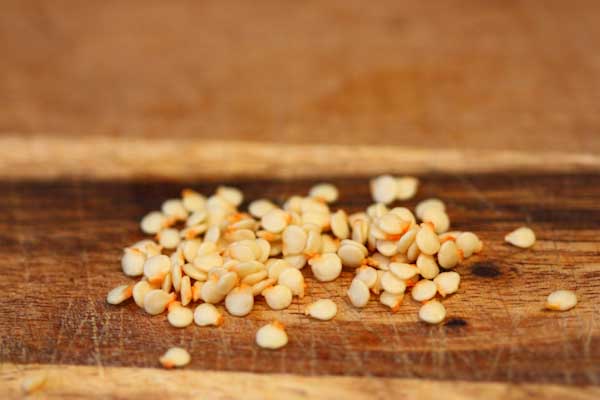
Selecting Variety of broccoli

While selecting the variety, it is necessary to keep the maturity time of the crop. The green sprouting variety often takes the 70 to 140 days to mature. The proper selection of the broccoli variety directly influences the final yield because one can thrive in a certain environment and others indifferent. 

Thus, it is worthy to select the relative variety so that the crop matures after optimum climate conditions.

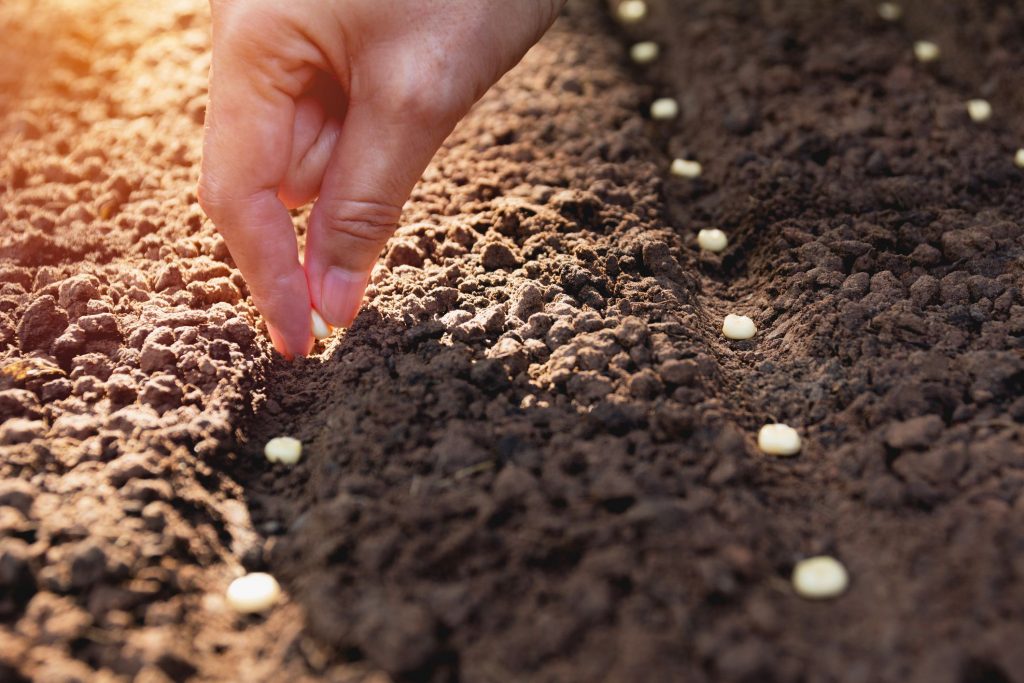
In the case of broccoli farming, direct seeding is far more valuable as compared to the transplant. While for some areas, due to the climate conditions, transplant is a better choice.

Besides, in both cases, it is recommended to grow the broccoli in two rows on the raised beds with a minimum distance of 4o to 45 cm. While in case planting is done in a single line, space should be around 60 cm.

And, during the transplant, a young plant with some leaves and almost a month old is the right choice to succeed. 

On the other hand, it is better to transplant thin plants to a different section of the field.

And, in case of direct seeding, sow the seed half an inch deep and at least three inches apart. 

When transplanting, it is worth that you must have a minimum of 11,000 plants per acre. 

 Broccoli planting spacing

For the spacing make sure that it adheres to the capability of irrigation, the schedule of the plantation as well the particular demand in the market if there is any.

Must Read: Planting and Growing Okra Step by Step

Irrigation of broccoli plants

Broccoli gives a better yield when irrigated regularly, it’s worth keeping the soil enough moist when flowers start to bloom. Though, watering with the furrow or the sprinklers achieves better growth in the broccoli plant. 

While if you have a large farm in the case of broccoli farming, it is appropriate to use drip irrigation.

The amount of water for the broccoli largely depends on the soil type, weather conditions as well as the growth or maturity of the crop. 

The watering to the plants should be more frequent when the crop is in the last phase and the vegetable’s growth is at its peak.

Fertilization

To get the highest yield of the crop, applying the proper amount of fertilization is utmost necessary. For healthier plant production, most of the crops rely heavily on NPK fertilizer.

Broccoli is a relatively hard feeder and must feed in a thin layer of old manure before the crop. 

The land as a resource requires proper maintenance and monitoring. Fertilization will then be produced on the basis of soil analysis tests.

 In the case of the drip irrigation system, nitrogen can be applied through the water as it is the most precise way to feed the plant.
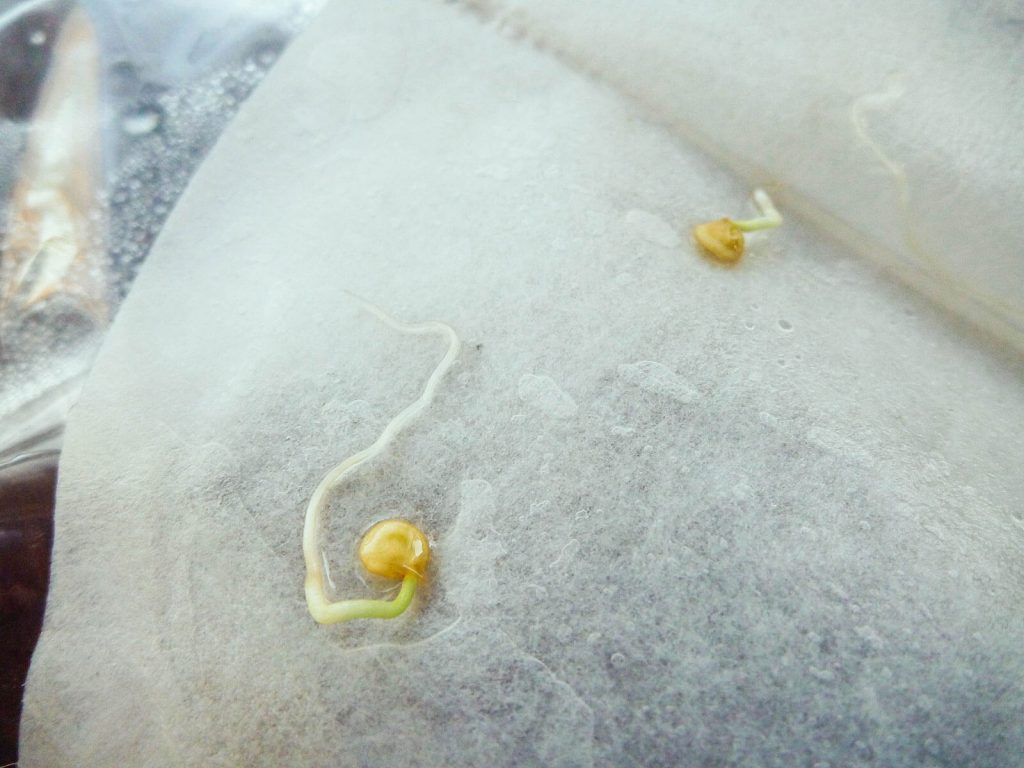
How grow broccoli sprouts

Broccoli develops in just more than two months from seed to harvest. It is appropriate to wait for the sowing before the weather conditions become favorable for the plants. Thus they can become stable and efficient, offering protection against intense weather.

While all broccoli plants may endure freezing, extended cold periods can delay development or harm plant production. 

The flowering cycle is triggered by low temperatures and warm days. This mechanism can cause plants to have flowers earlier than normal. This can affect the size of broccoli’s heads.

To combat these conditions, cold weather shelter is provided that gives further 4 to 8-degree insulation, protecting and extending the season of freeze harvests for up to four weeks.

Grow broccoli microgreens

Proper care of the crop is as important as another step. The caring of a plant may include, apart from the watering and fertilization, eliminating the unnecessary weed, identification of the insects or the adequate analysis of the crop diseases. 

The main problems of broccoli development may be insect pests, in particular for summer seedlings. 

Right monitoring of each plant can prevent unnecessary loss to the crop and eventually can hamper the overall yield at the end.

To take care of your plants, make sure you take appropriate action as soon as you get any hint of any problem to the plant.

These are some of the highlighted problems in broccoli farming:

Eliminating weed

The weed battles for food, sunshine, and air with the majority of the crops. And, consequently, reduce the growth of a particular plant. So, it is appropriate to keep the crop weed-free as it starts to appear after a month of transplantation.

Controlling the insects

Several insects harm the broccoli plant throughout its life. Flea beetles, wireworms or the cutworms can make the seedling die at the early stage. 

Besides, cabbage aphids can attack the heads while they are in the development phase. In this case, it is necessary to control these insects even before the head starts to develop. A quality insecticide can be sprayed to the plants to prevent these harmful insects. Or, you can handpick them to get higher yields.

The soil-borne pests have less impact over the broccoli plant, yet some soil pathogens can cause clubroot disease. These diseases can be controlled by crop rotation or applying the line to the roots in the case of broccoli farming.

Apart from these, downy mildew affects the broccoli plants quite a lot. It can be identified with the spots in the leaves. This fungal infection does not have a great impact on vegetables until it affects the head.

To counter such infection, some growers prefer to use a fungicide. In some cases, a seedling is treated by chemical treatment especially in moist conditions, which favors the disease.
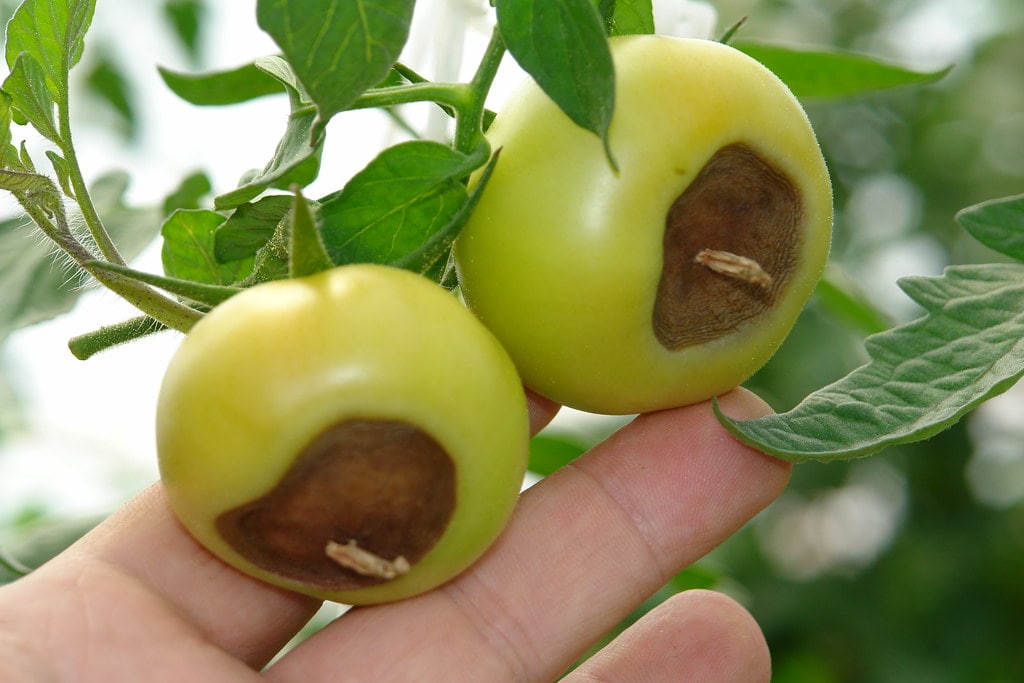
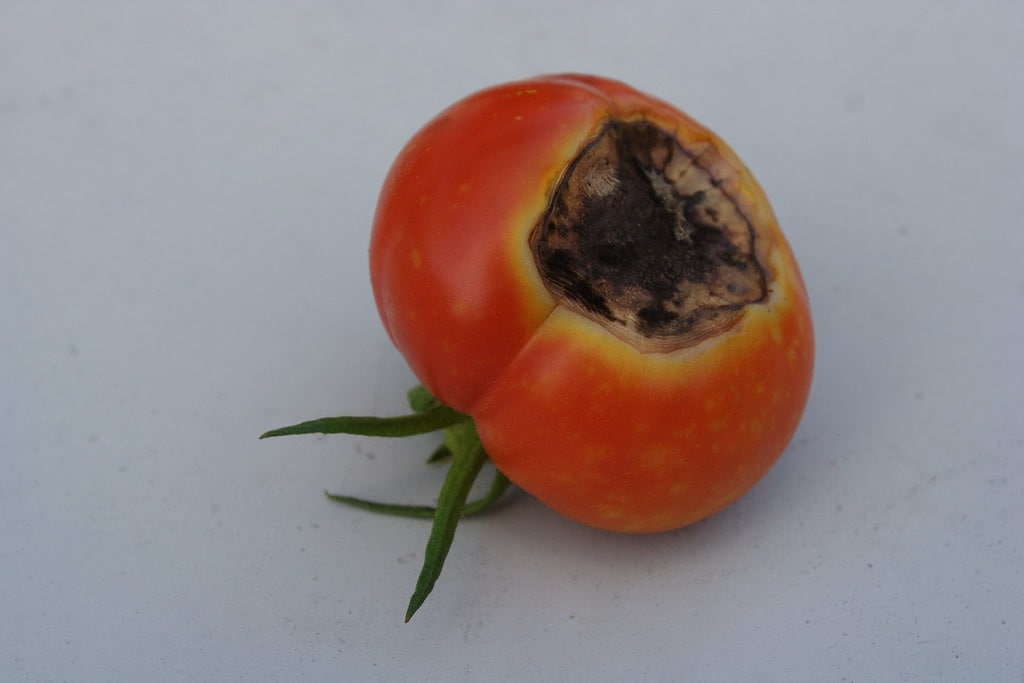
The broccoli head is also susceptible to the various diseases that need to be taken care of. The head diseases severely affect the flower buds and can also because of the head rot.

Such disease spreads in wet conditions and causes significant damage to the overall yield. To prevent such conditions, it is appropriate to use correct pesticides once you get any symptoms.

Harvesting broccoli

Seed based plants can produce broccoli in 100 to 150 days. This is the best broccoli plant harvest time. Broccoli can be developed in 55–80 days from the transplants method. It is worth leaving the foundation and some exterior leaves of the broccoli plant to facilitate fresh heads in the secondary production.

A crop must be hand-picked two to three-times during a season and in case of storage, a broccoli stem should be cut at the 6 inches.

Moreover, it is recommended to harvest the broccoli in the morning to maintain the freshness of the vegetable intact.

References:

1. https://harvesttotable.com/how_to_grow_broccoli/

2. https://me dium.com/@shinebrandseeds/everything-you-need-to-know-about-broccoli-farming-in-a-poly-house-e34aa6a21561

3. https://www.goodhousekeeping.com/home/gardening/a20706315/growing-broccoli/