What Does Blight Look Like On Cucumber? 

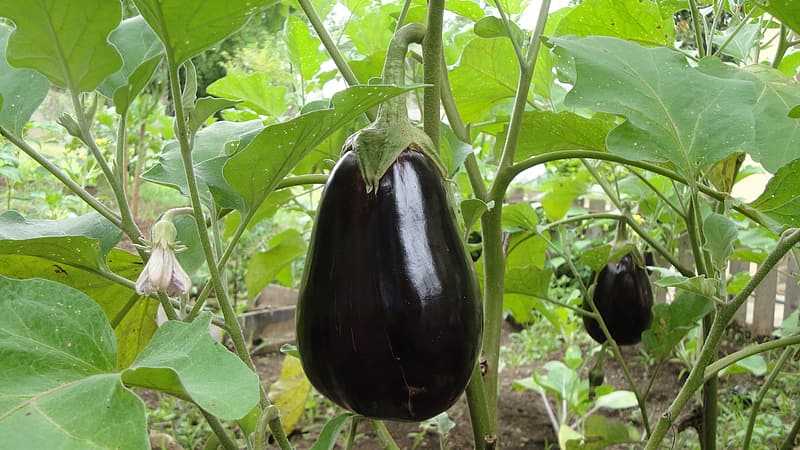
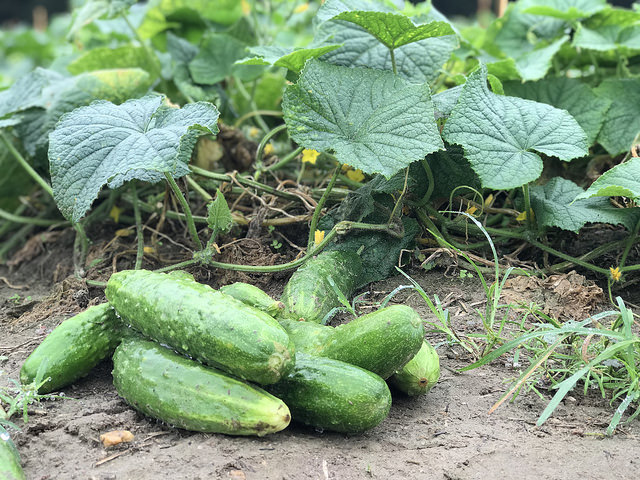
Cucumber is a summer vegetable grown in many parts of the world. The cucumber plant is a vine with large leaves and curling tendrils. The flowers produced by the plant are yellow and the fruit has many shapes and sizes but generally is a curved cylinder rounded at both ends. 

These plants are annual and have one growing season. The cucumber originated from the foothills of the Himalayas in India. 

There are a lot of diseases that are found on the cucumber plants and on the cucumber itself. They will destroy the plant and the fruit with their fungus and viruses. They can be on leaves, stems, fruit, and flowers. 

What are the General Diseases of Cucumber Plant?

Some of the common diseases on the cucumber plants are belly rot, leaf spots, blight leaf spots, downy mildew, gummy stem wilt, bacterial wilt, and many more. These diseases are mostly seen on the leaves and stem particularly, but some are also seen on the fruits.

There are some common ways through which we can save our cucumber plants from these diseases and they are:

  1. Plant certified disease-free seeds
  2. Keep the garden area and the area surrounding the garden free from weeds as they carry insects that will spread viruses and bacterial wilts. 
  3. Always remember to clean and remove the plant debris after the harvest season as many diseases can survive on that remaining plant debris and can spread many diseases to the plants.
  4. Select the plant seeds which are resistant to some of the deadly diseases. 

These diseases can be prevented by adopting these methods and continuing to do them so that the viruses don’t spread to the plants every time while gardening. You have to be extra careful if you are growing them in the home garden. Diseases spread like wildfire in the home garden and will also destroy the other plants.

Also Read: Should I Cut Off Yellow Cucumber Leaves?

What Does Blight Look Like On Cucumber?

Cucumbers farming

This disease is caused by a fungus known as Alternariacucumerina. The symptoms of this disease are small, circular, tan spots that appear on the leaves. These spots enlarge themselves into bigger spots and continue to do so until the plant is dead. 

The main cause of this disease is bright sunshine, frequent or regular dews and rainfall, and temperatures between 60- and 90-degrees Fahrenheit. These causes also favor the development of the disease and ruin the plant.

The more quickly you identify the disease the plant will be saved and will not die. Identifying proper medication and treatment can save the plant before they are dead. 

The prevention and treatment for this disease are to remove and destroy all the plant residues at the end of the gardening season as the fungus survives in the winter season on the plant residue. The disease can be easily spread out through wind, tools, splashing water and insects so be very careful with these carriers. 

Crop rotation and seed treatment are also some of the things which will help in preventing this disease. If this disease occurs repeatedly in your home garden or any garden then a preventive fungicide program is advised for it as it may never stop coming and can destroy the whole garden. 

Another bight disease on cucumber is known as Gummy stem blight. It is a leaf disease caused by the fungus Didymellabryoniae. This fungus also causes the fruit to rot and is called black rot. This disease is also found in watermelons, cantaloupes, and pumpkins. 

The symptoms of this disease are the same as the other blight disease which is tiny tan spots on leaves and they also enlarge themselves until they cover the whole leaf. The stems are spilled into two and form open wounds known as cankers. 

These open wounds have a brown gummy substance thus the name of the disease is discovered. The infected stems and the seedlings are dead one after the other and slowly killing the entire vine. Some of the leaf spots have rings around them thus making a target shape on the leaf.

The prevention and treatment for this disease are to remove and destroy all the plant debris as the fungus survives in it. Purchase seed from a reputed source as this disease can also be seed-borne. 

Rotation of crops with non-host plants such as corn for more than two years can be an effective solution. Avoid watering the leaves and only focus on the soil. If the disease gets out of hand, then fungicides are also available. 

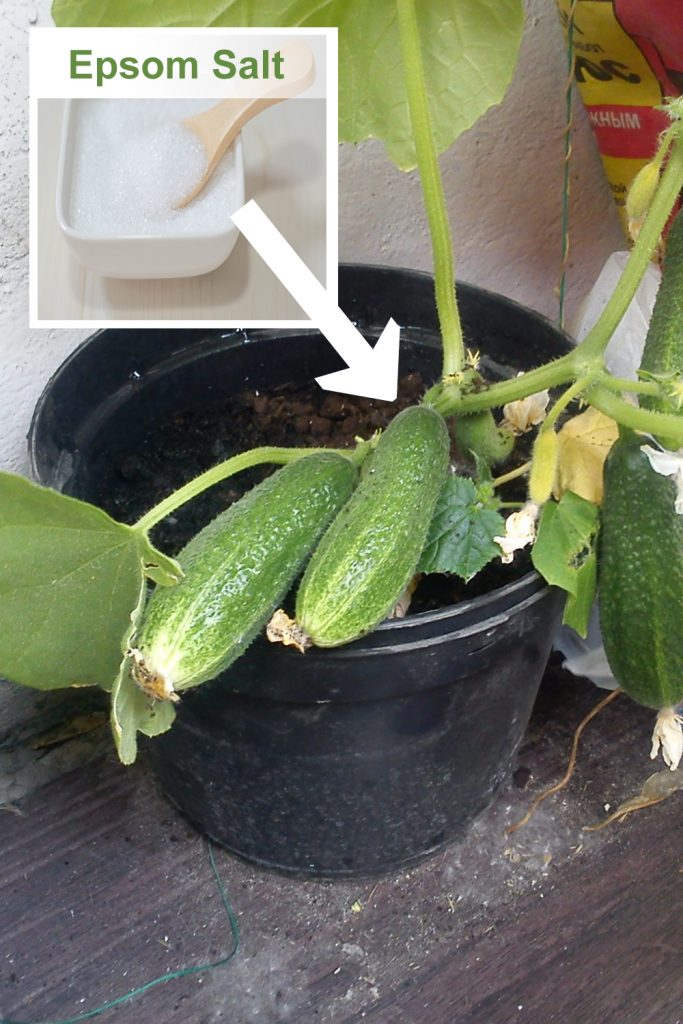
Also Read: How to use Epsom salt for cucumbers?

Another general type of disease that is commonly found in the cucumbers is the Cercospora leaf spot. This disease is caused by the fungus known as Cercosporacitrullina is mostly seen on leaves but can spread to the petioles and stems in a favorable environment. 

The spot is circular to irregular shapes and has a light color center with dark margins. The disease doesn’t spread to fruit and if it is that serious then the fruit is either low quality or is smaller in size.

The fungus survives on the weeds and crop debris so, they should be removed and destroyed. The spores are spread by the wind or carried by water. The disease is progress quickly at temperatures between 79 to 90 degrees Fahrenheit and infections on the leaves can occur every 7 to 10 days. 

The prevention and treatment of this disease are to avoid overhead irrigation. Water the plants in the early morning hours when the leaves are already wet because of the dew. Remove and destroy the old cucurbit vines and residues as the fungus thrives on them in winters. 

Remove every weed in the garden and the area surrounding the garden. Crop rotation also helps in preventing this disease. Don’t plant any cucurbits like melons, cucumbers, and squash for two to three years. 

If the disease is serious and is destroying the plants then use fungicides which are advised and some are also available for home gardens. 

The phytophthora blight is another kind of disease that destroys all the cucumber plants in every stage. The vines of the cucumber plant have a sudden and permanent wilting from their bases to the tips. 

As the infection spreads, the become brown and mushy in the soil with growing yellow and brown spots. This disease is also popular in other vegetables like squash, pumpkin, watermelon, and other melons. 

The prevention and treatment of this disease are to remove the plant debris and destroy them. Chemical ways like fungicides are also advised if the infection spreads more and is uncontrollable.

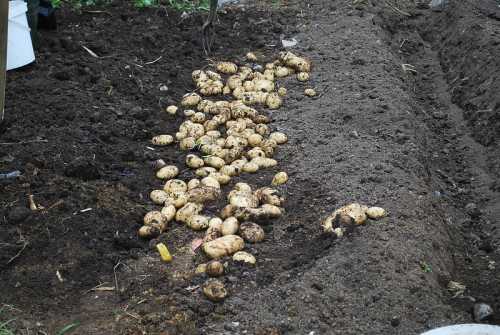
Also Read: Why Are My Potatoes So Small?

What are some of the common preventive measures that can be taken to reduce these diseases?

Other than using the fungicides and pesticides some of the things that can be done as a preventive measure to reduce these deadly diseases on plants, are as follows:

  • Always clean and tidy the equipment that is used in the garden. Everything starting from the tools, boots, and gloves has to be cleaned after every use.
  • Cleaning and sanitizing the pots that are to be used. They should be cleaned with bleach before reusing. 
  • Buy the seeds from a reputed source. These diseases are sometimes seed-borne so buying them from a respected source is a smarter option.
  • Removing the plant debris. Regular cleaning of the plant debris doesn’t give a chance to the fungus to survive on them and infect the plants.
  • Solarizing the soil before planting anything. It is a method of soil disinfestation that controls the soil-borne pests. This process removes all the pests which are responsible for the infection.
  • If possible, try to irrigate water underground. 
  • Create a barrier using a plastic mulch between the fruit and soil. 
  • Crop rotation every three years. Crop rotation is advised for most blight infections as they are the most beneficial and successful preventive method. 
  • Grow companion plants with them. Pairing plants with them deter pests, provides soil minerals and nutrients, prevents the weeds to grow, and provide vertical support.
  • Keep an eye for pests like aphids and striped cucumber beetles. These insects are responsible for destroying the cucumber plants and leaves. They even destroy the vegetable which is the result of our patience and hard work. 

These were some of the common preventives you can work on in your home garden and any other garden where you have planted cucumbers. The symptoms of these diseases are very harmful so, they shouldn’t be ignored.

All the preventive measures should be taken to control the infection in the plants. These are the tested preventives and they have shown good results on the infection. 

The blight diseases are very deadly and should be treated as soon as they are identified. The preventives and treatments are best for removing any blight-related infection and keeping the plants healthy and green. After removing the infection, the plants will grow as usual and will also bear fruits and vegetables. This will also keep the plant healthy and green with the fruits and vegetables being ready to eat.

Why Are My Potatoes So Small?

Are you growing large potato plants and only discovering small root vegetables when you excavate those up? There seem to be numerous reasons why this could occur, but regardless of the circumstances, the result is disheartening.

So, what’s the deal with your small potatoes? Small vegetables can be attributed to a lack of sunshine, insufficient watering, nutritional deficiencies, extreme heat, or harvesting quite soon. A few potato variants shrink in size than others because of nature, or even potatoes on the same plant could range in size.

Of course, it’d be useful to know whether any of these factors is causing a small potato yield. In that manner, you’ll be able to take the necessary actions to solve the issue.

Regarding Potatoes

Potatoes could be sown as quickly as feasible to operate the soil, which is quite soon in the planting season. Folklore suggests several “greatest days” for seeding potatoes:

Once they witnessed dandelions flowering in the open areas, old-timers in England started planting their potato plants.

The Pennsylvania Dutch observed St. Gertrude’s Day (March 17, also known as St. Patrick’s Day) as one‘s formal potato-planting day.

Numerous Christian growers did believe that planting potatoes on Good Friday might have been the ideal moment because the devil had no control over people.

More knowledge about seeding potatoes can be found below.

Why Are My Potatoes So Small?

If your vegetables are about the same size, there has been a crop-wide problem. This is pretty normal unless you had a couple of small potatoes for every plant but apart from that huge potatoes. A typical yield will include either a few extremely large potatoes, numerous medium or basic sized vegetables, and a few tiny potatoes.

Not every potato would be enormous, particularly in a household gardener’s plot. If you have a crop-wide potato output issue, you must keep track of every one of your growing vegetable practices from planting to production.

  • Did the plants get enough water?
  • Were they cultivated during particularly warm months?
  • Were the potatoes sown in direct sunlight?
  • Were you affected by pests or diseases?
  • Did you overwhelm the plants too much?
  • Were the potato variants known for their ability to produce large sprouts?
  • Were you too hasty in harvesting them?
  • Did you overfeed them with fertilizer?
  • Was the ground rich, and was also the pH just right?

These should have an immediate impact on the development of the plants grown and the veggies they generate. Let’s look at these questions more thoroughly.

Also Read: Do Asparagus Need Full Sun to Grow?

Potato Plants Didn’t Get Enough Water

For potato seedlings to develop well and make a huge harvest of well-developed potatoes, they need to be watered on a routine basis throughout the planting season, particularly when the potatoes are continuing to develop and bulge.

Once potato plants are not watered on a routine basis, they could dehydrate out or struggle to soak up minerals from the soil, resulting in tuber thinning.

Potatoes developed in brightness, sandy soils necessitate more moisture than potatoes raised in thicker soils. Because lighter, sandy soils deplete quicker than thicker soils, they consume more water.

Quick fix: Only when the potatoes are dehydrated, there are a few stuff you could do to keep this from happening again.

To begin, sowing the seed veggies, dig in enough well-rotted fertilizer or homemade organic manure to enhance the soil’s capacity to retain water, implying that less water is needed overall.

Second, leaf mulch all around plants cultivated as they develop prevents hydration loss due to evaporation. Freshly made organic material, as well as new grass cuttings, straw, and even plastic sheets, make excellent mulch. Mulching all over one’s potato plants also eliminates the potential of the potatoes turning green caused by light exposure.

Also Read: How Deep Do Potato Roots Grow?

Extremely High Temperatures

Although if the crops receive adequate amounts of sunshine, moisture, and nutrients, intense temperatures can lead to small potatoes. Because potatoes are just a cool-weather plant, extreme temps reduce both the number of potatoes that structure and the shape of those that do establish.

Sowing your vegetables in a bright location, of course, will trigger the ground to warm up quickly and reach hotter temperatures. You can maintain them cool and comfortable in the warmer months and inspire more tubers to establish by doing the following:

Use chilly water to grow your crops while also cooling the soil. To provide shelter to one potato plant all through the hottest time of each day, use shade fabric or line covers connected to stakes (at midday, around noon)

Also Read: How Many Potatoes Grow from One Seed Potato?

Nutritional Deficiency

A potato plant requires a wide range of vital nutrients. These components contribute to the creation of tubers and the total development of plants. Components such as nitrogen as well as potassium aid plants all through plant development, tuber creation, and bulking, and also the plant requires large amounts of them. Phosphorus, on the other hand, is more important in the early phases of potato plant development.

For development and tuber creation, potatoes require trace minerals such as boron, copper, manganese, & potassium.  As a potato planter, it is your responsibility to select a fertilizer which is well structured in those nutrient content. If you purchase fertilizer, ensure it contains all of those nutrient content.

You also can make high-quality compost to ensure that both macro and micronutrients are not depleted. The pH of the soil affects nutrition. To ensure that one’s potato plants could indeed properly absorb nutrients, keep the soil pH between 6.0 and 6.5.

What Potato Varieties Were Planted?

The fully grown size of each wide range of potatoes joining ur garden will be different, so picking the correct one will be the first move to collecting full-size potatoes.

When attempting to reach entire potato ripeness before harvesting your plant, the variation and duration until harvest move hand-in-hand.

Picking the right season to sprout a specific variety increases the likelihood that your potatoes would then mature before the first cold or the hot weather.

Most vegetables take 65-90 days to fully mature, so if users find themselves attempting to pull their veggies too early due to climate, this could be the justification they seem to be tiny. For proper growth, match the length of your planting time to a potato variety that really can develop during this period.

Check this out: How Far Apart Do You Plant Sweet Potatoes?

Potatoes dislike:

Depth planting, in that they may not yet sprout, or seedlings may struggle to break through the soil and become weak. Non-uniform seeding depths; when it is on plots, a few potatoes are down further into, whereas others are sown just about as near the surface. Whenever the veggies are barely touched by land and stay green, they are ready for surface plantation.

When deciding on a planting, keep in mind that sand particles necessitate different techniques than loam, which vary from thicker and moist soils. Techniques such as trench digging and hillside discharge should be selected specifically for one’s site after weighing all of the benefits and drawbacks.

Begin Growing Your Potatoes

Take a moderate spud that has begun to sprout. If you glance in the pouch under the sink, you’ll likely see the beginnings of a science trial or an alien living thing. That’s exactly what you want. New potatoes can be used, and yet they do not often function properly as well.

Snip the potato into portions with some “eyes,” or growing points. Enable air to dry overnight. Unless you don’t have hours, you could indeed plant those straight away, but they’ll rot faster. The better outcomes come from dried portions.

How to Plant One’s Potatoes

Following morning, drill or trim a few holes through the bottom of a big jar, such as a 13-gallon garbage can or an intricately knit burlap backpack. Border the gaps with coffee filtration – don’t fear, they’ll break down easily – and fill the bottom with around three inches of soil. Almost any type of soil will suffice, as long as it includes some potting mix or manure.

Put the potato portions, cut edge down, on the soil. The ground should be used to protect the seedlings. Water thoroughly and put it in a sunny location. One’s potatoes would then begin to push their path higher and higher within a few days over a week. Add the most land all around the shaft as they grow taller. If the temperature is over freezing, they would be fine outdoors.

Also Read: Why Are My Radishes Long and Thin?

Potatoes Grown in Containers

Unless you don’t have enough room in your garden to expand potatoes, users can sprout them on one’s balcony or veranda. Begin with a huge, thick pot with plenty of water flow.

Insert one-third of this same jar with growing medium, then squeeze the rest with seed potatoes. Add a layer of growing medium on top. Keep the container in direct sunlight and well-watered. Whenever the houseplant potatoes have grown about six inches, mountain them and rehearse until the jar is packed.

Also Read: What Size of Container Do I Need, to Grow Cucumbers?

Care

The soil must be rich in nutrients and well-drained. Clay soil samples must be amended with organic compounds and profoundly ploughed in the autumn.

If area permits, a protection crop like clover, buckwheat, or winter rye cultivated in the potato ground a year before veggies are cultivated enhances soil, organic content, and successive potato production.

Mulch is highly advantageous in potato cultivation. Organic mulch could be implemented after the plants have originated to protect and preserve moisture, maintain weed growth at bay, as well as cool the land. Whenever the ground temperature drops, some growers encompass lines of initial potatoes with transparent plastic film at growing to heat the land and encourage fast development.

When the plants arise, eliminate the film to help build up freely. After the vegetables have broken the soil surface, start building up a minimal ridge of topsoil towards the crops by cultivating and tilling. This ridge, which might grow to a height of 4–6 inches by warmer months, decreases the quantity of “sunburned” (greened) potatoes. The goal of potato production is to remove weed rivalries, soften and oxygenate the soil, as well as ridge the line.

In tough, compressed soil, malformed potatoes grow. When shovelling dirt close to potato plants, utilize great caution since emerging tubers are smoothly sliced and destroyed. Irrigate to keep the tubers hydrated while they are growing. A consistent moisture surplus also aids in cooling the earth and removing knobs induced by secondary development.

Prepare to harvest

Potatoes are beautiful plants. However, to reap one’s yield, you must first destroy the vines. To see if they’re prepared, start counting the days it takes your potato variation to mature (this is where maintaining better garden records comes in handy, but then you can also take a glance at the different types up on the internet).

Then, since plants don’t peruse internet sites or tags, pique a plant or a few to see whether the spuds are the right size for you. Unless you’re the overeager type, look into what one variety’s logs say about collecting “new” potatoes. You could always reap one plant while leaving the others to grow.

Do Asparagus Need Full Sun to Grow?

Asparagus is a plant grown mostly in the spring season and is also one of the few perennial vegetables that are grown in the garden. Like any other plant, asparagus do need the sun to thrive. If you don’t take proper care of asparagus then they will not survive for a long time.

Proper sunlight and adequate temperature are the things to be kept in mind while planting asparagus. As sunlight helps them in the process of photosynthesis it is very much needed for them. There is a normal or adequate temperature for asparagus is 75 to 85 degrees Fahrenheit and 60 to 70 degrees Fahrenheit after the sun goes down.  

A rise in temperature of about 50 degrees is needed for the new shoots to sprout. The higher temperature gives higher growth in plants. They can be outdoor and indoor plants as well. As long as the temperature is under control nothing will affect the seed germination no matter whatever the location is, outside or inside.

The asparagus plant needs direct sunlight to survive. The sunlight can be full exposure to partial. Like other plants, they turn yellow when they are exposed too much to the sun. They need at most eight hours of sunlight in the morning time for photosynthesis. 

How Do You Plant Asparagus in Your Garden?

Asparagus is a very delicate and sensitive plant that needs a lot of patience and preparation. They are spacious plants and should be planted twelve to eighteen inches apart. They won’t grow much in the first couple of years but as they settle they spread and fill in quickly. Most people grow asparagus from the crown which is almost available every spring season. 

The common way of growing asparagus crown is a trench. A twelve-inch deep and twelve-inch wide trench in spring is the easiest way to grow asparagus. Add your compost or fertilizer or any organic matter to it and create mounds about eighteen inches apart. 

Place the crown on the soil and cover the crown with the soil. Water them as required and when the shoots start to show up add more soil to them. Fill up the trench with soil until it’s totally full and flush with the soil line. 

Remove the weeds from the plant when they outgrow themselves while preparing the bed and keep doing it till the asparagus plants are young and tender. Never try to add any other plant to the asparagus plant bed as they don’t like competition for nutrients. 

Also Read: Why Are My Pumpkin Plant Leaves Turning Yellow?

Does Asparagus Need Full Sunlight?

Yes, actually the asparagus needs full sunlight when it is not a hot climate area. The right amount of direct sunlight is good for the growth of the plant. As every plant needs sunlight as part of its photosynthesis asparagus needs it too but not much. So, sunlight in a proper amount or for a certain period of time like eight hours a day in the morning is needed for them. 

A hot climate or hot temperature is not good for them and eventually, they will be dead. Sunlight is needed by everyone on this planet and the plants need it the most. Their food and survival depend upon the sunlight.

A correct place inside or outside of the house will give them enough sunlight for their survival. In fact, plants which are kept outside are much more fruitful than the plants which are kept in shade. Shade is important and needed when the climate gets hot and unbearable.

Full sun is actually the ideal thing for the asparagus plant. Tall trees or shrubs block the sun from them will reduce their growth and production. Giving them the appropriate amount of sunlight will nurture them into a healthy and fruitful plants. 

Growing asparagus is a very nice thing for your garden. They will produce for many years and will give you the result. They need lots of patience and care from you but after that, they will give you the fruit you need. They are well-established plants and can be outside and inside plants. They can also be grown in full sunlight as well as in partial shade.

Growing your own vegetables also gives you a feeling of full illness and is also fresh from your own garden without any harmful chemicals. So, do grow your own asparagus in your home garden!

How Can You Care for an Asparagus Plant?

Light or sunlight

Asparagus plants grow to the fullest in the presence of sunlight. With proper sunlight, the asparagus plant will thrive to the fullest and grows without any plant diseases. 

Soil 

Asparagus plants need proper soil which drains water well and which has a neutral pH level which is in the 6.5 to 7 range. The soil needs full preparation and needs plenty of organic matter. Try to get rid of any weeds and large stones from the soil before planting. 

Water

Watering plants is a crucial step because too much water can rot the plant. Sitting water is never good for the plant and it should be drained properly. When the asparagus plant is young and tender it needs watering regularly. A good start while planting will give you fewer problems in the future. For a better water system add a drip irrigation system or a soaker hose to the asparagus bed.

Also Read: Should I Cut Off Yellow Cucumber Leaves?

Temperature and humidity

In the growing season, the preferred temperature is seventy to eighty-five degrees Fahrenheit during the day and sixty to seventy degrees at night. The shoots will be discolored because of the frost on the plant. There will be slow growth of the asparagus when the temperature is above eighty-sixed and below fifty-five degrees Fahrenheit. 

Fertilizer or organic matter

The compost and organic matter are added to the trench in the asparagus bed for better growth and better production. Rock phosphate a natural mineral powder promotes root growth. These natural nutrients help the asparagus plant to develop a good and strong root system. 

To make the soil rich in nutrients and help the plants to feed for themselves compost is added to the plant bed annually. This can be done in the early spring before the shoots appear or in the fall after the fronds have died and when they are cut down to the ground.

They should also be fed with these nutrients to the soil in the mid-spring when they are actively growing. 

Keeping in shade for longer than the required time or when you ignore the rising temperature which is beyond eighty-five degrees Fahrenheit will lead to problems such as:

1. Unprocessed, premature shoots

2. Thinner and deformed spears 

3. Reduced germination of its seeds

4. Diminished growth of crown, with less or no outcome.

Also Read: Is Cow Manure Good For Chili Plants?

Harvesting of the asparagus plant

The harvesting of the asparagus plant is not done till the third year of the harvesting after they are planted. They need time to be settled and established with their root systems. When you need a healthy and well-established asparagus plant you will need a lot of patience. 

Harvesting can be done in the third year of growth. The plants are not fully matured so harvest them for two weeks and let them grow again in an undisturbed manner. 

In the fourth year snap it with spears or with a knife just above the soil line. Be very careful while cutting them with a knife. The harvest can also be extended to three weeks more. 

In the fifth year, harvest around the fourth or fifth week. During this period the shoots have emerged from the soil because of the spring season. These plants can grow and produce up to twenty to thirty years and be divided and transplanted if they become crowded over the current place.

Before the new growth of the plants, they need to be cut to the ground every year. The option is up to you whether you want to remove the stalks in fall or winter after the leaves have turned yellow and have died naturally. 

The early stalks removal gives you the advantage of preventing pests like asparagus beetles. When the stalks are left in the winter they have the advantage of plant debris which holds the snow and protects the asparagus crown from the freezing temperature.

Whatever the situation the dead stalks must be removed in the spring before the new growth starts. 

Also Read: How Far Apart Do You Plant Sweet Potatoes?

How Much Shade is Needed for the Asparagus Plant?

Asparagus do need partial shade to grow as full exposure and so much heat can damage the plant which will eventually lead to its death of the plant. Shade is also necessary as it gives coolness to the plants when there is the scorching heat. 

Hot summers can damage many crops and asparagus is not a different one. They are perennial so they need extra care from us. You have to be very careful about the sunlight as it will destroy the crop which has taken so much of your time and patience.

In hot weather keeping the asparagus plant in shade gives them coolness and protection from the sunlight which is sometimes not very necessary for them. Nothing as an overdose is good for the plant. This plant can be grown in full shade and no sunlight but it will be less fruitful than the plant which is kept in the sunlight.

Can asparagus grow in partial shade?

As mentioned just above in this article that asparagus plants can be grown in partial shade as in some parts of the country there is just too much heat for the plant to sustain. The hot climate is not very suitable for this plant as they also need to cool themselves from the heat.

The partial shade which has half sunlight and half shade in it is good for the plant. The heat will be less so that the heat will not bother them much. Partial shade gives them the right amount of sunlight on bright and hot sunny days. They can have shade and light both for their survival.

To grow the plant in the partial shade you need to do certain things for the plant. Find a place that has less sunlight. Mostly when plants are kept indoors they receive less sunlight and more shade. So, find a corner in your house where the sunlight reaches less and has shade that will cool it off.

The soil in the plant should be well-drained. As the plant is in less sunlight the chances of water getting vaporized is less so, well-drained soil will keep the plant fresh and will not rot the roots or leaves. 

Water the plant only if you feel the soil is dry. When the soil is dry from the above, then it will need water. Sitting water is never good for the plants and with less sunlight the water will stay for a longer period of time which will destroy the plant.

Why Are My Pumpkin Plant Leaves Turning Yellow?

As we are heading towards the monsoon, one of the most common complaints about pumpkin plants has started to come. These include the pumpkin plant leaves turning yellow, and dying without any specific reason.

Pumpkin plants are one of the most widely celebrated plant species for home gardeners for so many reasons and we can’t stress enough on the importance of keeping them under optimal conditions for continuous growth, productivity, and good health. So, if you are also facing problems with your pumpkin plants, you have arrived at just the right place.

In the following article, we decode some of the major reasons as to why the pumpkin plant leaves have started turning yellow and what you can do to restore the health of your plant.

In addition, there are some additional plant care tips that ensure that your pumpkins remain in the most exclusively amazing health throughout. Keep reading to get more insights.

Why Pumpkin Plant Leaves Turning Yellow?

As soon as people witness their pumpkin plant leaves going yellow in color, they fear if it is due to the prevalence of a disease or infection.

But, the good news is that more often than not, it is due to dehydration, rapidly changing weather, and nutrient deficiencies.

However, the not so good news is that while these causes are not adverse, they can evidently lead to conditions that are frightening, including plant death.

Before we jump on to the solutions for restoring your pumpkin plant health, let us inspect the major reasons and contributors a little more closely.

Also Read: Why Are Sweet Pea Leaves Turning Yellow?

It is all a part of the natural growth process

One of the reasons why your pumpkin plant leaves have started to turn yellow might be because it is just how it is supposed to be. This is by far one of the safest and most relieving causes for the yellowing leaves.

As a part of the natural process, the pumpkin plant starts to die when its fruit matures to its optimum condition, giving you an indication that it is now the right time to harvest your fruits and enjoy them. The vine becomes old and is unable to bear the weight of the full-grown fruit, thus dying eventually.

On a rough note, you can expect the fruits of your pumpkin plant to completely grow and mature after a period of 120 days from when you have sown the seeds.

You’d be surprised to know that not only do the plants die but the crown base also starts to show symptoms of deterioration. It is primarily because their role in the development of the plant has subsided and their presence is no longer needed for a healthy fruit.

This harmless process is actually good for the long-term health of your plant and is appreciated by many as a way of making the plant independent.

However, if left unnoticed for too long, the dead leaves of the plant can suffocate the air passages, disallowing the fruit to breathe completely. Also, it might promote the spread of root rot in certain cases.

To avoid such situations, it is best recommended to cut back the leaves of the plant as soon as they have turned yellow after fruit maturation.

An important point to remember is to chop the leaves very carefully with blunt scissors without leaving a mark on the fruit or other budding pumpkin plants or it can lead to infection and rot spread.

Also Read: How Deep to Plant Eggplant Seedlings?

Nutrient deficiency

Nutrients are the building blocks of humans and the story with plants is no different. If your plant is getting adequate sunlight, water, regular pest control services, and a good soil to grow into, you should not even wait for a millisecond to reach to the conclusion that your plants have turned yellow due to nutrient deficiency.

The macro and micronutrient profile of your plant says a lot about how it will keep itself during difficult times and how long it will actually be healthy. To make sure that all the nutrient needs of your plant are met, you should never compromise on the quality or quantity of fertilizer that you subject your plants to.

Nitrogen is the most important nutrient required by your pumpkin plant to keep the work going. To ensure that your plants have correctly restored their health from nutrient deficiency, follow the below mentioned steps:

  • Buy a commercially available fertilizer that represents the NPK ratio of 18-18-21.
  • Now, dilute the fertilizer before feeding it directly to the plant. An appropriate proportion is to dissolve one tablespoon of fertilizer in a gallon of water. This makes sure that the health of the plant is not compromised due to the high concentration of nutrients present in the fertilizer.
  • In addition, you can also follow the instructions as labeled on the packet of the fertilizer by the manufacturer of the product. Make sure to buy from a place that is not speculative of selling adulterated products and does the job just right.
  • A bonus tip to enhance the benefits provided by the fertilizer is to spread a layer of mulch or organic and well drained soil (approximately 3-inches in length) around the plant. Make sure that the layer does not directly touch the stem of the plant or it can block the flow of essential nutrients to and fro the plant.
  • The essence of making a manure layer around the plant lies in the fact that the plants never run out of adequate moisture conditions, and also ensuring that all the essential nutrients provided by the fertilizer are absorbed and retained in the right amounts.
  • Next, make sure to water your pumpkin plant in ample amounts. Make sure that you do not wash off the fertilizer completely. That would lead everything to go in vain. Instead, sit down and water the plant close to the ground to further the course of moisture in the plant. Do not overwater your plant or it could lead to root rot and a sodden soil bed.

That being said, loading your pumpkin plants with high amounts of nutrients alone will not do the job. You should always pair it with a moist and at the same time constantly well-drained soil to see the best results.

Check this out: Should I Cut Off Yellow Cucumber Leaves?

Presence of pests

Spider mites, whiteflies, and squash bugs are amongst the most dangerous pests that can cause tremendous harm and damage to your pumpkin plant. Their leaves turning yellow are the most common of them.

These pests operate by means of living on the stems and leaves of the plant, thus sucking all the sap that is present in the plant, making them turn yellow and devoting them of all the essential nutrients. Interestingly, and even more unfortunately squash bugs also feed on pumpkin fruit, which if left unnoticed and consumed directly, can cause tremendous damage to one’s health. 

Spider mites are usually present on the undersides of the leaves where they create their webs and stick to the plant, sucking all the sap out of the leaf. This leaves the leaf with almost nothing to live with, thus turning yellow.

Whiteflies, on the other hand, are comparatively easy to spot and are present everywhere from the plant root to the stem and finally even to the leaf.

One way to know if your plant has been infested with whiteflies is to shake your plant gently. If a small cloud of little white flies are seen dusting off from the plant, then you know who is to blame for the yellow leaves.

Squash bugs are most frequently observed as a pair of small brown eggs present in clusters on top of the leaves and even on the underside.

They adult themselves throughout their course of living on the plant and sucking out the sap from the plant.

If you want to get your plant rid of all the signs of infestation and pest damage, it is important that you check it weekly for any symptoms. Here is what you can do if you spot any signs of possible damage on the pumpkin plant from any of these pests mentioned above:

  • Always keep yourself stocked with good quality and low concentration insecticidal soap, either the liquid version or spray. Ideally, it is recommended to keep a spray as it becomes easier to apply on the plant when needed.
  • Each week, take out time to properly wet and gently rinse off each part of the plant, starting from the stem base to the main stem, the fruit, and finally the leaves. It is important that you clean your plant with water once a week to make sure that the pests stay away. Additionally, it also helps the plant parts absorb the moisture with maximum accuracy, thus giving you the best experience.
  • Do not spray water or soap spray when your plant is exposed to full sun. It can cause backlash from the plant and is not recommended by experts for scientific reasons.
  • Every morning, make it a routine to carefully examine the undersides of your pumpkin plant leaves. If you spot any usual development or eggs, remove them, wash the plant, and spray insecticides to avoid further risk of infection spread.
  • Another bonus tip to help you manage pumpkin pests is to take care of the plant debris that is easily available in winters. It does more harm than any good and is a major contributor the involvement of pests in your garden.

Also Read: Why Are My Spinach Leaves Curling?

Disease Infections

Pumpkin plants are not easy to grow and a major part of this comes from the fact that it is very easily vulnerable to diseases and getting sick.

Some of the most common diseases infections that you can witness your plant being exposed to include verticillium wilt, sudden wilt and downy mildew.

A mutual symptom of all of these insects is that they cause yellow pumpkin plant leaves and speed up the process of plant damage and death, which is not something that any house gardener wants.

To make sure that your plant stays away from catching such diseases, do not keep watering your plant beyond their holding capacity, and as mentioned earlier, remove plant debris as soon as the winters set in.

Check this out: What Size of Container Do I Need to Grow Cucumbers?

Conclusion

Now that you know what are the major reasons for which your pumpkin plant leaves have turned yellow and the measures that you can take to combat them make sure to apply them into your house garden as stated.

Follow the instructions and compositions mentioned to get the best results. You can also let us know in the comments what worked best for you. If you have more questions about the frequently prevalent problems about your pumpkin plant or any other plant, make sure to go through our other articles.

We have curated solutions to some of the most frequently witnessed plant problems after a lot of research and experimentation. Hope our content will be of help to you. Happy gardening!

How Deep to Plant Eggplant Seedlings?

Eggplants are not only easy to grow but also give you the option of having something healthy at your meal that is homegrown. How amazing is that! While most of us wish to grow such rewarding yields like eggplants, an unfortunate thing is not many of us actually know how to grow them.

If you identify with such situations, don’t worry!

We have shared an extensive guide on how deep to plant eggplant seedlings and how to take care of them so that they grow to their fullest potential.

So, without any further ado, let us dive into the journey of growing wonderful eggplants.

How Deep to Plant Eggplant Seedlings?

Eggplant Farming

Whether or not your eggplants will give a great product depends on how you sow the seedlings initially. Believe it or not, it all goes back to the earliest step of how you choose your eggplants seeds, prepare a bed for them and take its subsequent care.

Read on to know how to grow eggplants from seedlings, starting from how deep to actually plant them.

Also Read: Why Eggplant Flowers Falling Off?

Grow eggplant from seeds

Typically, it is advised that in order to grow eggplant from seeds, you need to plant the seedlings approximately 6 millimeters below the ground, which translates to roughly a quarter inch. However, you cannot simply throw the seeds away into the soil.

To be effective, you need to place your seedlings into durable cell containers or flats and then place them in the soil. Here are more tips to prepare your soil for optimal eggplant seedling:

Your soil should be well drained, fertile and filled with rich organic material to facilitate the growth of eggplant seedlings. Further, take special care that the pH composition of your soil is slightly acidic and not too neutral.

When you are sowing them, take proper care that they are germinated at the average temperature that doesn’t go beyond the range of 65 to 90 degrees Fahrenheit. This will ensure that the seedlings start emerging in not more than ten days.

The seeds that you sow in the garden remain viable and healthy for a period of about four years. This is good news for many of those who are too lazy to harvest their eggplant in the same season.

You can now keep them there for up to four years without worrying about how bad they can get. However, one important consideration is to always keep the soil and subsequent environment warm and humid instead of being frosty. It promotes the seed growth and preserves them for future use.

Eggplants are usually grown best when the method of transplanting is adopted, as opposed to directly being grown in the soil bed. For this reason, it is always advised to keep the soil slightly acidic and well maintained.

If you plant to grow your eggplants inside your house due to any reason, make sure that you sow the seeds at least five weeks prior to your last frost date. Any further, and you will restrict the chance of your plant to properly germinate and grow.

When you sow your eggplant seedlings below the ground, make sure to use additional equipment like a cloche or even a dome to help retain maximum heat and humidity for the process of germination of your eggplants.

Wait for two weeks after you have germinated your eggplant seedlings to see if there is any rapid reaction to the external stimuli or environment and then you can safely start fertilizing it.

Start with a soluble fertilizer and dilute it with enough water so that it doesn’t become too highly concentrated for the new seedlings. For reference, you can add about 10 to 15 ml of fertilizer to 3 liters of water and apply it to the seedlings.

Check this out: How often to water eggplant?

After your seedlings have matured, it is now time to harden them off using all the tips and tricks available in the book. One of the most effective is to reduce the high temperatures that they have been subjected to for so long and easing off on the amount of water that you are giving to the plant.

If you are growing your plant indoors and want to transplant them after hardening the eggplant seedlings, it would be best to do so in an area that receives a steady amount of sunlight throughout the day.

The ideal soil pH to place your eggplant seedlings is roughly between 5 to 7 on the scale and nothing beyond this range or it would be hard for your plant to bear.

Make sure to keep the soil at relatively warm temperatures at every step of the process. In order to increase the water retention abilities of your soil, you can also add mulch or organic manure to your soil and see the magic.

If your garden faces the issue of a lot of pests, bacteria, or is a house of diseases, you can also try and adopt the crop rotation technique to grow your plants. Usually, when the production of beans or peas precedes the growing of eggplant seedlings, it is said to yield the best results and keeps the pests at bay for a long period of time.

Your eggplant seedlings should be spaced at least 50 cm apart to help your seeds have enough room for themselves to grow and prosper, without interfering with the growth process of other plants.

How to Grow Your Eggplant: Care tips and tricks

Once you have established how to grow and sow in the best eggplant seedlings, it is time to help learn some quick and widely used technique that will help you actually maintain the entire growth process of your plant. Here is all you need to take care of when growing eggplants and harvesting them:

When you are presented with an option, always opt for eggplant varieties that are comparatively smaller in size. This is because, the smaller your eggplants would be in size, the more trustworthy they become of the growth process. They are comparatively less vulnerable to pests and demand less dedication from the side of the gardener, making it an easier job.

In addition, compact eggplant varieties can also be perfectly grown in small containers or cells, and do not require much space. Conclusively, smaller eggplants are also more powerful for staying durable and strong in the garden as compared to other plants or bigger eggplants for that matter.

If you are looking forward to a more durable eggplant yield, then maybe consider the seeding process a little late next time.

If you do it feeling like starting the seeding a few weeks earlier to the frost season, you can go ahead and seed your eggplants in midsummer. It gives more time to your plants to grow and enables their leaves to develop completely, which is not the case in the previous situation.

Expose your eggplants to at least six to seven hours of direct sunlight every day, the importance of a sunny and hot temperature for growing eggplants cannot be stressed enough and should certainly not be overlooked at all.

The soil needs to be kept moist throughout, so make sure that you water your plants enough, without any second thoughts. With this, comes the warning of not waterlogging or overwatering your plant, which can cause root rot or even the plant to die.

If you observe that your eggplants have started to in unusual size and shape, then it is an indication of abnormal watering and you need to fix it as soon as possible to prevent the premature death of your plant.

As opposed to the fact that eggplants require very high temperatures, they really do not follow the same rule when it comes to humidity. They can not manage to survive in conditions of either too high or too low humidity.

If pollination is not occurring, you probably need to check the high humidity levels of your plant. Try installing a dehumidifier for best and most accurate results.

If we are talking about the time when eggplants taste the best, then you need to harvest them when they are fresh and little and very new.

As soon as they start becoming ripe, not only do they lose their nutritional value, but also the taste fades away. One should always start picking out eggplants as soon as they become unwrinkled with a glossy appearance.

Also Read: Why Are Sweet Pea Leaves Turning Yellow?

Conclusion

Eggplants are the sole lovers of heat and they do not thrive until the temperatures rise above 70 degrees Fahrenheit throughout the day. Scientifically belonging to the Solanaceae family, the seedlings typically take two months or slightly more to grow to their optimal potential and support the production of fruit.

This journey can be a bit troublesome for some people, but now that we have told you all about the growing and caring tips of these plants, we are sure you’ll face no such issue.

If, however, you feel like you have certain perpetuating doubts about the growth process of eggplants or other similar yields, feel free to check out other articles posted by us. We post the most effective and time tested methods to solve your multiple gardening doubts and make it a memorable experience.

Why Are Sweet Pea Leaves Turning Yellow?

Sweet peas are a perfect complement to any veggie patch. They have a strong scent, which is one of the things that have made them quite attractive.

These blooms are equally effective as frontier plants when they’re on a trellis. They’re also lovely as fresh flowers in flower pot blossoms.

Now let us take a deeper look into how to flourish and support green beans so you can get one’s nose on them as well! Numerous gardeners have inquired as to “Why Are My Sweet Pea’s Leaves Turning Yellow?”

If the foliage on one’s sweet peas has been turning yellow, this usually indicates that perhaps the plant’s roots have been overwatered.

One other possibility is that the organic material is too rich, causing the roots of plants to tear. We will investigate the causes further.

Check this out: Do Sweet Peas Come Back Every Year?

Plant selection

Sweet peas are yearly basis growers that ‘cut-and-emerge-again.’ Sweet peas are easy to propagate as well as provide warmer months blossoms for the residents, and also aroma and the all the more important linear appearance.

Colour varies from steamy dark-red to pastel season tints of blue, lavender, or pink, with plaid and flaked cultivars available.

Almost all pea cultivars on the supply chain seem to be open-pollinated, as opposed to blends. Fully grown pea seed could be saved for sowing the very next season. Giant shrubs, which can develop up to 5 feet in height, are one species of plant.

Such vines should be supported as they ascend by a trellis. The above variants produce peas for a prolonged period. Relatively short or “bush” varieties are only 3 feet tall and they will blossom and establish one‘s crop production at the same time.

Vines that are dormant or semi-leafless will be less susceptible to infection. They might be capable of standing without a trellis since the tendrils intertwine into a density.

Other characteristics have included the number of peas for every pod, the size of the pod, the times to ripening, and knotted and stingless pods for eatable kinds.

Pea variants are widely available in local nurseries and seed collections. A few pea variants are resistant to conventional pea illnesses such as rot disease and wilt. A few years are fungicide-treated to enhance sprouting in chilly soils.

Why Are Sweet Pea Leaves Turning Yellow?

There are many answers to the explanations, “Why is my pea crop yellow?”

One sweet pea bush could be turning yellow as just a result of overwatering or using a cold water hose. This could also be attributable to overly rich organic manure, which is scorching the plant’s root systems.

Sweet pea seedlings just require watering weekly, but they must be kept moist all across the growing period.

These seedlings dislike warm conditions, so water those frequently in the morning hours during the warmer months to protect buds from falling and scorching.

Fusarium wilt

Fusarium wilt provokes yellowing of the vegetation of garden peas, stunted growth, and fading away of the plant body. The foundation of the stalks, on the other hand, is unaffected. The fungus continues to live in the land and joins the pea plant into its root system.

There are Fusarium-resistant pea variants labelled with an F which you should sprout if this appears to be a concern in the vegetable patch. Crop rotation, as well as the disposal and breakdown of leaves and roots, are also effective Fusarium wilt repellents.

Root damage

Root rot is another fungal infection that lives in the soil and impacts peas. Plants grown turn yellow at the bottom, and the stems end up dying away. Bacteria are spread by contact, breeze, and moisture. The fungus survives in the wintertime in garden waste, ready to infect seedlings in the springtime.

Planting in the well-draining ground, avoiding overwatering, rotating crops, allowing sufficient room between crops, purchasing disease-free seedlings and/or ones handled with the use of a fungicide, and removing and destroying diseased plants all are countermeasures for root rot.

Spotted Wilt

Spotted wilt is an infection that infects spherical yellow and brown patches on foliage. Aphids transmit the virus, that can destroy your seedlings. Regulate neighbouring weeds, such as grasses, with an insecticide.

Powdery mildew (or Erysiphe polygons) appears as a greyish-white development on diseased sweet garden peas foliage. Spotted wilt seems to be a pathogen that produces round yellow and brown blotches on foliage.

Solution for Yellowing Pea Plants

The majority of factors that cause yellowing plants have been fungal, and their treatment is essentially the very same: Choose disease-resistant seedlings.

Plant in well-drained land or garden beds. Mulch is used to keep rain from expanding soil-borne fungi to seedlings. Remain out of the vegetable patch when it’s slightly damp to avoid spreading fungi to crops.

Also Read: How Deep Do Potato Roots Grow?

How to Plant Sweet Peas?

Direct Seeding in the Vegetable patch:

Sweet pea seeds have a tough outer layer. Immerse the seed in liquid before seeding to promote sprouting.

In springtime, straightforward sow seeds in ordinary soil in bright sunlight. Germinate from autumn to springtime in frost-free regions.

Sweet peas have been climbers as well as require some kind of assistance to tie their tendrils approximately. They can scale a fence, a canopy, or even a chain. Dwarf varieties do not require any help or support.

Remove weeds and operate organic material into the upper 6-8 inches before levelling and smoothing.

Often these plants thrive in soils that have been modified with organic material. Compost is a marvellous type of organic material that can be incorporated into your plantation region at any moment. It has a good equilibrium of nutrient content and also an ideal pH scale.

If compost isn’t accessible, top accessories the soil upon sowing with 1-two inches of mulches, that will decompose into compost. In line with the growing period, a soil test can determine which soil modifications are required for the next period.

Sow seeds three inches off from each other in soil, then wrap with two inches of topsoil. Firm the soil gently and maintain it uniformly hydrated. Based on the land and climate circumstances, plants will arise in 10-14 days. When seedlings are 1 or 2 inches off from each other, thin them to 6 inches away.

Also Read: What Size Pot Do I Need to Grow Green Beans?

Sweet peas: How and where to Grow Them

Where can I grow sweet peas?

Sweet peas prefer a rich ground that holds water and yet drains well.

Aspect and placement: Sweet peas adore the sun, so choose a location that gets plenty of it.

When should sweet peas be planted?

From October to April, cultivate sweet pea seedlings. Aspire for late October/November and perhaps close to call February/March for the great outcome, as weather conditions and sunlight are far from perfect in winters.

Through April and May, sweet peas could also be sown down into the soil. Sprout one sweet pea seeds and crops around March and May, when the weather is gentle.

Check this article: Can You Grow Potatoes in Clay Soil?

Harvest

The majority of pea cultivars are harvestable 60-70 days after sowing. Peas reach maturity rapidly, so keep an eye on them every day once the blossoms begin to flourish. After the mist has dried, select the peas in the early hours.

Then they’re the crispiest. To prevent damage to the shrub, pick peas with two hands. With one hand, grasp the plant and in another, lift the pods off. But also pick on a routine basis to enhance the growth of more pods.

Snow peas should be picked when the sensitive pods start to show premature seeds within them. Snap peas should be harvested whenever the pods are thick but still shiny and full of sweet-tasting peas. Shell peas should be picked first before pods are waxy.

Peas seem to be at their most flavorful right after yield. Over fully grown pea pods have dried or transformed into a dull colour.

Through hot months, fully grown plants normally stop creating and eventually die. Even if you did miss the apex season for peas, you could still choose, dry, or shell those to be used in cold weather soups.

Must Read: How Deep Should a Raised Bed Be for Tomatoes?

How Should Peas Be Stored?

Enclose in plastic after placing in grocery bags. Alternatively, peas can be frozen. Sweet peas should be shelled, blanched, immersed in cold water, drained, and stored in airtight containers. Plan snow and snap peas as directed above.

Taking Care of Sweet Pea Plant

Watering

Sweet pea plants require little treatment and can thrive even in the apparent lack of supplemental watering. Such species grow when watered on a routine basis, whereas those cultivated in pots need more moisture.

Fertilizing

They sprout throughout the year and therefore should be fertilized with a general-purpose fertilizer mostly in spring and autumn.

So each couple of weeks, nourish the sweet pea seedlings with only an overall fertilizer and perhaps comfrey pellets. A tomato nutrient high in potassium is perfect. Sweet peas could last until August only when you keep up a regular application of water and feeding schedule.

Pruning

Sweet pea plants demand almost no pruning, and just a light snip at whatever moment of the year is something that is required to keep their shape under regulation.

Aged shrubs’ stalks could be woody, so you can often cut those to around 10 inches just above the surface and let them grow back. You could also choose to let things develop naturally.

You could also allow the seedlings to mature into young trees. Although the tree remains young, eliminate all but one linear stem and the corner branches on the bottom 50 per cent to two-thirds of the trunk.

Polygala plants could be reproduced from seeds that fall and start taking root if the crops aren’t deadheaded on a routine basis. Hybrids are barren and can be propagated from fall and spring softwood clippings.

Staking

Sweet pea crops require additional stability and a structure to leap up and ascend over because they can grow to be over 1.8m (6feet long) tall. A teepee or curve is perfect, and it can be purchased ready-made or built oneself.

Bind the youthful sweet pea into the roof structure as they develop. It is critical to link one sweet pea on just a routine basis because they will grow faster and produce greater crops if they have been connected.

Do this two times during the first month, well more frequently as they begin to romp away. We bind in the sweet peas once each seven to ten days to make sure vertical growth, and often more relying on the season.

Sweet peas in pots require a minimum of 10 inches of room around every seedling. The pots should have as much depth as conceivable.

Because freshly planted flavorful pea plants are quite ravenous and thirsty, whether they are cultivated too near to each other, they too will compete for the nutrient content in the pots.

How to Sprout Sweet Peas for Presentation?

Fall sowing is critical because it produces the most advanced roots and allows for the best early planting in the vegetable patch. Eliminate all but the most tenacious stem.

Consider removing the vines and use cables or raffia to connect and assist the primary stem. Eventually results blossom stems must be lengthier and better, with a greater number, length, and efficiency of flower for every stem.

What Size Pot Do I Need to Grow Green Beans?

Beans can be vine or bushy, & they come in a variety of dimensions and colors. They are mainly a warm-season vegetable that is effectively cultivated in the spring, although in a few temperate areas, they can also be begun for a summertime harvest.

Beans in pots could be grown by gardeners with limited space. Widening beans in canisters is also helpful for starting them early when soil temps are still quite nice for in-ground planting. These seedlings will have to be carried inside at night to prevent freezing conditions.

In general, there are two sorts of bean seeds that you can sprout in your yard. In this write-up you’ll learn about what size pot do you need to grow green beans?

Pole bean seeds are much like climbing vines that twist around vertical elements, creating them ideal for private gardens. Pole beans can sprout to be 10-15 feet in height, necessitating the use of a trellis or marking.

Bush bean seeds: Because they grow tidily like usual plants, they don’t need outside assistance. Bush beans are ideal for bed planting cultivation. The bushes’ harvest evolves even before pole beans.

Now, we’ll demonstrate to you how and when to sprout beans in containers and provide you with seven helpful hints for an effective harvest. We’ll furthermore focus on the best kinds of beans to develop in pots, as well as remedies to certain common issues.

How Do You Get a Bean Plant Started?

beans

Green beans could make lovely pot plants. They could be a valuable boon on a protected patio, veranda, or in a terraced set – up, with their beautiful flowers and appealing vegetation. There are a few actions to beginning a bean plant. Often these seedboxes should include variety-specific directions.

Begin by planting the seeds 2.5 inches down in the soil. Water the pot thoroughly during the first week, since green bean plant growth takes around a week. The soil must be kept moist. You might also want to put a pan under it to hold the overspill as the additional moisture sinks out from the bottom.

So when green beans start to blossom, be careful not to overwater because retaining the foliage dry is suitable. Water the surface just when it has become rough as the seedlings develop. When they’ve reached ripeness, take advantage of your labor by taking each unit at the stalks.

Also Read: How Often to Water Green Beans?

Bean Harvesting and Storage

Green quick beans are harvestable when the seeds within the pod have fully developed although the bean pod remains green and delicate. Hang tight till the pods transform yellow before going to shell beans. Sit tight till the pods are completely dry before using dry beans.

Bush, as well as pole beans each, produce multiple crop production, so don’t pull them out upon the first one. Bush beans typically produce a 2nd and 3rd harvest at one to two week time frames. Pole beans can keep producing throughout the growing season.

Green leafy beans can be stored unwashed in the vegetable fresher of the refrigerator for seven days in a Ziplock bag. Individuals can wash and freeze those for long shelf life.

What Size Pot Do I Need to Grow Green Beans?

Growing green beans in pots is simple – they’ll require sunshine, big pots to distribute out and develop, and high-quality potting soil. Understanding how to plant veggies in pots is essential if you might not have a lot of lawn and garden area! This will help to begin green bean seedlings sooner than scheduled, as well as relocate the pot outside however you see suitable.

Grow one’s green beans just at the start of the growing period, which is generally in springtime. Carry your newly planted green beans inside during dark, particularly if there is still a chance of ice and snow.

The dimension of the jar size for developing beans differs depending on the kinds of vegetables. Pole beans require eight to nine inches (20-23 centimeters.) of growing medium, while bush beans hardly require six to seven inches (15-18 cm.).

When starting to grow beans in pots, ensure the pot does have a few unhindered drainage openings. Although the look of a pot is unimportant, utilizing unglazed pots could well enable the pots to “breathe” and enable surplus water to drain, preventing the plants from drowning.

The amount of plants that can be sown in a pot is determined by the radius of the pot. Intend on 9 plants for every 12 inches (30 centimeters) of surface room. Use a container-friendly seed selection like Kentucky Wonder and Top crop.

Also Read: Do Sweet Peas Come Back Every Year?

How Deep Do Green Bean Roots Grow?

While the level of the green bean root system can achieve approximately 45 inches into the growing medium, its root ball’s width varies from 20 – to 30 inches. Regardless of the potential length of the pole bean’s root system, tinier bush bean crops can be grown inside a container veggie patch.

Arrange bright, well-drained raised beds or jars by supplying nutrients and modifications to create a softer, rich land that can support the root expansion of the green bean. Whenever you loosen its soil also eliminates weed growth, plant residues, twigs, and rock formations from the grow bed.

Check this out: How Long Does It Take For Green Beans To Grow?

Then, grind two to three inches of well-decomposed organic manure over the ground and burrow this in 10 to 12 inches deep. Other modifications may be added as required to bring the pH of the soil between 6.0 and 7.0.

Pole beans’ root spacing and intensity can be accommodated in 18-inch-wide as well as 36-inch-deep plant pots, whereas bush beans flourish in 8-inch-wide or 8- to 10-inch-deep containers. Complete the pots with rich planting soil or even your blend of organic manure, coir or peat moss, or coarse sand.

A cupful or a few of well-decomposed compost boosts nutrient levels. Install a trellis to allow the veggies to develop upward for peak sunlight exposure and airflow.

The much more common ailment issues in bean roots seem to be root rots & fungal infections. Fusarium, Rhizoctonia, and Pythium organisms are by far the most prevalent fungi that attack bean roots.

The bacteria can live a long time in the land, feeding on decaying foliage from crop residues. Sadly, there have been no natural fungicides that are useful against this issue. Crop rotation is among the most effective ways to prevent ailment. Do not even overwater, as this can promote disease.

Also Read: How Much Sunlight Do Green Beans Need to Grow?

Common Issues You May Face

Bush beans, in particular, are pretty tough. However, several pests are identified to serve on these vegetables, as well as some serious illnesses to be aware of before beginning one’s bean container plant.

Bean rust – This fungal disease can rapidly wreak havoc on one’s plants, causing yields to drop significantly. On the foliage, take a glance for white and yellow patches that develop into red and brown blisters with yellow loops. As quickly as you notice damaged leaves, snip them off. Making sure there is more than enough room and air circulation among plants will lessen the probability of your plants being impacted.

Mosaic virus – The said virus that attacks legumes creates a unique yellow speckled pattern on foliage and can adversely affect plant life. This infection is usually present in the diseased seed, however, it is frequently distributed by pests. The key to avoiding problems is to purchase seeds from a credible vendor and establish your container vegetable patch apart from other greenery.

Pests – The most prevalent pests which attack legumes seem to be aphids & bean leaf beetles. They end up causing leaf harm, which can result in growth retardation and decreased pod output. Bean beetles can even draw just on bean pods. When you see small yellow bugs as well as black or yellow beetles on one’s seedlings, rinse them with soap solution water to drown them.

Do Sweet Peas Come Back Every Year? Answered

Sweet peas are the dream plants for every house gardener and truly for the right reasons. Taking care of them is not that difficult and they entail an aesthetic appeal to the beauty of your garden.

However, one can become really puzzled when trying to grow sweet peas. And this confusion can arise from questions like do sweet pea plants come back every year.

Generally speaking, it is a valid question to ask. One invests a lot of resources to grow the right kind of sweet peas and it only makes sense to be sure that the sweet peas would grow with the same enthusiasm in the next season.

We understand how difficult and overwhelming it can be, and that is why we have brought to you the ultimate guide that tells you about all the know-hows of sweet peas, how they are grown and what you should do to nurture them.

Further, you will also get to know everything about the planting, caring, and growing methods of the plant. So, without any further ado, dive into the journey about sweet peas.

Do Sweet Peas Come Back Every Year?

Sweet peas make use of a setting seed to grow from each year and they terminate their lives when the seed dies after a year. This is one of the unique properties that are only specific to sweet peas and make them different from other perennial plants.

Sweet peas usually demand greater amounts of nitrogen to grow back the next year. While it is true that they generally require a fertilizer that is significantly high in the content of potassium, the property of sweet peas to fix nitrogen in the soil, thus making it more available, makes it vulnerable to this macronutrient.

Sweet pea plants are one of those rewarding plants that allow you to enjoy the harvest any time you want if you’re growing in your garden successfully. So, do not hesitate in planting sweet peas for you can enjoy the harvest every year.

So, even though it is possible to grow sweet peas year after year, you should not expect to yield high quality plants each year. With time, you’ll find yourself choosing amongst 5 out of 100. An additional problem is the gradual loss of fragrance from the plants.

Also Read: How Long Do Sweet Peas Take to Germinate?

How to Take Care of Sweet Peas?

Sweet Peas are better known by the name of Lathyrusodoratus and are considered one of the most beautiful yields that can once grow in their gardens. However, this beauty comes only after enough resources have been invested in the growth.

Taking care of sweet peas requires you to know about certain important aspects about how they will reap and be productive. Here are some of the most important, easy, and effective ways that you can adopt in your daily sweet pea care to see magical results.

Sunlight

Contrary to popular belief, sweet peas require a lot of sunlight to grow to their fullest potentials. In fact, they thrive under optimal sunlight. This can be estimated to be around eight hours per day as a minimum amount and the range can vary up to at least twelve hours. If you cannot arrange for 12 hours of direct sunlight exposure to your plants, then make facilities for artificial light and you will be good to go.

However, an additional thing that needs to be remembered when exposing your plant to sunlight is to keep a shady environment readily available for your plant so that it can be protected from long hours of sun exposure if it is needed. If your leaves start turning brown or yellow, then it is time to realize that you might be giving extra light to your sweet pea plant.

Soil conditions

Organic and nutrient rich soil is the preferred soil habitats for sweet pea plants and they do not settle for anything less than this. Although, they do have an additional soil prerequisite to grow to their maximum capacity and that is the soil should be well-drained and should have the ability to retain maximum moisture from the plant.

If you cannot find an organic and natural soil mix for growing your sweet pea plants, you can add some compost made of natural decomposed materials to your soil as it helps in significantly improving the nutrient profile of your soil. Further, you can also add some mulch to your soil to increase its water retention ability.

When choosing the ideal soil condition for your plant, it is also important to mark your inclination towards a soil type that is slightly alkaline in nature. Go and find for soil mixes that have a pH of 7.5 or slightly more than that, and replace your currently present soil with this. You will see results in just 30 days of time.

Also Read: How Far Apart Do You Plant Sweet Potatoes?

Watering techniques

Some people are of the belief that it is not so hard to water the sweet pea plants and this precisely needs them to ignore the growth needs of their plants.

In fact, sweet peas present one of the most complicated watering needs and if one does not have either enough knowledge or experience for it, they can end up disrupting the progress cycle of their plant. To avoid this, read up a few tips we have to offer on this subject below.

As the growing season begins, the watering needs of your sweet pea plants increases to that of two or three times during each week. That is, they expect you to keep them moist and warm throughout the growing season.

This should not be mistaken for soil conditions that are too soggy that it leads the plants to develop root rot, thus restricting the growth. Instead, to keep them moderately and routinely moist, but without overdoing it, do the traditional finger test.

To perform the finger test, gently insert your finger inside the soil bed and see if the soil is wet or arid. If it is dry, water it carefully, but if it is already wet, do not keep sprinkling water on it and try to reassess the plant situation in another two to three days.

Also Read: How Often to Water Broccoli?

Temperature and Humidity

Now that we know that the sweet pea plants thrive in sunlight and require a lot of water to grow during their dormant season, it only seems a plausible explanation to conclude that sweet peas love and possibly thrive during warmer climates and higher temperatures. Both logically and factually speaking, this plausible explanation is actually true.

Sweet Peas are a native of the mediterranean region and they absolutely love to be placed in the warmer temperatures and rarely do their best in those frost chills. If you are considering the best time to plant your sweet peas and get the est out of them, the time that has passed just after the frost would be the best and will consider the most productive sweet pea yield.

If you follow the USDA zones, then zone 3-8 would go best according to your preferences. They are pretty, comfortable, and the most enriching and stimulating conditions for your sweet pea plants.

However, remember that the seedlings of the sweet pea can tolerate a little frost and do not like extremely hot weather conditions. They tend to suppress their growth and react negatively when exposed to too much heat or conditions of abnormal humidity.

Fertilizer

Like any other plant, your sweet pea plant also needs fertilizing from time to time to supplement its growth process by means of providing enough nutrients, both macro and micro in the profile. Again, the growing season is considered the most appropriate time and that is exactly when you should fertilize your plant with ample amounts. It is best to regularly feed it and maintain a steady composition

It is important to remember that the proportion of nitrogen, potassium, and sodium, should be kept even and be balanced throughout the fertilization feeding or the plant would not be able to tolerate the conditions of such high concentration of any one nutrient, resulting in sudden plant death.

Check this out: Why Are Eggshells Good for Pepper Plants?

Pruning

You can also increase the branching of your sweet pea plants by introducing the technique of pruning to your garden. This technique helps in production of more flowering stems and is one of most widely adopted measures to support plant growth. To do this, pinch the tip of the plant backwards by one inch and release it when the plant has reached at least four inches in height.

Conclusion

As seen earlier, sweet peas are the most vulnerable and easily grown plants that one can grow in their house garden. And now we know that if they are given proper care, then they can also be regrown.

So, the next time you are in doubt about growing sweet peas in your garden, open our guide and apply these easy tricks to get the best yield. If you have any doubts about sweet peas or growing similar plant varieties, check out our blogs and you’ll get the solution. Happy gardening!

How to: Can You Grow Potatoes in Clay Soil?

Potatoes thrive in well-drained, soft soils which are rich in natural material. Soil which is excessively sandy, rugged, or clay isn’t nice for potatoes.” This is correct, but ideal circumstances will not always exist.

During a survey, it was discovered that references to potatoes are used to snap up clay topsoil in a day, mainly in places previously occupied with grass. The method of hilling up land and natural components around growing crops, we presume, aids in soil construction.

How to Plant Potatoes?

Potatoes are a beneficial plant to sprout in the vegetable patch; here’s how to maximize one’s yield. Nothing compares to the flavor of newly excavated potatoes, and rising your own can not be simpler. If you begin planning, you might be going to eat newly dug veggies all season and early fall, and if you’re witty, you might even get a\ winter to produce to brag about.

The potato season starts in earnest with ‘chitting’ (growing) the initial cultivars in January in relatively warm locations and during February in cold regions, approximately 6 weeks before sowing them outside. Simply hold them on the extreme in an egg plate with ‘eyes’ or tiny dents with blooms in the skin erect, and put them in a vibrant, chilly, frost-free location.

Can You Grow Potatoes in Clay Soil?

Thick soils are sometimes labeled as tough; but, when cultivated carefully, they may be just as fruitful as anything else, with no additional labor. Clay holds water and mineral nutrients higher than just about any other type of soil, making it ideal for vegan organic farming.

In fact, not all clay soils are exactly alike, some of which are very open than others, and some appear to be solely appropriate for making bricks. Nevertheless, almost all clays can react to the basic procedures.

The quantity of sand, clay, or loam existing in a specific soil specimen can be estimated by blending a small amount in water inside a glass and letting it rest; the three components will detach into layer upon layer, but the enhancement techniques are usually the same regardless of the type of the specific soil.

Clay soil is typically quite thick and densely packed. Because potato tubers develop underneath, clay makes it difficult for tubers to develop. Add extra composting or old manure to the clay soil to enhance it for potato cultivation.

This will help the ground drain properly, loosen it up, and provide minerals. Note that sand can not be used to soften clay soil. As a consequence, the soil would be extremely hard and tough to deal with!

If the soil contains loam (not clay), although maybe not as open as you would like, you may add just a little sand to that though. Potatoes, radishes, or other “root” plants like lighter earth, which enables them to develop without breaking against tight clumps of topsoil.

If your ground is excessively sandy, then that will drain extremely quickly. This might cause a water shortage for any crops you attempt to cultivate, even potatoes. If the ground does not keep its structure and washes up soon, it is most likely sandy soil.

Also Read: How Many Potatoes Grow from One Seed Potato?

Soil pH Level

Clay soils nearly always have a greater pH, which is inherently alkaline and therefore can vary between 8.0 – 10.0. This is a bit too much for what we’re looking for while producing potatoes. The very first step is to determine the soil ph. so that we know precisely what we’re working with.

Then we may start lowering the pH towards 5.5 to 6.0 – you might rarely decrease the pH over more than 1 to 2 points in a single planting season, however it is usually best to attempt than do nothing.

Wood ash, vinegar, coffee, iron sulfate, and even basic sulfur are examples of pH-lowering additions. Take caution to add them to the ground in little amounts so that you don’t overdo it.

We would recommend starting this practice in the preceding fall to give the remedies time to act. Add a small amount, integrate it, and afterward measure. Unless you’d want to read about reducing the pH of the soil, there are posts about that too.

Check this out: How Far Apart Do You Plant Sweet Potatoes?

Fertilizer

Fertilizer restores any minerals deficient in the ground. When spread at the ratio of 11/2 pounds every 50 square feet of beds before planting, a 5-10-5 and 10-10-5 combination gives plenty of nourishment. Potatoes primarily need nitrogen, phosphorus, and potash abbreviated N-P-K.

The amount of nitrogen is the very first figure on the fertilizer label, preceded by the amounts of p and k. The remaining elements are provided by the second treatment of a pound of fertilizer every 50-foot line once the potatoes attain a size of 4 to 6 inches. Spread this fertilizer on the ground approximately 6 inches distant from your plants and quickly water it in to allow it to soak in.

Water Content of the Soil

Appropriate soil moisture promotes healthy development, while excessive moisture could lead to rot issues. Although soil quality that has been modified with manure or organic material holds moisture efficiently, it can nevertheless dry out in scorching or dry conditions.

Thorough watering keeps the ground from running dry too rapidly, so offer about One inch of water every week, allowing it to sink at least every six inches into the ground. Topping the ground with 2-4 inches of straw mulch helps to maintain water even while shielding potatoes that grow close to the ground surface against sun damage, which might kill them.

Also Read: Best Soil for Sweet Potatoes

Planting Season

Potatoes could be cultivated throughout the year. They seem to be winter tender, requiring 60 to 90 days of cold-free to mature for effective production. If you are going to grow in a frost-prone area during the winter, include a shield of plastic or light color fabric connected to wagers or star picket lines to enable airflow.

It can be excluded when there is no threat of ice and snow (to enable rain to enter), though – and keep in mind to replace it if some other cold spell is predicted. The majority of people prefer to plant in the fall (March/April) since the ground is heated and development is quick.

If you reside in a frost-free area, you may plant them any moment from springtime to near summer – although they do not produce well during the warmer seasons and are more susceptible to pests and illnesses. Sow in frost-prone locations in early spring, right before the last anticipated frost.

Is it possible to grow potatoes from seeds?

Potatoes can be propagated from seed in concept, but only farmers do so in practice. Sowing potato seeds have no benefits for the home grower. For one reason, there is a good chance that cultivars were intermingled during pollination.

This suggests that the following generations from seeds will most likely be a hybrid rather than purebred. Secondly, tubers develop significantly more slowly in seeds.

A year after these seeds are sown in February, the produced tubers are relatively tiny and give little output. Only if the crop from the previous year is seeded out the next spring is the output comparable.

How Much Time Does It Require to Raise Potatoes?

Based on the cultivar, potatoes are prepared to harvest for around 70 to 90 days. Whenever the greenery starts to die away, the potatoes are harvestable.

Nevertheless, “baby” tubers can be harvested 2 to 3 weeks after crops have finished blooming. Dig cautiously all-around crop, collecting just a few potatoes that you want to consume right away.

Potato Harvesting

Potatoes for storage must not be unearthed for 2 to 3 weeks after the greenery has died down. Sit tight for just a few days for a dry season before harvesting. Pick potatoes gently with a strong gardening fork.

Let the potatoes rest in the growing medium for 2 or 3 days after picking. This procedure permits the potatoes to begin curing, which will help them survive further in storage.

If the weather report predicts rain, you may cure the tubers in a sheltered space such as a shed or enclosed porch. The tubers will have to cure lasting up to 2 weeks in a clean, cold, dark environment (45 – 60 ° F).

Some top tips:

  • Grow inside an old bag, half-wine barrels, or aging compost pile.
  • Potatoes would shrink in size in a smaller area.
  • Further fertilizer is usually unnecessary if the ground has been properly prepared. If you believe the development isn’t as rich as it ought to be, you may feed the tips a small feeding of seaweed and comfrey tea.
  • Grow potatoes in a sunlit location, and yet never leave the tubers to light.
  • Plants that make decent companions include horseradish, beans, corn, marigolds, peas, nasturtiums, cabbages, and parsnip.
  • Cucumber, sunflower, tomatoes, pumpkin, onions, and rosemary are all poor companion crops.

Conclusion

When we all wish we had perfect soil for growing potatoes, the fact is that not everybody does. This will not prevent us from growing potatoes; rather, we must understand how to properly prepare and maximize our soil before sowing. The advantage of producing potatoes on clay is that you’ll have greatly improved the ground for the following harvest!

How Deep Should a Raised Bed Be for Tomatoes?

Tomatoes are one of the most rewarding sets of plants that one can ever find in their garden. This is especially true if they are grown in the season that is similar to their habitat. With the ease that they present while growing, it is only human to experiment different kinds of growing methods with them, to help us know how we can reap the benefits of growing tomatoes in a multitude of ways.

One such experimental way that many people take in include growing tomatoes in raised beds. However, one question that always perpetuates the minds of the gardeners is that how deep a raised bed should be to grow tomatoes.

This is important from a number of perspectives. The very first being, having a general understanding of the depth of the raised beds for tomatoes, and others circling themselves around the fact that tomatoes benefit the most from this setting.

The answer to this question cannot be objectively defined and depends on a number of factors. However, as a general rule it is said that traditionally, the raised beds for tomatoes should be 12 inches deep for an optimal plant growth.

In the following article, we cover in detail about this aspect of growing tomatoes while also discussing some of the important points to keep in mind while growing them. If you want to know more about how to grow tomatoes in raised beds, keep reading.

How Deep Should a Raised Bed Be for Tomatoes?

It can be difficult and highly exhausting to try and get your native soil conditions just right every time. Therefore, the concept of growing tomatoes in raised beds allows you to explore easier and more efficient options for growing tomato plants, thus accelerating the pace of their growth.

But, once you have decided that you need to grow tomato plants in raised beds, something that immediately comes to our mind is how deep should a raised garden bed be for tomatoes. This authentic question deserves a well-researched and empirical answer, else the results can be truly devastating.

To get just the right conditions for growing your tomato plants in raised beds, here are a few most important and significant considerations that you can keep in mind and follow next time you decide to build a raised bed for your tomatoes or other plants for that matter:

Also Read: Should I Cut Off Yellow Leaves on Tomato Plants

Preparing the Site

When you decide to prepare a raised bed for growing your tomato plant, there is something that you need to take care of. And this is most important, because it lays the foundation for the rest of your process. That is, finding a perfect site for the laying of your raised bed and soil.

To prepare a site for your raised bed, it is necessary to find a space that is evenly leveled up and is free from all kinds of hard rocks and debris. If possible, try and manually remove the debris to make the space as even as is humanly possible.

Make sure that the spot you choose has easy and routine availability of both sunlight and water whenever you require it. A rough idea is to have at least 7 hours of direct sun exposure to your plant, so that should be considered while finding a spot.

Once you have found the perfect site, it is now time to prepare it for further usage. This can be done by following these tips as listed below:

Loosen and turn the soil repeatedly by making use of equipment like a tiller and by means of removing visible sods. If you feel that a tiller cannot be of much help in breaking up a hard soil bed, you can also put in use a spading fork or spading knife to work efficiently.

It is important to properly loosen the soil because doing this will make enough room for the deep roots of your plant to penetrate further in the soil and furthering the plant growth.

Decide the length and breadth of your raised bed and use simple materials like flour from your kitchen to create a rough outline at the periphery of your site.

A general idea is to keep the soil bed at least twelve inches deep. But, to arrive at a perfect estimate, you can multiply the length, width, and depth of the raised bed and see what are the final estimates.

The final step for preparing an ideal site of raised beds for your tomato plants would be to properly edge materials like stones or umber.

By edging your raised beds with heavy edging materials, you make sure that any drastic environmental conditions do not necessarily have the power to move the raised bed out of its place.

In addition to this, these high volume materials do not require much resources to find and are relatively inexpensive. This DIY is the most effective and widely adopted measure to prepare a site for your raised beds to grow high quality tomato plants.

Check this out: Is Chicken Manure Good for Tomato Plants?

How deep can your raised garden bed go?

The ultimate question comes back to how deep can we keep our raised garden beds, especially if we are considering growing plants like tomatoes. The answer varies on a lot of factors and is unique for every gardener.

Traditionally, the width of a general raised bed would be about three to four feet with the length going as long as eleven inches.

With this range in mind, it is safe to say that you can keep the depth of your raised garden bed at least 12 inches deep. But, under what conditions should we consider other alternatives and why is it important that we try to deviate from the standard norm of being twelve inches deep? Let us look at the possibilities.

Tomatoes are one of those vegetable plants that can just not do anything in a shallow sense. They strive only in deeply penetrated soil conditions and that is why it can sometimes be a good idea to keep the depth of your raised soil garden bed as deep as 36 inches, which is 3 times the recommended value.

Keeping the depth as high as 36 inches would not harm the growth of your tomatoes but would definitely leave out additional space for the nourishment of the deeply grown roots.

Consider lowering the values if the length of your raised garden bed is too small or too stunted or it may create additional pressure on the plant to grow more than the expected amount.

Keeping the depth as high as possible is also helpful in conditions like a raised garden bed because they usually require less space, directly resulting in little gaps between the growth of any two plants.

Therefore, to keep the plants for interrupting in each other’s way, it is important to pave the way for the growth of their individual root system development.

Also Read: Why My Tomato Branches Curling Down?

Additional Tips

One of most prominent reasons for why so many people are shifting to the adoption of methods like raised beds for growing their vegetables is that it accumulates so less space and allows for the timely and proper growth of your tomato plants without compromising on the quality.

While this is true for all the raised garden beds, you never would want to miss on certain additional tips to make it a sustainable and more effective gardening method:

Do not keep your soil away from the raised garden bed. Soil is one of the most underrated ingredients when it comes to creating a perfect environment for your garden bed. With this, it is important that you invest yourself in the right kind of soil.

Always choose something that gives out the properties of being well-drained and water absorbent. If you cannot find a soil type with these properties, try adding some mulch or organic materials and you will see the difference in the shortest amount of time.

For growing plants like tomatoes, that need the support of something durable when they are growing, make sure to make provisions for materials like stakes or wires or cages.

The installation of such elements in your raised garden bed will provide ample support to your tomato plants and will support their growth throughout, without you having to check on the drooping plants time and again.

Check this article: Why Are My Tomato Flowers Falling Off?

Importance of the depth of your raised bed

Although we have covered most of the part concerning the importance of the matter of depth in your raised garden bed, here is a more elaborate view that will convince you to pay attention to this aspect the next time you decide to adopt to this method:

In the modern day and age, we do not have the time to manually pick and clear out debris and other hard material from the soil that we are exposing our plants to.

While there are readymade soil sachets available, many people find it to be too expensive and prefer opting for the naturally present soil. Now, if you plant your tomatoes in such harsh soil conditions, you cannot expect them to show complete growth.

However, making enough allowance for the depth of your root growth will lay down a safe environment and certain parameters that will give your plants a comparatively nourishing environment to grow.

Benefits of growing tomato plants in raised beds

Some people might ask, why grow tomatoes in raised garden beds at all? What is the problem with the traditional gardening scheme and what can we actually gain from changing our gardening methods?

Well, if you aren’t already convinced, here are some points that will give you a very definite idea of why you should consider the method of raised garden beds for your tomato plants:

  • One, having a higher raised garden bed saves you from the double of bending or kneeling down to provide your plant all the necessary resources. So, it is a win-win situation for both you and your plants.
  • The depth provided by raised garden beds exceeds all other possibilities of providing the plant roots with enough space to grow.
  • If you are clever in selecting the right kind of raised garden beds for your tomato plants, you can also enhance the scenic beauty in your garden, while employing minimal resources and accounting for less space than the traditional practice of gardening in open ground.

Conclusion

As mentioned earlier, tomatoes are a rewarding set of plants and demand little care. However, they are very precise about the amount of nourishment that is provided and that is where the question of knowing everything about tomatoes comes into picture.

Next time you think of growing tomatoes in a raised bed, do not forget to refer to the tips that we have mentioned above, along with some of the care measures that should be necessitated in the growing environment of the tomato.

To get solutions for more such queries, read through more of our articles and apply them to your regular house gardening practices. Happy Gardening!