9 Best Black Succulents those are Incredibly Beautiful

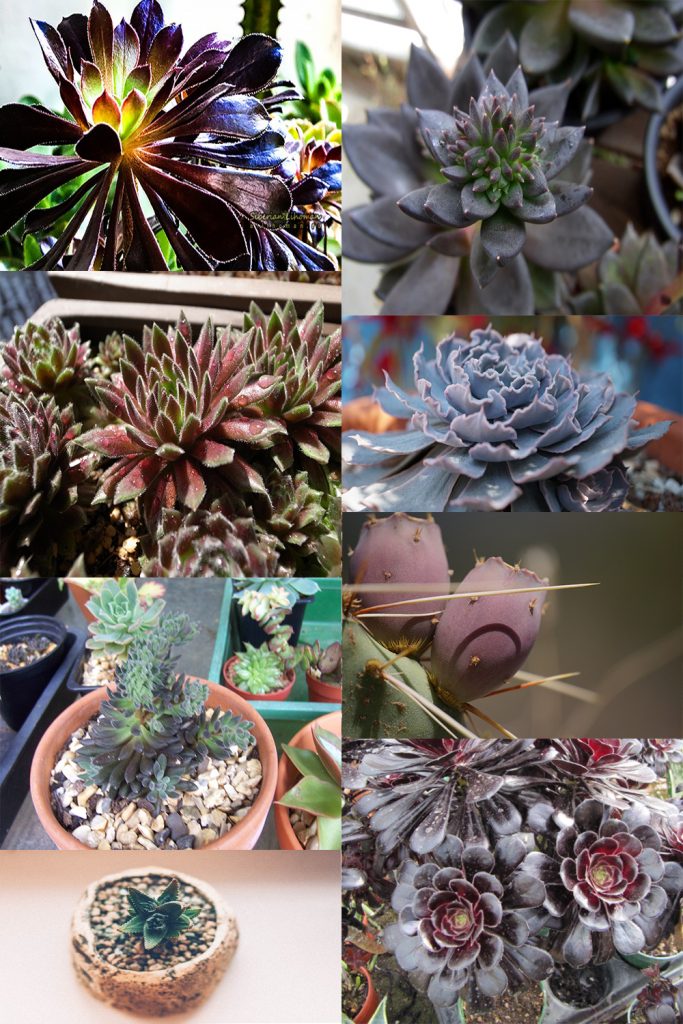
Green has an ownership over the plant world that we hardly see black in nature. That’s the reason the dark succulent are convinced to catch attention. Although you are decorating for Halloween or joining style to your garden, you will love this succulent.

The light or unusual colour of succulents is usually a sign of stress caused by exposure to the sun. So, more you stimulate the plant to glow, the darker the colour will be. If your basic needs are met, that’s okay.

To truly make your dark succulents stand out, use them to create evaluation in most of the white areas. You can also combine them with cute containers like zebra flower pots. 9 vibrant succulents cast a dramatic shadow on the boring room!

9 Best Black Succulents are
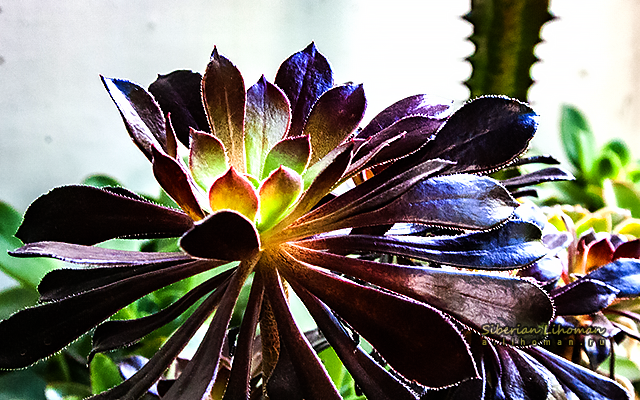
1. Black Rose

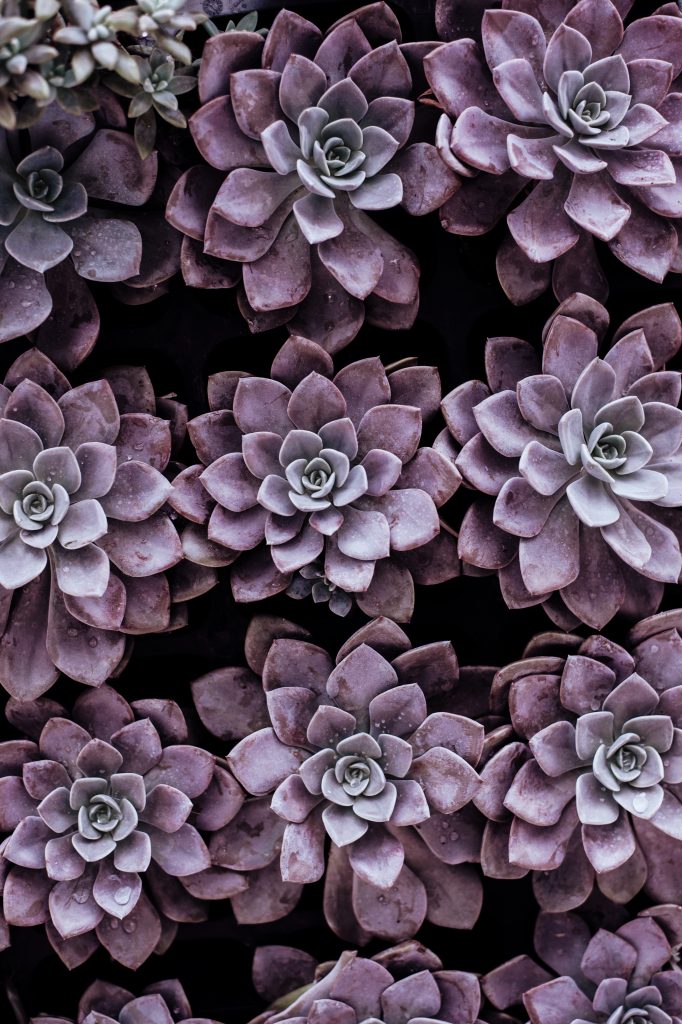
The black rose has a deep purple colour and smooth texture, giving it a shiny black presence and making it one of the best black luscious around. When plants are exposed to direct sunlight, their leaves will darken. Its leaves turn dark black and grow in full sunlight.

In the spring, use liquid fertilizer to fertilize the plants. Water once a week in summer and reduce the amount of water in winter.

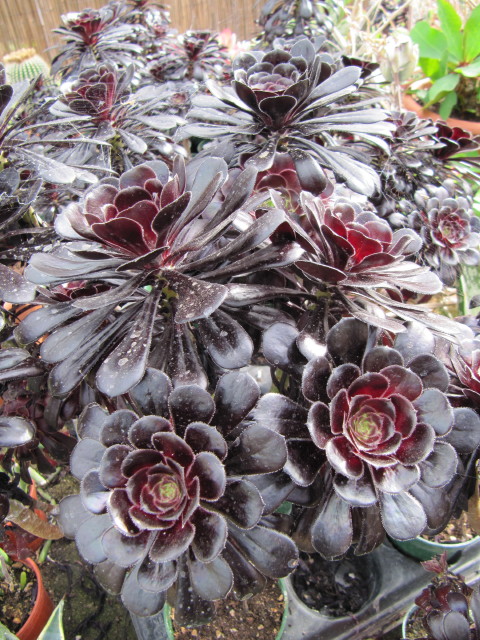
Its large rosettes are more reminiscent of flowers than succulents. The dark leaves are deep red and complement the yellow flowers at the end of winter.

 Give your juicy black roses well-drained soil so that the roots will not stick to the water. If the colour is darker, please place it in direct sunlight. If you live in the 911 area, your Aeonium will thrive outdoors all year round.

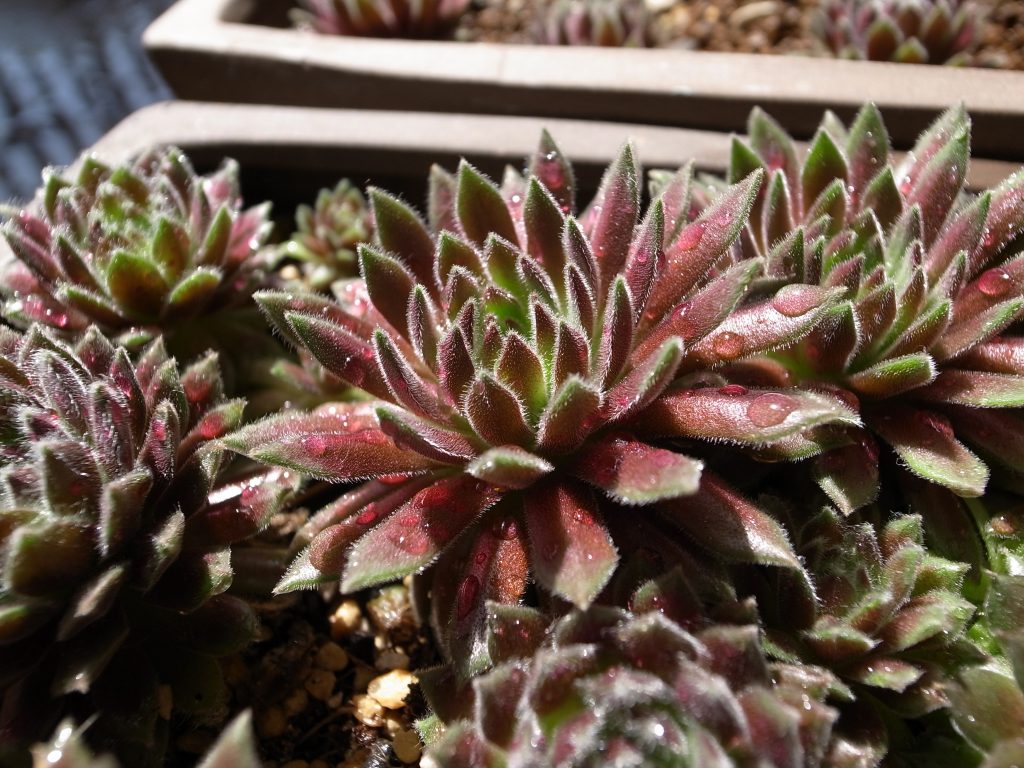
2. Black Hens and Chicks

Very suitable for poor soils, black hens and chicks require little maintenance. They produce clusters of tiny green rosettes with burgundy tips. In cold weather, its green leaves are dark purple and brown, and black from a distance.

Remove dead and rotting leaves from time to time. Waterlogging can cause root rot, so water only when the topsoil is dry.

Also Read: 15 Healing Houseplants That Can Improve Your Health
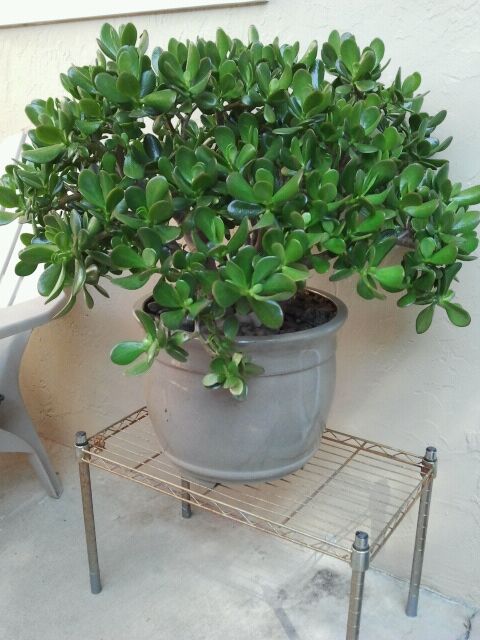
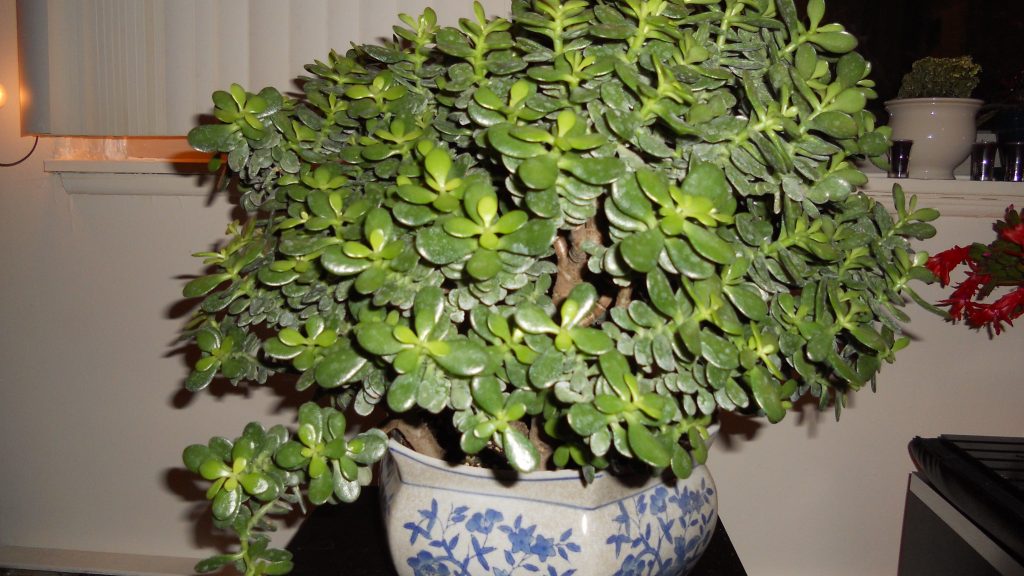
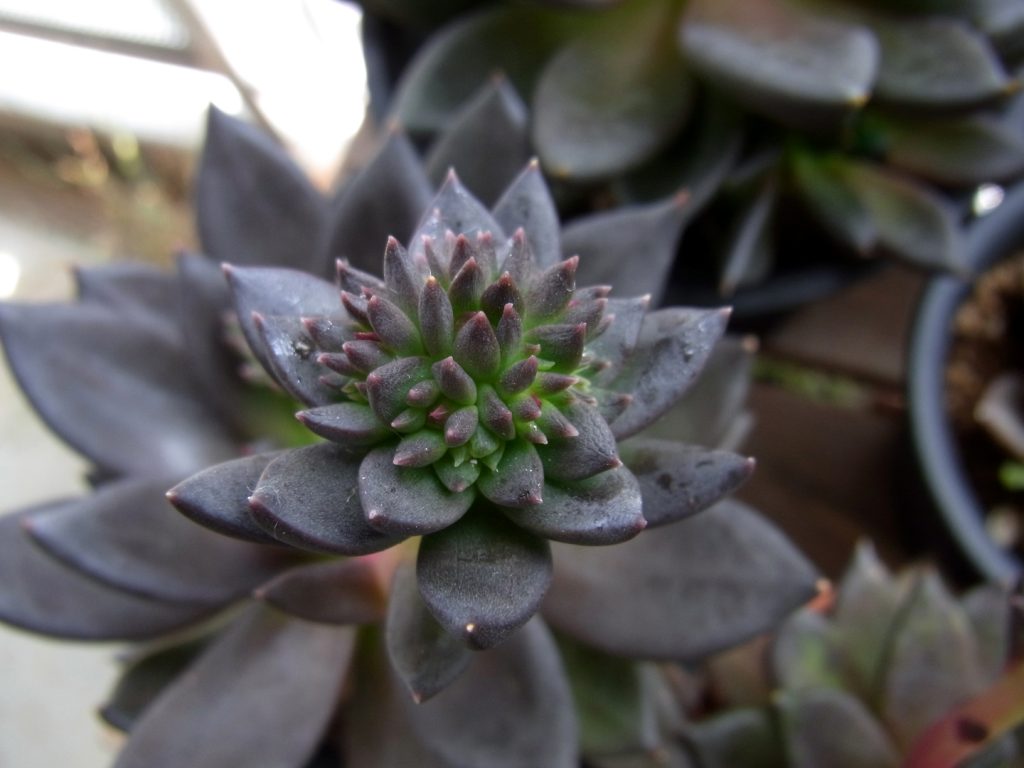
3. Chinese Jade

The pink pattern on this plant has dark purple or dark green fleshy leaves that look almost black. It spreads quickly and forms clusters of small stems and leaves. You can also spread it from the leaves in the container.

 You can grow it alone or mix it with other succulents in the same pot. Too much water will kill this succulent, so only water it when the soil is dry.

4. Haworthia Marxii

This slow-growing succulent plant has deep purple-green leaves that make it look a bit black. This rare and expensive plant can be propagated through offsets, seeds or cuttings.

 Use cactus mixture or well-drained soil to grow these twelve rolls. Reduce watering in winter.

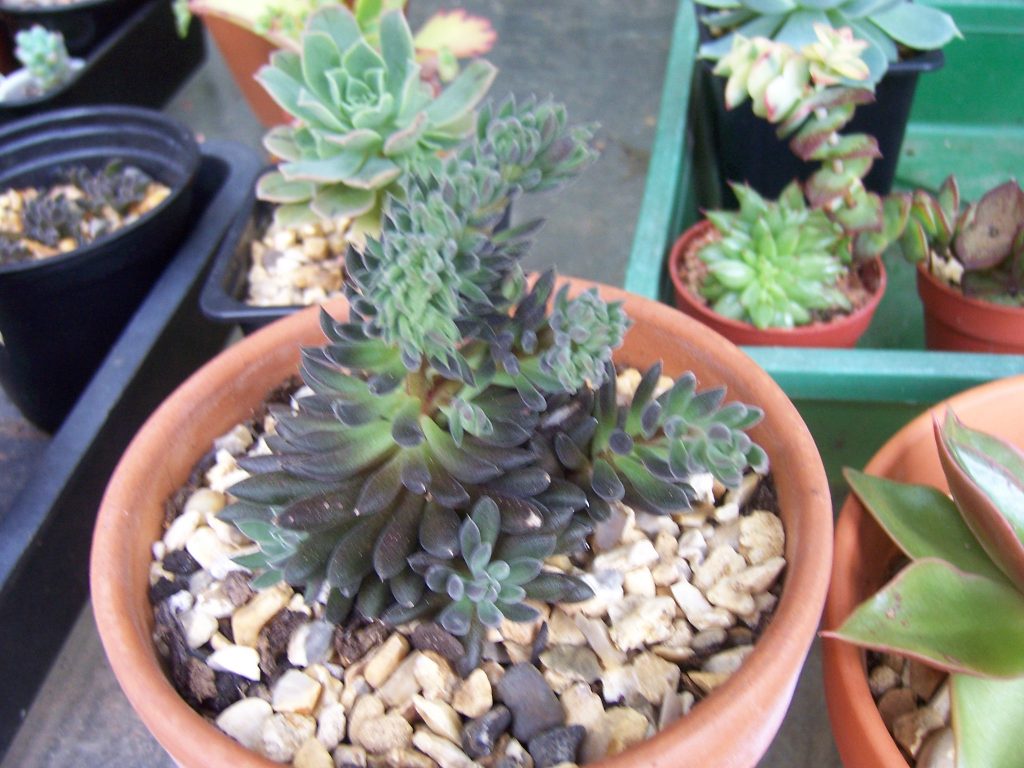
5. Anacampsros Purple Gian

This drought progressive perennial fleshy make beautiful dark purple green leaves and rosettes with white to normal purple flowers. In winter, it rests in cold climates and does not need to be watered until the soil is completely dry. If you have been in direct sunlight for several hours.

6. Black-Spined Pricklypear

This dense succulent plant is composed of charming multi-colored meat pads. It has purple spines, which turn dark purple when under pressure, and is black from a distance. This hardy succulent plant can grow up to 2-4 feet tall.

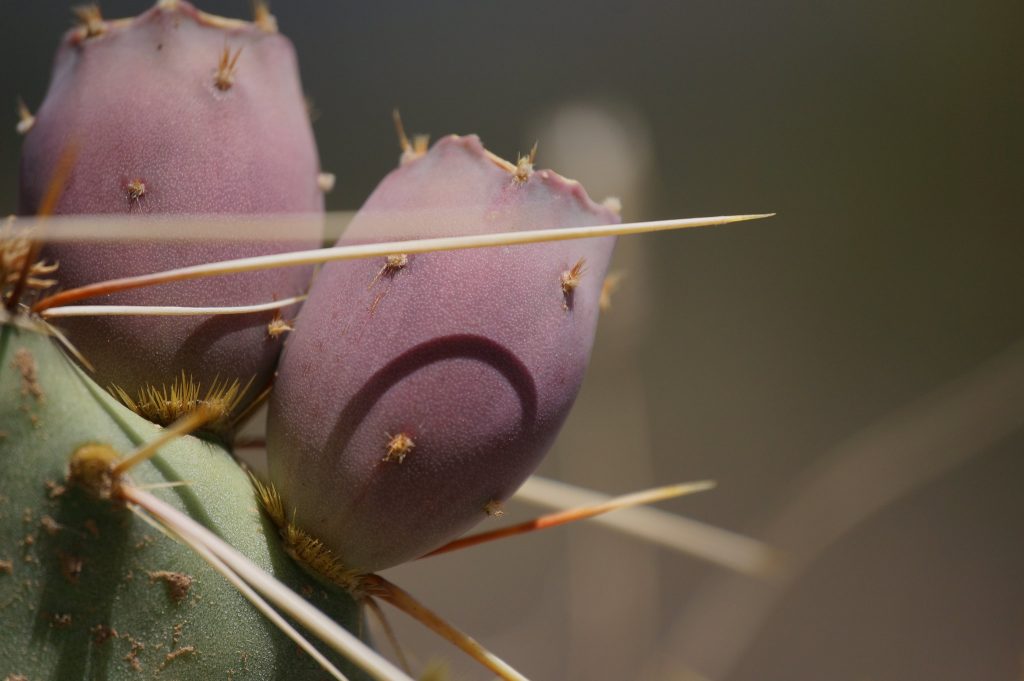
It performs well in full and moderate sunlight. Sharp thorns can be dangerous to pets and children.

Also Read: How to Grow Pumpkins in Pots | Growing Pumpkins in Containers

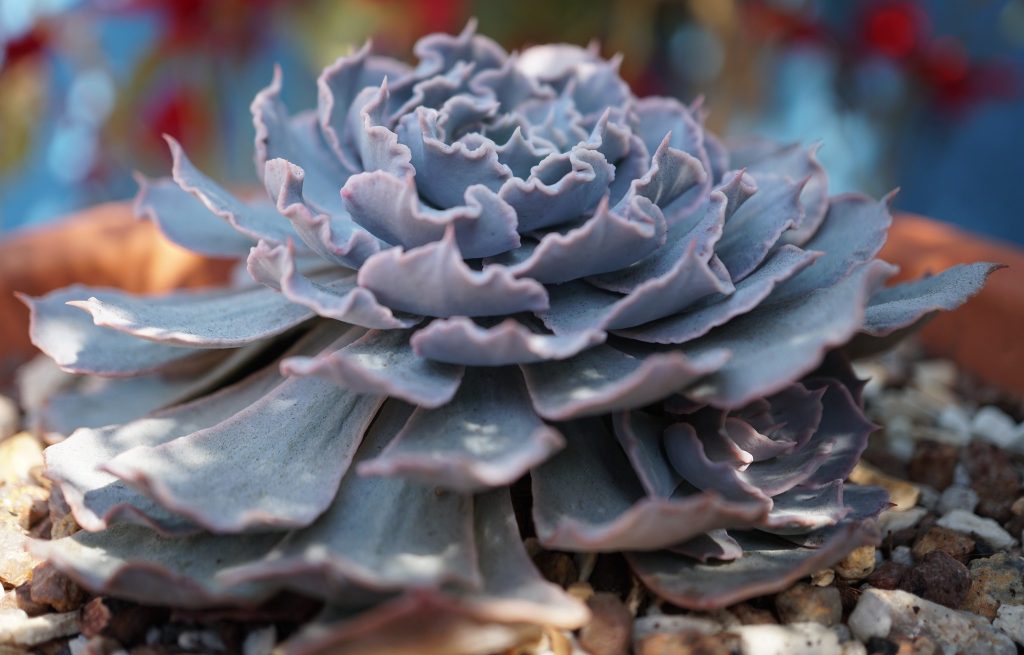
7. Echeveria Black Knight

Its thick dark purple leaves make the black look lush.This plant also produces coral flowers when grown in bright sunlight. Keep plants away from the sun in the afternoon, especially in summer. Keep it in a warm place.

Interesting: Is Sugar Water Good for House Plants?

8. Mexican Hens and Chicks

This type of Echeveria produces dark green rosettes that are 3 inches wide, but as they mature, they turn into a deep lavender brown and look black. Cannot tolerate the cold well, so put it indoors in winter. Echeveria can persist in leaves or cuttings to reproduce.

9. Haworthia Nigra

The other Haworthia has rough, dark green and gray leaves that look black. This upright succulent plant grows to 4 inches tall. This is one of the best indoor black succulents!

 Don’t let this succulent plant sink in flooded ground. Well adapted to partial sunlight.

Also Read: 10 Houseplants That Will Thrive in Your Kitchen

Tips for Black Succulent Stressing

If your specimens have not been exposed to full sunlight, start raising them in the spring to allow them enough time to adapt to the summer heat. On the hottest days, avoid direct sunlight at evening time because the leaves will burn. Before the start of the autumn vacation, we have enough time to make adjustments.

When growing colourful succulents, do not add too much water. Regular watering will help the succulent black varieties turn green again. Of course you will continue to water, especially if you grow succulents under high outdoor temperatures, please water as little as possible. When the temperature starts to drop, reduce watering.

12 Best Perennial Flowers for Your Garden

What does perennial mean?

In short, these are plants which blooms in spring and summer season but not in winter or autumn season. They bloom back on its own after winter season and can live two years or even longer.

The perennial flowers are of various colours and sizes. Short but beautiful in appearance. The name itself tells that through the years which means they bloom back every year; these plants are of low maintenance once they are planted. People who wish for long lasting beauties for their garden or back yard can choose this type of plants.

Perennial plants are of two different types. Where some of them are short lived that means they only bloom for few years before they die completely. While some of them only bloom for one day each year such as Daylily.

Perennial flowers come with different shapes and sizes also in different colours. The garden with perennial flowers is feast to eyes. Perennials maintain soil cover and have deeper root systems thus provides soil stability and soil health.This means that they can tap available nutrients, enhance biodiversity making more water available to plants. So, if you do not water them regularly also, they can grow well.

These plants are deep rooting and are habituated to slow growth that means they can survive with less fertilizers and less water. Growing perennial plants and maintaining them doesn’t require much efforts. As we know these can grow two years or even longer, so you don’t need to worry about planting or re-potting each time. They bloom back on their own with the propagation of soil when planted.

12 Best Perennial flowers that You Can Grow in your Garden

If well maintained, these flowering plants can be your best houseplants indoors.

#1 Hostas

These are low maintenance plants which bring tropical look to garden with variety of green shades containing white or purple flowers that blooms in summer or fall. The leaves of these plants are lighter so that it needs more sun to thrive and can live for years if maintained properly. Also, prefers partial shade.

#2 Shasta Daisy

These are short-lived plants and grows in clumps looks like chrysanthemum but are of smaller size. These are of white colour with yellow spots in middle. These flowers can also be used for flower vases to light up surroundings in living room. They will regrow within no time; prefers full sun and blooms from late spring to fall.

#3 False Indigo

They bloom after one year of planting flowers will pop-up. The flowers are in shades of blue, purple, and green. The best benefit with these plants is they are disease and pest free, meaning that nothing can stop them from growing. They can grow up to a person’s height and fills like shrub with over years. They prefer full sun and blooms late spring to early summer.

#4 Daylily

These are popular among all the perennial flowers that are known also called as perfect perennial. This daylily’s can survive through anything like fluctuating temperatures, irregular watering as such. They come in various colours and sizes; you can choose the best option that suit your surroundings. As we know they only bloom for one day. Prefers full sun and blooms in early summer.

#5 Phlox

They look pleasing in nature but are slow growing. In summer, tall phlox are visible anywhere from three to five feet height, they pop up creating a beautiful backdrop in your garden, no matter what height they are all of these are star shaped and emit strong fragrance. They prefer full sun but can tolerate shade and blooms spring to summer.

#6 Lupines

These are frequently spotted in wild these can be growing these flowers in your garden too. They grow up to five feet tall in entire lifetime with red in colour and comes in various colours like white, yellow, pink, and purple resembling pea flowers. They need partial or full sun and blooms from spring to summer.

#7 Summer lilacs

These are also known as butterfly bush as the name itself tells that they attract tons of butterflies throughout they bloom. Flowers often come in white and dark purple but lavender pink flowers are pleasing in nature. They require annual pruning; prefers full sun and blooms from summer to fall.

#8 Hydrangeas

 These are one of my favourites among all the perennial flowers that are available. The larger the life flowers heads bend emitting elegance and charm with the touches of pink, lavender, pink, and whites. To have a long-life plant them in spring after frost or in fall before the frost. They prefer partial sun and blooms from summer to fall.

#9 Sedum

These are also known as stonecrop with star shaped clustered flowers which attracts pollinators. These are of two types low growing sedum or upright sedum you can choose the best depending on your garden size. No matter what variety you choose they bloom same flowers with succulent leaves having coloured with pink, red, or yellow flowers. They prefer full sun and blooms from summer to fall.

#10 Asters

These are also known as Astereae with star shaped flowers which look like daisies, but these are entirely different type of perennial flowers. This plan can grow anywhere of height from eight inches to eight feet and blooms in late summer. They also attract bees and butterflies for late summer pollen supply. These plants prefer full sun and blooms from late summer to fall.

#11 Allium

These are purple pompom flowers are part of onion family; flowers looking like the shape of onion. Once they are planted should left untouched for years especially deer and pests to avoid them. They have skinny stems can rise to 30 inches height, makes them stand out against ground covers. They prefer full sun and blooms from fall to summer.

#12 Lavender

Bring the sights and smells of this plant from Mediterranean to your garden by growing these plants which has fantastic aroma. This plant requires extremely high temperatures and can grow well in such regions with little rain. They prefer full sun and bloom from late spring to early summer.

All the above given are some of the best perennial plants which can be perfectly grown in your very own garden. Not only this there are so many perennial flowers that can be grown. They add colour to your garden and smells divine.

There are so many perennial flowers that are available in nature. Choose the best plant among the wide range of varieties which you feel that suits best to your garden. Happy planting!

One Dragonfly Can Eat 100s of Mosquitoes a Day. Keep These Plants in Your Yard to Attract Dragonflies

Dragonflies are natural predators of mosquitoes, flies, and other insects. They are voracious hunters, capable of eating hundreds of mosquitoes in just one day. By attracting dragonflies to your yard, you can naturally control mosquito populations and create a peaceful, insect-free outdoor space.

Creating a Dragonfly-Friendly Garden

Creating a dragonfly-friendly garden is easy and can be done with just a few simple steps. Here are some tips to help you attract dragonflies to your yard –

  1. Provide Sunlight – Dragonflies require plenty of sunlight to hunt and breed, so make sure your garden receives at least six hours of direct sunlight per day.
  2. Add Water Features – Dragonflies lay their eggs in water, so adding a small pond, birdbath, or other water feature to your yard will make it more attractive to these insects.
  3. Plant Nectar Sources – Dragonflies feed on nectar from flowers, so plant a variety of blooming plants that will provide a constant food source throughout the growing season.
  4. Create Perching Areas – Dragonflies rest on leaves and branches, so consider adding shrubs or tall grasses to provide perching spots.
  5. Avoid Pesticides – Pesticides can harm dragonflies, so avoid using them in your garden. Instead, embrace natural pest control methods like companion planting and hand-picking.

Essential Plants for Dragonfly Habitats

Plants play a crucial role in attracting dragonflies to your yard. Here are some essential plants to include in your garden to create a dragonfly habitat –

1. Lilies

The large, brightly coloured blooms of lilies are a major attraction for dragonflies and other pollinators. Plant a variety of lilies, including daylilies, tiger lilies, and water lilies, to provide a diverse food source for the insects.

2. Wildflowers 

Wildflowers are a great choice for creating a dragonfly habitat, as they provide both nectar and shelter for insects. Plant a mixture of annual and perennial wildflowers, including black-eyed Susan, bee balm, and butterfly weed.

3. Sunflowers 

Sunflowers are a must-have in any dragonfly garden, as their large, yellow blooms are a major source of nectar for insects. Consider planting a variety of sunflower species, including giant sunflowers and Dwarf sunflowers.

4. Herbs

Many herbs, including basil, lavender, and mint, are attractive to dragonflies and other pollinators. Plant herbs near the water source in your yard to provide the insects with a close and convenient food source.

5. Ferns

Ferns can provide shade and shelter for dragonflies and also offer a habitat for the insects’ larvae. Incorporate ferns into your garden by planting species like the lady fern, sensitive fern, and ostrich fern.

6. Shrubs and Trees

Shrubs and trees can provide shade and shelter for dragonflies, as well as perching spots for the insects to rest. Good options include willows, dogwoods, and elderberries.

7. Water Horsetail

With both submerged and floating parts, water horsetail is a unique plant. To ensure successful growth, purchase nursery plants instead of seeds. Place the rhizomes two inches below the soil along the edge of your pond. Once established, the plant is able to withstand brief dry spells. This plant thrives in partial shade or full sun exposure.

8. Swamp milkweed (Asclepias incarnata)

Swamp milkweed is a type of milkweed plant that is native to North America. It is known for its showy, pink or white flowers that bloom in clusters and provide an important food source for monarch butterflies and other pollinators.

Dragonfly prey is attracted to this perennial plant, which thrives in moist and sunny locations.

By incorporating these additional plants into your garden, you can create a dragonfly habitat that is both beautiful and functional. With a diverse array of plants to choose from, you can attract dragonflies and other beneficial insects to your yard, providing a healthy and thriving ecosystem for all to enjoy.

The Benefits of Attracting Dragonflies to Your Yard

  • Mosquito Control: Dragonflies are voracious predators of mosquitoes, flies, and other pests, so having dragonflies in your yard can help keep these insects under control.
  • Pollination: Dragonflies are important pollinators and play a crucial role in the pollination of flowers, fruits, and vegetables.
  • Ecological Balance: Dragonflies are a key component of the ecosystem and play a role in maintaining the balance of the food chain by controlling insect populations.
  • Natural Beauty: With their iridescent wings and graceful flight, dragonflies can add a touch of natural beauty to your yard. By attracting dragonflies to your garden, you can enjoy watching these stunning insects as they hunt, feed, and breed.

Dragonflies and mosquito control

Dragonflies are important natural predators in the ecosystem, playing a crucial role in controlling the population of mosquitoes and other pests. Here are some key points to understand about dragonflies and their impact on mosquito control –

1. Efficient Hunters – Dragonflies are fast and agile hunters, capable of capturing mosquitoes and other insects in mid-air. They are also known for their voracious appetite, feeding on large numbers of insects in a single day.

2. Life Cycle – Dragonflies undergo a complete metamorphosis, starting as aquatic larvae and eventually emerging as adult insects. During the larvae stage, they feed on small aquatic insects, including mosquito larvae.

3. Importance in the Ecosystem – Dragonflies play an important role in maintaining the balance of the ecosystem by controlling populations of insects that can spread diseases, and affect human health.

4. Natural Pest Control – By attracting dragonflies to your yard, you can help reduce the population of mosquitoes and other pests, making your outdoor spaces more enjoyable.

Conclusion

Dragonflies play a crucial role in controlling mosquito populations in your yard. By planting certain species of plants that attract dragonflies, you can help increase their presence and ultimately reduce the number of mosquitoes. With just one dragonfly capable of consuming hundreds of mosquitoes in a day, incorporating these plants into your yard is a simple and effective way to create a mosquito-free outdoor space.

Dragonflies also bring aesthetic value to your garden with their vibrant colors and graceful flight patterns. By promoting a habitat for these beneficial insects, you are not only helping to control mosquito populations, but also supporting biodiversity and enhancing the overall health of your ecosystem

12 Reasons Everyone Should Start Growing Lemon Balm

Lemon Balm, also known as Melissa officinalis, is a versatile herb that has been used for centuries for its numerous health, beauty, and culinary benefits. This herb is easy to grow and can be grown indoors or outdoors, making it a great addition to any garden or home. 

From its anti-anxiety properties to its versatility in the kitchen, Lemon Balm is a must-have herb that is not only beneficial but also affordable and easy to grow.

lemon balm benefits

1. Health Benefits

Lemon Balm is known for its numerous health benefits, including digestive benefits and can help with nausea, bloating, and indigestion. In addition, it supports the immune system and has antiviral properties, making it a great herb to have during cold and flu season.

Lemon Balm contains rosmarinic acid, a natural anti-inflammatory that has been shown to reduce swelling and redness, making it great for those with skin irritations.

2. Beauty and Skincare Benefits

The herb’s anti-inflammatory and antioxidant properties make it great for reducing redness, and swelling, and helping to protect the skin from damage caused by free radicals. This makes it a great natural remedy for those with skin irritations or conditions such as eczema, psoriasis, or acne.

Lemon Balm has moisturizing properties, making it great for those with dry or sensitive skin. It can help to soothe and hydrate the skin, leaving it looking and feeling smooth and refreshed.

Read this: 10 Best Air-Purifying Plants For Better Sleep

3. Helps bees

One of the ways Lemon Balm helps the environment is by providing food for bees. The herb is a popular food source for bees, especially honeybees, and provides them with a rich source of nectar and pollen.

Bees are vital pollinators, responsible for 80% of plant pollination on Earth. This results in 1 in 4 of our food bites being from their efforts. If they were to disappear, our food supply would greatly decrease and drastically change our lives.

4. Medicinal Properties

Lemon Balm is a highly valued herb for its medicinal properties and has been used for centuries for its healing benefits. The herb contains compounds such as rosmarinic acid, eucalyptol, and citronellal, which give it its unique medicinal properties.

Lemon Balm has a calming effect on the mind and body, making it a great natural remedy for those who suffer from anxiety, stress, or insomnia. The herb has a relaxing effect on the nervous system and has been shown to reduce symptoms of anxiety, depression, and insomnia.

5. Repel Mosquitoes

Lemon Balm is not only beneficial for your health, but it can also help to keep annoying pests like mosquitoes at bay. The strong citrus scent of Lemon Balm is known to be a natural mosquito repellent, making it a great herb to grow in your garden or have in your home.

Crush fresh leaves and apply them directly to your skin, focusing on exposed areas like ankles and arms that are most susceptible to mosquito bites. Whether you are looking for a natural alternative to chemical-based mosquito repellents or simply want to enjoy the benefits of this versatile herb, Lemon Balm is a must-have for your home and garden.

Check this out: 8 Reasons Why You Should Use Vinegar for Your Houseplants

6. Culinary Benefits

Lemon Balm is not only valued for its numerous health and beauty benefits, but also for its culinary uses. This herb has a fresh, lemon-like flavour that can add a bright, citrusy note to a variety of dishes, from salads and sauces to baked goods and beverages.

Lemon Balm is a versatile herb that can be used fresh or dried, making it a great addition to any kitchen. The leaves of Lemon Balm can be chopped and added to salads, sauces, and marinades for a burst of flavour. The herb can also be used to make a flavorful tea, which can be enjoyed hot or iced, or added to lemonade or other beverages.

7. Control blood sugar levels

Lemon Balm has been shown to have an insulin-like effect, helping to regulate blood sugar levels by increasing insulin sensitivity and reducing glucose production by the liver. In addition, Lemon Balm has been shown to have a positive effect on blood lipid levels, helping to lower cholesterol levels and reduce the risk of heart disease.

8. Ease muscle soreness

Lemon Balm contains compounds that have a soothing and anti-inflammatory effect on the body, making it a useful herb for reducing muscle soreness and discomfort. When applied topically or consumed, Lemon Balm can help to reduce inflammation, ease muscle pain and discomfort, and promote faster recovery from exercise or physical activity.

9. Enhance Liver Health

Lemon Balm has been shown to have a positive effect on liver health, making it a valuable herb for those looking to maintain optimal liver function. The liver is a vital organ that plays a crucial role in filtering toxins from the body, producing bile, and regulating metabolic processes. Maintaining healthy liver function is essential for overall health and well-being. 

10. Improving memory 

People who consumed lemon balm have improved memory in comparison to others. Lemon balm had a favourable effect on fragments of brain tissue and chemical receptors in Alzheimer’s patient’s brains, according to the study. 

Lemon balm is easy to grow and can be found at most nurseries or online. Start growing lemon balm today and see how it can help improve your memory!

Also Read: 6 Amazing Composting Ways Everyone Should Try, No Matter Where You Live

11. Aid cold sores

Lemon balm has antiviral properties that have been found to be effective in reducing the severity and duration of cold sores. The herb’s active compounds, such as rosmarinic acid, can inhibit the replication of the herpes simplex virus (HSV) that causes cold sores. 

In addition, the anti-inflammatory and soothing properties of lemon balm can help reduce pain and promote healing. By applying lemon balm topically or consuming it in tea or supplement form, individuals can potentially reduce the frequency and severity of outbreaks.

12. Sleep better

Lemon balm has been found to have a calming effect on the body and mind, making it a useful herb for improving sleep quality. The herb’s active compounds, such as rosmarinic acid, have a sedative effect on the central nervous system, promoting relaxation and reducing stress and anxiety. 

Additionally, the herb’s ability to soothe the digestive system can also contribute to improved sleep by reducing discomfort or restlessness during the night.

Conclusion

Lemon balm is a versatile and beneficial herb that offers numerous health and wellness advantages. From its anti-inflammatory and antiviral properties to its ability to promote better sleep and soothe digestive discomfort, lemon balm is a natural solution for many common health concerns. Its ease of growth, attractive appearance, and fragrant aroma make it a great addition to any garden or balcony. Whether using it for cooking, tea, or skincare, the potential benefits of incorporating lemon balm into one’s life are numerous and appealing.

10 Best Air-Purifying Plants For Better Sleep

Good quality air is crucial for sound and restful sleep. That is where air-purifying plants come into play. These plants not only add aesthetic appeal to a space but also help to remove harmful pollutants and improve indoor air quality.

From snake plants to English ivy plants, peace lilies to rubber trees, there are many options to choose from.

air purifying houseplants

1. Snake Plant (Sansevieria)

When it comes to air purification, snake plants are truly top-notch. They are known to remove harmful pollutants such as formaldehyde, xylene, and toluene from the air. This makes them a great choice for bedrooms and other spaces where you want to improve air quality for better sleep.

They are also known to be easy to care for, as they can withstand a range of conditions and are happy in low light levels. 

2. Peace Lily

Peace Lily is a popular air-purifying plant known for its beautiful white flowers and lush, green foliage. Not only does it add visual appeal to a space, but it also helps to remove harmful pollutants from the air.

One of the standout benefits of peace lilies is their ease of care. They thrive in low to medium light and prefer consistently moist soil. They also require relatively low maintenance, making them a great choice for those who want to improve air quality without having to put in too much effort.

Also Read: 10 Houseplants That Will Thrive in Your Kitchen

3. English Ivy

English Ivy is a popular air-purifying plant known for its fast-growing, lush green leaves. It’s a great option for those looking to add some greenery to their space while also improving air quality.

English Ivy is known to be an effective air purifier, removing harmful pollutants such as formaldehyde and ammonia from the air. 

English Ivy is easy to care for and can be grown in a variety of lighting conditions, making it a great choice for both experienced and novice gardeners.

4. Aloe Vera

Aloe Vera is a succulent plant that is widely known for its medicinal properties, but it is also a great air-purifying plant. Its fleshy leaves and rosette shape make it a stylish addition to any room, while its ability to remove harmful pollutants from the air makes it a practical choice for improving indoor air quality.

Aloe Vera is known to remove harmful pollutants such as benzene and formaldehyde from the air.

Aloe Vera is relatively low maintenance and can be grown in a range of lighting conditions, making it a great choice for both experienced and novice gardeners.

5. Pothos

Pothos, also known as Devil’s Ivy, is a popular air-purifying plant known for its fast-growing vines and heart-shaped leaves. It’s a great option for those looking to add some greenery to their space while also improving air quality.

Pothos is known to be an effective air purifier, removing harmful pollutants such as benzene, formaldehyde, and xylene from the air. It’s especially effective at removing mold spores and allergens, making it a great choice for those with allergies.

Pothos is easy to care for and can be grown in a variety of lighting conditions, making it a great choice for both experienced and novice gardeners. 

Check this out: 15 Healing Houseplants That Can Improve Your Health

6. Rubber Plant

The Rubber Plant is a popular air-purifying plant known for its large, shiny leaves and upright stature. It’s a great option for those looking to add some greenery to their space while also improving air quality.

Rubber Plants are known to be effective air purifiers, removing harmful pollutants such as formaldehyde, benzene, and trichloroethylene from the air.

Rubber Plants are relatively low maintenance and can be grown in a variety of lighting conditions, making them a great choice for both experienced and novice gardeners. They prefer well-drained soil and occasional watering. Water it when the soil is slightly dry.

7. Boston Fern

The Boston Fern is a popular air-purifying plant known for its lush, green fronds and ability to improve indoor air quality.

Boston Ferns are known to be effective air purifiers, removing harmful pollutants such as formaldehyde, xylene, and toluene from the air.

Boston Ferns are relatively low maintenance, but they do require consistent moisture and high humidity to thrive. They are best grown in well-drained soil and bright, indirect light.

8. Dracaena

Dracaena is a large group of air-purifying plants that includes species such as the Dragon Tree and Corn Plant. These plants are known for their distinctive foliage and ability to improve indoor air quality.

Dracaenas are known to be effective air purifiers, removing harmful pollutants such as benzene, formaldehyde, and trichloroethylene from the air.

Dracaenas are relatively low maintenance and can be grown in a variety of lighting conditions, and it’s an ideal choice for everyone. They are also low-maintenance, easy to care for, and only need to be watered infrequently.

9. Lavender

Lavender is a fragrant herb known for its purple blooms and air-purifying abilities.

Lavender is known to be an effective air purifier, removing harmful pollutants from the air.

Lavender is easy to grow and care for, and it thrives in sunny, well-drained locations. It’s a great choice for those who want to add a pop of colour to their space while also improving air quality. Whether you’re looking for a natural way to improve air quality for better sleep or just want to add some greenery to your space, lavender is a great choice.

10. Lady Palm

Lady Palm is a slow-growing air-purifying plant known for its large, fan-like leaves and ability to improve indoor air quality.

Lady Palms are known to be effective air purifiers, removing harmful pollutants from the air. They are also believed to have some health benefits, improving air quality by releasing oxygen and absorbing carbon dioxide, and potentially reducing stress and improving mood.

Lady Palms are relatively low maintenance and can be grown in a variety of lighting conditions, making them a great choice for both experienced and novice gardeners. They are also low-maintenance, easy to care for, and only need to be watered when the top layer of soil reaches dryness.

Conclusion

Air-purifying plants are an easy and effective way to improve indoor air quality and promote better sleep. From Snake Plants and Peace Lilies to English Ivy and Aloe Vera, there is a wide variety of plants to choose from, each with its own unique benefits and features.

Whether you’re looking for a natural way to improve air quality, reduce stress, or simply add some greenery to your space, air-purifying plants are a great option. Consider adding one or more of these plants to your home or office for improved air quality and better sleep.

8 Reasons Why You Should Use Vinegar for Your Houseplants

Vinegar can be used as a natural and cost-effective solution for houseplant care from balancing soil pH levels to killing harmful bacteria, controlling pests, promoting germination, stimulating growth, preventing mold and mildew, and increasing humidity.

Houseplants play a vital role in improving air quality and the overall aesthetic of our homes. To ensure their health and vitality, it is important to provide them with the right care and attention.

While there are many products available in the market to help keep your houseplants healthy, one unlikely but effective ingredient that you may already have in your kitchen is vinegar.

8 Reasons Why You Should Use Vinegar for Your Houseplants

vinegar for houseplants

1. Promotes germination

The use of vinegar can promote germination in seeds by breaking down any natural inhibitors on the seed coat that may prevent germination. This happens because vinegar is acidic and can dissolve these inhibitors, making it easier for the seed to sprout.

To use vinegar for seed germination, simply soak the seeds in a solution of 6-8 drops of white vinegar and water overnight. That will help to improve the chances of successful germination, resulting in stronger, healthier plants.

It’s vital to note that not all seeds respond well to vinegar, so it’s a good idea to research the specific needs of the seeds you plan to plant before using vinegar. Additionally, some seeds may only require a brief soak, while others may need a longer soak for the best results.

2. Prevents mold

Mold and mildew can be a serious problem for houseplants, leading to poor health, discoloration and reduced growth. Luckily, vinegar can help to prevent the growth of these harmful fungi, making it a vital tool in houseplant care.

By using vinegar, you can create an inhospitable environment for mold and mildew, reducing the risk of these fungi developing and spreading.

Mix 2-3 tablespoons of vinegar in 1 gallon of water and spray on plants suffering from fungus. This will help to reduce the amount of moisture on the plant, making it harder for mold and mildew to take hold.

Also Read: How to Treat White Spots on Spinach?

3. Clean houseplant

Dust and debris on the leaves can block light and prevent the plant from photosynthesizing effectively, while pests and diseases can cause serious damage if left unchecked. Vinegar can be used to clean your houseplants and keep them healthy and vibrant.

Mix 1/2 cup white vinegar, 5-8 drops of dish soap, and 8-10 cups water in a big bowl. Fill the mixture into a spray bottle and apply it to the leaves of the plant, wiping off excess moisture for shine.

It’s important to note that some plants may be sensitive to vinegar’s acidic nature, so it’s a good idea to research the specific needs of your houseplants before using vinegar for cleaning.

4. Vinegar removes white lines from the vase(glass)

White lines that form on glass vases and containers can be unsightly and difficult to remove. However, vinegar can effectively remove these white lines, making your vases and containers look new.

To remove white lines from glass vases, simply fill the vase with a mixture of water and white vinegar and let it soak for several hours.

After soaking, use a scrub brush to scrub away the mineral deposits and rinse the vase thoroughly with water. Repeat this process if necessary, until the white lines have been completely removed.

5. Balances pH levels

The pH level of soil determines the availability of essential nutrients that plants need to grow. When the soil pH is too high or too low, it can limit the plant’s ability to absorb nutrients, leading to stunted growth and other problems.

Vinegar is acidic and can be used to lower the pH level of the soil. Mix 1 tbsp white vinegar with 1-litre water and pour over plants for an acid boost, ideal for plants like ferns or African violets. 

Furthermore, vinegar should be used with caution, as over-applying can be harmful to plants. It’s vital to examine the specific necessities of your plants.

6. Clay Pot Cleaning

Clay pots are a popular choice for growing houseplants, but over time they can become dirty and discolored, affecting the appearance of your plants and containers. To clean clay pots, you can use a simple and effective solution of white vinegar and water.

To clean clay pots, fill a bowl with 4 cups of water and 1 cup of white vinegar. Submerge the pots in the solution for several hours, or overnight if necessary. After soaking, use a scrub brush to remove any dirt, mineral buildup, or other residues from the surface of the pots.

Vinegar is a natural cleaning agent that is effective for removing dirt and discoloration from clay pots without harming the surface. Additionally, vinegar is safe for plants and the environment, making it an ideal choice for cleaning your clay pots.

7. Pet Repellent

Pets can be a big problem for gardeners, causing damage to plants, soil, and containers. White vinegar can be used as a natural and effective pet repellent to keep pets away from plants, gardens, and other areas where you don’t want them to go.

To use vinegar as a pet repellent, mix water and white vinegar in a spray bottle.

Spray the solution on plants, soil, containers, and other areas where you don’t want pets to go. The strong odour of vinegar will deter pets from coming into contact with the sprayed areas.

Vinegar is a safe and natural alternative to chemical pests and pet repellents, and it is safe for both pets and plants.

Additionally, vinegar will not harm the soil or the environment, making it an ideal choice for pet owners who are looking for an eco-friendly way to keep pets away from their plants.

8. Extends Indoor Flower Life

Indoor flowers bring a touch of nature into your home, and they can help to brighten up any room.

However, keeping flowers fresh and vibrant for an extended period of time can be a challenge. Fortunately, white vinegar can help you keep your indoor flowers looking fresh for longer.

To help extend the life of your indoor flowers, add 2 tablespoons of white vinegar and 1 teaspoon of sugar to the water. Mix it, and you are ready to use it. 

Additionally, vinegar can help to prevent the growth of bacteria, which can cause the water in the vase to become murky and the flowers to wilt more quickly.

Conclusion

Vinegar has multiple uses in caring for houseplants and improving the overall health of your houseplants. It can act as a soil amendment, promoting healthy plant growth by balancing pH levels.

It is also a natural pet repellent and can help keep pests away from your houseplants. Furthermore, adding vinegar to the water in vases can help extend the life of your indoor flowers.

Its multiple uses and benefits make it a must-have item in any indoor gardener’s toolkit.

By incorporating vinegar into your plant care routine, you can improve the health and longevity of your houseplants, while also enjoying its beauty and benefits.

How to Make Money Growing Microgreens?

Growing microgreens as a business is a great way to make money. The market for these nutritious sprouts is booming and they are in high demand.

There are several different methods you can use to start your own microgreen business, depending on the size of your operation.

If you have limited space, growing microgreens indoors is a great option. Indoor growing requires much less space and setup than an outdoor garden, so it’s perfect for those with limited resources.

You must consider expenses like seeds, potting soil, packing, shipping and electricity to grow microgreens for profit.

In this article I’ll discuss about complete process of making money by growing microgreens.

What are Microgreens?

Microgreens are tiny, edible leaves and stems of plants that are harvested when they are just a few weeks old.

These tender greens have been popular among chefs for years and now they’re becoming increasingly popular with consumers due to their concentrated flavor, vivid colors and nutritional value. You can find microgreens in many supermarkets and specialty stores, but they can also be grown in your own backyard.

Is It Profitable to Sell Microgreens?

Yes, it is possible to make money growing and selling microgreens. Microgreens have become a popular health food in recent years and they offer the home grower several advantages.

They have a high return on investment, require minimal space and time to cultivate, are easy to harvest and transport, and can be sold for high profits.

Growing Microgreens for Profit

Starting a microgreen business requires some preparation and research.

You must determine what types of microgreens you will grow, as well as which varieties have the best potential for success. It’s important to choose varieties that are high in quality, have a long shelf life and are easy to grow.

You’ll also need to purchase the necessary supplies for your business, such as seed trays, potting soil, fertilizer, and other growing materials.

Setting up a good irrigation system is essential for successful microgreen production.

You should also create a marketing plan and find out how you will package and ship your product so it arrives fresh to customers.

Once everything is in place, you can begin planting your seeds according to the instructions given on the packet.

After about two weeks, your microgreens will be ready for harvest.

Make sure that you give each plant enough time to reach its full potential before harvesting them.

After harvesting the microgreens, it’s important to properly clean and package them. This will help ensure that they remain fresh and attractive when they reach customers.

You should also invest in proper labeling so that your customers know exactly what they are buying.

By following the steps outlined above, you can start making a profit from growing microgreens in no time.

With the right planning and dedication, you can create a successful business that offers delicious, nutritious microgreens for years to come.

Also Read: How to Grow Basil Microgreens?

How to Market Microgreens Business to Make Money?

Once you’ve grown and packaged your microgreens, it’s time to market them. You can start by creating a website and social media accounts to reach potential customers.

Make sure that you include information about the health benefits of microgreens on your site.

You should also look into selling at farmers markets and local stores. These are great places to reach customers that are looking for fresh, locally grown produce.

You can also consider selling your microgreens online through marketplaces like Amazon or Etsy. This will allow you to reach a much wider audience.

Finally, you should consider creating partnerships with restaurants and catering companies. Many chefs are now using microgreens to enhance their dishes, so these could be great potential customers for you.

How to pack microgreens?

When it comes to packing your microgreens for sale, there are a few things to keep in mind.

It’s important that you package them in an airtight container so that they remain fresh and attractive when they reach customers.

You should also include information about the health benefits of your microgreens on the packaging.

You should also take steps to ensure that your microgreens arrive in good condition. When shipping your product, make sure to use materials that are designed to protect the delicate leaves.

You can also consider offering expedited shipping options for customers who need their microgreens quickly.

Check this out: How to Grow Lettuce Microgreens?

List Benefits of Microgreen Business

There are many benefits to starting a microgreen business. Some of these include:

• High return on investment: With minimal space and time required to cultivate, you can make a high profit from your microgreens.

• Easy to harvest and transport: Microgreens are easy to harvest, requiring little effort when compared with other types of vegetables. They’re also light and easily transported.

• Nutritious and delicious: Microgreens offer numerous health benefits, including providing vitamins and minerals that regular greens don’t have. Their flavor is also much more intense than traditional greens.

• Flexible selling options: You have the option of selling your microgreens through farmers markets, local stores, online marketplaces, and even partnership with restaurants.

Ultimately, starting a microgreen business is a great way to make some extra income while providing delicious and nutritious produce to customers.

Also Read: How to Grow Spinach Microgreens?

Conclusion

Starting a microgreen business is a great way to make some extra income while providing customers with delicious and nutritious produce.

With the right planning, you can create a successful business that offers fresh, locally grown microgreens for years to come.

Make sure that you take steps to ensure your product is properly labeled and packaged for maximum freshness and safety.

With the right marketing strategy, you can reach potential customers and make a profit from growing microgreens.

How to Grow Lettuce Microgreens?

Microgreens are gaining popularity due to their unique flavor in dishes and the benefit it gives to your gut health.

These are nothing but germinating seedlings of vegetables that can be harvested in less than 14 days.

In this write-up, you’ll learn how to grow lettuce microgreens at home.

What are microgreens?

Microgreens are tiny, edible plants that are harvested at an early stage of their growth, usually when the first true leaves appear.

You can grow microgreens from a variety of vegetables, herbs, and grains.

Growing Lettuce Microgreens at Home

Lettuce microgreens are easy to grow and can be harvested just a few weeks after sowing. They require minimal care, making them ideal for beginner and experienced gardeners alike.

What do you need before growing microgreens?

Before getting started in the wonderful world of microgreens, there are a few key items you’ll need:

  • Growing container – A shallow tray, such as a shallow plastic or wooden box, is ideal for growing lettuce microgreens. If possible, choose a container with drainage holes to prevent waterlogging.
  • Potting mix – A quality potting mix will provide your microgreens with the nutrients they need to thrive. You can either purchase a potting mix specifically designed for microgreens, or make your own by mixing equal parts perlite, vermiculite, and compost.
  • Water – Microgreens need to be kept moist at all times, so make sure to have fresh water on hand. If using tap water, let it sit for 24 hours before watering your plants to allow the chlorine to evaporate.
  • Seeds – You can grow microgreens from a variety of lettuce seeds, but make sure to choose a type that is suitable for eating raw.
  • Lighting – While microgreens don’t require full sun to grow, they do need bright light to prevent them from becoming leggy and weak. If growing indoors, place your container near a sunny window or under grow lights.

Also Read: How to Grow Spinach Microgreens?

Step-by-step Guide to Grow Lettuce Microgreens

It’s important to choose the right type of lettuce seed.

There are several varieties of lettuce, including butterhead, romaine, and iceberg. Generally speaking, any type of lettuce can be used for growing microgreens.

  1. Once you’ve chosen your seeds, the next step is to prepare your growing medium.
  2. You can use a mix of soil and compost or a soilless mix such as vermiculite or coco coir.
  3. If using soil-based mediums, make sure it is sterile and does not contain any pathogens that could contaminate your microgreens.
  4. To sow the seeds, sprinkle them evenly over the surface of the growing medium and lightly press them down so they make contact with the soil.
  5. Then water them gently but thoroughly until the top layer is damp.
  6. Cover the tray with a lid or damp newspaper to keep it moist and place it in a warm, well-lit spot.

Lettuce microgreens will be ready to harvest in about 7 to 10 days.

When they’re ready, simply snip them off at soil level using scissors or kitchen shears.

Enjoy your freshly harvested lettuce microgreens as part of salads or sandwiches, or add them as a garnish on top of soups and stews.

Growing lettuce microgreens is an easy way to get fresh greens into your diet year-round – no matter what season!

With minimal effort and provided you have the right conditions, you can enjoy homegrown lettuce microgreens in just under two weeks.

Lettuce Microgreens Growing Tips

Growing lettuce microgreens successfully requires a few key elements. Here are some tips to get you started:

  • Use quality potting mix – Make sure to use a soil-free potting mix that contains no pathogens or weeds. You can purchase a mix specifically designed for microgreens, or make your own using equal parts perlite, vermiculite, and compost.
  • Keep the soil moist – For best results, keep the surface of the soil damp at all times. If needed, mist it with water to ensure it stays damp but not soggy.
  • Provide adequate light – Microgreens need plenty of light to thrive. Place your container near a sunny window or under grow lights for best results.
  • Harvest early – Lettuce microgreens are ready to harvest when the leaves reach 2-3 inches in height.

At this stage, they will be tender and full of flavor! With these simple tips, you’ll be well on your way to growing a delicious crop of lettuce microgreens that you can enjoy all year round.

Conclusion

Growing lettuce microgreens is a rewarding and delicious way to get more greens into your diet any time of year.

With the right potting mix, water, light, and harvest timing, you can enjoy homegrown lettuce microgreens in as little as two weeks!

Give it a try today and see what amazing flavors you can discover in your own kitchen.

How Often to Water Jade Plants?

The Jade plant is commonly known as Crassula ovata. Lucky plants, money trees, and money plants are succulent plants with small white or pink flowers. It is native to the province of South Africa and commonly as a houseplant worldwide. The jade plant needs little water and can survive in indoor climatic conditions.

This jade plant has sturdy branches, smooth, shiny evergreen trees, which can grow in pairs along the branches. The leaves are dark green, but some can also be yellow-green. In strong sunlight, the edge of the leaves of some varieties can be displayed in red. The new buds on the stem have the same color and texture as the leaves turn into woody brown with age.

Jade plants are also known for their ease of propagation, which can be achieved through cuttings and even leaves falling from the plant. The Jade plants can be easily propagated and their success rate is higher than cuttings. Propagation is the main breeding method for Jade plants. The branches of wild Jade often fall off and these branches can take root and grow into new plants.

How often to water jade plants?

Improve growth of the jade plant maintains the watering schedule. Keep the jade plant in a clay pot and water every 10 to 14 days. In plastic pot water the jade plant about every 2-3 weeks.

They don’t like to seat in wet or moist soil. So the succulent of jade plants holds the water in their leaves. While watering, water it thoroughly and excess water should be well-drained. Don’t water again before the mix dries completely.

Here are the few factors to consider while watering the jade plant

  • Soil
  • Light
  • Temperature and
  • Fertilizer

Which type of soil is used for a potting mix for the jade plant?

Remember, the roots of succulents need to dry quickly.

Ordinary potting soil is usually sufficient, but it will stay moist for a long time.

 If you use succulent, well-draining soil, you may need to water more than ordinary potting soil.

You can also use quick-drying mixtures or modify conventional potting soil with inorganic substances such as perlite and pumice to increase drainage.

I found that a mixture of sandy loam, organic matter, and peat provides good growth conditions. Play with potting soil and get high-quality succulent soil.

If you planted your jade plant in an outdoor flowerpot, please water it every 10-14 days. The leaves should be thick. When the leaves are white and wrinkled, it is time to water them. Listen to your plants.

What did he say? No Before deciding to plant Crassula ovata plants in a new container, remember that they like to hang slightly from the roots.

Make sure that the pot has drainage holes. Put enough drainage material in the bottom of the container. This will help to drain the excess water from the root. Overwatering can cause root rot.

The jade plants are grown indoors as indoor plants also require well-drained soil. The most important rule applies when watering indoors, don’t water too much. If you water the jade every 2-3 weeks, the plants will get better. Plants are strong and resilient. The main reason for your failure indoors is root rot. Excess water can cause rotten roots!

How much the jade plant requires sunlight?

With direct sunlight, your jade plant can survive?

Yes, it is! If you allow your jade plant to sunlight for four hours every day then it will grow strong and thick.

I suggest placing the jade plant next to the south-facing window so that it can get enough daylight but not too much sunlight. If you still need sunlight, you can consider a grow light.

You may not be wonder about your jade plant become taller.

If the high amount of sunlight receives by the jade plant can be critical for its survival.

As an outcome, the jade plant tends to stretch out when it does not receive enough light.

Be careful about the plant while the leaves and stems are full of water.

This plant is very sensitive, if sunburns the leaves of the jade plant can turn yellow and brown. So the severe sunburn can be fatal to the jade plant.

As the Temperature Change, How often to water the jade plant?

Jade plants can withstand a variety of temperatures, except for freezing temperatures. It works best at day temperatures of 65 to 75 degrees Fahrenheit (18 to 24 degrees Celsius) and night temperatures of 50 to 55 degrees Fahrenheit (10 to 13 degrees Celsius).

The temperature in winter usually drops, which will kill your Jade plants. If possible, take the plants home and water them once or twice a month.

High temperature, dry air, and colder temperature will change the amount and frequency of watering.

 You’re not picky about temperature, but never let the temperature drop below 50 degrees Fahrenheit.

 High temperature and dry air will dry the potting soil. The lower temperature keeps the soil moisture longer.

 Also, note that your jade plant will sleep in winter. Water only when the leaves are drooping or wrinkled.

Also Read: 9 Best Black Succulents those are Incredibly Beautiful

Location

If your home is not too humid, jade plants will dry out quickly. You may need to water it every 5 to 7 days. If you live in a humid area, you may only need to water it every two weeks or less.

If you think your jade plants are more suitable for higher humidity, I suggest you spray the leaves in the morning so that they can dry before the cool night.

Fertilizers

I use balanced water-soluble fertilizer with that you can fertilize your jade plant in spring and summer growing seasons. Don’t fertilize in the winter season.

It is best to give organic fertilizer to jade plants in an appropriate amount every six months.

Use liquid fertilizers which are designed from cactus or succulent plants, because it has less nitrogen than regular houseplant fertilizer.

 Only fertilize the soil when the soil is wet because dry soil will damage the plants and excessive fertilization will produce salt. Overfertilization in the ground, you can also burn jade plants.

We recently tested this pre-formulated fertilizer with a slow release rate. We think this is great because you don’t have to think about quantity and time.

Add succulent fertilizer for plants and booms then fertilizer will work automatically.

How much and how do you water jade succulent?

  • Water your succulent rigorously and permit excess water to drain out through the hole.
  • Place the pot in a plastic container.
  • Fill the container with filtered or distilled water.
  • Permit the potting mix to thread up the water.
  • If the plant stops wicking water then dump the excess water in the pot to drain.
  • Keep the grow pot in the existing space.

If you cannot choose bottom-up watering, water the plants slowly along the soil line. Try to drain water from the stem.

Be careful not to sprinkle water on the leaves, as this will promote decay. Excessive water jade plants or any succulents must never stand in the water.

Also Read: Lavender Farming Guide: How to Grow Lavender with Maximum Productivity?

Underwatering jade plant

It is better but a little thirsty and never permits the potting soil of your jade plant to dry out completely.

If the plants are dried out or under watered then the leaves of the plant must be wrinkled, limp, and start to drop off and the remaining may grow with brown spots.

Roots begin to dry out and it will take time to recover.

What can you do with the jade plant?

Water the plants gently to allow the potting soil to absorb some water.

Soaking and pouring the potting soil will only cause the problem like edema.

Overwatered the jade plant

Watering the jade too much will cause the branches to become elastic and fall off. The leaves become moist and soft, the roots may begin to rot.

Consider growing plants in the water for a long period. Use fresh potting soil when transplanting. After transplanting the plants, stop watering for about a week then pour the water thoroughly.

Let the soil dry completely before watering again. Do not fertilize for at least four weeks after transplanting.

If a diseased root of jade is found, cut off some healthy leaves or stems for propagation after transplanting. If your mature plants cannot survive, this will ensure that you have alternative plants.

Why My Pepper Plants Leaves are Wrinkled?

Growing peppers is really science. It can be achieved with simple means soil, water and sun. It can be done in a complex greenhouse with precise nutrients and irrigation. However, as with anything that is alive, imbalances and stress can create problems.

With bell peppers, the plant gives clear signals when something happens. A common problem with bell pepper plant is when the leaves begin to wrinkle. This can happen for a number of reasons, and this article explains what to do when pepper leaves are wrinkled.

Pepper plant can be grown in neither too dry nor allowing to flooding, moist, rich in organic matter and well drained soil.

The plants are growing by cutting about 15 to 20 inches long, climbing to neighbouring tree at distance of about 2m apart. The rough bark trees climb more readily then smooth bark. Participating trees are cleared away, leaving few tresses to provide shade and permit free ventilation. The leaf mulch and manure can be covered the roots and the shoots are trimmed for twice a single year. The plant needs water for every other day during dry season for the first three years. The plant carries fruit from the 4 to 5 years and for the typically for seven years. The cutting plant require cultivator for both yield and quality of product.

A stem has 20 to 30 fruiting spikes. One or two fruits turn red at the roots of the spikes, but before the fruits are fully mature and have not yet hardened, the harvest begins.

If they are allowed to fully mature, the fruits will lose their sharpness and eventually fall off and be lost. Collect the spikes and place them in the sun to dry, and then remove the pepper from the spikes.

As we know, pepper can cause sneezing. Some sources say that piperine is a substance found in black pepper that can irritate the nasal cavity and cause sneezing. Black pepper is believed to treat various diseases such as insomnia, constipation, oral abscess, toothache and sunburn.

My pepper plants have wrinkled leaves

According to pathologist at the University of Florida, if the peppers in your garden grow wrinkles or wrinkled leaves, it may be the source of virus that numbs the growth and distort the fruit. Can be infect most sweet peppers, chilli peppers and ornamental plants, it is very common worldwide.

Also Read: Bell Pepper Farming: Bell pepper plant care, Pruning, Harvesting, Pest & Disease

Symptoms

Although the severity of symptoms may vary depending on the type of pepper plant you have, the first sign of infection is a slight frown or wrinkle on the leaves. Older leaves are mottled yellow or lighter green. In the striped form of the virus, yellow stripes appear along the main veins of the leaves, and then discoloured stripes appear on the outer veins. Growth retardation is common. The fruit is usually small, deformed and large in size.

Spread

The virus invades pepper plants through small scratches on the stem or leaves. Bell pepper fragile virus can be spread mechanically through contact or through infected soil tools, or seeds. Its cousin, spotted pepper vein virus exhibits similar symptoms in infected plants and is mainly transmitted by winged aphids. Although the severity of symptoms may vary depending on the type of pepper plant, aphids feed on certain weeds, such as woodpeckers and black nightshades, which can spread viral bites and infect nearby pepper plants.

Control

Because only a few pepper plants are resistant to the virus. If you suspect an infected plant, remove it and any nearby plants. Remove contaminated plant material from the soil. Before touching healthy plants or the surrounding soil, wash your hands and clean your nails with alcohol gel. Dis infects shovels and other tools with household bleach.

Overwatering

One of the failure things you can do with pepper plants is to keep the soil too moist. Pepper plants choose dry soil, and excess of water can cause many problems.

Over watering can cause pepper leaves to wrinkle. The leaves of pepper have shrunk because the roots cannot absorb enough oxygen and nutrients from the soil.  Excess of water also often to yellow leaves and plant growth retardation.

Water only when the soil is dry enough. Feel the weight of the plant by touching the soil below the surface or lifting the pot.

If the plant is allowed to dry, the leaves will begins to wither, but will fall off after watering. You can also try using water meter to check the soil moisture level.

Also Read: How to Germinate Chilli Seeds

Calcium deficiency

Calcium is a secondary nutrient for the growth of pepper plants. Among other things, it is used by plants to build strong cell walls. When plants lack calcium, the leaves do not develop properly and wrinkle or blisters appear.

There are brown spots on the leaves, there may be other signs of nutritional deficiencies, such as yellow leaves.

Use bone meal or other calcium supplements to supplement calcium. Calcium and magnesium are secondary nutrients that can be provided to inhibit growth of Irregular plants. Sometimes, but not always, they are added to general-purpose fertilizers, so please check the ingredients.

We like Fox Farm Fertilizer Trio because its feed is simple and balanced.

Many potting soils also contain calcium, but not all. Find out your soil to see what nutrients are added. If you are planting in soil, try to collect soil samples for analysis.

Excess of sunlight

It is very important to provide light to the pepper plants. This peppers plants like sunshine at all season. Therefore, if you grow outdoors, lighting is unlikely to be a problem.

A more common problem is caused by improper use of indoor plant growth lights. The brightness and intensity of plant lights varies greatly. These are necessary if you grow your own pepper seeds indoors, but you need to follow specific lighting instructions to understand how close they should be to your plants.

If your plant is too close to the light, you will see the leaves fold and block the bright light. Eventually, this problem can cause the leaves of the pepper to dry out and fall off, which usually turn brown and fall apart when pressed.

Please note that young plants tend to be more susceptible to this problem than mature peppers. Seedlings are softer than fully developed plants.

 If you think your plants have been slightly burned out, turn the light up a few inches. Keep our grow lights to be 10-16 inches from the canopy of leaves.

Make sure the lights are turned on for 12-16 hours on the timer and turned off for the rest of the day, because the 24/7 light is not good. If you are outdoors, please try to water at dawn or dusk to avoid scalding the leaves.

 Outdoor mild burns will be soaked in direct sunlight. Water droplets will destroy the leaves in direct sunlight. However, they look like dark burn marks on the leaves, not wrinkles. You can also see some wrinkles on the leaves for the first time. Move your plants outside. Make sure to adjust the temperature of the pepper properly and gradually allow it to adapt to direct sunlight.

Insect damage

Uncontrolled insects can be a nightmare in your garden. They are everywhere and can cause severe damage to your plants within a few days.

Wrinkled pepper leaves can be a sign of pest infestation, although they tend to be concentrated on individual leaves rather than on the entire plant. Wrinkled and bubbly leaves may be the leaves on which insects live.

Pepper plants have wrinkled leaves, and this is probably one of them. Other secretions mentioned. Unfortunately, pest control is more difficult than preventive measures. However, there are a few steps you can take to resolve the problem and eliminate most errors. If possible, burn the infected leaves, otherwise, because insects can spread easily, take them outside and discard them. You can also introduce ladybirds or other beneficial insects, which will feed on pests instead of pepper leaves.

Neem oil has a preventive effect, just apply the recommended amount to the soil before transplanting, or spray the diluted solution on the leaves.

Don’t expect the wrinkled pepper leaves to be completely healthy after treatment. The fact that plants are no longer beautiful does not mean that the problem is not solved. And understand that wrinkled sheets are still wrinkled.

Prevention and solutions

One form of PMMoV exists in the soil, usually in the seed itself, and cannot be cured after infection. Therefore, you should move the pepper plants to different parts of the garden each year. To avoid pests, PVMV is a portable form of growing peppers from plants that attract aphids, such as tomatoes and melons. Removing nearby weeds that can spread the virus will also reduce the risk infection. Experts recommend avoiding the virus, this is the best way to flight the virus, because very few pepper plants can resists the virus. In the common form of insects, peppers should be kept away from plants that attract aphids such as tomatoes and melons.

The best way to solve most landing problems is to learn from past mistakes and avoid them in the future!