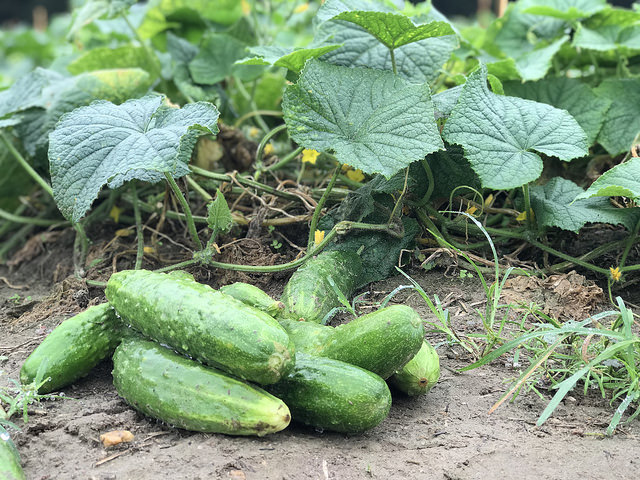
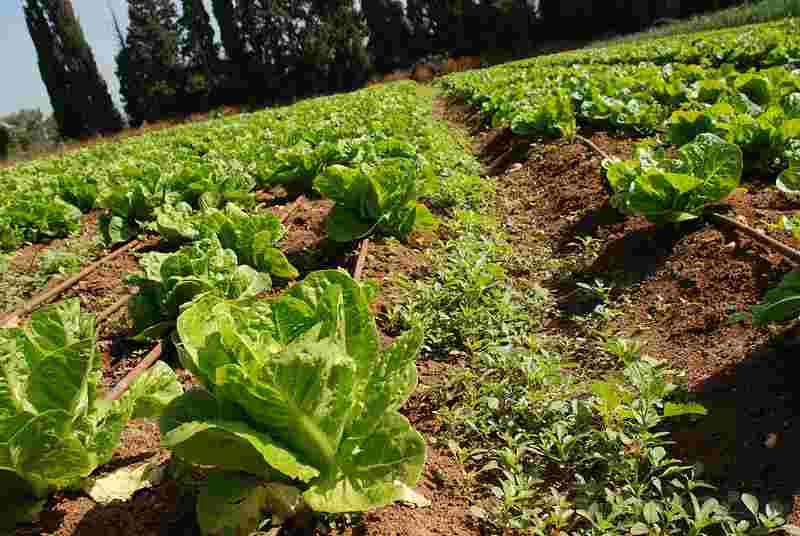
Cucumber plants are heavy feeders that require rich and consistent nutrients for optimal growth. Instead of using chemical fertilizers most vegetable growers opt for organic manure.
Chicken manure is filled with nitrogen, phosphorus, and potassium that can help cucumbers thrive.
In addition to providing essential macro-nutrients, chicken manure also adds organic matter and microbial life to the soil which helps improve soil texture and structure.
What is Chicken Manure?
Chicken manure is the droppings of chickens, and it can be used as an organic fertilizer. It is a rich source of nitrogen, phosphorus, and potassium that are necessary for plant growth.
Chicken manure also contains other trace elements like magnesium, calcium, iron, manganese and zinc which can help to improve soil fertility.
Nutritional Requirements of Cucumber Plant
Cucumber plants need a high amount of nitrogen, phosphorus and potassium to grow.
Nitrogen is essential for foliage growth and its deficiency can cause yellowing of the leaves. Phosphorus helps in producing more flowers and fruits while potassium improves the quality of fruits and increases their shelf life.
When compared with other manures, this chicken coop is housed with higher volumes of macro-nutrients in it.
This can help to improve soil structure and texture, improving the overall health of the cucumber plants.
Note: However, it is important to remember that chicken manure should be well-rotted prior to use in order to reduce its high salt content which can damage plants if used fresh.
Additionally, due to its high nutrient content, it should not be overused or else it could result in an imbalance of nutrients in the soil leading to poor plant growth.
When using chicken manure for your cucumbers, it is important to ensure that the manure has been properly composted, because it contains pathogens that aren’t good for plant.
How to Use Chicken Manure for Cucumbers?
While composting you must ensure the temperature between 140F to 160F. Though pathogens don’t get killed, there reproduction gradually decreases.
It may take 90 days to compost chicken manure, and you shouldn’t use chichen manure before that.
How to compost chicken manure at home?
Composting breaks down the organic matter in the manure and helps to make the nutrients more available for the cucumber plants.
Here are a few steps to composting chicken manure at home:
Collect fresh chicken manure, either from your own chickens or from a local farm
Place the manure in a pile or bin and cover it with soil or sawdust
Mix the pile regularly to ensure even composting
Water the pile occasionally to maintain moist conditions
Monitor the temperature and keep it between 140F and 160F
After about 90 days, the manure should be ready for use as a fertilizer for your cucumber plants
You can use chicken manure to enrich your plant soil in different ways.
While planting, add aged chicken manure to the planting hole.
Container gardeners can mix this organic manure to their potting soil mix along with garden soil and coco peat.
During growing season, your cucumber plant needs nutrients to produce yield. Adding a layer of chicken manure around the base of the plant will help to slowly release nutrients to the soil.
Use roughly 1-2 cups of composted chicken manure per plant and work it into the soil or top dress around the base of the plant.
Make sure you mix the manure into the soil to ensure even distribution.
You can also use a liquid fertilizer made of chicken manure as foliar spray which helps in faster uptake of nutrients by the cucumber plants.
You can add decomposed chicken manure to potting soil of cucumber plants while transplanting or during the regular fertilization.
To apply this organic manure to fully grown plant, just spread it around the base of the plant and water lightly. This will help to provide a steady supply of nutrients throughout the growing season.
Chicken manure is a great source of organic matter and nutrients for cucumber plants. It helps to improve soil texture, water retention capacity and fertility levels, promoting healthy plant growth.
Composted chicken manure should be used for the best results – simply mix it into potting soil, spread it around the base of your cucumber plants or use it as a liquid fertilizer.
With proper application and usage, you can make sure that your cucumber plants are getting all the nutrition they need to produce high yields.
White spots on spinach leaves can be caused by a soil-borne fungus, plant disease, or pests like leaf miners or flea beetle.
This fungal infestation can affect various plants and is also known as white mold, which produces dark brown or black sclerotia that eventually form white spots on the surface of affected spinach leaves.
However, you don’t have to worry in all cases. Trichomes are common in spinach leaves, which can be seen in younger leaves.
Spinach trichomes are tiny hairs that grow on the surface of the spinach leaves and serve to protect the plant from pests. These trichomes can become clogged with dirt, dust, and other debris, leading to the formation of white spots.
What are Spinach Trichomes?
If you see white spots on spinach leaves that can be rubbed off, then you don’t have to worry. These spinach leaves are safe to eat.
But, you should differentiate trichomes from white spots with fungal lesions.
If you notice, blisters on spinach leaves, then probably it can be caused due to a fungal infection.
You can check this site for signs of white rust on spinach leaves.
White rust is a fungal disease caused by the fungus Albugo candida.
It spreads through spores in the air, causing white spots on infected spinach leaves. These spots will eventually turn yellow and then brown before falling off.
If left untreated, white rust can cause serious damage to a spinach crop, making it unmarketable and reducing yields.
To prevent white rust, it is important to practice good crop rotation and sanitation techniques in the garden.
Additionally, using fungicides can help control the spread of white rust on spinach leaves.
It is also important to dispose of any infected plant material immediately, as this will reduce the risk of spreading the infection to other plants in your garden.
By taking these precautionary steps and monitoring your spinach crop for signs of white rust, you can protect your plants from this destructive disease.
It is important to remember that white spots on spinach leaves can be caused by a variety of factors, which we are discussing below.
What Causes White Spots on Spinach Leaves?
1. Soil-borne fungus
The soil-borne fungus can cause white spots on spinach leaves by producing dark brown or black sclerotia that eventually form white spots on the surface of affected spinach leaves. The sclerotia are created when the fungus produces asexual spores and these spores disperse in the air. These sclerotia will then settle on the surfaces of the leaves, leading to a white spot or discoloration.
2. Plant Disease
Plant diseases such as downy mildew can also cause white spots on spinach leaves. Downy mildew is caused by the fungus Peronospora effusa and manifests itself as yellow or white patches on the undersides of spinach leaves. If left untreated, the disease can spread rapidly and cause serious damage to a spinach crop.
3. Pests
Leaf miners or flea beetle are two common pests that can also cause white spots on spinach leaves. Leaf miners are small larvae that feed between the upper and lower layers of leaf tissue, leaving behind white patches on the surface of the leaf. Flea beetles feed on young plants, creating tiny holes in foliage which will eventually turn into white spots.
By understanding what causes white spots on spinach leaves, you can take steps to protect your crop from these damaging pests and diseases. With proper prevention and monitoring techniques, you can ensure that your spinach crop remains healthy and productive!
4. White mold
White mold is another common cause of white spots on spinach leaves. White mold is caused by the fungus Sclerotinia sclerotiorum and is characterized by white, tufted patches on infected spinach leaves. This fungus can quickly spread from one plant to another, making it important to practice good sanitation techniques in your garden to prevent its spread.
By understanding what causes white spots on spinach leaves, you can take steps to protect your crop from damaging pests and diseases. With proper prevention and monitoring techniques, you can ensure that your spinach crop remains healthy and productive! Taking these precautions will help you enjoy a bountiful harvest of delicious, nutritious spinach for years to come!
5. Trichomes clogged with dirt, dust, and other debris
As mentioned earlier, these are tiny, hairlike structures on the surface of spinach leaves that help protect them from pests and diseases.
If these trichomes become clogged with dirt, dust, or other debris, it can lead to white spots on infected spinach leaves.
To prevent this from happening, be sure to clean your spinach plants regularly and remove any dirt or dust from their leaves.
6. Fungal infection (white rust – caused by Albugo candida)
White rust is a common fungal infection that can cause white spots on spinach leaves. The fungus Albugo candida produces clusters of yellow-white spores on the surface of infected spinach leaves which eventually turn into white spots. To control this disease, it is important to practice good crop rotation and sanitation techniques in your garden.
All said, if you come across white spots on spinach leaves it is recommended to check whether they are due to trichomes or fungal infection. If the white spots can be rubbed out easily, then you don’t need to worry about them as those are just trichomes. However, if there are blisters on the leaf surface that cannot be removed easily, then it is advised to dispose of such infected plant material immediately to prevent its spread. Last but not least, proper crop rotation and sanitation practices can also help in reducing the risk of white rust infection in your garden. Keep these points in mind while tending your spinach crop and they will remain healthy and productive!
How to Treat White Spots on Spinach?
White spots on spinach leaves can be treated by utilizing various techniques such as sanitation practices and applying fungicides.
Use Fungicide to treat white spots
Fungicides are available at most garden supply stores and should be applied according to the instructions provided by the manufacturer on the label.
How to treat white rust?
It is important to note that once a plant has been infected with white rust, it cannot be cured; however, using fungicides will help slow down its spread to protect other healthy plants from becoming affected.
You can also use copper compounds like copper sulfate or copper hydroxide to help control the spread of white rust.
Practice Best Watering Techniques
To reduce the risk of white mold and other fungal infections, it is important to practice proper watering techniques to grow spinach. Be sure to water your spinach crop in the early morning or late evening when temperatures are lower and avoid over-watering as this can encourage fungal growth.
Sulfur Sprays to treat White spots in spinach
Sulfur sprays are also an effective way to treat white spots on spinach. These fungicidal sprays work by creating a protective barrier over the leaves of affected plants, preventing the spores from spreading further and causing more damage. Be sure to apply these treatments according to the manufacturer’s instructions for the best results.
How to prevent white spots on spinach plant Leaves?
The most effective method to prevent white spots on spinach is to practice proper crop rotation and sanitation techniques in the garden.
This means rotating crops annually to different parts of the garden and regularly removing any diseased or dying plants.
In addition, it is important to avoid over-watering plants or exposing them to excessive humidity.
Sanitation practices should also be employed to reduce the risk of reinfecting a crop with white rust or other fungal diseases.
These include properly disposing of plant material that has been infected with white rust, avoiding contact between infected and healthy plants, and frequently cleaning garden tools and equipment that come into contact with plants.
Is it safe to eat spinach with white spots?
Yes, it is safe to eat spinach with white spots as long as they are not caused by a fungal infection. If the spots can be rubbed out easily and don’t have blisters on the leaf surface, then they are likely trichomes and not a symptom of the disease. However, if the spots can’t be easily rubbed out and there are blisters present, then it is recommended to discard the spinach as it may be infected.
Conclusion
In conclusion, white spots on spinach leaves can be caused by either trichomes or fungal infections. Trichomes are harmless and can be safely eaten, whereas fungal infections should be avoided as they could make the spinach unsafe to consume. It is recommended to practice good crop rotation and sanitation techniques to reduce the risk of white rust infection.
If the spots can’t be rubbed out easily and there are blisters present, then it is best to discard the infected plant material to prevent its spread.
Worm castings feed your garden for a long time but they can also give immediate benefits to your veggies.
In this write-up, you’ll learn what they are, their benefits, and how you can use worm castings in the vegetable garden.
Nutrients housed in worm castings are prominent among organic farmers and home gardeners. It is damp simple to make your own worm castings at home or you can also buy it from local store to enrich your container gardening.
What are worm castings?
Worm castings are the poop of earthworms. They make it after they eat organic matter. Adding worm castings to potting soil helps plants grow by giving them food and making the soil better.
Worms consume whatever they come across and turn it into a form that can be easily absorbed by plants. Gardeners often call this process “black gold” or vermicastings or vermicomposting.
Benefits of Worm Castings for Vegetable Garden
Worm castings are a type of fertilizer that is rich in essential minerals and micronutrients. This natural fertilizer can help plants to grow bigger and healthier.
Adding organic matter to your soil makes it better. The organic matter makes the soil lighter and helps water drain out of it.
Not only does composting help to maintain your soil’s moisture, but it also prevents it from becoming too arid or waterlogged.
Worm castings contain microbes that help break down organic material and release nutrients into the soil. This makes it easier for plants to get the nutrients they need to grow.
Furthermore, it stimulates microbial activity in the soil that improves fertility and increases its healthiness over time.
Moreover, by providing a balanced environment for all types of organisms, it can also reduce damage caused by pests as microbes are known to repel some insects while attracting beneficial ones.
Worm castings are an all-natural fertilizer that can provide a long term source of nutrients for your vegetable garden and is easily accessible to organic farmers and home gardeners alike.
Seed Starting Soil Mix
Adding worm castings to seed starting soil mix is one of the simplest way to use it. Simply sprinkle some vermicastings around each seed before covering them with soil for better germination and growth.
You can also add a handful of worm castings in the planting hole when transplanting vegetables into your garden beds.
For container gardening, adding a few tablespoons of worm castings to the soil can provide a slow release of nutrients to plants.
Add Worm Castings to Compost
Worm castings is an ideal additive to compost piles as it will help speed up decomposition and improve the quality of your compost.
It also helps increase beneficial bacteria, fungi and other microorganisms in your compost pile.
Add a layer of worm castings to your compost pile after each layer of green and brown materials.
You can also use it as a top dressing by sprinkling some over the surface of your garden beds or container plants.
How to add Worm Castings to Seedlings?
When transplanting seedlings or seed starting soil mix, add a generous layer of worm castings to the bottom of each hole.
Add a few tablespoons of vermicastings around the base of each plant and cover it with soil to give your plants an extra nutrients boost.
Adding Worm Castings to top layer of vegetable plants
Sprinkle a handful of worm castings over the top layer of your vegetable garden beds or container plants.
This will help to provide a slow release of nutrients and improve the overall soil structure.
It can also help to deter some pests while attracting beneficial insects which can improve the health and yield of your plants.
You can also use worm castings as a side dressing, which involves adding a band of fertilizer around the base of individual plants.
This will help to provide an even distribution of nutrients over time.
Worm castings tea is a liquid fertilizer made by steeping worm castings in water. It is high in beneficial microbes and nutrients, which can help to improve the health of your soil and plants.
It can be used as both a foliar spray and soil drench to provide an extra boost of nutrition for your vegetable garden.
It is essential to check with your local extension office before using this organic material as fertilizer for vegetable garden as some states require special approvals and certifications when adding organic matter.
Remember, too much worm castings may burn your plant’s roots so make sure not to overuse it on your garden.
Once you add it to the soil, it will release essential minerals and increase water retention while increasing microbial activity within the soil which leads to improved fertility over time.
Yes, you can use worm castings instead of fertilizer for vegetables. It is packed with essential minerals and micro-nutrients that plants need to grow healthy and strong.
It also improves soil structure by adding organic matter which makes your soil lighter and better draining.
Can Worm Castings Cause Nutrient Burn?
Although worm castings are a natural fertilizer, it is possible for them to cause nutrient burn if you use too much in the garden.
It is best to follow instructions carefully and not exceed the recommended rate of application when using worm castings for vegetable garden.
If your plant experiences nutrient burn, then reduce the amount used or discontinue its use altogether.
Additionally, it is important to identify the source of nutrient burn in order to take appropriate corrective action.
If you need further assistance, then consult your local extension office for advice and recommendations.
The key is to start with a small amount and gradually increase the dosage if needed.
Conclusion
Worm castings are an excellent natural fertilizer that can be used to improve the fertility of your vegetable garden.
It is rich in essential minerals and micro-nutrients that are beneficial to plants, while also improving soil structure and reducing pest damage.
However, it is important to use them carefully as too much can cause nutrient burn.
With proper care and attention, worm castings can help you create a flourishing vegetable garden!
Cucumbers and tomatoes are both members of the same plant family but why you should not plant them near each other?
This is because cucumbers are prone to a variety of diseases like mosaic virus and phytophthora blight that can easily spread to tomato plants.
Apart from this, they have different nutrient needs, and when planted near one another, the nutrients from one crop may be taken away by the other.
Cucumber plants tend to take up a lot of space in garden beds, leading to overcrowding if planted too close to tomatoes.
If you want to grow cucumbers and tomatoes in your garden, make sure to keep them apart. Also, regularly trim the leaves and stems so that the plants can stay healthy and grow well.
Planting these two vegetables separately also makes it easier for you to keep track of the specific needs of each plant.
Why You Should Not Plant Cucumbers Near Tomatoes?
Companion planting is great for gardening, but you should avoid a few plants to plant together.
Cucumbers and tomatoes are one such combination that can’t go well.
The reasons are poor air circulation, the easy spread of diseases, and competition to absorb nutrients from the soil.
Below mentioned are detailed reasons why you shouldn’t plant tomatoes and cucumbers together.
Cucumber Mosaic Virus
Yellow patches, curly leaves, stunted plant growth, and reduction in yield are signs of mosaic virus.
It is common in cucumber plants and can easily spread to tomatoes when planted close together.
The virus can be passed from one plant to another through insect pests such as aphids and whiteflies.
Aphids spread this virus in less than a minute and if left unnoticed this virus can go all over the garden in a few hours.
Along with tomatoes cucumber mosaic virus can affect a wide range of plants like beans, peppers, spinach, carrots, celery, lettuce, legumes, and squash.
To combat you must cut off the affected part or remove the whole plant from the garden to stop the spread of this disease.
Phytophthora Blight
Phytophthora capsici when comes in contact with another type of P. capsici it spreads the disease.
This plant disease is common in cucumbers, tomatoes, melon, pumpkin, legumes, and eggplants.
Infected parts of the plant will start to turn yellow, rot, or develop black lesions on the foliage.
Fruit rotting and wilting can also be seen in plants affected by this fungi.
This disease spread rapidly through water or travel aerial when the wind blows.
Competition for Nutrients
When cucumbers and tomatoes are planted nearby, they compete for the same resources including sunlight, moisture, and nutrients.
As a result, both plants may fail to get enough of these resources, resulting in stunted growth or even death.
Additionally, the growth of one plant can shade out the other – preventing it from receiving adequate sunlight.
Common nutrients between tomato and cucumber plants are nitrogen, phosphorus, and potassium.
These three elements are essential for the development of healthy fruits, vegetables, and leaves.
Nitrogen helps plants to obtain energy from photosynthesis and is needed for plant growth.
It also allows for more robust fruits and vegetables with larger yields.
Phosphorus helps with root development as well as flowering and is necessary for photosynthesis.
Potassium increases a plant’s ability to tolerate heat, frost, and drought – making them more resilient.
If both tomatoes and cucumbers are vying for the same nutrients, their growth may be stunted due to limited resources available.
Lastly, competition from tomato roots can also prevent cucumbers from accessing the moisture they need to stay healthy.
In some areas, tomato plants have a longer and stronger root system than cucumber plants.
This can make it hard for cucumbers to absorb enough water to sustain their growth.
Good companion plants for cucumbers include beans, squash, peas, corn, onions and garlic.
These plants are known to increase the yield of cucumbers and enhance their flavor.
Beans add nitrogen to the soil which helps to stimulate cucumber growth.
Squash provides shade for cucumbers, keeping them cooler in hot weather and blocking out some weeds.
Peas also fix nitrogen into the soil helping it retain moisture which benefits nearby cucumber plants.
Corn can trap worms away from cucumber plants because of its tall stature and dense foliage – making it an effective pest deterrent.
Onions and garlic protect against a range of fungal diseases such as powdery mildew and blight that could otherwise harm your cucumber crop.
Additionally, marigolds are beneficial companion plants for cucumbers as they attract helpful predators that feed on destructive insects like aphids and other pests.
When planted around cucumber plants, marigolds can act as a non-toxic natural insect repellent.
Overall, companion planting is an effective way to keep your cucumbers healthy and productive.
With a careful selection of the right companions, your cucumber crop can thrive!
Bad companion plants for cucumbers include melons, potatoes, peppers, and eggplant.
These plants can stunt the growth of cucumber or cause it to become diseased.
Melons, in particular, require a great deal of space and nutrient resources which can prevent cucumbers from getting enough.
Additionally, they require long warm summer days and are more susceptible to disease than cucumbers.
As such, planting them nearby can cause both plants to be affected by the same diseases and pests.
Potatoes are another bad companion for cucumbers as they tend to take up too much of the same soil nutrients needed by cucumbers for healthy growth.
Both crops use nitrogen and phosphorus but cucumbers require much higher amounts during the growing season.
Similarly, peppers don’t share well with cucumber plants because they also need high levels of nitrogen – often more than what is available to them when planted near cucumbers.
Eggplant is also a bad companion plant as its roots may compete with those of the cucumber plant for moisture as well as nutrients like potassium and calcium that are necessary for healthy growth.
The large leaves of eggplants can also shade out smaller nearby plants like cucumber which will prevent them from getting enough sunlight – leading to poor yields and stunted growth.
Weeds can be an issue when planted near cucumbers – competing for water, light, air, and soil nutrients.
Warm climates especially foster the growth of cucumbers, so it’s essential to remain aware and take action if you’re hoping to cultivate healthy and productive cucumber plants.
To avoid the spread of disease and stunted plant growth, you should avoid planting cucumbers near tomatoes. It is also important to choose the right companion plants for cucumber and avoid those that are known to be bad companions.
If you pick the right plants to grow next to your cucumbers, your cucumber plants will stay healthy and you will have a good crop.
Good companion plants include beans, squash, peas, corn, onions, garlic and marigolds – all of which can help increase cucumber yields and flavor.
Worm castings are filled with essential nutrients like nitrogen, phosphorus and potassium. This organic fertilizer also has calcium, sulfur and magnesium, which are secondary nutrients that your vegetable garden needs.
Apart from being nutrient rich, the reason why you should use worm castings for tomatoes is that nutrients are readily available for your plants to absorb.
Worm castings are rich in humus, which helps improve soil structure and drainage, as well as attract beneficial organisms like earthworms to your garden.
In addition, the microbes present in worm castings can help with increased nutrient uptake by breaking down complex organic matter into simple substances that plants can quickly access and use.
What is Worm castings?
Worm castings are what is left behind after worms eat. Packed with beneficial fungi and microbes, compost provides a nourishing natural fertilizer for your plants while enriching the soil. This makes it an invaluable resource to any gardener or farmer..
As mentioned above, worm castings are also rich in essential nutrients like nitrogen, phosphorus and potassium, which are vital for healthy plant growth.
Furthermore, the humus in worm castings is advantageous for soil structure and drainage as well as enticing helpful organisms like earthworms.
Worm castings are also good for increased nutrient uptake because the microbes present can break down complex organic matter into simple substances that plants can easily access and use.
NPK Value of Worm Castings:
According to University of California, NPK in worm casting is 5.5.3. These are water soluble nutrients that can be easily uptake by your tomato plant roots.
Australia’s Griffith University research states that this organic fertilizer has 2-3 percent of nitrogen, 1.85-2.25% of potassium and 1.55-2.25% of phosphorus.
Another research in the year 1986 compared organic vermi compost with inorganic fertilizer. Growth of tomato plants with worm castings improved better than chemical ingredient fertilizer.
Despite good source of nitrogen, applying worm castings won’t burn your tomato plants.
Benefits of worm castings for tomato plants
It will be interesting to know how nutrients in worm castings will benefit your tomato plant.
Nitrogen:
By providing a steady supply of nitrogen, plants can more effectively absorb sunlight and synthesize nutrients, resulting in larger fruit and vegetable yields.
It can also help with plant resilience – it helps to develop strong stems and leaves.
Phosphorus:
It has an important role in helping with root and stem development, as well as aiding in the growth and maturing of fruits.
Phosphorus helps tomatoes produce more sugar that is used by the fruit to grow larger and develop better flavor.
Potassium:
Tomato plants absorb more water when there is a sufficient amount of potassium present in the soil.
This, in turn, allows the plant to uptake more nutrients and minerals, resulting in increased growth and larger yields.
Calcium:
It helps to build strong cell walls and regulate the uptake of other minerals, such as nitrogen and phosphorus. These are vital for healthy plant development and growth.
Additionally, calcium helps the tomato to regulate its water intake.
Magnesium:
Magnesium plays a vital role in photosynthesis, enabling the plant to convert sunlight into energy, and it also helps with nutrient metabolism.
Sulfur:
Sulfur helps to improve the availability of other nutrients in the soil, particularly nitrogen and phosphorus.
It also helps to break down complex organic molecules into simpler forms that the plant can use more easily.
How to Use Worm castings on Tomatoes?
There are different ways by which you can enrich growing soil of tomato plants.
You can add to while planting tomato seedlings or just apply as a layer on adult tomato plants.
Container gardeners can mix worm castings to their potting soil mix.
When Planting
When using worm castings for tomato plants start by adding a handful to each hole before planting.
During the growing season, you can apply more worm castings around the base of the plant. Do this every two weeks.
Alternatively, you can mix some worm castings into your potting soil or compost mixture when transplanting tomatoes.
Another way to use worm castings on tomatoes is to make a tea from them. To do this, fill a five-gallon bucket with water and stir in one cup of worm castings until fully dissolved.
Let it sit overnight and then strain out any solids that may have settled at the bottom of the bucket before applying to your tomato plants.
Use this tea as an all-purpose fertilizer to give your plants a boost in nutrients.
Adding Worm Castings to Compost
You can also add worm castings to your compost pile to help break down organic matter and release essential nutrients into the soil. This will help create a healthy, balanced soil that is perfect for growing tomatoes.
Adding worm castings into raised garden beds
You can add some worm castings into your raised garden beds when preparing them for planting tomatoes.
Just mix in a small amount at the bottom of each bed before planting.
This will help create an ideal growing environment for your tomato plants and provide them with the essential nutrients they need to thrive.
If you are growing tomatoes in containers, you can add a few tablespoons of worm castings to the soil before planting. This will provide your plants with essential nutrients and help create a fertile environment for them to grow in.
When using worm castings on tomato plants, it’s important to remember that too much of a good thing can be bad.
Worm castings are quite nutrient-rich and applying them in excess can have an adverse effect on the plant’s growth and health.
To avoid this, use sparingly and always follows the recommended guidelines for application rates.
Also make sure to combine with other fertilizers or compost when necessary to ensure your tomato plants get all the nutrients they need.
Can you use worm castings on seedlings?
Yes, you can use worm castings on seedlings.
Before planting seeds, mix some worm castings into the soil to give them a nutrient boost before they begin to germinate.
This will help ensure that your seedlings have enough nutrition and vitality to grow healthy and strong.
1. Use a balanced fertilizer: Fertilizers should include nitrogen, phosphorus and potassium to ensure that your tomato plants get the nutrients they need.
2. Apply fertilizer when needed: Fertilize regularly throughout the growing season to maintain consistent nutrition levels.
3. Use organic fertilizers: Opt for natural and organic sources of fertilizer such as worm castings or compost teas to reduce your environmental impact.
4. Don’t over fertilize: Applying too much fertilizer can burn and damage delicate tomato roots. Always follow the instructions on the package and use sparingly when necessary.
5. Mulch around plants: Organic mulches like wood chips help retain moisture in the soil while adding valuable nutrients.
Fertilizing your tomato plants is an essential part of successful gardening.
With the right balance of nutrients, you can ensure that your tomatoes stay healthy and productive throughout the season!
Conclusion
Using worm castings to fertilize tomato plants is an excellent way to give them the nutrition they need for strong growth and healthy yields.
When applying worm castings, remember to use sparingly and combine with other fertilizers or compost when necessary.
Additionally, use balanced fertilizers and mulch around plants for extra moisture retention.
With the right strategies in place, you can ensure your tomato plants have all the nutrients they need for a productive season of delicious tomatoes!
For a bountiful of harvest you must consistently provide water, sunlight and fertilizers for cucumber plant. Container gardeners often complain about over-watering their cucumber plants.
This happens when you start growing without prior knowledge of how much water does a cucumber plant need.
In fact, cucumber plants need about 1-2 inches of water per week during the growing season.
To ensure that your plant gets enough water without overdoing it, use a soaker hose or drip irrigation system to help you control how much and when to water the cucumbers.
Additionally, consider using mulch around the base of the cucumber plants to create an even level of moisture in the soil.
Keep an eye out for wilting leaves and yellowing stems – these are indicators that your cucumber plant needs more water.
Cucumber Watering Requirements
Cucumber plant needs consistent watering, at-least 1 inch of water per week during growing season is a must.
To make sure your plant gets enough water, but not too much water, use a soaker hose or drip irrigation system. This will help you control how often and how much water the cucumbers get.
With change in temperature, water amount may vary. During extreme heat or high temperatures, it is important to increase the water amount accordingly.
Mulching the soil around cucumber plants is a great way to ensure that moisture and temperature levels remain constant, providing ideal growing conditions for your plants.
If the leaves of plant starts withering or stems start yellowing, that is an indication for enough watering of cucumbers. It could mean that your cucumber plant needs more water than what you are providing.
To get the most out of your hard work, be sure to water adequately without overdoing it- either too much or too little can cause damage.
In this manner, you will be able to harvest a stress-free and abundant bounty of cucumbers.
Covering the soil with mulch can also help maintain an even level of moisture in the soil.
Remember, too much water can lead to disease and root rot – so stick to the recommended 1-2 inch range and monitor your plants for signs of wilting leaves or yellowing stems if you suspect they need more water.
How Much Water Does a Cucumber Plant Need Per Day?
Watering frequency depends on climatic conditions in your region and you also need to consider growing soil and plant location to actually determine how many liters of water does your cucumber plant need.
However, as a general rule cucumber plant needs about 1-2 inches of water per week during the growing season.
This translates to roughly 0.25 – 0.5 inch of water per day. (Will explain about this later in this article)
If you live in an area with high temperatures or if it’s an especially hot summer, you may need to increase your watering accordingly.
To ensure that your plant gets enough water without overdoing it, use a soaker hose or drip irrigation system to help you control how much and when to water the cucumbers.
Additionally, consider using mulch around the base of the cucumber plants to create an even level of moisture in the soil.
Keep an eye out for wilting leaves and yellowing stems – these are indicators.
Best to water cucumber plant in the morning so that it has time to absorb all the water before nightfall.
Use a sprayer or watering can and water directly onto the soil, avoiding wetting any leaves as this could invite disease.
Watering should be done slowly, taking care not to disturb the roots of the plant too much, and making sure that each part of the plant gets enough water.
Also make sure you provide consistent moisture levels.
Finally, aim to keep the soil evenly moist until harvest time!
With proper watering techniques and regular monitoring of your cucumber plants, you’ll have plenty of juicy cucumbers for salads and sandwiches in no time.
Signs of Overwatering cucumber plant
Cucumber plants need a lot of water, but too much can actually be detrimental to their growth!
Overwatering cucumbers can lead to signs such as wilting, yellowing leaves, root rot and fungal diseases.
Cucumbers that are getting too much water may also be slow-growing or produce fewer fruits than normal.
If you notice any of these symptoms in your cucumber plants, it might be time to reduce the amount of water they’re receiving.
Pay attention to how often and how deeply you’re watering the plants – regular yet shallow watering will help ensure your cucumbers receive just the right amount of moisture for optimal growth.
With careful observation and some mindful watering techniques, your cucumbers should have no trouble.
How to revive?
If you’ve overwatered your cucumber plants, don’t worry – there are a few things you can do to help bring them back from the brink!
Start by reducing the amount of water you give them, and make sure that any excess moisture is allowed to drain away from the root system.
If you can, try to lift the plant out of its pot and inspect the roots for signs of rot or damage.
Prune away any affected roots and repot the cucumber in fresh, well-draining soil.
You might also want to consider adding a layer of mulch around the plant to help retain moisture and reduce the risk of overwatering.
Signs of Under-watered Cucumber Plant
In contrast to over-watering, under-watered cucumbers can show signs such as brittle stems, drooping leaves and stunted growth.
If you think your cucumber plants are not getting enough water, try increasing the frequency or duration of watering sessions.
Make sure that the soil is thoroughly moistened all the way down to the root system.
How to revive?
First, check the soil and give the plant a deep watering if necessary.
If possible, lift the plant out of its pot and inspect the roots – they should be plump and white in colour.
Prune away any dry or discoloured roots, then repot the cucumber in fresh soil and water generously.
You may also want to add a layer of mulch around the plant to help retain moisture.
With the right care and attention, your cucumbers should recover quickly!
How Often to Water Cucumber Plants in Pots?
When it comes to growing cucumbers in pots, water is key. It’s important to make sure your cucumber plants have a consistent supply of moisture throughout the growing season.
Cucumber plants require 1-2 inches of water per week – but more when temperatures spike and during extended periods of drought.
The best way to ensure your cucumber plants get enough water is to check the soil for moisture a few inches down.
If it’s dry, it’s time to water your plant. You can also use self-watering pots or place a layer of mulch over the soil to help retain moisture and keep weeds under control. Just make sure that you’re not overwatering your cucumber plants, as this can cause problems such as disease and root rot.
Do Cucumber Plants Like Wet or Dry Soil?
Cucumber plants do not like overly wet soil. While cucumbers require consistent moisture to grow healthy fruits, too much water can lead to root rot and other issues.
To ensure your cucumber plants get enough water without becoming waterlogged, check the soil 2-3 inches down regularly.
If it feels dry, water your plant thoroughly.
Too much moisture can also lead to fungal diseases, so make sure there is adequate drainage in your pots and that excess water can escape.
Cucumber Plant Care Tips
Make sure your cucumber plants get 1-2 inches of water per week.
Check the soil 2-3 inches down for moisture regularly and water as necessary.
Avoid overwatering, which can lead to disease and root rot.
Use self-watering pots or place a layer of mulch over the soil to help retain moisture and keep weeds under control.
Ensure adequate drainage in your pots so excess water can escape and avoid fungal diseases caused by too much moisture.
Feed your cucumber plants with a fertilizer that is high in nitrogen every few weeks during the growing season to promote healthy growth and fruit development.
Provide support for vines by using trellises and stakes to help keep plants upright.
Regularly inspect your cucumber plants for signs of pests, such as aphids, and take steps to manage them if necessary.
Harvest cucumbers when they are young and tender for the best flavor.
Remove any rotting or diseased fruits immediately to prevent spread of problems throughout the plant.
Practice crop rotation by not planting cucumbers in the same area more than once every three years or so to avoid pest buildup and disease issues.
Keep your cucumber plants well-weeded to compete with weeds for nutrients, water, and space in the soil.
Do cucumbers grow well in pots?
Absolutely! As long as you give cucumber plants enough water, they can thrive in container gardens.
How much water?
A good rule of thumb is to water your cucumbers plant deeply about once a week, or when the top inch of soil is dry.
Do cucumber plants like water on their leaves?
No, cucumber plants don’t prefer to have water droplets on their leaves. It is best to water the soil directly and avoid wetting the leaves, as this can lead to diseases such as mildew and leaf spot.
Can you overwater cucumber plant?
No, you shouldn’t overwater cucumber plants, as this can lead to root rot.
Make sure to check the top inch of soil each week to determine if your cucumber plant needs water.
How to know my cucumber plant needs water?
The easiest way to tell if a cucumber plant needs water is to check the soil. If the top inch of soil feels dry, your cucumber plant needs to be watered.
You can also check the leaves and stems for signs of wilting, which indicates the cucumber needs more water.
Conclusion
Along with consistent watering, cucumber plant needs well-drained soil and full sunlight.
Under-watering or too much watering can result in yellow leaves and can negatively affect the yield.
Depending on the local weather and soil condition, cucumber plants can require up to 2 inches of water per week during the growing season.
It is important to carefully monitor your cucumber plants to ensure they get just the right amount of moisture.
With proper care and maintenance, you will be rewarded with a healthy crop of delicious cucumbers.
Who ever tasted a home grown cucumber will find home gardening an incredibly rewarding experience.
Whether you’re a beginner or an experienced green thumb, understanding how deep to plant the cucumber seeds in your raised bed is key to have a successful harvest.
In this blog post I’ll discuss what makes the optimal depth for planting cucumbers, so that you too can reap the rewards of growing cucumbers in raised bed.
The roots of cucumber plants can grow very deep, so it is important to make sure your raised bed is deep enough for them
For optimal growth, your cucumber raised bed should have a depth of at least 18 inches.
This will provide the roots ample space to spread and guarantee that they can absorb all of their necessary nutrients for flourishing.
As growing soil for cucumber must be well-drained you must use mix of organic material such as compost and manure along with garden soil.
Adding nutrient-rich soil to your raised bed will not only bolster the growth of cucumber plants, but also promote excellent drainage.
Make sure to incorporate the ingredients thoroughly so that they are blended throughout the bed.
With a deep enough raised bed and good soil mixture, you can now start planting your cucumbers.
How Deep Should a Raised Bed Be for Cucumbers?
Deep raised beds make it easy for cucumber roots to grow and spread.
To ensure that the roots of your cucumber plants are adequately nourished, a minimum depth of 18-36 inches is strongly suggested to provide them with enough room for optimal growth.
If you make your raised bed deep enough and use the right soil mixture, you will be able to have a good crop of cucumbers.
You already decided on the ideal depth for your cucumber raised bed, now it’s time to ready the soil.
To ensure your cucumbers have access to all the nutrients they need, blend together a combination of organic substances like manure and compost with garden soil.
Mixing these components fully, ensuring an even distribution throughout the bed, is paramount.
To ensure water retention and prevent weed growth, top off with 2-3 inches of mulch.
Now that everything is ready, you can start planting your cucumber seeds.
For the best yield, strictly adhere to the instructions on your seed packet or package and ensure that you water them regularly.
If you’re willing to put in a bit of effort and tenderness, soon enough your own home-grown cucumbers will be ready for harvesting.
Enjoy their delectable flavor with all the hard work you’ve done.
When it comes to planting cucumbers, the answer is dependent on what type you are cultivating.
If they are bush varieties, then 18 inches should be sufficient for a successful harvest.
For vining varieties, however, it is usually best to provide 36 inches of soil depth in order for ample room for their lengthy roots and vines.
To make sure that your cucumber plants get all the necessary nutrients, it’s wise to build a raised garden bed as deep as you can.
It is best to be careful when making a vegetable patch.
Utilizing a generously sized bed helps to not only keep weeds at bay, but also makes watering less of an effort.
Moreover, with some additional energy from your end you’ll be able to enjoy the harvest.
How Much Space Do Cucumbers Need in a Raised Bed?
Depending on the variety of cucumber you opt to cultivate, the amount of space your plants require in a raised bed will vary.
Generally, bush varieties require 6 inches of space between each plant while vining types need 18 inches to allow their vines to spread out.
Additionally, plants should be placed 3 feet apart in rows for optimal growth.
Additionally, it is important to bear in mind that cucumbers are quite demanding when it comes to nutrients – so make sure you give them plenty of fertilizer and other essential elements throughout their growth period.
Gardeners those who are planning to grow vining cucumbers in a raised bed, should provide them with support for their vines.
Planting close to a trellis or stake is the best way to ensure your plants will reach their highest potential.
If you’re looking to add a trellis to your garden, consider constructing one from wood, metal or plastic—it should reach 8-10 feet in height for optimal results.
To ensure that your plants have plenty of room for growth, space them out and use a trellis or garden stakes if needed. That way, the plants won’t become too cramped up!
If you give your cucumber plants the support system they need, not only will harvesting become simpler and less time-consuming, but there will also be a decreased chance of them being affected by disease or overcrowding. Allowing the vines to dangle freely helps in this regard.
With the appropriate love and nourishment, you’ll be able to revel in a succulent harvest of homegrown cucumbers.
How to Maintain Raised Bed for Cucumbers?
After carefully placing your cucumber seeds in the raised bed, you must nurture them by providing the ideal environment for their success.
Keep an eye out for pests or diseases and take action if necessary.
Watering your plants frequently – particularly during the hot summer days – is essential to protect against drought and maximize yield.
You should add fertilizer to the garden when it is needed, but not too often. You can use organic matter such as compost or fish emulsion.
To ensure your raised beds thrive, take the time to thoroughly remove any weeds from the area.
Mulching can also be an incredible help since it helps keep moisture locked in and minimizes competition with other plants for nutrients.
Raised beds are a great way to grow healthy cucumber plants. With its deep soil and easy access, it’s ideal for maximizing yield and minimizing pests or diseases.
The soil warms faster in the springtime, allowing for an earlier planting season.
And because you can control the soil quality, you can tailor it specifically to what your cucumbers need.
Raised beds also take up less space than traditional garden beds, so they’re perfect for small spaces.
Conclusion
Depth of raised beds for growing cucumbers is important for maximizing production.
They should be 18 inches deep for bush varieties and 36 inches deep for vining types, with 3 feet spacing between rows.
Providing plants with the right support system such as a trellis or garden stakes is also essential.
With proper care and maintenance, you’ll soon be able to enjoy a delicious crop of home-grown cucumbers.
Raised beds provide numerous benefits such as better soil quality and warmer temperatures, plus they take up less space than traditional garden beds.
If you are hoping to cultivate healthy cucumbers, raised beds are the best option.
While it is true that a vegetable garden can attract rats, the chances of this happening are minimal. Rats usually look for spots with an ample food source, and your veggie patch won’t typically be one of them.
If you do some things to stop rats from coming, such as picking up any fallen fruits or vegetables and keeping your garden clean, you should be able to keep rats away.
In case you do detect any warning signs of rats, it is pivotal to take action immediately since their population can magnify quickly and will be harder to regulate.
For optimal safety and efficacy, it is crucial to contact a qualified pest control expert when tackling infestations. By hiring an experienced professional, you can be sure the issue will be handled properly.
What Attracts Rats to Vegetable Garden?
Vegetable gardens offer a variety of sustenance to rats, offering the ideal conditions for them to find food, water and shelter.
Rats are notorious for their insatiable appetite and will scour your garden looking to devour any vegetables, fruits, seeds or roots they can find.
Additionally, rats may use the soil or compost as nesting materials and hide among the foliage. Rodents may be drawn to any standing water or food sources left out, such as pet food bowls or scattered bird seeds.
Do Vegetable Gardens Attracts Rats?
Planting veggies in a garden may be inviting rats due to their need for sustenance and refuge.Rats are not picky eaters! They feast on both plant-based and animal-based food, so a vegetable garden can be the perfect spot to give them their much needed nourishment—provided that they have easy access.
Furthermore, gardens are a haven of safety and security for rats due to their abundance of protective hiding places like shrubs, trees, and plants.
Not all types of vegetables will attract rats; however, some produce may be more enticing than others due to their smell or taste.
For instance, sweet potatoes and melons often emit strong scents that rodents find appealing.
Other vegetables like cucumbers, squash and green beans may also draw rodents because of their deliciousness.
If any vegetable scraps are left lying around the garden after harvesting them, this could potentially act as an additional attractant for rats looking for a quick snack.
It is important to note that rats don’t just come for the food; the vegetable garden can also provide them with an ideal habitat for nesting and seeking safety from predators.
Any enclosed spaces such as wooden planters or overturned buckets can become home to many rat families who will actively seek out these areas due to their protection from the elements as well as potential threats.
In addition, areas where there is plenty of vegetation can act as camouflage making it even harder to spot any unwanted guests in your garden – allowing them access to year-round sustenance and shelter if not managed properly with rodent control techniques.
How to Prevent Rats Infesting in Vegetable Garden?
You might think of using poison to get rid of rats, but fortunately there are natural methods that can be used to prevent rat infestation in your vegetable garden.
To start, make sure the area is kept clean and free of debris. Remove any food sources that could attract rodents, such as fallen fruit or leftover compost.
Keep garden waste stored away from the garden, and don’t leave out pet food or bird feeders that might invite rats into your space.
Additionally, plant plants with strong scents like rosemary, lavender and garlic around the borders of your garden – these are said to repel rodents naturally.
Finally, you can also consider using a water sprinkler system that comes on at night when rats are more active – this will scare them away without doing any damage to your plants.
How to use peppermint oil to get rid of rats from vegetable garden?
If you find yourself dealing with a rat infestation in your garden, peppermint oil can be a great natural remedy.
Studies have shown that rats have an aversion to the smell of peppermint oil and will stay away if it’s present in high enough concentrations.
To use peppermint oil to get rid of rats from your garden, try the following steps:
1. Dilute the peppermint oil by mixing it with water in a spray bottle. A good rule of thumb is 10 drops of peppermint oil per cup of water.
2. Spray the mixture around your garden – particularly near entry points for rats – and on any vegetation that might attract them. You may need to reapply every few weeks.
3. If the rats are living in a burrow, soak cotton balls with peppermint oil and place them at the entrance of the burrow. The strong smell will drive away any inhabitants.
4. Finally, take measures to prevent future infestations by removing clutter from your garden and keeping it clean and tidy. Rats tend to breed more quickly in areas that provide plenty of hiding spots and food sources – both of which can be found in messy gardens!
Using peppermint oil is a great way to get rid of rats from your garden without resorting to chemical pesticides or traps. Give it a try today for an organic solution to your rat problem!
Some vegetable plants that can attract rats include lettuce, broccoli, cauliflower, corn, beans, peas, and tomatoes.
Rats are also attracted to fruits like apples, cherries and melons.
Additionally, they will scavenge for bird food or pet food left outdoors as well as eat any fallen tree nuts.
Taking measures to properly store these types of food sources and keeping your garden clean and weed-free can help deter rat populations from growing in the first place.
5 Tips to Get Rid of Rats from Your Vegetable Garden
1. Keep your garden clean: Make sure to regularly clean up debris, fallen fruits and vegetables, weeds, and other organic materials that could attract rats.
2. Keep the area around your vegetable garden free of clutter: Rats love to hide in tall grasses and piles of leaves or brush, so make sure to keep these areas free from debris.
3. Use rat traps: Rat traps are an effective way to control rodents if they have already infiltrated your garden. Place them near potential points of entry into your garden such as holes in walls or fences. Check bait frequently and reset any traps that have been triggered by a rat.
4. Use natural repellents: Natural rodent repellents such as peppermint oil can be used to keep rats away from your garden. Sprinkle this essential oil around the perimeter of your vegetable plot to repel rats and other small animals.
5. Use physical barriers: A fence or sturdy netting can be used to keep rats out of your vegetable garden. Make sure any openings are no larger than 1 inch in width and that the barrier reaches at least 2 feet above the ground.
Gardening can be an enjoyable and rewarding experience, regardless of skill level!
However, to get the most out of your gardening efforts it is necessary to have a solid foundation in basic practices.
Water is one of the most essential parts of gardening – not providing enough or too much water can have serious consequences on your beetroot plant.
In this write-up, you can delve into how much water beetroot needs in order to produce healthy and fruitful yield.
Not just that, you’ll learn more about what kind of watering practices you should adopt when growing this root vegetable.
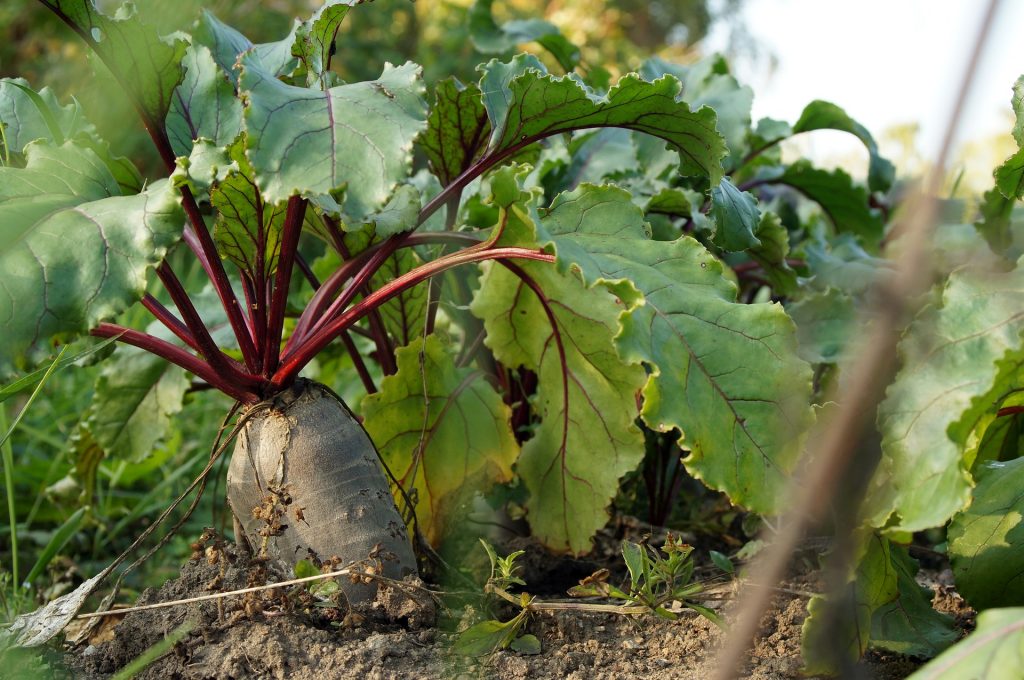
Know your plant – Beetroot
Growing beetroot at home can be a rewarding experience, when you know plant’s requirements.
Choose fertile soil, you can add old compost or organic matter, and making sure your plant gets enough sunlight.
Sow the seeds in drills, between 6-8 inches apart, and keep well watered as they grow.
Beetroot plant thrives in a sandy-loam soil, which should be free-draining and rich in organic matter.
This root vegetable plant also needs plenty of sunlight, so make sure it’s planted in an area that receives at least 6 hours of sunshine a day.
Beetroot is best grown in cooler temperatures, and soil that has been basked in the light of the sun. Make sure your soil temperature remains between 60-85°F for optimal growth.
During its blooming period, this plant requires consistent watering in order to yield the most fruitful outcome. Aim for at least 1 inch of water per week to ensure healthy and vibrant growth.
To ensure that your beetroot grows vigorously, it is imperative to water the soil every 2-3 days of its growing season. Keeping the earth moist allows for optimal growth and development of healthy roots.
When the sun is scorching, you may need to water your plants up to twice a day in order for them to remain healthy.
When temperatures are cooler or your plants aren’t in the midst of active growth, it’s best to water them just once a week.
If your plants appear dehydrated or wilted, make sure to give them a nice drink of water.
It’s critical to remember that excessive water can not only lead to nutrient leaching, but it can also cause root rot. Therefore, take care to ensure you don’t give your beetroot plant too much water.
To ensure that you don’t give your beetroot plants too much water, use a soil moisture meter to check the level in the ground. After it reads “dry”, it’s time to provide them some hydration!
Besides, mulching is an excellent way of trapping water and guarding against dehydration.
How to avoid under-watering beetroot?
If the soil is too arid, beetroot can go through water and nutrient deficiency. Regularly check your plants for wilting or drooping signs, and give them some much-needed hydration if it’s needed!
An irrigation system can be a great asset to your garden, ensuring accurate and consistent water delivery for all of your plants. Not only does this save you time trying to keep track of when the last watering was, but it also reduces the chance that any plant will suffer due to under-watering.
How much water does beetroot need?
During hot conditions, make sure to consistently supply beetroot with 1 inch of water per week or even twice a day. As opposed to the hotter months though, during cooler times when your plants are less active, you can reduce watering down to once a week for optimal growth and health.
Do you water beetroot every day?
No, you do not need to water your beetroot every day.
During the growing season, strive for approximately one inch of water per week and reduce this to once a week if your plants are not actively flourishing or when temperatures begin to plunge. Meanwhile, using a soil moisture meter can be beneficial in assessing the quantity of water below ground level and accordingly adjusting your irrigation technique.
Water your beetroot plant; if they appear wilted or droopy, this little care can transform their appearance.
Install an irrigation system to guarantee your plants are consistently hydrated and healthy.
Does Beetroot need a lot of water to grow?
Not really.
Beetroot plants, like many vegetables, favor a soil that is always damp but not waterlogged.
What kind of water is best for beetroot plant?
Plant growth is generally favored with soft or filtered water. Softened water eliminates minerals and salts, while cleaning agents like chlorine, iron, and other impurities are eradicated from your filtered supply; this helps plants to flourish!
To ensure that your plants are flourishing, use a water filter when utilizing tap water to eliminate any unwanted substances from the liquid before pouring it on the soil.
By taking this step, you can significantly reduce the chances of leaf damage or root scorching caused by high levels of salts and minerals or contamination.
Moreover, rainfall is an optimal source of hydration for plants because it is naturally filtered and softened as it passes through the atmosphere before being absorbed into the soil.
1. Plant beetroot seeds in well-draining soil, in a location that gets full sun. If your soil has poor drainage, amend it with organic matter such as compost or aged manure.
2. Water the beetroot plants at regular intervals to keep the soil consistently moist. Make sure you water deeply and avoid shallow watering which can lead to root rot and will make the plants more vulnerable to pest infestations.
3. During dry spells, water the plants once a week, if not more often depending on the weather conditions and temperature of the region you are growing in.
4. Fertilize beetroot plants every 2 weeks with a balanced granular fertilizer or liquid fertilizer solution. The amount and type of fertilizer will depend on your individual soil needs and should be adjusted accordingly.
5. Keep weeds away from your beetroots by regularly weeding or using mulch around them; this will help conserve moisture and prevent competition from unwanted vegetation for sunlight, nutrients and water resources that could otherwise stunt their growth and development.
6. Beetroots require high levels of potassium for optimal growth, so add potassium sulfate or wood ash to the soil near your plants during springtime when they are actively growing and need it most for effective growth and development; this will help promote strong root systems as well as healthy foliage growth throughout the summer months when conditions become drier overall due to adverse weather conditions such as drought or heatwaves.
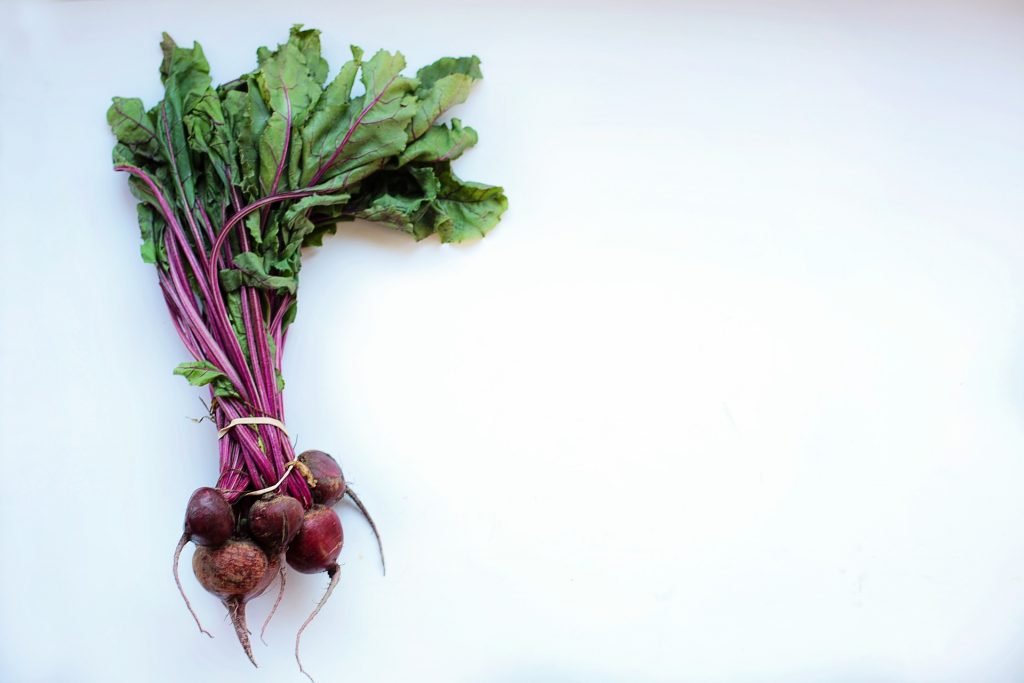
7. When harvesting your beetroots, be careful not to damage their roots or leaves; use sharp scissors to snip off their greens from the stem without uprooting them from the ground entirely unless absolutely necessary (e.g., if you need to move them). Carefully pluck out any remaining leaves attached to the root after harvesting without causing damage as well; these can then be cooked up separately for an additional nutritious side dish!
Conclusion
Watering beetroot plants is an important part of their growth and development.
It is essential to give your Beetroots a steady supply of water in order for them to thrive, since they prefer soil that is moist but not soggy. As such, make sure you are watering them on a regular basis and evenly distributing moisture throughout the soil.
During hot days, it is essential to increase your watering frequency in order to keep your plants healthy and vibrant.
Additionally, be sure to fertilize with balanced granular fertilizer or liquid fertilizer solution every 2 weeks in order to provide adequate nutrients for optimal growth and development.
If you devote the necessary time and effort to these straightforward techniques, you will soon enjoy a delicious crop of succulent beetroots.
Are you dismayed when you visit your garden to find that something has been nibbling on it? It’s a heartbreaking moment, especially if you aren’t sure who or what is responsible.
In this write-up, we’ll take a look at some of the most common culprits when it comes to eating beetroot leaves.
Hopefully, this will help you figure out what’s been nibbling on your plants!
Know: What is eating your beetroot plant leaves?
Inspect your beetroot plants for signs of damage such as holes in the leaves or chewed edges.
Checking your beetroot plants regularly can be a great way to make sure they stay healthy.
Keep an eye out for signs of destruction, like holes in foliage or gnawed edges, as these could be telltale indications that your plants are being swarmed by pesky critters.
To prevent further detriment, it is imperative to take prompt action if any damage is identified in order to protect the remains of the harvest.
In certain cases, this might require diligently removing pests from the foliage or applying insecticides and fungicides specific to vegetables.
With regular examinations and maintenance, your beetroot plants can remain in their prime for many years to come. Not only are these inspections crucial for ensuring the longevity of your crop, but also its overall productivity!
Aphids, caterpillars, or beetles may be eating your beetroot leaves
Don’t forget to inspect your garden for insects if you want it to remain vibrant and flourishing.
Aphids, caterpillars, and beetles can all cause issues if left unchecked.
For the optimal health of your beetroot plant, be sure to perform a detailed examination bi-weekly – this way you can instantly eradicate any pests that may be damaging them
Taking these steps will ensure that your hard work pays off and your garden can stay in tip-top shape.
Leafhopper can eat beetroot leaves
If not addressed promptly, Leafhoppers can wreak havoc on your garden. These minuscule plant-eating bugs are easily overlooked, but the damage they cause is immense.
Leafhoppers typically feed on the underside of beetroot leaves and can leave them looking wilted or discolored.
In order to effectively eliminate leafhoppers, you must use a pesticide specifically formulated for vegetables.This will help to reduce the population and keep your plants healthy.
Trying to eliminate these slimy intruders can be a daunting task, as they prefer the shade and stay out of sight during daylight hours.
If you find that these critters are munching on your plants, try using a slug bait or manually picking up the pests and removing them from your garden.
Beet armyworm can eat beetroot leaves
Beet armyworms are small caterpillars that feed on the beetroot leaves.
It’s essential to be be cautious and watchful for beet armyworms, as they may cause considerable harm your beetroot plant in a short period of time.
If you find evidence of them eating your beetroot leaves, you’ll want to take immediate action and apply an insecticide.
With quick and effective treatment, you can reduce the population of beet armyworms and save your plants from further harm.
Powdery mildew or leaf spot
To ensure your beetroot plant remain healthy and thriving, it is essential to routinely monitor them for any potential beetroot diseases.
Look out for common problems such as powdery mildew, which looks like white spots that can turn yellow as it spreads, or leaf spot, which often shows up in small spots with dark borders around them.
If you notice either of these symptoms on your plants, it’s important to take steps immediately to trim or cut the affected leaves and try a fungicide.
Paying attention now will save you a lot of time and frustration later when it comes to safeguarding your plants.
Take action to control the pests or diseases if you find them.
If you find your garden is being overrun by pests or diseases, it’s important that you take swift action.
Even leaving them to pass over time will likely make them worse and further damage your plants.
Luckily, there are plenty of ways to control these unwelcome invaders – products like insecticides are great for keeping them at bay; however, if they consider a more organic approach using techniques like crop rotation or adding natural predators like ladybugs can work too!
You should also consider checking the health of your soil and watering practices, sometimes the condition of either can lead to infections that shouldn’t be tolerated.
Taking action to stay on top of pests and diseases in your garden is essential for its longevity and beauty.
Monitor your plants regularly to prevent further damage.
Taking care of your plants requires regular maintenance and attention. Doing so will help prevent costly repairs and further damage to your plants.
Monitoring your plants for signs of disease, like wilting, discoloration, or insects, allows you to take action before the problem worsens. If you are struggling to identify what might be ailing your plant, consult an expert for help.
Not only can they provide advice on how to get a troubled plant back on its feet, but they can often help you determine why it happened in the first place.
Taking the time to monitor and check in with your plants pays dividends – not just preventing further damage now, but setting up healthy habits for years down the road.
One of the most effective ways to protect your beetroot plants from pests is by regularly inspecting them for signs of damage.
Look out for common garden pests like slugs, snails, and aphids which can cause a lot of destruction in a short amount of time. If you find any signs that these critters are present, take steps immediately to get rid of them.
You may need to use a chemical insecticide or consider introducing natural predators like ladybugs into your garden.
Regular inspections, insecticide treatments, and manual removal are all great ways to make sure your crops stay safe.
Additionally, you can protect your beets from pests by using crop rotation and making sure the soil is healthy and well fertilized.
Conclusion
To sum up, if you want to keep your beetroot plants healthy, you should inspect them regularly for signs of damage, pests, or disease.
Take action immediately if you find any problems so that they don’t have a chance to spread and cause even more damage.
With a little bit of care, you can enjoy a bountiful harvest of delicious beetroots!