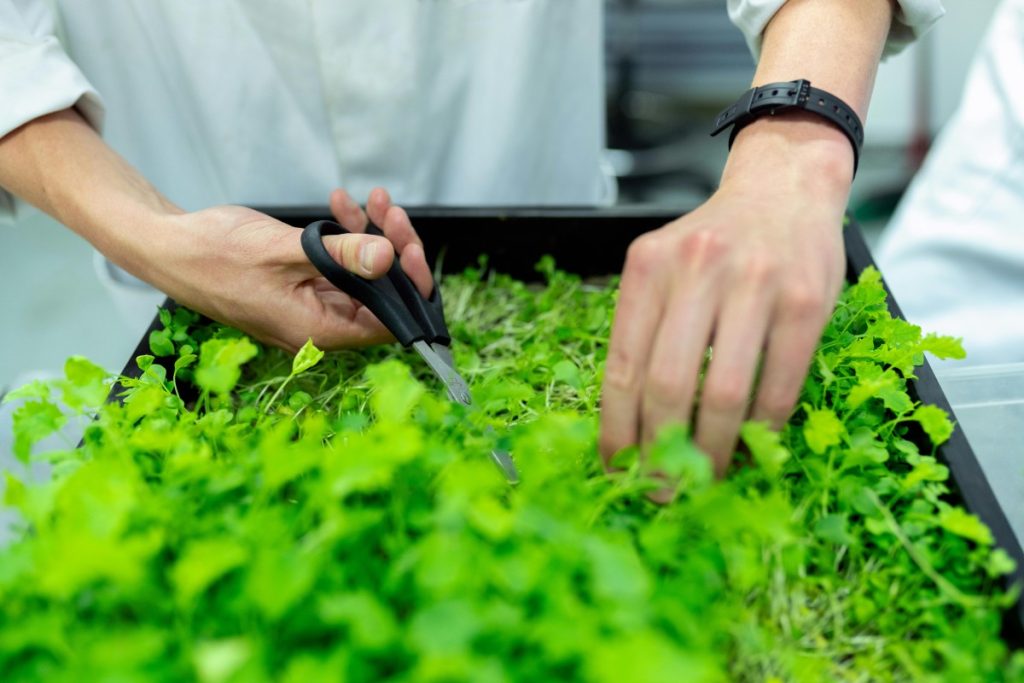
Imagine growing fresh, vibrant plants without ever digging into the dirt. No messy soil, no weeding, and no worries about unpredictable weather ruining your crops. This isn’t a futuristic fantasy—it’s hydroponics, a revolutionary method of cultivation that’s transforming how we grow food. Whether you’re a curious beginner or a seasoned gardener looking to explore new techniques, this blog will dive deep into what hydroponics is, how it works, and why it’s gaining popularity worldwide. Let’s get started!
What Is Hydroponics?
Hydroponics is a method of growing plants without soil, using a nutrient-rich water solution to deliver everything plants need to thrive. The word “hydroponics” comes from the Greek words hydro (water) and ponos (labor), essentially meaning “working with water.” Instead of relying on soil as a medium to hold nutrients and water, hydroponics provides these essentials directly to the plant roots through a carefully controlled system.
In traditional farming, soil acts as a reservoir for water, nutrients, and oxygen, while also providing physical support for the plant. Hydroponics skips the middleman—soil—and replaces it with alternative growing mediums like coconut coir, perlite, or even just water. The result? Faster growth, higher yields, and the ability to grow plants almost anywhere, from urban apartments to sprawling commercial greenhouses.
But how does this soil-less magic actually work? Let’s break it down step by step.
How Does Hydroponics Work?
At its core, hydroponics is about giving plants what they need—water, nutrients, oxygen, and light—in the most efficient way possible. Here’s a closer look at the key components and principles that make hydroponics tick.
1. The Nutrient Solution: The Lifeblood of Hydroponics
Plants need a mix of macronutrients (like nitrogen, phosphorus, and potassium) and micronutrients (like iron and zinc) to grow. In soil-based gardening, these nutrients come from organic matter or fertilizers that break down over time. In hydroponics, you dissolve these nutrients directly into water, creating a balanced “nutrient solution.”
This solution is tailored to the specific needs of the plants you’re growing. For example, leafy greens like lettuce might need more nitrogen for lush foliage, while fruiting plants like tomatoes require extra potassium and phosphorus for blooms and fruit. The beauty of hydroponics is that you can adjust the nutrient mix with precision, ensuring plants get exactly what they need, when they need it.
2. The Growing Medium: Replacing Soil
While hydroponics doesn’t use soil, many systems rely on a growing medium to anchor the plants and support their roots. Common options include:
- Coconut Coir: Made from coconut husks, it’s sustainable and retains water well.
- Perlite: Lightweight volcanic rock that provides excellent drainage and aeration.
- Clay Pebbles: Small, round pellets that allow roots to breathe while holding some moisture.
- Rockwool: A fibrous material made from spun volcanic rock, often used for seedlings.
In some hydroponic setups, like the Nutrient Film Technique (NFT), no medium is used at all—roots dangle directly into the nutrient solution. The medium, when used, isn’t a source of nutrients; it’s just a structural support.
3. Water and Oxygen: A Delicate Balance
Roots need both water and oxygen to survive. Too much water, and they drown; too little, and they dry out. Hydroponics systems are designed to strike the perfect balance. For instance:
- In a deep water culture (DWC) system, roots are submerged in water, but an air pump adds oxygen via bubbles.
- In a wick system, a wick draws nutrient solution up to the roots while leaving space for air.
This constant access to water and oxygen is one reason hydroponic plants often grow faster than their soil-grown counterparts—there’s no competition or delay in getting what they need.
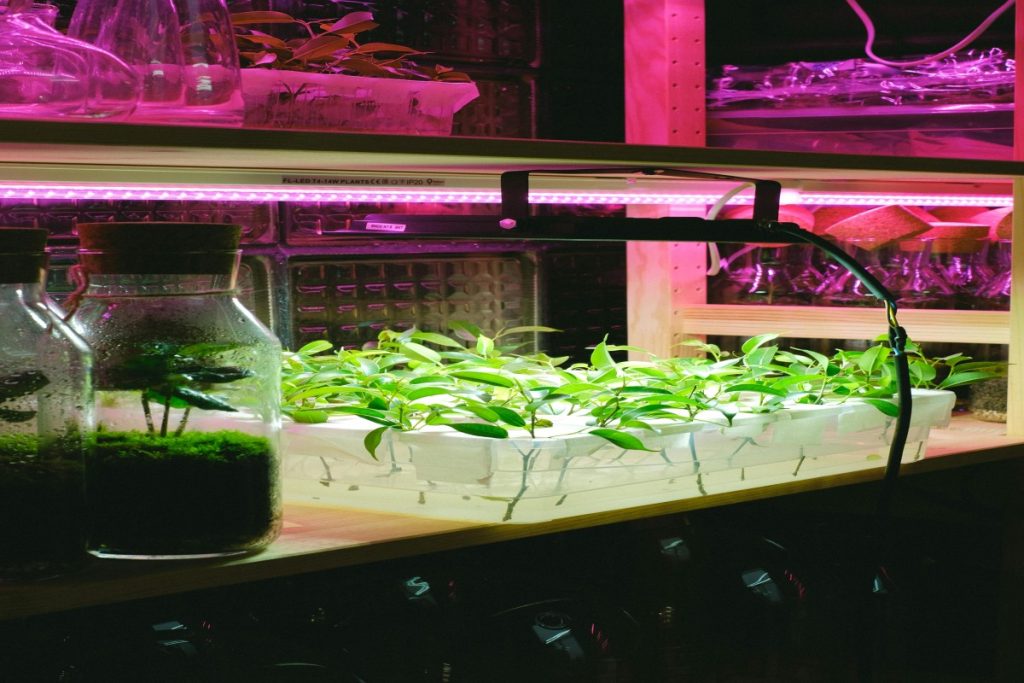
4. Light: Fueling Photosynthesis
Like all plants, hydroponic crops need light to photosynthesize and produce energy. Outdoors, sunlight does the job. Indoors, growers use grow lights—typically LED or fluorescent—to mimic natural conditions. These lights can be adjusted for intensity and duration, giving plants the ideal “daylight” hours for maximum growth.
5. The System: Bringing It All Together
Hydroponics isn’t a one-size-fits-all method. There are several types of systems, each with its own way of delivering nutrients and water to the roots. We’ll explore these in detail later, but the basic idea is the same: roots are exposed to the nutrient solution, either continuously or in cycles, while the plant grows above.
Types of Hydroponic Systems
Hydroponics offers a variety of setups, each suited to different plants, spaces, and skill levels. Here are the most popular systems and how they work.
1. Wick System
- How It Works: A wick (like a rope or fabric strip) connects the nutrient solution reservoir to the growing medium. The solution travels up the wick via capillary action, keeping the roots moist.
- Pros: Simple, passive (no pumps needed), and great for beginners.
- Cons: Slow delivery limits it to small, low-nutrient plants like herbs.
- Best For: Basil, lettuce, or small decorative plants.
2. Deep Water Culture (DWC)
- How It Works: Plants sit in net pots above a reservoir, with roots submerged in nutrient-rich water. An air pump oxygenates the solution.
- Pros: Fast growth, low maintenance once set up.
- Cons: Requires electricity for the pump; power outages can harm plants.
- Best For: Lettuce, kale, and other fast-growing greens.
3. Nutrient Film Technique (NFT)
- How It Works: Plants are placed in sloped channels, and a thin film of nutrient solution flows over the roots before draining back into a reservoir.
- Pros: Efficient water use, great for large-scale setups.
- Cons: Pump failure can dry out roots quickly; not ideal for heavy plants.
- Best For: Lightweight crops like spinach or strawberries.
4. Ebb and Flow (Flood and Drain)
- How It Works: A pump periodically floods a tray of plants with nutrient solution, then drains it back into the reservoir.
- Pros: Versatile, good oxygen access during drain cycles.
- Cons: More complex with timers and pumps.
- Best For: Tomatoes, peppers, and larger plants.
5. Drip System
- How It Works: Nutrient solution is dripped onto the base of each plant via tubes, with excess draining back or being discarded.
- Pros: Precise control, scalable for big operations.
- Cons: Clogged drippers can be an issue; requires monitoring.
- Best For: Fruiting plants like cucumbers or commercial crops.
6. Aeroponics
- How It Works: Roots hang in the air and are misted with nutrient solution at regular intervals.
- Pros: Maximum oxygen exposure, rapid growth.
- Cons: High-tech and expensive; misting failure can kill plants fast.
- Best For: High-value crops like herbs or experimental setups.
Each system has its strengths, and choosing one depends on your goals, budget, and space.
Why Hydroponics Works So Well
Hydroponics isn’t just a gimmick—it’s a science-backed approach with real advantages. Here’s why it outperforms traditional soil gardening in many ways.
1. Faster Growth and Higher Yields
Without soil, plants don’t waste energy searching for nutrients. Everything is delivered directly to the roots, so they can focus on growing. Studies show hydroponic plants can grow 25-50% faster and produce up to 30% more yield than soil-grown plants under similar conditions.
2. Water Efficiency
Hydroponics uses up to 90% less water than traditional farming. The nutrient solution is recycled in most systems, and there’s no runoff into the ground. This makes it a game-changer in arid regions or areas facing water scarcity.
3. Space Savings
No sprawling fields are needed. Hydroponics can be vertical, stacked, or squeezed into small spaces like balconies or basements. This is why it’s a favorite for urban farming.
4. Fewer Pests and Diseases
Soil harbors pests, fungi, and weeds. By ditching it, hydroponics reduces these threats, often eliminating the need for pesticides. Clean systems mean healthier plants.
5. Year-Round Growing
With indoor setups, you control light, temperature, and nutrients, so seasons don’t matter. Fresh tomatoes in December? No problem.
Challenges of Hydroponics
It’s not all smooth sailing. Hydroponics has its hurdles, especially for beginners.
1. Initial Cost
Pumps, lights, and reservoirs can add up. While small DIY setups are cheap, scaling up or going high-tech gets pricey.
2. Technical Knowledge
You need to understand pH, nutrient ratios, and system maintenance. A small mistake—like a clogged pump or imbalanced solution—can harm your crop.
3. Power Dependency
Many systems rely on electricity for pumps and lights. A blackout could spell disaster if you don’t have a backup plan.
4. Limited Crop Variety
Leafy greens and herbs thrive in hydroponics, but root crops like potatoes or slow-growing trees are trickier and less practical.
Despite these challenges, the benefits often outweigh the drawbacks, especially with practice.
Getting Started with Hydroponics
Ready to try it yourself? Here’s a simple guide to dip your toes into hydroponics.
Step 1: Choose Your System
Start small with a wick or DWC system. They’re affordable and forgiving for beginners.
Step 2: Pick Your Plants
Go for easy growers like lettuce, spinach, or basil. They’re fast and don’t need complex setups.
Step 3: Gather Supplies
You’ll need:
- A container or reservoir
- Nutrient solution (premixed or DIY)
- A growing medium (if required)
- Plants or seeds
- A light source (sunlight or grow lights)
Step 4: Set Up and Monitor
Follow your system’s instructions, keep the nutrient solution balanced (pH 5.5-6.5 is ideal), and check water levels daily.
Step 5: Harvest and Enjoy
In as little as 4-6 weeks, you could be eating homegrown greens!
The Future of Hydroponics
Hydroponics is more than a hobby—it’s shaping the future of food. With a growing global population, shrinking farmland, and climate challenges, traditional agriculture faces limits. Hydroponics offers a sustainable alternative, already powering vertical farms in cities like Singapore and commercial operations in the Netherlands.
NASA has even explored hydroponics for space missions, growing food in zero gravity. On Earth, it’s helping feed communities in deserts and disaster zones. As technology advances, expect hydroponics to become cheaper, smarter, and more widespread.
Conclusion
Hydroponics is a blend of science, innovation, and nature—a way to grow more with less. By delivering water, nutrients, and oxygen directly to plant roots, it skips the inefficiencies of soil and unlocks incredible potential. Whether you’re growing herbs on your kitchen counter or dreaming of a high-tech farm, hydroponics opens doors to a greener, tastier future.
So, why not give it a try? Start small, experiment, and watch your plants thrive like never before. The soil-less revolution is here—and it’s growing fast.