How to Grow Pumpkins in Pots – An Ultimate Guide to Grow Pumpkins in Containers

Growing pumpkins in containers is beneficial, allowing you to have a fresh harvest all year round. Learn how easy to grow them in this article!

 Pumpkins are valued for their taste and decorative appearance. Growing pumpkins in containers is not difficult and does not require a lot of maintenance. It is actually a kind of undemanding vegetable that adapts to any climate!

Growing Pumpkins in Container

You can plant pumpkin seeds or buy seedlings from a nursery. It can be planted from April to the end of May in very cold climates, and until July in slightly warmer climates. If you live in a subtropical climate or without tropical frost, you can grow it for most of the year.

Also Read: Powdery mildew of Pumpkin

Choosing a Pot

Choose a large pot of 10 gallons or at least 16-20 inches (for small pumpkins). For larger varieties, it is better to use a larger pot. Just make sure it has a drain hole at the bottom.

Small varieties of pumpkins are best for containers and small gardening. However, you can also grow a wide variety of pumpkins. Few of the best are listed below:

The First Pumpkin

It is a family heirloom that was originally used to feed cows and is now used as a delicious pumpkin pie.

Lumina Pumpkin

 It is similar to the crescent variety. Lumin has smooth-skinned white pumpkins.

Porcelain Doll

The fruit is unusually pink. The medium-sized pumpkin has bright orange flesh.

Goosebumps

At first, your skin is smooth, but as it grows, warts gradually appear.

New Moon

It is one of the largest varieties and has thick white flesh. The crescent moon is named for its fair skin.

Prize winner

This diversity is very large. The winner can make a large pumpkin that usually weighs between 75 and 150 pounds.

Baby Boo

Baby Boo is ghostly white, named “Baby” because of its small size. It grows to 2-3 inches.

Sugar Pie

This strain is as cute as its name and much smaller. Used for baking cakes, biscuits and pies.

Jack-o’-Lanterns

The midsole round pumpkin is a great choice for carving.

Jack-Be-Little

This small variety of squash can only grow to 3-4 inches tall, and it takes about 80-90 days to mature. You can plant rows to get a bright and rich harvest.

Also Read: Pumpkin farming: how to plant, grow, and harvest pumpkins correctly and properly

Pumpkin care

#1.Mulching

Once your plant grows to a few inches, do mulching. It reduces water evaporation and helps maintain moisture in the soil.

#2.Fertilizers

 Pumpkin plants are rich in nutrients and require a lot of fertilization. Most importantly, it is important to have fertile soil so that the pumpkin can become bigger and fleshier. It is best to use balanced fertilizer in the early stage of growth.

It is a good idea to switch to low-nitrogen, high-potassium, and high-phosphorus fertilizers, such as water-soluble fertilizer for every two weeks (when the plants are long enough to bloom).

#3.Pests and Diseases

Pumpkin is a hardy plant, but it still suffers from many diseases, especially powdery mildew. Try to keep the leaves dry to prevent diseases.

For pests, look out for common garden pests such as aphids, fleas, mealy bugs, cucumbers and worms. Use organic insecticides such as neem oil to treat them. If the pests increase, try using commercial insecticides.

Pumpkins can be harvested 90-120 days after planting (depending on the variety and growing conditions).

 Immature and green pumpkins are also used in gourmet recipes and many exotic dishes.

 But to pick mature pumpkins, check if they harden into a deep and uniform colour (most common varieties are orange). When the peel hardens and looks empty, it’s time to reap the benefits. The bark must also withstand the pressure from the nails. There should be an interval of approximately 100 days between the sowing of the vegetable pulp and the fully mature harvest.

 To pick a pumpkin, use scissors or a sharp knife to carefully remove it from the branch. However, do not cut too close to the fruit; leave long stems (about 10 cm) to extend the shelf life. Store pumpkins in a dry, cool and dark place.

Also Read: Planting and Growing Okra Step by Step

Create an organic pumpkin container garden and maximize your harvest

  • Sowing pumpkins in spring when the danger of frost has passed and the soil temperature reaches 65°F.
  • It is best to grow pumpkins with seeds, but you can use seedlings grown in biodegradable pots to reduce exposure.
  • For growing pumpkins require a huge container, usually at least 20-25 gallons, to hold pumpkin plants.
  • Your pumpkin plant needs a support system to help the vine grow.
  • Pumpkin is a good fodder crop, so add enough compost to the soil before planting. Then plan to fertilize frequently during the growing season.
  • Depending on the selected pumpkin variety, it may take 90-120 frost-free days for the pumpkin to fully mature.

Your pumpkin plants will grow happily in their pots, but now you need them to be happy. Here, we explain how to take care of pumpkin plants growing in pots.

How to Grow Corns in Containers?

You will be glad to know that corn can be grown in pots!

Many people do not think about using containers for growing corn and yields will be lower than when growing corn in the garden. With the right containers and good conditions, you can get the highest yield possible by planting corn in your garden beds.

 In fact, all you need is a spot with plenty of sunshine, little wind, and the ability to keep the soil moist.

Corn is a warm-weather crop, so it is best to plant seeds for the past two to three weeks after the last frost. When growing potted corn, you will need a container that is at least 12 inches deep in diameter. 

Each container box holds four corn plants. Corn eats a lot, so compost or fertilizer should be added to the soil before planting. Fertilizers should also be used during the growing season. Moist the soil regularly by watering.

 Don’t even think about growing corn in a pot, but despite the difficulties, it’s worth a try. This can be a fun experiment for your family as you watch the corn grow. Plus, homegrown sweet corn tastes great. For your potted garden, we’ve put together a simple guide that walks you through the steps.

How to start growing in the container?

Growing corn is a hobby for adults and children. Children love to watch the trees grow; Hiding in a corn tree is always a fun game for kids. 

If your family wants to try growing corn stalks in their garden this year, this is what you need to do. 

Choosing a potted corn variety 

So many people I don’t know, there are different varieties of corn. Not all corn is a table and salted.

Corn varies in some places may be different. There are significant differences in grain maturity, internal structure, texture, smoothness, and aroma. Think about the different types of corn you can grow. 

Sweet corn

If you need fresh corn for dinner, then sweet corn is the way to go. It is soft and mellow, the perfect accompaniment. Sweet corn is usually yellow in color but comes in a variety of colors, such as brown and red.

Popcorn 

Yes, you can grow popcorn like the one you eat when you watch a movie with your friends. These seeds are hard and crunchy. 

The popcorn you recognize from the shop is yellow-orange. However, the popcorn you may develop at home may also be blue!

Flint Corn 

This type of corn has a hard glass surface, a sticky popcorn-like texture that appears when heated, but is used primarily as corn tortillas.

Flour corn

 In the south-western United States. Corn flour is starchy, but corn flour is soft and can be made into finer corn flour. It’s also sweet, and if steamed or baked, you can eat it without a core. 

Dent corn

This type of corn, known as field corn, is grown by many farmers because it is commonly used as animal feed and food. It is the most commonly grown corn in the United States. 

The mashed corn will dry out and the soft heart will shrink. This is why the beads look wrinkled, hence the name. You can use mashed corn to make cornmeal or dry it to make corn.

Right pot for container

You can grow four corn plants in a container this size, so you may need multiple containers depending on how many corn plants you want to grow and the container size you choose.

The one you choose has enough drainage holes at the bottom. Corn needs moisture, but these plants don’t like standing water. So drainage holes are essential. If your pot does not have a drainage hole, you can drill it with a drill.

Suitable location for your container

Corn is a warm-weather crop and requires a lot of sunlight to grow well. Find a place with six to eight hours of sunshine every day. The plant acts as a wall of privacy because the corns cobs grow quickly even in a pot.

If you plant corn in May, you can expect it to become a curtain in the middle of summer. While container-grown corn will never grow 12-15 feet taller than garden-grown corn, it can easily grow up to 6-8 feet.

Also Read: How to Grow Tamarind Tree?

Prepare your soil for planting

Now it’s time to prepare the soil for sowing corn seeds. Corn needs soil to retain moisture.

Do not dry out too quickly, and the soil must be well-drained so that the soil does not get soggy, one of the best options is to make a pot of peat.

Fertilize rotting chicken droppings or some fish dung into the soil before planting. This helps to add essential nutrients to the corn during the first few weeks of growth.

It is important to understand that corn feeds a lot. According to farmers, corn can destroy the soil if not replenished because it consumes a lot of nutrients.

Planting Corn Seeds in a Pot

Now it’s time to plant corn seeds in your bucket of choice. Too easy!

Six corn kernels per pot. Each seed should be sown 1 inch deep and lightly covered with soil.

 Don’t worry if you are planting your corn very close to the substrate because sowing closer to the seed will help pollinate and produce more fruit. That’s better!

 You must sow each seed six inches apart along the outer circle of the pot. The seeds should be three to four inches from the edge of the container.

After planting, it is imperative to water the seeds. The sun will do the rest of the work for you. Corn seeds germinate for 10-14 days, in cooler weather conditions, 55-60 ℉. At 65 ℉ and above, it may take as little as six days to germinate.

Caring For the Corn Growing In Containers

After planting, it’s time to tackle the corn. It’s easy but remembers that growing corn in a container can be tricky. You will need to notify your plants.

1. Water your corn

 Corn plants need a lot of moisture. You should water the plants every other day and keep the soil moist at all times.

 Moisture is one of the essential ingredients for tasty, sweet, and smooth corn, so this is one of the reasons why water is so essential. Especially during flowering and fruiting, the more you need to water the corn pot. 

2. Use fertilizers

Ten weeks after sowing the corn, it should be fertilized. Try using ½ tablespoon of 5-10-10 or 10-20-20 fertilizers per plant. It is best to dig a small hole at the base of the tree and spread the manure, mixing it well with the soil. 

3. Don’t forget to mulch

Even though corn grows in a barrel, adding mulch around the corn isn’t a bad idea either. The coating helps to retain moisture. 

Wood chips, newspapers, and grass clippings are great ways to prevent soil moisture loss. Mulch also helps reduce weed growth; nobody likes weeds!

Common pests and diseases affecting corn

In general, corn is considered resistant to crop pests, but this does not mean that this is not impossible – diseases and pests are always possible, so take a look, understand the common problems your crops are facing 

Corn leaves aphids 

Aphids can be a problem for many different crops severe infections can cause warping and stunted corn cobs. Plants you may have black mold in your home Corn beetle 

This beetle is active in the spring. They start out by killing weeds in the area and then move on to corn plants as they begin to grow. You will know you are infested with corn fleas if there are small holes in the leaves for blood circulation. 

This pest can affect almost any plant in your garden, not just corn. Scoops usually damage the tops of the plants, but in some cases, the worms can eat the tops.

Also Read: What is Mango Farming all about? A complete guide

Harvesting

Picking corn in a pot is essentially the same as harvesting corn in a garden. Most ripen in 60-100 days, depending on the cultivated variety and weather conditions. You should be aware that your containerized corn crop may not be what you expect. This is why grow a variety of container-friendly corn varieties and pay as much attention to the yield as possible.

Planting four branches in each cage and keeping them together for the best possible pollination will ensure the best yield.

Early in the morning when the sweetness is at its highest. 

When you’re ready to pick up the corn, take the ear and pull it down. Then twist and pull. He will quickly crawl out of the trunk. 

You can harvest as much corn as you can eat in a few days.

How to Grow Tamarind Tree?

The tamarind tree is easy to grow and it’s a low maintenance plant with a few needs. It is native to Africa and grows as a wild plant in India. It is also grown in various countries such as Southeast Asia, Australia, North America, and South America.

Tamarind tree can survive more than 300 years and it is a slow-growing tree. The leaves of the tree look like acacia leaves. The tropical tree can be able to reach a height up to 90 feet tall and nearly as wide as in a frost-free climate.

Growing tamarind from seed:

The safest methods for home gardeners are to boil water and/or prolonged soaking to break up the hard shell surrounding the workpiece.

 Boil water in a kettle. Place the seeds in a cup and pour boiling water over the seeds. Set aside the cup out of the reach of children and pets, and let the seeds soak for at least an hour. Alternatively, place the seeds in a jar and cover them with warm tap water. It allows the seeds to soak for 12 to 24 hours before planting.

Also Read: What is Mango Farming all about? A complete guide

Care for a tamarind tree:

When seedlings emerge, remove the mulch and place them on a bright spot, preferably in full sun, or under an illuminated growing platform for 12 hours or more per day. As the seedlings grow, transplant them into larger containers to accommodate the roots. To grow as an ornamental plant, plant in a shallow ceramic pot. Use a well-drained potting mix or make your own using equal parts coconut fiber, compost, and coarse sand.

Keep the plant moist until it is planted in a container, and then reduce watering. Regularly until you water only when the topsoil is 1 to 2 inches dry.

Fertilize every two to three months with Fertilizer 6-6-3. Add a layer of compost or mulch on top of the soil every two to three months. Pull 3-4 inches away from the barrel.

Wear protective equipment, including gloves and goggles, and disinfect the trimming tools by dipping the blades in isopropyl alcohol or Lysol.

Prune the tree as required to control its growth and size. Remove dead branches of the tamarind tree. When grown as an ornamental plant, you can also carefully trim the roots to make the tree smaller by expanding the trunk.

Mulching:

Every spring, early in the morning, spread a layer of mulch around the tamarind. It helps protect the roots of the tree, prevent weeds and keep the soil moist, mimicking the effect of natural forest covers.

Pruning:

In the mature stage, the tamarind tree grows naturally, has on a characteristic round, generating a few shades under a dense canopy. You do not need to shape the tamarind tree by pruning to achieve this desired property. The University of Florida IFAS Expansion Program notes that some trees can produce multiple crustal stems, which are pieces of bark that form in the area between trunks or between the main trunk and branches, which can damage a weak tree.

This problem can be easily avoided by pruning young tamarind trees. Make sure that the branches growing from the central trunk are separated from each other, rather than growing together. Remove branches that are more than half the trunk. Clean or soak pruning tools in ethanol or isopropyl alcohol between each incision to prevent the spread of the disease.

Also Read: How to Grow a Lemon Tree in Pot | Care and Growing Lemon Tree

Pest and Diseases:

Tamarind trees are very susceptible to pests such as scaly aphids, mealybugs, aphids, moths, and spots on the leaves.

How to grow tamarind tree:

Tamarind may be a tropical tree, it endures gentle winter however growing it outside in an exceedingly colder climate is certainly a nasty idea. If you would like to grow it, grow tamarind trees in a pot and keep them inside or in a greenhouse throughout winter. You’ll conjointly build a pretty tree of the tamarind tree.

Tamarind tree growing requirements:

Sun:

Tamarind requires full sunlight and it loves heat and high-temperature climate.

Soil:

Tamarind loves deep clay soil. It grows well in neutral and sandy conditions such as clay, even saline soils. The soil must be well-drained. To grow tamarind, you don’t need to worry about soil pH. It grows at a pH of around 4.5-9.

Watering:

Water the seedling when the first layer of soil is dry. Once rooted, tamarind does not require irrigation and can tolerate severe drought periods painlessly.

Fertilizers:

Tamarind does not require fertilization, so you can fertilize it as recommended in a soil test to make sure you don’t overdo it. In the absence of soil testing, fertilize young plants every two to three months with 6-6-3 fertilizer or compost. Equivalently, starting at 1/4 pound of fertilizer per plant and gradually increasing to 1/2 pound of fertilizer per year, starting at the age of the tree, three to four times per year. If your tamarind tree is fruitful, apply fertilizer 8-3-9 or equivalent organic matter at a rate of 0.5 lb per year to the aged tree on the same schedule three to four times per year.

It is important to check the soil before fertilizing. Your plants need trace minerals like iron, which may be lacking in alkaline soil. The cooperative extension service you live in can do a soil test for a small fee, and all you have to do is bring a soil sample around the tree to your local office.

Health Benefits of tamarind:

  • Digestive health is good
  • Heart health is good
  • Source of iron and good blood circulation
  • Aid in nerve function
  • Aids in weight loss
  • Helps in managing diabetes

Tamarind uses:

Tamarind fruits are used fresh and for the preparation of juices, sauces, jams, drinks, and syrups. Tamarind pulp is used in many South Asian dishes and curry recipes.

How to Grow Cashews Tree| Growing Cashew Nuts at Home

Are you thinking about the fruits which seeds are outside of fruit? Cashew and strawberry are the 2 fruits they seed outside of the fruit.

They are several benefits of cashews check them and let us learn about how to plant and grow the cashews tree at home.

Introduction

The cashew tree is one of the best and most versatile evergreen trees which produce cashew fruits. It produces two types of fruits cashew nuts and the cashew apple. In general, we all are aware of cashew nuts but not about cashew apples. The cashew tree is cultivated for commercial purposes in Brazil and India. It is originated from Central America and the Caribbean islands. Cashew tree likes tropical climate whether the climate is wet or dry and it grows flowers as well as fruits in winter.

Planting the cashews

Cashew tree prefers the sandy soil and laterite soil because ensuring a lack of waterlogging. Avoid different types of soil which permit free flow irrigation can lead to damage to the tree. It will grow in poor sandy soil with a pH of about 5- 6.5. They never grow in clay soil and the soil should be well-drained in such a way that water flows smoothly.  

To propagate cashews from seed and then buy seeds from the nearest nurseries that are matured unshelled nuts. They are viable for up to 4 months. Have you collected seeds from the tree, dry them for 3 days in sunlight and soak in water overnight before sowing. They sowed seeds can be germinated for 4 days to 3 weeks. 

Also Read: How to grow cherry trees- A complete guide

Requirements for growing the cashews

Sun 

Cashew nuts tree requires direct sunlight for at least 6 hours per day. It can’t grow quickly in shades and doesn’t produce fruits. 

Water

The cashew tree is drought-tolerant if once established. If you provide water regularly it can produce more fruits. In summer, regularly water the plant once in the afternoon time. Withhold water or reduce watering in winter twice or thrice week water the plant and overwatering also kill the cashew tree. So, watered the plant when it becomes dry and lets the soil dry out then water it frequently.

Fertilizers

Cashews need to be fertilized regularly for the tree to grow and bear fruit, use a slow-release fertilizer according to the product instructions on the package. Apply around the base of the tree, every two months during the growing season fertilize at the same time. Compost or manure is applied once a year at about 30 pounds (15 kg) above the ground until the plant is ripe.

Harvesting the cashews

Select the fruit when it is pinkish red and the skin is dark gray. This color means that the fruit is ripe and the skin is fully formed. This usually happens in winter or during the rainy season (depending on what climate you are in).

Separate the shell from the fruit (cashew). The pods are kidney-shaped and stick to the fruit at one end. Twisting the peel should remove the fruit.

 The fruit is also edible, contains many nutrients, and many people use it for smoothies or even eat it raw. The peel can be stored for up to two years before further processing.

Roast raw shells in a frying pan covered with fine sand for 10-20 minutes. This is because there are walnuts inside the shell, but there is also extremely acidic caustic oil that can burn you. Sealing the shells is very important or completely immerses you in the sand. The temperature for this process should be around 190 ° C (374 ° F). Anything above will cause the oil to evaporate into smoke (which should be avoided) and dry out. Use an old or disposable oven tray, as oil residues are difficult to remove afterward.

Sift sand seashells. Before further processing, the housing should be rinsed with detergent to avoid contact with oil residues. Be careful not to get into your eyes or face during this process, as oil may remain on it.

Break the shell, the nuts prepared for peeling from the inside will have a layer around, you must carefully peel with a knife before moving on to the next step.

Roast walnuts in coconut oil for 5 minutes. Made to remove toxic oil residues and ensure you are edible. The oil should be heated to approximately 150 ° C (302 ° F). Walnuts are ready to eat.

Growing tips for cashews

Sow fresh cashews for easy sprouting. 

A plant grown from seed takes 3 to 5 years to bear its first fruits. 

Our recommendation is to buy potted plants from the nursery. If you do this, you will not get the expected results. 

Find the location which is protected from the wind. It grows best at around 80 degrees F (25 degrees C), although it can withstand temperatures from 50 degrees F (10 degrees C) to 105 degrees F (40.5 degrees C) No problem. 

Make sure there are no weeds, small bushes, vines, or debris around the cashew root. Watch out for diseased or dead branches and prune them if necessary.

Also Read: Custard Apple Farming Was Never So Fruitful – Read This Guide Till The End

Cashew tree care

Pruning

Prune the cashew tree regularly to remove weak, dead, shriveled branches, as well as infected and diseased branches. Also, prune overcrowded branches to promote strong growth.

Mulch 

Organic matter around the cashew tree to prevent weeds and retain moisture. 

Pests and Diseases 

Cashews are generally free of pests and diseases as long as they are healthy and Webber.

What is Mango Farming all about – A Complete Guide

Do you know what is mango known as? Aam, as we call it in India is crowned with the title of King of Fruits. Mango Farming is the most dominant and money-making venture in the world. 

It is loved and relished for its taste, appearance, and low upkeep cost. The perk of cultivating mango is that it can be consumed at any stage. 

Like the raw mango has a delightful taste as chutney, Aam Panna, pickle, sauce. A full grown, mango can be consumed as shakes, juice, jelly, ice-cream, and desserts.

India exports a huge quantity of mangoes to the USA, Europe, and Middle-East. Mango farming is the most money extracting fruit grown in the Indian sub-continent. 

If you want to start your mango farm, you need to gather all relevant about its cultivation. Here, is an outline of important steps to be executed to ensure good mango production.

Types of Mangoes

Here is a list of mangoes with their place of origin. Let’s get a quick look through it:

  1. Alphonso- Ratnagiri, Maharastra
  2. Kesar- Junahgadh, Gujarat
  3. Dasheri – Lucknow, Uttar Pradesh
  4. Himsagar and Kishan-bhog, West Bengal
  5. Chausa- Uttar Pradesh 
  6. Safeda -Andhra Pradesh
  7. Totapari
  8. Amrapali
  9. Langda

Sweetest mango variety

Sweetest mango varieties

For all the beginners and mango lovers, it is difficult to figure which the best variety of fruit among all. Carabao, the manilla mango is the best and sweetest mango in the world.

However, if we talk about Indian mangoes, Alphonso, the king of all is the best and sweetest mango among all. But don’t forget that mango itself is a sweet fruit loved by all. Every variety is sweet and unique in its way.

Requirements for mango farming

Mango can be planted through seeds or by vegetative propagation. The propagation is carried out through techniques like veneer grafting, epicotyl grafting, and inarching. 

Surely, vegetative propagation is a rapid process of germination. It should be carried out through grafting trees.

The spacing of mango trees

The spacing pattern of the trees should be 10 m * 10 m. This is the ideal pattern to be followed to ensure a good yield. 

The mango trees are tall and wide. So, they require adequate space to expand themselves. If you compromise with its space, the growth of the tree would be hampered.

As a result, you will be deprived of a desired and profitable yield.

Mango plants training

Training mango plants is an essential step to ensure the proper shape of the fruit. It becomes unavoidable in the case of low branched grafting.

The plant should attain a minimum height of 1 meter for training to be executed well. Regular trimming of branches and leaves ensures th healthy growth of the plant.

The plantation is disease-free and the energy of the plant is centered towards the growth only. Therefore, a continuous training process is maintained to get the desired fruit quality.

In mango farming, it is a mandatory step.

The season for mango plantation

For rain prone areas, the plantation is done in July-August, for irrigation-based areas it is carried out in February-March, and at the end of rainfall in rain prone areas.

Rainfall is a good factor to enhance the growth of the tree. As heavy water intake is needed for the thriving of mango trees.

Also Read: Custard Apple Farming Was Never So Fruitful – Read This Guide Till The End

Fertilization of mango trees

The process of fertilization is carried out in 2 doses. First one, immediately after planting, and the next in the young plants. A spread of urea (normally 3%) is advised in the case of sandy soil before the plant starts flowering.

Soil and light requirement for mango seeds

A mango seedling requires a good amount of sunlight but not direct sunlight. For nurturing the plant, a minimum of 6 hours of sunlight is required and 8-10 hours of sunlight will work wonders.

When planting mango seeds it should be kept in mind, that a good drainage system should be there. Like on watering the soil could flush out excess water.

In summers the plant needs water in excess, do remember excess doesn’t mean water overflow. The water should be well enough to keep the soil hydrated.

How to sprout a mango seed

To sprout a mango seed you need to remove the flesh from the fruit, the seed needs to be cleaned, to ensure that they are ready to plant. 

Now, with the help of a sharp knife, chop off the edges of the seed. Ensure the visibility of the pod inside.

Take a container of 11 liter capacity. Place some soil beneath the container providing an outlet at the edge. For settling the soil fill some water in it.

The container is ready to plant the seed inside placing the pointed side downwards. One-fourth of the pod should be popping out of the soil.

Keep watering the seed and place it in a warm place ensuring sunlight but not directly.

Germination time of mango seed

The mango seeds germinate in a period of 2 to 4 weeks. A fully grown-up tree bears fruit in 5 years. These mango seeds germinate at a temperature range between 4-40 degrees.

mango seed germination

But a higher range of temperature is ideal for germination. Seeds restore water in them, dies when dry. All the favorable conditions facilitate the process of germination.

A small bunch of leaves shoots up and the roots start getting firm deep into the soil.

Planting mango seed

A suitable temperature, enough sunlight, and adequate water content is a perfect recipe for  healthy fruit. When you have all the necessities for mango farming, you can go for it.

You need to have a spacious place for the mango canopy. A mango tree has a stature of 90 feet with long leaves. So, it is recommended to plant them separately allowing proper space for them to thrive.

How long does it take a mango tree to grow?

This is the most common query among mango farming. Beginners are curious to know how long does it take a mango tree to grow? Before proceeding, this question needs to be answered.

From planting the seed in the soil to ultimately bearing fruits, it is a package of 5 years. It takes 5 years complete for a mango tree to produce your favorite mango fruit. 

But a lot of rigorous hard work is required to nurture the mango plantation in these 5 years. Regular pruning of branches and leaves is necessary. Plus, after bearing flowers the water intake of the tree is around 26 gallons per week.

This should be maintained to prevent the tree from drying. The proper spread of fertilizers should be done to curb the spread of diseases.

The resultant is the delicious, tasty, and lip-smacking mango fruit.

Diseases infecting mango farming

Mango farming is threatened by aphids, bugs, and mites. Infections prevailing in the plantation can be witnessed in the form of webs on the leaves, white residue, or insects crawling over the leaves.

These infections need to be curbed in, timely before they hinder the growth of the plantation.

mango infecting diseases

Mango farming is prone to anthracnose, a sort of fungal infection. They can be checked by the use of copper-based fungicide. It should be used after 14 days of planting.

How to take care of flowering mango tree

Some of the flowers are formed through the process of self-pollination. However, few of them are pollinated through fruit bats, humming birds, and bees. It must be noted that all the flowering trees don’t produce fruits.

Taking care of a flowering mango tree is a must. Proper care must be taken of those trees who produced heavily during the previous season. 

They should be trimmed regularly. And should also provide more fodder to ensure a better flowering and fruit production in the present season as well.

The much-branched inflorescence needs to be detached or trimmed compulsorily. It ensures better flowering and fruit production.

In the regions where the evening temperatures trips below 30 degrees, these white creamy flowers become steady. On reaching the temperature range back, they tend to bear fruits immediately.

Mango yield per acre

The mango yield per acre varies. This depends on the quality of seeds sown and the good upkeep of the mango farming. Ideally, the yield ranges from 2.5 to 3 tonnes per year. Exceptionally, it can reach 9-10 tonnes per year.

Mango yield per acre

A good spacing in the orchard, among the trees, and favorable climatic range shoots up the yield of a mango farm.

Mango farmers must adhere to these 2 most important factors apart from other upkeep necessities. A little extra care can make you earn higher profits.

When to harvest mango?

After flowering and bearing fruits, now the point arise when to harvest mangoes. The tasty tropical fruit of mango is grown in various parts of the world, favorable to mango farming. 

The harvesting of the fruit is directly proportional to the amount of care taken of the tree in the 5 years of the plantation.

On average a good harvesting time prevails after the completion of 100-150 days from the flowering stage. Generally, flowering ends up producing fruits and you can observe the fruit grow in shape and size.

harvesting mango

In 3 months, the fruits become ripe, this can be felt on touching the mango, as it becomes soft on ripening. The color turns into a proper yellow shade of the fruit.

Heavy fruit can be seen bulging downwards from the branches. This is an indication the fruit is ready to pluck.

Now, you have 2 ways to get the fruit down either shaking the tree or thrashing the branches to chop off ripen fruits.

Shaking tends to damage the roots and branches of the tree. Also, unripe fruits get disturbed as well. It is highly recommended to thrash the branches by the use of a rope or stick.

This the best way out to spank down your favorite mango fruit. The fruit is ready to explore the markets.

Must Read: Papaya Farming Ultimate Guide

Transporting mango to markets

Once you are done with mango harvesting, it is time to get a reward for the 5 years of hard work done. Proper steps should be taken to avoid any sort of damage to the fruit during the transit period.

mangoes in market

For transporting mangoes, the packaging is done in two ways either using a wooden crate or by using CFB boxes. However, for long-distance transit it advisable to store mangoes in CFB boxes as it is a perishable item.

Wooden crates can hold the mangoes for 8 days maximum. After that, they tend to perish.

When transporting to local nearby markets, wooden crates are the best open as they keep the fruit safe and fresh. And the fruit is ready to consume. 

Is mango farming profitable?

To find out the profit ratio of mango farming, let’s calculate the cost of production involved. The cost of the land stands on whether it is owned or rented.

Then comes the plantation cost. This comes to around 2 lakhs per acre per year. And it gives a normal yield of 2.5 -3 tonnes or even up to 9-10 tonnes.

It is a profitable deal. A deal with huge profits. It is one of the most profitable ventures in horticulture. Profitability has a direct relationship with demand for the product in the market.

Mangoes are high in demand. The reason for this is the limited availability and good taste. This fruit is relished by everyone.

This tropical fruit is an evergreen fruit and never will lose it’s charm. Nothing can beat the demand for mango fruit.

Yes, you can say it is a tedious job but the hard work is paid off well. Whether its appreciation in taste or money, a mango farmer lands in huge profits after selling his mangoes in the markets.

People wait for those delicious mangoes in the market every year for their limited availability. So, the idea of mango farming is a sure shot profit deal. Crack this deal and enjoy the benefits.

How to Nurture the Dragon Fruit –An Exotic Tropical Fruit

Do you know that some of the fruits are healthier than others? Dragon fruit is one of them with plenty of health benefits. Dragon fruit, or pitaya, is a cactus fruit, well known for its peculiar look.

The healthy fruit is loaded with vitamin C, fiber, and antioxidants. This improves the immune system of the human body and is also used for diabetes treatment. The farming dragon fruit is profitable as well as satisfying experience.

Besides, medicine extracted from the flower and stem can be used in treatment to improve blood circulation. Therefore Dragon fruit can be branded as prestigious health food.

Moreover, the flowers of the plant are unique; indeed it is one of the world’s largest flowers. Their size is not the only specialty of dragon fruit. But the flower of the dragon plant just blossoms for one night and the fragrances on this night are beautiful with added tropical fruitiness. 

Also Read: Growing Orange with Perfection

 The hot summer months are suitable for dragon fruit cultivation. It won’t grow for the rest of the year but grows quickly once it starts growing. The fruit begins to form after the flowering takes place. For around 20 to 30 years, one plant can produce fruit. Thus, your one plant can deliver plenty of ready to eat delicious dragon fruit.

How to Grow Dragon Fruit?

The dragon plant requires little support to grow. As it is a subtropical plant, which needs a great deal of heat and humidity, here is a breakdown what do you need to feed and produce dragon fruit.

Deciding the Place and Soil

Dragon fruits must be cultivated in an open field with a clear exposure to the sun. It is not encouraging the planting of crops in areas with good rainfall. The place must be safe with a strong organic sandy loam soil with sufficient drainage.

Besides, this plant may thrive in any well-drained soil but likes to develop in slightly acidic soil, with a pH range of six to seven. For this plant, sandy soil is the best option.

In one single growing season, the dense fleshy stems can grow up to 4 m and must be accustomed and tied to a single 1.8 m high pole or trellis support. There is one another option of precast concrete poles that are widely used, and between three and four plants on one pole can be mounted. 

Farming dragon fruit is done by two methods. First is germinating the seeds and others by using stem cuttings. Let’s have a look.

1. Germinating Dragon Fruit Seeds

Growing dragon fruit plants from seeds depend on the same process as other plants. It involves preparing the soil with a well-mixed with potting mix. Then mix the seeds into the soil gently.

The soil needs the proper moisture with a cover over it with some plastic sheet. These seeds may take up to a month to germinate.

But there is an advantage to this method. The seedling grows slowly and cannot be propagated efficiently.

2. Using the Mature Stem

But it is ideal to use safe mature stem parts that have a length between three to six inches. 

Once the cutting has been sliced into three to six inches. Make a slanted cut at the base of the stem and add a fungicide at the ends and put it in a shaded area for about 5-7 days before being placed on the field directly. 

This is not necessary. But it does promote growth. When you dry or cure the stems, normally two to five days. You will get to know that when the cutting tips turn white, it’s ready to plant.

Besides, these cuttings can be obtained from the commercial nurseries as well as from pitaya growers. 

Next, you should plant the cutting in the field, they have to be about 2 inches into the soil and the cut must be positioned in the same direction as the parent plant. Water the plant every day unless the weather stays warm otherwise skips a day. 

Finally, you’re going to begin to see roots. You will soon see new growth if the growth is successful. It takes normally about 3 and 4 weeks. This young cutting will produce the fruit of its own in a few years.

At this stage of dragon fruit farming, it is necessary to focus on these few points:
  • Fertilizer – Give it fertilizer per month during the active growing season to ensure that the dragon fruit grows well. You’ll want to stop feeding your plant for a couple of months in the cold winter months.
  • Water – Since this plant is a cactus plant, it is important to ensure that it is properly watered. Water only the plant when the top of the field is dry and don’t let the plant rest in water. The soil must be wet, not drenched.
  • Light – The plant base can see a little shade, but the plant tips require full sun to ensure the plant blooms correctly. When the plant gets too much water, the fruit doesn’t perform well.
  • Temperature – Dragon fruit does not thrive in cold weather, so make sure the temperature is higher than 40 degrees Fahrenheit. The temperature needs to vary from 65 to 80 degrees Fahrenheit for optimal growth.

Dragon Fruit Pollination

The proper pollination of dragon fruit is done by the Moths, bats, and bees. But some varieties do not self fertilize at all.

In this case, the pollination techniques come into play. This technique requires the collection of the pollen from two dragon fruits. Using cotton swab softly to mark it with cross-pollinate on the stigma of the opposite herb.

This requires to be done at night, so the time between eight at night and eight in the morning is the best. 

In the case of pollinating various plants, it is recommended to use a new cotton swab for each one of these.

After this process, it will take about a month for the fruit to grow.

The fruit has a direct threat from animals such as animals, birds, and monkeys, and of course, they love the dragon fruit. 

Some growers use the shade net to shield maturing fruit from damage caused by the birds and hail. 

In Dragon Fruit Farming, the emphasis should always be on pesticides and disease control.

Pests include mites, thrips, bees, spiders, mealy bugs, slugs, nematodes, fruit flies, and mice. The birds are the most commonly reported.

Though, the diseases of dragon fruits contain stem purple, anthracnose and fungal pathogens such as fusarium. 

Identification of Ripeness of Dragon fruit

When it’s not mature, dragon fruit is green. Once, the fruit starts to mature. The exterior of the fruit shifts to red or yellow depending on the size.

Once the wings of the dragon tend to dry, to grow brown and fade. It signifies that fruit has been starting to mature and ready to eat. In case the wings are still bright. It shows that the fruit is underweight and will take more time to mature.

Once, the dragon fruit attains the stage of maturity. It can press just by a delicate touch of the thumb or fingertips on the surface. The fruit is presumably overripe if it is too pulpy. On the other hand, it’ll take several days to mature if your touch feels solid.

The rugged handling and shipping malfunctions can cause the dragon fruit a damaged skin. For instance, if the fruit is not adequately wrapped during shipping, they may hit each other. 

These may even be broken if they dropped. 

When the fruit is damaged, the flaws are visible and often smaller this is because of the lack of moisture.

Considering these few points is beneficial for the daily harvesting of dragon fruit.

  • Dragon fruits do not grow after harvesting as many other fruits and it is recommended that they should be picked once mature completely. 
  • The fruit is at its mature stage for processing once the color shifts from green to reddish.
  • If the fruit matures, the tiny leaves on the fruit side may often tend to appear gray.
  • Once the color of the fruit shifts, it is the right time to pluck the fruit. However, it is necessary to harvest a day after the color changes if the fruit is exported.
  • When a dragon fruit is ripe and ready for harvest, it can quickly twist away from the plant. When you ever pull the fruit so fast, it definitely would not be harvested

Conclusion

Besides the health benefits of dragon fruit, it has such a delicious taste once it matures perfectly. It is the right ingredient for a yummy smoothie and is often mixed with the lychee smoothie.

These fruits that contain the red or pink, leathery skin is tasted by the spooning out otherwise it is eaten in pieces. It is possible to process fruits into juice, ice cream or wine. The beautiful flowers, only blowing at night, are applied for the aromatherapy.

Must Read: Custard Apple Farming

How to Grow: Farming Orange for a Perfect Citrus?

Do you have your breakfast without orange juice? Isn’t it like a day without sunshine?

Orange is not just a favorite fruit of many individuals but it provides many essential nutrients. A pulpy orange has a great source of fiber that keeps a check on the human digestive system. 

The high content of vitamin C helps in lowering the blood pressure, consequently improves the heart’s health. Moreover, it is full of antioxidants that eventually boost your immune system.

There is also some mystery on how citrus fruit is bloomed by juicy skin. Simply, how to do orange farming? 

Also Read: Papaya Farming Ultimate Guide

Growing Orange with Perfection

The tropical region as well as in sub-tropical regions are perfect for the orange cultivation.

However, the dry environment is ideal for productive orange growing for the higher orange yield.

A temperature of the surface in a range of 25 degrees Celsius is ideal for both the plants as well as roots. Nevertheless, oranges are known to grow at their best and in a dry climate. The warm summer and reasonable rains between 100 and 200 cm suits more to orange plants. These conditions prove to the better climatic conditions for the excellent growth of orange plants.

Keeping into the mind that orange plants are particularly responsive to high humidity and frosts, orange farming can be prone to a significant number of diseases and dangerous insects and pests. 

Besides, it is also a smart strategy to maintain the farm’s temperature to a desirable limit throughout the growth cycle to achieve a high yield of oranges. Because the summer hot winds cause orange flowers and budding fruits to collapse. 

Deciding the Right Soil

The soil preparation before planting directly enhances the overall yield. It significantly boosts the health of your plant as well as keeps many diseases away, especially those that are sourced from the hidden pests in the soil.

Moreover, this is recommended to check your land for important minerals and nutrients to determine these important additives. 

A large variety of soils such as clay and silt soils of loam or sandy soil, oranges can be planted. But the soil with strong drainage capacity, limestone-free with strong salt absorption ability is ideal for the orange farming.

Generally, the soil ph is roughly 6.0 to 7.0. And oranges are indeed a citrus crop, the growth of these plants on soil with a pH of about 5 is a better idea for higher yields. 

Yet, it is a smart practice, at least once before planting, to go for the soil check and see if the soil is adequate or not?

In the winter and monsoon seasons, the growing farm should not be too cold as it makes your farm a variety of plagues and diseases.

In this case, providing the windshields by planting the trees across the farm not only prevents the fruits and flowers in case of a storm or heavy winds but can give additional revenue once they get mature.

Growing an orange plant

You can reproduce an orange tree just by seed or the shield budding often known as T-budding. In case, there is already a plant that has attained the age of its maturity. Vegetative propagation is a better choice.

Growing an Orange Plant

In case, you choose to grow an orange plant from a seed. You have a few things to learn in orange farming.

Planting By Seeds

In case, you are trying sowing the seeds to the soil directly. You can add a good mix of additives to the proper fermentation. Moreover, you can add manure to the soil before sowing the seeds. Let’s have a look at how to grow a plant using seeds,

  • Sprinkle your orange seed into the soil and mix them properly so they can mix around 1.5 inches into the soil.
  • You should take care of these seeds so that they can enough sunlight as well as properly make the soil enough moist whenever it becomes dry.

 It is worthy of notice that seed-based trees are mostly short-lived because they are vulnerable to root and foot decay. 

However, oranges plants are more productive and fast-growing if planting is done through the budding.

Besides, the oranges should be planted early in the rainy season in the case of orange farming in Florida. A comparatively small rainy season leads to less chance of plant mortality. And, a plant can be better sustained by rainwater.

Planting By Budding

In the case of planting the budding, you need a young orange tree which can be obtained from the local nursery or can be grown of its own with seeds.

Furthermore, this process requires a branch with multiple stems. And, in this process, you need to keep in mind while selecting the branches or stems. They tend to bend at the time of snapping. 

It is worthy to note that trees grown after T-budding in orange farming are more productive than others that are seed-based.

T-budding is required certain steps to follow. Let’s have a look:
  • Split the bottom of the bud stem at the 45-degree angle
  • Create a hole at in the trunk of a young orange tree
  • Slide in the slit in the trunk alongside the cut
  • Wrap both parts and tie them together with a tiny amount of tape
  •  Wait for some time as the graft starts to expand, once grown, remove the grafting tape to prevent the development

The slatted bud stem is known as the scion. The fruit is spruced and grows quickly on grafted trees than on seeds based orange plants.

Once, a tree grows enough from the initial stage. It requires special care to be the best to yield for the full capacity while orange farming in California.

Generally, a plant needs some important aspects of growth that are fertilizing, watering and pruning. 

1. Water

The water needed for orange trees is based on the local environment, however, it is required to low irrigation in fall, while frequently water in spring. The watering of a plant also varies according to the rainfall in a year.

It is worthy to note that excess watering reduces the pulp quality of the fruit. The planting depth often influences the amount of water that you provide in orange trees. 

2. Fertilization 

Fertilization in orange farming directly influences the quality of mature fruits as well as the breeding of orange plants. In case you provide some extra nitrogen in fertilizers to the growing plants. It contributes the oil to the peel. While fertilizer excess in potassium reduces peel grease. 

Usually, one or two pounds of nitrogen should be added to the growing tree for the high production of good oranges. 

And, indeed potassium, phosphorus, and several micro-nutrients will also be part of the fertilizer. 

If you are not getting enough yield from an orange-tree. It is recommended to have a soil check to see the actual amount of nutrient ratio at present.

Besides, it is not appropriate to cut the orange tree just for shape. 

Any shorter trees will be eliminated from the ground. Often, it is good to trim the weak or rotted leaves from the orange tree.

Must Read: Custard Apple Farming Was Never So Fruitful

Diseases in organic farming

1. Citrus Canker

This is a highly deadly bacterial infection for citrus trees that can be identified by the scabs on the fruit, leaves, and branches of the orange trees. 

2. Root rot 

 The soil-inhabiting fungus from the Phytophthora species causes the wilting of leaves as well as a thin canopy of the fungus.  Look at the roots for signs of rot and disease.

3. Citrus greening 

In case leaves of the orange plant are getting yellowish. A nutrient shortage might be behind such occurrence in orange farming.

Though, they can also be induced by the harmful disease of the citrus plant. Such infection can cause the leaves of the plant to wither. While fruits would be a bit sour as well as tiny and rough.

4. Sooty mold 

 This disease can lead to a branch to die. To identify this infection, you can bark peels away, for a dark sooty fungus disclosure.

5. Greasy Spot

If the leaves of orange plants have the mark of yellowish-brownish sore spots, especially under the leaf. This is a sign of another fungus disease known as a greasy spot.

As the disease evolves, the spots enlarge into oily-looking spots. These greasy spots cam hamper the growth of leaves even can make them shrink or wilt. In a plan to prevent the greasy spots, collect the fallen leaves that might counter the further spreading to healthy leaves.

However, it is good to spray the tree with liquid copper fungicide in June or July. 

And, you can apply as the second spray of the same fungicide in august or September to preserve the summer growth of your orange farming.

Apart from this, many insects such as citrus whitefly, caterpillars and aphids may damage your orange flowers, leaves, and fruits significantly.

It is best to ensure that you are informed of diseases in your area. While offering the orange trees the best conditions so that a strong and healthy tree has a better immune system to the diseases.

How Do Pineapples Grow? – A Complete Guide

The tasty nutritious pineapple fruit has its popularity matched to mango fruit.  Its yummy tangy flavor and appearance make it familiar with people. 

How do pineapples grow? Is it profitable to grow a pineapple? How to plant a pineapple? These are some common queries that come to your mind when planning for pineapple farming

This fruit is high in Vitamin A and Vitamin B. Also, has traces of Vitamin C and minerals, iron too. Caribbean, South, and Central America are the largest producers of pineapples, India holds the fifth position. Here is an overview of pineapple cultivation.

In India, it is popularly known as ANANAS. Here, Karnataka, Kerala, Goa, Bihar, and North-eastern states cultivate pineapple abundantly.

Preparing land for pineapple farming

Plowing, digging, and leveling are done step by step to get the land ready for pineapple farming. In the case of trenches, a space of 165 cm from center to center is required.

Treatment for suckers

The suckers need to be sorted, healthy or unhealthy. Then the healthy ones should be eliminated from unhealthy ones. 

pineapple suckers

The healthy ones are dried in the shelter and then dipped in Bordeaux mix before plantation.

The Necessity for pineapple farming

To ensure the best yield for pineapple farming always remember, a coastal and humid climate is necessary.

Season favorable for pineapple farming

The flowering season for pineapple farming is between December and March. It is advisable to maintain a gap of 12-15 months from the flowering season.

A heavy rainfall period is avoided for plantation, so it is done before the onset of monsoon rains. Too much rain in the early stage will ruin the pineapple plantation.

Soil requirement

For pineapple cultivation, sandy loam soil is a perfect choice to be made. Though alluvial and laterite soil is also ideal for pineapple cultivation. 

The basic theory behind this is it should be free from waterlogging. Also, the acidic content should be between 5.5-6.0. 

How often do we need to water a pineapple plant?

Normally, pineapple cultivation is done in tropical places enriched with a humid climate. So, the water intake of the fruit is sufficient.

No artificial irrigation is required. But when planting on a commercial basis there might be a need for additional water to get a healthy grown delicious fruit. 

watering pineapple plant

Artificial irrigation helps retain water during the offseason to nourish the plant. Thereby, facilitating water supply in deficit regions as well.

In such cases, you need to water a pineapple plant twice a week.

Also Read: Guava Farming: Planting, Spacing, & Cultivation Guide

How do pineapples grow

Let us know how do pineapples grow?  To grow pineapples a set of 4 techniques is applied like flat-bed, furrow, contour, and trench.

This is entirely dependent on the land and rainfall pattern of the area of cultivation. A contour planting is generally practiced to curb soil erosion.

To give good support, the plant -soil is moved towards the trench area. The flat-bed planting pattern is adopted as the pineapple roots are very hollow. This is how pineapples grow.

Diseases of the pineapple plant

It is a pest-free crop, though in some severe cases scale insects and bugs are its worst enemy.

Fertilizers for pineapple crop

Pineapples are high in potassium and nitrogen requirement. For good pineapple farming, they are harmful to the soil, so they are applied in minimum quantity as per the requirement. 

Nitrogen is generally divided into 6 doses. The first is applied after 2 months of cultivation and the last one before 12 months of harvest.

Similarly, potassium is given in 2 doses. Half can be applied after planting and the remaining after 6 months from the plantation.

Pineapple harvesting

After 12-15 months of planting, the pineapple crop bear flowers. It takes a complete 15-18 months to get a fully grown pineapple fruit. 

The growth of pineapple depends upon the climate, temperature, variety of pineapple, size, and type of plant material.

The month of May-August is the time for pineapple harvesting. After 5 months of flowering, the plant bears fruit. 

For canning purposes, the fruits are extracted from the plant when the fruit is not fully grown. For table use, you have to wait till it has attained a golden yellow color. 

Steps involved pineapple plantation

Pineapple farming involves a series of to be followed to ensure a good fruit. 

  1. Earthing: Pineapple is a hollow root plant. If they don’t get sturdy support, they tend to bend. To render support to the fruit the soil is moved towards the trench.
  2. Weeding: The most common weeds in pineapple farming are nutgrass and hariyali. It is done to make sure the good growth of the pineapple fruit.
  3. Mulching: When grown as a rain-fed crop means, dependent on rainwater. It is an important step. The idea behind this is to store water for an adequate water supply.
  4. Ratoon crop: Rotation crop farming is generally practiced in India. The cropped part of the fruit is used as a base for the next farming cycle.

Unusual behavior in pineapples

This is a big reason to worry, as to remain in demand pineapples must have to be perfect in taste and appearance. Else they get neglected. 

Though pineapple farming is free from any sort of infection and all still there are few challenges.

  1. More than one crown: In some cases, the fruit might develop more than one crown. In this, it gets de-shaped. Broad from the upper portion and pointed from below. Making them non-eligible for canning.
  2. Slips collar: This happens when a large number of slips appears from the base. It leads to small-sized fruit with too many slips overlapping.

Must Read: How to Nurture the Dragon Fruit –An Exotic Tropical Fruit

Storage and market

A decent time of 15 days can be ensured to store the pineapples without removing the crown. 

For transporting the fruit to the market, they should be stored in a cool place or refrigerator at a temperature of 10-13 degrees.

Pineapple farming has a lot of market demand. It should be noted that the fruit is easily accessible to the market, to avoid losing its charm.

Health Benefits of pineapple:

This lovely crown shaped fruit is adored not only for its taste and appearance but also has some benefits as well.

  1. Rich in Vitamin C: It is enriched with Vitamin C which indicates a capacity to curb heart and joint diseases.
  2. Rich in fiber content: This helps in keeping the intestines healthy.
  3. Helps in removing excess mucus.
  4. Helps in weight loss.

Conclusion

You need not worry about the profitability of pineapple farming. It has already made deep roots in the market. They have a loud market domestically or internationally. 

Sold on huge margins, still have the monopoly in the market. Can be consumed in multifarious ways. Jams, fruit, jelly, spread, canned, and candies loveable in all forms.

Pineapple waste serves as fodder for the animals. Enjoys fame all over the world. The production cost is low as compared to other farming’s.

Pineapple needs no introduction. No separate marketing strategy is required.

What else you need!!! Just go ahead with your pineapple farming. Surely, you can create magic with your pineapple farming.

How to Grow Cherry Trees- A Complete Guide

Cherries are those eye-catching red stony fruit which is loved for their sweet taste. People love the mesmerizing view of the spring blooming cherry trees with white and pinkish flowers.

We just have to find out how to grow cherry trees. Growing cherries is trending these days. As they can be preserved and are much in demand. 

Apart from a common thought that cherries can grow on big grounds, you can add a look and grace to your home gardens as well.

Even, they improve your health status also. Like curing arthritis and gout. Improves blood circulation and is good for the heart also.

Let us have some insights into the entire process of cherry cultivation.

Where do cherry grow?

Where do cherry grow? Cherries thrive happily in the zones receiving enough sunlight, with a cold climate and perfect wet soil. However, this icy cold climate varies among different species of cherry.

Soil should also have a PH value between 6, which means a bit acidic. The sun rays should be on the plant for 6-8 hours.

Because excessive cold climate can make cherry plants dormant. These conditions make for a perfect cherry plantation.

Selection of seeds

You need to choose between the varieties of cherry and then analyze your climatic conditions for how to grow cherry trees. 

Selecting cherry seeds entirely depends on the climatic conditions prevailing in your area. And for the soil, you have to make it fit for growing your cherry plants.

Can you grow a cherry tree from a pit?

Well, you must be thinking can you grow a cherry tree from a pit?  In your backyard or home garden. The answer is yes.

This is an amazing idea to grow a cherry tree from a pit. You ought to have patience, as it is a time taking activity.

The trees can produce flowers very late and not sure all those turns into sweet tasty cherry fruit.

Cross-pollination adds life to the reproduction process. With enormous and dedicated management and hard work, you can have cherries from the pit. Seeds are prepared for it first. Let’s check out how.

When those pulpy balls find their way to your stomach, save those leftover seeds. Instead of throwing them, just dip them in warm water and clean them.

Allow them to dry on a paper or towel for 5 days. After that place them in a plastic container covered with a lid tightly. Now, carefully this container is allowed to rest in a refrigerator for 10 weeks.

This is a preparatory step as to how to grow cherry trees. 

Planting cherries

Remove those dormant cherry pods and allow them to rest at room temperature for 3 hours.

You need to place these tiny pods in soil pots, each with 2-3 pods in number. Place the pots in sunlight with keeping the soil moist.

You can observe seedlings sprouting from those cherry pods. On gaining some height they tend to be kept inside on colder nights. 

The moment your cherry plant starts flourishing, plant the seedlings out at a distance of 20 meters from each other.

At this point, they are 10-12 inches tall. And this is how to grow cherry trees.

Also Read: How do pineapples grow? – A complete guide

Protecting cherry trees from wildlife

The worst enemy of cherry trees is wildlife. These rabbits, reindeer, and other animals hunting for fodder end up eating these tasty plants. 

You can tie burlap around the plantation. Yes, they are effective but unwrap them when the spring approaches to ensure proper sunlight to the tiny tots.

Once they attain maturity, they become out of reach and they are safe anyways then.

Apart from how to grow cherry trees, you should also be aware of how to save them.

Do cherry trees need full sun?

You must be wondering, do cherry trees need full sun? Yes, they do.

These cute little red bulbs need full sunlight. Let’s define FULL SUN. Full sun means sunlight of 8 hours.

Yes, you heard it well, a complete 8 hours of sunlight will work wonders. It is mandatory, otherwise, they will end up having a straggly stem, discolored fruit, and that is not done.

When to plant cherry blossom trees

The amazing, tasty, and world-famous cherry blossom is the home production of Japan. These cherry blossom plants were given to the USA as a token of gift in the early of 19 century. Later the USA also started with the production of cherry blossom.

A cherry blossom plant needs explicitly nutritious and productive soil. Soil should not be waterlogged and a minimum of 6 hours of sunlight is a necessity.

Proper spacing of 20 feet should be maintained between the plants. Fertilization is the key to how and where to grow cherry.

Now, for when to plant cherry blossom trees you should wait for the frost period to get over, this supports a speedy and good growth of the plant.

Growing dwarf cherry trees

Dwarf cherry trees look cute with their smaller size. The size of the tree does not affect the size of the fruit.

If your backyard can’t accommodate tall cherry trees, growing dwarf cherry trees is an option. With these trees, you can still have that alluring sight of light bounty flowers in the spring. 

These dwarf trees are obtained by grafting. They are 6-8 feet in height so, they find a perfect place in your backyard. Initially, they can be planted in pots or containers.

Their upkeep is also easy like pruning. Sandy soils are apt for these trees. The condition remains the same. It should be a well-drained one.

How long does it take for a dwarf cherry tree to grow?

These are cultivated for their explicit capacity to withstand extremely cold temperatures. Dwarf structure and too much pulp is the outstanding feature of these dwarf cherries.

Growing dwarf cherry trees follows the same process nothing different, they are planted and taken care of, in the same manner.

With dwarf cherries, you need not wait for how long does it take for a dwarf cherry tree to grow? As in comparison to normal cherry trees bearing fruit in 10 years, you have them in 3-5 years in your backyard.

Pruning in cherry trees

In the case of cherry plantation too pruning is required. Trimming ensures the removal of dead and unwanted parts from the plant.

It promotes good health and growth of the plant. The plant is disease-free and also free from abnormalities.

Fertilization of cherry plants

Cherry cultivation needs a handful of good organic fertilizers. In 10 years, the plantation needs a combo of Calcium ammoniate, potash, and superphosphate to thrive well.

Good manure promotes rapid growth and productivity of the plant.

Growing cherry trees in Australia

Cherries do cause a bit of hassle as they are typically cold climate lovers. Don’t lose hope. Even Australia can have their cherries. Growing cherry trees in Australia is not MISSION IMPOSSIBLE. 

There are species of cherries that love Australian weather too. Some variety of dwarf cherries do well in mild cold and don’t grow too tall.

They can be grown all year-round. Those juicy, pulpy cherries can be grown at much ease.

To grow cherry trees in Australia all you need is well-drained humus soil, with a PH scale of 6.5- 7. Proper mulching should be done to ensure the soil temperature.

As cherries can’t stand too much water though need water every day in summers. The soil should be moist.

Pruning should be taken care of. And all this trouble is worth taking. When you have your cherries to eat.

Must Read: Strawberry Farming – A business that promises a “delicious” future

Wrap up

Well, the above-stated information is enough. So how to grow cherry trees is no more a query.

You have to tighten your shoes and get into how to grow cherry trees. 

Sow the seeds in this winter and you have them ready by the summer for those yummy shake toppings.

Cherries look good for Christmas gifting and are delicious too. Now with all the complete knowledge about growing cherries, you can accomplish your goals for having home cherries.

They are easy to grow, don’t require a gross procedure. Especially those dwarf cherries beautify your backyard with the bunch of red pulpy cherry fruits hanging on them.

Apart from satisfying your taste buds they are contributing towards health as well. Anti-oxidants help in curbing cancer growth. Good for the heart as well.

So, you have enough on how to grow cherry trees just execute it and enjoy the yummy cherries from your backyard.

How to: Grow Strawberry Farming – Complete Guide

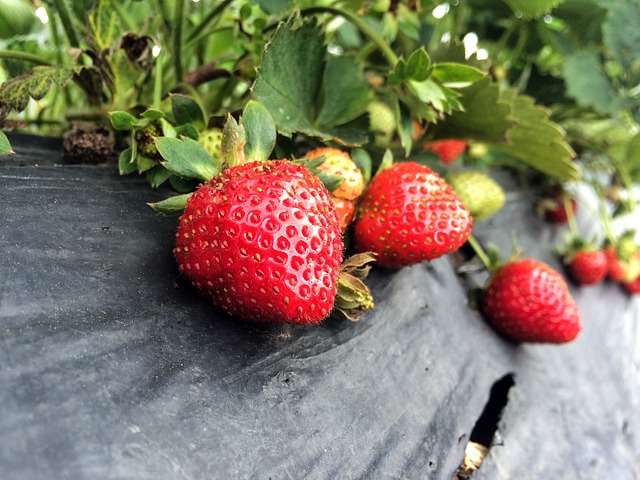
Strawberries farming is one of the best alternatives to traditional crop farming in the USA. A large number of farmers around the country are growing strawberries for commercial purposes, and are making decent money. But, unfortunately, a lot of them are also struggling to earn a livelihood, because they are doing it the wrong way.

If you also want to secure your finances through growing strawberries, you should follow this detailed guide at every step. This guide is an overview of all the aspects related to commercial strawberry farming.

The guide focuses on starting a strawberry farm in almost every region in the USA. All the points are collected from a publication in CIS 93, written by B. B. Davis, D. L. Barney, and J. K. Fellman, and published by the Agricultural Experiment Station and Cooperative Extension Service of the University of Idaho.

Here are the most important points we’ve taken from the publication to make your strawberries growing efforts as fruitful as possible.

The economic importance of strawberries

As many as 76 countries produce strawberries for commercial purposes. China, the USA, Mexico, Turkey, and Spain are the top five producers, but the production is only increasing in various other parts of the world including Asia, Central, and North America, and North Africa. And the demand is getting larger and larger with every passing year too!

The development and of California’s strawberry industry is itself a story, and the rapid expansion of the industry at local levels in other parts including Central and South America, Australia, China, and the Mediterranean region is clearly visible to the global economy.

In short, if you are planning to start strawberries farming (you are most probably doing so, and that’s why you are here), your economic future is amazing! You’re going to make loads of money, of course, if you are determined enough to do the hard yards, especially in the beginning. So, let’s start with our guide.

Also Read: Cultivation of Custard Apple

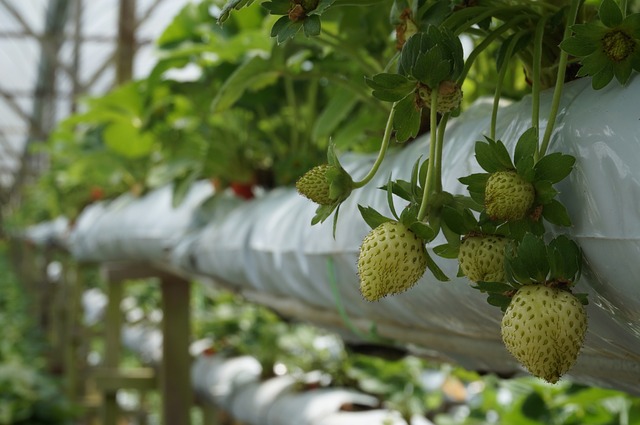
Preparing the land for the strawberry plants

Most of the producers start preparing land for commercial strawberry farming in late August. Strawberry plants are actually perennial, but most of the farmers consider them as annual. The land is properly fertilized before farming and harvesting strawberries.

After fertilization, farmers focus on mounding soil into plateau-like rows, and then they cover the soil with black plastics.

Usually, the drip tape irrigation is also placed in the ground while covering with plastics. Experienced farmers use a specialized tractor-machine to accomplish all the tasks related to growing strawberries from scraps. The drip tape is very useful for watering and fertilizing strawberries throughout the growth period.

Perfect climate and soil for planting strawberries

The temperate climate is the best option for growing strawberries. It is considered as “short-day and long-evening” plant and needs 10 days of sun-exposure of not more than eight hours to initiate flowering.

Strawberry plants remain dormant throughout the winter. The plants continuously grow and flower during the spring season, when the days are longer than those of winter. Some varieties also grow in a subtropical climate and grow very slowly even in winter.

Based on their response to the light, strawberries are divided into two groups i.e.

  1. The overbearing varieties that give buds during both short and long periods of light.
  2. The varieties that are common for commercial purposes and develop buds in the presence of short-light periods only.

When we talk about soil, strawberries farming needs properly-drained soil with medium loam. The soil should contain a decent amount of organic matter and should be slightly acidic (with a pH from 5.7 to 6.5).

If the soil is highly acidic, there won’t be proper root formation in strawberry plants. And soil rich in calcium makes strawberry leaves yellow, which is not a good sign at all. And, runner formation is also very good in light soil which is rich in organic matter.

You should prefer manured green land for proper growth and timely budding of plants. Don’t even think about alkaline soils or soils that are infected from nematodes.

Different varieties of strawberries

There is a wide range of strawberries available around the USA. Some of the varieties introduced from California like Solana, Tioga, and Torrey, etc. are very good for farming. For hilly areas, Dilpasand, Srinagar, and Sovereign varieties from India and neighboring countries are perfect.

For strawberries farming in warmer areas of the USA, you should choose from Blackmore, Premier Florida-90, Klonmore, Missionary and Klondike, etc.

Propagation of Strawberry plants

Runners that are prepared after the blooming season are used for propagation. Multiple runners are used for successful propagation. The target should be to use every plant with a good root system to successfully set the plantation. If properly nurtured and cared for, a single plant can give up to 18 runners.

Best season for planting strawberries

In the hills, September to October is the best time to plant crowns and runners. And for plain areas, January to February is the perfect window for planting. If planting happens too early, the overall quality and quantity of fruits are expected to be affected.

And if it is too late, runners start developing in March, and the crops are usually not very good. So, depending on the atmospheric temperature and other climate factors, August to October is the perfect strawberry growing time.

You should give priority to uprooting runners from the nurseries. Keep them into bundles before planting in the field. Keeping them in cold storage before transplanting is also a great option. You should irrigate the soil regularly to reduce the stress of water in the leaves.

Planting

Before planting, the land should be properly prepared by harrowing after deep plowing. There should be enough amount of organic manure in the soil before planting. Flatbeds, hill rows, and matted rows, all are suitable for planting strawberries. But in irrigated areas, you should plant on ridges.

The distance between the two plants varies according to the variety of plants as well as the type and area of the land. Usually, strawberry farmers follow a standard spacing of 30 cm. X 60 cm. In an ideal “strawberries growing condition”, a population of 22,000 plants per acre with the spacing if 30 cm. x 30 cm. is followed.

The plants should be planted in the soil with roots in a straight position. There should be enough air in the soil for healthy growth. The growing point is usually just above the surface of the soil. Plants should be decently irrigated at the beginning with no dry spots on the surface.

How to ensure proper care of plants

The straight roots of the strawberry plants spread closer to the surface. Therefore, you will have to maintain decent moisture in and around the soil. Young plants should be free from weeds, and there should be light and regular hoeing.

Horticultural practices related to the strawberry crops

Strawberry Farm

Farmers prefer covering the soil with mulch throughout the winter to protect roots from cold injury. The mulch protects fruits from the soil, conserves moisture of the soil, and controls the decaying of fruits. And for strawberries farming, straw mulch is the most preferred one. Black alkathine mulch is also used, especially before and after the winter.

Requirement of irrigation

Strawberry is a shallow-rooted plant, and less amount, but more frequent watering in each irrigation. Excessive irrigation usually converts into increased incidents of Botrytis rot, and growth of excessive stolons and leaves at the expense of flowers and fruits. Strawberry plants are also very susceptible to drought, so insufficient watering can also damage the plants completely.

In the case of newly planted runners, you should irrigate frequently after planting. Otherwise, plants will start dying, even before their proper growth. During September and October, especially if there is no rain, you should irrigate the plants

A couple of times in a week. In December and January, irrigation once in a couple of weeks is ideal. The frequency of irrigation is usually increased once the fruits appear on the plant to ensure larger fruits in a decent number.

How many strawberries per plant?

Well, it depends entirely on a lot of factors including conditions, rain, soil, variety of strawberry plants, care, irrigation, etc. On average, a healthy plant yields 150 to 400 grams of strawberries.

Using fertilizers and manures for strawberry plants

A fertilizer dose of 25 to 50 tonnes manure, 75-100 kg. N, 40-120 kg. P205, 40-80 kg. K20/ha. maybe needed depending on the variety of plant(s) and soil type.

Intercultural operations

Harrowing and plowing are the two methods through which strawberry crop is kept free from weeds during the first season. Applying plastic sheets and herbicides are also preferred in some regions.

How to protect strawberry crops from different pests and diseases?

Cutworms and red spider mites are the most common pests related to strawberry plants. You can control spider by using 0.25 percent water-soluble sulfur with 0.05 percent monocrotophos. And a dusting the soil before plantation with 5 percent chlordane or heptachlor can control cutworms.

Blackroot rot and red stale are the two major diseases affecting strawberries farming. Fungus Phytophthora fragariae is responsible for both of them.

Black root rot can be controlled by increasing the resistant variants like stelemaster, and red stale can be managed by maintaining the vigor of the plants and rotating the strawberry crops with other crops like beans, legumes, and peas, etc.

Virus diseases like crinkle, dwarf, and yellow edges also affect strawberries crops. And raising the crop in hilly areas is the best way to avoid these diseases. Strawberries are known for throwing various chlorotic plants, which usually results from genetic segregation – and should not be confused with virus infections.

Harvesting

When the half to three-fourth of each strawberry fruit starts changing its color, you should get the indication that the harvesting time has arrived. Depending on the growth and weather conditions, you can do the picking every second or third day – prefer morning hours for picking. Small baskets and trays are preferred for harvesting at the end of strawberries growing season. To avoid damage due to excessive heat, keep those baskets or trays in a shady place.

February to April is the best time for the ripening of strawberries grown in plains. And May and June are suitable for harvesting in places with higher elevations. If you want to transport them in distant markets, try to harvest when fruits are still light in color. For transporting them in local markets, harvest them when they are fully ripe.

Post-harvesting care

Strawberries are perishable fruits. Therefore, they are packed in shallow, flat containers of different types including bamboo, cardboard, trays, and papers, etc. with not more than two to three layers of fruits. Avoid washing them, as it causes bruises and makes them lustreless – and of course, can completely derail your marketing strategies.

Yielding also depends on various factors including varieties, conditions, care, and rain, etc. If you yield 20 to 25 tons of fruits per hectare, you’ve grabbed the jackpot! But if the conditions are ideal, even 50 tons of fruits per hectare have been reported.

  • Grading: Grading is also an important aspect of a successful strawberries farming strategy. Factors like size, color, weight, etc. are considered before proper grading.
  • Storage: You can store strawberry fruits in cold storage at 32 degrees Celsius up to 10 days. If you are planning to transport them to distant markets, don’t forget to pre-cool them at 4 degrees Celsius within the first two hours of harvesting. After pre-cooling, you can ship them in refrigerated vans.
  • Packing: Packing is done based on grading and transportation distance. Perforated cardboard cartons with paper cutting as cushioning material are preferred for first-grade fruits. And low-grade fruits are packed in trays or baskets.
  • Transportation: Road transport by lorries or trucks is the easiest mode of transport because you will find it easy to travel from orchards to the market.
  • Marketing: Most of the farmers, especially the new ones prefer contacting trade agents at local levels to get a decent price. We recommend this to you as well!

To be honest, strawberries growing is not the easiest of options to start your business. But if you are determined enough to do the hard work in the beginning, there is a lot to take.

Strawberry farming is considered as one of the most profitable farming in the world. It does demand a lot of hard work, care, grit, and determination.

But, once you successfully go through the first season of farming, you will find it considerably easy in the subsequent seasons. It is full of fun, taste, tang, and a lot of profit. So, keep delivering the delicacy, keep growing strawberries, keep growing fruits! Happy farming!