How Many Potatoes Grow from One Seed Potato?

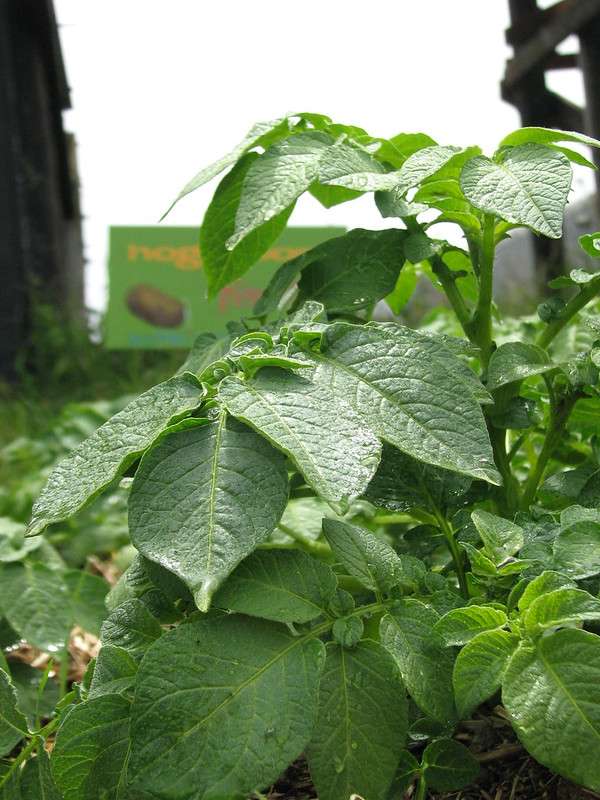
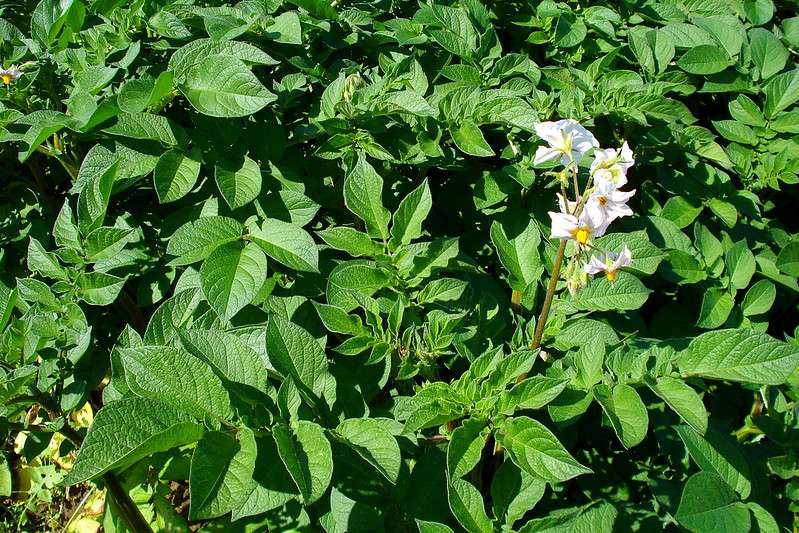
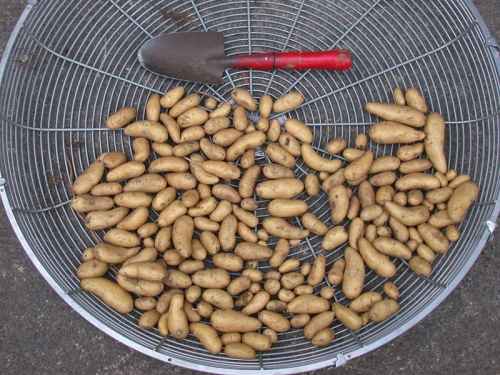
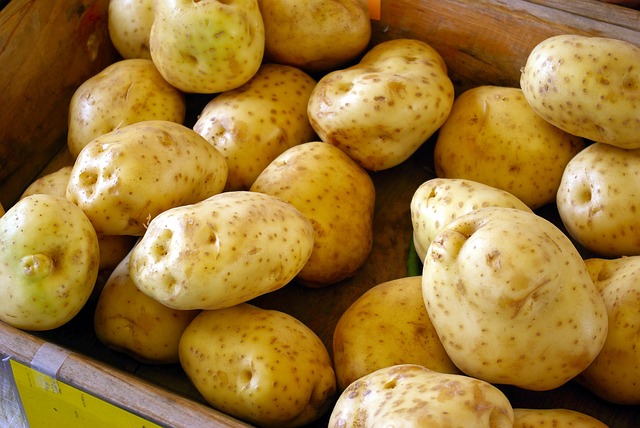
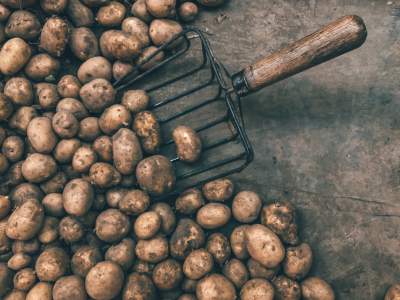
It is really fascinating to see a bunch of potatoes from one seed potatoes. This is why most urban living people are turning towards growing their own veggies.

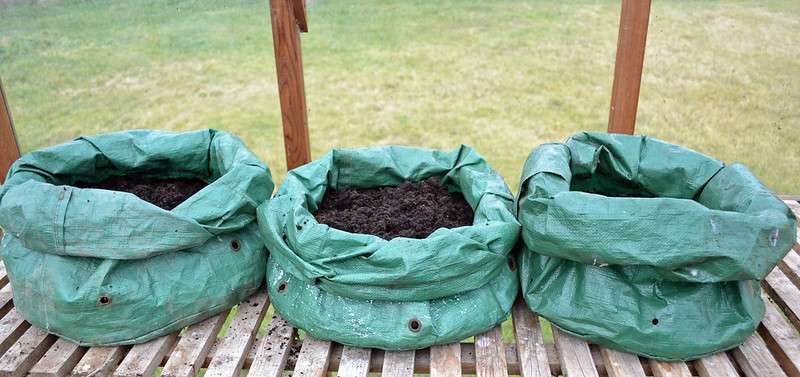
With container and grow bags you can easily grow potatoes or any other vegetables in your apartment space.

One of the most prominent of them is how many potatoes grow from one seed potato. The answer generally varies according to a number of factors, and we will be looking at all of them in the article here.

A quick answer would be, you can grow 8 to 10 potatoes with one seed potato in your backyard.

Additionally, emphasis would also be placed on how to grow your potato plants from a seed to the fullest, by taking routine and easy care of them.

So without any further ado, let us begin the journey of growing potatoes from seed.

How Many Potatoes from One Seed Potato?

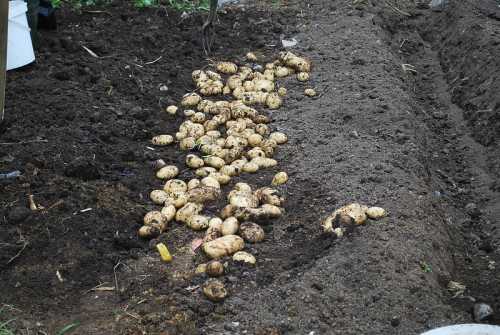
The general rule is that you can see about four pieces of an average sized potato from one seed of potato. Some people can witness more but some people might see less potato growth from the seed. It largely depends on how you take care of it.

If you have a single potato seed and plan to nurture an entire garden out of it, you can actually make this true. All you need is the right technique and little patience and you’ll be good to go.

The good news is that you can reap the benefits of this potato property by either placing your plant in a large container, a frozen ziplock bag, or even directly in the soil of your garden.

If you have limited space, you can still enhance the chances of the number of potato plants that you can grow by choosing the right set of tools and techniques.

To know how you can increase the chances of your plant growth, it is first essential to do a comparative analysis. This expects us to have a general understanding of the average yield that is obtained from one single potato seed without any additional efforts.

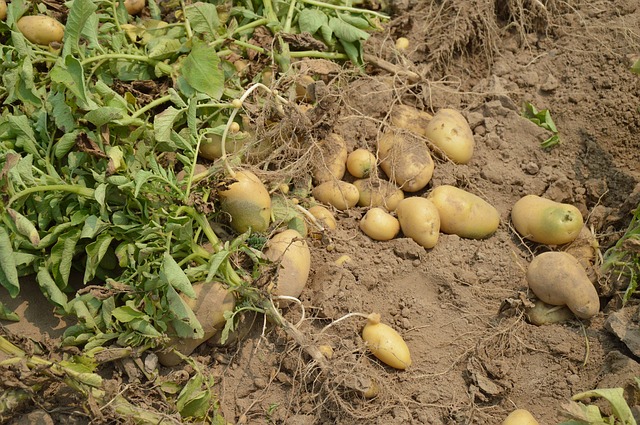
If the seed of your potato plant is relatively big, then you can easily see about ten tubers growing out one seed of potato. Five is the lowest that it can get with a large potato seed.

It is important to remember that the values mentioned here are just an estimate and can vary significantly depending upon the growing conditions that you put your plant under.

Also Read: Is Cow Manure Good for Potatoes?

What are the most supporting soil conditions?

growing potato plants

The soil should be kept moist at all parts of the day. Never leave the base of your soil dry and under watered. It can hamper the growth of your potato plant severely.

Always keep your plants at the uphill so that the nutrient supply is directly inclined up to the stems. Hilling the plants in such a way gives them the much needed support they need to grow and further their journey as a full fledged potato plant.

Suitable fertilization should also be provided to the plant with the right proportions of nutrient composition so that the growth is not compromised.

Also Read: How Long Do Sweet Peas Take to Germinate?

How to choose the right kind of seeds for growing potato plants?

One of the most important considerations for growing potato plants from a seed and choosing the right kind of seed is all about whether the chosen seed is whole or is present in pieces.

Instead of the additional 5 to 10 tubers that you can get from each seed, you can also get additional multiple plants out of a single seed.

Take a good look at the number of eyes that your potato seed has. The greater number of eyes that are present on your seeds, greater are the chances that you’ll have more number of plant openings.

Also, pay special attention to where are the eyes placed on your potato seeds. They should be forward looking and not too far away from each other as it can restrict the opportunities of growth for the multiple layers of plant.

If you can, stat away from the potatoes that are available in the grocery stores. They’ve been subjected to artificial environment and present little opportunities for the growth of your plant. They should be the last option on your list.

Diminish sprouting is one of the most harmful conditions that they are subjected to. It can further deteriorate the condition of other plants present in your garden. If you still want to go for grocery brought potato seeds, make sure to select those that are certified as being natural.

If there is a large potato seed available at your disposal, make sure that you use them as a whole.

If the space constraints do no allow you to do so, you can also cut the seed in half, but in a way that there are at least two eyes present on each of the halved seeds. This ensures that adequate number of plants are growing from your seeds even if they split.

A general idea that helps you make an estimate of the potatoes that you can grow from each seed is that for each pound of seed, you can expect the growth of about 25 pounds of a potato plant, or sometimes even more.

While growing your potato seed, make sure that you do not place them too close to each other. A general rule is to space them out at least 12-15 inches apart.

This gives each plant enough space to grow on their own, while interrupting the progress of their counterparts. The optimal yield of the plant should be kept at least 2.5 foot away from the subsequent plants. It will stimulate the growth of multiple potato spuds.

Select the right varieties of potato seeds

Just like no two potato plants are same, no two potato seeds are same and this is an exemplary point that needs to be taken special care of, especially if you want to yield potato plants from the seeds.

Potatoes are known to be of varying varieties ranging from early season, mid season and finally to the main crop varieties. The unique nature of your potato seeds determine how many plants will eventually pop out of the seeds.

As one can already imagine, it is the main crop potato variety that is responsible for giving out the greatest yield.

Check this out: Why Are Eggshells Good for Pepper Plants?

Some of the most popularly known high yielding varieties of potato plants include those listed in the following points:

  • Early season crops like the potato maris bard, and Celine.
  • Mid season crops like the Daisy Gold that easily gives 3 to 5 eyes yields 5 to 8 lbs per potato seed, Kennebec that has similar growth statistic like daisy gold, and almera.
  • Main crop potato seeds like Agria, Car, Hermes, Kondor, and finally the Maris Piper.

Identify the right growing technique

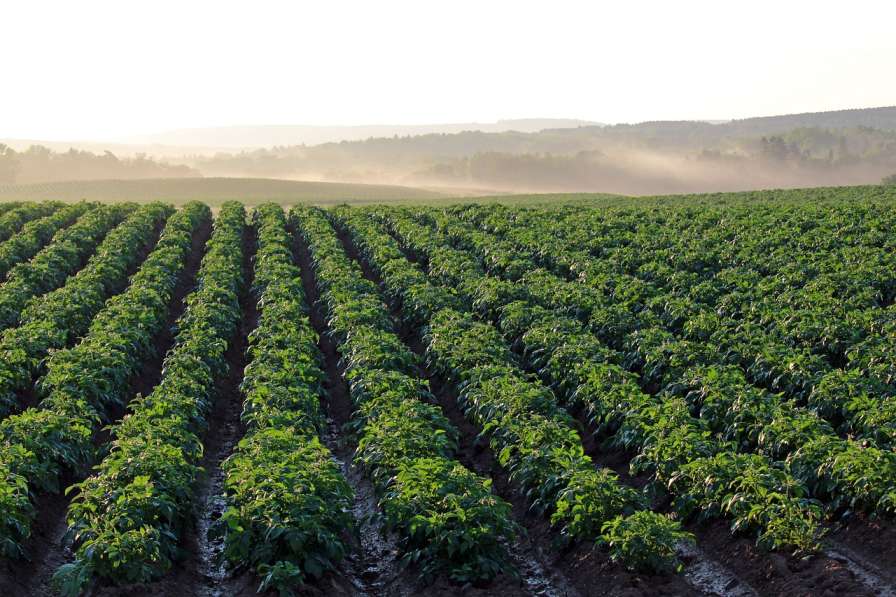
A large part of how your potato plants respond to the potato seeds include the growing techniques that you ascribe to. The yield largely has to do with how you are choosing to grow the plant. Here are some of the most effective potato plant growing techniques that you can follow for a healthy yield:

Make sure that you do not subject your plants to very high temperatures, that is above 75 degrees Fahrenheit. Under such conditions, your plant effectively stops producing new tubers.

If you want little yields but those that are significantly greater in number, then you should probably look for small spaces to grow your potato seeds. These are the most empirically tested and efficient methods to grow your plants from the seeds.

Overall, almost any growing method you choose would produce a healthy yield. To know the average size that each method leads to, refer to our information below:

  • Raised beds lead to an average growth of 2.4 lbs.
  • Wire bin leads to an average growth of 0.7 lbs.
  • Pot leads to an average growth of 0.6 lbs.
  • Grow bag leads to an average growth of 0.58 lbs.

Also Read: What Size of Container Do I Need, to Grow Cucumbers?

How to effectively increase your potato yield?

Even after following the aforementioned tips you are suffering from the situation of a low potato yield, it is about time that you start to apply the following practices into use:

Keep your soil well drained and very light throughout the growing season.

Try growing your potatoes in hills. It helps to support the stems of your potato plants and is highly beneficial for underground growing plants. Do not expose the entire plant to sunlight. Instead, continue to hill them as they grow for seeing maximum productivity.

Since potatoes do not have very deep roots, they demand constant water from the care taker. As mentioned before, keep your soil moist and well drained, but not soggy or it can lead to conditions of root rot.

If you still face issues, try mulching your soil frequently. It is an easy and effective technique to help retain maximum moisture from the soil.

The pests, bacteria, and diseases that affect one plant are soon to be spread to other plants as well as they are highly communicable. To minimize the destruction, spot early signs of disease in your plant and leaves and remove them from your garden immediately.

If only a few parts of your plant are affected, like the leaves, consider removing them from the plant and you’ll be fine. Also, spot signs of root rot in your plant and carefully replant your produce before it makes much destruction to the rest of the plant.

Pay special attention to the fertilization needs of your plant. Your plant needs fertilizers for meeting its macro-nutrient goals and to amplify maximum growth. Most people tend to overestimate this need, but it shouldn’t be overlooked.

Your potato plants generally seek for a fertilizer that presents a balanced composition of nitrogen, potassium, and phosphorus.

The recommended composition ratio usually varies from 5-10-10 to 10-10-5 on the NPK scale. Consider not to use fertilizers that are heavily concentrated on nitrogen. It can be harmful in the long run.

Expose your plant to ample amount of sunlight for the absorption of nutrients and the conduction of photosynthesis.

Sure, the potato plants do not like to be put under high temperatures, but avoiding them of complete sunlight can do more harm that good. If natural sunlight is not available, try arranging for conditions of artificial light.

Conclusion

Instead of rushing to the grocery store every time you run out of potatoes, you can grow potatoes in your house garden and keep the worries forever. Exciting news is one seed of potato can give you multiple potato plants. We have mentioned how to take care of these yields in the article above.

We have also listed a few easy and efficient ways to get the best out of your potato seeds at home. Do not forget to apply these principles as mentioned, or you might fail to see the desired results.

Is Cow Manure Good For Chili Plants?

If you’re planning to use cow manure to fertilize your chilli plant, then this article is for you.

Packed with essential nutrients, cow manure boost healthy growth of any plant.

Chemical fertilizers and pesticides damage the growth of a plant and also don’t provide the plant with the basic nutrition it needs or the growth.

But, can you directly apply fresh cow manure around your chili plant?

No, you can’t directly apply cow manure or poultry manure to your veggies, gardeners must compost it before using it to enrich the growing soil.

Manure is a natural and healthy option for plants as they don’t harm them in any way whereas chemical pesticides and fertilizers harm them and stop their growth.

Cow manure for chili plants is always the best option as manure for the plants. They increase the production of the chilies and also keep the plant healthy and green.

Cow manure has all the essential nutrients and fibers that a plant needs to produce the fruit. Cow manure for chili plants helps them in producing more chilies and also keeps the plant healthy.

Generally, chemical fertilizers and pesticides help in producing more but it damages the health of the plant.

Organic manure like cow manure is way better than any artificial fertilizer and also they are best for the plants whether is in the nutrition or their growth.

Cow manure has the qualities and advantages a chili plant needs starting from the seeding to the last stage which is when it bears fruit. Adding it to the soil is a very essential part of the process of growing chilies.

How Does Cow Manure for Chili Plants?

As we already know that cow manure has many essential nutrients for the plants it is very good for the plants to add it to their soil for their health.

This natural fertilizer won’t hamper the soil like the chemical fertilizers. 

The natural remains in the manure dissolve in the soil without harming the soil’s health and fertility.

By this you can protect both the plant and the soil from artificial and chemical products.

By adding the natural fertilizers they also protect the soil from any kind of soil pollution. When you protect the soil from pollution the plant also stays healthy and even produces more.

When the natural remains of the manure are mixed with the soil, the quality of the soil is increased, and also the nutrients which are present in the soil help the plant in growing.

These nutrients work as food for the plants as they help them to grow and produce more.

Like humans, plants need food to grow into a green and healthy ones. Organic manure like cow manure helps them in growing and also keeps them green.

Any manure whether it is cow or horse whatever it is they have the essential nutrients and the food source which are needed for the plants to grow into a green and healthy ones.

They have an ample amount of nutrients which is needed for the plants to grow.

When plants and especially chilies don’t get enough and the right amount of manure and care then they don’t bear many fruits and also die soon. 

Cow manure for chili plants is a boon as they are filled with the basic nutrients which are needed for the chili plant. The garden is filled with chilies when you add cow manure to the chili plants. 

Also Read: Is Cow Manure Good for Potatoes?

How to Use the Cow Manure for the Chili Plants? 

Chilies are the easiest plant to grow and with the right fertilizer at the right time, they will grow like anything in the garden and will also provide you with so many chilis.

With the proper amount of manure and organic fertilizer, the chili plants can do wonders in your garden. The right and proper amount with the right knowledge of what goes and what not will give you a massive production of chilies in the garden.

The basic NPK, nitrogen, phosphorous, and potassium are the nutrients that are needed for the chili plants.

These nutrients are almost present in every organic and non-organic fertilizer as well as in every soil on this planet. These nutrients work wonders on the plants and keep the plant healthy.

A fertilizer with higher nitrogen content should be used in the first four months of production. Nitrogen is a basic nutrient for every plant as they work miraculously on its growth of it.

The root development is done by the phosphorous and the production of fruits and flowers is the work of potassium.

The blooming starts in the four to six months after the seeds are planted. During this time you can add the fertilizer with higher content of phosphorous and potassium.

Also Read: Is Chicken Manure Good for Tomato Plants?

Is Cow Manure for Chili Plants Work?

Without trying we don’t know whether the cow manure for the chili plants will work or not.

People have tried this and it worked for them but whether it works for everyone or not it depends on the type of chili plant and the type of soil.  

Climate also plays a big part in the production of the chilies as a warm climate and warm soil is the type which is needed for the plant to grow. The cold climate doesn’t suit very much to the plant and dies as soon as it is planted.

The manure is organic and it will harm neither the plant nor the soil. If it doesn’t increase the production and the quality of the chili when added to the soil then it has no harmful effect of it on the plant as it is made from nature only. 

Nature heals nature and doesn’t damage the product. The cow manure is made from nature and is organic which will never hamper the health of the soil or the plant.

Also Read: Why Are My Pumpkin Plant Leaves Turning Yellow?

People assume that everything works on every plant which is not true. There is some organic manure that works on chilies but doesn’t work on other plants. Every plant’s need is different and its growth is different.

Some manure may work wonders on a plant and some cannot do anything to the plant. The type of plant and soil with the right manure can do great things to the plant whereas wrong amount of manure on the wrong plant and soil will do nothing.

Proper research and knowledge are very important when you add something to the plant in your garden. 

There are also different mixtures of manure which makes the plant healthy and green. There are also substitutes and add-on to the manure which is organic and healthy for the plant.

Before adding anything to plant detailed research is very necessary and an important step to follow.

Cow manure is a very safe and good option for chili plants and with the right amount of it you can have enough chilies in your garden. Amount of cow manure you use on chili plants should be limited to avoid over fertilization.

The manure also retains soil fertility and also improves the quality of the soil. Hence, do add the right amount of cow manure to the chili plant for a full and healthy production of the fruit.

How Much Sunlight Does Potatoes Need?

Without enough sunlight, your potato plant may not receive the energy it needs to thrive, resulting in stunted growth or a low yield.

Growth of potatoes is heavily dependent on the amount of sunlight your plant gets.

For potatoes to flourish and yield an abundant tubers, they require at least 6 to 8 hours of full sun every day.

This is because, like every plant potatoes needs sunlight to perform photosynthesis, a crucial process that enables the plant to generate the energy required for tuber growth and development.

When your plant don’t get enough sunlight, they will not be able to thrive and may become vulnerable to disease or pests.

Additionally, too much shade results in small potatoes.

Therefore, it is important to ensure that your potato plants are getting enough sun exposure throughout the day. With which you’ll be gifted with delicious and bigger tubers.

Explain Factors Affecting Sunlight Requirements of Potatoes

How much sunlight potatoes needs depends on temperature, humidity, soil fertility, and season in your region.

Potato plant needs higher temperatures to thrive, ideal temperature ranges between 55-75°F.

Potatoes also require moderate levels of humidity, as well as soil that is both moist and well-drained, and rich in organic matter.

This type of root vegetable thrives during the summer season when there is an abundance of sunlight and the plant can effectively avoid blight or other potato plant diseases.

Understanding how these factors impacts the potato plant’s sunlight requirements will help you in determining the optimal time and location to plant them.

How Much Sunlight Does Potatoes Need?

Exact amount of sunlight potatoes need will vary depending on the conditions mentioned above.

Generally, potatoes should receive at least 6 to 8 hours of full sun each day during the peak growing season.

This is the time when days are longest, and the temperatures are just right for the potatoes to grow.

Explanation of how potatoes use sunlight for photosynthesis and tuber production

As a gardeners we all know importance of sun exposure to grow healthy potato plants. Sunlight helps them make energy so they can produce bigger tubers.

When you fail to give adequate amount of sunlight, your plant won’t be able to make enough energy and will stay small or not produce any tubers.

Amount of sunlight your potato plant needs depends on various factors such as temperature, humidity, soil fertility, and climate.

As already mentioned, potatoes need at least 6-8 hours of full sun each day during the peak growing season when temperature is optimal for growth.

Too much shade can also have an adverse effect on plant growth, so it is important to plant your seed potatoes in a spot with adequate sunlight throughout the day.

Do Potatoes Need Full Sun?

Yes, potatoes need full sun for at least 6-8 hours each day to reach their maximum potential size and yield a good harvest.

This is when the hours of daylight are longest and temperatures are in the optimal range for growth.

Too much shade can stunt their development or cause tubers to fail altogether, so it is important that they get adequate exposure to sunlight throughout the day.

Can You Grow Potatoes in Partial Sunlight?

While potatoes do need full sun for optimal growth, they can still be grown in partial shade. However, the yield will be lower and tubers may be smaller than those grown in full sun.

Additionally, potatoes grown in partial shade are more vulnerable to disease and pests due to decreased photosynthesis.

What is Full Sun and Partial Shade?

Full sun is defined as 6 to 8 hours of direct sunlight each day during the peak growing season.

Partial shade, on the other hand, is defined as 2 to 4 hours of direct sunlight each day or indirect light for up to 6-8 hours.

Understanding what counts as full sun and partial shade can help you determine the best place to plant your potatoes for optimum growth.

What happens if potatoes get too much sun?

Too much sun can be just as damaging to potatoes as too little. Potatoes that get too much direct sunlight can become stressed and dry out quickly, leading to a decrease in yield and poor quality tubers.

It is important to monitor the amount of sunlight your potato plants are receiving and adjust accordingly if needed.

Can potatoes survive without sunlight?

No, potatoes need sunlight in order to survive and grow. They use the light from the sun for photosynthesis and to create energy for growth.

Without this energy, they will be unable to produce tubers or reach their full potential size.

Therefore, it is important that potatoes receive adequate sunlight throughout the growing season in order to maximize yield and quality of the crop.

Conclusion

It is clear that potatoes need a certain amount of sunlight to thrive. They should receive at least 6-8 hours of full sun each day and can tolerate partial shade for up to 6-8 hours.

Too much or too little sun can be detrimental, so it is important to monitor the exposure your potato plants are getting and adjust accordingly if needed.

With the right amount of sunlight, potatoes can reach their maximum potential size and yield a good harvest.

How to: Growing Cucumbers in Grow Bags?

Before you start to grow cucumbers in grow bags, you must first understand how easy or tough is to use grow bags to grow your veggies.

Lack of space forced most urban gardeners to opt for container gardening, now luckily you can use grow bags without plastic containers.

It’s not impossible, there are many gardeners who already tried this and have been successful.

Grow bags are made of a porous fabric that can be filled with growing medium, it is much thicker and more durable compared to a plastic container.

The material allows the plants roots to grow unhindered and air can pass in and out with ease which aids drainage.

By, now you already know that grow bags are not ordinary bags , they are specifically designed to provide your vegetables with a good amount of water and nutrients.

So, lets first learn about them.

What are Grow Bags and Different Types of Grow Bags?

Grow bags are a great way to grow cucumbers in small spaces, such as patios and balconies. Grow bags come in various sizes, shapes, and materials to accommodate different types of cucumber plants.

They also allow for more control over soil temperature, moisture levels, nutrient availability, and other environmental factors.

There are three main types of grow bags: fabric pots, plastic pots, and trays.

Fabric pots offer superior aeration and water absorption compared to plastic or tray systems due to their breathable material.

However, they are not as durable or long-lasting as the other two options.

Plastic pots can be used either indoors or outdoors but do not provide sufficient drainage when exposed to direct sunlight. Lastly, tray systems are ideal for those who need to move their cucumber plants around often. They also provide superior drainage and aeration.

Bio-degradable grow bags are also available and are made from natural materials such as jute, coconut coir, and other plant fibers.

These provide an eco-friendly option for those who want to grow cucumbers without relying on synthetic materials.

No matter which type of grow bag you choose, it is important to ensure that the cucumbers have adequate space, sunlight, and water in order to thrive. Be sure to check the instructions on your particular grow bag before planting your cucumbers.

Also Read: What Does Blight Look Like On Cucumber?

Step-by-step Guide to Grow Cucumber in Grow Bags

Once you have selected the right grow bag for your needs, it is time to start growing cucumbers. Here are a few steps to get started:

Prepare the soil

Before planting cucumbers in your grow bag, mix compost or rotted manure into the soil to provide essential nutrients and improve drainage.

Choose your variety

Consider the features of different cucumber varieties when selecting which type to plant in your grow bag. Some will do better than others depending on light availability, humidity levels, and other factors.

Plant seeds or seedlings

Plant two or three seeds per hole and cover them with 1-2 inches of soil. If using seedlings, plant the entire rootball up to the base of the stem.

Water regularly

Keep soil moist but not waterlogged. Check for adequate moisture each day and adjust your watering schedule accordingly.

Fertilize as needed

Fertilizing is important to maintain healthy cucumber plants in grow bags. Use a liquid fertilizer once or twice a month throughout the growing season.

Harvest when ready

When cucumbers reach their desired size, pick them off with scissors or pruning shears. This will ensure that the plant continues to produce more fruits.

Check this out: How Deep Should a Raised Bed Be for Cucumbers?

Best grow bags for cucumbers?

The best grow bag for cucumbers will depend on your needs and the environment in which they are planted. If you have limited space, then a tray system may be the best option.

For those who need to move the plant around often, fabric pots provide superior aeration and drainage. For an eco-friendly option, bio-degradable grow bags are an excellent choice.

Ultimately, it is important to select a bag that provides adequate space, sunlight, and water for the cucumbers to thrive.

What size grow bag for cucumbers?

The size of the grow bag will depend on the variety of cucumber you are planting. Generally, a 10-gallon or larger is suitable for most varieties.

For vining types, however, you may need to use a larger bag (20-30 gallons).

It is also important to consider how much space the plants need and their root structure when selecting a grow bag size.

It is best to select one that is slightly larger than necessary so the plants have room to spread out and grow.

Also Read: How Much Water Does a Cucumber Plant Need?

How many cucumber seeds in one grow bag?

This will depend on the size of your grow bag and the variety of cucumber you are planting. Generally, it is best to plant two or three seeds per hole in a 10-gallon grow bag.

For larger sized bags (20-30 gallons), you may need to plant four to five seeds per hole. It is important to leave enough space between the seed holes so that the plants have room to spread out and grow.

Additionally, you may need to thin out the seedlings once they sprout, removing any weaker or overcrowded plants. This will help ensure that each cucumber plant gets adequate space and sunlight.

Can I reuse my grow bag for cucumbers?

Yes, you can reuse your grow bag for growing cucumbers. However, it is important to thoroughly clean the bag between uses, as leftover dirt and debris can harbor pests and diseases.

Additionally, adding fresh soil before planting will ensure that the plants get adequate nutrients.

Also Read: Is Chicken Manure Good for Cucumbers?

FAQs

What is the best soil for cucumber plants?

The best soil for cucumber plants is a nutrient-rich soil with good drainage. A combination of compost and rotted manure will provide essential nutrients while helping to improve drainage.

How often should I water my cucumbers in grow bags?

Cucumbers grown in grow bags should be watered regularly, as the soil can dry out quickly.

Aim to keep the soil moist but not soggy, checking for adequate moisture each day and adjusting your watering schedule accordingly.

How do I know when my cucumbers are ready to harvest?

Cucumbers are ready to harvest when they reach their desired size.

Check the fruits regularly and pick off any that have reached their maturity with scissors or pruning shears. This will ensure that the plant continues to produce more cucumbers.

What type of grow bag is best for cucumbers?

The best type of grow bag for cucumbers will depend on your needs and the environment in which they are planted.

If you have limited space, then a tray system may be the best option. For those who need to move the plant around often, fabric pots provide superior aeration and drainage.

For an eco-friendly option, bio-degradable grow bags are an excellent choice. Ultimately, it is important to select a bag that provides adequate space, sunlight, and water for the cucumbers to thrive.

Also Read: Why You Should Not Plant Cucumbers Near Tomatoes?

Conclusion

Growing cucumbers in a grow bag can be an easy and efficient way to add some fresh veggies to your garden.

It is important to choose the right size grow bag, depending on the type of cucumber and how much space they need.

Additionally, it is essential to keep the soil moist but not soggy and harvest when the cucumbers reach their desired size.

Why Are My Potatoes Not Flowering?

Unlike other veggies, which needs flowering to produce yield, potato plants don’t rely on blooms to produce quality yield.

Flowers on potato plants indicate that harvest time is near. It is completely normal that some potato plants don’t flower. Actually, these seeds from these flowers are used to reproduction. However, most gardeners choose seed potatoes to reproduce.

Some potato varieties even produce small tomato like fruits after flowering. You don’t have to worry if your neighbor’s plants are producing more flowers but your potato plants are left with only fewer blooms.

As already mentioned, flowering is not related with tuber production in potatoes.

Do All Potato Varieties Flower?

For some potato varieties, such as Russet Burbank, Bintje, Kennebec and Irish Cobbler, successful breeding has resulted in sterile potatoes that do not flower. If you are growing these types of potatoes at home, it is unlikely you will witness blooms.

If your potato plants have leaves that are a different color, wilting, or dying too soon, you should check to find out why. You might have a disease in your potatoes.

If the problem is caused by a virus, fungus, or bug, get rid of the plant quickly. It might make other plants sick too.

Why Potato Plants Not Flowering?

There are a few reasons why your potato plants may not flower. These include:

• Poor soil quality – Potatoes need well-drained soil to grow and produce quality yield.

• Too much water or fertilizer – Over-watering the plant can lead to root rot and too much fertilizer will cause the leaves to burn.

• Insufficient sunlight – Many varieties of potatoes require 6-8 hours of direct sun each day for optimal growth.

• Low temperatures – Cold temperatures can stunt the growth of the potato plants, resulting in fewer flowers.

Varietal differences – Some varieties of potatoes simply don’t flower due to their genetics.

Taking all these factors into consideration it’s entirely possible that your potato plants are not flowering due to one or more of the above mentioned reasons.

To ensure successful growth and yield, it’s important that you keep an eye on the potato plants and take corrective action as and when needed.

If you’re still unable to get satisfactory results then it may be time to try a different variety of potatoes next season.

With adequate care and correct selection of varieties, your potato plants can produce abundant yields without having to rely on blooms at all.

So don’t worry if your potato plants aren’t flowering! Just enjoy their delicious harvest.

Also Read: How Many Potatoes Grow from One Seed Potato?

When Do Potato Plants Bloom?

Potato plants typically bloom anywhere between 90 to 120 days after planting. The flowers of the potato plant are edible and make a beautiful addition to salads or as garnishes.

They open early in the morning and close late in the afternoon. So if you have planted your potatoes recently, it’s best to keep an eye out for flowering around this timeline.

Although it’s not necessary, some gardeners choose to remove the flowers from the plant prior to blooming. This is done in order to encourage more tuber growth and increase yield.

However, this should only be done if you are certain that your potatoes are planted in well-drained soil with sufficient sunlight and nutrients.

Can I Dig Potatoes Before Flowering?

Absolutely! You can begin harvesting potatoes as soon as they reach a usable size. The best indicator of when to harvest is the amount of foliage on top of the plant.

A thick layer of green leaves indicates that the potatoes have had enough time to mature and are ready for harvest.

If you notice any sign of flower buds, it means that the plant has gone past its prime and you can expect a lower than usual yield.

So, don’t wait for your potato plants to flower – simply keep an eye on their foliage and start harvesting as soon as they look ripe.

Check this out: Is Cow Manure Good for Potatoes?

How Long After Potato Plants Flower are the Potatoes Ready to Harvest?

Once the potato plants bloom, they should be ready to harvest within 4-6 weeks.

However, you can begin harvesting small potatoes as soon as they reach a usable size – usually before the flowering stage.

The size of the potatoes depends on your variety and how far along in their growth cycle they are. As a general rule, potatoes should be ready to harvest when the vines start to wither and die back.

At this point, you can gently dig around the base of each plant with a shovel or trowel and check for potatoes. The tubers can then be carefully lifted out of the soil and stored in a cool dry place until ready to use.

Should I Allow Potato Plants Flower?

It’s completely up to you whether or not you want your potato plants to bloom.

Although some gardeners prefer to remove the flowers in order to encourage more tuber growth and increase yield, others allow them remain on the plant for aesthetic reasons.

That said, flowering comes with its own set of positives. Not only does it make for a beautiful addition to your garden, but the flowers of the potato plant are also edible.

They open early in the morning and close late in the afternoon and make a great addition to salads or as garnishes.

Check this out: Is Chicken Manure Good for Potatoes?

Potato Growing Tips

  1. No matter whether you allow your potato plants to bloom or not, there are a few key things to remember when growing potatoes:
  2. Choose the right variety for your climate and soil type.
  3. Plant potatoes in well-drained soil with plenty of sunlight and nutrients.
  4. Water regularly throughout the growing season.
  5. Keep an eye out for pests and diseases and take corrective action as needed.
  6. Harvest potatoes as soon as they reach a usable size.
  7. By following these tips, you can expect an abundant harvest of delicious potatoes from your garden.

Also Read:

Conclusion

Potatoes are a wonderful addition to any garden and can produce amazing yields with minimal effort. If you’ve recently planted potatoes, keep an eye out for flowering anywhere between 90 to 120 days after planting.

You can begin harvesting as soon as the plants reach a usable size – usually before flower buds appear. Just remember to water regularly and choose the right variety for your climate and soil type.

With a bit of patience, you’ll soon have an abundant harvest of delicious potatoes.

Is Chicken Manure Good for Potatoes – Answered

Soil, water and sunlight are essential needs for a plant growth. But, without right amount of nutrients you can’t expect the potato plant to give quality yield.

With increasing use of chemical filled fertilizers, it’s enticing to switch to natural organic fertilizers to enrich your plant soil. Chicken manure is one such fertilizer.

Those who aren’t aware of nutrients in chicken manure may wonder is it good for potatoes?

Clemson University states that poultry manure has 13 essential plant nutrients including nitrogen, phosphorus, potassium, calcium, magnesium, sulfur and manganese, which are all essential for healthy potatoes. It also contains trace elements like zinc and iron which benefit potato plants to thrive.

Before dwelling further, lets know about chicken manure.

What is Chicken Manure?

Chicken manure is the excrement of chickens which is often used as an organic fertilizer in gardens and farms. It is made up of droppings, feathers and bedding material such as straw or sawdust.

It is often used as a natural fertilizer to provide essential nutrients to plants.

Poultry manure has a high nitrogen content, which helps with photosynthesis and helps the plant to produce proteins and enzymes.

It also contains phosphorus, which is important for root growth, and potassium, which helps plants to absorb water and nutrients more efficiently.

What Kind of Nutrients Potato Plant Needs to Grow?

Potatoes require a few essential nutrients to grow well. The primary nutrients needed are nitrogen, phosphorus and potassium.

Nitrogen helps the plant with photosynthesis and encourages leaf growth so that potatoes can better absorb sunlight.

Phosphorus is important for proper root growth while potassium helps the plants to absorb water and other necessary minerals from the soil more effectively.

Your potato plant needs Phosphate and Magnesium for bigger tubers.

All nutrients help in tuber growth, calcium helps to regulate the water uptake of potatoes and sulfur helps in chlorophyll formation. (Source)

Is Chicken Manure Good for Potatoes?

As mentioned chicken manure provides essential nutrients such as nitrogen, phosphorus and potassium, which are important for plant growth. It also contains several trace minerals like zinc and iron, which are beneficial for the potatoes to thrive.

Adding chicken manure will helps your potato plant to absorb water and other minerals from the soil more efficiently.

It enhances photosynthesis and encourages leaf growth for better absorption of sunlight.

Adding chicken manure to potato plant will regulates water uptake in potatoes through calcium content.

  • Chicken manure has a lot of nitrogen. That helps potato plants grow tall and have big leaves..
  • It also contains phosphorus, which is important to promote root development and overall plant growth.
  • Potassium is essential for flower production and tuber formation in potato plants, and chicken manure is a good source of this nutrient.
  • Potato plant needs calcium for strong plant cell walls, which can be provided by this organic fertilizer.
  • Magnesium housed in chicken manure promotes photosynthesis and overall plant health.
  • Sulfur content in this organic fertilizer helps to promote enzyme activity in potato plants and can help improve soil structure.

Also Read: Why Are My Potatoes So Small?

How to Use Chicken Manure for Potato Plants?

Chicken manure can be used to fertilize potato plants in a few ways.

The easiest way is to mix the chicken manure into the soil before planting the potatoes.

However, you can also use this organic fertilizer as a side dressing.

Spread the chicken manure around the base of the potato plants, at least 6-8 inches away from the stem.

Below mentioned are different ways to use this natural fertilizer:

#1 Compost the manure

Composting is the process of breaking down organic matter into a nutrient-rich soil amendment for gardening.

You can add poultry manure for your compost bin, so that you can reuse the decomposed compost to enrich your potatoes.

  • To add chicken manure for compost, you will need to collect fresh chicken bedding material such as straw or sawdust.
  • This is mixed with the manure and composted for several weeks before it can be safely used in your potato garden.
  • You must add 1 part of brown and 2 parts of green in your compost bin. More on this here.

#2 Apply the composted manure

To ensure the best growth of your potato plants, utilize decomposed manure instead of fresh to nourish and enrich their soil. Place it around them in a circular formation for optimal benefits.

  • Apply the composted chicken manure evenly around the potato plant.
  • Make sure not to spread it too close to the stem of the plant or it can cause damage.
  • Water it in well after application and fertilize according to your garden’s needs.

#3 Apply Directly

Instead of adding to your compost bin, you can spread old chicken manure (3-4 months decomposed) in your garden as a top-dressing for maximum nutrient absorption.

  • To use this method, spread the chicken manure on top of the soil around your potato plants and gently work it into the first few inches of soil.
  • Make sure not to bury the stem of the plant.
  • Watering in well after application helps to release the nutrients from the manure and make it available to your potato plants.

#4 Mix with potting soil

Adding chicken manure to the soil before planting potatoes can give your plants an instantaneous dose of essential nutrients that will aid in their growth and development.

  • Add a few inches of chicken manure to the planting area and mix it into the soil well before planting your potatoes.
  • This will provide the plants with a slow release of nutrients throughout the growing season.

Check this out: Can You Grow Potatoes in Clay Soil?

Other organic fertilizer for potatoes

You can give your potato plants organic fertilizer. This could be compost, dried seaweed, or fish emulsion.

  • Compost is a special type of food for plants. It helps potatoes grow strong and healthy by giving them all the nutrients they need.
  • Dried seaweed is a good option for your plants because it has lots of vitamins and minerals. Fish emulsion can help the roots grow strong..
  • You can use organic fertilizers on your potato plants, like you would with chicken manure. This will help them grow healthy during the season.
  • The best thing about using organic fertilizers for your potatoes is that you don’t need to worry about chemical residues in the soil, making them safer and more eco-friendly.
  • By understanding which nutrients are most beneficial for potato plants and how to use organic fertilizers such as chicken manure, you can ensure a successful harvest.

List Potato Plant Fertilizing Tips

1. Compost the manure before applying it in your garden.

2. Apply composted or fresh manure as a side dressing around the base of the plant.

3. Use top dressing for freshly applied manure.

4. Mix it into soil before planting potatoes to give them an immediate boost of nutrients.

5. Consider supplementing with other organic fertilizers such as compost, dried seaweed or fish emulsion to provide additional nutrients and promote root growth.

6. Water well after application to release the nutrients and make them available to your plants.

Read other organic fertilizer articles here:

FAQs

How long should chicken manure sit before planting?

It is best to let chicken manure sit and compost for at least 3-4 months before using it in your garden. This will help reduce any potential nutrient burn and make the manure more effective as a fertilizer.

Can I use fresh chicken manure on potato plants?

No, fresh chicken manure should not be used on potato plants as it can cause burning to the plant. It is best to compost it first or use it in moderation as a side dressing.

Does chicken manure burn plants?

Yes, fresh chicken manure can cause burning to the plant. It is important to compost it first or use it in moderation as a side dressing.

How do I compost chicken manure?

Chicken manure should be composted for at least six months before applying it in the garden. The compost pile should be kept moist and turned every few weeks to ensure the manure breaks down properly.

How often should I fertilize my potato plants?

It is best to fertilize your potato plants every 4-6 weeks, once the plants have reached 6 inches in height. This will help to ensure they get the nutrients they need to produce a healthy crop.

How much chicken manure should I use on my potato plants?

It is best to use a light side dressing of composted chicken manure around the plants. For every 10 square feet, use one cup of composted manure. This will help to provide the necessary nutrients for healthy growth and development.

When should I apply chicken manure to my potato plants?

It is best to apply composted chicken manure before planting potatoes or as a side dressing once the plants have reached 6 inches in height.

This will provide the necessary nutrients throughout the growing season for healthy growth and development.

Are there any risks to using chicken manure on potato plants?

Yes, it is important to be aware that fresh chicken manure can contain harmful bacteria such as E. coli and Salmonella.

Therefore, it is important to compost the manure before applying it in the garden or use it in moderation as a side dressing.

Additionally, there may also be some risk of nitrogen burn if too much is applied at once. Therefore, it is important to use a light side dressing and supplement with other organic fertilizers for additional nutrients.

Conclusion

Chicken manure is a great way to give your potato plants the nutrients they need to grow well.

It can provide the necessary nitrogen and other essential minerals, while being eco-friendly and free of chemical residues.

However, it is important to compost the manure first or use it in moderation as a side dressing to avoid any risks.

Finally, supplementing with other organic fertilizers can help to further boost plant growth and development.

How Long Does it Take for Spinach to Grow?

Home grown spinach are delicious and packed with iron, calcium, antioxidants and essential vitamins.

With right potting soil and adequate watering, you can easily grow spinach at home. As a gardener it might be exciting to know how long does it take for spinach to fully grow, so you can harvest and enjoy in your dish.

Depending on spinach variety, it takes around 45-60 days to fully grow spinach plant.

But, for optimal growth you need to follow certain growing conditions. Most new gardeners out of anxiety ignore to care spinach plants, resulting in low quality yield.

In this article l”ll discuss best way to grow spinach at home.

What Are the Main Factors that Can Affect the Growth of Spinach?

While growing leafy vegetables like spinach it is important to consider below mentioned factors for quality yield.

1. Temperature: Spinach plants prefer cooler temperatures ranging from 50F-70F. Prolonged exposure to temperatures above 80°F (26.7°C) can cause spinach leaves to become bitter and less palatable.

2. Sunlight: Spinach needs around 6 hours of sunlight each day for optimal growth but will tolerate some shade.

3. Soil: Spinach grows best in loose, well-draining soil with plenty of organic matter like compost or peat moss added in it. The soil should have a slightly acidic pH between 6 and 7 for the best results.

4. Water: Spinach needs consistent moisture in order to thrive, so it’s important to keep the soil moist at all times by watering frequently throughout the growing season; however, be careful not to over-water as this can lead to root rot or cause premature bolting (flowering) of the plants before they’ve had a chance to mature properly.

Also Read: How Much Water Does Spinach Need to Grow?

5. Fertilizer: An application of compost or manure tea prior to planting will work wonders for your spinach crop as this type of fertilizer will provide essential nutrients that help promote stronger growth and bigger yields of healthier plants that are more resistant to diseases and pests.

Check this out: How to Grow Spinach Microgreens?

How Long Does it Take for Spinach to Grow?

Spinach is a fast-growing crop with a short life cycle of approximately 45-60 days from seed to harvest.

It generally takes 45 to 60 days for spinach plants to reach maturity, depending on the variety.

Most varieties of spinach can be harvested when they are young and tender (at around 30 days) or left until they have fully matured.

To harvest your crop, pick the outer leaves first and leave the inner ones to continue growing; this will prolong your harvest period.

It also needs 6-8 hours of direct sunlight per day and well-drained soil with an acidic pH level between 6.0 and 7.0.

For optimal growth, it is important to provide consistent moisture while keeping the soil moist but not soggy in order to avoid root rot or premature bolting (flowering) of the plants.

However, some spinach varieties may take more than 45 days to grow. Also, above mentioned factors like temperature, watering and sun exposure impact the growth of spinach plants.

With proper care and maintenance, you can enjoy a healthy, fresh supply of home grown spinach for several months.

It’s also a great way to get more nutrient dense vegetables into your diet without spending lots of money at the grocery store.

Also Read: What Causes White Spots on Spinach?

How long does it take for spinach seeds to germinate?

It usually takes 7-14 days for spinach seeds to germinate and then the plants will take 45-60 days to fully grow.

For optimal growth, it is important to provide consistent moisture while keeping the soil moist but not soggy in order to avoid root rot or premature bolting (flowering) of the plants.

How long does it take to harvest spinach?

Once the spinach plants have reached maturity, it takes another 7-10 days to harvest.

During this period, you can start harvesting the outer leaves first and leave the inner ones to continue growing; this will prolong your harvest period.

Make sure to pick spinach before it starts flowering (bolting).

Also Read: Why Are My Spinach Leaves Curling?

Spinach Growth Stages

1. Germination Stage: The germination process begins with the soaking of the spinach seeds in warm water for 12-24 hours, followed by planting them in soil. Depending on the variety, it takes 7-14 days for the seeds to germinate.

2. Early Growth: After germination, the plants will start to put out their first true leaves and begin growing more intensely.

This is a crucial stage when regular watering and good nutrition are important for optimal growth and development of the plants.

3. Vegetative Stage: This is where the true leaves grow out and become taller as the plant matures. Proper weeding, pest control, adequate sunlight (6-8 hours) , temperature between 50F-70F, acidic pH level between 6.0 and 7.0 soil along with timely fertilizer application are essential during this stage for healthy growth of spinach crops.

4. Reproductive Stage: During this stage, flowers start forming on top of long stalks which eventually turn into seed heads as they reach full maturity.

This may take around 45-60 days depending on the variety being grown; however some varieties may take longer up to 80 days or more before they are ready to harvest.

5. Harvesting: Towards the end of this stage you can start harvesting your spinach crop by picking outer leaves first while leaving inner ones to continue growing; thus prolonging your harvest period further! Make sure that you harvest your spinach before it starts flowering (bolting).

Also Read: Why Are My Spinach Leaves Turning Yellow?

Spinach Planting Tips

When planting spinach, it is important to select a variety that’s suited for your climate and growing conditions.

Plant the seeds in well-drained soil and cover them with a thin layer of soil. Water the soil thoroughly so that it is moist and keep it this way until the seeds germinate.

To ensure even germination, opt for succession planting – plant a new batch of seeds every few weeks.

Once the plants have started to grow, make sure to give them plenty of space between rows, allowing at least 3-4 inches between each seedling.

This will help increase air circulation and reduce chances of disease or fungal infection.

For best growth results, provide consistent moisture throughout the growing season while avoiding over-watering which can cause root rot or premature bolting (flowering) of the plants.

Fertilizer application is an important part of spinach growth as well.

A balanced fertilizer with higher nitrogen content should be applied during early growth stages to promote leafy green growth; while phosphorous can be added before flowering stage to promote strong roots and flower development.

Finally, it is important to monitor your spinach crop regularly by checking for signs of pests or diseases such as aphids, downy mildew or black spot which can weaken the plants or affect their yield adversely.

Appropriate pest control measures such as traps or natural predator introduction should be taken immediately upon detection in order to limit further damage.

By following these simple tips you can enjoy a healthy harvest of delicious home grown spinach.

Also Read: How to Get Rid of Rats in Vegetable Garden Naturally?

Conclusion

Growing spinach at home can be a fun and rewarding experience. With the right climate, soil conditions and care, it’s possible to achieve a successful crop in as little as 45-60 days.

However, each variety may take longer so make sure to choose one that is suited for your local environment while keeping an eye out for pests or diseases that may affect your harvest.

With consistent care and attention, you can enjoy a bountiful crop of home grown spinach.

How Much Water Do Potatoes Need?

Potatoes are a very important food that grows in many places. People can use them to make lots of different meals.

To ensure successful growth, proper amounts of water need to be provided to potatoes throughout their growing season.

The amount of water needed by potatoes is highly dependent on the soil type, climate and length of the growing season.

Potatoes require an adequate amount of water to grow and produce successful yields. The amount of water needed can vary depending on a variety of factors, including soil type, climate and length of the growing season.

When it comes to soil type, potatoes prefer a well-drained soil that is high in organic matter. Sandy soils can be more prone to drought, so it’s important to monitor water levels carefully and irrigate as needed.

In areas with high clay content, drainage is typically good and less frequent watering may be required.

Climate also plays an important role in determining how much water potatoes need. Your potato plant need 1-2 inches of water per week.

In cooler climates, potatoes require less water because of the longer growing season. In warmer climates, however, potatoes require more water to accommodate the shorter growing season.

Finally, the length of the potato’s growing season also impacts how much water is needed. Potatoes need more water when planted in areas with a longer growing season and less water when planted in areas with a shorter growing season.

How water is used by potato plants?

Potatoes are very efficient in terms of water use. They have a relatively deep root system and can access moisture from deeper levels in the soil. This helps them to survive periods of drought and makes them more resilient crops than some other vegetables.

Also Read: Can You Grow Potatoes in Clay Soil?

How much water potatoes typically need?

Considering factors like soil type, climate, and stage of growth, potatoes typically need between 1-2 inches of water per week in order to remain healthy and productive.

This can be monitored through a soil moisture monitor or simply by observing the plant leaves for signs of wilting or drought stress.

It’s important to keep in mind that potatoes can be sensitive to over-watering as well. Too much water can also cause issues with potato plants, such as root rot or poor yields. It’s best to monitor soil moisture levels and provide supplemental irrigation only when needed.

Overall, proper amounts of water are essential for successful potato growth and production.

How Much Water Does Potato Plant Need?

Drip irrigation is a popular and effective method for watering potatoes, as it allows for precise and efficient supply of water.

Water is released through a series of emitters connected to a main line and spread evenly over the entire field or garden.

This method reduces water loss due to evaporation and can help ensure that potato plants are receiving the right amount of water.

Manual watering is another option and can be done with a garden hose or sprinkler system.

Make sure to spread the water evenly over the entire field or garden, taking into account factors such as soil type, climate and stage of growth.

It’s also important to note that potatoes should not be watered when the soil is already saturated or overly wet. This can lead to root rot and other issues, so it’s important to avoid over-watering.

When watering potatoes, it is important to water them frequently and deeply.

The frequency of watering will depend on the soil type, climate and length of the growing season, with potatoes typically requiring 1-2 inches of water per week in order to remain healthy and productive.

Deep watering helps to ensure that moisture reaches deep into the root zone where it can be more easily absorbed by the plant.

Over-watering Potato Plants

Signs of over-watering in potato plants include wilting, yellow leaves and a decrease in production.

If the soil is already saturated or overly wet, it is important to stop watering and allow the soil to dry out before resuming irrigation.

Additionally, it may be necessary to reduu97tyl̥uiyl67 tf gvyr xr[0c ce the amount of water being applied or consider using a more efficient irrigation system, such as drip irrigation.

To avoid over-watering potatoes, it’s important to monitor soil moisture levels through a soil moisture monitor or by observing the plant leaves for signs of wilting or drought stress.

If the soil is a receive the right amount of water.

By understanding how much water potatoes need and how to water them properly, it’s possible to ensure that potato plants stay healthy and productive even with a shorter growing season. Proper amounts of water are essential for successful potato growth and production, so make sure to monitor soil moisture levels and provide supplemental irrigation when needed.

Check this out: How Deep Do Potato Roots Grow?

Under-watering Potato Plants

Signs of under-watering in potato plants include wilting, yellow leaves and a decrease in production.

To avoid under-watering potatoes, it’s important to monitor soil moisture levels through a soil moisture monitor or by observing the plant leaves for signs of wilting or drought stress.

If the soil is starting to dry out, it’s best to provide supplemental irrigation.

It’s also important to note that potatoes should not be watered when the soil is already saturated or overly wet. This can lead to root rot and other issues, so it’s important to avoid over-watering as well.

Check this: Why Are My Potato Plant Leaves Curling?

Tips for avoiding over-watering or under-watering potatoes

• Monitor soil moisture levels through a soil moisture monitor or by observing the plant leaves for signs of wilting or drought stress.

• Provide supplemental irrigation when needed, but avoid watering if the soil is already saturated or overly wet.

• Spread the water evenly over the entire field or garden, taking into account factors such as soil type, climate and stage of growth.

• Water potatoes frequently and deeply to ensure that moisture reaches deep into the root zone where it can be more easily absorbed by the plant.

By following these tips, it is possible to prevent over-watering or under-watering potatoes and ensure that potato plants receive the right amount of water for optimal growth and production.

Proper irrigation is essential for successful potato cultivation, so make sure to monitor soil moisture levels and provide supplemental irrigation when necessary.

With the right amount of water, potatoes can thrive even with a shorter growing season.

Also Read: Why Are My Potatoes So Small?

Conclusion

Watering potatoes is an important part of cultivating a successful crop.

The amount of water potatoes need will depend on the soil type, climate and length of the growing season, with potatoes typically requiring 1-2 inches of water per week in order to remain healthy and productive.

To avoid over-watering or under-watering potato plants, it’s important to monitor soil moisture levels through a soil moisture monitor or by observing the plant leaves for signs of wilting or drought stress and provide supplemental irrigation when needed.

By following these tips, it is possible to ensure that potatoes receive the right amount of water and thrive even with a shorter growing season.

How to Get Rid of Rats in Vegetable Garden Naturally?

If you head out to your vegetable garden and found out that it has been munched by rats. Not just in garden, homestead gardener also face problems with rats even in house. The best way to get rid of rats is by trapping and baiting them.

In this article, I’ll also explain few preventive measures to avoid rats from damaging your garden.

Why You Should Get Rid of Rats In Vegetable Garden?

Rats are dangerous for your veggies because:

• They feed on your vegetables and fruits.

• They chew the roots of plants, causing them to die.

• Rat droppings can introduce diseases into the soil, harming your plants.

• Rats also cause damage to garden tools, hoses and other items in the garden.

Is it common to have rats in your garden?

Yes, it is common to have rats in vegetable gardens. Rats are attracted by food and other items they can use as nesting materials or hideouts. If you leave out crumbs, uneaten fruits or vegetables, birdseed or pet food on the ground, it can attract rats.

What are signs of rats in the garden?

You need to first detect rats in your vegetable garden to get rid of them.

Here are some signs to look out for:

• Unusual scratching and squeaking sounds coming from the garden.

• Burrowed paths or holes in the soil near plants.

• Droppings, usually 1/2-3/4 inch long, dark and tapered at one end.

• Tracks along walls or pathways.

• Damage to plant leaves and stems.

How to Get Rid of Rats in Your Garden?

Once you identify the presence of rats in your garden, there are several ways to get rid of them. Here are some methods:

• Trapping – Humane traps can be used to catch and remove rats from your garden. Make sure the trap is securely placed near a rat burrow or nest.

Baiting – Poison baits should only be used as a last resort. Always check with local authorities for approved bait types and follow directions precisely to avoid poisoning other wildlife or pets.

Repellents – Ultrasonic sound repellents may work on smaller rodents; however, larger rodent populations require more control methods.

By following preventive measures, you can also make sure that no new rats enter your garden.

• Eliminate sources of food – Ensure there are no crumbs, uneaten fruits or vegetables, birdseed or pet food left on the ground.

• Seal off entry points – Seal any cracks or holes in walls and foundations using steel wool and caulking.

• Remove shelter areas –Remove piles of rocks, wood and debris that may provide shelter for rats.

• Keep your garden clean – Keep your vegetable garden free of weeds and debris to discourage rat activity.

By following these methods you can easily get rid of rats in your vegetable garden and protect it from future invasions.

Always remember that prevention is better than cure when it comes to dealing with rodents.

Also Read: Does Growing Vegetables Attract Rats?

Natural Ways to Get Rid of Rats in Garden

If you prefer not to use poisons or traps, here are some natural methods which may help get rid of rats in your garden:

• Peppermint oil – Rats do not like the strong smell of peppermint oil. Spray peppermint oil around the affected areas to keep them away.

• Dryer sheets – Place dryer sheets in areas where you think rats are likely to enter. The strong odor will repel them and keep them away from your garden.

• Hot peppers – Sprinkle hot pepper flakes around the perimeter of your garden as a natural rat repellent.

• Natural predators – Encourage owls, cats, snakes and other animals that can naturally prey on rats to visit your garden often.

• Predator urine – Sprinkle the urine of predators around your garden as a natural deterrent for rats.

• Essential oils – There are several essential oils such as lavender, peppermint, eucalyptus and tea tree oil that can be used to repel rats from your garden.

Also Read: How to Use Worm Castings in Vegetable Garden?

How to use onion to get rid of rats in garden?

Onions are a great natural way to get rid of rats in your garden. You can simply spread sliced onions around the perimeter of your garden or place them in areas where rats are likely to enter.

The strong smell of the onion will repel the rats and keep them away from your plants. Also, make sure you clean up any food spills

How to use potatoes to get rid of rats from vegetable garden?

Potatoes are a great natural way to get rid of rats in your vegetable garden.

Start by slicing potatoes into small pieces and then place them around the perimeter of your garden or areas where you think that rats may be entering.

The strong smell of the potato will repel the rats and keep them away from your plants.

Make sure to clean up any food spills or debris in your garden so the rats don’t have a food source.

You can also sprinkle cayenne pepper, black pepper or chili powder around your garden to further deter the rats.

Additionally, you can introduce natural predators such as owls, cats and snakes that will hunt down and eat the rats.

By following these natural methods, you can get rid of rats in your vegetable garden without causing any harm to the environment or other animals.

It is important to take preventive measures like sealing off entry points, eliminating food sources and removing shelter areas in order to prevent rat infestations in your garden.

How to stop rats entering garden?

To stop rats from entering your garden, you can follow these preventive measures:

• Keep your garden clean – Remove weeds and debris to discourage rat activity.

• Seal off entry points – Seal any cracks or holes in walls and foundations using steel wool and caulking.

• Remove shelter areas –Remove piles of rocks, wood and debris that may provide shelter for rats.

• Eliminate sources of food – Ensure there are no crumbs, uneaten fruits or vegetables, birdseed or pet food left on the ground.

• Set traps and baits – Place humane traps and poison baits around the perimeter of your garden to catch any rodents before they enter.

By taking proactive steps to protect your garden from rodents, you can help keep your vegetables healthy and free from rats.

How to Protect Your Harvest from Rats?

To protect your harvest from rats, you should take the following measures:

• Set traps and baits – Place humane traps and poison baits around the perimeter of your garden to catch any rodents before they enter.

• Seal off entry points – Seal any cracks or holes in walls and foundations using steel wool and caulking.

• Remove shelter areas –Remove piles of rocks, wood and debris that may provide shelter for rats.

• Eliminate sources of food – Ensure there are no crumbs, uneaten fruits or vegetables, birdseed or pet food left on the ground.

• Prune plants regularly – Trim back tall grasses, shrubs and trees that can provide a route into your garden for rodents.

• Cover crops and vegetables – Covering the tops of plants with bird netting can help protect them from rodents.

By taking these steps, you can help keep your harvest safe from rats and other pests. It’s also important to monitor your garden regularly for any signs of rat activity. If you spot any, take action immediately to get rid of them.

Conclusion

Rats can be a nuisance in your garden and can cause damage to crops and vegetables.

To get rid of them, you should take preventive measures such as sealing off entry points, removing shelter areas and eliminating sources of food.

You should also set traps and baits around your garden perimeter to catch any rodents before they enter.

Lastly, remember to cover crops and vegetables with bird netting to protect them from rats. By following these tips, you can help keep your garden free of rodents and your harvest safe from pests.

How to Grow Basil Microgreens?

Microgreens are easy to grow and requires minimum effort from you. Compared to fully grown plant, microgreens takes less time to get the yield.

There are different varieties of basil microgreens to grow. Genovese basil are one of the most common microgreen variety.

If you want to have purple colored basil microgreens then opt for opal basil variety.

Growing process for all these varieties are nearly same.

Growing Basil Microgreens at Home

Things you’ll need to grow basil microgreens:

  • Basil seeds variety of your choice
  • Organic potting mix or soil
  • A trays to sow the seeds
  • Water to moisturize basil seeds
  • Sunlight or grow lights

Now, you’ve all the essential things to kick start your journey of growing basil microgreens.

Also Read: How to Grow Lettuce Microgreens?

Prepare Container

Before you sow the seeds, it is important to prepare the container for growing microgreens. Start by selecting a shallow tray or container with adequate drainage holes that can hold the soil and moisture in place. For best results, use a container that is at least 2 inches deep and 6-8 inches wide.

Potting Soil Mix to Grow Basil Microgreens

When it comes to potting soil mix for microgreens, it is important to choose a light and airy mix that drains well. A sandy loam potting mix with organic matter such as compost or peat moss works best. It should be free of chemicals, pesticides and weed seeds. The ideal pH of the soil should be 6.5 to 7.0 for basil microgreens.

Choose Basil Seeds

As mentioned there are different types of basil seeds, most common being Genovese and Opal varieties. Choose the variety based on your preference and availability.

Different types of basil seeds varieties are: Genovese basil, Opal basil, Thai basil, Sweet basil and Lemon basil.

Check this out: How to Grow Spinach Microgreens?

Step-by-step Process to Grow Basil Microgreens

  1. Prepare the trays for sowing. Fill the tray with moistened organic potting mix up to ¼ inch depth.
  2. Spread the basil seeds evenly across the tray and then cover it with a thin layer of vermiculite.
  3. Place the tray in a bright and sunny spot.
  4. Make sure that the soil is kept moist at all times. If necessary, give them occasional misting to maintain the moisture level.
  5. Basil microgreens should show up within few days.
  6. Once they are about 1-2 inches tall, your basil microgreens are ready to harvest!
  7. Trim them off at soil level using scissors or harvesting knife.

You can also try growing multiple varieties of basil microgreens for an exciting flavor experience! Enjoy your fresh harvest as garnish on salads, sandwiches or other dishes!

Tips While Growing Basil Microgreens

1. Make sure to choose organic potting mix as it’s free from weed-killers and synthetic nutrients.

2. Always water the basil microgreens from the bottom. Overhead watering can cause damping off, which is a fungal disease that can have devastating effects on your microgreens.

3. Monitor the moisture content of your soil and make sure that it does not dry out completely.

4. If you are growing them indoors, use grow lights to ensure that they get enough light for optimum growth.

5. Do not grow too many varieties of basil microgreens in one tray as this will reduce their yields significantly.

6. Harvest basil microgreens when they are about 1-2 inches tall.

7. Store the harvested basil microgreens in the refrigerator and enjoy them within a week after harvesting.

With simple to follow steps, you can have your own crop of delicious and healthy basil microgreens at home! Get started today and enjoy the fresh harvest for weeks.

Is it safe to grow microgreens indoors?

Yes, growing microgreens indoors is completely safe and can be done with minimal efforts. All you need is a suitable container, organic potting mix, a source of good light and moisture. Follow the above steps to grow basil microgreens indoors for best results.

Do I need grow lights to grow microgreens?

Grow lights are not necessary for growing microgreens indoors. However, they can help to increase the yield significantly and provide plants with the needed energy. If you are growing microgreens indoors without light, make sure to place the container near a sunny window or have grow lights set up for optimum growth.

How many hours a day should a grow light be on?

Grow lights should be on for 14 to 16 hours a day to provide maximum light intensity. If you are using natural sunlight, make sure to rotate the containers regularly to ensure that all sides get sufficient light.

Are basil microgreens easy to grow?

Yes, basil microgreens are relatively easy to grow. All you need is a suitable container, some good quality potting soil and adequate light.

Keep the soil moist and make sure to trim them off when they are 1-2 inches tall. With simple steps, you can have your own crop of delicious and healthy basil microgreens in no time.

Conclusion

Basil microgreens are a deliciously healthy addition to any meal. With minimal effort, you can easily grow your own basil microgreens indoors and enjoy their fresh harvest for weeks. Make sure to choose an organic potting mix, keep the soil moist and use grow lights if needed. Harvest them when they are 1-2 inches tall and store them in the refrigerator. With these few easy steps, you can have your own crop of delicious basil microgreens at home.