How Much Sunlight Does a Cucumber Need?

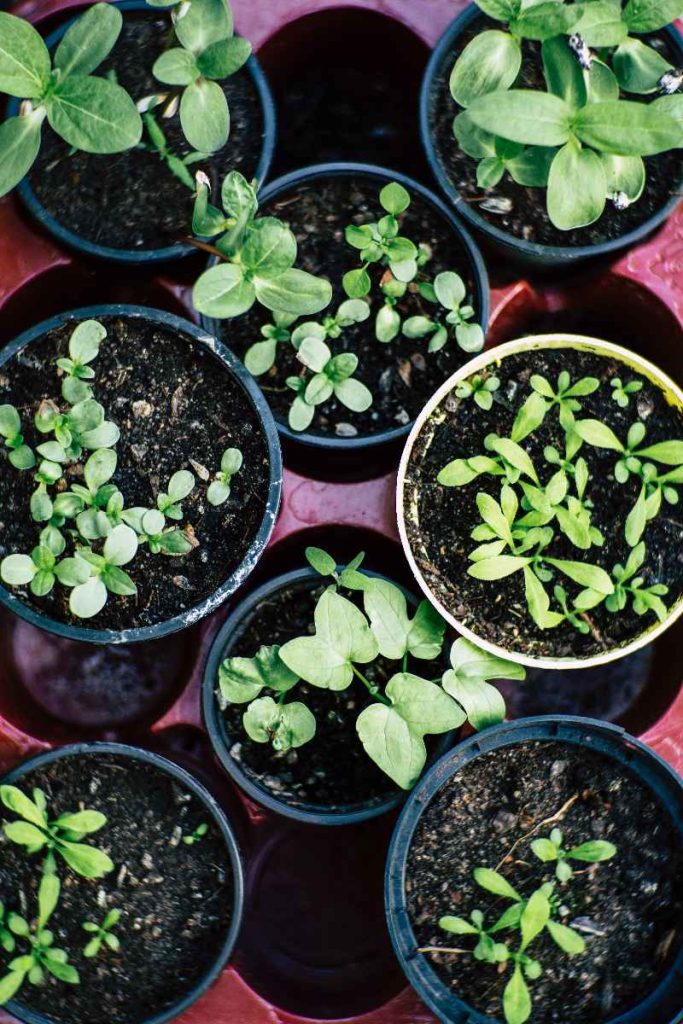
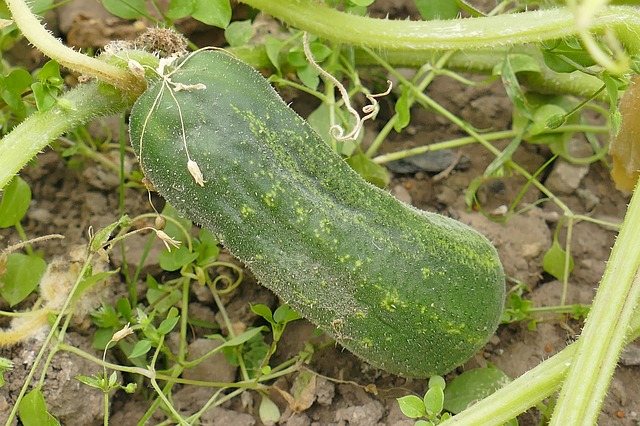
Cucumbers are one of the most popular vegetables in the world. People love cucumber for their crisp texture and refreshing taste. If you’re growing cucumbers in your own garden, then understand how much sunlight they need in order to thrive well. 

Sunlight is essential for photosynthesis, the process by which plants convert light into energy. Without enough sunlight, cucumbers may not grow properly, which can result in stunted growth, poor yields, and even plant death.

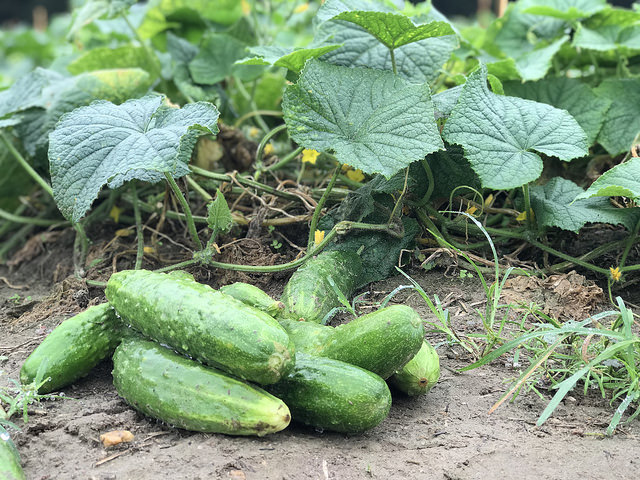
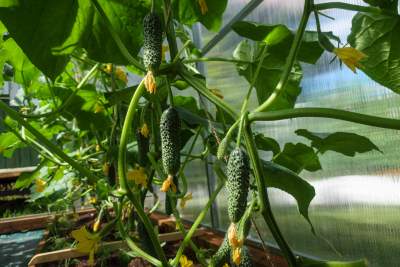
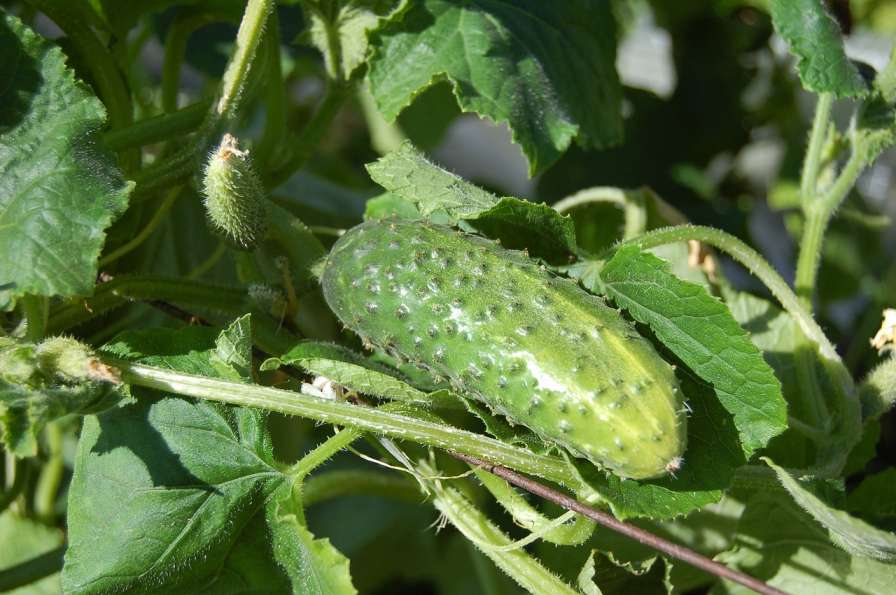
Cucumber plants need a great amount of sunlight to thrive. Cucumbers need at least 5 to 6 hours of direct sunlight daily. Regular and uninterrupted direct sunlight is required for cucumbers to grow and yield fully.

If cucumber plants don’t receive sufficient sunlight, they may grow slowly, produce fewer fruits, and can be exposed more to diseases and pests. However, if cucumber plants receive too much sunlight, they may become stressed and experience sunburn.

Importance of Sunlight for Cucumbers Growth

Cucumber farming

Sunlight is a vital component for the growth of cucumbers. Cucumbers are a type of plant that requires a lot of direct sunlight for photosynthesis, the process by which they convert sunlight into energy to fuel their growth. Without sufficient sunlight exposure, cucumbers may not grow properly, resulting in stunted growth and poor yields.

One of the essential functions of sunlight for cucumbers is that it helps them produce chlorophyll. On the other hand, if cucumber plants receive too much sunlight, it can lead to problems such as sunburn and stress. Sunburn can cause the leaves and fruits of cucumber plants to turn yellow or brown and become dry and brittle. 

This can make them more exposed to pests and diseases. Stress from excessive direct sunlight exposure can also cause cucumber plants to become weak and vulnerable to pests and diseases.

Also Read: Why You Should Not Plant Cucumbers Near Tomatoes?

Ideal sunlight conditions for cucumber plants

  • Cucumber plants need at least 5-6 hours of direct sunlight per day to grow well.
  • Morning sunlight is preferred as it allows the plants to soak up the light they need before the heat of the day sets in.
  • Afternoon sunlight can be too intense for cucumber plants, especially in hot climates. So, provide some shade during the hottest part of the day if necessary.
  • Cucumber plants should be planted in an area that receives full sun for most of the day.
  • Check the amount of direct sunlight that your cucumber plants are receiving and change the direction of your plant if required.
  • You can use shade to provide safety from excessive heat and light during the hottest parts of the day to your plant.
  • Provide sufficient water and nutrients to your cucumber plant to grow and thrive in ideal sunlight conditions.
  • In cooler climates, it’s vital to ensure that cucumber plants receive enough sunlight to grow properly, and planting them in a location that receives the most sunlight is recommended.
  • Cucumber plants grown in containers or indoors can require sufficient artificial light to balance the lack of natural sunlight. A grow light or other types of artificial lighting can be used to provide sufficient light for indoor or container-grown cucumber plants.

Location for growing cucumbers

Choosing the right location for growing cucumbers is necessary for a successful harvest. Here are some important factors to consider when selecting a location for your cucumber plants.

Sunlight – As mentioned earlier, cucumbers require at least 5-6 hours of direct sunlight per day. Therefore, it’s vital to choose a location that receives full sun for most of the day. The location should receive morning sunlight and have some protection from extreme afternoon sunlight.

Soil – Cucumbers grow best in well-draining, nutrient-rich soil. The soil should be loose, with good water retention capabilities. The ideal pH range for growing cucumbers is between 5.5 and 7.0.

Temperature – Cucumbers prefer warm temperatures between 70-85°F (21-29°C). Cooler temperatures can slow down their growth, while too-hot temperatures can stress the plants.

Watering cucumber Cucumber plants require consistent moisture to grow and produce fruit.

Space – Cucumber plants require a lot of space to grow and produce fruit. They also require support, such as a trellis or fence, to prevent them from spreading all over the ground.

Pest and disease – It’s vital to choose a location that’s relatively pest and disease-free. Avoid areas with a history of fungal or bacterial diseases or infestations.

Common Mistakes to Avoid

Growing cucumbers can be a rewarding experience, but it’s vital to avoid common mistakes that can lead to poor growth and reduced yields.

Planting too early – Cucumber plants are sensitive to cold temperatures, so planting them too early can lead to stunted growth and poor yields. Wait until the soil has warmed up to at least 60°F (16°C) before planting cucumber seeds or transplanting them.

Overcrowding – Cucumber plants require a lot of space to grow and produce fruit. Overcrowding them can lead to poor air circulation, increased humidity, and increased risk of pest and disease problems. Plant cucumber seeds or transplants at least 12-18 inches (30-45 cm) apart in rows that are 3-4 feet (0.9-1.2 m) apart.

Overwatering or underwatering – Cucumber plants require consistent moisture to grow and produce fruit, but overwatering or underwatering can lead to poor growth and reduced yields. Water cucumber plants deeply once a week, or more frequently during hot, dry weather. Avoid overhead watering, as it can increase the risk of fungal diseases.

Poor soil – Cucumber plants require well-draining, nutrient-rich soil to grow and produce fruit. Before planting, amend the soil with compost or well-rotted manure to improve soil structure and fertility. Test the soil pH and adjust it and ensure that it’s in the ideal range of 6.0-7.0.

Also Read: Is Chicken Manure Good for Cucumbers?

Lack of support – Cucumber plants require support, such as a trellis or fence, to prevent them from sprawling on the ground. Without support, the plants can become tangled and more prone to pest and disease problems.

Failure to control pests and diseases – Cucumber plants are susceptible to a variety of pests and diseases, such as cucumber beetles, aphids, and powdery mildew. Watch your plant regularly for signs of damage or disease, and take proper actions to control them.

Also Read: How Deep Should a Raised Bed Be for Cucumbers?

Conclusion

Sunlight is an important factor in the growth and development of cucumber plants. By providing cucumber plants with sufficient sunlight, you can help ensure that they grow well, produce high yields, and fight pests and diseases.

However, it’s vital to choose a suitable location for growing cucumbers, prepare the soil properly, and avoid common mistakes such as overcrowding and overwatering.

With proper care and attention, you can grow healthy and productive cucumber plants that will provide you with fresh and delicious cucumbers throughout the growing season. Remember to monitor the plants regularly for signs of stress or disease, and take appropriate actions to address any issues that occur.

How to Use Cow Manure for Vegetable Garden?

With increasing use of chemical fertilizers in vegetables, more people are turning towards starting container gardening.

There are many types of fertilizers you can use. Cow manure is a good choice because it works well and it is not too expensive.

Cow manure can help your vegetable garden grow. It gives the plants the nutrition they need to stay healthy and strong.

In this article, we will discuss the essential benefits of fertilizing your vegetable garden with cow manure to ensure that your plants become strong and flourishing.

Why You Should Fertilize Your Vegetable Garden?

Adding balanced fertilizers will enrich the growing soil with essential nutrients that eventually encourage the plant to produce quality yield.

Through fertilizers, your garden will get the essential nutrients like nitrogen, phosphorus, and potassium which helps promote strong roots and stems as well as an abundance of foliage.

Vegetables need plenty of these vital elements to grow properly; without proper amounts they may be unable to produce healthy fruit or vegetables.

What’s more, insufficient levels can make them vulnerable to various illnesses or even pests that could harm your entire plot.

Also Read: Is Chicken Manure Good for Vegetable Garden?

Cow Manure for Vegetable Garden

Cow manure is the best way to help your vegetable garden grow. Packed with essential nutrients such as nitrogen for lush foliage, phosphorus and potassium for robust root development and flower/fruit production, this organic fertilizer is a key factor in achieving success in your gardening endeavors.

  1. Cow manure is full of helpful things for growing vegetables. These things help the plants grow, like nitrogen, phosphorus and potassium.
  2. Nitrogen helps plants make leaves and grow bigger. It also helps them make chlorophyll, which is like food for the plant.
  3. Phosphorus helps plants grow roots and make flowers and fruit. It helps the plant get food so it can be strong and healthy.
  4. Potassium helps plants stay healthy. It helps them use water and make food from the sun. It also makes sure that their stems are strong.
  5. Cow manure has a lot of organic matter. This helps the soil keep water and not get too wet. It also helps tiny organisms that help plants grow and stay healthy.

Furthermore, it bolsters the population of helpful microorganisms in the earth – further enhancing plant health and growth.

How to Use Cow Manure for Vegetable Garden?

If you want to use cow manure in your vegetable garden, make sure you do it correctly. Below mentioned are some tips to do.

#1 Use Aged Manure

Fresh cow manure has a lot of nitrogen. If you put it directly on your plants, it can hurt them. To be safe, use old cow poop. Old cow manure has had time to break down so it is not as strong and won’t hurt your plants.

#2 Apply in the Fall or Spring

Applying cow manure to your garden in either the fall or spring offers a plethora of benefits. If you use fertilizer in the fall, it will break down over the winter and give your plants lots of food when they start to grow again in spring.

Conversely, applying it when things begin blooming outside ensures that your vegetation will have all essential elements available for them to become strong and healthy throughout their lifetime.

Check this: How to Use Cow Manure for Potatoes?

#3 Mix with Soil

For your plants to absorb the nourishment from the cow manure, you should combine it with your garden’s soil. Utilizing a tiller or gardening fork, stir in the cow dung into the dirt up to six inches deep for maximum absorption by vegetation.

#4 Use Sparingly

Cow manure is a excellent fertilizer, yet it’s important not to overdo its use. Too much nitrogen can lead to an abundance of leaves without the desired flower/fruit production.

Therefore, sparingly spread cow manure around your garden and then incorporate it into the soil for optimal growth results!

#5 Keep it Away from Edibles

Cow manure is safe to use in a vegetable garden. But, do not put it near plants that are close to the ground like lettuce or strawberries. Cow manure could have harmful bacteria that could make you sick if you eat it.

Check this: Is Cow Manure good for tomatoes?

Conclusion

If you want to ensure lush, thriving vegetable gardens, cow manure is the ideal fertilizer. Fertilizer has important vitamins like nitrogen, phosphorus, and potassium. It helps plants to grow bigger. It also makes the soil better so that water can stay in the ground longer and drain out more easily. Cow manure truly is a gardener’s best friend.

The use of cow manure can greatly benefit the health and growth of your vegetable garden by promoting a larger population of helpful microorganisms in the soil.

For successful utilization, however, it’s essential to take some necessary precautions – from applying aged manure to mixing it with soil to using it judiciously and distancing any edible plants near ground level.

If you follow these steps, you will get the benefits from using natural fertilizer.

Cow manure can help your vegetable garden grow healthy and yummy vegetables. If you want to give your garden food, think about using cow manure instead of something else. It is natural and it works.

How Much Sunlight Does Garlic Need – Full Sun or Shade?

After hearing reaping health benefits of garlic, as a gardener you might want to grow this vegetable in your backyard or container.

Cultivating a successful garlic plant demands careful thought and consideration of various elements, including the quality of soil, frequency of watering, and exposure to sunlight.

Gardeners often want to know how much sunlight does garlic plant need to grow?

Most garlic varieties do need full sunlight of 6-8 hours. But, there are few garlic types that does well under 4-6 hours of sun exposure.

Depending on climatic conditions in your region and the spot where you want to grow you should choose appropriate garlic variety.

You can grow this root vegetable indoors with minimal sunlight. However, with partial sunlight the plant may produce smaller garlic bulbs.

Sunlight Requirements of Garlic Plant

Sunlight is important for garlic plants to grow and be healthy. Sunlight helps the plant get bigger and makes it possible to harvest the bulbs. Sunlight also helps the plant make energy which helps it grow. Finally, sunlight makes it stronger so that bugs or diseases don’t hurt it.

  • Garlic plants need to be in the sun for 6 hours each day. This will help them grow better and give you a good harvest.
  • Garlic plants need sunlight to grow. Without enough sunlight, the garlic plants will not get big and might not make any garlic bulbs.
  • Planting garlic requires the right soil conditions in order to thrive. To ensure this, it’s essential that you have well-drained soil and incorporate organic matter before planting your cloves.
  • Plant garlic in the spring or fall when it is cool outside. Planting garlic too late in the summer or early winter can significantly reduce its yield since you are cutting into a shorter growing season.

Some garlic plants can grow even if there is not a lot of light. ‘Inchelium Red’, ‘Music’, and ‘Chesnok Red’ are some popular types. Other kinds that don’t need a lot of light are ‘Krasnodar’ and ‘Khabarovsky’.

How Much Sunlight Does Garlic Need?

Garlic needs sunlight to grow the best. Make sure it gets enough sunlight each day.

Most types require at least 6-8 hours of direct sun exposure daily; for an optimal outcome, find a location in your garden or yard that yields full sunshine most of the day and faces south or westward.

On the other hand, any area with less than adequate light can affect growth rate and result in diminished yield.

To get good plants, pick ones that can survive in the amount of light you have where you live.

If you give garlic plants lots of care, they will grow even if the weather or soil is not perfect.

When growing garlic in hot climates, make sure the soil stays wet. Mulch or put something over the garlic plants to keep them cool and stop water from evaporating. Water your garlic deeply once a week to keep it watered.

Put up a shade cloth over your garlic plants to protect them from the sun. This will help keep the temperature lower and stop the garlic from getting sunburn.

Even if your garlic doesn’t get much sunlight, it can still grow well with good care. But you may not get as many garlic as you would in full sunlight.

Also Read: Best Homemade Fertilizer for Garlic

Does garlic need full sun?

Most types of garlic need lots of sunlight to grow well and give you a good harvest. To maintain luscious growth and vigor, these plants must bask in minimum of six hours of direct sunlight daily.

Sunlight is very important for garlic to grow. Without enough sunlight, the garlic will not grow as big and it won’t make as many bulbs.

Garlic grows best in full sun. If it is not sunny in your area, you will need to give the garlic some shade or pick a type that can handle less sunlight.

Even if your garden is lacking in the sunlight department, with careful selection of garlic and attentive cultivation you can still yield a bountiful harvest. But the garlic will not be as much as if it grew in full sunlight.

Can garlic grow in shade?

Some types of garlic plants can grow in areas with 4 hours of sunlight. But, you won’t get a good harvest if you plant the garlic in full shade.

When growing garlic, pick a kind that can handle the amount of light in your area. You might need to give some shade or pick a type that can grow in less light. If you pay close attention, you can get some garlic even if there isn’t much light. But it won’t be as good as if there is more light.

Signs that Garlic Plant Getting Too Much Sunlight

  • If the leaves of your garlic plant turn yellow or brown, it might mean that the plant is getting too much sun. Check the plant carefully to make sure there are no bugs or diseases.
  • If your garlic plant does not grow very tall, it might be getting too much sunlight. The plant may dry up and stay small if it is in the sun too long.
  • Garlic plants need both sunlight and shade. Too much sun can make them wilt and the bulbs will be small and not taste very good. The right balance of sun and shade helps garlic grow healthy and delicious.

What Happens when garlic plant gets no sunlight?

Garlic plants need 6 hours of sunlight each day. Without any sun, the garlic plants will not grow and will not make bulbs.

Garlic plants need enough light to grow well. If you live in a place with less sun, you may need to put something over the garlic plants or pick a type of garlic that doesn’t need as much light.

Check this out: When Is It Too Late to Plant Garlic and Harvest?

Can you grow garlic plant indoors?

It is possible to grow garlic inside your home. But it is hard to make the right conditions for it. Garlic needs at least 6 hours of sunshine each day to be healthy and give you a good harvest.

Garlic needs light to grow. If your garlic is not in a place with enough light, it won’t grow as much. Also, the temperature can change too much and that is bad for garlic.

If you want to grow garlic indoors, you need extra lighting. Keep the temperature consistent and choose a type of garlic that can handle low light.

Growing Garlic in full sun

For an abundant and vigorous garlic harvest, bask your plants in full sun! When you plant your crop in the sun, here are some tips to help you get a good result:

First, pick the type of garlic that will grow best in your area. Some types can handle hot weather better. Others are better for places with more humidity or a shorter growing season.

When planting garlic, make sure the soil has good drainage and is of high quality. To cultivate the finest garlic, it is paramount to ensure that your soil’s pH ranges between 6.0 and 7.5 – a number of key minerals are essential for successful growth, so be sure to use plenty of organic matter as well!

After planting, be sure to water your garlic plants frequently during periods of intense sunlight to avoid them drying out. Furthermore, fertilize your crops periodically with a balanced fertilizer to ensure they reach their full potential and produce bountiful yields!

To defend your garlic crop from excessive temperatures, use shade cloths or other forms of shelter when needed. If you adhere to these simple tips, it will guarantee an abundant and prosperous yield of garlic.

Also Read: How to: Growing Turnips in Containers?

Conclusion

Garlic plants need 6 hours of sunlight every day to grow well. Garlic is a tasty ingredient in many different meals and it can be grown in the sun, shade or even inside.

Selecting the correct variety of garlic for your local climate is essential. With regular tending, your garden will yield a bountiful harvest. With enough work and planning, you can have a great garlic harvest no matter what the weather is like.

Best Homemade Fertilizer for Garlic – Organic, Liquid Fertilizers

Fertilizing your garlic plant at the right time will gift you back the bountiful harvest. During the growing season, enrich your garlic with nitrogen rich fertilizer.

Most gardeners opt not to use chemical incorporated fertilizer for their garden. Fortunately, there are organic fertilizer available in the market.

You can also homemade fertilizers for garlic plant, that is rich in nitrogen, phosphorus and potassium.

Does garlic need fertilizer?

Garlic needs fertilizer to help it grow. Fertilizer gives garlic important nutrients like nitrogen, phosphorus and potassium. Fertilizer will help the garlic plant grow bigger and make more garlic.

Organic fertilizer can help garlic plants grow strong and healthy. It gives the plants important nutrients like nitrogen, phosphorus, and potassium.

Nitrogen helps plants capture energy from the sun. It does this by helping the plant make chlorophyll. Chlorophyll lets plants use more of the sun’s energy for food.

Phosphorus helps plants grow bigger roots and makes the stems stronger. Potassium helps the soil keep more water and keeps it at a balanced pH level.

You can make your own fertilizer for garlic plants. Mix composted manure or hay with minerals like kelp meal, rock phosphate, or greensand. It is easy and not very expensive.

Mixing certain things together can make a good fertilizer for garlic plants. This helps the plants to grow really well.

It is important to give your garlic plant some fertilizer, but be careful not to put too much. Too much fertilizer can hurt the roots of your plant. Put just a small amount of fertilizer on the ground. Read the directions on the package to make sure you use it correctly.

Check this out: How Much Water Does Garlic Need?

How often to Fertilize Garlic Plant?

Every 4 to 6 weeks during the growing season, garlic plants need fertilizer. For regular garden soil use 1 lb for every 100 square feet of soil. For sandy soil, use 0.5 lb for every 100 square feet.

It is important to remember that garlic plants do not need fertilizer all the time. Too much fertilizer can hurt the plant. It can make the roots weak and cause problems with nutrients in the soil.

When growing garlic, it is important to adjust your fertilizer schedule based on the type of soil. Some soils need more fertilizer, some need less.

If you don’t know which fertilizer to use for your garlic plants, ask someone who knows about gardening. A garden center or an agricultural office can help you choose the right fertilizer that works best with the soil and weather in your area.

Also Read: When Is It Too Late to Plant Garlic and Harvest?

Best Homemade Fertilizer for Garlic

Making your own fertilizer is a good idea for garlic plants. It is natural and not bad for the environment like chemical fertilizers.

Homemade fertilizer can make the soil better, so that it has more nutrients for the plant to use. This helps the garlic plant grow bigger and stronger. It also helps sandy soils hold onto water better, which makes them better places to grow things.

Composted Manure or Hay

Manure or hay that has been composted is great for garlic plants. It gives the plant extra nutrients like nitrogen, phosphorus, and potassium which helps them grow.

Compost also makes the soil better for growing by making it easier for water to stay in the ground.

Kelp Meal

Kelp meal is good for helping garlic plants grow. It has lots of important vitamins like calcium, magnesium and phosphorus. It also has nitrogen, potassium and iron which are all necessary for healthy growth. Plus, kelp meal can help the soil stay wet during dry times.

Rock Phosphate

Rock phosphate is a good fertilizer for garlic plants. It helps make the roots grow more and helps the plant absorb nutrients from the soil.

It also adds important vitamins like iron, magnesium, calcium and potassium to the soil which makes it healthier for growing plants.

Greensand

Greensand is a good fertilizer for garlic plants. It makes the soil better and adds minerals like iron, potassium, magnesium, and calcium. It also helps the soil store more water which can be helpful during dry times.

When making fertilizer for garlic plants, use organic materials instead of chemicals. Chemicals can hurt the environment and be dangerous for people and animals. Follow the directions on any packages when using fertilizer to get the best results.

Blood meal for garlic

Blood meal makes plants grow healthy and strong. It adds nitrogen to the soil which helps roots grow. Apply blood meal at least twice a year for the best results.

Homemade liquid fertilizer for garlic

To make liquid fertilizer for garlic, mix one part fish or seaweed with nine parts water. Add 1 tablespoon of Epsom salt and 1 tablespoon of molasses to the mix.

Use this mixture every two weeks during the growing season to help your garlic plants stay strong and healthy. You can also use a weaker solution of compost tea instead of liquid fertilizer. Remember to give your garlic plants lots of water all through the growing season.

Garlic Growing Tips

  • When you are growing garlic, use organic fertilizer. Do not use chemical fertilizers or pesticides. These can harm the environment and be dangerous for people and animals.
  • Garlic plants need to be fertilized every 4-6 weeks while they are growing. If you have regular garden soil, use 1 pound of fertilizer for every 100 square feet. For sandy soils, use 1.5 pounds of fertilizer for every 100 square feet.
  • Water garlic plants often so the soil is moist. Don’t water too much. Too much water can make the roots rot and cause diseases.
  • If you have garlic plants, spread organic materials like grass clippings or leaves around them. This will help keep the soil moist and stop weeds from growing.
  • Wait 6-8 months after planting your garlic bulbs to harvest them. This will give you the best flavor and make sure they are healthy.
  • Harvested garlic can be stored in a cool and dry place for up to one year. You can use it in your cooking or you can save it for later.
  • Plant different types of garlic for the best possible growth. Plant garlic cloves or seeds in soil that has good drainage and the right pH level for your area.
  • Plant your garlic in a different spot each year. This will keep the soil healthy and strong.
  • Plant garlic in the fall, about 2 weeks before it gets cold. Harvest it by the middle of summer. Use organic fertilizer made for garlic plants. It has better nutrients than chemical fertilizer.
  • When you make your garlic garden, pick a spot that gets lots of sunshine and has soil that water can drain through easily. This will help the garlic grow the best it can.
  • Look for weeds and bugs often. They can hurt your plants. Make sure there is enough space between the plants so that air can flow around them. Cut off any dead or broken leaves and stems.

Conclusion

Garlic is easy to grow and it tastes good. It also has lots of nutrition. If you take care of it, you can get garlic for up to a year! You need sunshine, soil that water won’t stay in and fertilizer.

Try to use organic fertilizer if possible. Change where you plant your garlic each year so it will be healthy and give a lot of garlic. Follow these tips and you’ll have success with growing garlic.

How to: Growing Turnips in Containers?

Container gardening is becoming very popular. It has lots of advantages over soil-based gardening. With indoor gardening, you’ll have the power to cultivate your own lush greenery without demanding too much in terms of space.

Growing turnips in containers is better than the regular way. When you opt for container gardening, you gain full authority over the water, lighting, and temperature needs of your plants.

Gardeners can control how fast their turnips grow. They can change the conditions to make sure their turnips grow just the way they want.

Container gardening takes up less space than using soil. If you have limited outdoor space but still dream of harvesting your own turnips, this is the perfect solution for you.

Things to consider while growing turnips in pots

When growing turnips in a container, make sure it has holes so that water can escape. Put soil that is good for turnips in the container. Place the container in a spot with lots of sunshine and enough room for the turnips to grow.

It is important to take good care of your turnip garden. Check it often for bugs or diseases. Make sure the soil has enough water and give the plants fertilizer regularly. If you take care of them, turnips grown in containers will do just as well as turnips grown in the ground.

Also Read: Why Are My Beets Growing above Ground?

Step-by-step Guide to Grow Turnips in Container

You can grow turnips in a container. Choose a big enough container and use the right soil and fertilizer to help them grow well. This will give you lots of yummy turnips with not much effort.

1. Choose a pot for your turnips. The pot should have a depth of 8 inches and span 10 inches in width. Make sure the pot has holes in the bottom so that water can come out.

2. Fill the container with soil that has lots of nutrients. Add some organic fertilizer too. Make sure the soil is wet, but not too wet or else the turnips’ roots could rot. Turnips like soil that is slightly acidic with a pH between 6 and 7.

3.Put the turnip seedlings in the container. Space them out so they have room to grow. Put several seeds in each hole because not all of them will start growing. Put each seedling one inch deep into the soil and cover it with soil afterward.

4. Water your turnip plants every week. Give them about 1 inch of water. If your soil is dry, it’s essential to give your plants more water. To ensure that the earth stays moist and nourished, be sure to check for signs of wilting; if present, drench with additional H2O.

5. Put some mulch around your turnip plants. This will help them stay moist and stop weeds from growing too close. You can use straw or grass clippings for the mulch. The straw and clippings will break down over time and add nutrients to the soil.

6. When your turnip plants are 4 inches tall, use scissors or shears to cut off some of the seedlings that are too close together. Cut them at the base. Leave 4 inches between each plant. This will help them grow and make good roots that you can harvest later.

7 . Give your turnip plants fertilizer every few weeks. Use a special kind of fertilizer for growing vegetables in containers. This will help the plants stay healthy and grow big! Make sure to routinely check up on your plants in order to avoid any pesky pests or diseases that could potentially harm them. If you find any, use insecticidal soap to treat the affected plant.

8 . It is time to get your turnips. When they have been growing for 3-4 months, you can pick them with a knife or garden shears. Put the turnips in a cool place so they stay fresh for several weeks.

Best Soil for Growing Turnips in Container

To grow turnips in a container, use soil that has lots of nutrients. The best pH level is between 6 and 7. To make the soil better for growing turnips, add compost or manure.

To ensure vigorous plant growth, it’s important to keep the soil from becoming overly wet or retaining too much moisture. Use mulch around the turnips to help keep in moisture and stop weeds from growing.

If you take good care of your turnips, put them in the right kind of soil, and give them the right amount of maintenance – they will taste really yummy.

Check this out: Can You Plant Lettuce and Carrots Together?

Container to grow turnips

To cultivate turnips, ensure that you have a planter with an 8-inch depth and 10 inches in width. To grow a flourishing garden, you may want to consider investing in a larger planter.

To ensure that your plant’s root system thrives, select a pot with holes at the base. This helps water come out of the pot and not stay in the soil. Clay or ceramic pots are great for this because they let air get to the soil and help water flow away.

If you want something cheaper, plastic planters are a good choice. Pick a planter that is the right size for turnips and their roots.

Harvesting Turnips from Containers

When your turnips are ready, it is time to cut them. Use a sharp knife or garden shears and cut the turnips at their base. Cut carefully so you don’t damage the turnips. To guarantee their original flavor and texture, keep them in a chilled atmosphere to maintain maximum freshness for up to multiple weeks!

Pests and Diseases

When you grow turnips in a container, watch for pests and diseases. Aphids, mites, white-flies, and powdery mildew can hurt your turnips. If you see any of them on your plants, do something quickly.

To get rid of bugs, you can use insecticidal soap. To stop and treat powdery mildew, use a sulfur-based fungicide. If you take good care of your turnips, you can have a successful harvest.

You don’t need to be scared to grow turnips in a container. You just need the right dirt, pot, and bug/disease protection. Then you can have a good harvest soon.

Check this out: How Much Water Does Garlic Need?

Important Tips Growing Turnips in Container

1. Make sure your container is big enough. In order to cultivate the amount of flora you intend on growing, your garden should be at least 8 inches deep and 10 inches wide for optimum success.

2. Use soil that is full of good things for your plants. To grow strong, healthy plants, the soil should have a slightly acidic pH between 6 and 7. You can add compost or animal poop to make the soil even better for growing plants.

3. Make sure the pot you use to grow turnips has holes in the bottom. Adding a layer of mulch to the beds can help retain moisture, resulting in healthier plants.

4. Look carefully for bugs and diseases that could hurt your crop. If you find any, use insecticidal soap to help the plants.

5. Cut the turnips out of the ground using a sharp knife or garden shears. Make sure to be careful so you do not damage them.

6. Keep your turnips in a cool place after you pick them. When appropriately taken care of, they can remain fresh for weeks.

These tips can help you grow turnips in containers. Don’t wait! Start today and enjoy the delicious taste of your own turnips.

Conclusion

You can grow turnips in a container. With just soil, a pot and your dedication, it is easy to cultivate thriving plants. Then you can have fresh turnips soon.

If you see any pests or diseases, take action right away. This can hurt your plants. For a successful turnip harvest, use either sharp knife or garden shears to sever the vegetables at their leaf base. With these tips and some work, you can enjoy yummy turnips from your own garden.

How Much Water Does Garlic Need?

There are several factors that need to be considered while watering garlic plant. You must consider your local climate. If you live in a hotter or dryer environment, then the garlic plants will need more frequent watering than if you live in an area with a mild climate.

As a general rule, you should water garlic plant at least 1 inch per week. In winter and raining season, you can reduce garlic watering frequency.

Later in this article we’ll discuss about the factors that influence how much water garlic plant need.

When you water the plants, give them enough water so that the soil is wet.

It is best to water your plants in the morning or early afternoon. This way, they will get sunshine after they have been watered. Do not over water your garlic plant, as it can result in root rotting.

Remember that garlic plants need less water as they get bigger. So, when the plants get older, give them less water.

Importance of Watering Garlic Plant

It is very important to give garlic plants the right amount of water. This will help them grow healthy and strong so you can get a good harvest.

If you water your plant often, the garlic bulbs will taste better and be bigger. Else, it will not grow as much. You will get less garlic than you usually would.

It is important to give garlic plants water regularly so that you get the most and best quality.

Watering garlic plants is important. It gives them food and keeps the soil wet. This stops weeds from growing, so the plants get more food and water for themselves. Water also helps us stay healthy because it stops soil diseases that make us sick.

Water your garlic plants correctly. This will help them to make sugar in the cloves and give you garlic that tastes really good. With proper care and attention, your garlic will reach its full potential.

How Often Should You Water Garlic?

The amount of water for garlic plants depends on the climate and type of soil. Garlic likes soils that keep water, but also let it drain away. Keep the soil moist all the time.

Water your garlic plants at least one inch per week during the growing season. During prolonged periods of heat or drought, you may need to water your plants more often to ensure their health.

If you live in an area with lots of rain and humidity, do not water the garlic too much. Too much water can hurt the roots.

When the bulbs start to form, give the garlic less water. This will help make bigger cloves with better taste.

Factors Influencing Garlic Watering

When you water garlic plants, think about the weather where you live. If it is hot or dry, you need to water more often. During winter and when it rains a lot, water less because the ground will be wet.

Climate

The climate affects how much you need to water garlic. If it is hot and dry, you need to water more. But if the area is mild, you don’t have to water as often.

If there is a lot of rain or humidity, then you should not water too much or the roots will rot.

How Much Water Does Garlic Need in Winter?

In winter, you don’t need to water garlic as much. Water every two weeks or only when needed. That way the garlic will have enough moisture and be healthy when spring and summer come.

Watering Garlic After Planting

When planting garlic, give it enough water so the soil is moist. This will help the garlic grow well. Water your garlic regularly once it has been planted. This will help you get a lot of good quality bulbs.

Soil Type

The type of soil also affects how much you need to water garlic plants. Garlic likes soils that are light, have good drainage, and stay wet. If your soil has a lot of clay or does not drain well, you may need to water the garlic more often.

Watering Garlic Before Harvesting

Before you pick your garlic, give it less water. This will make the cloves bigger and yummier.

If it is raining a lot before harvest time, don’t water your garlic at all. Keep your garlic bulbs away from water. This will help them stay dry and make them taste better.

Think about all of the things that will make your garlic plants grow best. Provide your garlic with ample hydration and proper care. Doing so will guarantee a flavorful outcome.

How to Water Garlic Plant?

Watering garlic is important when you are growing it. Here are some tips on how to do it the right way:

  • Water your garlic plants every week during the growing season. Pour one inch of water over the soil. This will keep the soil wet and make sure it drains well so your garlic plants can grow better.
  • If it is hot and dry, give your garlic plants more water. If the weather is cooler or wetter, give them less water.
  • Once the bulbs start growing, give them less water. This will help the cloves on the bulb to be bigger and tastier.
  • Before you pick the garlic, give it less water. That way, the cloves will be bigger and taste better.
  • When watering garlic, water all of the area around the plants. Make sure to spread the water out evenly so that all garlic bulbs get enough moisture for them to grow well.

These tips will help you give your garlic plants the right amount of water. This will make them healthy and you can get more garlic from them.

Conclusion

It is important to water garlic plants often and the right way. This will help make sure they stay healthy and produce good bulbs.

Water your garlic plant at least one inch every week while it is growing. You may need to water it more or less depending on the climate and soil in your area.

When the garlic starts to grow bulbs, give it less water. This will make the cloves bigger and help them taste better. If you do what is suggested, your garlic will grow very well and you can enjoy eating it.

Is Chicken Manure Good for Vegetable Garden?

Chicken manure is one of the richest in nitrogen of all the compost manure. Essential nutrients like 5.46% of nitrogen, 2.82% of phosphorus and 2.32% in of potassium are present in this poultry manure.

It also contains, magnesium, calcium, sulfur and micro-nutrients like Iron, manganese, copper and zinc.

Is Chicken manure good for vegetable garden?

Yes, essential nutrients in this organic manure can be used to enrich your vegetable garden soil and help the veggies to grow healthy with quality yield.

Nutrients in Chicken Manure

Chicken manure has important nutrients in it. These nutrients help the soil for vegetable gardens. They make sure the vegetables are healthy and you get a good harvest.

  • Nitrogen: Chicken poop is full of nitrogen. It has 5.46% nitrogen in it. Nitrogen helps plants to grow better and have bigger leaves.
  • Phosphorus: Chicken manure has a special nutrient called phosphorus. It helps plants grow bigger roots and make more flowers.
  • Potassium: This organic fertilizer has 2.32% potassium in it. Potassium helps vegetables taste better and look better.
  • Magnesium, Calcium, and Sulfur: Chicken manure has special ingredients that help plants grow. It has magnesium, calcium and sulfur which make plants stronger and help them to grow faster.
  • Micro-nutrients: Poultry manure has tiny nutrients in it that plants need to grow. These include iron, manganese, copper and zinc.

Chicken manure is a great fertilizer for vegetable gardens because it has lots of nutrients.Chicken poop can make your soil better. This helps vegetables grow better and taste yummier.

Use it carefully. Mix it with other things like compost or soil. When adding manure to your garden, it is best to use chicken manure that has been aged. Fresh manure can have too many salts and toxins that can harm plants.

If you use organic fertilizer correctly, it can help your vegetable garden grow really well.

Also Read: How to: Growing Malabar Spinach in Pots?

How to Use Chicken Manure for Vegetable Garden?

Once the chicken poop is old, mix it with other things like compost or dirt in the garden. Compost can be spread on the soil or put on top of it.

Make sure you spread the manure across your plants evenly. Then water it so that all of the nutrients can be taken in.

Chicken manure is a type of fertilizer that has a lot of nitrogen in it. You should not use too much at once.

Using too much nitrogen can hurt plants. It can make the leaves turn brown. So use it carefully and only a little at a time.

Using old chicken poop in your vegetable garden will help make sure that your plants get all the vitamins and minerals they need to grow really big.

This organic fertilizer can help your vegetable garden grow if you use it the right way. You need to know how to apply, manage and fertilize it correctly.

Chicken manure is a good fertilizer for vegetable gardens. It has special nutrients that help the vegetables grow and produce good yields.

Here is a step-by-step guide on how to use chicken manure in your vegetable garden.

1. Obtain the Manure: Before you use chicken manure in your garden, make sure you get it from a place that you trust. Buy manure that has been aged. This will make sure it does not contain any toxins or salt that could harm plants if applied when fresh.

2. Prepare the Manure: Before using chicken manure in your garden, mix it with other natural things like compost or dirt. Adding nutrients to the soil helps the plants grow better. Too much nitrogen can burn the soil, so be careful not to add too much.

3. Apply Evenly: Mix chicken manure with other organic material. Spread it around the garden or in areas where you want to make the soil more fertile. Do not use too much fertilizer on your plants. Too much can cause them to be hurt.

4. Water Thoroughly: After you put the fertilizer on your vegetables, water them a lot. This will help the fertilizer go into the ground and be used by your plants.

5. Monitor Growth: Watch your vegetables as they grow. See how they do with the new environment you gave them and make changes if needed.

You can make chicken manure work better in your vegetable garden. Follow these steps to get the most out of it.

Also Read: Is Cow Manure Good For Chili Plants?

How to Composting Chicken Manure?

Composting chicken manure is a good way to give your garden soil more nutrients. The compost helps the fertilizer break down so that the nutrients can be released into the soil. Composting makes manure smell less. This means it is easier to use and won’t attract bugs.

Here are some tips for composting chicken manure:

1. Combine: Mix chicken manure with other things like leaves and grass clippings. This helps make a mix that has nitrogen, phosphorus, and potassium in it.

2. Aerate: Mix the soil in your garden often. This will help it get the nutrients plants need to grow.

3. Balance Ratio: When making compost, make sure to mix equal amounts of things that are rich in carbon and nitrogen.

4. Moisture Levels: Your compost should not be too wet or too dry. Make sure you have the right amount of moisture.

5. Monitor Temperature: Check the temperature of your compost. The best temperature is between 55-65 degrees Celsius or 130-150F.

6. Turn Compost: Mix the compost often. This helps it break down and turn into fertilizer.

Do certain steps to turn chicken manure into fertilizer. This is great for your garden where you grow vegetables.

This organic fertilizer can help your garden do its best. If you use it and manage it well, your garden will look great.

Also Read: Is Chicken Manure Good for Tomato Plants?

Conclusion

Using chicken poop in your vegetable garden can help make your plants stronger. It will give them the nutrients they need to grow healthy.

Fertilizer helps your vegetables grow better and make more food. Use it correctly for the best results. If you plan and use the manure in your garden carefully, it will be helpful. Put compost with it and adjust the amount so you can get the best results.

How to: Growing Malabar Spinach in Pots?

Malabar spinach is a plant that grows in hot climates like India and Indonesia. It looks like regular spinach, with bright green leaves and thick stems that can get up to 8 feet long. The plant produces small, white flowers and is a reliable producer of edible greens all year around.

Growing Malabar spinach in pots is easy and it does not take up much space.

This plant is an ideal selection for container gardening, as it can be trained to develop up a trellis or other vertical structure.

This plant is easy to care for and will flourish in temperatures ranging from 60F to 90F.

An Ultimate Guide to Grow Malabar Spinach in Pots

If you use the right pot and soil, it will be easy to grow malabar spinach in pots. The plant is not hard to look after. Growing a plant will give you lots of tasty leaves. You can use them in salads, stir fries, soups and other foods.

What do you require to grow malabar spinach in pots?

To grow your malabar spinach, you’ll need a spacious pot with potting soil and fertilizer. Make sure the container offers plenty of sunlight for this leafy vegetable; otherwise, it won’t be able to reach its full potential by growing long vines.

For the best results, use a soil mix made for container gardening. It should be light so it is easy to move.

Also Read: How Long Does it Take for Spinach to Grow?

What size container to grow spinach?

To plant malabar spinach, you need a container that is 8-10 inches deep and wide.

You can use bigger pots for planting. But make sure the pot has holes in the bottom so that water can come out.

Make sure the pot has holes at the bottom so extra water can escape. This will help keep your plant safe from root rot and other problems..

While planting it is recommended to old compost or worm casting to to the potting mix. This ensures that malabar spinach gets initial boost to grow.

When you buy a pot for your Malabar spinach, pick one that is light and strong.

Container gardening is when you grow plants in pots, containers or boxes. The most common materials for this are plastic, terracotta and ceramic.

Plastic pots are light and not too expensive. They are a good option for people who want to try out gardening before buying more expensive materials.

Terracotta pots are a great choice because they have small holes in them. This helps the water flow out of the pot and keeps the plants healthy.

Ceramic pots can make a garden look fancy, but they are heavy and hard to move.

Also Read: White Spots on Spinach – How to Treat and Is it safe to eat

Best Potting Soil Mix for Growing Malabar Spinach

For the best results, use a kind of soil made for container gardening. It should be light and come from a store..

The soil should have things like compost in it. The soil needs to have a way for water to escape so that the plant’s roots don’t get too much water. The soil should have lots of air in it. This will help the roots to get oxygen easily.

Add slow-releasing fertilizers like organic matter or worm casting to ensure this leafy veggy gets essential nutrients throughout the growing period.

This combination will provide them with everything required to thrive and flourish.

Compost and manure can help the soil get more nutrients.

Remember to give your Malabar spinach water often and make sure it gets enough water so the soil does not dry out. Doing this will help the plant grow better. The leaves will stay green and soft.

Malabar spinach flourishes in slightly acidic, loamy or sandy soil with a pH range of 5.5 to 6.5; these types of soils provide optimal drainage and oxygenation for the plants’ roots, allowing them to reach their full potential!

Clay soil forms dense layer after watering, by not allowing roots to breathe. Excess water can also cause root rot and other serious damage to your plants.

To enhance its nutrient content and promote better drainage, incorporate organic matter such as compost or manure into the soil. You need to use a special kit to check how acidic the soil is. The kit is called a pH testing kit.. This will help your plants grow strong and healthy.

Potting soil mix recipes for growing malabar spinach

Creating the best potting soil for malabar spinach depends on several factors, such as the size, type of container and plant variety.

To help your plants grow well, make your own special soil. Add things like manure or compost to the soil. This will give your plants the food they need.

You should also add some special food for the plants. This special food helps the plants get minerals and vitamins they need.

While planting malabar spinach make sure the soil drains well. This will help your plants not get too much water and stop their roots from rotting.

To reach optimal results, you should strive for a sandy or loam-based soil composition as opposed to clay which can retain moisture far more easily.

To ensure that malabar spinach grows healthily and abundantly, craft a potting mix recipe with ingredients such as vermiculite or perlite that will facilitate aeration of its roots and provide it with the critical nutrients it needs.

For a flourishing green garden, consider combining peat moss, perlite, vermiculite and sand with composted leaves or grass clippings. This magic combination will provide ample oxygen as well as other essential elements for strong growth of your plants and herbs.

Planting Malabar Spinach Seeds in a Pot

For successful Malabar spinach growth, the starting point is picking a container of adequate proportions. To give your plant’s roots extra room to grow and develop, opt for a container that is larger in size. Don’t forget to put holes in the bottom of the pot. They are very important for your plant’s health.

Choose a pot and fill it with potting soil, sow malabar spinach seeds.

When planting seeds, make sure to put them 6 inches apart. Then sprinkle a little soil over the top of each one.

Water your plants often and make sure the soil is damp. After sprouts appear, take away any plants that are growing close together. This will help them to grow strong and healthy.

Sunlight

Malabar spinach likes to be in the sun all day. It can also handle a little bit of shade if needed.

For the best growth, place your plant in full sun. Nevertheless, partial shade will also suffice if needed.

To ensure your plant is vibrant and thriving, provide it with a minimum of 6 hours sun exposure embrace daily. This sunlight should be direct, not blocked by anything.

Check this out: How Much Sunlight Does Spinach Need?

Watering requirements

In times of extreme heat and dryness, it is essential to water your plants more regularly. When it is cold and rainy, you do not need to give your plants as much water.

Malabar spinach might need extra fertilizer during the growing season so it can make a lot of leaves.

By taking proper steps to care for your container garden, you can anticipate a bountiful harvest of luscious greens.

Also Read: How Much Water Does Spinach Need to Grow?

Germination time

Depending on the variety you choose and climatic conditions in your region, germination of malabar spinach seeds may take around 10-15 days.

As you anticipate reaping your harvest, consider snipping off some external leaves in advance to promote continuous regrowth on the plant. Cutting from the outside of the foliage instead of its core will further invigorate growth and productivity.

With the right amount of love and attention, you can reap a rewarding harvest of succulent greens from your container garden.

Pruning and harvesting

Cut off leaves that look old or hurt. Cut off dead or sick branches too. This will make room for new growth and you can get bigger harvests.

If you want lots of delicious greens, be careful how much you take. Only pick what you need and leave the rest of the plant alone. This will encourage new growth and ensure that your crops are always fresh!

Pests and Diseases

Malabar spinach is usually not bothered by bugs and illnesses. But it is important to check it often for signs of trouble.

Gardeners must be aware of several common issues, including aphids, white-flies, and powdery mildew. To protect your plants from pests, use approved insecticides or fungicides when needed to minimize any damage.

Malabar Spinach Growing Tips

1. Make sure that your potting soil mix is well drained to avoid waterlogging and root rot.

2. Mix peat moss, perlite, vermiculite, sand, and composted leaves or grass clippings to prepare the best potting soil mix for malabar spinach.

3. Plant malabar spinach seeds at least 6 inches apart and cover them with soil.

4. Keep the soil damp until your seeds start to grow. Once germinated, seedlings need to ve watered often, but avoid overwatering.

5. When plants start to grow, pull some of them out so there’s not too many. This helps the plants grow healthy and strong.

6. Make sure that your plants get enough sunlight. It is best if they get full sun, but if that is not possible, some shade will work too.

7. Harvest the spinach leaves off the plant when you want to use them. Cut branches off the plant when it is time. This helps the plant grow and make more leaves for you to eat.

Growing malabar spinach in a pot can be fun and easy. With little effort you’ll be gifted with surplus of healthy and delicious spinach leaves.

Conclusion

Growing malabar spinach in pots requires suitable well-drained potting soil, regular watering and full sunlight.

As veggies are need to be fertilized regularly, add slow-releases fertilizers while planting malabar spinach.

Fertilizing with organic matter, compost or worm casting during growing season will enrich the soil with essential nutrients and it encourages plant to produce quality leaves.

How Deep Do Potato Roots Grow?

With shallow roots, potato plant go 6 to 12 inches deep from the surface of the growing soil. However, roots may go deeper in favorable conditions.

According to this report, potato plant has fibrous roots that can’t go deeper than 24 inches. To increase root development you must provide ideal temperature of 59-68F, along with nutrient rich soil and adequate water.

Potato plants are the most efficient, easily grown, and resourceful plants that a house gardener can ever opt to invest in. This is especially true if you have just started growing plants and potatoes are your first try ever.

When growing potatoes in the garden there are always a few key considerations that need to be kept in mind.

One of these is to determine the adequate growth of your plants. Determining the depth of your potato plant roots is one of the most effective methods of doing so.

Other than this, having knowledge about the depth of your potato plant roots also enables you to cater to the growth needs of your plant. So, next time you grow potato plants in your garden, you are well aware of the amount of water, sunlight, and fertilizer that they depend on to get to their optimal growth level.

If you are also one of those plant lovers who want to know the approximate depth to which potato plant roots grow, then keep reading because we have provided a comprehensive answer for the same.

A bonus section is also included that tells you about the growth needs of your potato plants and how to take proper care of them throughout the process. So, without any further ado, let us begin.

How Deep Do Potato Roots Grow?

potatoes

Potato plants are surely not the most popular or glamorous plant options that people have, but they are definitely the most rewarding plants that one can ever grow. That being said, potatoes are basically a root vegetable and grow best when put under soil.

When we say, “grow best”, we are actually referring to a depth of approximately 18 inches or in some cases, even longer than that.

But, in order for your potatoes to grow to such an extent, it is very important that they are comfortably bedded in a soil that has been loosened using all the resources and I perpetually free of stones or any other hard material for that matter.

It allows your potatoes with enough space to grow smoothly without any obstacles and this freedom is one of the best mediums to grow your plant.

Another important noteworthy thing is that potatoes don’t grow in a random zig zag manner. Rather, they prefer going in a straight direction starting right below where the seed is planted.

Also Read: Can You Grow Potatoes in Clay Soil?

How to Promote the Root System of Your Potato Plants?

Everyone wants to have the best environment for their potato plants to grow and prosper in. But, what many people don’t know is that in order to get into an accurate understanding of what kind of environment your plants need, it is equally important to get to a basic understanding of how your plants grow.

This practice begins when you first decide to buy the seed of your potato plants. Naturally, a large potato seed promotes a longer and more vertical growth of the potato plant than a seed that is smaller.

In doing so, the plant pushes its roots outwardly downward from the seed to grow and orient their structure in a progressive manner. In this manner, the farthest that your plants can grow is known to be 18 inches, as mentioned earlier.

This doesn’t mean that you maintain the depth of your bed to be 18 inches. It is considered to cause issues for the proper structure of the plant because if the root doesn’t extend to the desired length, it can severely compromise with the position of the plants.

It is generally advised to prepare your bed approximately 10-12 inches deep for a productive yield. The plant will eventually make space for itself.

Other than what is elaborated above, it is also important to reiterate on the earlier points of keeping the soil free of stones, hard rocks, and loosening them using expert equipments.

Further, remember that your potato plants grow straight downwards from the roots and you’ll have good to go with fulfilling the watering needs, where drip irrigation is preferred.

Also Read: How Many Potatoes Grow from One Seed Potato?

Taking Care of Potato Plants

While it is true that you can see a potato yield of about 11-18 inches below the ground, it is also true that none of this would work if the plants are not taken proper care of. How to know if your potato plants are happy with their service? We are here with a few easy and effective tips to help you take proper care of your potato plants under all conditions.

The soil should not only be loosened and free of harsh materials, but it should also be comparatively dry, light, and extremely well drained. Moisture is something that is not very well taken by potato plants. Imagine subjecting your plant to an environment it doesn’t like for most of its life. It is unlikely to grow.

Your soil bedding should be nutritious and posses the ability to retain moisture for longer times, without disturbing its natural chemical composition.

To do so, you can supplement your bedding with some organically developed compost, manure, or simply adding mulch to enhance its nutrient profile. Another more suitable approach is to purchase a fertilizer that is slightly high on the nitrogen aspect and you’d be good to go.

In order to yield a good potato plant yield, it is relatively important that you purchase good quality seeds. A premium quality potato seed is ideally the size of an egg of hen and has at least three to five potato eyes to support the growth of new plants.

Initially, it is important to space your potato seeds at least 14-15 inches apart. This makes sure that the growth of adjacent plants don’t necessarily interfere the productivity of other plants.

If you feel that it is about time that you harvest your potatoes as they are ready to eat, consider doing it during the mid summer season. Not before it, and certainly not after that. Baby potatoes are the most commonly available harvest during midsummer and you can conveniently harvest them by gently reaching out to the first few inches of soil and pulling them off carefully.

As soon as you see the growth of potato tubers from the plant, start hilling the soil above the plant. You can also make use of mulch to do the same. It is important to also reduce the composition of nitrogen during this time since we effectively require stopping the maturation process of potato tubers.

Also Read: What Size Pot Do I Need to Grow Green Beans?

Conclusion

Potato plants, as we have seen, vary in their length and depth of growing and this is what makes them unique from other plants. By adopting the aforementioned easy care tips, you can ensure that your potato plant grows to its fullest potential and is getting the adequate environment for the same.

If you want to learn more about potato plants and the different problems concerning them, go through more of our articles and seek solutions to your gardening issues. We have covered answers and solutions to a range of your gardening issues for different plants. Till then, happy gardening!

The statistics mentioned above are cited from the report published by the State Extention Service of North Dakota. So, if you want to know more about the depth of your potato plants, you can checkout the report.

Should I Cut Off Yellow Cucumber Leaves?

Having yellow leaves is a sign of concern for most gardeners. However, yellowing of lower leaves is a normal among plants.

But, do you have to cut off the yellow leaves of the cucumber?

Yes, you should prune the yellow leaves of the cucumber as they help your cucumbers to grow.

Every cucumber vine has one main stem that has nodes, or joints along its length. From those nodes, one leaf, fruit, tendril, and a new stem are grown.

When the pruning is done the new stem is removed which is also called growth point, shoot, or lateral runner. The flower and leaf are also pruned in some situations. 

The type of the cucumber plant decides whether to use the clippers or not. Pruning the leaves is based on the cucumber plant you have grown.

Like the bush varieties, they don’t need much pruning or trimming. The only time they need pruning is when they get friendly with other plants in your garden.

The cucumber vines that sprawl on the ground without any vertical support also don’t need pruning or trimming.

Proper pruning of the cucumber plants helps the plant grow higher quality fruits. Pruning of the plants is necessary because it helps the vines grow in the right direction.

If your cucumber vine is only focusing on growing lots of stems and leaves then it is never going to focus on growing fruit. So, by pruning them you are giving the plant a chance to grow fruits that as the cucumbers. 

Cucumber is generally a summer-grown vegetable that is loved in the country. Cold cucumbers with spices are much loved by every age group. They are crispy and crunchy, they also your quench thirst in the hot summers. Cucumbers also give the essential nutrients which are needed in the summer season. 

Also Read: What Size of Container Do I Need to Grow Cucumbers?

does PRUNING GIVE A HIGHER YIELD IN CUCUMBERS?

Pruning the cucumbers helps in their growth and they produce a higher quality of cucumbers which are rich in nutrients and fibers.

The yellow leaves in cucumbers suck all the nutrients of the plant which are necessary for the plant to bear fruits and green leaves. 

The unwanted plants and leaves grow on the main stem they take up all the nutrients which are needed for the plant’s health. These unwanted plants and leaves need to be pruned and trimmed so that they don’t affect the plants. 

Pruning the cucumbers balances the vine growth and fruit production. It is done on the outside branches, leaves, flowers, and fruits as needed throughout the growing season. The trimming of the plants should be started by removing the dead and damaged parts in the plant. 

Removing the old and drying leaves from the plants helps the sunlight to reach the plants directly without any obstruction. When you remove the obstruction from the plants they help in the development of fruits and improve air circulation.

When you remove the lateral runners which are near the base of the plant they don’t restrict the growth of the higher quality fruits. Pruning the cucumber plants helps in the growth and direction of the cucumber plant.

Also Read: How Deep to Plant Eggplant Seedlings?

WHY DO THE LEAVES OF THE CUCUMBER PLANTS TURN YELLOW?

The leaves of the cucumber plants turn yellow which is known as chlorosis. When a plant has chlorosis the chlorophyll content which is very essential for photosynthesis is short in supply. After this, the ability to do photosynthesis in the plant is affected and it struggles to produce sugar which is needed for the plant’s health. 

There are many causes for the yellow leaves in cucumber plants and some of them are:

1. Pests: The pests which are used in the plants sometimes make the leaves yellow. Their harmful chemicals damage the leaves and change the color of the leaves from green to yellow.

2. Improper watering: When plants don’t get proper watering their leaves turn a yellow color. The yellow color of the leaves indicates that there is an insufficient amount of water in the plants. 

3. Insufficient sunlight: Sunlight is very important for the plants to do photosynthesis which is the main process of plants to make food for them. When there is insufficient sunlight the process of photosynthesis is affected and proper food is not made for the plants. In this way, the health of the plants gets affected.

4. Plant diseases: When the health of the plant starts to deteriorate they also have many diseases in them. Plant diseases also change the color of the leaves to yellow.   

5. Poor nutrition: When the plants lack sunlight and water the nutrition of the plants also gets affected. Poor nutrition in plants decreases the health of plant and their growth of it. The yellow color of the leaves indicates their poor nutrition in them. Poor or lack of nutrition stops the plant’s growth and reduces their health.

When you maintain these things with your plants they bear fruits and green leaves. The health of the plants is very important and maintaining their growth and health is very necessary. Like we take care of our health, plants’ health is also very important. 

Also Read: Why Are Sweet Pea Leaves Turning Yellow?

HOW DO WE PRUNE THE YELLOW LEAVES OF CUCUMBER PLANTS?

When you start to prune or trim the yellow leaves of cucumber plants you need to take care of a few things.

The first thing to do is clean the tools by which you have to trim or prune the leaves in the plant. When you clean the tools and instruments the chances of spread of disease are low not only in cucumber plants but also in other plants.

When we cut the growth of the unwanted plants and yellow leaves the lifeline of these plants is decreased and won’t regrow if they are cut at the proper time.

Usually, the pruning is done on the base of the plant. This pruning helps the leader vine grow and the top to fill out the trellis. 

When the nodes are a few inches long they are pruned through clippers so that they don’t damage the main vine. Remove the flowers which are restricting the plant to bloom. 

After all these steps remove any leaves, vines, or fruit that are damaged or show any kind of disease. When they show any disease in the stem, leaves, vines, or fruits immediately remove them before they damage the whole plant. 

If the leaves are bushy in one place then trim them so that they block the air circulation of the plant. If the air circulation is blocked then they will die or show diseases that are not good for the plants. 

When you are finished doing all these activities clean all your tools and instruments so that they don’t get dirty for the next use.

Do timely trim and prune the cucumber plants so that they don’t harm the main stem and take all the nutrients which are needed for the plant. 

Check this out: How Deep Do Potato Roots Grow?

IN THE END, ALL WE GOT TO KNOW IS

Cucumbers are very nutritious and healthy for us. During the summer season, cucumbers provide many nutrients like vitamins, and minerals and provide hydration which is very much needed for our body when the climate is very hot. 

Hydration is very much needed for our body as water is reduced because the temperature is very high during the summertime.

Cucumbers are also used in salads and yogurt for raita. Cucumbers are also used in skincare. It is used in under the eyes to remove puffiness and dark circles. 

The leaves of the cucumber plants turn yellow because of chlorosis which is a lack of chlorophyll that helps in photosynthesis which makes food for the plant and which gives them strength to grow strong and healthy.

When the plant is not able to do photosynthesis it starts to become weak and unhealthy and starts showing diseases.

Leaves turning yellow are also an indication to us that the plant is turning weak and needs trimming or pruning.

When you remove the yellow leaves from the cucumber plant, it yields healthier and high-quality fruits and green leaves.

Yellow leaves on the cucumber plant could happen because of any reason.

There is a lack of sunlight, chemical pesticides that are used to kill the insects and worms that damage the plants; insufficient watering of the plants, and many more can lead to this problem in it. 

The discoloring of leaves can also happen because of soil problems like when the plant doesn’t get enough soil nutrition or doesn’t get enough nitrogen and potassium in their diet.

The organic manure or humus which we give to their soil must have these nutrients so that the leaves don’t leave their color.

As we maintain our health we should maintain the plants as well. Maintaining them will give us the fruits we need and will also make them strong and healthy.

Plants are also living beings and like humans, they also need proper food, water, and medicines when they suffer from any kind of disease. 

The plants need proper hydration and care just like humans so that they don’t die or suffer from any kind of disease.

Pruning or trimming your cucumber plants is a very wise choice and by adopting this technique you can save your plant’s life. 

The unwanted plants and leaves take away all the nutrients from the main stem or vine and reduce the growth of the plant.

The energy is distracted from the main stem and is divided into unwanted plants and yellow leaves. Due to this reason, the plant doesn’t get enough nutrition and dies soon after planting. 

Also Read: Should I Cut Off Yellow Leaves on Tomato Plants?

Maintaining any plant’s health is not easy and providing them with proper nutrition and care is very important. They have their disease and problems which needs to be solved so that they can give us tasty fruits and vegetables.

Plus taking care of a plant makes it greener and healthier which in return gives us oxygen to breathe. There are also horticulture experts who advise on how to take care of specific plants and what are the things that need to be done when we face any kind of problem with the plant. 

Some medicines are natural and organic for plants. They are given to them when suffering from any kind of disease or have any problems which are restricting the plant to grow.

There are many medicines that help them grow into a healthy and strong one that doesn’t die anytime soon because of the disease,

We have to notice and observe the plants for yellow leaves so that they don’t die and all of our energy behind them doesn’t get wasted.

Gardening also is a very good hobby which relaxes your mind and even improves your mental health. Plants have healing powers that calm our mind and makes us feel fresh to start again. 

If you are planning on cutting and pruning the yellow leaves in your cucumber plants do it without any hesitation as it will do wonders to your plant and will make your garden green and full of fruits.