Why Are My Squash Plant Leaves Turning Yellow?

If you are growing squash in your garden then you must be wondering why the leaves are turning yellow? As the squash develops, you may notice that the foliage becomes yellow and decay. It’s an indication that something is up with the crops.

The most typical cause of squash leaves turning yellow is a hydration issue. That suggests you’re probably overwatering or underwatering your crop.

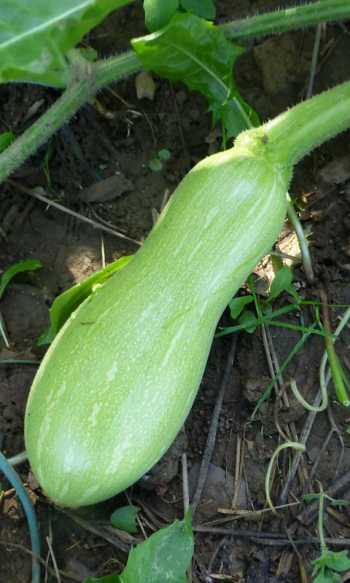
Squash is native to North and Central America and also is known by many different names, including acorn, squash, spaghetti, zucchini, and banana.

Squash plants have yellow and orange blossoms and also green, white, or yellow tasty fruit in several different forms, depending on the variety.

These species may also be found as bush-like vegetation with huge lobed foliage and lengthy vines which can cling to and start climbing a surface using their stems. A deep green tint on the plant leaf is a notable statement of how these plants are prospering.

Yellowing leaves on vegetation, on the other hand, are a bad indication because they suggest a deficiency of nutrients or, worse, distress caused by the presence of some pests, as we shall explore later.

Growing Squash

There is a distinction between a ready-to-eat fruit and then one that’s yet to be served.

 This might be due to the drab and chapped skin of ripe fruits and the glossy look of young fruits.

The species requires a huge amount of sunshine and sufficient drainage to flourish. Meaning that best development occurs when plants are placed in soil that is nutritious, well-drained, and high in organic material.

Furthermore, the gaps among plants are critical since pests and illnesses proliferate the greatest when crops are planted too tightly together. Squash plants may be grown through either transplant or simply planting the seeds into the ground.

Seeds for the former must be planted three to four weeks before the latest frost date. Manual seeding, on the other hand, should be done after the final frosts on warmer soil.

Squash plants thrive best when they have a constant source of water. However, if you live in a location where the water system is unreliable, you may offer an inch or two by thoroughly watering weekly. It would be the most suitable option.

Also Read: Why Are My Radishes Growing Above Ground?

Why Squash Plant Leaves Turning Yellow?

How is your squash foliage becoming yellow and decaying? This is a frequently asked question. The most common cause of yellowing leaves is insufficient irrigation — you might be watering the squash under or over.

On the other hand, you might overwater the squash. The soil surrounding the squash should not get wet. It should be moist but just not soaked. If the squash is becoming soggy, you’re either overwatering or the ground is too packed and not draining correctly.

But overwatering or underwatering aren’t the only reason for squash leaves to turn yellow. Read below to know more about the causes of squash leaves turning yellow and how to prevent that.

Also Read: Why are my Strawberry Leaves Turning Red?

#1 Water scarcity

Although squash plants are rather resilient, they do require roughly 2 inches (5 cm.) water moisture each week when compared to other veggie plants. Due to extreme heat, they may be required more often at times.

Each week, squash requires an inch of deep water. For squash to be adequately nourished, the soil must be thoroughly moist 8-12 inches. If you reside in a location, where summertime is warm and sunny, you might have to water the squash nearly every day.

Examine the squash plants to determine whether they are getting nearly this much moisture every week. If not, use a sprayer or drip hose to complement environmental watering (i.e. rain).

Also Read: How Often to Water Green Beans at Home?

#2 Inadequate iron intake

Plants struggle to produce chlorophyll, the chemical that turns leaves green, in the absence of iron. Iron chelates (a type of fertilizer) incorporated into the soil can assist.

The majority of the time, the iron shortage is caused by minerals being extracted out from the soil as a consequence of overwatering. Make sure you’re not overwatering the plants.

#3 Squash Pest Issues

Pests bothering your crops is a less probable but probable cause of the squash foliage becoming yellow. Whiteflies, mealybugs, aphids, and insects all like eating the squash and would do it voraciously. Squash is also susceptible to disease.

The best way to deal with yellowish squash leaves is to be cautious. If your plants are adequately hydrated and nourished, they are less likely to suffer from insect issues. Below are a few common pests that can cause squash leaves to turn yellow.

Check this: Why My Eggplant Leaves Turning Yellow and Curling?

Vine Borers

Vine borers can target a squash crop and chew their path through the plant’s stem. Yellowing of the leaflets from the bottom portion of the plant to the top is unmistakable indicators of a vine borer, as is a little mound of “sawdust” at the foot of the plant, around where it emerges from the earth.

If you detect a vine borer, keep in mind that insecticides would not be effective. The only viable, if not always effective, the remedy is to extract the vine borer insect from the stems. Split the plant lengthwise at the location where you assume the vine borer is stuck.

This won’t harm the squash vine very severely, but if you don’t discover the vine borer, your crop will die anyhow. If you find the vine borer, puncture it with a stick and destroy it.

Also Read: Why Tomato Branches Curling Down?

Bacterial Wilt

Sadly, there is little you can do to preserve your squash seedlings if they are affected by bacterial wilt. This yellowing of foliage will be swiftly accompanied by withering and darkening of the foliage, and then death.

Bacterial wilt could be identified by removing a portion of the stems and pressing some of the fluid within. If somehow the juice is slimy or leaking, the crop has been damaged. Plants should be destroyed rather than composted.

Do not grow squash or any other cucurbit crops in that place the following year, since the bacterial wilt is still present in the ground and thus will affect them too.

Although the factors described above are among the most prevalent causes of yellow leaves in squash plants, these are not the primary ones.

As previously indicated, squash plants’ foliage will change color once the plant is distressed. Once you can determine what is causing the crop to become stressed, you will be ready to correct the issue and assist your squash plant in regaining its green color.

Suggestions for Growing Squash

Squash, like other vine-growing vegetables, requires heat, yet it is usually more hardy than melons and cucumbers. Squash plants demand full light, healthy soil, and plenty of water. It is advised that well-composted manure be incorporated into the ground.

Summertime and cold weather squash usually grow in full-sun settings with healthy, well-drained soil rich in organic materials. Organic material may be applied to the soil by mixing fertilizer and decomposed manure.

Squash seeds can be planted immediately in the field or grown inside. Summer and cold weather squash are generally grown in 1 inch (2.5 cm) thick hills. Sow seeds soon after every frost threat has passed and the ground has heated.

Typically, four to five seeds every hill are sufficient, with pruning downward to two or three seedlings every hill after the plants have formed leaf blades.

Summer squash slopes and rows must be around three to four feet (1 m.) away, whereas winter squash rows must be roughly four to five feet (1-1.5 m.) off from each other, with Five to Seven feet (1.5-2 m.) among rows and hills around Three feet (1 m.) away.

Squash may be grown indoors three to four weeks before transplanting. Start seeds into peat containers, but be careful not to disrupt the squash seedlings’ roots when transferring.

Plant three to four seeds per container and trim to two plants afterwards. To ease the stress of transplanting, tough the seedlings off before transplanting inside the yard, and wait till all risk of frost is gone. It is beneficial to heavily mulch squash seedlings; mulching retains moisture and suppresses weeds.

Companion plantings can be a highly successful method of producing strong, vigorous squash harvests. Grow a variety of herbs & blossoms that draw pollinators and also parasitic and predator insects to keep your yard pollinator-friendly.

For optimal pollination, squash vines require numerous visits from their winged buddies. Allow fragrant herbs to blossom, like dill, basil, fennel, cilantro, mint, chamomile, and tulsi, drawing and nourishing hoverflies, parasitic insects, damselflies, ladybugs, & bees.

Plant a lot of lovage because it serves as a hosting crop for parasitic wasps which eat cucumber insects, squash bugs, and aphids. Planting petunias, nasturtiums, and turnips in the squash beds are also said to prevent squash pests.

Soil, Planting, and Maintenance

Squash likes to twist their roots over pieces of decaying leaves or even other manure, and they require a lot of light and adequate drainage. Put in a 3-inch coating of manure to prep the soil for squash.

Another viable alternative is to combine old compost-enriched clay with the first couple of inches of natural soil. Squash vines are often large, so put them at least Three to Six feet away.

You’ll like to supply a consistent source of nourishment by treating squash vines using a continuous-release fertilizer according to package recommendations for optimum development and a large yield.

Since squash foliage is so wide and thick, big plants suppress weeds while also providing pleasant shade.

When putting squash seedlings in the sunlight, shade plants using an upside-down flower vase or any other shadow covering for a few days following transplanting to prevent possible withering.

Squash blossoms have both female and male blooms.

Watch for a little squash under the flowers to distinguish the female flowers. Male flowers, typically appearing a week or so before female flowers, sit straight on the stalk.

Honeybees and other tiny bugs pay frequent visits to assist female flowers to grow into squash, putting behind pollen tracks supplied by male blooms. Male flowers frequently fall on the ground towards the close of their lives; this is natural.

Harvesting

Summer squash produces fruits over several months, beginning in mid-summer and lasting until the first frost. Harvest the fruits once they are tiny, delicious, and have velvety skin.

Harvesting regularly will foster the formation of more fruits. Allow the fruit of wintertime squashes to ripen on the vine before removing before the first cold.

Place the fruits in the sunlight for a whole week, either outside or in a nursery, to firm the skin. It helps to guarantee that they stay in good condition.

Keep the fruits inside at 10–15°C (50–60°F) in a well-ventilated area. Cold weather squash may be stored for 3 months or longer, based on the type. Store them in an appropriate environment to enjoy them for long. You can serve them in various dishes and snacks.

Best Soil for Growing Leeks- Soil Preparation

Leeks – Allium ampeloprasum var. porrum- are a delicacy crop that is simple to cultivate. They have this little onion taste to them. You can eat these raw, sautéed, or in stews and soups or quiche, and salads. Both the leaves and also the whitish stem are edible.

Leeks have the appearance of enlarged greenish onions, with a tall, cylindrical white stem. The blades are big, flat, and curled. Plants can be grown to be two to three ft high and two inches wide.

Planting Leeks

Leeks are often grown in containers or trays with the potting mix before being moved into their permanent location once they are large enough.

Sowing is a simple process. Begin by separating potting mix into containers or trays. Lightly push down the potting mix, then spread the seeds quite thinly, approximately 1 inch (2-3cm) away.

In a plug plate, you may also plant two seeds in each cell. Top them with a thin coating of additional potting soil and hydrate them. As the seedlings sprout and the plants develop, keep your potting soil wet.

Initial appearances must be kept on a bright interior window or in a nursery, where the heat will promote faster growth. If you want, you may divide the seedlings and plant them into single containers as they develop.

Best Soil for Growing Leeks

To flourish, leeks require well-draining ground; damp soil can hinder development and destroy seedlings. Another important issue with inadequately draining soils would be an added danger of diseases and pests like onion flies, white rot, or leek moths damaging leeks.

Dig a one-foot-deep hole to test the water flow. Load it halfway with water and then let it drain fully before refilling. Determine how much water drains from the pit in 1 hour.

The soil has low permeability if lower than 2 inches of the liquid has drained at the end of the hour. Creating a sloping area to promote water flow is one way of increasing soil drainage, as is applying 2 to 3 inches of manure.

Soil pH values indicate the soil’s alkalinity or acidity. Growing leeks in soils with the proper pH level promotes plant development, and also the pH level must be calculated 2 to 3 months ahead of sowing to enable adequate time to just get pH levels corrected.

Leeks, like many veggies, demand somewhat acidic soil to flourish in. To evaluate the pH of the topsoil, use a pH test kit (available on the internet or at most gardening centers).

Leeks plants thrive in soil with a pH of 6.0 and 6.8. Gardeners can increase soil pH by using wood ashes or even lime. The precise amount required depends on the material and the initial pH value of the ground.

Also Read: Why Eggplant Flowers Falling Off?

Leeks Transplantation

When transplanting your baby leeks, ensure they’ve been conditioned to outdoor circumstances by placing them outside for greater lengths of time over the duration ranging from 1 to 2 weeks. Once they reach a height of 6 to 8 inches (15-20cm), plants are set to be transplanted.

Start by ‘dubbing’ (poking) gaps into the well-dug ground that are the same size as the stalks of the leek plants. You could use a dibber designed specifically for this job.

Make a separate hole for every plant. The holes will be about 6 inches (15cm) off from each other, with an ft (30cm) within rows, or 7 inches (20cm) away from each direction if growing in a block area.

Carefully take the leeks off their containers and pry the roots separate if they’ve not previously been potted on. Fill the holes with seedlings.

The roots must extend down to the base of the opening, so assist them forward if required – you might have to cut them to put them in if they’re lengthy.

Cover these holes to the top with water and set the leeks aside to drain. Over time, the soil will simply fall in, enabling the shanks (stalks) to expand freely.

Also Read: How Often to Water Green Beans?

How to Start Growing Leeks From Seed

Leeks may be propagated from seed or transplanting. Seeds could be sown inside in cooler areas eight to twelve weeks well before final spring frost.

Once temperatures rise above 40 ℉, bring them outside and gradually tough them up (for approximately seven days) before transplanting plants to the soil.

In hotter areas, where spring and autumn are good growth times, start your seeds inside three to four weeks well before the final spring frost and transfer outside for an early summertime crop.

You may also direct sow in later summer and collect in winter or early spring.

Sow leeks at a distance of at least six inches away. Leeks should be blanched to promote a glossy white stalk (the edible portion of the plant more commonly used in recipes).

This is yet another means of expressing that they must be kept out of the light so that no area of the crop produces chlorophyll and turns green.

Sow the seeds 6-8 inches down in the ground and proceed to pile the earth up all around the leek as this grows out of the earth, beginning around the moment the stalks are just an inch thick.

Development Needs for Leek

Pick a good site that gets enough sun to yield the greatest leeks. Leeks may thrive in moderate shade but flourish best in direct sun. Leeks may be grown in the soil, raised beds, or even giant grow bags.

Leeks are intensive feeders that require a lot of nitrogen. When sowing, amend the earth with a few inches of well-aged manure. We also apply a sprinkling of slow-release fertilizer to the surface of the soil, which is softly scraped into the land.

A mid-season dose of composting tea, diluted seaweed extract, fish fertilizer, or a supplementary dressing of moderate slow-release powdered fertilizer may help long-season leeks. Heavy fertilizers should be avoided throughout the growing season since they may cause leeks to split.

Leeks flourish under conditions of steady moisture.

As a result, irrigate leeks on a routine basis enough to keep the soil wet (but not waterlogged) on all occasions.

Mulch all around the bottom of leeks (when they’re no more delicate seedlings) to retain existing water and protect against temperature variations. For leek plants that were originally planted 4 to 6″ deep, between one – 2 inches thick mulch is sufficient.

For thinly planted seedlings or even when cold temperatures are forecast, apply a thicker covering of mulch.

Also Read: How Long Does it Take for Kale to Grow?

Harvest

Whenever the stem diameter of most leeks exceeds one inch, they are completely developed. A few of the smaller kinds bloom at half to three-quarters of an inch thick.

A good leek must have a solid, white stem that is at least three inches in length. Bulbing, or enlargement at the root, is unwanted.

 Leek tips, unlike onions and shallot tops, will not fall off as the plant grows. The flag, or top spike, ought to be dark blue-green.

Leeks can be harvested by carefully twisting and removing them from the ground, or by excavating and raising them. If necessary, cut the foliage to a more acceptable length before harvesting.

Before preparing, properly clean the leeks. Because there is typically a little bit of dirt held securely between the leaflets, cut the entire leek vertically, split the layers, and carefully wash to eliminate any soil.

Because leeks are generally cold hardy, you can postpone harvesting until after your first couple of cold spells. Some cultivars may be unaffected by freezing temperatures as 20°F.

Pile mulch over your leeks to preserve them, and you’ll be able to harvest veggies from your garden until late October.

Also Read: Why Are My Tomato Flowers Falling Off?

Keeping Fresh Leeks

Avoid cleaning or cutting the leeks after harvesting until you’re willing to utilize them. (If you expect to use it sometime in the next couple of days, that is.)

Remove the filthy roots but just don’t cut further into the stem directly. Refrigerate fresh leeks in a Ziploc bag (or more, if they’re particularly tall). Cooled leeks should keep for at minimum a week, if not longer.

Another alternative for storing green leeks is in a basement area, which should be kept at 32 and 40°F. After harvesting, place the leeks (unclean, roots attached) in a container of gardening sand or new potting soil. Place them straight in the sand/soil, covering a few inches of the base stem.

How Long Does it Take for Kale to Grow?

Nowadays, kale seems to be the healthful, organic trend image. Kale is well-known for its health advantages, including the prevention of diabetes, cardiovascular disease, cancer, and the improvement of bone strength.

It is also highly beneficial to the skin and hair. The green veggie is high in vitamins A, C, & K, potassium, manganese, copper, and iron. It is very delicious.

It can be served steamed, cooked, or raw in stews or sandwiches. Kale goes well with intense flavors like garlic, chillies, onions, and thyme.

Kale is a cool-season vegetable. While it may be cultivated in the summer, it needs a lot of cover and attention. Furthermore, the winter produce tastes sweeter.

How long does it take for kale to grow? Explore our Kale Cultivating Guide for tips on planting and gardening this hardworking wonder.

Kale Planting Season

Kale seedlings can be started inside the house or immediately put in the yard. Direct-sow seeds outside as quickly as the ground is usable in the spring for an initial summer yield. Direct-sow seeds approximately three months before the first autumn frost date for an autumn or winter crop.

Tiny kale seedlings can be planted in the yard 3–5 weeks before the final springtime frost date. If conditions are expected to fall significantly below freezing, young plants should be covered at night.

Young kale seedlings can be planted 6 – 8 weeks before the initial fall cold for a fall crop. Kale can endure freezing temperatures (25 to 28 degrees F) without harm and survive in the low 20s to high teens.

Kale may also be cultivated as a winter crop, either inside or outdoors, in moderate winter climates such as Southwest, Pacific Northwest, or Southeast. They’ll continue to grow and produce throughout the winter. Contact your regional cooperative extension to find out if and when you can grow winter veggies.

Also Read: How Long Does Horseradish Take to Grow?

Selecting and Setting a Planting Location

Kale grows best under bright sunlight, although it may also be grown in moderate shade. To avoid any diseases, your soil pH should be 6.5 to 6.8. However, kale is adaptable to higher alkaline situations, even to the pH of 7.5. (Check your pH using a pH testing kit from your cooperative extension service or nursery store.)

Supplement your soil using nitrogen-rich fertilizer or blood meal depending on the outcomes of the soil test. (If you haven’t tested your soil, add a few layers of manure.)

The soil must drain adequately and be supplemented for sensitive leaves. Fertilizer should be applied when sowing (1-1/2 cup of 5-10-10 fertilizer per 25 feet of line into the upper 3 to 4 inches of the earth).

How Long Does Kale Take To Grow?

You may hope to harvest fresh kale within 70 days if you sow it from seeds. From sowing until harvesting, such a plant needs around two months of cooler temperatures.

Relocated kale plants get a jump start over seeds, so they should get ready to be harvested in around 55 days after sowing.

Check this out: When Is It Too Late to Plant Garlic and Harvest?

Growing Kale Seeds

Although kales enjoy the light, too much sunlight can cause them to turn prickly and harsh. They develop best in low conditions, keeping their flavor.

Start the seeds inside about six weeks before your final frost in the springtime to allow the seedlings to develop before the summer’s severe heat.

Sow your plant in the autumn, about six to eight weeks before the first predicted freeze if you would like a winter yield. This crop will be harvested even after the cold has arrived.

Support, Level, and Distance

Sow kale plants 1 1/2 to 2 feet away, at about the same level they were developing in their nursery pot. Seeds must be placed at a depth of around 1/2 inch.

Also Read: Tomato Branches Curling Down

How long does it take for kale seeds to germinate

If you’re curious how long it takes for kale seeds to sprout, you might be amazed. Kale seeds can sprout in as little as 2 to 4 days after planting. Certain seeds may take much longer to germinate. The quick sprouting of kale seeds makes this lush plant an instant favorite.

Kale seeds can be planted directly in the soil or a container. This is the easiest method, needing no equipment, but you must wait till April or May, once the soil has warmed sufficiently. Loosen up the dirt in your selected place to provide a good bed for the kale.

If you have a vegetable patch, you might wish to spread the seeds in a row. This helps distinguish the plants from other weeds, which may sprout easier. To have a perfect line:

  1. Run your fingers or trowel down a stick.
  2. Fill the palm with tiny seeds, then press them to plant thinly down the row and gently top with dirt.
  3. Gently pour in water.

If growing amid other attractive garden plants, do not plant in a row. Instead, plant them in a circular or cross form to distinguish your kale seedlings from the rest of your vegetation.

If you’re planting in a pot, pick a big container with lots of room for the roots to develop and cover it with multipurpose fertilizer. Top with a thick coating of compost after scattering the seeds over the top.

Plants in containers dry out faster than seedlings in the soil, keeping them moist. If you cultivate them for an extended period, treating them with a fluid seaweed feed can benefit them because the nutrition in the manure may diminish after a bit of a while.

You will have to trim your plants once they have sprouted since you will not have enough space to expand them all. Cavolo Nero may develop to reach 90cm x 60cm in dimensions, although dwarf versions can be as small as a beach ball. The good news is that the plants you trim out can be eaten. They are delicious.

Taking Care of Kale

Sunlight

Kale thrives in conditions ranging from full sunlight to partial shade. The plant will develop to its maximum potential if it receives six or so more hours of bright sunlight over most occasions. If you reside in a warm, dry area, though, give your plant little cover, particularly from the scorching, blazing sun. Heat can cause the foliage to wilt and lose taste.

Soil

Kale plants want rich ground with heavy inorganic compounds and a somewhat acidic pH. Natural matter’s more excellent nitrogen material is critical for healthy leaf growth. The soil must also drain effectively.

Water

Water the kale crops daily to keep the soil equally wet but not saturated. Kale prefers 1 – 1 1/2 inches of moisture each week. In addition to mild temperatures, damp soil keeps kale greens pleasant and crunchy instead of harsh and bitter. Mulching around the crops will assist in keeping the ground cold and wet.

Also Read: How often to watering sweet potatoes?

Moisture content and temperature

The plant is classified as a cool-weather crop and may withstand moderate cold when grown. Kale grows best in soil temperatures ranging from 60 to 65 ℉. All types, like chilly temperatures, will benefit from a bit of frost. Kale becomes bitter in the hot heat.

Kale is biennial, which means it has two growth stages (or years) to finish its life span. However, it is typically planted annually. If subjected to solid frosts or ice, it will break. However, if the winter weather is moderate and there is enough water, it may be cultivated throughout the season.

Fertilizer

Mix the fertilizer into the upper 3 – 4 inches of ground when sowing. Then, water your kale as directed on the fertilizer package during the growth season. Mulch or a high-nitrogen plant fertilizer should be used.

Also Read: How Long Does It Take For Green Beans To Grow?

Kale Harvesting Tips

Kale takes around two months to ultimately grow from when it is planted, although you can pick immature leaves even before the crop matures. More giant leaves should be picked from the edge of the plant, while tiny leaves should be allowed to develop from the center.

Kale greens may be harvested many times out of the same crop. Store gathered kale blades in an open plastic bag to keep humidity. After harvesting, kale leaves may be stored in the fridge for a week or so.

Picking Baby Kale

However, gathering baby kale takes less time than over-harvesting full-sized kale. After sowing the seeds, you may begin harvesting young kale leaves in around 25 days. Once the plants are approximately 4 inches, the baby kale is suitable for gathering and serving.

Baby kale is simple to pick. Grab a bunch of the tiny plants and chop the stems using a fine knife or scissors. To permit the leaves to regenerate, leave around 2 inches of stems on every plant.

Diseases & Pest problems

Several brassica pests and illnesses attack kale, including cabbage moths, aphids, slugs, snails, and other soil-borne diseases. Onions, potatoes, beets, and artichokes are all excellent companion plants.

Raising kale during the cold months keeps many bug problems at bay. Because fungi grow in damp soil, the soil must be well-drained to resist diseases. Crop rotation is advised, so that species of cabbage group are not produced in the exact location the following season. This decreases the possibility of pests and pathogens accumulating in the ground.

Safekeeping

A given plant can generate hundreds of seeds, which must be stored properly to be viable. Please put them in paper bags or glass containers.

On its side to the center of the frame, a little white ceramic container has Brassica oleracea seeds pouring out onto a wooden surface. Beside it are several tiny microgreens with a bit of earth on the ends of the stems. Once wrapped, they must be stored in a cold, dark place to maintain their moisture levels.

Temperatures about 50°F and humidity levels of 40 % are optimum, making the vegetable section in your fridge a suitable storage location.

Unheated basements, gardening sheds, and vegetable cellars are all suitable options. If the temperature in the unheated regions is near freezing, put your seeds pot in a compact plastic beverage cooler before storage. They may be kept alive for up to 4 years if properly preserved.

Conclusion

Kale is a multipurpose kitchen staple that is simple to prepare for both novice and experienced vegetable plotters. Many types are accessible to cultivate in the Uk environment, ranging from curly red & frizzy green to the grand deliciously salty leaf of Cavolo Nero.

The best part is that they can be planted anywhere there is some outdoor area—plant in vegetable patches directly in the ground or in a pot on a patio or balcony.

They aren’t picky with soil and can work in bright and shaded conditions. Many people believe that the majestic or ruffled blades are elegant enough to stand out among plants and flowers.

Growing from seeds is an inexpensive way to feed yourself fresh leaves throughout the fall, cold, and spring, harvesting entire or plucking side stems to add to mix stews and salads.

How Often to Water Green Beans- Fix Overwatering

Huge, healthy green beans (Phaseolus vulgaris) contain high essential elements such as carbs and potassium. Growing your home bean plants enables you to eat these veggies right from the plant.

If you maintain them properly, you can grow significantly more beans. To grow sufficient large beans for food, the plants require an adequate quantity of water.

How Often to Water Green Beans?

Photosynthetic activity energy and a plentiful supply of water are required to form the bean pea; plants require around 1/2 inch of moisture per day throughout the flowering and pod development phase.

For this reason, the plants must be watered regularly to restore the water absorbed by the plant root throughout the growth stage. To prevent water stains on plants, water when the sun is already out.

Also Read: How Long Does It Take For Green Beans To Grow?

Green bean varieties to grow:

Several tasty bean varieties may be planted in yards and pots. They can be classified based on their edible portions (pods vs. seeds), how they are consumed (fresh pods vs. fresh seeds vs. dried seeds), or their growing habits (bush versus pole). This is the category that makes good sense to green beans.

  • Bush beans – These beans develop quickly and easily, with most types reaching a height of 12 to 24 inches. After the seed germinates in springtime, the harvesting typically starts in 7 to 8 weeks that can last roughly three weeks.
  • Pole beans are either runner or vining pinch beans that develop to reach 8 to 10 feet in height. They must be grown and developed into a vine, teepee, tower, nets, or any other structure produced 11 to 12 weeks after sowing. The harvest time is more significant than bush beans, extending six-eight weeks.

Watering green beans plants

Avoid soaking the tops on your bean seedlings while watering them. Instead, concentrate your attention on the roots. This allows the seedlings to draw the most water. Watering should be done in the early hours of the morning. This allows any remaining water to evaporate during the blazing sun.

When water lingers on the tips of the plant for a lengthy amount of time, the fungus may form on the leaf tissue. If there is no rainfall, a thorough soak weekly should suffice.

If the plant doesn’t get enough water, the blooms may fall off the plant. No flowers mean no veggies; thus, a steady water supply is required for the crops to grow.

Examining the Soil Moisture Content

Bean plants exhibit stress from water shortages by having a grayish hue on their foliage. Allowing the plants to reach this stage should not dictate your feeding practices.

For the most precise estimate of water levels, dip your fingertip into the adjacent soil. If your fingertip goes 3 – 4 inches lower and the ground turns dry, you must water right away.

Watering Method

Water is delivered deep into the soil using efficient watering methods. Using average sprinklers watering bean plants is the least efficient strategy; the water might sit on the foliage and evaporate before hitting the bottom.

To irrigate bean plants, use manual watering or proper irrigation lines. Avoid spraying later in the day to lessen the probability of plant pathogens attacking the saturated leaf surfaces.

Overwatering green beans

Keep bush or pole beans adequately hydrated, but be cautious not to over-water since beans decay in the soil if over-watered. Let the topmost soil level completely dry between feeding your seedlings to prevent this.

Understanding when or how much to supply water is second nature as they rise from the ground. If the soil appears parched and your crops begin to wilt, this indicates the plant requires more water.

Also Read: Tomato Branches Curling Down

Underwatering green beans

The most prevalent cause of wilting bean foliage is a water shortage. Water is required for a plant to generate its nourishment.

The green bean crop gets distressed and weaker in the absence of water. The withering of the foliage is among the earliest indicators. If the foliage does not straighten up after a good watering, it is necessary to research more.

Growing Green Bean Plants

Beans, for example, are often sown straight into the ground in your yard. They may, nevertheless, be transferred into the yard as tiny bean plants. The most important thing to know while growing green beans would be not to put the seeds too soon.

Planting the seeds very early can cause them to decay in the chilly, moist soil. There are several techniques for getting an early lead on growing them, but you should still be cautious of frost harm.

Placing black plastic to warm up the ground is an excellent way to get a head start on sowing.

This will keep the seedlings from decaying due to winter because the black plastic will heat the ground from the sun while also protecting them from dampness.

Another suggestion is to utilize inoculants. Even with these precautions, it is vital to be aware of cold, which can pose a risk to seedlings once the seeds have sprouted.

Before sowing the seeds, examine the climate and temperature regularly. Take note of the final frost dates in your location.

Also Read: When Is It Too Late to Plant Garlic?

Selecting and Arranging a Planting Location

Beans plants thrive in well-draining soils with average fertility. Beans usually do not require additional fertilizer since they fix their natural nitrogen from the ground.

Nevertheless, in autumn, inadequate soil should always be modified with old manure and compost before transplanting (or before sowing during the springtime). Beans need soil pH ranging from mildly acidic to balanced (6.0–7.0). Establish any pole bean props before planting.

Planting

Sow green beans just after any threat of cold has gone in the springtime. Plant these in the autumn, 10 – 12 weeks ahead of the first forecast winter. For every 100 ft of green bean line, use 1/4 to 1/2 pounds of seed.

Employ fungicide-treated seeds whenever feasible to prevent seedlings from illness once they are established and thriving. Do not consume treated seeds.

Place bush beans approximately 1 inch down and 1 – 2 inches away in the line. Rows must be spaced 2 1/2 to 3 ft away. Prune the vines to 3 – 4 inches apart once the beans are grown.

Plant seeds in lines 3 to 4 ft apart between pole beans. Put them 3 feet wide in a row on slopes. In the center of every hill, put a 6-8-foot pole.

Sow 3 to 4 seeds in the ground around the pole, approximately an inch thick. The bean plants will climb the bar as they develop. Sow when the soil is wet enough for the seedlings to sprout and grow fast.

Green Bean Harvesting

Once the sugar content in the beans is maximum in the mornings, harvest these. Green beans are harvested while they are new and fragile, before the seeds within have reached maturity. Harvest green beans daily; the more you gather, the more beans will develop.

Check for solid, substantial parts which can be split and are about the thickness of a pencil. Pinch or clip the beans from the plant, taking care not to damage it.

When snapped, new beans will break readily. Green beans go past their expiration date when the seeds inside begin to bulge, and they will taste harsh.

Also Read: How Long Does Horseradish Take to Grow?

How to Keep Green Beans Fresh?

Refrigerate beans in a sealed, moisture-proof jar. Even though stored correctly, beans will stiffen with time.

Beans could be stored fresh for around four days after harvest or blanched and stored in a freezer right away. Beans can be frozen or pickled as well.

How to Raise Beans in Containers?

When planting beans in pots, the most significant factors to consider for effective maintenance of cultivated bean plants are the type of soil, irrigation, pot thickness, and environmental parameters. Cover your pot halfway with bean and veggie potting soil.

You may buy a ready-made veggie start mix or prepare your homemade. Combine sphagnum moss/manure with sterilized soil and vermiculite equal measures. Before planting, add veggie fertilizer or compost.

One can alternatively use a soil-free mixture as a potting solution for beans. Plant seeds one inch (2.5 cm) down and keep them wet until they sprout. For vining kinds, spread the seedlings 3 inches (7.6 cm) away or sow 2 to 3 seeds around every pole.

Green Bean – Insects

A variety of insects eat bean plants. Many factors can contribute to wilting leaves. Blister beetles are minor winged bugs that tend to congregate in clusters. These not just eat, but they additionally release a poison that blisters and wilts the foliage.

Leafhoppers generate dark edges and wrinkles on foliage. They move fast and, therefore, will bounce away if the vegetation on which they are perched is touched.

Green Bean – Diseases

At least four diseases cause shriveled leaves. Bean mosaic virus (BMV) promotes leaf cupping downwards along the primary stem. Anthracnose is a fungal infection that intensifies in chilly, wet weather. It enables withering by causing lesions on the foliage.

Bacterial blight appears as brown spots that develop and give the blade a burned appearance: damping-off – a fungus that lives in the ground and damages the root systems. Vegetables do not thrive properly, and those who do bloom appear withered.

Green Bean Fertilizing needs

Green beans being low feeders require no additional fertilizer other than what is provided from putting natural material to the land when growing green beans. Nitrogen fertilizers are damaging to green bean growth and therefore should be prevented.

Beans’ Upkeep

Plants may require a little coaxing to hook the supporters at first, but they will soon find their independent way up. Bush varieties rarely need any support. However, top-heavy plants filled with beans would benefit from short canes, branches, or pea sticks to hold them off the soil.

In the dry season, retain your beans regularly hydrated, particularly as they start to blossom. Mulching all-around roots of the plants serves to maintain the soil wet for extended periods and makes weeds work harder. Weeds that still do poke around should be eliminated by hands to halt harming the base of the bean plant.

Once the pole beans have hit the peak of their stakes, pull out the tips. This keeps them from being an unwieldy tangled mess and directs the plants’ energy toward generating more blooms and beans.

Conclusion

Planting green beans is a beautiful hobby for kids since the seeds are big and straightforward to sow, and planting pole beans onto a tipi or any other vine may make a delightful shady space in the yard for youngsters to play. Pole beans may also be grown in the front of or over sunlit windows to aid in keeping your house cooler throughout the summer months. Green beans are easy to plant and their upkeep is also simple. So keep your garden filled with these veggies. 

How Long Does It Take For Green Beans To Grow?

Green bean, also called Phaseolus Vulgaris, is a common annual plant or even the french plant that people use in day-to-day life. Most green vegetable hatters might love to eat this vegetable because of the taste. The preparation process for this plant also matters, so people should prepare green beans in the right way.

Many names are commonly known, and some of them are french beans, string beans, and much more. In french, to distinguish long and short beans, they have created a new name: Baguio beans or habichuelas. But most plant growers doubt how long it takes to grow green beans?

Bush beans might take around 50 to 55 days to grow, while the green or pole beans take around 50 to 60 days to grow the plant. The usual size of this plant and vegetable might vary according to the growing conditions, but this plant might generally grow around four and six inches in length. Soon after achieving this stage, people can easily cut down vegetables and use them for various purposes.

This crop remains the favorite crop for cooking and eating for many people as the mild sweetness in beans has been the favorite taste for many people. This type of crop can grow well in your garden for a long time, and hence the period for producing this kind of crop is very low compared to other crops.

How Long Does It Take To Grow Green Beans?

Green bean is a warm-weather plant, and hence it is planted after the spring frost of each season. It can grow well up to 6 inches and can be found in places where there are warm weather conditions. It grows well in solid pH levels between 6.0 to 6.8.

It suffers a lot when the soil bone dries, so it is a must to look at some essential criteria and water the bean plant in regular intervals to avoid problems in growing the plant in a proper way. As mentioned earlier, it will take around 50 to 60 days to germinate and grow well in suitable weather conditions.

When the plant is placed in direct sunlight, it must water the soil and allow it to saturate in direct sunlight. Moreover, fertilizing the soil is also necessary as the fertilizer might support the soil to achieve proper ph l; levels which eventually strengthens the plant better. The fertilizer can be applied in the form of the 10-10-10 method, and hence applying this method, it is clear that people can quickly grow the plant with many effects.

The effects of growing the plant in different weather conditions may vary, and hence people should follow the advice of an expert to grow the plant properly. The methods to grow the bean plant can also be found by viewing the advice of an expert.

Also Read: Watering Sweet Potatoes?

Planting Green Beans Plant

The plant grower can also decide the growing style as this plant can be grown by using two methods: the pole and bush. But we cannot find much difference in this method as both ways have direct sunlight to grow the plant.

One of the important things is that people should never sow the plant in wet or even in cold conditions as planting this seed with this condition might lead to root rot or make the plant die in a short time.

Root rots can be cured if found in a short time. But the burnt leaves or even the health of the plant can be decided by placing the seeds after the soil reaches that particular temperature. For instance, the soil can reach a maximum temperature of 70 degrees F or 21c to place the plant at the right temperature.

Most of the bean seeds can be planted directily into the garden, and there is no need to do any other additional steps to keep the plant in the garden. These plants can be germinated well, even in normal conditions. If the germination process is slow, planters can add some additives like fertilizers to make the plant grow well in all weather conditions.

But it is always better to plant the seeds in the recommended weather conditions to make the plant grow properly. Transplanting this plant will be a bad idea as the root must have been set to a particular location, and it will be critical for plants to coordinate well in all the soil and even in weather conditions.

Generally, these plants can survive well in almost all weather conditions, but it requires fussing to thrive well, even in moderate weather conditions. One of the common threats that every bean plant might face is pest issues. Pests like ladybugs with 16 dots on their back might attack the plant, and it would be a significant problem if left unrectified for a long time. So to avoid this, people can use row covers and prevent pests. Pests might even make the plant die in a short time, so they must be treated in a proper way to avoid the pest in your garden area. These pests can be a great danger for plants, and eliminating this will be mandatory to maintain the plant in good condition.

Also Read: Tomato Branches Curling Down

How Long Does It Take For Green Beans To Grow?

The exact time for growing the green bean plant is around 11 to 12 weeks, so in this time, the plant can attain its maximum growing levels, and it will provide been of size 6 to 6.8 inches, so it is the exact time for properly growing this plant. This growth can be attained by planting the seeds in suitable climatic conditions.

Tips For Growing Bean Plants Properly

1.   Balancing pH levels of soil

Not only for bean plants, balancing pH levels in the soil is essential to make all the plants attain proper growth. If the Ph levels are not balanced, people might face some issues in achieving adequate plant growth. Beans can produce nitrogen on their own, but it is necessary to provide these plants with soil rich in all the nutrients. A normal red soil or soil that is rich in other minerals can make the plant attain proper growth in a short time.

2.   Providing Sufficient Sunlight

Providing your soil with excessive sunlight is a must as these plants can grow well in good sunlight. This is a must-know factor so people can place bean plants in open gardens or even in open weather conditions to achieve a good aroma and texture. This will also make the bean achieve great taste.

But high temperature can also burn the leaves and kill the plant, as it is necessary to monitor the level of heat allowed to fall in the plant. Or people can also place some covers to allow only a little amount of sunlight. It will be great if the plant has moderate lighting and heat conditions.

Also Read: When Is It Too Late to Plant Garlic

3.   Maintaining the soil

This plant’s soil must be maintained properly, but how to maintain it properly? It is necessary to have well-drained plants and soil to grow them properly. In general, bean plants require 2 inches of water every week, and it is more than enough to maintain the plant in good condition. The more water, the more chances for making the root rot quickly. Always water your plant with care and never over-water the plant.

Also Read: How Long Does Horseradish Take to Grow?

How Long Does It Take To Grow Green Beans From Seed?

Even the plant’s growth from seed will be around 50 to 60 days, but the growing time might vary, and people should know the exact details for the delay in the process. But if people prefer to follow the above-mentioned points, they can grow the bean plants quickly. It is also said that the plants will make the surroundings fresh and keep the environment eco-friendly by providing excess beans for a long time. Moreover, this plant must be provided with sufficient fertilizer and additives to avoid pests.

Final Words

Hence, we have seen some common factors that might help your bean plant grow well, so now anyone can choose the right place and time to plant the seeds. These plants can also be grown well in indoor conditions, but the lighting and heat conditions have to be maintained properly to have better growth even in indoor conditions. Most plants can be grown well by providing basic care for that particular plant, so care for your plant and have a great free time experience by spending time with your plants.

Watering Sweet Potatoes: How Often to Water?

Sweet potatoes aren’t linked to potatoes in any way. Although orangish sweet potatoes are the most common, sweet potatoes can also be white, yellow, or purple.

Sweet potatoes keep growing slowly and are always sown in the springtime since they demand four months of hot weather to build up whole tubers. Bush kinds are also available for tiny gardens.

We will learn how much and often watering sweet potatoes is required. But let’s start with how to plant a sweet potato and its requirements.

Planting Sweet Potatoes

Creating your slips is straightforward, and you may choose a sweet potato of last year’s crop, a supermarket shop sweet potato, or a vendor’s field sweet potato. Look for tubers that are free of dark spots and disease.

You’ll probably require a couple of sweet potatoes in slip growing, based on how many seedlings you want. Evey tuber has the potential to produce lots of slips.

When you have the sweet potatoes, there will be two ways to make slips:

  • Insert toothpicks into the upper third of the potato, then place that in a jar full of water, such that the lower two-thirds remain submerged.
  • Cover a pot, sowing tray, or deep container using pre-moistened, high-quality soil mix and lay’s entire sweet potato on its surface inside it. Cover the pot halfway with soil mix to reach the lower portion of the sweet potato.

Put your sweet potato pots or jars in a light, warm location and relax. The slips usually appear after a few fortnights, but they can take two months.

This suggests you begin the sweet potato slips approximately two months ahead to plant them in the yard.

Also Read: How Long Does Horseradish Take to Grow?

When Should You Plant?

Because these species are tropical, wait till the ground has wholly heated before sowing.

Sweet potatoes are frequently grown in high rows approximately 8 inches tall to provide them a good start.

This allows the soil to warm up quicker and leaves it well-drained. Placing plastic on the ground would also heat up quickly if you plant in a colder region.

Choosing a Planting Location

Sweet potatoes might very well grow in any ordinary, well-drained land in a bright place. If the ground is too thick or rough for sweet potatoes, try growing them in high beds loaded with sandy yet rich potting mix.

Check this out: Why Tomato Branches Curling Down?

Support, Level, and Distance

Put slips 12 – 18 inches away, with rows 3 to 4 feet off each other. Allow lots of space for the plants to grow and grow in.

Perfect Growing Environment

Sweet potatoes are notoriously difficult to prepare. Cool-weather, on the other hand, they despise. Even a minor cold will harm them.

They do, however, function well in high temperatures and drought. Nonetheless, the more acceptable the growth circumstances, the greater the yield. Because this is a root vegetable, soil quality is quite essential. It is best to grow in the mildly acidic ground with a 6.0 to 6.5.

The sun-loving tropical plant will thrive in well-draining, nutritionally dense sandy soil. Raised beds are another good alternative because they heat up fast and are generally complete with a loamy earth combination. Roots may proliferate in loose soil.

A week or two before sowing for increased fertilizers and raw material, add some fresh, natural manure. If you favor chemical fertilizers but don’t want to get your soil analyzed, use a combination of 5-10-10 N-P-K (nitrogen, phosphorus, potassium).

Remember that excessively high nitrogen results in robust plants but a slight crop. Add a natural mulch coating, like pine bark and grass clippings, to protect and conserve soil water and warmth while reducing weeds.

When plants begin to grow, you may presume they’re rooted. Containers also work nicely but don’t attempt to jam so many slips into a tiny space. The number of tubers that grow per plant will be drastically reduced when you do.

Plants that have ample area to develop will yield a considerably greater crop. After they are well set, sweet potatoes may thrive in dry areas.

You’ll have to feed it just once a day for a week, subsequently once per 2 days for another week or two, then finally once a week with one inch of water.

It’s also vital to remember that you shouldn’t water the sweet potatoes for the final three weeks before harvesting; else, ripe tubers can break.

Also Read: When Is It Too Late to Plant Garlic?

How frequently should sweet potato plants be watered?

In general, checking the top half-inch of topsoil for the moisture is the most straightforward approach to estimate how frequently to irrigate the sweet potato vine plants.

As a general rule, water it when the sweet potato vine is dry. There’s no need to feed the sweet potato vine if it’s still soggy or wet in the top half-inch.

How Often to Water Sweet Potato Plants?

When it refers to how much to water sweet potato plant seedlings, always want to be sure you provide your new sweet potato vines with the water they require for their initial growth.

Sweet potato vines are sometimes cultivated in groups. This might absorb water more quickly, so keep a watch on the moisture content for such seedlings.

Watering them moderately more regularly is preferable to feeding them infrequently. When plants are overwatered, they are far more prone to “sinking.”

Far too much moisture in one go also could trigger the plant to detach itself since soil wipes away more easily whenever the plant lacks a firm root system.

Hydrate your sweet potato plant in a few days, if not every day. Stay updated on the top-level dampness of the ground and water the plants if it doesn’t appear damp.

Sweet potato plants develop quicker if they barely receive sufficient water; thus, if the vine is withering and the ground is dry, a lack of water is likely the cause.

Harvesting and storing

Sweet potatoes are generally ready to be harvested when the tips of the vines become yellow or shortly before winter in the north.

To prevent damaging tubers, locate the central crown of the plants you wish to harvest and open an 18-inch large circle surrounding it using a digging tool.

Lift the top and grab your sweet potatoes with your hands. You may clip part of the plants away before excavating to make digging simpler to get the plants off your path.

Harvest prior cold since low temperatures may impair tubers’ shelf life and quality. When freshly scooped, sweet potatoes aren’t lovely; however, they are suitable for sweetened desserts or casseroles.

They require rest and “cure” for a while to draw out their flavor. Wipe off the dirt and set the unwashed potatoes in a sunny (80°F – 90°F), well-ventilated location for around ten days.

A sheltered table outside, away from the rains, works excellent. Any scrapes in the covers will mend as the sweet potatoes recover, and the content inside will grow tastier and more healthy.

This process is essential since raw, uncured tubers do not cook. Following ten days, transfer your cured potatoes to a chilly, dry location, but do not freeze or keep them under 50°F.

Healed sweet potatoes can be kept for six months at temperatures near 60°F with humid conditions; a basement is best, but an air-conditioned warehouse area or pantry would suffice.

Conclusion

Those root tubers taste like sweets in a new diet household with or without the additional powdered sugar. Therefore, if you’re searching for healthy and delicious garden produce, sweet potatoes are indeed the way to go.

This readily kept warm-season food is tasty and flexible for brunch, lunch, and supper. And while it takes up a lot of room in the yard, it’s a relatively simple crop to produce.

Tomato Branches Curling Down: Why & How to Fix

Tomatoes (Solanum Lycopersicum) are a favorite among home gardeners in the summer because of their delicious flavor and low maintenance costs.

On the other hand, tomatoes are subject to environmental issues, infections, and physiological issues, which might culminate in stressed plants.

You certainly visualized your tomato plant standing high, with straight branches stretching for the sky.

On the other hand, your tomato plant appears to be doing all the reverse, reaching out to the soil. Why are tomato branches curling down?

Your tomato branches could be bending as a result of environmental pressure. You might well have overwatered or underwatered the land.

A shortage of nutrition can sometimes cause this condition. Pests and pathogens can also cause the branches to bend.

Let’s go through the significant causes of branch curling one by one. We will learn to fix the issues, so do not worry and keep reading.

Tomato Branches Curling Down

Is the Moisture In The Tomato Plant Overly Stressed / Shriveled?

If the vegetation is now water-starved, it will most likely require water. Put your fingertip into the ground at the root system; if your fingers are 2′′ deep, and the dirt is bone parched, your crops are in desperate need of moisture.

If the distressed plant goes too long without water, it will rapidly wilt. Have your plants well-watered, particularly during dry spells.

When strained, the plants may not blossom or fruit as lavishly, if any; tomatoes have a pretty high moisture content, which implies the plant consumes more moisture than other vegetation

There Are Some Indications of Diseases or Damages on the Tomato Crop

Examine your plant for symptoms of illness or damage:

  • Defoliation
  • Broken stems, feeding action on fruits or foliage
  • Leaf spotting or discoloration
  • Dropped fruit, branch, or flower
  • Disease ridden fruit, fruit with flower end rot removed
  • Also, on plants, a mold-like development or fungal is forming.
  • Insects

There are several potential explanations for dropping and withering branches; nevertheless, the reason for the branch’s drop is noticeable in most situations.

Instead of just wilting, the branch typically shrivels or dies before falling. Pruning unhealthy or dead branches is a good idea. Eliminate them from the yard and dispose of them properly, such as by destroying them.

Instead, search for damaged branches and feeding activity within the plant. If a predator attempts to eat your tomatoes, they are likely clamping down on the stems, driving them lower. If that’s the situation, you must erect prevention measures to keep predators away.

Also Read: How to Turn Green Tomatoes Red in the Fall?

Stress from the environment

Tomatoes are among the most sensitive crops; therefore, even minor changes in the surroundings can affect them. If you have a great deal of wind in the yard, the tomato branches can bend as they strive to maintain the moisture from draining out.

The same thing might happen if the atmosphere becomes very hot. Tomato branches are sensitive to this and will coil up to defend themselves. Pruning tomato branches is necessary to maintain them in excellent shape and yield more fruit.

However, excessive trimming will distress the plant, leaving the branches to bend. Tomato plants can be grown from seeds or purchased from a greenhouse or garden shop as seedlings.

The tomato crop will have some time indoors during both circumstances. As a result, you must be cautious while transplanting the plant into the yard.

If you transfer it without first hardening it, its tomato branches can bend up due to the strain. The good news is that you may rectify this situation. When the tomato plants exposed to natural stress are reduced, it readjusts.

Nutrient deficiency or overabundance

Tomatoes are indeed a hungry resource. From seedlings, till the plant grows and produces fruit, you must provide the proper balance of nutrients.

Tomato branches might fall due to a lack of nutrition. This is a common issue while planting tomatoes in a pot instead of in the field.

When planted on the soil, the roots can extend profoundly and widely in the quest for nutrition. They can’t do that in a container, so you’re stuck feeding them.

When preparing the ground for the tomato plant, We recommend applying natural slow-release fertilizer. The fertilizer will be released into the soil whenever you water the crop.

This slow-release fertilizer might stay for several weeks when cultivating the tomato plant. To make your tomato plants thrive, use this fertilizer 2-3 times through the growing season.

The other option is to fertilize the tomato plants with organic solvent fertilizer. This fertilizer may be applied to both the ground and the leaves.

The advantage of utilizing liquid fertilizer is that the minerals are immediately taken and accessible to the plant. However, you must feed it to the tomato crop every two weeks.

You may also use it when hydrating the tomato plant daily. Just ensure you dilute it properly before doing so.

There’s a possibility that using too much fertilizer can damage the roots. Because they are incapable of delivering nutrition to the stem, the branches will droop.

If this occurs, do not fertilize the plants over several weeks until the branches have healed.

Also Read: How long can a tomato plant go without water?

Shriveling of Tomato Plants Following Transplantation

Transferring tomato plants into a yard or relocating a plant into a larger pot might induce root breakage and withering.

However, as the seedlings begin to thrive in their new home, they usually recover. When moving tomato plants, take better care not to damage or rip the roots and avoid overwatering.

Protect the plants with paper or similar thin, translucent fabric during the warmest portion during the day for a couple of weeks since you’re bringing them out and into an exposed, sunlit location to preserve them until they adapt.

Tomato plant stems curling down

Stem curling, which is connected with many infections, is one indicator of a tomato issue. Understanding the root cause is critical to developing the right plan for this possibly fatal condition.

Tomato plant stems are prone to breaking, particularly when overburdened with ripening fruits. There are other factors too that might bend the stems of a tomato plant.

Wind, insufficient support, poor handling, and predators are all potential reasons for damage. If the damaged stem doesn’t bear fruit, pruning the stem would be the perfect idea for the plant.

If the stem holds fruit that has not yet matured, you can attempt to repair the stem at least long enough to save the tomatoes. Different types of breakage require various fixes, from simple splints to grafting.

Also Read: How To Hand Pollinate Tomato Flowers?

How to fix Bending Stems?

There are a few ways to fix this. Follow the measures given below and soon you will find your tomato plant stems healing.

  • Lift the plant high to realign the stem into its appropriate position.
  • Put a brace along the stems, including a wooden craft piece or a bamboo stick, with similar stick sections extending along each bend. If required, put one inside and outside; each is bent for additional stability.
  • To fix the parts, wrap bridging tape over the stems and splints. Pin or bind the plant to stabilize the limb as it heals. The slings may have to be relaxed or withdrawn as the stems develop.

Tomato Plant Problems – Growing in a pot.

If tomato plants are grown in pots, the foliage of the plants tends to curl. This is primarily due to the following factors:

  • Inadequately Small Container – Consider relocating to a bigger 1 to 2 square foot container.
  • Irregular watering – Because containers empty more quickly, evaluate your watering routine and take into account drip-feeding.
  • Soil Quality — If the soil conditions are inadequate, try covering organic materials such as kitchen waste.
  • Nutrients – In addition to those mentioned above, ensure you are serving on time. This is especially crucial when growing tomatoes in pots since minerals can readily escape.

How to Avoid Tomato Branch Curling?

There are precautions you may take to reduce the danger of curl. Certain variables, such as the environmental and climatic circumstances, are basically beyond your hands. Below are some tips to keep in mind when you see tomato plant branch curling up –

  • Plant Varieties that are Resistant to pests
  • Watering and feeding should be done regularly.
  • Pruning in the right way
  • Proper Plant Spacing
  • Think about other plants.

Companion planting is yet another protective approach to explore. The plants you cultivate with tomatoes may hopefully prevent illness and potentially enhance the flavor of your tomatoes.

Conclusion

We hope this information has assisted you in understanding why the tomato plant’s branches are curling. This is a typical symptom of a distressed tomato plant, do not be alarmed; this could quickly grow out of it.

We always appreciate learning about folk’s tomato plant difficulties, and We are committed to assisting others. Please do not hesitate to get in touch with us and share your challenges or accomplishments!

Therefore, if you notice tomato plant stems bending, keep the following in mind:

  • Don’t Jump to conclusions – this is not a great difficulty
  • Check the list of potential problems.
  • Begin with tiny modifications and reassess every week.

When Is It Too Late to Plant Garlic and Harvest?

You can plant Garlic anytime, but the harvest will be affected if the time isn’t right. Garlic comes in a variety, but two prominent ones are usually grown – Softneck and Hardneck Garlic.

Even though Softneck Garlic can be planted in the very earliest days of spring if necessary, good harvests are acquired by growing in the autumn. Hardneck garlic, in particular, benefits from being planted in the fall.

Planting should begin once the soil temp at 4″ deep reaches 50°F. 9 a.m. is the standard time for temperature readings.

So when soil is not frozen, the garlic root systems will thrive, and the layers will flourish when the average temp is over 40°F.

The primary objective in colder climates is to get the Garlic to develop roots before the cold spell, yet not to contribute to making top development until after the toughest of the cold season has passed.

The main objective in hot climates is to have sufficient top progress in getting a head start during the spring, and though not so high that the foliage can’t survive the winter.

Please read below to know when it is too late to plant Garlic and how not to make a mistake.

Also Read: How Often to Water Eggplant?

Garlic Planting Time

The most significant period to plant Garlic would be in the autumn for most areas. Do not plant Garlic till after the fall season equinox, which occurs in late September.

Garlic, such as onions or other Allium crops, is delicate to time and develops during the summer’s lengthiest days.

It gets a bit of an advantage on the planting season by growing in the autumn, and it’ll be among the first items to sprout in the vegetable patch upcoming spring.

Garlic harvesting can occur anytime between May and August, relying on its date of sowing, weather patterns, and the kind of Garlic grown.

It can’t be taken too soon or too late, and yet how you can say once your Garlic is ready to be harvested when its bulbs are deep into the earth?

It is all about the leaves, in a nutshell.

Beginner Guide to Start Planting Garlic

If you’ve already tried to plant some other bulb in your vegetable patch, you’ll notice that Garlic isn’t all that unique. Below are the guidelines for sowing it step-by-step.

Step 1: Make preparations for the garden bed by removing any crops or weeds that may have grown there previously.

Step 2: Blending in all-purpose fertilizer granules, organic manure, or natural worm castings to soften up the ground. Make sure to get rid of any rock layers or massive twigs as well.

Step 3: Closely separate the bulb into independent cloves, retaining the thin skin.

Step 4: Place the cloves 6-8 inches apart on the soil surface.

Step 5: Plant every 2-3 inches deep with the spiky tip-up.

Step 6: Lightly bundle soil over the top of the cloves to conceal them.

Step 7 (optional): Accommodate the bed with compact gardening mulch when you’re planting during the autumn.

Also Read: Best Potting Soil For Tomatoes

Where Should Garlic Be Planted?

Plant the Garlic in full sun with proper drainage in well-drained soil. Garlic can not endure wet yards, so pick a location where the moisture will drain quickly.

It also thrives in unrestricted, fertile soil with few barriers. So make sure to add worm castings, organic manure, or an all-purpose natural fertilizer to the earth. Also, clear the grass, twigs, and rocks from the ground.

Uses of Garlic

Garlic has traditionally been treated as a medicine and its many culinary applications. Although it is renowned for having anti-bacterial, antiallergic, and antifungal qualities, actual scientific research in human beings has produced mixed results.

Garlic plays a crucial role in lowering the buildup of some forms of cholesterol and regulating blood glucose levels in individuals, but the mechanisms are unclear.

Garlic is used in long-established medicine to cure parasites, inhibit the cold virus, and treat breathing issues.

Garlic is full of protein, vitamin C, calcium, potassium, micronutrients, and other healthy compounds, regardless of how it is consumed.

It can be consumed raw, cooked, and kept in oil, wine, and vinegar. Then it serves as a foundation for a variety of recipes and dips (hummus, pesto, aioli, vinaigrette, to mention a very few) that can all be stored in the fridge and kept healthy for days.

Dried Garlic can even be ground into a fine powder and stored for approximately a year in a sealed container. When using powdered Garlic instead of fresh Garlic, 1/8 teaspoon equals one fresh clove.

Also Read: How to Turn Green Tomatoes Red in the Fall?

Garlic patch upkeep

Mulch well enough with dry leaves after plantation. After stalks have emerged, mulch must be left in the spot to prevent weeds — except if the soil is becoming too wet.

You can also add Mulched leaves to the soil to enhance the surface and loaminess. Water early morning hours, once the top few inches of land feel dry.

Garlic Harvesting: The when How

Harvest your Garlic when the lesser third to half of the foliage has transformed brown and shriveled up, but the top leaves are primarily green between the close of July and August.

It can be challenging to know when to harvest so that the bloom stalks might help. It’s harvest time when the foliage begins to turn dull, and the scapes scrunch up and stand straight.

Garlic Sowing and Distance

Garlic can be grown from garlic cloves or bulblets. Place the cloves inside the surface with the tipped side up and the curvaceous piece down (the root part).

Set the cloves 6 to 8 inches (15-20cm) off and 1–2 inches (2.5-10cm) deep. Rows should be 12 inches (30 cm) off from each other.

When planting, incorporate a tbsp of 5-10-10 fertilizer, bone meal, or fish meal to its lowest part of the pit. Before putting the clove in place, scatter a little soil over the fertilizer.

Plant just pest and disease-free, solid, better, and healthier bulbs or garlic cloves.

Also Read: Why Are My Tomato Flowers Falling Off?

Garlic in the Warmer months: How to Cool It Down

Choose a location that will be partially covered during the sunniest time of the day.

Mulch profoundly with a light-colored substance like straw to reflect sunlight, help shield the ground from high temperatures, and hold moisture, each of which serves to maintain the soil temperature down.

Mulching also protects the Garlic from becoming too chilly in regions where the soil freezes. Mulch alternatives include potting mix, cocoa mulch, and Mega Mulch.

You may use a shade cloth to protect your garlic patch.

The largest garlic cloves produce the most oversized garlic tops. Big garlic cloves have much more power and are therefore more resilient to winter harm, which will aid your Garlic already off to a decent start.

Pick the biggest cloves for sprouting garlic heads and the relatively small cloves for developing spring green garlic while dividing cloves for plantation.

Pick the bigger of your collected garlic tops for plant garlic and cook the tinier tops if you stored a few for planting.

Although the bigger ones are much more appealing, choosing more giant heads for planting this year means you’ll have even more big heads in the coming periods for planting and consumption.

Also Read: Why My Pepper Plants Leaves are Wrinkled?

Garlic Storage for Long – term survival

Utilize fresh Garlic or help treat it for later use. Treat Garlic in a warm, dry, dull, and well-ventilated area. Allow bulbs to cure for 2 to 3 weeks.

You can cure Garlic by hanging it in small loose clusters. Tie twine around the heads of the plants and place those to dry—cure Garlic between 60 and 90 degrees Fahrenheit (15 and 32 degrees Celsius).

Once the Garlic has cured, eliminate the leaves and stems. Store fully grown bulbs in a chilly, dry place in a sieve or net sack. Garlic can be kept at 35° to 40°F (1.7-4.4°C) for 5 to 8 months.

Cloves that have been peeled and scraped can be cooled in a sealed jar. Garlic cloves that have been peeled can indeed be canned or preserved. Pluck fresh garlic leaves and use them as fresh herbs.

How Long Does Horseradish Take to Grow?

Horseradish can be grown from crowns or root clippings that are sown 4 to 6 weeks before the usual final frost season in your location.

Horseradish is finest cultivated as just an annual because it is a resistant perennial. Plant horseradish in a pot to prevent it from expanding in the yard.

Horseradish is a tough annual planted for its bitter roots, that can expand to be 2 feet (.6m) tall and narrow.

Horseradish is best grown as a perennial since the roots might become rough and stiff in the following year. Horseradish is best cultivated in pots since it grows quickly and could become out of hand.

Horseradish can be harvested 140 to 160 days after it is planted. Horseradish is a tough, cold-hardy plant that thrives in areas in which the cold is long enough to put the vegetation into hibernation.

Horseradish comes in two varieties: regular horseradish, which has wide, crumpled leaves, versus Bohemian horseradish, which has thinner, smoother leaves.

Guide to Getting a Herb or Veggie Yard Started Growing Horseradish:

Horseradish mixes are available for purchase. Small root pieces (commonly referred to as horseradish sets) are frequently planted straight into the underlying soil while growing horseradish. Horseradish sets are widely accessible in stores, grocery stores, as well as nurseries.

Select the soil. Horseradish may be cultivated in a wide range of soil types, although it prefers mildly acidic & loamy soils with a pH of 6.0 to 7.5.

Select a growing location. To allow adequate area for the root systems to grow without affecting your existing plants, maintain your horseradish sowing location at least one and a half to two feet apart from other crops. Horseradish should be planted in full sun or light shade.

Allow space for root systems to grow. Horseradish taproots spread fast and can reach a depth of up to a foot (or more, if left unattended for too long). In clear, sandy soil, create a hole 3 to 4 inches shallow.

The trench must also be large enough for the horseradish roots to be laid at a 45 ° angle, exposed root face down, in the trench.

Plant to keep as a company. Rhubarb, sweet potatoes, as well as asparagus, are all great horseradish accomplices, and though don’t plant them excessively close around each other.

Horseradish roots require space to expand, and they may contend for supplies or dismantle the root systems of neighboring fruits and vegetables.

Also Read: Best Potting Soil For Tomatoes

Selecting a Location

Horseradish grows best in the broad sun but may take some shelter. Horseradish can grow in practically any soil, except chronically wet circumstances.

Since you won’t like to relocate your horseradish after it’s established, plant this in an out-of-the-way location.

From Seeds to Fruit

Assemble the bed as directed above. Make a trench 3–5 inches deep. Top the seedlings with sandy soil or manure and plant them in the trench. Trim seedlings to one foot away after they emerge.

Narrow them out to 2–3 feet off when plants reach 4 inches high. To keep horseradish from expanding in the yard, create 2 foot-deep boundaries all around crops.

Horseradish in a container – how to plant it

To enhance root development, pick a good pot that is at least 500 mm broad & 700 mm deep. Load the container with excellent potting matter and place it in a bright but rather gently sheltered location.

In late winter/early springtime, plant 15-cm-long roots in the potting medium, making the apex of the root 2.5 cm beneath the top.

Because crops in containers wilt much more rapidly than perennials in soil, hydrate them frequently. Cut down the number of sprouts to 2 to 3 when they mature to promote root development.

Horseradish Planting Instructions

Place horseradish in kind of a 3 to 4 inches shallow dig by placing sets or segments of roots approximately 18 inches away as well as at a 45° inclination. The lower part of most sets is chopped off at the angle to demonstrate which side will lean down.

Foliage will emerge from numerous spots throughout the length of a set if completely horizontal sowing is used, which is less desirable. Following planting, fill with topsoil.

Also Read: How to Turn Green Tomatoes Red in the Fall?

Horseradish: How to Grow It

The crops put on a lot of surface development over the summertime and then start accumulating starch in their roots in the autumn, which makes them larger.

Water and trim on a routine basis, but only when the crops are immature. Defend the plants from diseases like cabbage worms or flea beetles, which typically target cabbage relatives.

Harvest its roots regularly—ideally, every springtime or fall—and shift the bed to a different location periodically, planting pencil-sized pieces split from the primary roots to avoid the transmission of bacteria or viruses.

Horseradish Harvesting Instructions

Although farmers debate over whether spring-dug or late-fall-dug horseradish has the best flavor, many believe that summer-dug roots are unappealing.

After the greenery has been eliminated by cold and just as the soil freezes, they harvest their primary source of roots in late October or the initial November.

Horseradish harvesting is just a straightforward procedure.

Dig a hole a foot or so deep solely on a single end of the planted row. Using a fork or shovel, separate the roots from the opposite end of the row.

Take the plants’ crowns and carefully pull them out of the ground. Prune the leaves to approximately an inch from the ground. Trim the roots on the sides and at the base.

Keep any that are 8 to 10 inches or taller for sowing cuttings the next year. Knot clean root clippings securely and keep them in damp soil in a cold, dark spot around 32 and 40 ℉ if you’re overwintering seedling stock (0-4 C.).

To prepare the root to be used as a dish, clean them thoroughly and peel them. Chop into half-inch pieces and blend with 1/4 cup water and cubed ice inside a food mixer or blender.

Allow 3 minutes for the purée to sit before adding 2-3 tablespoons white wine or even rice vinegar plus 12 teaspoons salt per cup of horseradish purée. Mix the vinegar & salt right upon pureeing if you would like a milder sauce.

Use a fine strainer or cheesecloth to filter most of the fluid if that’s too sloppy for your liking. The finished product can be kept in the fridge for approximately 4-6 weeks in a closed container.

How to Keep Horseradish Fresh

Trim the leaves to around 1 inch in length and rinse the roots using running tap water, wiping away all impurities. Let the roots dry completely before storing them.

Horseradish should be stored in moist sand in a dark corner of the root cellar. It is not advisable that temperatures drop past freezing.

A little number of roots should store well in a zippered plastic sack in the fridge for up to two months for even more instant usage.

Peeling or scraping the roots is by far the most popular method of preparing horseradish for consumption. Shred the root in white wine vinegar or even distilled vinegar straight away.

Cider vinegar should not be used since it creates discolouration in the shredded horseradish in a matter of minutes. You may mix the vinegar according to your preferences.

After shredding the horseradish, jar it and seal the bottles as quickly as possible.

To keep the pungent flavour, keep it refrigerated on all occasions. Newly grated horseradish would only last a couple of weeks.

After that, make a new stock. Horseradish could also be dried, crushed into a powder, and stored in containers in a dried form. Dried horseradish lasts considerably more than newly shredded horseradish, although it’s hardly as good.

Horseradish Plant Maintenance

Sunlight

Horseradish plants may survive a little shadow, although their yield will suffer. On most occasions, they need to get at least 6 hours of bright sunlight.

Soil

The finest roots should grow in the soft, well-draining ground with plenty of natural matter. Horseradish likewise prefers a little acidic to balanced soil pH.

Water

Horseradish does have a low water requirement. Woody roots with such a faint flavour can develop from a lack of water. Excessively water, on the other hand, can result in weak roots with a pungent flavour. It’s best to get 1 to 2 inches of fresh water each week.

Moisture and Temperature

Horseradish prefers chilly temperatures. It thrives in temperatures up from 45 to 75 ℉, with ideal conditions reaching 60 to 65 ° F.

Humidity is usually not an issue especially as the vegetation’ soil moisture standards are fulfilled and there is adequate air circulation around them.

Fertilizer

Fertilize young horseradish when you first saw it and then every 4 weeks or so after that. Organic material, compost tea, or a synthetic 10-10-10 plant fertiliser could all be used (following the product instructions).

Insects

On the horseradish leaf, the horseradish flea beetle is a major pest. It lays egg groups on the petioles of the blades. The larvae dig into the petioles of the leaflets, killing a few of them.

To keep the Beatles away, gently scatter wood ashes upon that plant. Insect protection in the yard is better accomplished by proper cleanliness techniques.

Infections

Horseradish can get root rot every time to time. To serve as a planting resource, just use disease-free roots clippings. Growing locations should be alternated after 3 to 4 years to avoid growing horseradish in the identical spot.

12 Plants You Can Start with One Cutting & A Glass of Water

There are several plants you can start with a cut and a glass of water!

Does this surprise you? Read more below.

If you’re looking for easier ways to care for your houseplants, plants are ideal for you, which you can start with cuttings and a glass of water.

Plants You Can Start with One Cutting

  • Basil

Basil is an aromatic herb, needs moisture and sunlight to grow, so you should always keep a jar in which the herb gets at least 6 hours of sunlight per day.

When grown in water, the water must be changed daily with this it can prevent the growth of algae and bacteria.

 If you have a lot of plants in a large pot, you can change the water about every month. We also recommend mixing each 1L of water with 1g of a balanced fertilizer such as N-P-K 20-20-20.

Also Read: 10 Houseplants That Will Thrive in Your Kitchen

  • Monstera

Monstera is very similar to vineries in that they grow and tend to climb vertical surfaces around them. As they get older, many plant owners want to store them in order to stimulate their growth. I didn’t have to do this yet, but things can change as they develop.

And since it grows like a vine, there is always plenty of room for new growth. New shoots form and grow at the end of each new leaf. As a new leaf grows, the vine forms a knot. These houseplants can survive in indirect sunlight.

 But not in all cases, these nodes end up as aerial roots, which plants use to cling to and climb vertical surfaces.

When preparing to cut, make sure you have a sharp knife or scissors, and you want to make sure it is clean to avoid contaminating the mother plant or cuttings. You will want to cut directly below the knot or above your head.

  • Heartleaf philodendron

This ancient practice is still an excellent way of propagating a variety of plants, including the climbing or soft-bodied varieties of Philodendron.

 Prepare the philodendron to cut and place it in water. The cuttings will have new roots. In a pot or in a garden after rooting, a philodendron is one of the few houseplants that can grow in water for a long time.

 Fill a clear jar or container with tap water, leaving 1 inch of space under the edge. Leave the water overnight to allow the chlorine to dissolve.

 Cut off a 6-inch stem of a healthy philodendron. Cut with scissors, garden shears, or a sharp knife, cutting off the stem just below the set of leaves.

 So that at least two leaf nodes on the stem are exposed. Soak the leafless end of the cut in water. The top leaves should protrude from the top of the container, and the bare leaf nodes from which the leaves were removed should be soaked in water.

 Change the water every three days, letting the water sit overnight before changing it. After about 10 days, the stem will begin to form roots.

 Move the philodendron to a bright place, but not in direct light. Place the plant near a north or west-facing window, or at least 3 to 4 meters from a south-facing window with curtains.

  • Geranium

      Geraniums are easy to propagate in water and in jars. Take a 4-6-inch cut off a healthy plant, place it in a jar, and place it in a bright place, away from direct sunlight. 2-4 weeks, after which you can transplant it into the ground or use it as a centerpiece.

  • Dragon tree

You can easily propagate dragon blood cuttings in water, take a cut with one or two nodules and place it in a bowl of water filled with nodes, after a few weeks the roots will sprout, and then the cut can be transplanted in the pot.

  • Arrowhead vine

Growing arrowheads in water are as easy as growing a lucky bamboo or potholes! Take the cut stem with the healthy leaves of the plant and place it in a cup of chlorine-free water.

  • Spider plant

Spider plants have many nominal interests and needs. This beautiful air-purifying plant can be easily grown in water by cutting off the seedling from the parent plant and placing it in a jug of water.

Also Read: 7 Houseplants that Reduce Dust and Particulate Matter

  • English ivy

English ivy is easy to propagate and grow. It is an excellent houseplant that can only be grown with healthy cuttings and a jar of water.

  • African violet

African violets are easy to grow from leaves in a small glass of water. The roots will form in about 3-4 weeks and the leaves will grow in 6-8 weeks.

  • Inch plant

This vine, also known collectively as stray beans, is easy to cultivate and thrive in an aquatic environment. Take a 5-6-inch cut with 3-5 leaves, place in a cup of water, and place in indirect sunlight. Soon you will get a new plant!

  • Pothos

Growing plants in water are one of the easiest tasks. It’s the best way to easily propagate this heart-shaped foliage air purifier plant! All you need is a warm area with indirect lighting.

  • Croton

Take a 3-6-inch piece of croton with several leaves and place it in a full glass of water, change the water every 2-3 days, and after 4-6 weeks you will see the cut from new roots. You can grow a single croton leaf with the stem attached to it.