Onion is one of the popular vegetables for most people worldwide. Growing onions is productive and straightforward. Investment needed for commercially producing onions is very limited, and onion plant treatment is also shallow.
So, we’re studying top onion growing methods, tricks, and ideas today. Usually, onions are cultivated early in the summer and harvested after their tops start to die off. Few onion varieties can be planted in fall in the southern US. At the end of this guide, you would be able to know about “How to plant onion?”, “How onion grow?”, the ways to onion cultivation, and so on.
Onion varieties origin:
For centuries, insects such as bees and flies have developed onion (Allium cepa L.) seed by random crossing between plants. This open pollination (OP) results in every onion plant being genetically isolated from many other crops in the environment.
This high degree of genetic variability results in non-uniformity for essential characteristics like maturities, disease tolerance, bulb shapes, etc. Throughout the mid-20th century, breeders began self-pollinating onions to create more scientifically uniform inbred rows.
These inbred onions were less intense and yielded less than their initial OP populations. Fortunately, the natural crossing of two inbred lines for hybrid onion will restore vigor.
Onion hybrids are much more uniform for desirable characteristics, produce consistently higher yields than OP varieties, and comprise 90-95% of US production. Also, classical plant breeding enhanced both hybrid and OP onions.
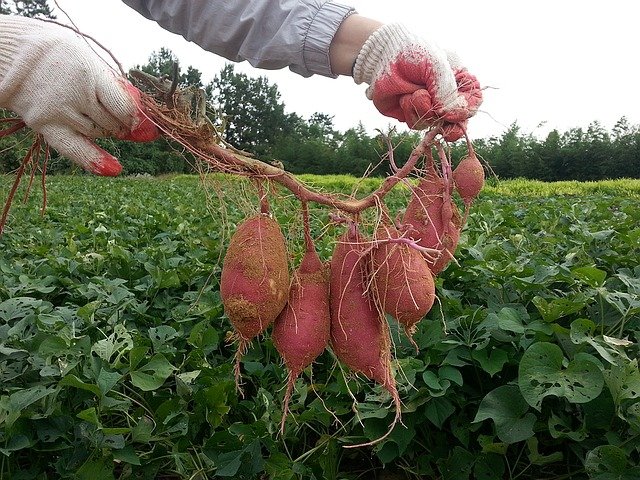
Also Read: Sweet Potato Farming Information Guide
How Onions Grow– seed or sets!
We suggest using onion sets that can be planted without thinking about frost damage and are more effective than growing from onion seeds or transplantation. Onion sets are tiny bulbs marketed exclusively for planting.
After around 3-1⁄2 months, they mature into a full-size bulb. Onion plants grow well in elevated beds or rows at least 4 inches wide. If you’d instead start growing onions from seeds, check our tips on increasing indoor onions.
How Onion Grow: Plantation of onions
You might have several questions on your mind. For example, when to plant the onion?How to prepare the plantation site? Etc. So, let’s begin with the answer to the first question.
How to plant onions and when?
Typically, when the weather is pleasant, plant onion sets outdoors — not cold. Ideally, after planting outdoor temperatures shouldn’t drop to 28 ° F (-2 ° C). Grow onions in regions with a frigid winter as soon as the field can be worked in spring — probably late March or April. In milder climates, late fall or winter will help in onion plantation.
They’ll remain dormant throughout the cold season, but they’ll be able to develop as soon as the longer, milder spring days start.
Continue planting them indoors around six weeks before you intend to move them to the ground. Onion seeds require at least 50 ° F (10 ° C) to sprout correctly. So, you must have now got the idea about how to plant onions and when.
How to prepare for the plantation site?
It’s not a tough job to prepare for the plantation site. You just need to consider a few things before starting right away. Look at those factors below.
- Find a full-sun location so that individual plants won’t cover your onions.
- The soil must be well-drained, soft, and nitrogen-rich; compacted, rough, or clay-heavy soil influences bulb growth.
- Add in any nitrogen fertilizer while planting.
- Conduct onion seed rotation. In other words, don’t grow them at the same place year after year because this will promote disease distribution that affects the seed.
- Attach aged manure or compost in early spring, until planting. Onion plants are fast feeders, needing continuous nourishment to grow big bulbs.
More on how to plant onions
As they develop much quicker (and less total work), we consider increasing onions through onion sets (i.e., tiny onion bulbs) rather than seeds.
However, seeds are also an alternative in moderate, long growing season regions. If seed planting, note that onions plants live for a short period, so start increasing the year with fresh seeds.
Start seeds within around six weeks until transplanting into the field. If planting onion sets, place them 2 to 6 inches apart and don’t hide them farther than 1 inch under the dirt. When transplanting into the field, place plants 4-5 inches apart in rows 12-18 inches apart.
How onion grows – Should you plant a sprouted onion?
Yeah, you can grow a germinated onion, but you will get fewer onions. You’ll get plenty of yellow sprouts, too!
Steps:
- Fill a bowl with potting soil and create a middle hole around the onion’s depth and distance.
- Next, you can place the onion in the hole, and then you need to cover it.
- You now need to water the onion and keep it on the sunny spot.
- Your green sprouts are now ready for cooking, wait. You need to harvest it first!
Note: If you have a flower sprout, wait before the crop dies. Keep seeds for spring planting.
Caring for the onion plants:
Firstly, you need to consider onions a leaf flower, not a root flower. And then, you need to fertilize nitrogen every few weeks for large bulbs.
But you should stop feeding when the onions drive away from the soil and start the bulbing cycle. In addition to that, don’t bring the ground around the onions; the bulb will rise above the land.
And one more thing, generally, by utilizing mulch, onion plants don’t require regular irrigation. About one-inch water every week (including rainwater) is plenty. For sweeter onions, add more.
Getting rid of pests/diseases – Onion cultivation
Before you learn to do away with onion plant pests/diseases, you first need to know about a few pests/conditions that are its foe.
Thrips
Take in the garden a dark piece of paper to monitor thrips — tiny insects about as thick as the sewing needle — and knock on it with their onion tops; if thrips are present, you can see their tangy bodies on the paper.
Any insecticide soap treatments destroy them. Follow packaging rules. Sprinkle the plants twice, and the thrips will vanish.
Onion maggots
Cover with a fine mesh your growing onion crop. Seal it around the edges by shifting dirt. The onion maggot likes to place its eggs on the plant’s base, which is stopped by the netting.
You should also keep mulch off because insects like organic matter to rot and make sure that you collect your onions thoroughly as the season progresses. In stormy times onion maggots are usually a concern, so such measures may be unnecessary when you have a dry season.
From Onion harvest to the storage of onion plants
Now is the time to explore the details about how to harvest and store onion plants. This step is pretty much crucial since it’s the time to reap whatever you have sown with your hard work. So, let’s first begin with the onion harvesting part.
Irrigation needs for onion farming
Irrigation is needed at the time of clove transplantation / dibbling, and moderate watering must be performed on the third day after plantation and subsequent irrigation at 7-10 days intervals depending on soil condition and season. Immediately after planting, water transplants.
Due to the shallow root system, onions need regular furrow irrigation. Stop overhead irrigation causing plant diseases. If the foliage is harmful, yellowish, the plants are over-irrigated. The soil would be too dry around an under-watered crop and broken.
Onions typically need 30′′ irrigation during a growing season, and the closer to onion harvest, the higher the need for water. If the onion doesn’t get enough sunlight, it won’t make a large bulb. When the necks begin to fall, and the onions mature, watering should be stopped, allowing the soil to dry.
Must Read: Pumpkin farming: how to plant, grow, and harvest pumpkins correctly and properly
Micro-irrigation of onion crop
Through drip and sprinklers, irrigation will happen once every three days. A drip machine operating pressure should be 1.5kg / cm2 and 2.5kg / cm2 for the rotary micro-sprinkler. Using nitrogen fertilizers should be achieved by a trickle. Apply 50 percent N as a primal dose and the remaining 50 percent N for seven splits (10 days period up to 70 days after transplantation) via the drip irrigation system.
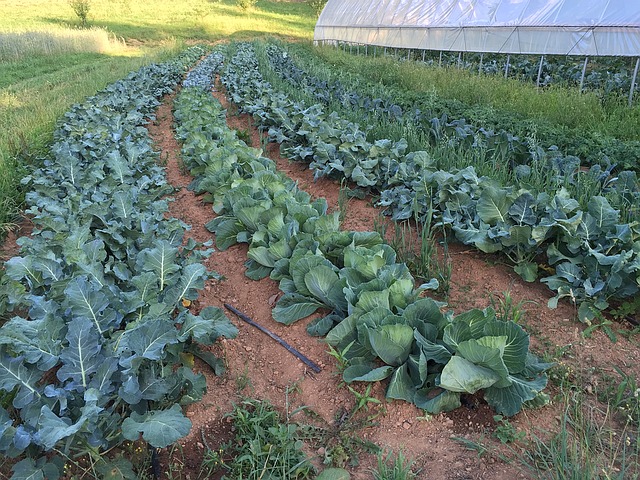
How to plant Onion: Crop rotation
Practical and optimum use of all the applied soil mineral nutrients is impossible. Available nutrients leach and settle in the sub-soil.
Over the next planting season, planting leguminous crops will ensure utilizing these nutrients. Thus, the cultivation sequence of onions and legumes is recommended to preserve soil quality, optimum nutrient usage, and higher yield.
How to harvest onions?
- Pull some onions sending flower stalks; if you see the flower stalk, it means that the onions have stopped growing. Such onions are not well processed but can be used in a few days.
- When onions start maturing, the heads (foliage) turn yellow and start falling over. Bend the tops at that stage or even stump them to speed up the final maturation process.
- You need to loosen the soil around the bulbs to encourage drying.
- Are you observing the brown tops? Great.It’s an excellent time to pull the onions.
- And lastly, ensure that you harvest only in late summer before the weather gets cold. Since mature onions may get spoiled in fall weather.
Harvest onions: Pre and post-harvesting
In addition to the doses of fertilizers as recommended, the crop is watered in rolls of 6-12 days, based on local conditions. Be vigilant about watering turns, such that the plant may not suffer from water tension. When the onion bulb matures below level, the long upper leaves become yellowish and begin to fall off, meaning the crop is now ready for harvest.
When the roots at the bulb’s bottom are dry, they lose their grip on the earth. The stage’s called “neck-breaking.” When 75% of the crop has reached this point, harvesting begins. The pulled-out bulbs are permitted to stay in the field for 4-5 days, which in turn dries up and thickens outer layers, increasing storage life.
Storing the onions
- Clip the roots and cut the tops up to 1 inch (but if you intend to braid the onions, leave the heads on).
- Let the onions recover for a few days, depending on the weather. Often treat them very carefully — the slightest bruise can promote spoilage.
- Enable onions to dry for a few weeks before stocking in a root cellar or any other storage area. You also need to spread them out on a full screen, which should be off the ground to dry.
- You need to store it at 40 to 50°F while removing its stems in a mesh bag.
- You should not store apple or pear onions together, as the fruit-producing ethylene gas can disrupt the germination of the onions. On the other hand, onions can also ruin these fruits’ flavor.
Marketing of onion
Onions can be classified into three marketable categories: spring (“green”), summer-fresh market onions, and fall/winter onions (“dry bulb”). Fresh or green onions are pulled while the tops are still green, usually before a large bulb has grown. Small, light-colored skin may recognize fresh market onions and have edible green tops.
While the new onion market was accounting for the most significant proportion of onion use, other markets also account for substantial production. Most canning and freezing onions come from new market varieties, while dehydrated products use separate types with a higher solids content
Conclusion
So, it was all about the onion farming. We have tried to answer all your questions related to this topic. Whether it be plantation to harvesting and everything in between, we hope you can now kickstart farming practices.