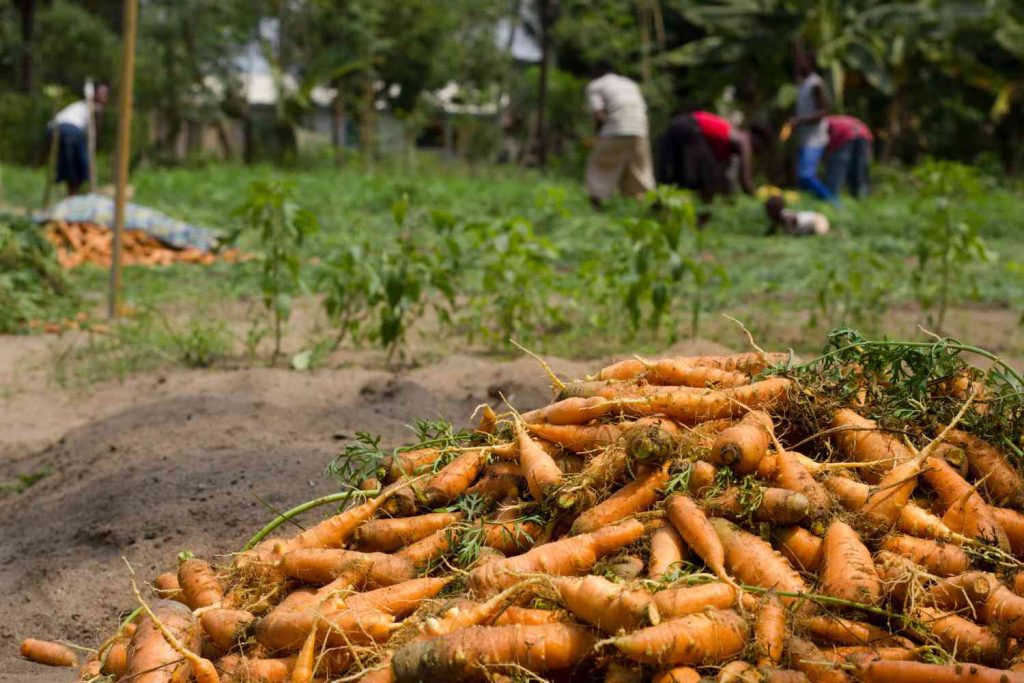
Carrot Farming 101 – Unleash Your Carrot Farming Potential

Carrot is one among the popular root vegetables and can be grown easily in your backyard. It needs well-drained and fertile soil with 8 hours of sunlight. It takes about 70-80 days to grow carrot at home. Regular inspection is needed to avoid pests and diseases.

If you can grow carrots in the garden, you will get the best of the varieties, full of flavor and texture! Carrots are very popular, loved, long-lasting vegetables. And you can grow them in almost any climate. Here is everything about carrot farming methods, planting growing, and harvesting.

You can grow carrots pretty easily if you can use loose, sandy soil during cold days of the growing season – fall and spring, and carrots can tolerate frost as well. Depending on the local conditions and variety, carrots may take two to four months for proper growth. Plant them in summer and spring and harvest them continuously through the fall!

Why is the Type of Soil Very Important?

carrot farming

It is massively important to choose the most suitable soil for profitable carrot farming. If the roots of the carrot don’t grow easily, you may end up getting misshaped crops – of course, the last thing you would want!

Here is how to prepare the soil for carrot farming:
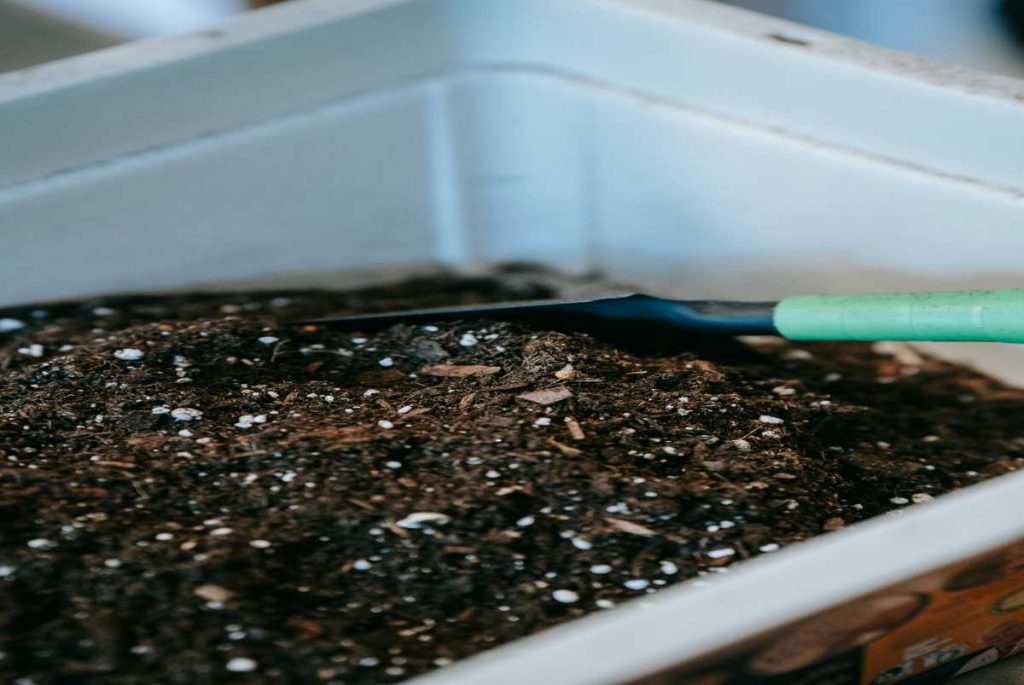
  • Till down 12 inches and remove all the stones, rocks, and even the clumps of soils – ensuring the soil is very smooth and sandy.
  • Don’t amend the soil with material rich in nitrogen like manure and fertilizer, which can disrupt the healthy growth of carrot roots. Working in cold coffee grounds is a great idea.
  • If there are a lot of clay or rocks in the ground, you should think about planting carrots in a raised bed with 12 inches deep trenches filled with airy, loamy soil.

Climate Requirement for Carrot Farming:

Cold weather is ideal for growing carrots but does well in warm climates too.

The optimum temperature for healthy growth is 16 degrees Celsius to 20 degrees Celsius, while temperature more than 28 degrees can drastically affect the production. Temperatures below 16 degrees Celsius may affect the natural colour of carrots, and may even lead to slender roots, while there are shorter and thicker roots in warm climates.

The temperature range of 15 degrees Celsius to 20 degrees. Celsius is very, very good for growing carrots, as you will get attractive roots with decent colour and quality.

Planting Dates for Carrots

Fall Carrots Planting:

Usually, the first frost occurs at the end of September in the USA

  • For carrot harvesting in summer, you should sow the carrot seeds outdoors three to five weeks before the end of spring frost.
  • To ensure productive carrot harvesting, you should plant a fresh round of seeds every three weeks continuously through the spring.
  • If you want to harvest carrots during fall, ensure sowing seeds in mid to late summer. Start approx ten weeks before the first fall frost.

Choosing the right planting site

  • Location with proper, direct sunlight is the best site for carrot farming, though they survive in partial shade as well.
  • As already discussed, you should opt for loose, loamy or sandy, airy soil, so that the roots can easily go through the soil.

Propagation of Carrots

Propagation of carrots is done using the seeds. Depending on the variety, the seeds that are broadcast or sowing in the filed with a seed rate of 5 to 6 kg/ha or 6 to 9 kg/ha.

Seeds are smaller in size and count approx. 800 per gram. And they remain lively for as many as three years with up to 80% chances of germination. However, the germination may be inadequate in some local varieties.

Therefore, you should not forget to get a rough calculation of germination percentage while calculating the requirement of seeds.

For best results, procuring clean, healthy and viable seeds from a reliable source is very important. Usually, the carrot seeds take up to 7 to 20 days to germinate properly.

The atmospheric temperature of 20 to 30 degrees Celsius is ideal for seed germination (different from the growth of carrots).

Also Read: Sweet Potato Farming Information Guide

How to Plant Carrots?

Carrot planting from seeds is the best option, instead od transplanting. It would be best if you sowed the seeds directly in the field, keeping in mind that they don’t like any disturbance whatsoever.

Sow the seeds 2 to 3 inches apart in rows, ¼ inch deep, and 1 foot apart.

A useful TIP: Ensure distributing seeds equally so that they don’t grow together at the same place. You can use a seed-sower for proper distribution.

Again, maintain enough moisture in the soil with frequent shallow watering. Small carrot seeds don’t like hard crusts or lumps for their growth. Covering the seeds with fine compost or vermiculite is also a decent idea to prevent the formation of crusts.

You can check the moisture by putting a finger in the ground – the soil should be moist, but not wet.

At times, carrots germinate very slowly, and it may take two to three weeks to show any sign of life. So, being patience is also very important. If you have maintained the right carrot planting distance, there are very high chances of timely, healthy and productive germination.

Tip: You can add radish seeds to carrot seeds to track the growth of carrots. As radish grow quickly, you can harvest them, and the carrots will also start to grow.

Fertilization Management in Carrot Farming:

You should choose the fertilizers after proper analysis of the soil.

Farm Yard Manure with the distribution rate of 30 tonnes per hectare is recommended at final ploughing with a dosage of 40 to 60 kg nitrogen, 90 to 110 kg potassium, and 25 to 50 kg phosphorus for every hectare.

Add about three tons of farmyard manure while preparing the land, mixed with 40 kg phosphorus, 50 kg nitrogen, and 50 kg potash for each hectare.

Add a full dose of phosphorus and potassium, and half the dose of nitrogen before sowing the seeds. You should add the remaining nitrogen at the 56th week of germination.

Carrots love feeding on potassium, deficiency of which can severely affect the roots as well as the overall metabolism of the plants. Carrots with low potassium quantity are not good to taste and don’t last long too.

Irrigation Management for Carrot Crops

The first carrot farming irrigation should be light, and you should do it immediately after sowing. Carry out the subsequent irrigations as per requirement.

As discussed, too much moisture is not ideal for carrot crops, and you may end up getting light-coloured, short carrots with a larger diameter. Types of soil, season, and variety of carrots play key roles in deciding the requirement of irrigation.

carrot farm

Usually, irrigation in every 5 to 6 days in summer and 10 to 15 days in winter is ideal for adequate moisture for the carrot crop.

Only occasional irrigation is needed during the rainy season. It would help if you avoided water stress around the roots, especially while they grow, to prevent from cracking.

Carrot Care Tip

While Carrots Are Growing

  • Mulching carrots gently is a decent option to maintain moisture, speed-up the germination, and stop direct sunlight to the roots.
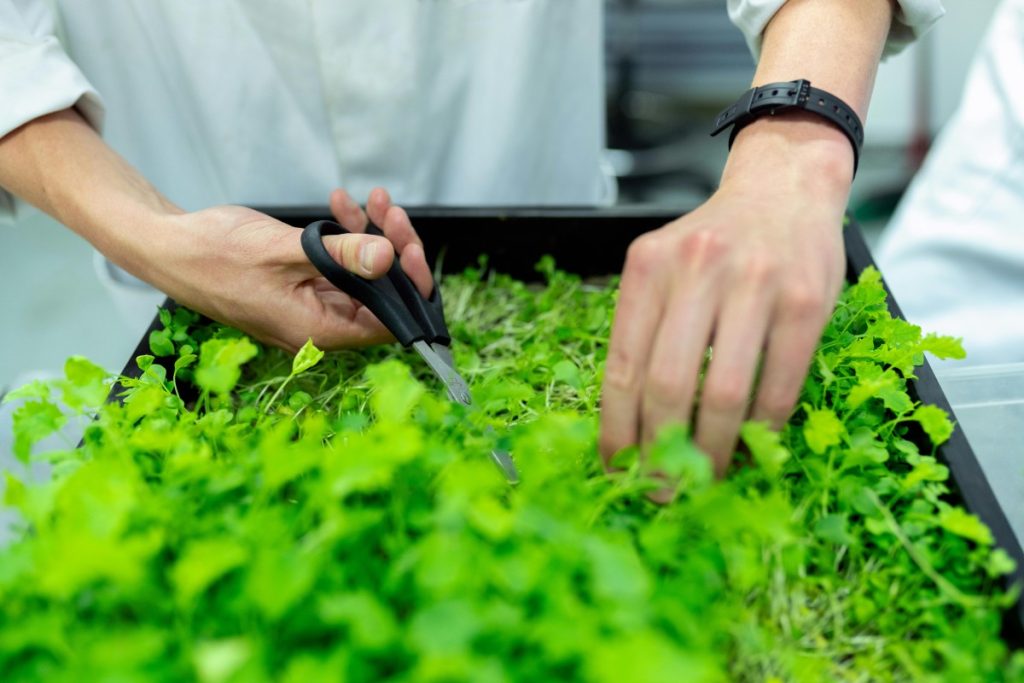
  • When seedlings are of one-inch height, they will usually stand 3 to 4 inches apart. You should trim the tops with a farming scissor instead of plucking them to avoid certain damage to the fragile roots.
  • One-inch water every week is recommended in the beginning, then two inches with the growth of roots.
  • Weeding is an important aspect of carrot planting care, but ensure you don’t disturb the young roots while doing so.
  • Fertilizer with low-nitrogen quantity but high potassium and phosphate after 5 to 6 weeks of sowing is recommended. Excess nitrogen in fertilizer works on the top of carrot plants, not on the roots.

Managing Pests and Diseases

There are some common pests and diseases associated with carrot planting. They are:

  • Black (Itersonilia) canker
  • Flea Beetles
  • Carrot rust flies
  • Root-knot nematodes
  • Wireworms, and
  • Aster Yellow Disease:Causes discoloured and shortened carrot tops with hairy roots. You can invest in a control plant to control the pests like leafhoppers.

Carrot Harvest and Storage:

Harvesting

  • Small-sized carrots taste best, so you should prefer carrot harvesting when they are still young.
  • You can decide to harvest, depending on your priority. Carrots with the width of a thumb or at least ½ inch of diameter are very good for harvesting.
  • Suppose you are planting carrots in the early summer or spring. In that case, harvesting before the arrival of hot days is the best idea, as carrots may get fibrous under high atmospheric temperature.
  • Harvesting carrots after one or more frosts are linked with better taste, as the plants store more energy (sugars) in the roots for later usage.
  • You can also preserve the carrots after first frosts by covering the 18-inch layer of shredded leaves for late carrot harvesting.

FYI, Carrots are biennial crops. If you don’t harvest due to some reason, the tops will start flowering and producing seeds after the first year.

Storage

Once the carrot harvest season is at its end, storage is the next big task.

  • Twist or cut the ½ inch off the tops of carrots to store them fresh.
  • Don’t forget to remove any dirt under cold, running water, and dry in the air.
  • Refrigerate only after sealing them in airtight plastic bags; otherwise, they will get limped within a few hours.
  • For temporary carrot storage, you can leave the mature ones in the soil, if there are not freezing or pest’s problem with the soil.
  • Tubs, sand, dry sawdust with the cool, dry atmosphere are also some other options for storage.

Recommended Varieties

There are plenty of different carrot varieties. They are of rainbow colors, shapes, and sizes!

  • Bolero: 7 to 8 inches, slightly tapered, resists most leaf pests as well as blights.
  • Danvers: One of the classic heirloom carrot varieties, tapered at the end, and has a dark, rich orange color, suitable for heavy soil.
  • Little Finger: Another heirloom variety, looks like Nantes as they grow only 4 inches long, and one inch thick; one of the best varieties for storage.
  • Nantes: Cylindrical, 6 to 7 inches tall, sweetest of them all; with a crisp texture.
  • Napoli: One of the first-rate sub-types of Nantes variety, grown in spring, known for bright orange roots, mild, juicy, crunchy, and fine texture.

Some common varieties of UK carrot:

Altrincham: Long and slender roots with good flavour. The neck is purple, where it is exposed to sunlight.

Amsterdam Forcing: Bouncing, small, finger carrot.

Autumn King: One of the most common commercial carrots, flaky type, with strong tops and heavy yields. A true winter carrot, which is fairly colourful and smooth.

Baby Bell: Small, tender type, matures earlier than most of the other varieties.

Belgian White: Large roots with white skin, very popular in Belgium as well as France.

Crusader: One of the Nantes types, good colour, smooth skin, ready to harvest in autumn, summer and late spring.

Wit and Wisdom

  • There are so many different colors of carrot, including orange, purple, red, and white, and only some of them are resistant to pests and diseases.
  • Long-lasting carrots contain a rich quantity of sugar and are a very good source of carotene and vitamins.
  • Carrot is also called as “underground honey” in Ireland due to its sweetness.
  • FYI, carrots are the first vegetables to be commercially canned.

That’s all about our guide on “how to do carrot farming”.If you are planning to start carrot farming, we would suggest you go ahead. It’s easier; it’s full of fun, and very, very productive too.

Hopefully, you liked it, and you are not better prepared to start your own carrot farming. Do write to us if you have found it helpful, or if you have some questions. Share the guide with your friends who are interested in carrot farming.

References:

https://www.almanac.com/plant/carrots

https://agricultureguruji.com/carrot-farming/

How to Grow Squash – A Step-by-Step Guide

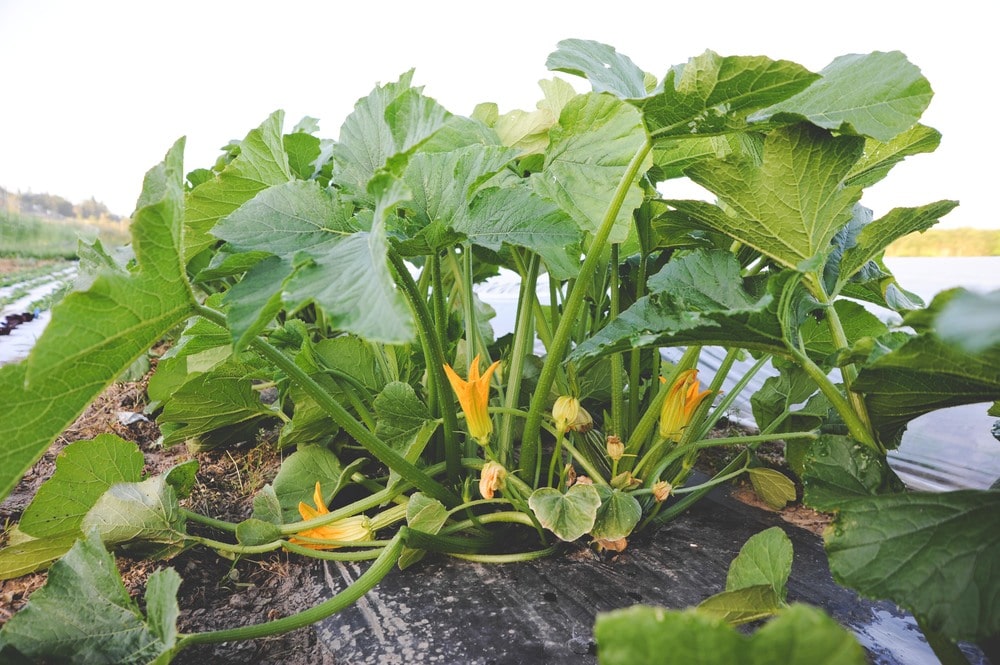
Squash is one of the easy veggies to grow in your garden or backyard. Squash can be grown easily in most of the regions of The United States. 

In this article, you will know everything about how to grow squash, varieties of squash, growing stages, and harvest period.  Before heading towards how to grow squash let us first know about its varieties.

Varieties Of Squash

Squash comes in many varieties which can be grown both in summer as well as winter. Few popular varieties of winter squash are as follows

Winter Squash Variety

Winter squash comes in dozen varieties, it can be kept for months after harvesting as it has tough exterior. 

  1. Butternut Squash

Butternut squash is a popular pick for cold weather dishes like soups and risotto. It comes in a shape of a bulb with tan yellow skin and orange fleshy pulp. Its taste is similar like pumpkin, sweet, and nutty. It grows on a vine and its taste becomes sweeter and richer as it gets ripe. 

  1. Spaghetti Squash

Spaghetti squash is the most trendiest among all the varieties. It has got shredded flesh that is the reason it is called as spaghetti squash. It is one of the healthy substitution of pasta, with low carbs. 

  1. Acorn Squash 

Acorn squash is also known as pepper squash. This squash has green exterior and yellow orange flesh. It can be used for roasting or stuffing and has mild sweet flavor. 

  1. Sweet Dumpling Squash

Sweet dumpling squash comes in much smaller size when compared to other squashes. It resembles a small pumpkin and can be used as a bowl for soups or stuffed with meat and other veggies. Its flesh is sweet and tender and tastes similar to sweet potato. 

  1. Red Kuri Squash

Red kuri squash has a tear top shape with orange skin which can be consumed once cooked. This squash can be best consumed when stuffed with rice, meat or vegetables.

Summer Squash Variety

Well, summer brings sunshine as well as new varieties of squash. These are harvested mush earlier than winter squash. The shelf life of summer squash is one or two weeks only. It is very soft and takes less time to cook. 

  1. Yellow Squash

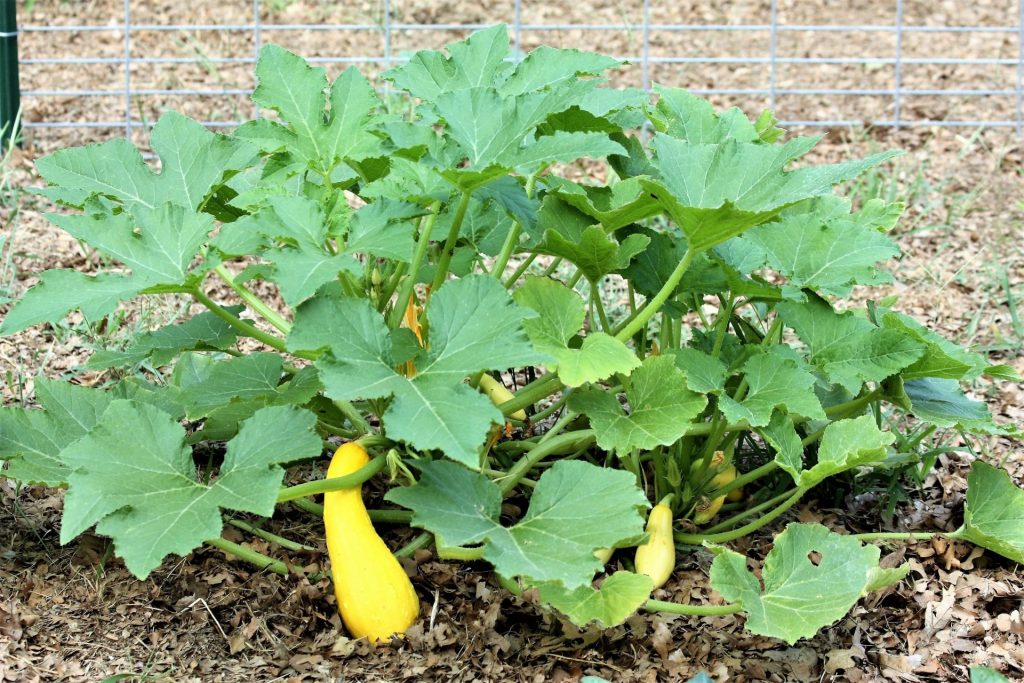
It has a bright yellow exterior and comes in two varieties which can be distinguished by the shape of its neck, straight neck or crooked neck. It has tender and thin skin that can be easily peeled and chopped. 

  1. Zucchini Squash

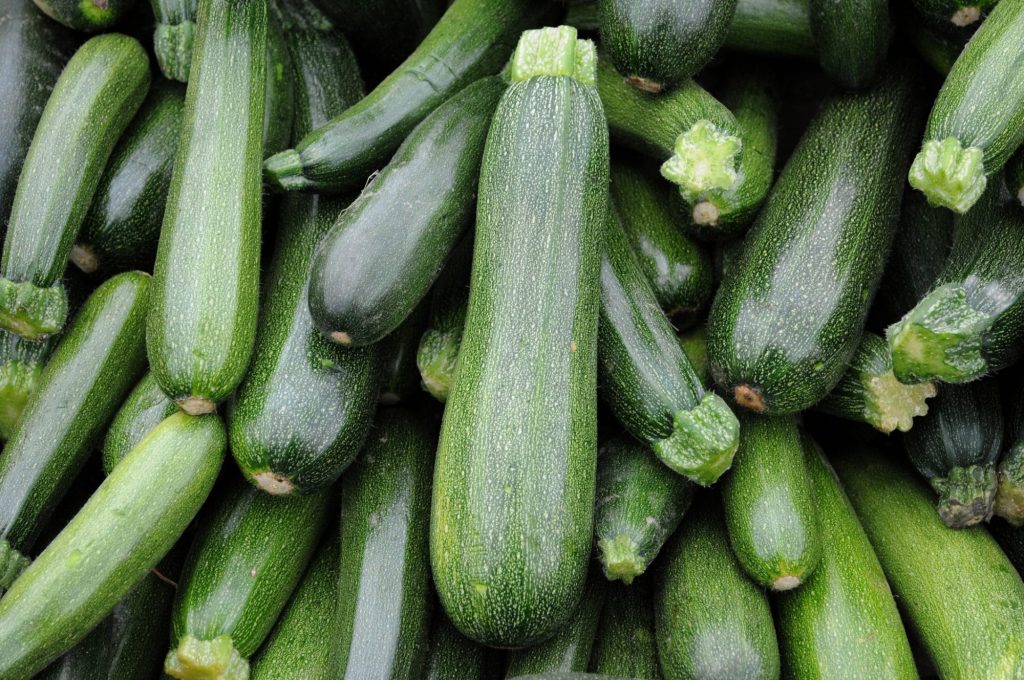
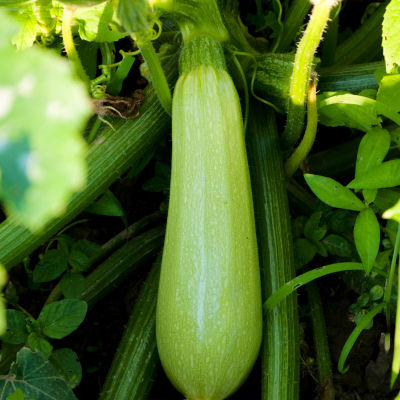
Zucchini is the favorite squash of all the chefs as it is perfect for grilling, baking, sauteing, and much more. It is dark green in color and most loved summer squash. It is the best low-carb substitution for noodles and fries. 

  1. Chayote Squash

This squash is originally from Mexico and resembles a lot like pear. Chayote squash is low in calorie and tastes similar to that of cucumber. It can be made in various ways which makes it versatile. 

Also Read: How to grow cauliflower: All The Information Regarding It

Planting Squash

Let us know about squash growing stages, what month to plant, how long will it take to grow squash, and when to harvest as well. 

If you are planting winter squash then you must know what month to plant. The best time to plant winter squash is after the last frost is over. 

The first thing to be done is to make the soil ready for planting, you need quite open space as it grows in vine and spreads quickly. Spread at least 3 inch of compost and make the land ready. Make sure to provide nutritious fertilizer as well. Squash need full sun and good air circulation so choose the place accordingly. The condition for summer and winter squash are the same, except the harvest time. 

Here is the way on how to grow squash from seeds. Sow the seeds 1-2 inch deep in the soil and give a gap of at least 4-6 feet after every seed. The seedlings will emerge within 3-4 days of planting. 

After this is done now you will be eager to know how long will it take to grow squash. The plant takes 70-100 days to mature, but it depends on the type of plant and the weather as well. 

Harvesting Squash

Harvesting or picking squash is fun, its so good to see different varieties with different shapes and sizes. You can expect about 1-10 fruits from each plant, depending on the variety. Look for the below mentioned points before harvesting winter squash

  • Harvest after at least 50-55 days from the time fruit has set.
  • You should hear a hollow sound when tapped gently.
  • Harvest it before the frost arrive.
  • The rind should change from light green to tan.
  • Cut the rind with a short stub of vine attached. 

After harvesting the squashes need to be kept in a cool and dry place. Winter squash can be kept for as long as 1-2 months, they can even be used for decoration. Where as summer squash cant survive this longer. It needs to be cooked or consumed withing 2-3 weeks. 

Turnip Farming Information Guide

Turnip farming can be performed on commercial or personal scale very easily and with minimal efforts. Gaining much needed knowledge gets you ready to start. Check out this full guide on turnip farming. 

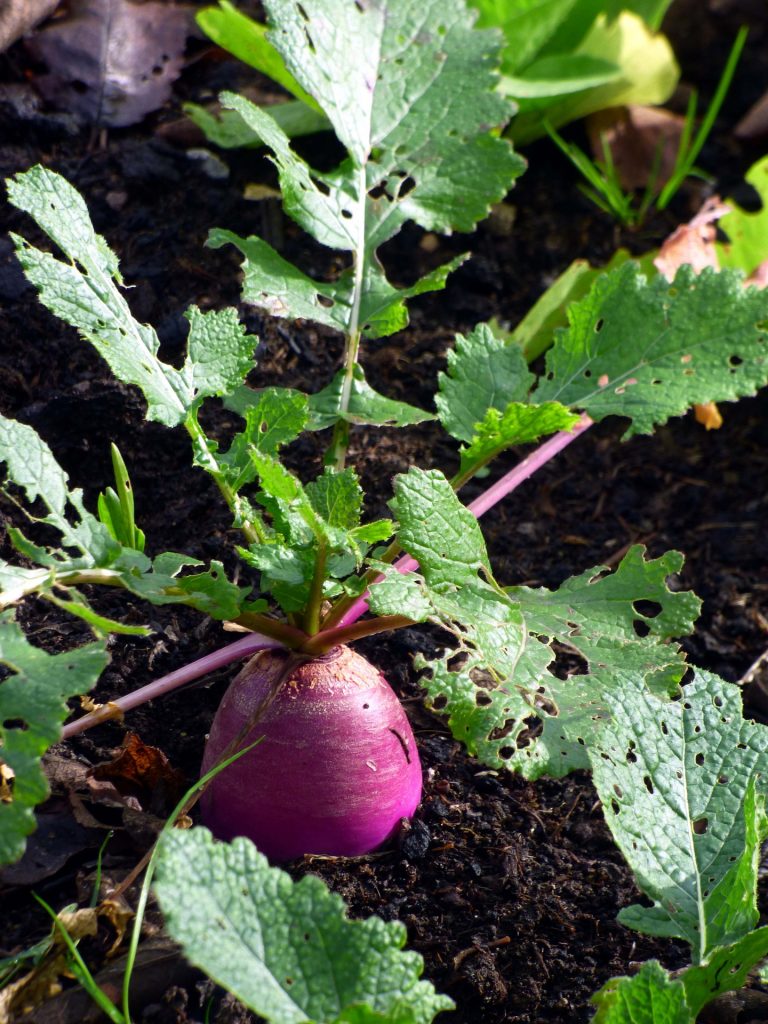
Turnips are cool weather vegetables and its botanical name is Brassica rapa. These are considered as staple food for humans and livestock too. They have a rosette of bright green leaves that grows from tubers or swollen roots. Turnips are consumed for their swollen roots and greens. Also, they are biennial but grown as annual.

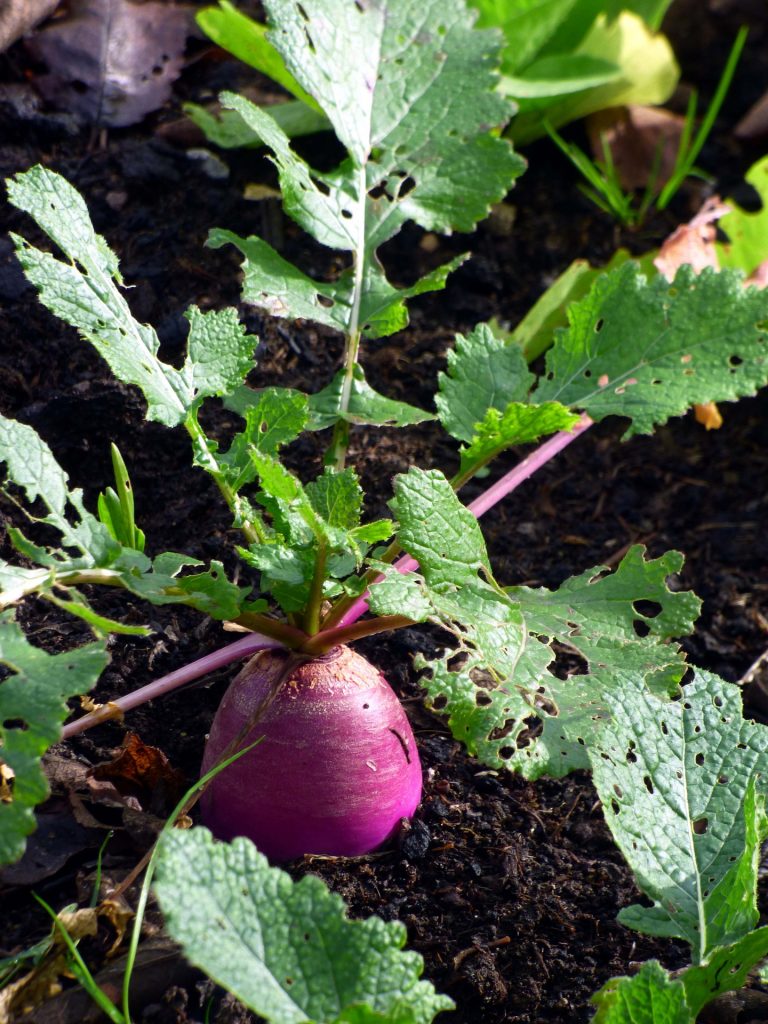
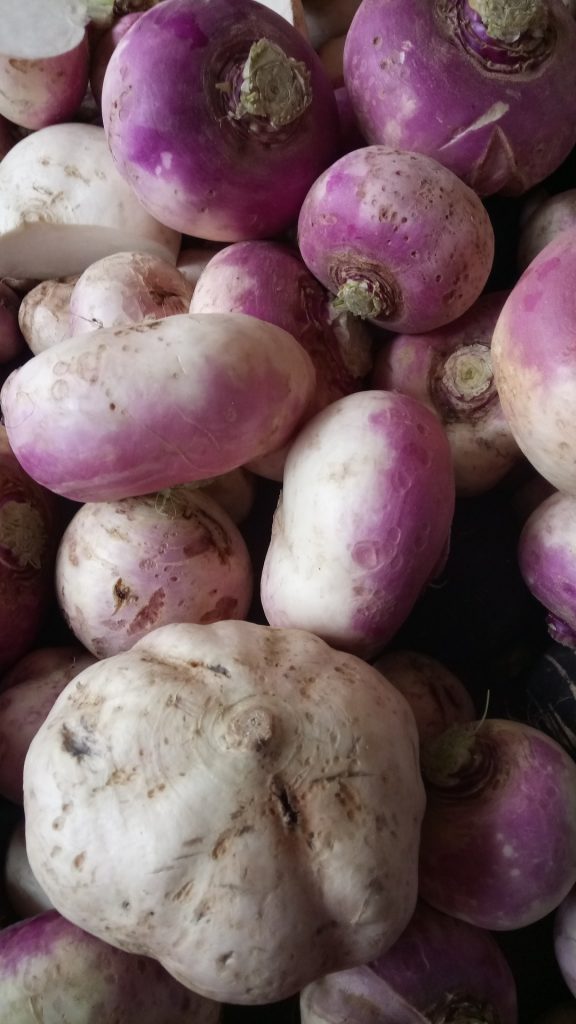
Most commonly found turnips are light purple in colour from top and white from bottom. However, more than 30 varieties of turnip are  found over the globe. All of these vary in shape, sizes, and colours. Some might taste as sweet as carrots and others might taste like a potato. 

Swollen turnip is eaten by people all over the world. It can be either consumed raw or stewed, roasted, boiled, mashed with other root crops to consume. Greens of turnips can be consumed too. People cook and eat them in the same manner as spinach as kale are. 

They generally grow in spring and fall.temperate climates are best suites for turnips. Therefore, they are mostly grown in the USA, UK, Poland, China, France etc. They have been grown and consumed for over 3000 years by our ancestors. 

It is advised to avoid hot summer weather for their growth. Turnips tend to become woody and bitter in hot temperatures. They mature rapidly and are very easy to grow in home gardens.

Turnips are considered biennials hardly. They are mostly grown by people as an autumn crop. 

As mentioned earlier, turnips can be fed to livestock too. Animals can be fed upon turnips after they are harvested. Or browsing animals can consume them in fields too. Few people plant turnips to attract deers to their fields.

Also Read: Sweet Potato Farming Information Guide

Varieties of turnip

There are various varieties of turnips. Most popular varieties of turnip are Purple top, Royal Gloss, Just Right ( 40-60 days), White globe( 57 days), Tokyo Express, Market express, Shogoin, and mild Hakurei. Best varieties in the case of greens are Alltop (50 days greens), Topper, Royal Crown (52 days) and Seven top( 45 days,greens). 

Yellow Globe produces golden turnip roots and is great for roasting. For upper midwest and canada, Green Globe and York Globe are the most suitable varieties. 

Health benefits of turnips

Turnip is full of nutrition and anti-disease properties. Moreover, the health benefits of turnip are immense too. 

  • Nutritional value-

1 medium turnip is laced with following nutrients-

Calories- 34g

Fat- 0.1g

Carbs-7g

Proteins-1g

Fiber- 2g

Sugar- 4g 

Cholesterol- 0g

  • Vitamins and minerals 

Calcium- 3% of daily value (DV)

Folate- 5% of DV

Magnesium

Potassium- 115% of DV

Phosphorus- 3% of DV

Vitamin C- 30% of DV

Turnip greens are also full of nutrition. Vitamin A and C are found in abundance in turnip leaves. One cup of greens contains 6373 IU of vitamin A and 33mg of Vitamin C. 

Health benefits

Vitamin C is helpful in protecting the body from free radical damage. To add to this, it increases iron absorption and regulates blood cholesterol. 

Vitamin K, on the other hand, prevents excessive bleeding. Vitamin A regulates eye, skin and lung health. 

Anti cancer properties Turnip is famous all around the globe for its anti cancer properties. It helps prevent growth and spread of cancerous cells. Also, turnips are rich in glucosinolates. Glucosinolates are a group of bioactive plant compounds. These compounds have antioxidant properties and therefore, reduce risk of various cancers like lung cancer, colon cancer, rectal cancer etc. 

Along with this, they are also enriched with flavonoids. Mainly anthocyanins are found in turnips and they are known to have anti cancer properties too. Plus, they lower the risk of chronic and degenerative disease. 

Control blood sugar Turnip swollen roots and greens are believed to have anti-diabetic effects. They can control metabolic disorders like high blood cholesterol, high triglyceride levels. Further, they increase blood sugar clearage and lower production of glucose from the liver. Also, they reduce the absorption of carbohydrates. 

Anti inflammatory– Many diseases cause inflammation in the body part as symptoms like arthritis, cancer or high blood pressure. Turnip can be helpful in such a condition due to the presence of glucosinolates. It breaks down into indoles and isothiocyanates which have anti-inflammatory properties. 

Protect against Bacteria– Turnip has antibacterial and antimicrobial properties also. Turnip ensures inhibition of bacterial or microbial growth in the human body. 

Weight management– It is a non starch edible, full of fibre, and has very low calorie count. Therefore, consuming this will help you stay full for longer periods and healthy.  

Promote bone healthMaterials present in turnip have the power to maintain good bone health. Vitamin K found in turnip helps in bone metabolism. 

Liver protectionConsuming turnip ensures lesser glucose production and thus less stress on the liver of the human body. 

How to grow turnips

First of all, you must be aware of when to grow turnips. Turnip growth months vary with region. For late spring harvest, you can sow seeds directly in your garden around 2-3 weeks before the average last frost date. For instance, in USA zone 2a, the best time for sowing seeds of turnip is august and September for autumn harvest. You can easily check out the best month of growth of your region. 

For autumn harvest seeds are sown in late summers. These seeds are generally sowed after summer crops of onion,squash, beans or sweetcorn. Seeds can be sowed in early autumn too to get a late autumn harvest.

They grow in temperatures ranging from 40F to 70F ( 7-24C). They must be reaped out before temperature exceeds 24 C. 

Next thing that you need to focus upon is the planting site. The place for growing turnips must receive full sunlight for maximum hours. Soil of the area must be well drained to ensure good growth and sweet and tender vegetables. If soil is heavy or clayey, you can fix it by adding sand in it before seeding. Remove any stones at the site to provide a bigger area for roots to expand. pH of soil must be ranging between 5.5 to 6.8.

Addition of compost and well aged manure is suggested. Manure or organic compost is enriched with nutrients and minerals. Therefore, it is very beneficial in the growth of turnips. 

Soil bed must be weed free. But keep in mind that removal of weeds can disturb roots of young turnip plants. Therefore be careful while removing weeds. Usage of mulch is proven beneficial. It helps in retaining moisture in soil and suppresses weeds too. Addition of peat moss, compost,coconut coir or well aged manure is also favoured.

Although not much care is needed for turnip plants but do provide them with enough moisture at all times of growing period. Watering must be done upto 1 inch per week to avoid bitter and tough roots. It is observed that they demand dry bed but wet heads. Plus, soil must be kept moist at all times. 

Overcrowding must be avoided in case of turnip plants. It results in small roots in turnips. 

How to sow turnip seeds

Turnip seeds are sowed directly into the soil. Just scatter the seeds in your garden. Dig a small hole of ½ inch depth. Place the seed in it and cover it with soil and then patt a little.  Further, they must be placed 2 inch apart wide rows of 12 inches. In later stages,thin them upto 4-6 inches apart for large turnips while 2-4 inches apart for greens. Overcrowding can be an issue for turnip plants. Therefore, work out these beforehand. 

You can also grow turnips in pots or containers. The container taken for turnip growth must be 8inch deep at least. This depth will ensure proper growth of roots. 

Further, for summer harvest, seeds should be sown in early spring, 4-6 weeks before the last expected frost date. And in the case of autumn harvest, sow seeds 6-8 weeks before the first expected frost date. You can expect mature turnips in early spring and after 2 months of first frost date respectively. 

Germination time of turnips

Turnip seeds take around 3 – 10 days approximately to germinate. Soil beds are required to be moist all the time for faster and better germination of turnip seeds. The temperature conditions must be favourable and the best temperature for germination is 71F or 21C. Also, colder temperatures can delay germination. Optimum Temperature for turnip growth is 16C. 

Diseases in Turnip

Pests can affect turnip plants in various ways. Some might cause defects in vegetables or some can affect leaves of the turnip plant. Whatever, it is they ,ust be taken care of to ensure healthy plants. 

Aphids and flea beetles are disastrous for turnips. Aphids can be removed by pinching out the foliage. While on the other hand, flea beetles can be removed or avoided by getting rid of weeds in the area of turnip plantation. 

White rust of fungus is also a disease seen in turnips. It results in small white cottony blisters on the upper surface of the leaves. Yellow discolouration is also observed on the underside in this disease. 

Alternaria leaf spot- In this disease, small black spots appear on leaves which turn into brown or grey. It is caused by fungus and can be treated with a fungicide. 

Anthracnose- Small circular shaped spots appear on leaves. High number of spots can kill the leaves of turnip plants. Lesions turn leaves into yellow and make them wilt. The cause of this disease is fungus. Sanitary practices must be considered to avoid fungus and cruciferous weeds should be gotten rid off. 

Black rot- dark rings appear on the cross section of stem in black rot. Lesions of v shape can also be seen. Leaves can turn into yellow or brown. Cause of disease is a bacteria. Good sanitation must be ensured and avoid sprinkler irrigation. 

Club root- slow and stunted growth is observed.roots become distorted in this disease. It is caused by fungus. Treatment of this disease is economically unfeasible. In future,purchase certified plants from a renowned nursery.  

Downy mildew- irregular yellow patches on the leaves are observed and gray growth is observed on underside of leaves. Apply appropriate fungicide and  remove crop debris. 

Root maggots- This insect leads to root damage and scars on the turnip. 

Growth time for turnips

It takes from 5 weeks to 2 months to grow turnips. Growth time for turnip varies on the basis of a variety of turnip-like greens, tender roots to eat, or larger roots to store. It takes 60 days to grow fully but if you pull them out in 30 days, they will be very small in size. 

Growing for 60 days helps in making them more flavoured and avoid watery or bland taste. 

Along with time, take care of proper water supply too, in order to receive sweeter and tender turnips. 

When to harvest turnips

Small, young and tender turnips can be harvested after 5 weeks of sowing seeds. Main crop can be harvested from 6 weeks to 10 weeks. 

Fall turnips are harvested after light frost and they are known to be sweeter than other harvests. Do harvest them before hard breeze for best results. 

Lift roots when they are 2-3 inch in diameter. Further, you can cut leaves of turnips when they are 12 inch long. Keep in mind to lift them very carefully with a garden fork.  

After harvesting turnips, you can store them for 3 or 4 months in cool,dark and humid places.  Turnips can also be stored in the root cellar, a vegetable drawer for the fridge in a perforated plastic bag. 

Turnips plant  is such a plant that doesn’t require much effort for growing. You just need to take care of the water supply and good soil condition for them to be best. Ensure good fertility in the sowing and growing period to receive sweet and tender turnips. Above mentioned knowledge is enough for you to get started. Then what are you waiting for, just begin. 

How to Grow Beans: Planting, Care, Yield, Harvesting

The term beans generally refers to large seeded plants that include soybean, peanut and peas.  Beans are one of the evergreen vegetables that can be grown easily in your backyard, terrace garden and even in your balcony as well. They belong to the legume family and have enormous amounts of health benefits. 

Beans are a good source of protein and fiber and are also rich in iron, potassium and magnesium. 

How to Grow Beans and What Month do you Plant Beans:

Beans need warm weather to grow, so if you are planning to grow green beans then summer is best for growing, start it in summer as cold weather or frost can damage the seeds and make them rotten. Sow the seeds directly in the garden, if you transplant it later,  then the roots may get easily damaged as they are shallow. 

Before planting the beans make sure to know about the type of plant that it grows into, whether it is a bush bean or pole bean.

Bush bean: If it is a bush bean then sow the seeds one or two inches deep and apart. In case you are planting it in garden then the rows should be 2-3 feet apart. 

Pole bean: If you are planting pole bean then they need support of some stick or pole to grow. For every 3-4 seeds one pole is required with a space of 3-4 feet between each pole.

These beans grow when under full sunlight or at least look for a place where there is partial sunlight. The soil should be well drained but moist enough for the seeds to germinate.

Different Types Of Beans:

Beans come in large variety, some can be eaten raw while the other needs to be cooked. The green tender pods can be consumed as it is, where as the dried ones need to be cooked before consuming. 

They are considered nutritious as it contains large amount of protein, carbohydrates and minerals. The various beans cultivated through out the world are

  • French Beans
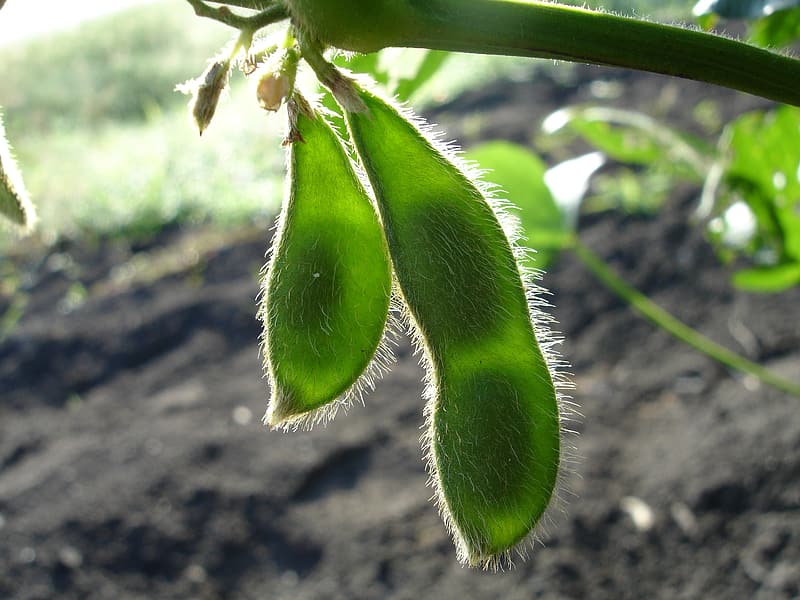
  • Soy Beans
  • Kidney Beans
  • Cluster Beans
  • Lima Beans
  • Broad Beans
  • Sword Beans
  • Garden Beans
  • Dolichos Beans
  • Navy Beans
  • Fava Beans
  • Pinto Beans
  • Cranberry Beans

In this article we are going to study about how to grow kidney beans, when to harvest beans, when to plant broad beans and how long do broad beans take to grow.

How To Grow Kidney Beans

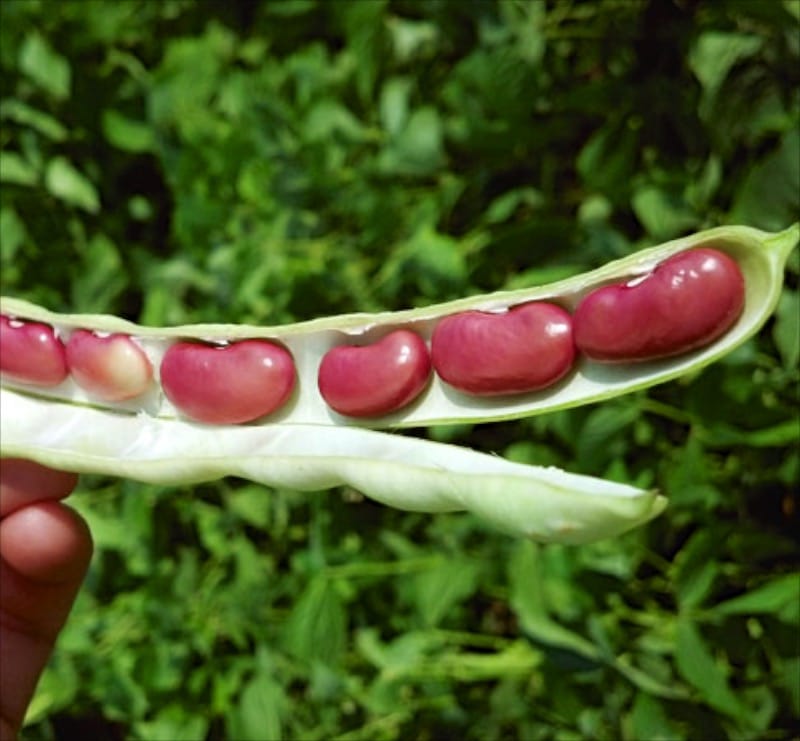
Kidney beans are very healthy as they contain antioxidant properties, vitamin B6, folic acid as well as cholesterol lowering fiber. Kidney beans can be a good choice for vegan’s as well as the one having diabetes. Kidney beans need to be consumed only once they are dried and cooked, the raw once are toxic. 

Kidney beans can be planted when the temperature is about 18-26 degree Celsius. It is best to do the planting in the spring or after the last frost. It give good results when they are directly sowed in the garden instead of doing transplant, as it may damage the plant and it may not yield well. 

Kidney beans comes in two varieties-bush and vine. Make sure you know what type of seed you are using. The vine variety need some sort of support like a pole or trellis to grow.

The planting area should have full sun exposure or at least for about 6 hours daily. Kidney beans require humidity and warmth to thrive. Make sure that the temperature does not go below 16 degree Celsius. Sow the kidney bean seeds 1-2 inches below the soil surface, giving a space of about 4 inches between each seed. Water the plant daily once, when the soil is dried out, do not give over supply of water. The seeds will germinate in about 10-12 days. 

Unexpectedly if there is snow fall after the beans have sprouted , cover the seedlings with a canvas or cloth so that it doesn’t get effected by the freezing temperature. 

Also Read: Soybean Farming: A Complete Guide to Cultivation and Production

Harvest And Storage

If you have planted bush variety then it needs to be harvested only once at the end of the growing season. But if it is pole variety then it has to be harvested several times through out the season. The average harvesting time will be 3-4 months depending on the type of seed you use. 

If there are some unfavorable conditions like dropping temperature that may threaten your harvest then pull out the plants early. Keep the plants for the pods to dry out completely, it may take several days or weeks. As you dry the seeds keep them in a warm indoor location with lots of circulating air. 

How To Grow Broad Beans

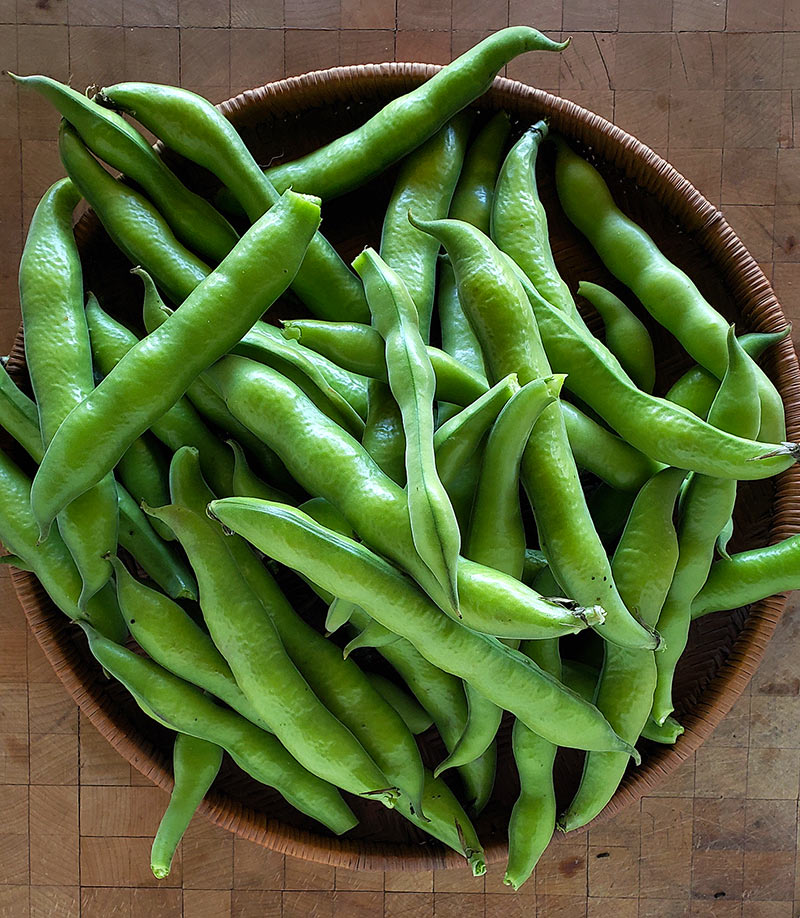
 Broad beans produce high yields from the smaller area of garden. These can be grown in modest sized pots as well. This vegetable is easy to grow, especially a good activity for children. 

Lets learn about when and how to grow broad beans.

Before starting with the planting few things need to be kept in mind. Always choose a spot away from strong winds, sheltered spot, fertile land and a place where you can easily get sunlight.

When To Grow Broad Beans

Some variety of broad beans need to ne sown in spring while some are well grown if you plant them in autumn. If you sow it in November, that is autumn then it will germinate within 2-3 weeks. 

The germinated seeds will overwinter and start growing again in spring. In severe winters you need to protect the crops by covering it with fleece or cloches. 

Must Read: Growing Your Favorite Peanuts or Groundnuts

How To Sow Broad Beans

The seeds of broad beans should be sown 2 inch deep into the soil. Each seed should have a gap of at least 9 inches. These can be sown in double row with a gap of 9 inches between each row. After sowing the seeds water them adequately. 

Now you will be concerned about how long does it take for the broad beans to grow. Well the answer is that these beans germinate in approximately 10 days. 

When To Harvest Broad Beans

Broad beans should be harvested and when they are 3 inches long. You can even wait for a little longer and harvest them later. But make sure that when you harvest the seeds should be soft and pots well filled. 

Best time to consume them is when the scar on the edge of the seed is white or green. If it has become black then the bean will become hard and chewy. 

The most important thing to keep in mind while sowing any seed is that don’t be in a hurry to plant the seeds, wait till the weather becomes appropriate as all the seeds may not be suitable for all typed of weather.

Take proper care after the seeds germinate and protect them from insects and mice attack.

How to Grow: Snake Gourd Farming?

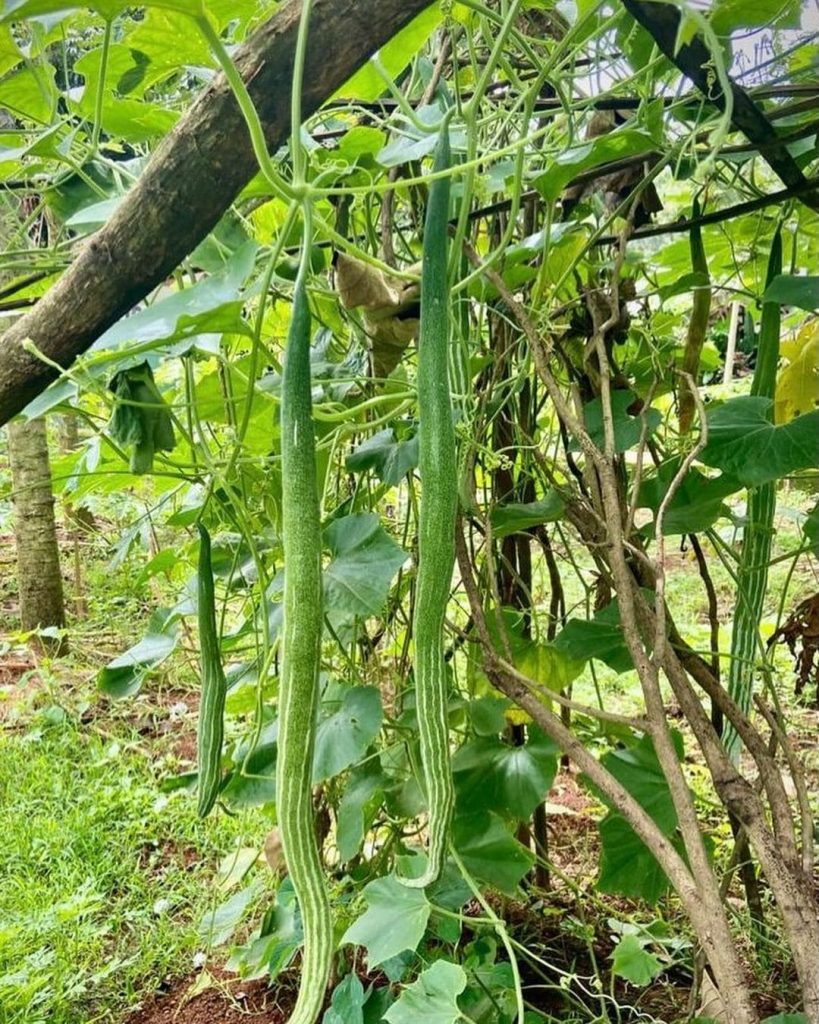
As the name sounds a bit weird, the appearance of Snake Gourd is not. The veggie appears to be elongated and wavy like a snake and tastes like a cucumber. It is a creeper plant. Snake Gourd farming rules the South and Asian market.

India Grows it in abundance and exports it to other corners of the world. In, other words, we can say India is a proprietary market for snake gourd farming.

Though it finds a place in Bangladesh, Pakistan, Indonesia, Sri Lanka, Myanmar, China and, Malaysia. It can be consumed in a multifarious way, whether pickled, sauté with herbs, cooked with typical Indian spices, tastes good.

How to grow snake gourd from seed?

The growing pattern throws light on the type of climate required for snake gourd farming. Being enormously grown in a tropical area, the veggie thrives well in the tropical climate. To grow snake gourd from seeds, you need to follow certain steps, for better results.

As it is a creeper veggie it needs a chain, fence, or kind of support to grow on but it has to be built to last. There are a variety of seeds available. We have chalked down a few for you:

  1. White Glory
  2. Baby
  3. Extra Long Dancer

The seeds are hard as coconut shells which hinders the germination process and can even take a month or more to germinate. To cope up with this issue, you need to crack the seeds with the help of pliers ensuring the safety of the endosperm inside.

If the endosperm is hurt or crushed it won’t allow the seed to sprout. Now, to start with the germination process, you need to soak these seeds extracted from the shells for 12 hours at least.

For growing snake gourd from seeds, it should be allowed to rest in warm water resting on the refrigerator top or any other place that is warm enough to let the water get embedded in the seeds.

Then seeds need to be planted in weed mix soil in large flower pots covered with a cling film or plastic wrap. The vision behind is to hold the moisture to allow sprouting. In about 10 days these seeds start sprouting and now it’s time to uncover them and allow some fresh air to reach them. 

Once the germination process gets a swing, a regular water supply should be maintained to ensure moisture. Now, these young seedlings find their wings in the garden.

snake gourd seed germination

After planting them in the garden, 15 days’ is ideal to water them. Or when you find it necessary like the soil is dry, it needs to be nourished immediately. In about three weeks, these seedlings start’s maturing and demand some additional nutrients in the soil to be added.

This acts as a catalyst to shape these beautiful gourd vines. But always remember a strong back should be there to render a stiffen to the 6 feet (approx.) fruit.

To attract the insects a light or fluorescent cloth needs to be placed next to the blooming flowers to speed up the pollination process.

Growing and harvesting period for snake gourd

Due to the new agro technologies, flushing in the market no vegetable is restricted to a particular point of time. Though it is still advisable to grow snake gourd in January and July.

As it needs a temperature of 25 degrees to 38 degrees. The harvest time of snake gourd depends on the variety of seeds sown. On average it takes 45 to 60 days from the time it is sown.

Getting the soil ready for snake gourd farming

Snake gourd farming is a non-fussy task, as it goes with all types of soil. For getting good results it is recommended to use loam sandy soil with a spice of organic content.

A minimum of 3-4 plowing is needed to be done, to get a PH value equal to 6. Snake gourd cultivation demands a good soil drainage system. On adding good manure to the soil, a higher yield is obtained.

Treatment and sowing of seeds

10 grams of fluorescens and 4 grams of viride should be added to the seeds to accelerate the production cycle. This will surely give better and high yields. And snake gourd farming would be more profitable then.

The cropping season of snake gourd is in July and January. Cropping season is just a medium to enhance productivity.

Production techniques of snake gourd

The production techniques of snake gourd is a bit lengthy. Let’s grab a look at the following:

  1. Sowing and spacing pattern: The sowing pattern should be in multiples of 5, that too in a grid-like structure. After 15 days of germination, pick any 2 healthy seedlings. An alternative method can be used, you can sow the seeds in plastic bags until they germinate. Later can be shifted to pits in 4.
  2. Fertilizer and manure: At the time of soil preparation heaps of compost should be mixed in the soil. Then after 30 days of sowing and the rest just before the plowing time.
  3. Water intake for snake gourd farming should be maintained. One a week of watering is good for the plantation.
  4. Weeding is done twice and not more than that.

Types of Snake Gourd

There are different varieties of snake gourd available in the Indian Market. Let’s take a glimpse:

  1. Padwal or pointed gourd
  2. Serpent gourd
  3. Chinese Gourd
  4. Japanese Gourd
  5. Chichinda

Health benefits of snake gourd:

The significant story of this green thumb relates long back to the ayurvedic culture. With an enormous number of highs, this green veggie finds a place in medicine as well.

Even in today’s time as people are becoming aware of health benefits, the snake gourd has made its root in a portion of day-to-day dietary food. Tendrils, the delicate stem part is also used in some of the medicines.

Let’s have an overview of the benefits that can be extracted from this simple vegetable:

  1. Losing Weight:  Being a possessor of an ample amount of nutrients is a complete food. Keeps the stomach full, free from any sort of unwanted cravings. Thereby, vanishing fat from the body.
  2. Supplement to Heart: Cholesterol free food is always a good choice for the better functioning of the heart. Apart from typically cooked in Indian spices, it can be consumed in boiled form or with negligible oil. And yes, it tastes yum. At the same time a relaxing food for the heart muscles.
  3. A Kidney Detox: A snake gourd sweeps out all the toxic material from the excretory system of your body. It triggers the secretion of fluids responsible for the process of excretion in the kidney. Thereby maintaining the water in the body content ensuring proper hydration.
  4. Speed up the digestion process:  Snake gourd is high in fiber quantity, so helps to keep the stomach light and happy. Chances of acidity and bloating are reduced so the process of digestion becomes fast and easy.
  5. Cleans the respiratory tract: Another amazing perk of consuming this veggie is curbing the mucous secretion and clearing the respiratory tracts. This also controls the infections in the lungs.
  6. Ideal for the keto diet: Being low in carbohydrate and sugar content, it can be easily added to the keto diet as well.

Threats to snake gourd farming

The basic enemies of snake gourd farming are leaf beetles, caterpillar, and flies. To demolish leaf beetles and caterpillars you need to apply pesticides to snake gourd production.

For fruit flies, you have to pluck the infected veggies and throw them away from the rest of the production. These are the best possible ways to save the snake gourds.

Snake gourd diseases

Yes, you heard it right. Even plants get affected by diseases, like humans. The 2 major diseases targeting the veggie are Downy mildew and powdery mildew.

These are controllable, the mere spread of pesticides can make you get rid of these diseases. All you have is healthy snake gourd farming.

Also Read: Planting and Growing Okra Step by Step

Planting snake gourd

Snake Gourd is a tropical veggie, it loves a warm climate to grow. Like warmer days and cool nights. For snake gourd farming sandy loam soil ideal. Which has the benefit of keeping the temperature high for a high yield.

Tresilling snake gourd is adapted to grow erect, this can keep this veggie away from pathogens and flies.

Snake gourd is touchy to excess water and could not bear dry soil as well. There needs to a perfect balance between both.

snake gourd plant

Basic tips to stimulate snake gourd production

With an increasing urge to compete with one another, farmers face a low yield problem with snake gourd farming.

To boost production, we have thrown light on the following tips:

  1. A perfect base fertilizer: To make a perfect fertilizer base cow dung in powdered form or an organic fertilizer should be added to the soil to trigger production rate.
  2. Quality of seeds: To get good results, hybrid or local seeds should be used. Either they can be allowed to soak in water for 6 hours or sowed in cow dung.
  3. Water passage: Choose a place that ensures a continuous and proper water supply. To prevent seeds from drying.
  4. Saplings should be healthy to ensure a good production rate.
  5. As soon as the seeds begin to sprout, the additional underneath growth should be copped off to instigate high yield.

The market for snake gourd farming

With an increase in awareness among the people, the demand for snake gourd has also risen. People tend to switch their eating habits to a healthy delight. This has resulted in huge demand for snake gourd farming.

The farmers are growing this veggie on a large scale as it is low in investment. No extra care is demanded just proper management can work wonders. Being a less perishable item, it can be transported easily.

Conclusion

The ending note on snake gourd farming is a bag full of knowledge. Infused with lots of health and nutritional benefits this simple veggie is a good deal for your family. 

With tips on how to grow snake gourd, types of snake gourd, how to increase production, and the prolonged benefits of the vegetable we have penned down all the relevant and required information regarding snake gourd farming.

 We hope, the article was informative. So, go ahead with your snake gourd farming. Do share your experience of snake gourd farming with us. Stay connected for more updates.

How to Grow Organic Asparagus From Seed?

If you are looking around for a guide on “how to grow asparagus?”, here we are to help you! In this guide, we are going to talk about everything related to farming of asparagus from planting, caring, harvesting and storage. Let’s move on to find more.

Asparagus is among the first few plants that greet farmers in springtime. It is a perennial plant, which means, once you successfully start asparagus farming, you will earn decent benefits year after year. Also, to be healthy, low-calorie food, asparagus’s ferny foliage is used to make beautiful ornamental as well.

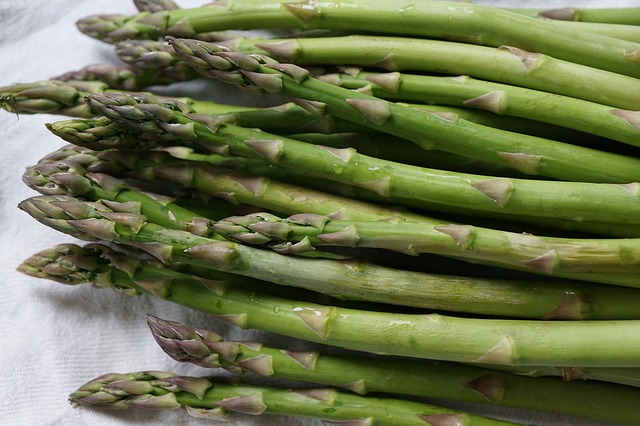
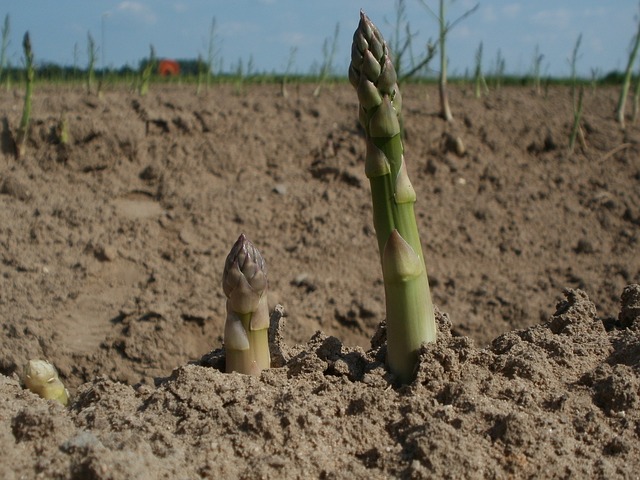
The whole of the USA is almost suitable for growing asparagus, but cooler regions with long winter season are perfect conditions for robust growth. Young stem shoot is the edible portion of the plant and starts emerging once the temperature of the soil increases more than 50°F in springs.

The most important factor you must have to know that, asparagus is “not harvested in the first couple of seasons”. The plants need a lot of time to get matured and you will have to be patient before you can finally harvest them. And you will surely get the rewards of your patience, as the asparagus field remains productive for 15 to 30 years!

In this asparagus planting guide, we will focus on all the important aspects of growing asparagus from choosing a planting site for harvesting and transporting. Let’s start our guide by knowing “when to start planting”.

When to start planting asparagus?

Early spring is the best time for planting. You can grow asparagus from one-year-old plants or “crowns”, both of which are easily available at garden centers and nurseries.

Growing asparagus from seeds is also popular in some parts of the country, but we recommend starting with crowns, as you can eliminate the long-year headache of weeding which is usually associated with seeds.

Also Read: Spinach Plant Spacing And Growing

A few varieties like hybrid “sweet purple”, and open-pollinated “purple passion” are grown from the seeds. But you should try these varieties after gaining some experience of asparagus crops.

Choosing the right site for plantation

Given that asparagus takes at least a couple of years for proper growth, and comes back year after year for so long, you must have to decide, where is the best place to plant asparagus.

  • Choosing a site with at least partial sunlight is recommended.
  • If you are planning to grow some other crops, choose one side of the garden/field for placing the asparagus bed, so that it won’t be disturbed due to constant activities of planting or re-planting other crops.
  • Ensure the proper drainage of the asparagus bed without any pooling of water. Asparagus doesn’t like “wet feet”. If you are unable to find a site with decent enough drainage, you should consider raised beds for growing asparagus instead.
  • Neutral to slightly acidic soil with a pH of about 6.5 is suitable for asparagus growth.
  • Get rid of all weeds from the planting area by digging it placing a 2 to 4-inch layer of soil mix, aged manure, or compost.
  • Ensure that the soil is loosened enough to 12 to 15 inches in depth for proper rooting of asparagus crowns, and the roots are not disturbed by rocks and other obstacles.

How to plant asparagus roots?

  • The aim of planting crowns should be to protect them from various external obstacles, so plant them to ensure enough depth.
  • Dig a trench of 6 to 8 inches deep and about 12 to 18 inches wide. Keep a distance of at least 3 feet, if you are digging multiple trenches.
  • Don’t forget to soak asparagus crowns in water before planting.
  • Use soil to make a 2-inch high ridge right at the center of the trench. Place the crowns on top, ensuring roots are evenly spread.
  • Place the crowns 12-18 inches apart from each other inside the trench. Do the measurement from the tip of the root of one crown to the second and so on.

What after placing the crowns?

Placement of crowns keeping in mind the proper depth as well as distance is a very important part of asparagus cultivation. Here are the steps to follow once you are done with this important part.

You can either follow the “all-at-once” method or “little-by-little” method

Some farmers fill the trench directly with a mixture of soil and compost. Although other traditional “little-by-little” is considered as the best method, farmers found no problem whatsoever with this “all at once” method either. As long as the soil is free enough, you will get the desired crop even with this fairly easy method.

Little-by-little method

  • Burry the crowns two inches deep with the mixture of compost and soil, ensuring proper watering.
  • With the progress of the season, when the spears are 2 to 3 inches tall, add another 2-inch layer of soil, ensuring spears are not buried completely.
  • Once you notice further growth of spears again through the soil, add one more layer of soil. Keep doing this until the levels of the trench and the ground are the same. You can also add soil a couple of more times throughout the growing season.
  • After filling the trench, ensure molding the soil to avoid pooling around the trenches.

How to care for asparagus?

  • Once the trenches are full of soil, add a 5 to 6-inch layer of mulch.
  • Fighting with weeds, especially in the first couple of years is the biggest challenge while growing asparagus. You will have to keep the crop free from weeds, and that too, without disturbing their roots! So, pulling the weeds gently with hands is the only option. The problem of weeds will go away slowly with the growth of plants. So, mulch the surrounding of roots with compost or grass clippings to maintain moisture and to control the growth of weeds.
  • Asparagus plants require a couple of inches of water, especially in the first two years. So, if there is not enough rain, you will have to water them properly and regularly. And, the drip irrigation method is the best option for asparagus.
  • A proper supply of plant food is necessary for healthy and constant growth. So, prefer using the drip irrigation method for adequate and balanced watering of plants.

Some important points to remember before harvesting

Yes, it is important to know, when and how to harvest asparagus. But, before that, let’s discuss a few important pre-harvesting points.

  • Avoid harvesting the crop in the first season. But, for caring purposes, ensure side-dressing with compost, as well as cutting down the dead foliage, especially in late fall.
  • During the second season, start harvesting, but not more than 3 to 4 weeks. Ensure side-dressing with compost, especially in spring cutting down the dead ferns regularly, preferably in late fall. And of course, maintain the thickness of the bed with mulch.
  • You will notice the full production of asparagus bed in the third year, and you will then be able to harvest asparagus continuously in every season.

Transplanting Asparagus

Transplanting is also an important factor in asparagus farming. You should transplant the crowns early in the spring season when they remain dormant, or in the later stage of fall, after cutting down the foliage.

Use a garden fork to dig and lift the crowns, without disturbing the roots! Divide the clump into more than two pieces, and water the transplants properly. Avoid harvesting heavily in the following year to ensure good asparagus crops in the future.

Pests and diseases commonly affecting asparagus

As already mentioned, weeds are the most common problems related to asparagus crops. And regular hand pulling in early summer and spring is the best way to get rid of them. Prefer light cultivation to avoid damages to asparagus crop.

Here are some common diseases you may encounter during asparagus farming, and how you can control/prevent them.

Disease/PestTypeSymptomsControl/Prevention
Asparagus BeetlesInsectsSpears start appearing brown and they convert into hook shape. Beetles can also cause damage and defoliation to the fruitsYou can hand-pick the beetles and throw them away from the field. Disposing the plant matter, especially in the fall season.
CutwormsInsectWitling, younger stems start cutting automaticallyConstant inspection and hand-removal is the best way to protect crops from cutworms.
Fusarium Crown RotFungusWilted, stunted, yellow fruits, brownish or reddish spots on the stems, roots, or crowns, spears start rottingThis is quite a big challenge in asparagus farming. Destroying the infected plants is the only option. In addition, you will have to avoid planting asparagus around the infected areas for at least five years. Otherwise, using resistant varieties, disinfected tools, and avoid overharvesting are a few options.
Asparagus RustFungusEmerging spears are full of pale green spots, that become orange or yellow. If not cured in time, they will convert into reddish-brown blisters. There is defoliation, as well as reduced vigour.Excessive moisture is responsible for spreading rust. So, avoid excessive watering, especially on the ferns or spears. Choose other resistant varieties, destroy infected plant matter, improve air circulation, and avoid growing plants around the infected area.

How to grow asparagus from seed?

Growing asparagus from seed is super easy and fun, but again, you will have to be very patient, as you can’t harvest asparagus for a couple of years, even if you are using seeds. Here are the steps on how to grow asparagus from seed:

  • Soak seeds for a couple of hours.
  • Use sterile soil, and plant each seed 1 cm deep in separate 5 cm pots.
  • You will notice sprouts coming out after a couple of weeks.
  • Seedlings take 10-12 weeks to grow properly.
  • Now, you can place the transplants just like we have discussed placing the asparagus crowns in the field. All the steps afterward are the same.

How to harvest asparagus

We have discussed it repeatedly that you should not harvest the asparagus for a couple of years in the beginning.

  • With young plants, the production period is usually 2 to 3 weeks. But established plants take up to 8 weeks for production.
  • Check your plants every second or third day to see if there are harvest-ready spears. The growth of spears is too quick, and they can convert into wooden structures in no time. And they’ll be too hard for eating, and hence, for marketing.
  • Spears are ready to harvest when they are 8 to 10 inches in height and ½ and ¾ inch thick. (Thinner and younger spears are usually more tender. So, keep in mind for your marketing purposes.
  • Cut the spears at ground level using a sharp knife or scissor.
  • When the diameter of spears is less than the size of a pencil, stop the harvest.
  • Harvesting is also an important part of asparagus farming, so keep all important points in mind.
  • Make sure, you don’t cut the asparagus ferns. Otherwise, your asparagus bed will be ruined completely. Give them enough time to get matured. They will replenish important nutrients in the asparagus bed for next season’s spear production.

Storage of asparagus

  • You can’t store asparagus for very long after harvesting. So, start marketing right from day one.
  • Remove any visible dirt, or wash them gently with cold water before storing. Don’t forget to dry them completely after washing, because any moisture will pave the way for molds.
  • Bundle the spears properly, use a moist paper towel to wrap the stem ends, and keep the bundles in a plastic bag. Place the bags in a refrigerator to maximize the freshness.

So, that’s all about our asparagus growing guide. Asparagus is full of nutrition and tastes very delicious too. It is an amazing source of fiber, minerals, vitamins, calories, and sodium, etc. When it comes to economic value, it can be a great source of income too.

You can increase your income by combining it with other crops, especially in a couple of non-harvesting seasons in the beginning. So, if you are thinking about growing asparagus for commercial purposes, you can surely be affirmative about it. All you need to do is to be very active and caring.

You will have to wait for a couple of seasons, but you will be amazed at the returns after that. After all, every good thing worth to wait.

How to Grow Lettuce – An Ultimate Guide

Lettuce farming is gaining popularity day by day. It is among the highest consumed salad vegetable throughout the world. Becoming trendy in India too. 

Although the roots of lettuce farming lie in Asia. Though, it was wholehearted adopted by the rest of the countries.

Being a store of healthy nutrients, how to grow lettuce, became an important part of farming.

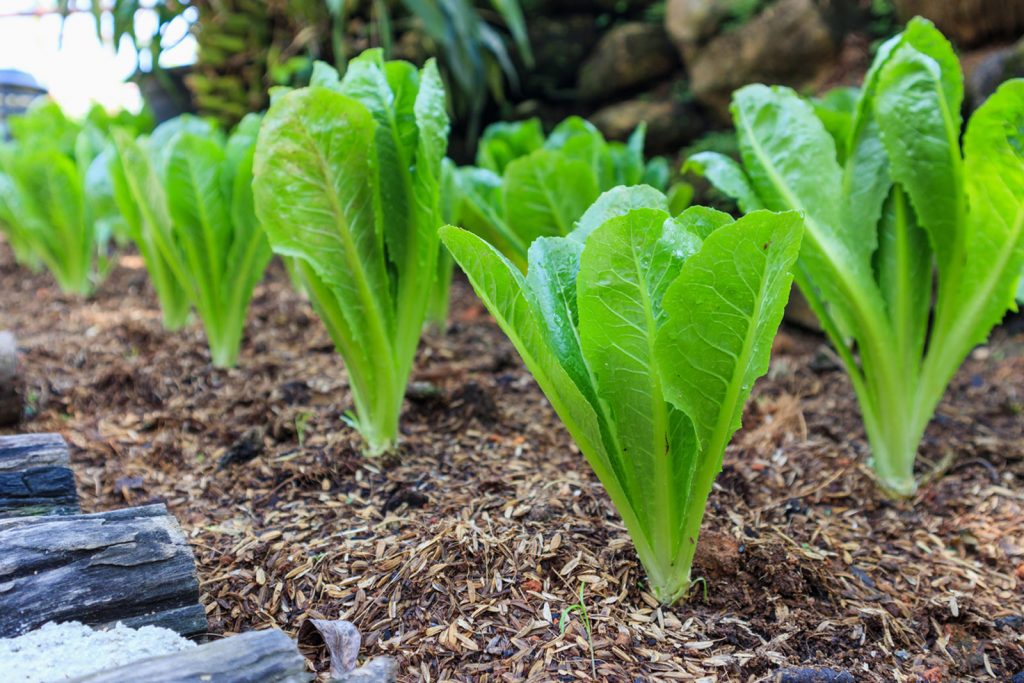
The Romaine species of lettuce is the most famous among all. Lettuce finds a place in healthy food items like wraps, salads, sandwiches. Etc.

China lead in the production of lettuce. It is a spiral leafy vegetable with a package of health.

This crop has acquired commercial importance in the passage of time. If you are planning a business strategy by growing lettuce, surely will land towards wealth in your bag.

How grab a look!!!!! 

Different types of lettuce 

These nutrition ruched salad leaves have different species. Check them out:

  1. Leaf Lettuce: 

They are like a branch splashing out from the stalk. Red, green, and Oak in color. Leaf lettuce is the most delicate and short-lived. The red one has a mild flavor than the green one. While the oak one is the crunchiest and spiciest.

  1. Romaine Lettuce:

Sweet in center and bitterly towards the tip, long and firm in appearance.

  1. Iceberg lettuce:

It is crispy in taste and resembles cabbage. Unlike lettuce, it is not juicy. Can be refrigerated for 15 days in plastic bags.

  1. Arugula Lettuce:

This is generally used in pizza toppings. Blends with pesto sauce so go well in sandwiches too.

  1. Frisse:

It belongs to the radicchio family. Available in grocery stores are used as toppings.

Requirements for how to grow lettuce

For growing lettuce on your farm, these things should not be overlooked. Note the following:

Climate

Being a cool-headed crop thrives amazingly well at temperatures ranging between 15 to 18 degrees. 

They are reluctant towards extremely hot temperatures. It can be cultivated throughout the year using shady or greenhouse effect in warmer climates.

They have a speedy growth. And performs well in the spring season. Ideally, the  lettuce growing season is spring time before the onset of scorching heat.

Soil Required

Good organically rich soil is a perfect combo for Lettuce cultivation. The soil should excel in two things, water retention and good drainage. 

This is a boon in disguise for farming. Highly allergic to acidic soil, better to choose a neutral one.

Prepare Land

The land needs good plowing till tilth. Plowing has to be carried out for successive 3-4 times.

Also, get the soil tested for productivity and if needed add some good organic manure to boost up the productivity.

Make necessary arrangements to flush out excessive water at frequent intervals.

Irrigation

Water supply should be maintained regularly. For this, you can water the plantation, once every 4 days. Extra water must be flushed out during excessive rains.

Fertilization

60 TO 65 KG of potash and phosphorus is needed by the lettuce crop. With good quantity of manure around 15 to 20 tonnes. It ensures healthy growth.

Pest and Disease Control

The pests are the disturbance-causing agent. They hamper the yield and have an adverse effect on lettuce cultivation.

Cutworms, bollworms, aphids are some of the enemies of the lettuce plantation. Soft rot, downy mildew are the diseases caused by these agents.

To curb their spread, you need to approach the horticulture department for some remedy.

Germination in lettuce seeds

Lettuce seed germination is an easy process. But you don’t have to be antsy. Pick the best quality seeds from the market or any other reliable source.

Now plant these seeds in the soil. The temperature of the place is the deciding factor to initiate lettuce seed germination.

Make sure the temperature is 20 degrees at least. Else, the seeds will enter a deep sleep mode.

During the entire sprouting time, these standards should be maintained. Ideal temperature, exposure to sunlight, and moisture laden soil is an explicit combo to trigger sprouting in seeds.

This has to be maintained for 7 to 10 days until the germination starts. You can see tiny tots emerging from the seeds.

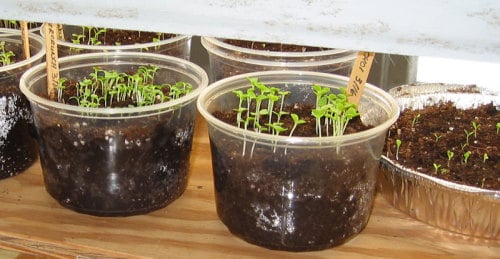
How to grow lettuce from seeds

Propagation through seeds is easy. You can sow them directly into the soil. As an alternative, they can be planted in a nursery till germination.

After that, it can be translocated to the fields.

Mostly leafy varieties are cultivated by this method. Raised beds are prepared in the field. This ensures proper water drainage and air to the soil.

The seeds should be at least 12 to 15 mm deep. This is ideal, depth for a lettuce plantation. 

A lettuce plant spacing should be done in rows 15 to 25 cms far from each other.

Also Read: How To Plant Spinach? Here Is Everything You Need To Know

How to grow leaf lettuce from seed

Leaf lettuce demands sunlight, although too much heat can be injurious. Causing bolting of leaves. As an introductory step, sow the seeds inside for about 4 weeks before the arrival of frost.

Amid springs, shift them outside in the fields. The purpose is to allow a shady and light sun area till the germination process pops up.

Do make a note sun is an essential element to instigate germination. So, don’t sow them very deeply. And cover with a thin layer of soil to allow the sunlight to reach them.

The soil quality of those freshly prepared beds should be highly productive and the PH between 6.2 to 6.8. Acid or lime soil burns the seeds. The soil must be moisture-laden to keep nurturing the seeds.

Spacing style is like one-inch gap between the seeds and a 12 to 18 inches gap between the soil beds or rows. 

Before shifting the sprouting seeds allow the seeds to get harder by reducing the water content. Maintain the temperature of 20 degrees.

Then translocate them to their soil beds in fields. Water them and protect them from injuries by moths and bugs.

After some time they start growing, keeping mulching the soil to retain the fertility. Once lettuce farming starts flourishing, it’s time to remove them before the frost arrives.

Harvesting lettuce

Such a delightful sight it is, to have those butter surfaced, big green crunch in the field waiting for you. Firstly, when to harvest lettuce is not restricted to the maturity stage.

Lettuce can be removed at any point in time. As it is consumable at every stage of growth. Even small leaves are demanded in the market for sandwiches, wraps, etc. 

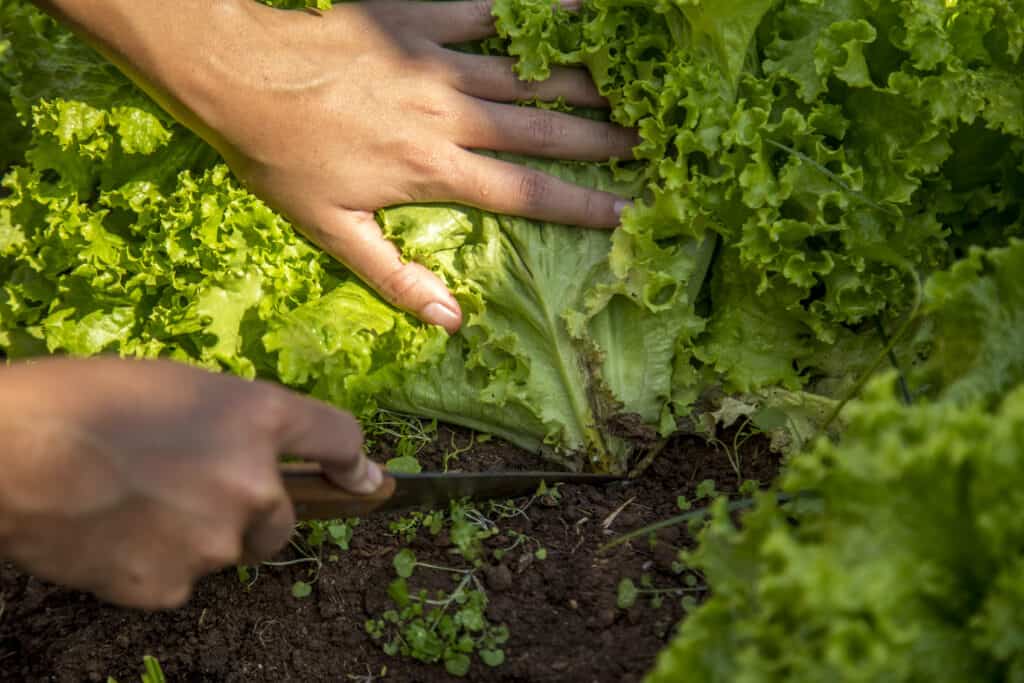
Always pluck lettuce in the early hours of the day before sunlight falling on them. To enjoy the lettuce thickens, pluck the early tiny leaves and allow the plant to grow densely.

Allow the plant to attain a bigger size. When to feel the firmness of leaves, then it’s perfect time to get the juicy leaves out. When and how to harvest lettuce is all about the firmness of the plant.

As it can be plucked anytime.

Benefits of the lettuce plant

Consumption of lettuce can be beneficial in multiple ways. Having a calorie content of 12, it is highly recommended for weight loss.

Fibrous and cellulose riches make it desirable. It assists in the breakdown of cholesterol.

Makes you hail and hearty. Strengthens the functioning of the heart.

Storehouse for omega-rich fatty acids.

Work on the protein deficiency in the body.

Conclusion

This was a brief insight into how to grow lettuce. Once you start your lettuce farming, you will get to know the profitability of this venture.

Starting the business and setting your goal towards a decent profit earning, depends on the number of efforts invested in it.

Apart from this, you have a clear picture of how much trendy lettuce has become these days.

In comparison to older times where it was considered as a fancy or lavishly consumed vegetable. Now it finds a way to the routine diet of people.

With the above information, you are already a step ahead towards lettuce farming.

Start growing your lettuce for a profitable venture.

How to: Onion Farming – An Ultimate Guide

Onion is one of the popular vegetables for most people worldwide. Growing onions is productive and straightforward. Investment needed for commercially producing onions is very limited, and onion plant treatment is also shallow.

So, we’re studying top onion growing methods, tricks, and ideas today. Usually, onions are cultivated early in the summer and harvested after their tops start to die off. Few onion varieties can be planted in fall in the southern US. At the end of this guide, you would be able to know about “How to plant onion?”, “How onion grow?”, the ways to onion cultivation, and so on.

Onion varieties origin:

Onions

For centuries, insects such as bees and flies have developed onion (Allium cepa L.) seed by random crossing between plants. This open pollination (OP) results in every onion plant being genetically isolated from many other crops in the environment.

This high degree of genetic variability results in non-uniformity for essential characteristics like maturities, disease tolerance, bulb shapes, etc. Throughout the mid-20th century, breeders began self-pollinating onions to create more scientifically uniform inbred rows.

These inbred onions were less intense and yielded less than their initial OP populations. Fortunately, the natural crossing of two inbred lines for hybrid onion will restore vigor.

Onion hybrids are much more uniform for desirable characteristics, produce consistently higher yields than OP varieties, and comprise 90-95% of US production. Also, classical plant breeding enhanced both hybrid and OP onions.

Also Read: Sweet Potato Farming Information Guide

How Onions Grow– seed or sets!

We suggest using onion sets that can be planted without thinking about frost damage and are more effective than growing from onion seeds or transplantation. Onion sets are tiny bulbs marketed exclusively for planting.

After around 3-1⁄2 months, they mature into a full-size bulb. Onion plants grow well in elevated beds or rows at least 4 inches wide. If you’d instead start growing onions from seeds, check our tips on increasing indoor onions.

How Onion Grow: Plantation of onions

You might have several questions on your mind. For example, when to plant the onion?How to prepare the plantation site? Etc. So, let’s begin with the answer to the first question. 

How to plant onions and when?

Typically, when the weather is pleasant, plant onion sets outdoors — not cold. Ideally, after planting outdoor temperatures shouldn’t drop to 28 ° F (-2 ° C). Grow onions in regions with a frigid winter as soon as the field can be worked in spring — probably late March or April. In milder climates, late fall or winter will help in onion plantation.

They’ll remain dormant throughout the cold season, but they’ll be able to develop as soon as the longer, milder spring days start.

Continue planting them indoors around six weeks before you intend to move them to the ground. Onion seeds require at least 50 ° F (10 ° C) to sprout correctly. So, you must have now got the idea about how to plant onions and when.

How to prepare for the plantation site?

It’s not a tough job to prepare for the plantation site. You just need to consider a few things before starting right away. Look at those factors below. 

  • Find a full-sun location so that individual plants won’t cover your onions.
  • The soil must be well-drained, soft, and nitrogen-rich; compacted, rough, or clay-heavy soil influences bulb growth.
  • Add in any nitrogen fertilizer while planting.
  • Conduct onion seed rotation. In other words, don’t grow them at the same place year after year because this will promote disease distribution that affects the seed.
  • Attach aged manure or compost in early spring, until planting. Onion plants are fast feeders, needing continuous nourishment to grow big bulbs.

More on how to plant onions

As they develop much quicker (and less total work), we consider increasing onions through onion sets (i.e., tiny onion bulbs) rather than seeds.

However, seeds are also an alternative in moderate, long growing season regions. If seed planting, note that onions plants live for a short period, so start increasing the year with fresh seeds.

Start seeds within around six weeks until transplanting into the field. If planting onion sets, place them 2 to 6 inches apart and don’t hide them farther than 1 inch under the dirt. When transplanting into the field, place plants 4-5 inches apart in rows 12-18 inches apart.

How onion grows – Should you plant a sprouted onion?

Yeah, you can grow a germinated onion, but you will get fewer onions. You’ll get plenty of yellow sprouts, too! 

Steps:

  • Fill a bowl with potting soil and create a middle hole around the onion’s depth and distance.
  • Next, you can place the onion in the hole, and then you need to cover it. 
  • You now need to water the onion and keep it on the sunny spot.
  • Your green sprouts are now ready for cooking, wait. You need to harvest it first!

Note: If you have a flower sprout, wait before the crop dies. Keep seeds for spring planting.

Caring for the onion plants:

Firstly, you need to consider onions a leaf flower, not a root flower. And then, you need to fertilize nitrogen every few weeks for large bulbs.

But you should stop feeding when the onions drive away from the soil and start the bulbing cycle. In addition to that, don’t bring the ground around the onions; the bulb will rise above the land.

And one more thing, generally, by utilizing mulch, onion plants don’t require regular irrigation. About one-inch water every week (including rainwater) is plenty. For sweeter onions, add more.

Getting rid of pests/diseases – Onion cultivation

Before you learn to do away with onion plant pests/diseases, you first need to know about a few pests/conditions that are its foe. 

Thrips

Take in the garden a dark piece of paper to monitor thrips — tiny insects about as thick as the sewing needle — and knock on it with their onion tops; if thrips are present, you can see their tangy bodies on the paper.

Any insecticide soap treatments destroy them. Follow packaging rules. Sprinkle the plants twice, and the thrips will vanish.

Onion maggots

Cover with a fine mesh your growing onion crop. Seal it around the edges by shifting dirt. The onion maggot likes to place its eggs on the plant’s base, which is stopped by the netting.

You should also keep mulch off because insects like organic matter to rot and make sure that you collect your onions thoroughly as the season progresses. In stormy times onion maggots are usually a concern, so such measures may be unnecessary when you have a dry season.

From Onion harvest to the storage of onion plants

Now is the time to explore the details about how to harvest and store onion plants. This step is pretty much crucial since it’s the time to reap whatever you have sown with your hard work. So, let’s first begin with the onion harvesting part.

Irrigation needs for onion farming

Irrigation is needed at the time of clove transplantation / dibbling, and moderate watering must be performed on the third day after plantation and subsequent irrigation at 7-10 days intervals depending on soil condition and season. Immediately after planting, water transplants.

Due to the shallow root system, onions need regular furrow irrigation. Stop overhead irrigation causing plant diseases. If the foliage is harmful, yellowish, the plants are over-irrigated. The soil would be too dry around an under-watered crop and broken.

Onions typically need 30′′ irrigation during a growing season, and the closer to onion harvest, the higher the need for water. If the onion doesn’t get enough sunlight, it won’t make a large bulb. When the necks begin to fall, and the onions mature, watering should be stopped, allowing the soil to dry.

Must Read: Pumpkin farming: how to plant, grow, and harvest pumpkins correctly and properly

Micro-irrigation of onion crop

Through drip and sprinklers, irrigation will happen once every three days. A drip machine operating pressure should be 1.5kg / cm2 and 2.5kg / cm2 for the rotary micro-sprinkler. Using nitrogen fertilizers should be achieved by a trickle. Apply 50 percent N as a primal dose and the remaining 50 percent N for seven splits (10 days period up to 70 days after transplantation) via the drip irrigation system.

How to plant Onion: Crop rotation

Practical and optimum use of all the applied soil mineral nutrients is impossible. Available nutrients leach and settle in the sub-soil.

Over the next planting season, planting leguminous crops will ensure utilizing these nutrients. Thus, the cultivation sequence of onions and legumes is recommended to preserve soil quality, optimum nutrient usage, and higher yield.

How to harvest onions?

  • Pull some onions sending flower stalks; if you see the flower stalk, it means that the onions have stopped growing. Such onions are not well processed but can be used in a few days.
  • When onions start maturing, the heads (foliage) turn yellow and start falling over. Bend the tops at that stage or even stump them to speed up the final maturation process.
  • You need to loosen the soil around the bulbs to encourage drying.
  • Are you observing the brown tops? Great.It’s an excellent time to pull the onions.
  • And lastly, ensure that you harvest only in late summer before the weather gets cold. Since mature onions may get spoiled in fall weather.

Harvest onions: Pre and post-harvesting

In addition to the doses of fertilizers as recommended, the crop is watered in rolls of 6-12 days, based on local conditions. Be vigilant about watering turns, such that the plant may not suffer from water tension. When the onion bulb matures below level, the long upper leaves become yellowish and begin to fall off, meaning the crop is now ready for harvest.

When the roots at the bulb’s bottom are dry, they lose their grip on the earth. The stage’s called “neck-breaking.” When 75% of the crop has reached this point, harvesting begins. The pulled-out bulbs are permitted to stay in the field for 4-5 days, which in turn dries up and thickens outer layers, increasing storage life.

Storing the onions

  • Clip the roots and cut the tops up to 1 inch (but if you intend to braid the onions, leave the heads on).
  • Let the onions recover for a few days, depending on the weather. Often treat them very carefully — the slightest bruise can promote spoilage.
  • Enable onions to dry for a few weeks before stocking in a root cellar or any other storage area. You also need to spread them out on a full screen, which should be off the ground to dry.
  • You need to store it at 40 to 50°F while removing its stems in a mesh bag.
  • You should not store apple or pear onions together, as the fruit-producing ethylene gas can disrupt the germination of the onions. On the other hand, onions can also ruin these fruits’ flavor.

Marketing of onion

Onions can be classified into three marketable categories: spring (“green”), summer-fresh market onions, and fall/winter onions (“dry bulb”). Fresh or green onions are pulled while the tops are still green, usually before a large bulb has grown. Small, light-colored skin may recognize fresh market onions and have edible green tops.

While the new onion market was accounting for the most significant proportion of onion use, other markets also account for substantial production. Most canning and freezing onions come from new market varieties, while dehydrated products use separate types with a higher solids content

Conclusion

So, it was all about the onion farming. We have tried to answer all your questions related to this topic. Whether it be plantation to harvesting and everything in between, we hope you can now kickstart farming practices.

How to Plant, Grow Sweet Potato – Farming Guide

Sweet Potato popularly known as Yams in some parts of North America and is one of the most favorite foods enjoyed by all. It is native to lands of tropical America and generally comes under the family of ‘Convolvulaceae’.

Sweet potatoes are rich in carbohydrates and hence, give a good amount of calories when consumed. Due to its high carbohydrate content, it is used as livestock feed. Sweet potatoes have sweet root tubers. Thus, it is the main source of starch, industrial alcohol, sugar syrup, and glucose.  

How to Plant, Grow Sweet Potato?

sweet potato

Climatic Conditions

Sweet Potato cultivation has a wide color range of tuber skin. This mainly consists of purple, brown, white color tuber skin. Farming is done mainly in tropical and subtropical climatic regions. It is generally cultivated in totally frost-free areas.

Soil specifications

Sweet potato cultivation requires soil that has a pH of 5.8 to 6.7. It can be cultivated in sandy as well as loamy soils. However, the best soil recommended for sweet potato cultivation is sandy loam soil with high fertility and good drainage system. It is advised not to cultivate in areas having light sandy and heavy clayey soil.

It is so because the tuber development in such soil does not occur well. Many varieties of sweet potato are cultivated. Among them, the most common variety is Punjab Sweet Potato- 21. This type gives an average yield of 75 QTL per acre and contains deep red color tubers having white flesh.

Also Read: Growing Mushroom for Your Diet

Other varieties from different states include:

  • Varsha, which is grown in Maharashtra and gives an average yield of 62.5 QTL per acre.
  • SreeArun, which is grown near Sreekariyam gives an average yield of 83 to 116 QTL per acre.
  • KonkanAshwini, which is grown in Maharashtra gives an average yield of 70 QTL per acre.
  • H – 41, Co 3, H – 42, and SreeRetna are some of the improved varieties of sweet potatoes cultivated in the US.  

Land Preparation

Now, a question arises on how to grow sweet potato. Farming requires proper land preparation. It is essential to bring the soil to a fine tilt. Before sowing the seeds, it is essential to plowing the land around three to four times. This should be followed by the planking process. Ensure that the land is free from weed.

This is followed by the sowing process. The best time for sowing tubers in nursery beds in January or February. For planting vines, the best time is between April and July. To sow tubers, keep the depth to 20 to 25 cm. For spacing, it is advised to use the row to row spacing of sixty centimeters and plant to plant spacing of thirty centimeters.

Commonly, sweet potato farming uses vine cutting methods for sowing purposes. In this, the tubers are taken from the old vines and are then planted and prepared on nursery beds. Ridges and flatbeds are used for vine plantation. It is advised to use terminal cutting as it gives a better result. Also, the host plant should have at least four to five nodes.

You can sow around thirty-five to forty kilograms of tubers in half a Kanal land, which is then followed by the planting of vines in one-acre land. You can also treat the tubers by placing them in a plastic bag and soaking them in concentrated sulfuric acid for around ten to forty minutes.

Planting sweet potatoes 

Sweet potatoes have unique properties and hence can be cultivated even in poor soil. There are chances of development of deformed roots if the soil is very clayey or is rich in the excessive sandy dirt. For creating a perfect environment, it is necessary for creating long, wide ridges spacing at least 10 inches. The potatoes are placed at a distance of 3 and a half feet from one another. 

The plantations require plenty of compost. Avoid the use of fertilizers that are rich in nitrogen components. These produce lush vines and stunted tubers. If you are performing sweet potato cultivation in cold areas, remember to cover the soil with a plain plastic. This will help in keeping the soil warm, thereby promoting strong growth to the sweet potatoes.

Sweet potatoes cultivation and crop rotation 

Sweet potato farming can be done along with rice crop rotation. This can be done for maximum usage of land. In such a case, sweet potatoes can be planted in December and January after the second harvest of rice. After sowing, apply a full dose of K2O and P2O5 which acts as fertilizers.

Also, apply nitrogen dose at the time of planting and after five weeks of planting. This fertilizes the soil and helps in providing better results.

After planting the vines, perform irrigation once in 2 days for ten days. After that, perform irrigation once in seven to ten days. Thereafter, before three weeks of harvesting, stop the process of irrigation.

However, irrigate the land before two days of harvesting. This provides better results. This process should be followed to grow sweet potatoes.

Weed Control

Weed control is another essential step undertaken during cultivation. Sweet potato cultivation requires the application of several treatments to prevent the growth of weed around the crops. Treatment solutions such as Metribuzine 70WP with a dosage of 200gram per acre or Alachlor at 2ltr per acre is applied to the field. This needs to be done before the sweet potatoes start sprouting.

Weed infests the plants even after sprouting. When around 5 to 10% sprouts have emerged, the sweet potatoes’ field gets infested with several varieties of weed. At this stageParaquat at 500 to 750 ml per acre is applied

Protecting the plants against pest

Sweet potato weevils are long insects with a length of ¼ inches. These are dark blue heads, orange-red bodies, and wings. They lay their eggs into the stems and tubers. They lay their eggs on the tubers and stems. The fleshy roots contain sufficient nutrients for the larvae to grow, while the vines and leaves are a great source of nutrients for the adults.

Potato foot rot, a common disease in these plants are caused due to these pests. The plants infected with the disease have brown or black stems near the soil and at the ends, that does on enlarging.  

These weevils multiply themselves quickly and can affect the whole field within a few days. Hence, they are hard to eliminate. But, with better-certified disease-resistant chemicals along with crop rotation after every four years.

It is advised to destroy all the plants from their roots that have been infected. Alternatively, you can pick these plants along with their roots, place them in a sealed container, and discard them with other household wastes. 

Irrigating the field

Another important technique that is involved in all types of crop cultivation. Some crops require less water while others require more. Moreover, the amount of irrigation required for different crops is different at every stage.  

Sweet potatoes are irrigated once in every 2 days after the stems are planted. This continues for about 10 days. Thereafter, irrigation is given once in a week or 10 days. The plants stop receiving irrigation before 21 days of harvesting. However, irrigation is just a couple of days before sweet potato harvesting. 

Protecting the plant from different diseases

Apart from the above-mentioned points, it is very important to perform weed control in the initial days. Earthing up should be followed after one month of planting. This removes weeds and results in good yield. Weeds are automatically suppressed once the vines start to grow.

Also, it is important to protect your sweet potato cultivation from various diseases. Various diseases such as black scurf, early blight may destroy your plantation and may cause a great loss to the investment.

A black scarf is observed on tubers which in turn causes the plant to dry up. In this, black color appears on the tuber’s eyes. To avoid this disease, treat the tubers with mercury.

In early blight, some necrotic spots appear on lower leaves of the plant. It happens in areas having high moisture content and low temperature. To avoid this, prevent mono-cropping and follow crop rotation. Check for other diseases like common scab also. It is advised to perform pest control by using appropriate pesticides.

Besides, sweet potatoes are affected immensely due to fungal diseases. One such is the black rot, causing dark and circular depressions on the tubers. Infected sweet potatoes must be discarded properly, followed by curing the healthy roots of the same crop. 

Stem rot is another fungal disease commonly found in these plants. The fungus affects the part of the stems that insects have injured due to careless sweet potato farming. Although plants will not die due to the disease but will result in poor quality yields. It is best to plant healthy slips for farming. This will minimize the chances of the plants from being infected by insects and fungus. 

Are you afraid of mummification of sweet potatoes? Are you wondering how to save them and reduce dry rot? It is easy. Store the healthy and fleshy roots at 55 to 60 degrees. This simple step will help you a lot in saving your sweet potatoes as well as give you high yields. 

 Harvesting sweet potatoes

Lastly, harvesting needs to be done. These crops get mature after around 120 to 125 days of planting. Sweet potato harvesting is done at the time when tubers get mature and the crop’s leaves turn to yellow. But, the longer you keep the crop in the ground, the better yield it will be. How? If the potatoes are left for longer, they will be more nutritious as they will have high vitamin content.

Must Read: Onion Farming Skills? Here’s What To Do

But be careful and keep a track of the climatic conditions. On the arrival of frost, the vines will start to turn dark, and finally black. Beware, the tubers will start rotting and the yield will be wasted. 

What are the best ways of harvesting sweet potatoes? Many often inquire about this, as they are not aware of the best measures. It is better to use a spading fork for digging tubers during sweet potato harvesting.

Harvest them on a bright sunny day. This needs to be done when the soil is completely dry. Store them in a well-ventilated area at 85 to 90 degrees Fahrenheit for a couple of weeks. 

There is a sharp trend in the cultivation of sweet potatoes. Farmers are shifting the areas for cultivation of other cash crops that have a high yield and more demand in the market.  

Cabbage Farming Guide

Cabbage also is known as Brassica oleracea var. capitata is a popular temperate and small green-leafy or purple vegetable. The leafy vegetable is also called a biennial plant or as a rabi crop but in certain areas, it is grown as a Kharif crop too.

Cabbages are rich in vitamins C and A and are also filled with minerals such as sodium, calcium, phosphorus, iron, and potassium. Cabbage can be consumed in cooked or raw form depending on the individual. The external appearance of the crop displays a compact mass of smooth leaves wrapped around each other and the structure is referred to as the head of the vegetable.

The leaves on the exterior are large in size than the inner ones. The stem of the plant is stout and short and the flowers of the plant appear in the winter season. Thus, cabbage is a cool-weather crop.

Before initiating cabbage farming, it is essential to understand the basics of cabbage cultivation and the environment necessary for the entire process. Starting to grow cabbage in the late or mid-summer so that it can be harvested in the winter, early spring, or in the autumn season.

The seeds of the crop should be planted indoors approximately 4-6 weeks before the last spring frost and the crop should be ¼ inch deep during the sowing process. The transplants of the crop can be transferred to the outdoor garden once they are around 7-10 cm (3-4 inches) tall and the seedlings are hardened.

The sowing process of the plant can be started as soon as the soil is easy to work on in the spring season. The regions with mild winters can start the seeding process during the late summer so that the crop can be harvested in spring or winter.

Also Read: Are You Embarrassed By Your Onion Farming Skills?

Perfect Environment to Grow Cabbage

How long does cabbage take to grow

Weather and soil are the dominating factors in the proper outcomes of the cabbage. Cabbages are regarded as adaptive in nature when it comes to soils as well as climate. Cabbage quickly depletes the nutrients present in the soil and thus the plant is considered as the heavy feeder.

Organic constituent rich and well-drained soil is ideal for growing cabbage. Heavy to sandy soils rich in nutrients is preferred for cabbage cultivation. The planting bed/soil should be prepared well in advance by combining the aged manure or compost. The well-drained soil aids in inhibiting the rotting of the head that stands in the water.

Light soil is used for early crops whereas late crops require heavy soils to store moisture. Growing the plant on the heavy soil helps in growing the plant slowly thus maintaining the quality. The soil used for cabbage farming should have a pH level in the range of 5.5-6.5. The pH of the soil shouldn’t cross 6.5 and it shouldn’t fall below 4.5 as it can damage the petals of the cabbage plant.

The cabbage plant is prone to various diseases when grown in saline soils. Thus, it is crucial to determine the pH to get the best results in the cabbage planting. Furthermore, crop rotation is practiced to avoid soil-borne diseases and infections to the plant.

The cabbage plant in the Indian subcontinent is grown in moist and cool climatic conditions. The optimum temperature ranges from 15°-21°C for the perfect growth of the head of the cabbage. The flowering intensity of the plant is influenced by the duration of its exposure to low temperatures and the age of the plant.

Popular Varieties of Cabbage

There are different types of cabbages with varied sizes, colours, and shapes. The varieties in green cabbages are Golden Acre, Round-Up, Blue Boy, Green Boy, Badger Ban Head, Market Prize, Blue Ribbon, Flat Dutch, Jersey Wakefield, and Stonehead. Red cabbage varieties are Ruby Perfection, Red ball, Red Acre, and Red Ribbon. Savoy cabbage varieties available are Savoy King and Savoy Ace.

The other varieties available are PusaMukta, Hariana, Bajrang, September Early, Pusa Drum Head, Pride of India, K-1, Pusa Synthetic, Late Large Drum Head, ShriganeshGol, Copenhagen Market, Early Drum Head, Kaveri, and Midseason Market.

Stages of Cabbage Growth

The complete growth of cabbage is divided into 9 stages – Cotyledon (first leaf), Seedling, 6-8 true leaf, 9-12 true leaf, Precupping, Cupping, Early head formation, Head fill, and Mature stage. The seedling goes through these stages to turn into a mature plant.

Cabbage Watering Requirement

Watering the cabbage plant too is an important ingredient necessary in the developmental stage of the plant. The cabbage plant need a continuous moisture supply. Drip system can be installed for better water retaining. Plant bolting occurs in the dry environment and thus prevents from drying. A cabbage plant requires 11/2-inch rain/week and if the environmental condition is not favourable, external watering should be done to keep the plant hydrated.

Around 10 litre water is required for meter square of the land and thus hose and jugs are used. It is essential to be careful while watering the root levels and upper levels. Roots help in retaining the soil moisture and upper levels aids in keeping diseases and pests at bay.

The leaves that have turned yellow should be removed as they can cause a further infestation in the plants. Mushy soil is not a suitable environment for cabbage like other vegetables. If for any unknown reason the soil is dry, the soil has to be dug 3 inches down and then water it. If the moisture level transfers from the upper layer, the plant can be harvested in better shape.

Spacing and Planting Cabbage

Cabbage farming is easy but to understand the correct planting procedure helps in good yield. The distance of planting relies on soil conditions, variety, and planting season. The seedlings are planted in 4-5 levels. The seedlings of cabbage are sowed 0.5-inch-deep and spaced 2.5 cm (1 inch) apart.

Thin plants on the other hand are 45-61 cm (18-24 inches) apart from each other. When there are 4-5 true leaves and are 4-6 weeks old, cabbage can be transplanted to the garden. Cooked stem plants should be planted deep. Seedlings are spaced 45-61 cm (18-24 inches) away from each other and are placed in rows which are apart at 61-91 cm (24-36 inches).

The plants can also be placed near to each other but the size of the mature heads would be smaller. Based on the maturity levels, the following distances are recommended:

Early maturity: 60×30 cm or 45×45 cm

Mid-level maturity: 60×45 cm

Late maturity: 60×60 cm or 75x60cm

A garden fabric set or black plastic can be used to plant cabbage in the early spring season. An x is cut in the fabric or plastic to set the cabbage transplant. Cabbage crop can be planted in succession with the time interval of every 2 weeks so the plant can be harvested at varied times of the season.

Planting Method

Morning or late evening is preferred time for transplanting process. The roots of the seedlings are dipped in Bavistin solution (2 gram/litre of solution) before transplantation. After the process of transplantation, irrigation is immediately carried out. Some countries irrigate the beds first and then the seedlings are transplanted to the bed.

Irrigation Mechanism

The cabbage is a versatile vegetable yet at the same time, it can’t suffer drying out. In the colder time of year season the interim irrigation methodology is used which takes 8-10 days. In any case, in the dry season the method must be constant.

A restricted water quantity ought to be present in furrows in order to re-hydrate the crops during dry climatic conditions. During the rainy season, a remarkable drainage technique needs to be made to deal with the situation. Areas with less rainfall should implement drizzle irrigation to cope up with the water scarcity in the plantation method.

Fertilizers and Manures

The dose of fertilizer depends on the quantity of organic manure used in the crop and the soil fertility. Approximately 4 weeks before transplanting, 15-20 tonnes of FYM is integrated into the soil for better yield. In general, for optimum yield 60-100 kg P2O5, 60-120 kg K2O, and 80-120 kg N is recommended. At the time of transplantation, entire quantity of K and P is given and half dose of N is applied. The remaining N is applied after 6 weeks from transplantation.

Apart from these fertilizers, decomposed cow dung 40 tonnes/ acre, Muriate of Potash 40kg/acre, Single Superphosphate 155kg/acre, and Urea 110kg/acre is applied. Also, look for magnesium or boron deficiency in the plant and accordingly perform soil testing.

Companions of Cabbage

Cabbage can be grown together with onions, fragrant herbs, beet roots, potatoes, sage, thyme, cucumber, dill, spinach, kale, artichoke, lettuce, and celery provide additional benefits to the cabbage plant. Try to avoid growing tomatoes, pole beans, cauliflower,and strawberries as they require the same nutrients and thus can’t be grown together.

Harvesting and Yielding

when do you harvest cabbage / cabbage harvest time?

It takes 90-120 days for the plant to get harvested. The ideal time for harvesting the cabbage is when the head portion is mature and hard and stable. The delay in harvest even for few days after it is matured can cause incidences of disease and split heads of the plant.

The harvesting of heads that are immature results in reduced yield as the heads are not yet mature and are easily prone to damage due to the delicate nature. The life of immature heads is shorter than the mature heads.

The harvesting of head is done by tilting the head on one side and then gradually cutting it with a sharp knife. The stalk of the plant has to be cut in flat form and incision should be done close to the head but stalk has to be long to preserve 2-4 wrapper leaves. The wrapper leaves or extra leaves behave as cushions that helps in protecting cabbages while handling. Certain markets desire the extra leaves for consumption or decoration purposes.

The head of the plant has to be handled carefully and should not be twisted or snapped while removing as it can cause head damage and the length of the stalk becomes inconsistent. The breakage in the stalks causes faster decay.

Depending on the maturity of the heads, the harvest is carried out as different heads require different time for maturity and thus differs in harvest time. Before packing, the harvested produce should be stored in shade conditions. The sorting and grading process is followed after harvesting and it depends on the head size.

The yielding process depends on various factors such as cultivation season, variety, and maturity group. The early varieties have an average yield of 25-30 t/ha and the late level varieties yield is 40-60 t/ha.

Common Diseases and Pests

The growth of the plant attracts various types of pests and diseases. These pests and diseases impact the plant externally as well as internally. The entire system of the plant from roots to leaf is damaged by the catastrophic elements. For instance, it can damage the essence, weight, growth rate, color, and many other things.

The pests infecting the crops are Cutworms, American Bollworms, Flea Beetles, Aphids, Cabbage worms, Nematodes, Cabbage rot maggots, Bagrada Bug, Diamond Back Moth (DBM), and Cabbage loopers.

The diseases that infect the produce are Wire Stem, White Blister, Downy Mildew, Club-root, Target spot/Leaf spot/ Ringspot, White Mould, Blackleg (Dry Rot Canker), Powdery Mildew, White leaf spot, and Dumping off. Most of the diseases are caused by Botrytis and Sclerotinia.

To control these diseases and pests, chemicals like insecticidal soaps, Spinosad, Carbaryl, Permethrin, and Neem oil extracts is used. However, not all the pests and diseases can be controlled and thus a proper consultation with agricultural institute might provide solutions.

Preserving and Storing Cabbage

Cabbage can stay for 1-2 weeks or may be longer in a refrigerator. The seeds of cabbage can be sprouted. Cabbage can also be dried and frozen. It can also be cured in brine to make processed cabbage known as Sauerkraut.

Conclusion

Cabbage farming can yield profits if best practices are implemented at every stage of the process and proper hydration is provided to the plant.