Do you want to start a Papaya farming business? Here we have listed a comprehensive business strategy roadmap for beginners with profit margin, expense, and papaya farming techniques. However, before we tell you anything about Papaya farming, let’s first get familiar with this plant and the cultivation techniques that you should use to get the maximum output.
About Papaya
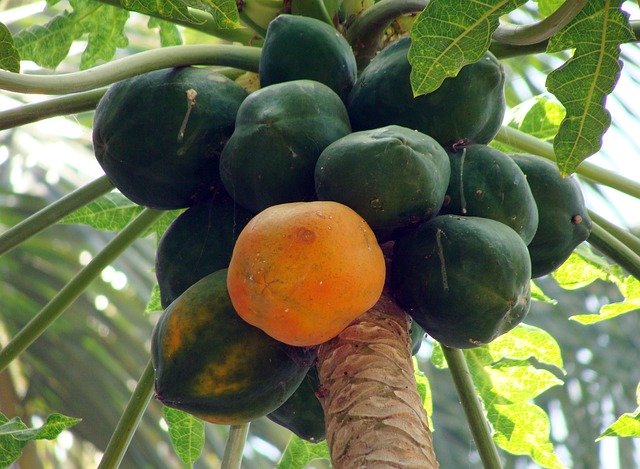
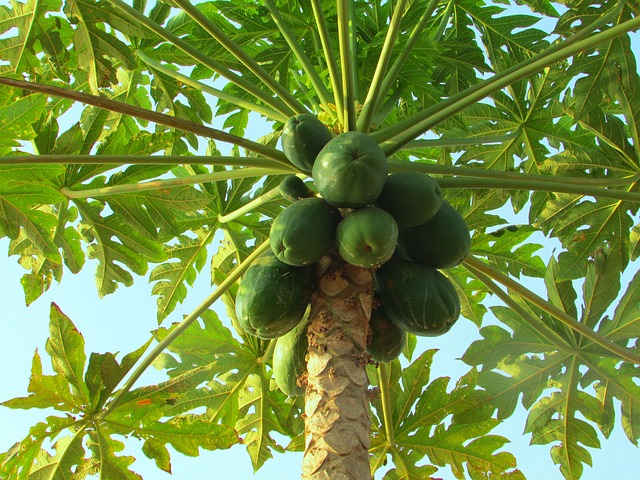
Papaya (Carica papaya) could be an early-living and dying fruit tree. These fast-growing trees can bear fruit in the first year of planting, if possible. However, a multi-hour sub-freezing temperature will destroy an exposed plant. Papaya plants are so cold sensitive that they should be grown in warm areas. Throughout the year, warm areas will have papaya flowers and fruit on the plant.
How long does Papaya farm take to grow?
It may take eight to 10 months before the fruit is ready to be harvested after planting a small plant in the field. In the number of months that Papaya will develop and bear mature fruit, the environment has a role to play. In hot areas, harvesting from seed can take six to nine months, but zones that are more temperate need 9 to 11 months to be able to grow fruit from seed. When planted later in the year, the colder autumn and winter weather slows down growth and increases the time required by the plant to produce fruits for harvest.
Also Read: How to Nurture the Dragon Fruit –An Exotic Tropical Fruit
Papaya cultivation and harvesting
When the tree has bloomed, wait for five to eight months for the fruit to be harvested. This time depends on the temperature and the state of the fruit. Papaya trees bloom during the year. After the first year, the fruit and flowers on the tree should be supplied continuously.
The form of flowers on a tree decides whether, after many months, you can see fruit. If the tree has male flowers only, it won’t be fruitful. Trees that have only female flowers, or both, can bear fruit if adequately pollinated. Vigorous flora hangs from long stalks, while female vegetation has short stalks and a bulge at the ovary’s base.
Edible flowers like female flowers are available on short stalks and have the stems that are typical of male flowers.
How to know if your papaya plant has fully grown-up
As there are often fruits in various stages of tree development, it will help to recognize the ripe ones when to pick them. The fruit’s color is the primary measure of maturity. Choose fruits of one to three-fourths of the yellow rind.
The green fruit is not ripe and after harvest does not sweeten. Depending on your growing conditions, 30 to 150 fruit can be obtained each year from your papaya tree.
Papaya farming blueprint for business
You must conduct an economic analysis to validate the use of various production inputs and the revenues received. Fixed costs are primarily in initial land growth in papaya farming. Fixed prices may include fixed labor salaries and repair of farm machinery and other miscellaneous expenses.
The cost varies between manufacturing methods and input costs, including fertilizers and pesticides. It also includes payments for irrigation, intercultural, mining, transportation, and other management activities. Calculate the gross production expense. Calculate and record the anticipated profitability and ROI in your business plan.
The more uses, the better business prospect
- Papaya is used in many ways. And, its several uses opens the opportunity to explore the business scope from the same. So, let’s know more about it.
- Sometimes Papaya is taken in the breakfast or dessert fruit.
- Papaya is also loved as a diet fruit.
- The culled Papaya can be fed to the pigs and or other cattle.
- Papaya is used as an ingredient in a variety of fruits across the world whereas unripe fruits and leaves are also used as a vegetable.
- Papain, which is milky latex obtained from the Papaya after a process of the incision. And, then latex is dried and sold in the powder form.
- The latex powder is then used in digestion aids, tooth-cleaning powders, and so on.
Papaya farming and health benefits
1. Papayas are high in starch, vitamin C, and antioxidants that avoid arterial cholesterol build-up.
2. Single Papaya will meet more than 200% of your daily vitamin C requirements, which makes it ideal for developing a more robust immune system.
3. Papayas have a low sugar content (8.3 gm. in a cup of Papaya) and glycemic index. This property produces excellent papaya fruits for diabetics.
4. Papayas are rich in vitamin A and flavonoids such as beta-carotene, zeaxanthin, cryptoxanthin, lutein that keep mucous membranes safe in the body.
5. Just 120 calories include one medium-sized Papaya. It also helps in the pursuit of weight loss.
6. Papaya is rich in many nutrients, such as vitamin C, which will keep you stress-free.
Papaya cultivation and agro-climatic condition
A tropical fruit, Papaya. Sub-tropical sections, however, also develop well. It’s frost-sensitive. The ideal temperature is 25-30 ° C and 16 ° C minimum. Appropriate pH is between 6 and 6.5. The foothills enjoying mild winters are suitable for papaya cultivation. Low temperature and frost restrict higher-altitude cultivation. Excessively cold nights cause slow fruit maturation and mediocre quality in the winter season.
Papaya cultivation and soil suitability
The right soil type is well-drained or sandy loam soil with enough organic matter. Sticky and calcareous soils aren’t pleasant because the soil can trap rainwater. It could be lethal to the crop. In this scenario, create a better-raised ground and drainage ditch. Furthermore, you must keep the field with enough soil moisture required to grow papaya plants.
Also, a ripening dry climate is fantastic for fruit quality. Additionally, in the same region, continuous cropping can result in reduced production. A slightly messy field is compared to a perfectly flat area. The region’s hilly soil is ideally suited to well-drained organic matter.
Steps involved in papaya farming
Now, it’s time to dive deeper into the steps involved in papaya farming. Therefore, those to better utilize your farming skills.
Propagation
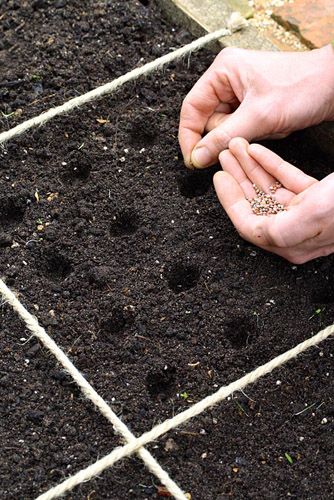
You’ll need seed papaya propagation. Second, you must collect seeds. You can receive from ripe, big, healthy fruits, mainly from pest-free female plants. Often seeds fail to germinate because seed viability is lost in about 45 days.
Germination of seed
The equilibrium temperature is 21-27 ° C, and 19-29 ° C of extreme emergence. It takes 1-4 weeks after sowing, depending on the weather. Treat with Thiram (TMTD) W.P. Until, sowing young to combat fungal diseases.
Sowing the seed
In 8 – 9 cm long, 8 cm long, and 8 cm high or black soft plastic containers, you can use the clear plastic bag. The bags require drainage space. You may also use a plastic seedling tray. It is a new form of seedling for good seedlings.
Transplantation
When the seedlings are 15-20 cm tall, a razor blade will open the bag. Now the seedlings are set for evening transplantation in pits. You may plant three seedlings about 15 cm apart in each hole. Watering is vital after transplantation for rapid recovery from transplant shock.
Adding Manure
The plant requires continuous fertilization as fruiting begins at maturity. From day one, you will prepare for fertilization. Because a five-month transplant-to-first flowering cycle is essential for papaya plant nutrition. You will stop manuring 6 months before harvesting the crop.
Now it’s about cropping
Male papaya plants typically thrive and start flowering after three months of transplantation. When their presence is detected, you will delete most of them. Of successful female flowers, however, around one male tree is kept for every ten female trees. Papaya starts flowering about five to six months after transplantation.
Irrigation
Currently, irrigate every winter ten days or every summer week. However, it varies with soil, climate, and irrigation methods. You may use a loop, furrow, or drip irrigation. Be sure, however, to avoid water meeting the stem. Irrigation can avoid frost damage to plants.
Papaya cultivation and plant protection
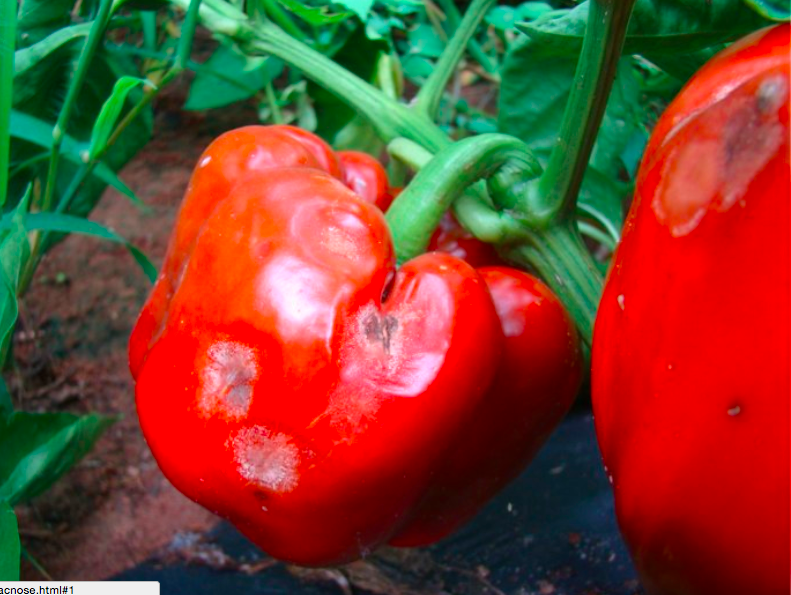
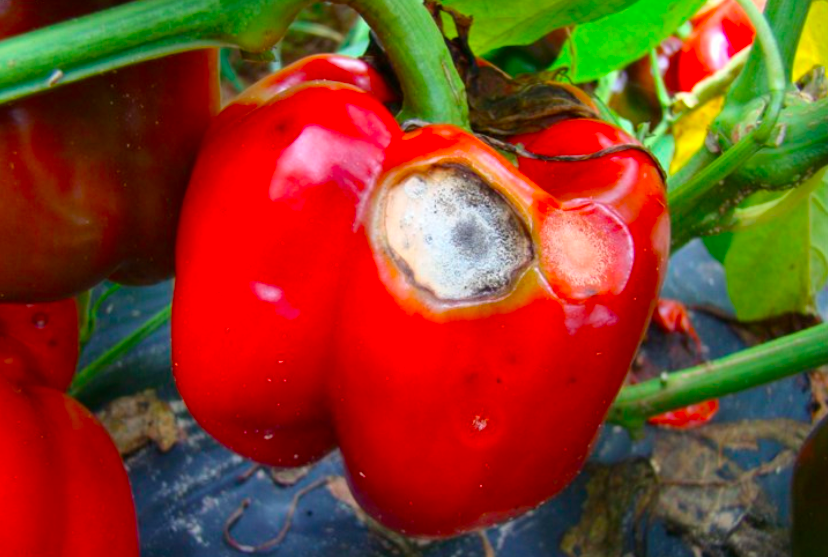
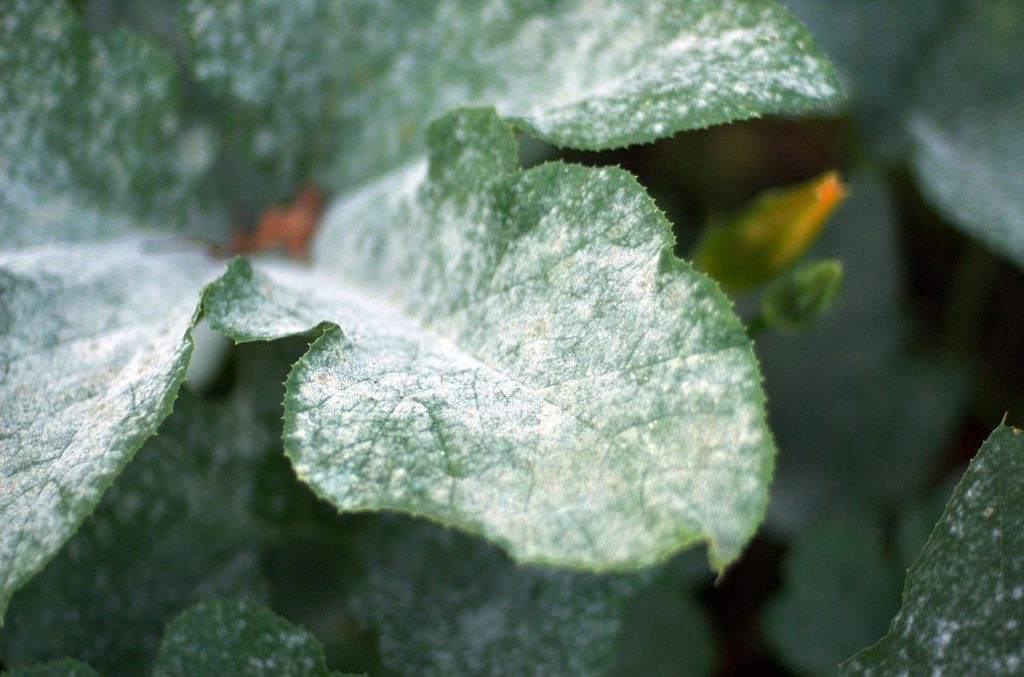
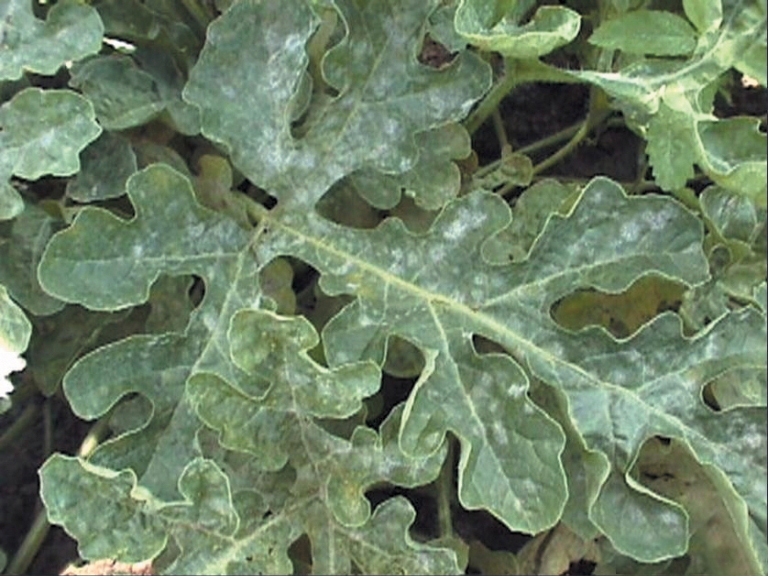
You need proper disease management to get the optimum yield. The major diseases are powdery mildew (OidiumCaricae), anthracnose, and stem rot.
Another possible condition is a root-knot nematode (Meloidogyne incognita) frequently and gently extracts weeds at the early stage. Never deep soil tillage, however, because the plant has shallow roots. With 43% lasso E.C, you can apply herbicide once before an emergency.
Harvesting
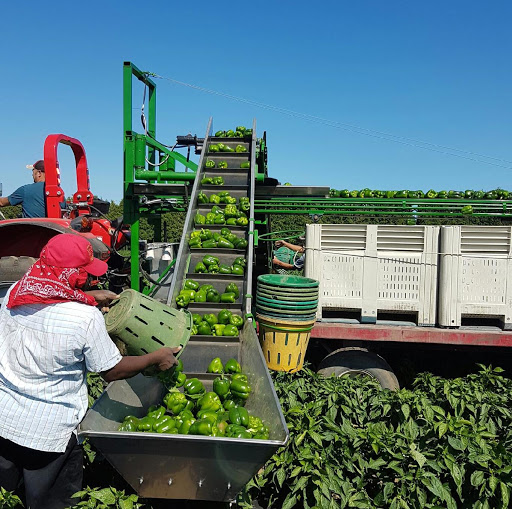
Overall, Papaya takes six months to bloom. And, five more for processing. However, it can vary with climatic conditions and management. For shipment to distant markets, fruits should be harvested when the apical starts to turn yellow, and latex is no longer milky.
In the cold months, fruits will stay on the tree to produce deeper colors and get a better flavor. In papaya cultivation, in the first 15 to 18 months, a tree with proper management produces 25-40 fruits weighing 40-60 kg.
Pest and disease control
The frequently found pests are fruit flies, aphids, red spider mite, stem borer, gray weevil, snail, and grasshoppers. They are all regulated by spraying prophylactic substances including 0.3% dimethoate and 0.05% methyl gemstone.
The growing diseases are powdery mildew, anthracnose, damping off, black spot, nematode, and stem rot. Essential control measures are growing disease-resistant crops, choosing well-drained soils, practicing crop rotation, and growing seedlings or plants under net households.
Intercropping with a barrier crop such as corn mulching the bed with silver and plastic film that immediately destroys infected plants and replants the crop to avoid this virus infection.
Yield from papaya farming
All cultivar yields are different. Suitable plants are estimated to produce 34 kg fruit per plant per year, which amounts to around 38,000 kg fruit per hectare. The total area under Indian papaya farming has increased in recent years. Papaya’s nutritional and medicinal value has resulted in heavy consumption within the country, i.e., only 0.08 percent is exported. Thanks to conventional agricultural methods, exports are also less competitive. Delhi and Mumbai are Papaya’s main markets. The country’s overall production accounts for 54-lakh tones/year.
What is the cost of papaya farming?
Papaya farming costs will rely primarily on the farmland location. The cost components are farmland acquisition, planting expenses, irrigation expenses, fertilization facilities like labor shed, and land growth. Other than farmland costs, papaya farming costs aren’t much.
How much profit can you mine?
The margin of profit in papaya farming depends on the land area and the diversity of Papaya growth. In general, papaya farmers get their entire investment payback in around 2-2, 5 years. However, in the end, we would say that the amount of profit entirely depends upon your practices and techniques you use for farming.