Carrot Farming 101 – Unleash Your Carrot Farming Potential

Carrot is one among the popular root vegetables and can be grown easily in your backyard. It needs well-drained and fertile soil with 8 hours of sunlight. It takes about 70-80 days to grow carrot at home. Regular inspection is needed to avoid pests and diseases.

If you can grow carrots in the garden, you will get the best of the varieties, full of flavor and texture! Carrots are very popular, loved, long-lasting vegetables. And you can grow them in almost any climate. Here is everything about carrot farming methods, planting growing, and harvesting.

You can grow carrots pretty easily if you can use loose, sandy soil during cold days of the growing season – fall and spring, and carrots can tolerate frost as well. Depending on the local conditions and variety, carrots may take two to four months for proper growth. Plant them in summer and spring and harvest them continuously through the fall!

Why is the Type of Soil Very Important?

carrot farming

It is massively important to choose the most suitable soil for profitable carrot farming. If the roots of the carrot don’t grow easily, you may end up getting misshaped crops – of course, the last thing you would want!

Here is how to prepare the soil for carrot farming:
  • Till down 12 inches and remove all the stones, rocks, and even the clumps of soils – ensuring the soil is very smooth and sandy.
  • Don’t amend the soil with material rich in nitrogen like manure and fertilizer, which can disrupt the healthy growth of carrot roots. Working in cold coffee grounds is a great idea.
  • If there are a lot of clay or rocks in the ground, you should think about planting carrots in a raised bed with 12 inches deep trenches filled with airy, loamy soil.

Climate Requirement for Carrot Farming:

Cold weather is ideal for growing carrots but does well in warm climates too.

The optimum temperature for healthy growth is 16 degrees Celsius to 20 degrees Celsius, while temperature more than 28 degrees can drastically affect the production. Temperatures below 16 degrees Celsius may affect the natural colour of carrots, and may even lead to slender roots, while there are shorter and thicker roots in warm climates.

The temperature range of 15 degrees Celsius to 20 degrees. Celsius is very, very good for growing carrots, as you will get attractive roots with decent colour and quality.

Planting Dates for Carrots

Fall Carrots Planting:

Usually, the first frost occurs at the end of September in the USA

  • For carrot harvesting in summer, you should sow the carrot seeds outdoors three to five weeks before the end of spring frost.
  • To ensure productive carrot harvesting, you should plant a fresh round of seeds every three weeks continuously through the spring.
  • If you want to harvest carrots during fall, ensure sowing seeds in mid to late summer. Start approx ten weeks before the first fall frost.

Choosing the right planting site

  • Location with proper, direct sunlight is the best site for carrot farming, though they survive in partial shade as well.
  • As already discussed, you should opt for loose, loamy or sandy, airy soil, so that the roots can easily go through the soil.

Propagation of Carrots

Propagation of carrots is done using the seeds. Depending on the variety, the seeds that are broadcast or sowing in the filed with a seed rate of 5 to 6 kg/ha or 6 to 9 kg/ha.

Seeds are smaller in size and count approx. 800 per gram. And they remain lively for as many as three years with up to 80% chances of germination. However, the germination may be inadequate in some local varieties.

Therefore, you should not forget to get a rough calculation of germination percentage while calculating the requirement of seeds.

For best results, procuring clean, healthy and viable seeds from a reliable source is very important. Usually, the carrot seeds take up to 7 to 20 days to germinate properly.

The atmospheric temperature of 20 to 30 degrees Celsius is ideal for seed germination (different from the growth of carrots).

Also Read: Sweet Potato Farming Information Guide

How to Plant Carrots?

Carrot planting from seeds is the best option, instead od transplanting. It would be best if you sowed the seeds directly in the field, keeping in mind that they don’t like any disturbance whatsoever.

Sow the seeds 2 to 3 inches apart in rows, ¼ inch deep, and 1 foot apart.

A useful TIP: Ensure distributing seeds equally so that they don’t grow together at the same place. You can use a seed-sower for proper distribution.

Again, maintain enough moisture in the soil with frequent shallow watering. Small carrot seeds don’t like hard crusts or lumps for their growth. Covering the seeds with fine compost or vermiculite is also a decent idea to prevent the formation of crusts.

You can check the moisture by putting a finger in the ground – the soil should be moist, but not wet.

At times, carrots germinate very slowly, and it may take two to three weeks to show any sign of life. So, being patience is also very important. If you have maintained the right carrot planting distance, there are very high chances of timely, healthy and productive germination.

Tip: You can add radish seeds to carrot seeds to track the growth of carrots. As radish grow quickly, you can harvest them, and the carrots will also start to grow.

Fertilization Management in Carrot Farming:

You should choose the fertilizers after proper analysis of the soil.

Farm Yard Manure with the distribution rate of 30 tonnes per hectare is recommended at final ploughing with a dosage of 40 to 60 kg nitrogen, 90 to 110 kg potassium, and 25 to 50 kg phosphorus for every hectare.

Add about three tons of farmyard manure while preparing the land, mixed with 40 kg phosphorus, 50 kg nitrogen, and 50 kg potash for each hectare.

Add a full dose of phosphorus and potassium, and half the dose of nitrogen before sowing the seeds. You should add the remaining nitrogen at the 56th week of germination.

Carrots love feeding on potassium, deficiency of which can severely affect the roots as well as the overall metabolism of the plants. Carrots with low potassium quantity are not good to taste and don’t last long too.

Irrigation Management for Carrot Crops

The first carrot farming irrigation should be light, and you should do it immediately after sowing. Carry out the subsequent irrigations as per requirement.

As discussed, too much moisture is not ideal for carrot crops, and you may end up getting light-coloured, short carrots with a larger diameter. Types of soil, season, and variety of carrots play key roles in deciding the requirement of irrigation.

carrot farm

Usually, irrigation in every 5 to 6 days in summer and 10 to 15 days in winter is ideal for adequate moisture for the carrot crop.

Only occasional irrigation is needed during the rainy season. It would help if you avoided water stress around the roots, especially while they grow, to prevent from cracking.

Carrot Care Tip

While Carrots Are Growing

  • Mulching carrots gently is a decent option to maintain moisture, speed-up the germination, and stop direct sunlight to the roots.
  • When seedlings are of one-inch height, they will usually stand 3 to 4 inches apart. You should trim the tops with a farming scissor instead of plucking them to avoid certain damage to the fragile roots.
  • One-inch water every week is recommended in the beginning, then two inches with the growth of roots.
  • Weeding is an important aspect of carrot planting care, but ensure you don’t disturb the young roots while doing so.
  • Fertilizer with low-nitrogen quantity but high potassium and phosphate after 5 to 6 weeks of sowing is recommended. Excess nitrogen in fertilizer works on the top of carrot plants, not on the roots.

Managing Pests and Diseases

There are some common pests and diseases associated with carrot planting. They are:

  • Black (Itersonilia) canker
  • Flea Beetles
  • Carrot rust flies
  • Root-knot nematodes
  • Wireworms, and
  • Aster Yellow Disease:Causes discoloured and shortened carrot tops with hairy roots. You can invest in a control plant to control the pests like leafhoppers.

Carrot Harvest and Storage:

Harvesting

  • Small-sized carrots taste best, so you should prefer carrot harvesting when they are still young.
  • You can decide to harvest, depending on your priority. Carrots with the width of a thumb or at least ½ inch of diameter are very good for harvesting.
  • Suppose you are planting carrots in the early summer or spring. In that case, harvesting before the arrival of hot days is the best idea, as carrots may get fibrous under high atmospheric temperature.
  • Harvesting carrots after one or more frosts are linked with better taste, as the plants store more energy (sugars) in the roots for later usage.
  • You can also preserve the carrots after first frosts by covering the 18-inch layer of shredded leaves for late carrot harvesting.

FYI, Carrots are biennial crops. If you don’t harvest due to some reason, the tops will start flowering and producing seeds after the first year.

Storage

Once the carrot harvest season is at its end, storage is the next big task.

  • Twist or cut the ½ inch off the tops of carrots to store them fresh.
  • Don’t forget to remove any dirt under cold, running water, and dry in the air.
  • Refrigerate only after sealing them in airtight plastic bags; otherwise, they will get limped within a few hours.
  • For temporary carrot storage, you can leave the mature ones in the soil, if there are not freezing or pest’s problem with the soil.
  • Tubs, sand, dry sawdust with the cool, dry atmosphere are also some other options for storage.

Recommended Varieties

There are plenty of different carrot varieties. They are of rainbow colors, shapes, and sizes!

  • Bolero: 7 to 8 inches, slightly tapered, resists most leaf pests as well as blights.
  • Danvers: One of the classic heirloom carrot varieties, tapered at the end, and has a dark, rich orange color, suitable for heavy soil.
  • Little Finger: Another heirloom variety, looks like Nantes as they grow only 4 inches long, and one inch thick; one of the best varieties for storage.
  • Nantes: Cylindrical, 6 to 7 inches tall, sweetest of them all; with a crisp texture.
  • Napoli: One of the first-rate sub-types of Nantes variety, grown in spring, known for bright orange roots, mild, juicy, crunchy, and fine texture.

Some common varieties of UK carrot:

Altrincham: Long and slender roots with good flavour. The neck is purple, where it is exposed to sunlight.

Amsterdam Forcing: Bouncing, small, finger carrot.

Autumn King: One of the most common commercial carrots, flaky type, with strong tops and heavy yields. A true winter carrot, which is fairly colourful and smooth.

Baby Bell: Small, tender type, matures earlier than most of the other varieties.

Belgian White: Large roots with white skin, very popular in Belgium as well as France.

Crusader: One of the Nantes types, good colour, smooth skin, ready to harvest in autumn, summer and late spring.

Wit and Wisdom

  • There are so many different colors of carrot, including orange, purple, red, and white, and only some of them are resistant to pests and diseases.
  • Long-lasting carrots contain a rich quantity of sugar and are a very good source of carotene and vitamins.
  • Carrot is also called as “underground honey” in Ireland due to its sweetness.
  • FYI, carrots are the first vegetables to be commercially canned.

That’s all about our guide on “how to do carrot farming”.If you are planning to start carrot farming, we would suggest you go ahead. It’s easier; it’s full of fun, and very, very productive too.

Hopefully, you liked it, and you are not better prepared to start your own carrot farming. Do write to us if you have found it helpful, or if you have some questions. Share the guide with your friends who are interested in carrot farming.

References:

https://www.almanac.com/plant/carrots

https://agricultureguruji.com/carrot-farming/

How to Grow Beans: Planting, Care, Yield, Harvesting?

The term beans generally refers to large seeded plants that include soybean, peanut and peas.  Beans are one of the evergreen vegetables that can be grown easily in your backyard, terrace garden and even in your balcony as well. They belong to the legume family and have enormous amounts of health benefits. 

Beans are a good source of protein and fiber and are also rich in iron, potassium and magnesium. 

How to Grow Beans and What Month do you Plant Beans:

Beans need warm weather to grow, so if you are planning to grow green beans then summer is best for growing, start it in summer as cold weather or frost can damage the seeds and make them rotten. Sow the seeds directly in the garden, if you transplant it later,  then the roots may get easily damaged as they are shallow. 

Before planting the beans make sure to know about the type of plant that it grows into, whether it is a bush bean or pole bean.

Bush bean: If it is a bush bean then sow the seeds one or two inches deep and apart. In case you are planting it in garden then the rows should be 2-3 feet apart. 

Pole bean: If you are planting pole bean then they need support of some stick or pole to grow. For every 3-4 seeds one pole is required with a space of 3-4 feet between each pole.

These beans grow when under full sunlight or at least look for a place where there is partial sunlight. The soil should be well drained but moist enough for the seeds to germinate.

Different Types Of Beans:

Beans come in large variety, some can be eaten raw while the other needs to be cooked. The green tender pods can be consumed as it is, where as the dried ones need to be cooked before consuming. 

They are considered nutritious as it contains large amount of protein, carbohydrates and minerals. The various beans cultivated through out the world are

  • French Beans
  • Soy Beans
  • Kidney Beans
  • Cluster Beans
  • Lima Beans
  • Broad Beans
  • Sword Beans
  • Garden Beans
  • Dolichos Beans
  • Navy Beans
  • Fava Beans
  • Pinto Beans
  • Cranberry Beans

In this article we are going to study about how to grow kidney beans, when to harvest beans, when to plant broad beans and how long do broad beans take to grow.

How To Grow Kidney Beans

Kidney beans are very healthy as they contain antioxidant properties, vitamin B6, folic acid as well as cholesterol lowering fiber. Kidney beans can be a good choice for vegan’s as well as the one having diabetes. Kidney beans need to be consumed only once they are dried and cooked, the raw once are toxic. 

Kidney beans can be planted when the temperature is about 18-26 degree Celsius. It is best to do the planting in the spring or after the last frost. It give good results when they are directly sowed in the garden instead of doing transplant, as it may damage the plant and it may not yield well. 

Kidney beans comes in two varieties-bush and vine. Make sure you know what type of seed you are using. The vine variety need some sort of support like a pole or trellis to grow.

The planting area should have full sun exposure or at least for about 6 hours daily. Kidney beans require humidity and warmth to thrive. Make sure that the temperature does not go below 16 degree Celsius. Sow the kidney bean seeds 1-2 inches below the soil surface, giving a space of about 4 inches between each seed. Water the plant daily once, when the soil is dried out, do not give over supply of water. The seeds will germinate in about 10-12 days. 

Unexpectedly if there is snow fall after the beans have sprouted , cover the seedlings with a canvas or cloth so that it doesn’t get effected by the freezing temperature. 

Harvest And Storage

If you have planted bush variety then it needs to be harvested only once at the end of the growing season. But if it is pole variety then it has to be harvested several times through out the season. The average harvesting time will be 3-4 months depending on the type of seed you use. 

If there are some unfavorable conditions like dropping temperature that may threaten your harvest then pull out the plants early. Keep the plants for the pods to dry out completely, it may take several days or weeks. As you dry the seeds keep them in a warm indoor location with lots of circulating air. 

How To Grow Broad Beans

 Broad beans produce high yields from the smaller area of garden. These can be grown in modest sized pots as well. This vegetable is easy to grow, especially a good activity for children. 

Lets learn about when and how to grow broad beans.

Before starting with the planting few things need to be kept in mind. Always choose a spot away from strong winds, sheltered spot, fertile land and a place where you can easily get sunlight.

When To Grow Broad Beans

Some variety of broad beans need to ne sown in spring while some are well grown if you plant them in autumn. If you sow it in November, that is autumn then it will germinate within 2-3 weeks. 

The germinated seeds will overwinter and start growing again in spring. In severe winters you need to protect the crops by covering it with fleece or cloches. 

How To Sow Broad Beans

The seeds of broad beans should be sown 2 inch deep into the soil. Each seed should have a gap of at least 9 inches. These can be sown in double row with a gap of 9 inches between each row. After sowing the seeds water them adequately. 

Now you will be concerned about how long does it take for the broad beans to grow. Well the answer is that these beans germinate in approximately 10 days. 

When To Harvest Broad Beans

Broad beans should be harvested and when they are 3 inches long. You can even wait for a little longer and harvest them later. But make sure that when you harvest the seeds should be soft and pots well filled. 

Best time to consume them is when the scar on the edge of the seed is white or green. If it has become black then the bean will become hard and chewy. 

The most important thing to keep in mind while sowing any seed is that don’t be in a hurry to plant the seeds, wait till the weather becomes appropriate as all the seeds may not be suitable for all typed of weather.

Take proper care after the seeds germinate and protect them from insects and mice attack.

What is Mango Farming all about – A Complete Guide

Do you know what is mango known as? Aam, as we call it in India is crowned with the title of King of Fruits. Mango Farming is the most dominant and money-making venture in the world. 

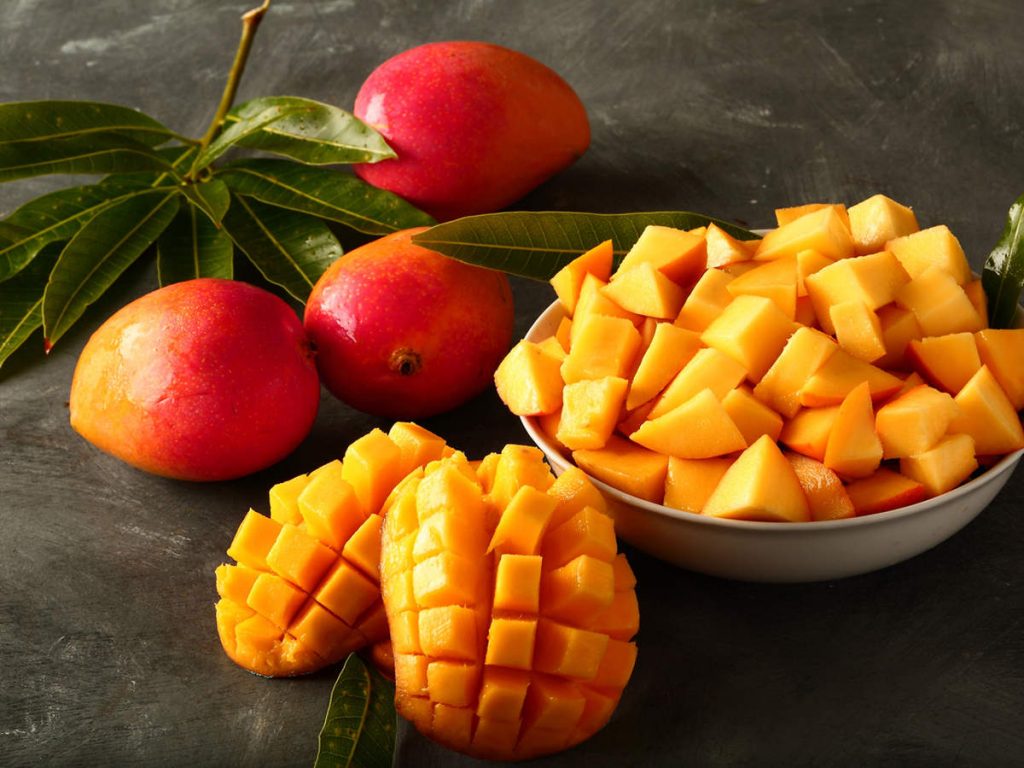
It is loved and relished for its taste, appearance, and low upkeep cost. The perk of cultivating mango is that it can be consumed at any stage. 

Like the raw mango has a delightful taste as chutney, Aam Panna, pickle, sauce. A full grown, mango can be consumed as shakes, juice, jelly, ice-cream, and desserts.

India exports a huge quantity of mangoes to the USA, Europe, and Middle-East. Mango farming is the most money extracting fruit grown in the Indian sub-continent. 

If you want to start your mango farm, you need to gather all relevant about its cultivation. Here, is an outline of important steps to be executed to ensure good mango production.

Types of Mangoes

Here is a list of mangoes with their place of origin. Let’s get a quick look through it:

  1. Alphonso- Ratnagiri, Maharastra
  2. Kesar- Junahgadh, Gujarat
  3. Dasheri – Lucknow, Uttar Pradesh
  4. Himsagar and Kishan-bhog, West Bengal
  5. Chausa- Uttar Pradesh 
  6. Safeda -Andhra Pradesh
  7. Totapari
  8. Amrapali
  9. Langda

Sweetest mango variety

Sweetest mango varieties

For all the beginners and mango lovers, it is difficult to figure which the best variety of fruit among all. Carabao, the manilla mango is the best and sweetest mango in the world.

However, if we talk about Indian mangoes, Alphonso, the king of all is the best and sweetest mango among all. But don’t forget that mango itself is a sweet fruit loved by all. Every variety is sweet and unique in its way.

Requirements for mango farming

Mango can be planted through seeds or by vegetative propagation. The propagation is carried out through techniques like veneer grafting, epicotyl grafting, and inarching. 

Surely, vegetative propagation is a rapid process of germination. It should be carried out through grafting trees.

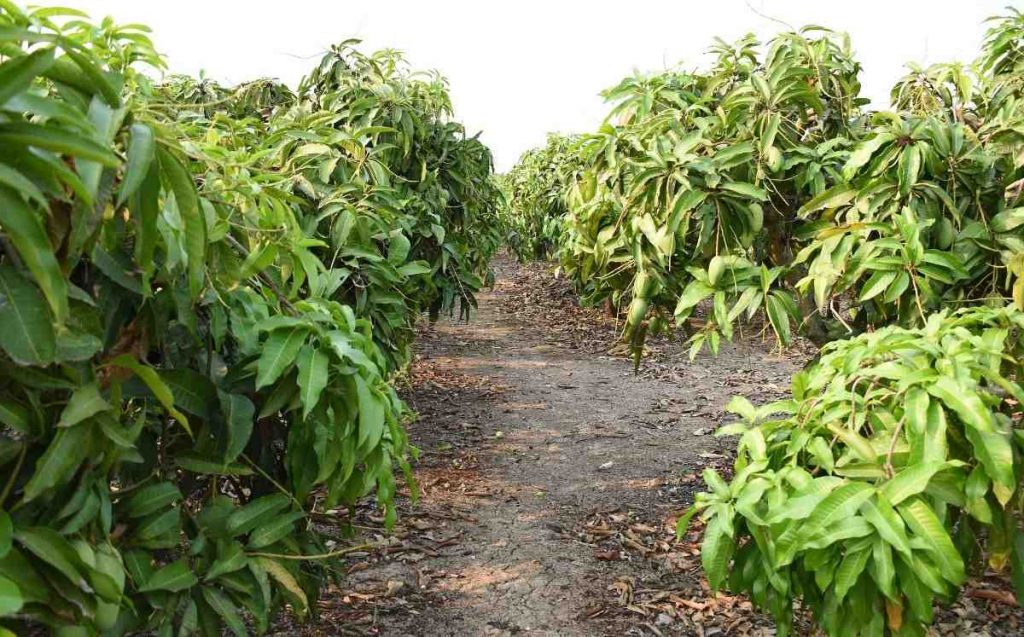
The spacing of mango trees

The spacing pattern of the trees should be 10 m * 10 m. This is the ideal pattern to be followed to ensure a good yield. 

The mango trees are tall and wide. So, they require adequate space to expand themselves. If you compromise with its space, the growth of the tree would be hampered.

As a result, you will be deprived of a desired and profitable yield.

Mango plants training

Training mango plants is an essential step to ensure the proper shape of the fruit. It becomes unavoidable in the case of low branched grafting.

The plant should attain a minimum height of 1 meter for training to be executed well. Regular trimming of branches and leaves ensures th healthy growth of the plant.

The plantation is disease-free and the energy of the plant is centered towards the growth only. Therefore, a continuous training process is maintained to get the desired fruit quality.

In mango farming, it is a mandatory step.

The season for mango plantation

For rain prone areas, the plantation is done in July-August, for irrigation-based areas it is carried out in February-March, and at the end of rainfall in rain prone areas.

Rainfall is a good factor to enhance the growth of the tree. As heavy water intake is needed for the thriving of mango trees.

Also Read: Custard Apple Farming Was Never So Fruitful – Read This Guide Till The End

Fertilization of mango trees

The process of fertilization is carried out in 2 doses. First one, immediately after planting, and the next in the young plants. A spread of urea (normally 3%) is advised in the case of sandy soil before the plant starts flowering.

Soil and light requirement for mango seeds

A mango seedling requires a good amount of sunlight but not direct sunlight. For nurturing the plant, a minimum of 6 hours of sunlight is required and 8-10 hours of sunlight will work wonders.

When planting mango seeds it should be kept in mind, that a good drainage system should be there. Like on watering the soil could flush out excess water.

In summers the plant needs water in excess, do remember excess doesn’t mean water overflow. The water should be well enough to keep the soil hydrated.

How to sprout a mango seed

To sprout a mango seed you need to remove the flesh from the fruit, the seed needs to be cleaned, to ensure that they are ready to plant. 

Now, with the help of a sharp knife, chop off the edges of the seed. Ensure the visibility of the pod inside.

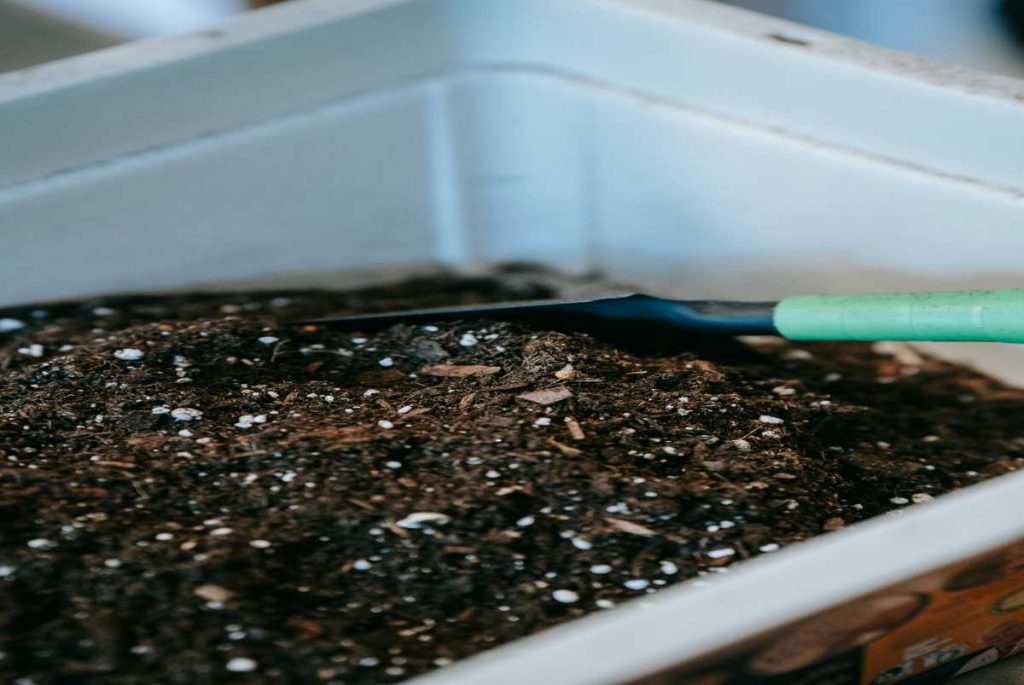
Take a container of 11 liter capacity. Place some soil beneath the container providing an outlet at the edge. For settling the soil fill some water in it.

The container is ready to plant the seed inside placing the pointed side downwards. One-fourth of the pod should be popping out of the soil.

Keep watering the seed and place it in a warm place ensuring sunlight but not directly.

Germination time of mango seed

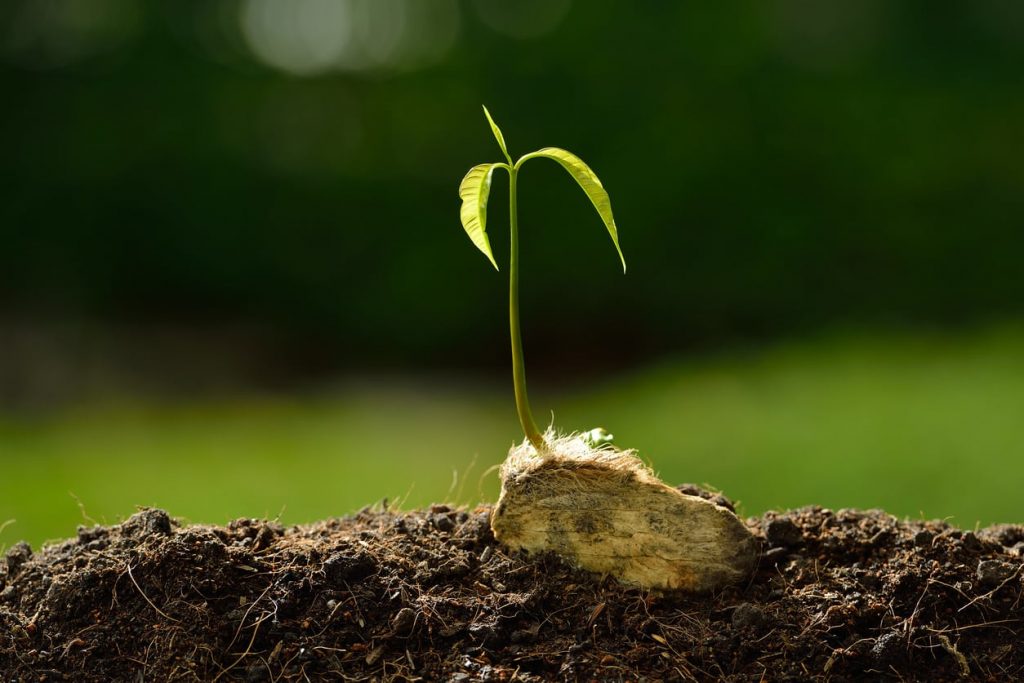
The mango seeds germinate in a period of 2 to 4 weeks. A fully grown-up tree bears fruit in 5 years. These mango seeds germinate at a temperature range between 4-40 degrees.

mango seed germination

But a higher range of temperature is ideal for germination. Seeds restore water in them, dies when dry. All the favorable conditions facilitate the process of germination.

A small bunch of leaves shoots up and the roots start getting firm deep into the soil.

Planting mango seed

A suitable temperature, enough sunlight, and adequate water content is a perfect recipe for  healthy fruit. When you have all the necessities for mango farming, you can go for it.

You need to have a spacious place for the mango canopy. A mango tree has a stature of 90 feet with long leaves. So, it is recommended to plant them separately allowing proper space for them to thrive.

How long does it take a mango tree to grow?

This is the most common query among mango farming. Beginners are curious to know how long does it take a mango tree to grow? Before proceeding, this question needs to be answered.

From planting the seed in the soil to ultimately bearing fruits, it is a package of 5 years. It takes 5 years complete for a mango tree to produce your favorite mango fruit. 

But a lot of rigorous hard work is required to nurture the mango plantation in these 5 years. Regular pruning of branches and leaves is necessary. Plus, after bearing flowers the water intake of the tree is around 26 gallons per week.

This should be maintained to prevent the tree from drying. The proper spread of fertilizers should be done to curb the spread of diseases.

The resultant is the delicious, tasty, and lip-smacking mango fruit.

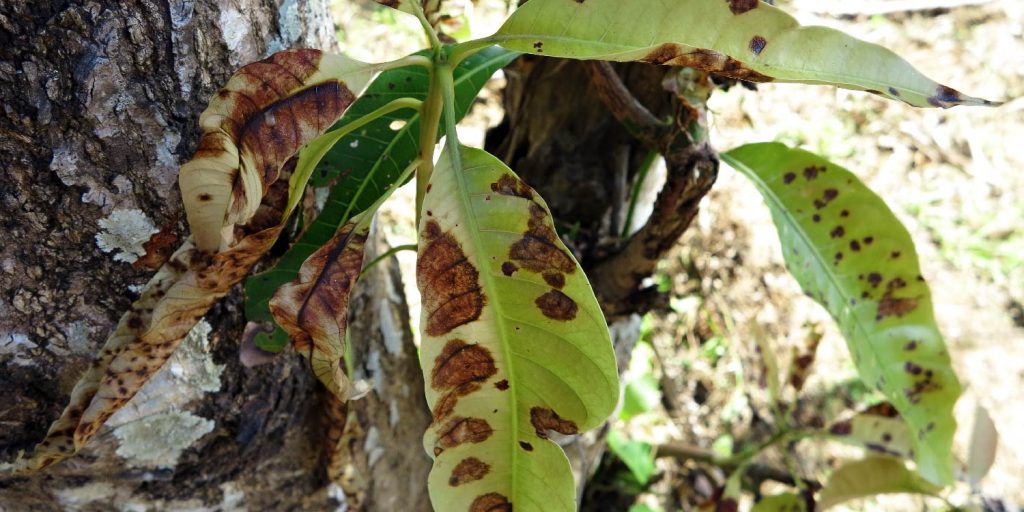
Diseases infecting mango farming

Mango farming is threatened by aphids, bugs, and mites. Infections prevailing in the plantation can be witnessed in the form of webs on the leaves, white residue, or insects crawling over the leaves.

These infections need to be curbed in, timely before they hinder the growth of the plantation.

mango infecting diseases

Mango farming is prone to anthracnose, a sort of fungal infection. They can be checked by the use of copper-based fungicide. It should be used after 14 days of planting.

How to take care of flowering mango tree

Some of the flowers are formed through the process of self-pollination. However, few of them are pollinated through fruit bats, humming birds, and bees. It must be noted that all the flowering trees don’t produce fruits.

Taking care of a flowering mango tree is a must. Proper care must be taken of those trees who produced heavily during the previous season. 

They should be trimmed regularly. And should also provide more fodder to ensure a better flowering and fruit production in the present season as well.

The much-branched inflorescence needs to be detached or trimmed compulsorily. It ensures better flowering and fruit production.

In the regions where the evening temperatures trips below 30 degrees, these white creamy flowers become steady. On reaching the temperature range back, they tend to bear fruits immediately.

Mango yield per acre

The mango yield per acre varies. This depends on the quality of seeds sown and the good upkeep of the mango farming. Ideally, the yield ranges from 2.5 to 3 tonnes per year. Exceptionally, it can reach 9-10 tonnes per year.

Mango yield per acre

A good spacing in the orchard, among the trees, and favorable climatic range shoots up the yield of a mango farm.

Mango farmers must adhere to these 2 most important factors apart from other upkeep necessities. A little extra care can make you earn higher profits.

When to harvest mango?

After flowering and bearing fruits, now the point arise when to harvest mangoes. The tasty tropical fruit of mango is grown in various parts of the world, favorable to mango farming. 

The harvesting of the fruit is directly proportional to the amount of care taken of the tree in the 5 years of the plantation.

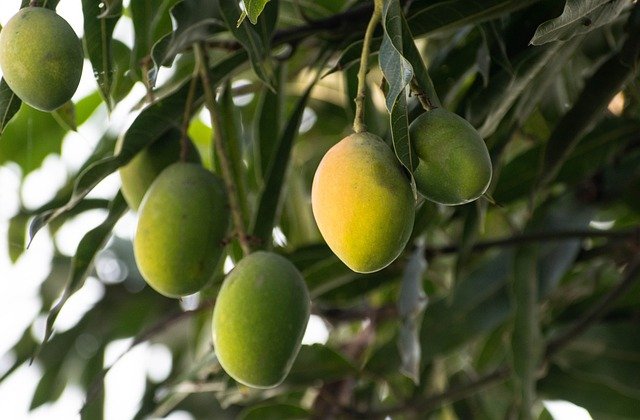
On average a good harvesting time prevails after the completion of 100-150 days from the flowering stage. Generally, flowering ends up producing fruits and you can observe the fruit grow in shape and size.

harvesting mango

In 3 months, the fruits become ripe, this can be felt on touching the mango, as it becomes soft on ripening. The color turns into a proper yellow shade of the fruit.

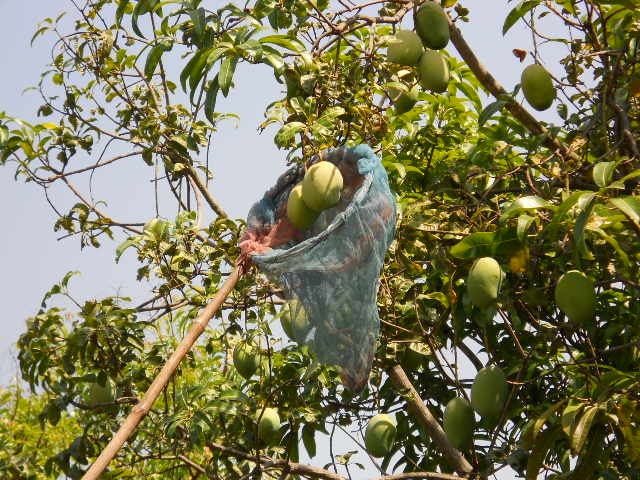
Heavy fruit can be seen bulging downwards from the branches. This is an indication the fruit is ready to pluck.

Now, you have 2 ways to get the fruit down either shaking the tree or thrashing the branches to chop off ripen fruits.

Shaking tends to damage the roots and branches of the tree. Also, unripe fruits get disturbed as well. It is highly recommended to thrash the branches by the use of a rope or stick.

This the best way out to spank down your favorite mango fruit. The fruit is ready to explore the markets.

Must Read: Papaya Farming Ultimate Guide

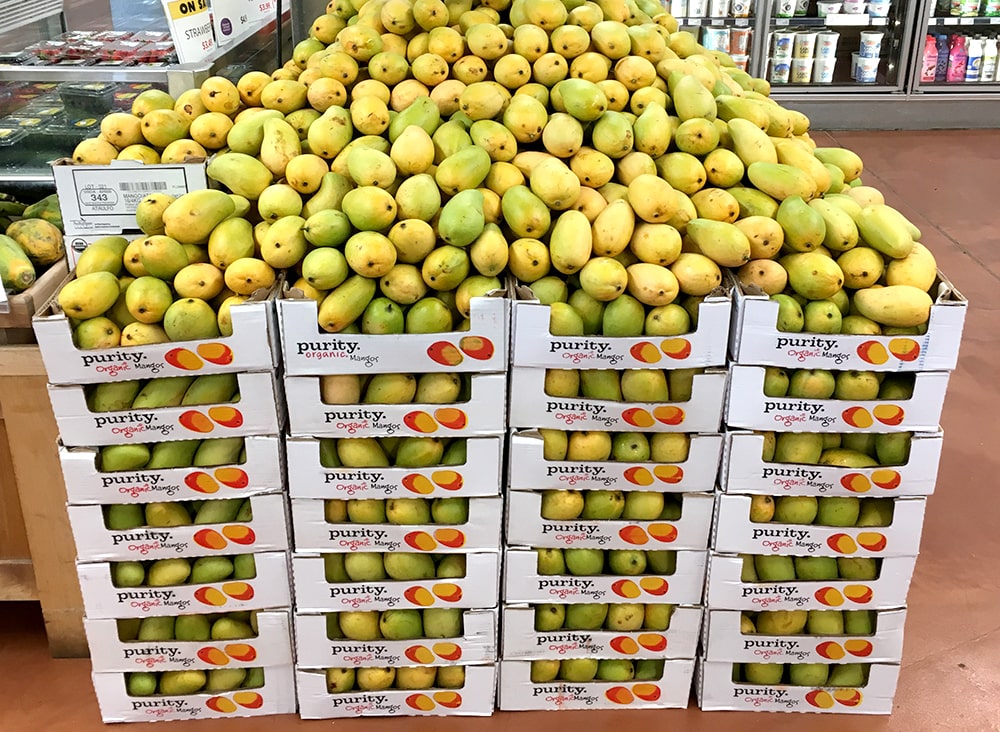
Transporting mango to markets

Once you are done with mango harvesting, it is time to get a reward for the 5 years of hard work done. Proper steps should be taken to avoid any sort of damage to the fruit during the transit period.

mangoes in market

For transporting mangoes, the packaging is done in two ways either using a wooden crate or by using CFB boxes. However, for long-distance transit it advisable to store mangoes in CFB boxes as it is a perishable item.

Wooden crates can hold the mangoes for 8 days maximum. After that, they tend to perish.

When transporting to local nearby markets, wooden crates are the best open as they keep the fruit safe and fresh. And the fruit is ready to consume. 

Is mango farming profitable?

To find out the profit ratio of mango farming, let’s calculate the cost of production involved. The cost of the land stands on whether it is owned or rented.

Then comes the plantation cost. This comes to around 2 lakhs per acre per year. And it gives a normal yield of 2.5 -3 tonnes or even up to 9-10 tonnes.

It is a profitable deal. A deal with huge profits. It is one of the most profitable ventures in horticulture. Profitability has a direct relationship with demand for the product in the market.

Mangoes are high in demand. The reason for this is the limited availability and good taste. This fruit is relished by everyone.

This tropical fruit is an evergreen fruit and never will lose it’s charm. Nothing can beat the demand for mango fruit.

Yes, you can say it is a tedious job but the hard work is paid off well. Whether its appreciation in taste or money, a mango farmer lands in huge profits after selling his mangoes in the markets.

People wait for those delicious mangoes in the market every year for their limited availability. So, the idea of mango farming is a sure shot profit deal. Crack this deal and enjoy the benefits.

How to Grow Beans: Planting, Care, Yield, Harvesting

The term beans generally refers to large seeded plants that include soybean, peanut and peas.  Beans are one of the evergreen vegetables that can be grown easily in your backyard, terrace garden and even in your balcony as well. They belong to the legume family and have enormous amounts of health benefits. 

Beans are a good source of protein and fiber and are also rich in iron, potassium and magnesium. 

How to Grow Beans and What Month do you Plant Beans:

Beans need warm weather to grow, so if you are planning to grow green beans then summer is best for growing, start it in summer as cold weather or frost can damage the seeds and make them rotten. Sow the seeds directly in the garden, if you transplant it later,  then the roots may get easily damaged as they are shallow. 

Before planting the beans make sure to know about the type of plant that it grows into, whether it is a bush bean or pole bean.

Bush bean: If it is a bush bean then sow the seeds one or two inches deep and apart. In case you are planting it in garden then the rows should be 2-3 feet apart. 

Pole bean: If you are planting pole bean then they need support of some stick or pole to grow. For every 3-4 seeds one pole is required with a space of 3-4 feet between each pole.

These beans grow when under full sunlight or at least look for a place where there is partial sunlight. The soil should be well drained but moist enough for the seeds to germinate.

Different Types Of Beans:

Beans come in large variety, some can be eaten raw while the other needs to be cooked. The green tender pods can be consumed as it is, where as the dried ones need to be cooked before consuming. 

They are considered nutritious as it contains large amount of protein, carbohydrates and minerals. The various beans cultivated through out the world are

  • French Beans
  • Soy Beans
  • Kidney Beans
  • Cluster Beans
  • Lima Beans
  • Broad Beans
  • Sword Beans
  • Garden Beans
  • Dolichos Beans
  • Navy Beans
  • Fava Beans
  • Pinto Beans
  • Cranberry Beans

In this article we are going to study about how to grow kidney beans, when to harvest beans, when to plant broad beans and how long do broad beans take to grow.

How To Grow Kidney Beans

Kidney beans are very healthy as they contain antioxidant properties, vitamin B6, folic acid as well as cholesterol lowering fiber. Kidney beans can be a good choice for vegan’s as well as the one having diabetes. Kidney beans need to be consumed only once they are dried and cooked, the raw once are toxic. 

Kidney beans can be planted when the temperature is about 18-26 degree Celsius. It is best to do the planting in the spring or after the last frost. It give good results when they are directly sowed in the garden instead of doing transplant, as it may damage the plant and it may not yield well. 

Kidney beans comes in two varieties-bush and vine. Make sure you know what type of seed you are using. The vine variety need some sort of support like a pole or trellis to grow.

The planting area should have full sun exposure or at least for about 6 hours daily. Kidney beans require humidity and warmth to thrive. Make sure that the temperature does not go below 16 degree Celsius. Sow the kidney bean seeds 1-2 inches below the soil surface, giving a space of about 4 inches between each seed. Water the plant daily once, when the soil is dried out, do not give over supply of water. The seeds will germinate in about 10-12 days. 

Unexpectedly if there is snow fall after the beans have sprouted , cover the seedlings with a canvas or cloth so that it doesn’t get effected by the freezing temperature. 

Also Read: Soybean Farming: A Complete Guide to Cultivation and Production

Harvest And Storage

If you have planted bush variety then it needs to be harvested only once at the end of the growing season. But if it is pole variety then it has to be harvested several times through out the season. The average harvesting time will be 3-4 months depending on the type of seed you use. 

If there are some unfavorable conditions like dropping temperature that may threaten your harvest then pull out the plants early. Keep the plants for the pods to dry out completely, it may take several days or weeks. As you dry the seeds keep them in a warm indoor location with lots of circulating air. 

How To Grow Broad Beans

 Broad beans produce high yields from the smaller area of garden. These can be grown in modest sized pots as well. This vegetable is easy to grow, especially a good activity for children. 

Lets learn about when and how to grow broad beans.

Before starting with the planting few things need to be kept in mind. Always choose a spot away from strong winds, sheltered spot, fertile land and a place where you can easily get sunlight.

When To Grow Broad Beans

Some variety of broad beans need to ne sown in spring while some are well grown if you plant them in autumn. If you sow it in November, that is autumn then it will germinate within 2-3 weeks. 

The germinated seeds will overwinter and start growing again in spring. In severe winters you need to protect the crops by covering it with fleece or cloches. 

Must Read: Growing Your Favorite Peanuts or Groundnuts

How To Sow Broad Beans

The seeds of broad beans should be sown 2 inch deep into the soil. Each seed should have a gap of at least 9 inches. These can be sown in double row with a gap of 9 inches between each row. After sowing the seeds water them adequately. 

Now you will be concerned about how long does it take for the broad beans to grow. Well the answer is that these beans germinate in approximately 10 days. 

When To Harvest Broad Beans

Broad beans should be harvested and when they are 3 inches long. You can even wait for a little longer and harvest them later. But make sure that when you harvest the seeds should be soft and pots well filled. 

Best time to consume them is when the scar on the edge of the seed is white or green. If it has become black then the bean will become hard and chewy. 

The most important thing to keep in mind while sowing any seed is that don’t be in a hurry to plant the seeds, wait till the weather becomes appropriate as all the seeds may not be suitable for all typed of weather.

Take proper care after the seeds germinate and protect them from insects and mice attack.

Lavender Farming Guide: How to Grow Lavender with Maximum Productivity?

Lavender, also known as Lavandulaspica consists of 30known species of flowering plants in the entire mint family. Lavender is a beautifully aromatic and rustic shrub or herb that originated in the mountainous region of the Mediterranean and North Africa. The height of the herb is from 40-80 cm. The plant has oblong, linear, and opposite leaves consisting of small purple flowers.

Lavender farming is really easy and it only requires ideal growing conditions and extra space. Climate is a critical factor in growing the lavender plant. Lavender can be containers/pots, and backyards. Growing dozens of lavender plants in the backyard of the house can make an individual earn a high profit. If the lavender is cultivated commercially on a huge scale, it can fetch high profits.

Also, there are plenty of ways in which lavender farming can help an individual earn money. For example, lavender can be used in making lotions, soaps, essential oils, fragrant sachet, teas, medicines, and flavorings. Also, fresh or dried lavender can be sold to earn huge profits.

The Indian subcontinent cultivates lavender on the slopes of the hills of Uttar Pradesh and Himachal Pradesh and in regions experiencing scanty rainfall. Successful cultivation of the lavender crop is also seen in Kashmir valley.

Types of Lavender

At a global level, there are five types of lavender varieties known in the market – French lavender, English lavender, Spanish lavender, Spike lavender, and, Lavandin

French lavender

French Lavender

French lavender or Lavanduladentata grows in warm climate and are extremely fragrant. This variety of lavender is grown annually in certain regions of the United States.

English lavender

English Lavender

English lavender, also known as Lavandulaaugustifolia is one of the popular species of lavender. This species is used in flavouring, oils, dried flowers, and perfumes. English lavender can be cultivated in warm regions where days are longer.

Spanish lavender

Spanish lavender

Spanish lavender or scientifically known as Lavandulastoechas blossoms in dark purple colour and are majorly used for dried flowers. Spanish lavender species are grown annually for decoration purposes.

Spike lavender

Spike lavender

Spike lavender, also called as Lavandulalatifolia is grown to extract essential oils which is further used to make soaps. Spike lavender is also referred as Portuguese lavender and requires a Mediterranean climatic conditions.

Lavandin

Lavandin

Lavandin, also referred to as Lavandula x intermedia has a high oil and flower yield, however, the oil quality might not be of supreme quality as compared to the yield. The other name of Lavandin is Dutch lavender and this variety is a hybrid of Spike and English lavender.

In India, Spike lavender, Lavandin, True lavender (English lavender), and Sher-e-Kashmir varieties are grown.

Starting a Lavender Farm

Lavender flower farming should be on the top of a gardener’s list as it is a commercially profitable crop. The flower also adds more beauty to the garden. Although growing lavender on a farm is time-consuming and a risky business because the product may not be of preferred variety.

The transplants of lavender can be planted in small areas such as nurseries. To retain desired characteristics in the plant, growers opt for root divisions or cuttings. It is advisable to do a patch test in a small area to check the appropriate climatic conditions for the plant.

Lavender Propagation Techniques

In order to grow lavender for profit, cutting and planting through seedling is done. The sifted soil can be layered lightly. However, planting seeds need knowledge as well as effort. Beginners can start their journey of lavender cultivation by the cutting method. Tissue culture and layering can also be used for the propagation purpose of the plant.

Seedlings can be sowed directly in the area or in the trays. The germination time of lavender seeds is around 2-6 weeks. To plant the lavender plant by cutting (vegetative technique), it is essential to cut the stems which can be around 10 cm long. The leaves present in the lower region of the plant are removed. Slight humid soil is required in the cutting technique as excess water can cause decomposition. The spacing between each plant should be around 30-90 cm in the cutting method.

Tissue culture is preferred for mass production of the plant and to yield genetically identical and disease-free plants. The mother plants are selected and then cultured for bulk production. However, this technique is costly. On the other hand, layering method uses healthy stem from which a 12-15 cm foliage is removed.

This leaves a 10 cm foliage at the branch tip. The bare section is covered with moist soil. Once the new plants start to grow, they are separated from the mother plant. The new plants are then again planted in the field once the rooting starts. The roots in the plants take around 6-12 weeks to grow.

Spacing and Planting in Cultivation

Spring or Autumn is the best time for the transplantation of the seedling. The plant need plenty of room to grow. The lavender plant is planted 30-40 cm inside rows and are kept at a distance of 4 feet between rows. The highest yield should have plant density of 20,000/ha. For the proper root establishment of the plant, earthing up of soil is extremely essential. 

Lavender can tolerate the drought situations. The water requirement of the plant is minimal and thus needs water every 2-3 weeks till the time the buds are formed. Later on, once or twice in a week is required until the harvesting is done.

Best Farming Conditions for Cultivation

Lavender plant being a Mediterranean plant grows best in the dry climatic conditions. The plant however can tolerate various temperature range. Cold or humid climate is not suitable for the proper plant development. Direct sunlight or sun exposure for approximately 6-8 hours is preferable for growing a healthy lavender plant.

Lavender grows best in a dry and warm environment, and in mild winters. Early years require pruning even during the mature stage as it makes the entire framework of the plant sturdy. Failing to do pruning an initial couple of years can result in woody stems subsequently affecting flowers and stem health.

In order to avoid humidity, a proper drainage system is preferred. As the rise in a humid environments increases the risk of fungal infections. Well-drained soil with pH in the range of 6-8 is used for the cultivation. A calcareous type of soil is ideal for lavender. The optimum temperature for lavender cultivation is in the range of 15-30 °C. The temperature of soil should be higher than 18 °Ctosupport proper growth. The product quality can be affected badly by overheating in summer.

lavender farm-purple beauty plants

In India, the best climatic condition to grow lavender is autumn season. This helps in firm establishment of the plant before the cold winter. Spring season further will help the plant to grow quicker. 

Global Cultivating Regions

Lavender can be easily grown in Canada, Africa, Indonesia, Japan, UK, India, Australia, New Zealand, and USA. Other regions producing the herb are Goodwin Creek, Central Mexico, Bulgaria, and Italy, Spain among others.

Irrigation in Cultivation

The commercial cultivation of lavender requires irrigation for initial 2 years so that the crop can be properly established. The regions experiencing low rainfall and has light soil need irrigation only at vital growth stages. Irrigation is must during the flower initiation stage. It is advised to avoid sprinkler irrigation system as that may elevate disease conditions in the crop. Drip irrigation is the preferred system as it aids in controlling weed and in saving water.

Drip Irrigation for Lavender Fields

As discussed earlier, excessive moisture is not good for lavender crops. It can cause a lot of problems and can disrupt the overall growth, and hence productivity. Aerial irrigation is not suitable too, as it causes leaves to spit in half. Lavender is also at risk of rotting, especially of the soil, remains moist for a long time. Hence, proper planning is required to ensure healthy and productive growth of lavender plants.

Talking to the experienced lavender farmers about “how to do lavender farming” is not a bad idea either. After all, there is no substitute for experience. And they already have learned a lot of lessons, you are now about to learn, and they can give you some valuable feedback!

As said repeatedly, lavender plants don’t require a lot of water, and you should stay at the shorter side while watering. These plants can even withstand droughts well enough. All you need to do is to maintain the moisture in the soil.

Essential Tools for Lavender Cultivation:

Like other crops, lavender cultivation also needs some equipment and tools. These are some essential tools commonly required while planting lavender.

  • Sharp Sickle
  • Steel Shank
  • Kneeling Pad
  • Lavender Sifter
  • Mini Plow
  • A folding hand saw
  • Washable gloves

Fertilizers and Manures for Lavender Cultivation

Once the lavender plant is established properly, there is no need of fertilizer. The new plants do need fertilizers as they can boost the plant growth. It is recommended to use P 40kg/ha, N 100kg/ha, and K 40kg/ha. The basal application needs complete dose of K2O and P2O5 but only 20 kg nitrogen is used. Rest of the nitrogen is used in the later stage.

Diseases and Pests in Lavender

Lavender is resistant to most common pests and insects. However, to be successful in the farming of lavender, it is essential to prevent these insects rather than curing them in the later stage. There are chances that the plant might be affected by Mites, Slugs, Con chinchillas, and Whiteflies.

Preparing the land and making the right soil

Lavender farming profitability depends a lot on the land and soil. A lot of successful lavender farmers do some research before finally starting, and there is no reason why you should not do the same.

Well-drained, gravel-laden, sandy soil with a pH between 6.5 and 7.5 is perfect for growing lavender. Dig the ground at least 18 to 24 inches deep and then add the soil to it. If you can mix the soil with a mixture of 1/3 clay, 1/3 loam, and 1/3 sand, the effectiveness of soil will be even better.

A lot of hybrid lavender species are known for producing sterile seeds. In such a scenario, you should use well-drained, light and moderately fertile soil.

How to Plant Lavender – Start Planting through Soft Cuttings

If you are a beginner, growing lavenders from seeds is not a good idea at all. Instead, start growing from soft cuttings, taking care of the resource links. Herbs grow from these links. Preparing the cuttings can be both frustrating and tedious. So, you should get some from a nearby nursery.

  • Leave a space of four feet between rows and 2½ feet between the two plants.
  • This type of spacing is ideal for growing approximately 4,000 plants per acre.
  • Ensure surrounding every plant with garden cloth, mulch the plats as well as rows to protect from weeds.
  • Add a light-colored hoop at the base of every plant, like gravel, sand, or a piece of marble. This will help the reflection of sunlight on the plants.
  • Prevent excessive moisture to keep your plants healthy.

When to Plant Lavender?

Planting lavender cuttings in the seedbed at the beginning of spring is the best idea. Lavender usually transplants in the autumn or winter. You can obtain a new lavender plant when it is grown a little, and the germination is started. The end of the summer is a suitable time to separate the branches. The flowering time will most probably end at that time.

Taking Care of Lavender Crops for High Yield and Profit

“Good care equals to good yield” suits very well to lavender farming as well. It needs a little bit of rain and a lot of direct sunlight. Furthermore, it can adapt to fall as well.

  • Removing invasive plants is recommended for proper lavender care. Invasive plants may take up the nutrients from the soil.
  • You should also remove the old branches at regular intervals. Because, old branches get woody, and may disrupt the growth of soft, younger plants.
  • You can divide the branches to reproduce new lavender.
  • Having good drainage for lavender is necessary to avoid puddles of water around the plant.
  • Pruning is suitable for lavender so that it can bloom the next year again.

Common Pests, Diseases, and their Management

Although, lavender is known as a repellent to most common insects and pests, controlling them is still a very important aspect of lavender care. The formula of “prevention is better than cure” suits the lavender crops best. Therefore, you should act before any sign of attack from pests or diseases.

Also Read: Why Are Bottom of Tomatoes Turning Black: Blossom End Rot

Lavender is commonly attacked by:

  • Mites
  • Slugs
  • Whiteflies, and
  • Con Chinchillas

You can keep a few lavender plants in pots and use them as a repellent spray to protect other plants. Basil and garlic are very effective to protect the plants from files, insects and some fungi.

Even after proper lavender care, plants may get the victim to different plagues. To avoid that, you would like to eliminate the dead or infected plants as soon as possible.

How to Harvest and store lavender?

It would help if you cut the entire branch with leaves and flowers while harvesting lavender. You can remove the leaves later. Use only sharp flower cutting tools to ensure maximum profit. Flowering begins in the first year itself, but the lavender gets ready for harvesting after one year of planting. So, you can start harvesting after 13 to 14 months of planting the cuttings.

  • Harvesting the lavender crops in the morning hours is ideal, as the oils are most concentrated at that time.
  • It would be best if you cut the stems as long as possible.
  • Gather them in bundles and use rubber bands for securing.
  • Hang them at a sheltered place for proper drying. A cool, dark place with good air circulation is recommended for drying.
  • Flowers will get dried after a few weeks, and you will be able to remove them by shaking the bundles gently. Shake them into lidded jars for a lot of uses!

The flowering process starts late in high slopes while it starts early in low altitude and warm regions. During the harvesting process, flowers are cut with 10 cm stem length. August or September is the ideal time for harvesting lavender in the Kashmir region.

The yield as well as the quality of the oil depends on various aspects such as the agro-climatic conditions, variety, process of distillation, planting, fertilization, and soil. A yield of 15kg/ha with oil content in the range of 1.2%-1.5% can be obtained under optimal herbal cultivation methods.

Now, lavender for marketing is ready. You can opt to trade in local markets or transport them to distant areas. You should get ready to get some decent money!

Lavender for Business

If you are planning for lavender farming, we would suggest you move ahead. But you will have to be a bit patient, at least in the first year, and you can, of course, afford it to become a successful lavender farmer.

Lavender is available in various fragrances and colours depending on the harvest. The family tree of lavender also constitutes widely known sage, Mediterranean herbs, thyme, and rosemary. The historical data suggests the use of lavender as a fragrant, medicinal, and culinary herb. Roman soldiers used the herb as a disinfectant while ancient Roman people scented their bath tubs using the plant.

The average life of productive and healthy lavender plant when used for commercial purpose is around 12 years. However, in certain cases steady produces are obtained for nearly 20 years. Planting lavender for gaining profit can be a perfect mode to transform the love for gardening and herbs into a method to earn money by selling the plants as well as the products. Various products can be made from the plant such as aromatherapy products, dried lavender bundles, herbal pillows, skin care products, lavender buds, tinctures, sachets, and oils. Manufacturing these products require less effort but are high in demand in the market.The herb is also used to increase the taste of honey. The baking process too uses lavender crop to enhance the taste.

Fresh bouquets also provide profit to the grower. A 20’x20’ area produces approximately 300 bunches/year which is of $1,800. The profit margin in large plots is even higher. For instance, a quarter acre area produces around 3,000 bunches which costs $18,000. The flower bunches that remains unsold can be dried and sold to florists, crafters, candle makers, beauty product manufacturers for various purposes.

The easy endeavor is to make soaps using the very simple melt and pour technique. These soaps are the best-selling gift items among the customers. Aromatherapy uses lavender oil as one of the most essential products. The distillation process helps in the extraction of lavender oil. The by-product obtained after the distillation process consists of the water-soluble products together with the oil and thus it is used in room fresheners and spritzers.

At a global level, a certain region of France has been involved in commercial lavender farming for centuries. North America has started to grow the crop on a commercial scale. The growers in these regions have started farming in the backyard as well as multi-acre farms. The knowledge is shared among the novice growers for better yield. Thus, lavender is considered a perfect cash crop for small growers to get substantial income.

Drying the Purple Herb

Once the process of harvesting is complete, the stems of the lavender bunches are tied with a strong rubber bands. The bunches are then transferred to the drying area as early as possible. The delay in transferring results in fading of the natural colour. The drying area should be well-ventilated, dry, and dark. Lavender bunches are hanged in upside-down direction for drying.

Advantages of Growing Lavender

The flowers of the crop are edible and the crop has an approximate life span of 10 years. The plant lavender can be grown without hassle but is a costly herb. The extracted oil has many health benefits such as preventing digestive issues, anti-inflammatory, reduces stress and anxiety, treats sleep issues, among others.

Thank you for reading this piece patiently! Hopefully, we have helped you at the beginning of your journey as a lavender farmer. If you have any questions, feel free to write to us. We will be more than happy to answer! And don’t forget to share with your friends and family members! Good Luck!

How to Increase the Production of Okra?

Okra is a vegetable commonly known as ladyfingers in many countries. These plants are very simple and easy to grow. Okro, gumbo, kopi, Arab, and bhindi are some other common names of okra pods.

This crop can be grown in different varieties of climate and soil. It requires plenty of sunlight. Also the roots should not remain wet for a long time. However, climate plays an important role in okra production. Cold climate is not very suitable for okra. They require proper temperature for germination of seeds. 

To products a big crop yield you must be aware of how to increase production of okra?

Keep in mind the steps mentioned below to increase okra production.

Why are my okra plants not growing?

There can be a number of reasons for improper growth of your plants. Some of the common reasons for this are: 

  • Lack of proper sunlight: sunlight is very important and main factor for growth of okra. It needs sun for 7-8 hours daily. Hence if the crop doesn’t get sufficient sunlight then it will not bloom. 
  • Heat: Heat is very important for okra as cool climate will lead to rotting of the seeds. The temperature of soil should be at least 70° F. Therefore heat is necessary however if the plant doesn’t get sufficient heat then it may end up growing improperly. Hence it is said that areas having plenty of sunlight are most suitable for okra production
  • Not getting enough water: Though okra is a plant that doesn’t need much water and can survive in less amount of that for a good and healthy plant it is important to water the plant from time to time. 
  • Improper nutrition: It is clear that if a plant doesn’t get sufficient amounts of nutrients required then growth will definitely be affected. Hence to avoid this situation, one can add necessary fertilizers to the crop to fulfill the need of nutrients. For example, adding phosphorus is beneficial for flowering. 
  • Right time: Usually the plant matures in 55-65 days but sometimes it may take a bit longer. Nothing can be done in this situation except wait. One should have patience and wait for flowering.

Must Read: Planting and Growing Okra Step by Step

What to do with the wilted seedlings? 

Wilted seeds are a common problem that you may often face. But it is not a big deal if you take necessary action on time. Keeping your crop hydrated can save them from wilting.

If you find that your plant is wilted then water it until the soil becomes moist. Then wait for about an hour and if you feel that the soil is dry then water it again. 

Usually, in hot and dry climates the water gets evaporated very fast hence leads to wilted seeds. To treat this you need to water the plants at regular intervals. But before irrigation, put your finger in the soil 1-2 inches deep and check whether the soil is dry.

If the soil is dry then water it. On the other hand, if the soil has moisture then the reason for wilting is not lack of water. Excess sun or wind or any pest or disease may be responsible for this. So to avoid this change the position of the plant and shift it to an area where the sunlight is not direct or excess. 

Next, if the problem is excess  water then for that one can make some holes on the surfaces of soil, this will allow the water to penetrate to the soil. Also to avoid this one should check the soil before watering. 

Along this remember that you don’t keep your plant in a pool of water as this can lead to yellow leaves. 

Also Read: Why Are My Papaya Leaves Wilting

How to get rid of aphids on okra plants?

Firstly aphids are small-sized insects that feed on the plant and suck the nutrients. These insects cannot be recognized easily. They are very tiny in size and can not be easily seen with naked eyes.

Okra exists in a variety of colors like yellow, brown, light green, pink or black. They have a waxy or wool-like coating on the surface. They have long antennae on their pear-shaped body. There are different methods to control aphids like:

  • Aphids are not very friendly to cold water. Hence one you spray chilled water on the leaves, there is no coming back of aphids on the same plant. 
  • Flour can be another cure to aphids. Flour constipates the aphids hence can be sprinkled on the plant
  •  Neem oil also has properties to destroy aphids. Along this insecticidal soaps or any dish washer solution can also be used. 
  • Diatomaceous earth is an organic material that will vanish the aphids without harming the plant. 
  • Isopropyl alcohol can also be used to control aphids. Ethanol however is also a great option. 

Why is my plant not Blooming?

There can be different reasons for this but insufficient water is one of the main and common reasons for not Blooming. Along with this improper sunlight also delays blooming. Pruning of the plant on time is very important in this cultivation.

Hence if you don’t do this activity on time, then plants may not show flowering. Hence one should take care of all the above-mentioned points so that your plant blooms on time.

Homemade fertilizers of okra plant: 

You can prepare fertilizers for your okra plant at home and increase production of okra plants by multiple folds. Preparing fertilizers at home will surely improve the quality of it as well as will be organic. A list of homemade fertilizers is given below: 

Compost:

Compost is very common as well as easy to prepare. It is used by many cultivators for all types of crops. To prepare this, dig up a big hole in the ground. Put a layer of soil mixed with dry leaves. Then you can add a lot of things like kitchen waste like vegetable and fruit peels or other kitchen waste, paper, clothing, etc.

After that again cover it with a layer of soil and leaves. You can add such types of waste products afterward also. Now leave this for 45 days and your compost is ready. 

You can also make a very nutritional solution for your crop again using your kitchen products. You can use the left over water or water from the vegetables or water left after washing your cereals. Whether it is pasta or eggs you can use all of them. Collect all the water and let it cool and you can use it. Also you can use hot boiling water on weeds to destroy them

Eggs shells

Eggs shells can also provide some nutrients to the plant. You can use all the leftover eggshells. Dry them properly and then grind them. Hence they are ready to be used. These contain calcium carbonate that improves the fertility of the soil. 

These are some of the homemade fertilizers that can be used for your crop

Bottom line:

okra crop is one of the easiest crops to grow. However similarly as other crops they need proper care. In this article you can learn about some facts and points  that you should know if you are growing okra crops and wish for higher crop yield than usual.

How Do Pineapples Grow? – A Complete Guide

The tasty nutritious pineapple fruit has its popularity matched to mango fruit.  Its yummy tangy flavor and appearance make it familiar with people. 

How do pineapples grow? Is it profitable to grow a pineapple? How to plant a pineapple? These are some common queries that come to your mind when planning for pineapple farming

This fruit is high in Vitamin A and Vitamin B. Also, has traces of Vitamin C and minerals, iron too. Caribbean, South, and Central America are the largest producers of pineapples, India holds the fifth position. Here is an overview of pineapple cultivation.

In India, it is popularly known as ANANAS. Here, Karnataka, Kerala, Goa, Bihar, and North-eastern states cultivate pineapple abundantly.

Preparing land for pineapple farming

Plowing, digging, and leveling are done step by step to get the land ready for pineapple farming. In the case of trenches, a space of 165 cm from center to center is required.

Treatment for suckers

The suckers need to be sorted, healthy or unhealthy. Then the healthy ones should be eliminated from unhealthy ones. 

pineapple suckers

The healthy ones are dried in the shelter and then dipped in Bordeaux mix before plantation.

The Necessity for pineapple farming

To ensure the best yield for pineapple farming always remember, a coastal and humid climate is necessary.

Season favorable for pineapple farming

The flowering season for pineapple farming is between December and March. It is advisable to maintain a gap of 12-15 months from the flowering season.

A heavy rainfall period is avoided for plantation, so it is done before the onset of monsoon rains. Too much rain in the early stage will ruin the pineapple plantation.

Soil requirement

For pineapple cultivation, sandy loam soil is a perfect choice to be made. Though alluvial and laterite soil is also ideal for pineapple cultivation. 

The basic theory behind this is it should be free from waterlogging. Also, the acidic content should be between 5.5-6.0. 

How often do we need to water a pineapple plant?

Normally, pineapple cultivation is done in tropical places enriched with a humid climate. So, the water intake of the fruit is sufficient.

No artificial irrigation is required. But when planting on a commercial basis there might be a need for additional water to get a healthy grown delicious fruit. 

watering pineapple plant

Artificial irrigation helps retain water during the offseason to nourish the plant. Thereby, facilitating water supply in deficit regions as well.

In such cases, you need to water a pineapple plant twice a week.

Also Read: Guava Farming: Planting, Spacing, & Cultivation Guide

How do pineapples grow

Let us know how do pineapples grow?  To grow pineapples a set of 4 techniques is applied like flat-bed, furrow, contour, and trench.

This is entirely dependent on the land and rainfall pattern of the area of cultivation. A contour planting is generally practiced to curb soil erosion.

To give good support, the plant -soil is moved towards the trench area. The flat-bed planting pattern is adopted as the pineapple roots are very hollow. This is how pineapples grow.

Diseases of the pineapple plant

It is a pest-free crop, though in some severe cases scale insects and bugs are its worst enemy.

Fertilizers for pineapple crop

Pineapples are high in potassium and nitrogen requirement. For good pineapple farming, they are harmful to the soil, so they are applied in minimum quantity as per the requirement. 

Nitrogen is generally divided into 6 doses. The first is applied after 2 months of cultivation and the last one before 12 months of harvest.

Similarly, potassium is given in 2 doses. Half can be applied after planting and the remaining after 6 months from the plantation.

Pineapple harvesting

After 12-15 months of planting, the pineapple crop bear flowers. It takes a complete 15-18 months to get a fully grown pineapple fruit. 

The growth of pineapple depends upon the climate, temperature, variety of pineapple, size, and type of plant material.

The month of May-August is the time for pineapple harvesting. After 5 months of flowering, the plant bears fruit. 

For canning purposes, the fruits are extracted from the plant when the fruit is not fully grown. For table use, you have to wait till it has attained a golden yellow color. 

Steps involved pineapple plantation

Pineapple farming involves a series of to be followed to ensure a good fruit. 

  1. Earthing: Pineapple is a hollow root plant. If they don’t get sturdy support, they tend to bend. To render support to the fruit the soil is moved towards the trench.
  2. Weeding: The most common weeds in pineapple farming are nutgrass and hariyali. It is done to make sure the good growth of the pineapple fruit.
  3. Mulching: When grown as a rain-fed crop means, dependent on rainwater. It is an important step. The idea behind this is to store water for an adequate water supply.
  4. Ratoon crop: Rotation crop farming is generally practiced in India. The cropped part of the fruit is used as a base for the next farming cycle.

Unusual behavior in pineapples

This is a big reason to worry, as to remain in demand pineapples must have to be perfect in taste and appearance. Else they get neglected. 

Though pineapple farming is free from any sort of infection and all still there are few challenges.

  1. More than one crown: In some cases, the fruit might develop more than one crown. In this, it gets de-shaped. Broad from the upper portion and pointed from below. Making them non-eligible for canning.
  2. Slips collar: This happens when a large number of slips appears from the base. It leads to small-sized fruit with too many slips overlapping.

Must Read: How to Nurture the Dragon Fruit –An Exotic Tropical Fruit

Storage and market

A decent time of 15 days can be ensured to store the pineapples without removing the crown. 

For transporting the fruit to the market, they should be stored in a cool place or refrigerator at a temperature of 10-13 degrees.

Pineapple farming has a lot of market demand. It should be noted that the fruit is easily accessible to the market, to avoid losing its charm.

Health Benefits of pineapple:

This lovely crown shaped fruit is adored not only for its taste and appearance but also has some benefits as well.

  1. Rich in Vitamin C: It is enriched with Vitamin C which indicates a capacity to curb heart and joint diseases.
  2. Rich in fiber content: This helps in keeping the intestines healthy.
  3. Helps in removing excess mucus.
  4. Helps in weight loss.

Conclusion

You need not worry about the profitability of pineapple farming. It has already made deep roots in the market. They have a loud market domestically or internationally. 

Sold on huge margins, still have the monopoly in the market. Can be consumed in multifarious ways. Jams, fruit, jelly, spread, canned, and candies loveable in all forms.

Pineapple waste serves as fodder for the animals. Enjoys fame all over the world. The production cost is low as compared to other farming’s.

Pineapple needs no introduction. No separate marketing strategy is required.

What else you need!!! Just go ahead with your pineapple farming. Surely, you can create magic with your pineapple farming.

How to: Grow Strawberry Farming – Complete Guide

Strawberries farming is one of the best alternatives to traditional crop farming in the USA. A large number of farmers around the country are growing strawberries for commercial purposes, and are making decent money. But, unfortunately, a lot of them are also struggling to earn a livelihood, because they are doing it the wrong way.

If you also want to secure your finances through growing strawberries, you should follow this detailed guide at every step. This guide is an overview of all the aspects related to commercial strawberry farming.

The guide focuses on starting a strawberry farm in almost every region in the USA. All the points are collected from a publication in CIS 93, written by B. B. Davis, D. L. Barney, and J. K. Fellman, and published by the Agricultural Experiment Station and Cooperative Extension Service of the University of Idaho.

Here are the most important points we’ve taken from the publication to make your strawberries growing efforts as fruitful as possible.

The economic importance of strawberries

As many as 76 countries produce strawberries for commercial purposes. China, the USA, Mexico, Turkey, and Spain are the top five producers, but the production is only increasing in various other parts of the world including Asia, Central, and North America, and North Africa. And the demand is getting larger and larger with every passing year too!

The development and of California’s strawberry industry is itself a story, and the rapid expansion of the industry at local levels in other parts including Central and South America, Australia, China, and the Mediterranean region is clearly visible to the global economy.

In short, if you are planning to start strawberries farming (you are most probably doing so, and that’s why you are here), your economic future is amazing! You’re going to make loads of money, of course, if you are determined enough to do the hard yards, especially in the beginning. So, let’s start with our guide.

Also Read: Cultivation of Custard Apple

Preparing the land for the strawberry plants

Most of the producers start preparing land for commercial strawberry farming in late August. Strawberry plants are actually perennial, but most of the farmers consider them as annual. The land is properly fertilized before farming and harvesting strawberries.

After fertilization, farmers focus on mounding soil into plateau-like rows, and then they cover the soil with black plastics.

Usually, the drip tape irrigation is also placed in the ground while covering with plastics. Experienced farmers use a specialized tractor-machine to accomplish all the tasks related to growing strawberries from scraps. The drip tape is very useful for watering and fertilizing strawberries throughout the growth period.

Perfect climate and soil for planting strawberries

The temperate climate is the best option for growing strawberries. It is considered as “short-day and long-evening” plant and needs 10 days of sun-exposure of not more than eight hours to initiate flowering.

Strawberry plants remain dormant throughout the winter. The plants continuously grow and flower during the spring season, when the days are longer than those of winter. Some varieties also grow in a subtropical climate and grow very slowly even in winter.

Based on their response to the light, strawberries are divided into two groups i.e.

  1. The overbearing varieties that give buds during both short and long periods of light.
  2. The varieties that are common for commercial purposes and develop buds in the presence of short-light periods only.

When we talk about soil, strawberries farming needs properly-drained soil with medium loam. The soil should contain a decent amount of organic matter and should be slightly acidic (with a pH from 5.7 to 6.5).

If the soil is highly acidic, there won’t be proper root formation in strawberry plants. And soil rich in calcium makes strawberry leaves yellow, which is not a good sign at all. And, runner formation is also very good in light soil which is rich in organic matter.

You should prefer manured green land for proper growth and timely budding of plants. Don’t even think about alkaline soils or soils that are infected from nematodes.

Different varieties of strawberries

There is a wide range of strawberries available around the USA. Some of the varieties introduced from California like Solana, Tioga, and Torrey, etc. are very good for farming. For hilly areas, Dilpasand, Srinagar, and Sovereign varieties from India and neighboring countries are perfect.

For strawberries farming in warmer areas of the USA, you should choose from Blackmore, Premier Florida-90, Klonmore, Missionary and Klondike, etc.

Propagation of Strawberry plants

Runners that are prepared after the blooming season are used for propagation. Multiple runners are used for successful propagation. The target should be to use every plant with a good root system to successfully set the plantation. If properly nurtured and cared for, a single plant can give up to 18 runners.

Best season for planting strawberries

In the hills, September to October is the best time to plant crowns and runners. And for plain areas, January to February is the perfect window for planting. If planting happens too early, the overall quality and quantity of fruits are expected to be affected.

And if it is too late, runners start developing in March, and the crops are usually not very good. So, depending on the atmospheric temperature and other climate factors, August to October is the perfect strawberry growing time.

You should give priority to uprooting runners from the nurseries. Keep them into bundles before planting in the field. Keeping them in cold storage before transplanting is also a great option. You should irrigate the soil regularly to reduce the stress of water in the leaves.

Planting

Before planting, the land should be properly prepared by harrowing after deep plowing. There should be enough amount of organic manure in the soil before planting. Flatbeds, hill rows, and matted rows, all are suitable for planting strawberries. But in irrigated areas, you should plant on ridges.

The distance between the two plants varies according to the variety of plants as well as the type and area of the land. Usually, strawberry farmers follow a standard spacing of 30 cm. X 60 cm. In an ideal “strawberries growing condition”, a population of 22,000 plants per acre with the spacing if 30 cm. x 30 cm. is followed.

The plants should be planted in the soil with roots in a straight position. There should be enough air in the soil for healthy growth. The growing point is usually just above the surface of the soil. Plants should be decently irrigated at the beginning with no dry spots on the surface.

How to ensure proper care of plants

The straight roots of the strawberry plants spread closer to the surface. Therefore, you will have to maintain decent moisture in and around the soil. Young plants should be free from weeds, and there should be light and regular hoeing.

Horticultural practices related to the strawberry crops

Strawberry Farm

Farmers prefer covering the soil with mulch throughout the winter to protect roots from cold injury. The mulch protects fruits from the soil, conserves moisture of the soil, and controls the decaying of fruits. And for strawberries farming, straw mulch is the most preferred one. Black alkathine mulch is also used, especially before and after the winter.

Requirement of irrigation

Strawberry is a shallow-rooted plant, and less amount, but more frequent watering in each irrigation. Excessive irrigation usually converts into increased incidents of Botrytis rot, and growth of excessive stolons and leaves at the expense of flowers and fruits. Strawberry plants are also very susceptible to drought, so insufficient watering can also damage the plants completely.

In the case of newly planted runners, you should irrigate frequently after planting. Otherwise, plants will start dying, even before their proper growth. During September and October, especially if there is no rain, you should irrigate the plants

A couple of times in a week. In December and January, irrigation once in a couple of weeks is ideal. The frequency of irrigation is usually increased once the fruits appear on the plant to ensure larger fruits in a decent number.

How many strawberries per plant?

Well, it depends entirely on a lot of factors including conditions, rain, soil, variety of strawberry plants, care, irrigation, etc. On average, a healthy plant yields 150 to 400 grams of strawberries.

Using fertilizers and manures for strawberry plants

A fertilizer dose of 25 to 50 tonnes manure, 75-100 kg. N, 40-120 kg. P205, 40-80 kg. K20/ha. maybe needed depending on the variety of plant(s) and soil type.

Intercultural operations

Harrowing and plowing are the two methods through which strawberry crop is kept free from weeds during the first season. Applying plastic sheets and herbicides are also preferred in some regions.

How to protect strawberry crops from different pests and diseases?

Cutworms and red spider mites are the most common pests related to strawberry plants. You can control spider by using 0.25 percent water-soluble sulfur with 0.05 percent monocrotophos. And a dusting the soil before plantation with 5 percent chlordane or heptachlor can control cutworms.

Blackroot rot and red stale are the two major diseases affecting strawberries farming. Fungus Phytophthora fragariae is responsible for both of them.

Black root rot can be controlled by increasing the resistant variants like stelemaster, and red stale can be managed by maintaining the vigor of the plants and rotating the strawberry crops with other crops like beans, legumes, and peas, etc.

Virus diseases like crinkle, dwarf, and yellow edges also affect strawberries crops. And raising the crop in hilly areas is the best way to avoid these diseases. Strawberries are known for throwing various chlorotic plants, which usually results from genetic segregation – and should not be confused with virus infections.

Harvesting

When the half to three-fourth of each strawberry fruit starts changing its color, you should get the indication that the harvesting time has arrived. Depending on the growth and weather conditions, you can do the picking every second or third day – prefer morning hours for picking. Small baskets and trays are preferred for harvesting at the end of strawberries growing season. To avoid damage due to excessive heat, keep those baskets or trays in a shady place.

February to April is the best time for the ripening of strawberries grown in plains. And May and June are suitable for harvesting in places with higher elevations. If you want to transport them in distant markets, try to harvest when fruits are still light in color. For transporting them in local markets, harvest them when they are fully ripe.

Post-harvesting care

Strawberries are perishable fruits. Therefore, they are packed in shallow, flat containers of different types including bamboo, cardboard, trays, and papers, etc. with not more than two to three layers of fruits. Avoid washing them, as it causes bruises and makes them lustreless – and of course, can completely derail your marketing strategies.

Yielding also depends on various factors including varieties, conditions, care, and rain, etc. If you yield 20 to 25 tons of fruits per hectare, you’ve grabbed the jackpot! But if the conditions are ideal, even 50 tons of fruits per hectare have been reported.

  • Grading: Grading is also an important aspect of a successful strawberries farming strategy. Factors like size, color, weight, etc. are considered before proper grading.
  • Storage: You can store strawberry fruits in cold storage at 32 degrees Celsius up to 10 days. If you are planning to transport them to distant markets, don’t forget to pre-cool them at 4 degrees Celsius within the first two hours of harvesting. After pre-cooling, you can ship them in refrigerated vans.
  • Packing: Packing is done based on grading and transportation distance. Perforated cardboard cartons with paper cutting as cushioning material are preferred for first-grade fruits. And low-grade fruits are packed in trays or baskets.
  • Transportation: Road transport by lorries or trucks is the easiest mode of transport because you will find it easy to travel from orchards to the market.
  • Marketing: Most of the farmers, especially the new ones prefer contacting trade agents at local levels to get a decent price. We recommend this to you as well!

To be honest, strawberries growing is not the easiest of options to start your business. But if you are determined enough to do the hard work in the beginning, there is a lot to take.

Strawberry farming is considered as one of the most profitable farming in the world. It does demand a lot of hard work, care, grit, and determination.

But, once you successfully go through the first season of farming, you will find it considerably easy in the subsequent seasons. It is full of fun, taste, tang, and a lot of profit. So, keep delivering the delicacy, keep growing strawberries, keep growing fruits! Happy farming!

How to: Growing Tomatoes in Containers, Raised Beds & Backyard?

When it comes to tomato flavor the list of delicious cuisines is fairly long. Besides, take a look at your favorite fast food, whether it is a hamburger, or delightful wrapped pizza, without a slice of tomato you can’t imagine the taste that can touch your palates. 

Tomato’ Journey from Concern To Preference

Tomato farming has a tradition. While it’s usage in popular culture is ironic. In the late 1700s, a large percentage of Europeans were frightened by the tomato.

The fruit was termed as poison apple then because it was thought that some of the aristocrats fall sick and eventually died after consuming them. Although, the real reason behind the tragedy was the utensils of wealthy Europeans. These pewter plates have high lead content.

Also Read: Farming Orange for a Perfect Citrus

Since tomatoes are so rich in acidity, the fruit can leach lead from the plate when put on this specific tableware, resulting in numerous deaths from lead poisoning. At that moment, no one related this to plate and poison, and eventually the tomato bore all the blame.

Moreover, the tomato was not only criticized for lead poisoning. Before the fruit found its way to the table in North America, tomato is misunderstood as a lethal nightshade-a family of Solanaceae plants containing toxins called tropane alkaloids.

While as far as the use of tomato concerned, Italian started the use of tomatoes in their cuisines. And, mass migration from Italy to America in the 1800s made tomatoes famous in North American and since then tomato has been in the focus of flavors. It has come so far to be an essential vegetable from the fruit in our everyday cuisines.

Growing The Tomatoes

Tomatoes are subtropical plants and therefore need a maximum sun position. For the tomato cultivation, this is particularly important for growing areas to have sunshine at a premium. 

Besides, the tomato plants need six to eight hours of daily sunlight to flourish. During the growing season, it needs to be sure to give sufficient room for the growth of each plant.  

Apart from this requirement, the selection of the seed is the utmost variety as the market has thousands of varieties to choose from and some of them can suit your requirements better than others.

Determining the seeds

When it comes to picking a variety, hundreds of varieties are available. You can determine the right one based on some aspects.

According to the growth model. 

You can discover the tomato seed based on the height of a plant. There are two types of plants at maturity.

1. Indeterminate or vining types – a tall plant 

2. Determinate – a short bushy plant

It is better to choose based on your selection of area.

Based on fruit characteristics

These are taste, smell, color, texture, shape, etc. While yield is one of the most important aspects of a variety that is the priority that we need to focus

Growing area 

Is your space outdoor or in a protected setting?

When the seed variety is concluded, it is high time the soil is prepared according to the correct seeding guidelines.

Preparation of Seedlings

Tomato seeding requires a slightly hot environment, especially in indoor conditions. The proper time for tomato seedling is in late February to early March. And, seeding in tomato farming needs the well-mixed compost that can be warm up to the 22 degree celsius. It’s rational that a young seedling will keep warm until the start of the summer with a bit of warm compost.

You can seed at a very short distance often known as sort seeding and will require at least two cubic feet of soil.

Tomato seeds are quite small so you won’t see them again if you grow them too deeply. The tomato seed planting depth should about a quarter-inch, partially filled with a moistened potting mix.

Besides, you can sprinkle 2-3 seeds into the trench and cover them with a mix of potting. Strengthen the blend gently so that the seeds go enough deep into the soil. If it doesn’t sound wet enough, you should spray the surface with water.

Nurturing the Tomato Seedling

You will wait for the plant until a seedling has real leaves. Now it needs better treatment for the young plant. It’s the best moment to continue feeding. At this time, the sunlight is critical and always requires putting the seedlings under sufficient light exposure.

When they are about 6-8 inches high, the seedlings get the first truss flowers. Now, it is time to prepare compost or rusty manure.

Preparing The Soil

Tomato farming is seasonal, especially for warm weather and better suited on well-drained, fertile soils. 

A sloping surface approx two percent is desired for early production with sufficient sunlight in place.

In some cases, it is feasible to also grow tomatoes on pots or containers, whereas in personal usage or a hobby it is favored.

This method needs more intense feeding due to the restricted root area. 

These plants must be drained better, besides plants like tomatoes need to have enough area. If you choose to grow into pots, selecting a well-drained big pot, at least 30 cm tall with a regular potting mix is ideal.

It’s best to change the soil before growing them again. It has been noticed the or soil pests and root diseases can be a serious problem.

Soil Requirements

Before you grow in the field, make sure that during winter, just before you plant, you put in plenty of compost or manure as an overall fertilizer.  

In the case of tomatoes, fertile land is the base for every good harvest. Prepare the soil with a ton of rotting waste and a complete wheelbarrow on 3 square meters.

In case of sowing into pots. The number of seedlings should be two and keep in mind they need to be irrigated and cared more as compared to others.

Transforming and Planting a seedling

The tomato planting distance should be about 18 inches apart, leaving 30 inches between the rows. 

A good plant up to 2 meters high can produce hundreds of fruits while consuming a relatively small size.

As a young tomato plant has been sown in well fertile and nutritious soil. Now it is time to look after these plants.

Nurturing the Plant for Tomato Cultivation

A complete nutrient solution with trace elements (especially in case of use of artificial mixtures) should be provided to transplants at weekly intervals.

They can also be fed with water using a diluting nutrient solution

The latter approach has the benefit that the fertilizer is supplied more according to the needs of the plant: more in hot, warm days; fewer in cool cloudy days.

In each case, following the instructions for feed quantities on the fertilizer label. A fertilizer where the bulk of nitrogen is nitrate instead of ammonium and urea is better than the others.

The issue with the Tomatoes

1. Blighting

Tomato blight spreads fast, leaving a visible brown patch all over the surface, especially with outdoor plants. This is a common problem caused by wet weather. It not only ruins plants, but they also eat the crop.

The moist environment offers perfect environments for early fungal diseases, which first develop dark spots on the bottoms. Make sure any bad or ill leaves are collected during the season.

 The substantial fungal disorder is more destructive and destroys plants fast.

It needs spraying the plants with a fungicide, such as chlorothalonil or copper, to shield them from fungal disorders.

2. Fruit Splitting

Tomatoes with certain strains that are more likely than others to have issues commonly caused by irregular watering. This problem in tomato farming should be fixed by more frequent watering.

3. Pest and insecticides

Search for green and whitefly, as both will spread. As soon as you notice pests, spray your plants with a recommended insecticide. 

Tomato has a significant effect of such incidence while it directly hampers the yielding

Finally a Fruit full Cultivation

Tomatoes continue to develop their color changes, with a subtle pink or yellow blushing, from bright medium-green to light shade. The exact ripeness indications differ with variety, but usually fully mature tomatoes have a dark color.

Can okra and tomatoes grow together?

Finally, tomatoes and other vegetables are a great food source for stink bugs. Planting okra near the tomatoes draws these pests away from your other crops.

Must Read: Planting and Growing Okra Step by Step

Companion planting strives to boost harvests by situating plants that have symbiotic relationships. Used for centuries, selecting the right companions for tomato cannot only reduce pests but also provide a haven for beneficial insects, boost pollination, enrich the soil and in general diversify the plantation – all of which will produce healthier plants that can fend off disease and produce bountiful crops.

Conclusion

Once done with the plucking the proper ripe tomatoes. Last but not least for tomatoes farming is storage. The cooler temperatures will minimize flavor and induce sluggishness in a refrigerator is not to be advised. Although lower temperatures will allow the fruit to stay

How to start Emu Farming (Complete Business Guide)

Emu farming in USA is a very popular and productive business model. Emus are among the large-sized poultry birds having connections from the ratite group and play a very important role in economies around the world. They produce productive meat, eggs, oil, feathers, as well as skin. And the best part is, they adopt in almost all types of climates and agricultural conditions.

Farmers can raise these large-sized birds in both semi-intensive as well as extensive systems. Countries like the USA, Australia, and China are the leaders in emu farming.

And the climate in countries like India, Pakistan, Sri Lanka, and Bangladesh, etc. is also very favourable for emu farming. If you are planning for a profitable emu farming business, you are going in the right direction.

Starting an emu farming business in the US is very easy, and you can start it anytime, especially if you own some land. But before starting, you need to know the right emu farming information. Factors like housing, breeding, caring, feeding, disease management, and atmosphere can make a lot of difference in a successful, profitable, and wayward, fruitless farming.

Also Read: Quail Farming – A profitable business for farmers having small lands

Some interesting facts about emus

  • Emu comes from the species “DromaiusNovaehollandiae.”
  • They belong to the group of ratite families with other birds like Kiwi and Ostrich etc.
  • Birds from ratite are known for “not flying.”
  • These birds can adapt to almost all kinds of weather and conditions, from excessive cold to extreme heat. And hence, emu farming in the US is not a challenge from a weather point of view.
  • They survive for as many as 30 years.
  • These birds are known for their friendly nature and be raised easily on the dry open farm and grassy plains.
  • An adult eum’s average weight is 45 to 60 kgs, while the average height is 5 to 6 feet.
  • Female emus can reproduce for at least 25 years.

Advantages of Emu Farming

There are various advantages associated with emu farming. Some of the main highlights of commercial emu farming are:

  • Emu meat is always in demand because of its amazing taste and nutrition. It is high in energy and protein, and low in cholesterol and fat.
  • Almost all products, including emu eggs, meat, oil, and skin, are of great value in different industries.
  • Emus don’t require a lot of food. They can easily survive in different types of affordable foods. And can give you a lot in return.
  • It is very easy to raise them even with other poultry birds and pet animals.
  • Diseases are less common in emus, and they survive healthily in almost all types of climates and conditions.
  • Emu farming is full of profits and can be an excellent source of income and employment.
  • You don’t need vast management and technical knowledge to raise emus. Only basic knowledge about how to start emu farming is enough.

How to start farming with high chances of productivity

If you own spacious land with enough nature in the surroundings, setting up an emu business won’t take many efforts. Here is a step-by-step guide on everything you need to know about emu farming – yes, A to Z of emu farming!

Location for farming

Selecting a suitable location/land is important to start emu farming correctly. And if you have your own plot of land, then you are in a win-win situation. It would help if you can keep a few important factors in mind while selecting a location for emu farming. And one of them is to ensure proper availability of clean and fresh water, cheap labor, good sources of food and nutrition, proper transportation chain, medical system, and a market near the location.

Manging emu chicks

If you want to get decent emu farming profit, managing emu chicks becomes very important. The average weight of a newly born chick is around 370 to 450 grams i.e., about 67% of the total weight of emu egg. But the exact chick weight also depends on the size of the emu egg.

Manging emu chicks

Keeping the chick inside an incubator for 2 to 3 days is important. It will ensure proper absorption of egg yolk as well as drying of the chick. Then, place them in a house with a deep litter floor. You can easily prepare litter with paddy husk. Setting up a brooder for a batch of around 25 to 40 chicks. Each chick requires 4 square feet of space in the first three weeks of its life.

Set the brooding temperature at 900F for the first ten days, reduce it to 850F, and don’t change the temperature until they are 3-4 weeks old. If you want to raise them properly, taking care of temperature is massively important.

Place enough number of feeders and water pots inside the brooder. Build a chick guard of at least 2.5 feet to ensure the chicks don’t jump and stray outside the brooder. Hang a bulb inside the brooder, and keep it on all the time. A 100 square feet area needs a 40-watt bulb for proper lighting and temperature.

Once the chicks are of 3 weeks, increase the brooder area as well as the height of the chick guard. Keep them feeding with chick starter mash for 12 to 14 weeks or until their body weight touches the 10-kg mark.

Emu chicks need a lot of playing and running space for proper and healthy growth. So, provide them with as much floor space as possible. You can easily raise around 40 chicks in a floor space measuring 30×40 square foot. Space should be drained easily and is free from any dampness.

Grower management

This is the most important part of emu farming information. Unlike most of the poultry birds, emus are big. And naturally, they need large flooring space, large feeders, and big-sized water pots. Keeping male and female emus together is not a good idea, so keep them separately after identifying their sexes. Feed them with birds’ grower mash and 10% of green for 34 weeks of age or weight 25 kg. Never raise chicks with grown adult emus to ensure maximum safety.

Breeder management
  • Usually, emu birds attain maturity at 18th to 24th month of age.
  • Ensure male and female ratio as 1:1 for proper breeding.
  • Each pair requires 2500 square feet area for comfortable mating.
  • You can grow multiple shrubs and trees to induce mating with complete privacy.
  • Plan your breeding campaign properly, and increase the number of minerals and vitamins in their food to better breed. This will ensure healthy fertility.
  • An adult emu needs one kg of food per day, but the requirement reduces dramatically during mating.
  • You will get about 15 emu eggs in the first year. And unlike most of the other poultry birds, the number of eggs increases with every passing year.
  • A female emu usually lays its first egg at the age of one and a half years.
  • The average weight of a healthy egg is 470 grams to 650 grams. Eggs are slightly greenish and are fairly tough in appearance.
  • Usually, a healthy egg takes as many as 52 days of incubation to produce a healthy chick!
  • To ensure proper hatching of eggs, you must have to maintain proper temperature as well as moisture.
  • Proper care and management are very critical for producing healthy chicks. So, you will have to be extra careful throughout the breeding process.

Feeding emus

A balanced diet and nutrition are very important for emu birds, like all other poultry birds. Fresh, high-quality foods play a very important role in keeping them healthy and disease-free. So, for profitable emu farming in the USA, never compromise with the quality of food you provide to the emus. And don’t forget to give a sufficient amount of fresh and clean water at regular intervals!

  • Care and management

Emus are among the strongest birds, and they have a very long life. Issues related to health and mortality rate are also not common. Juveniles and chicks often suffer from a few health problems like clostridial infections, coli infections, leg abnormalities, malnutrition, intestinal obstruction, and starvation, etc.

Genetic disorders, improper brooding, caring, handling, and poor diet and nutrition, etc. are responsible for these diseases. Conditions like ascarid infestations, candidiasis, lice, salmonella infection, coccidiosis, aspergilla, etc. are less common but are noticed in emus.

Vaccinating them on time is a great idea to protect them from possible diseases. Veterinary experts recommend vaccines like Lasota, Lasota booster, and mukteswar strain for good immunity.

Marketing emus and their products

You can earn a lot of emu farming profit as you can sell almost everything! Start selling emu products when they attain the marketing age. Along with emu eggs, meat, skin, feather, and oil are in great demand. You can even sell them as day-old chicks or gown birds! Selling a chick for $50 to $60 won’t be a huge challenge. And you can sell growing emu at $300 to $400. First, explore your local market so that you don’t need to be worried about transport expenses. On a larger scale, you have the whole international market in front of you!

Emu farming is definitely an astoundingly profitable business. The USA’s weather is also not a big challenge, as they can grow in almost every condition. So, follow this detailed emu farming information, visit a few emu farms around your city/town, and start your own business today!

Reference Link:

https://www.roysfarm.com/emu-farming-in-india/