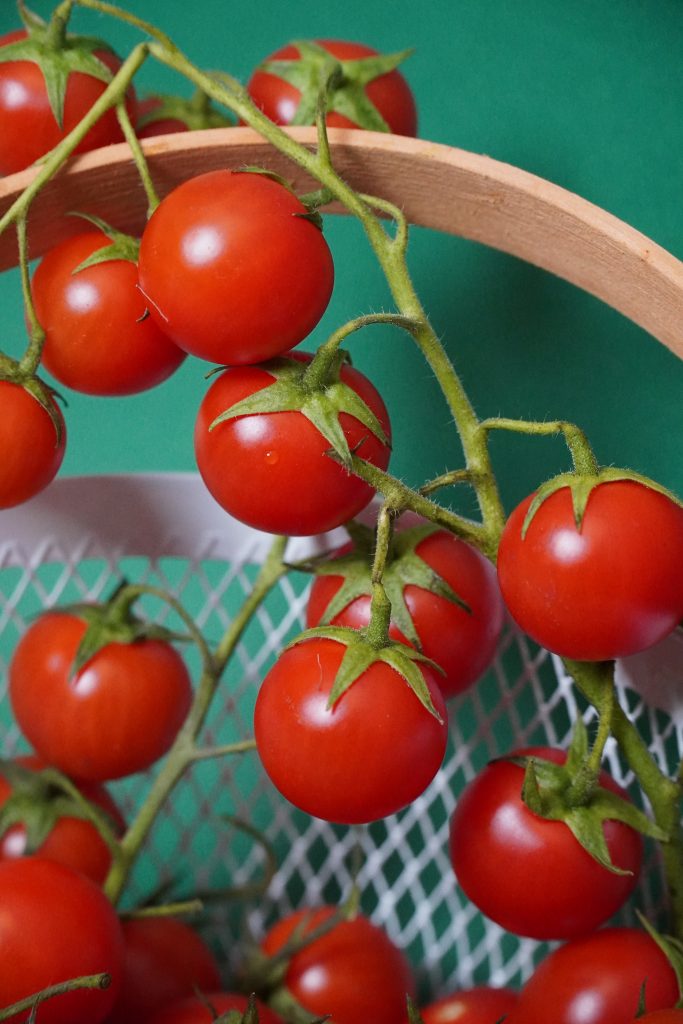
How to: Growing Tomatoes in Containers, Raised Beds & Backyard?

When it comes to tomato flavor the list of delicious cuisines is fairly long. Besides, take a look at your favorite fast food, whether it is a hamburger, or delightful wrapped pizza, without a slice of tomato you can’t imagine the taste that can touch your palates. 

Tomato’ Journey from Concern To Preference

Tomato farming has a tradition. While it’s usage in popular culture is ironic. In the late 1700s, a large percentage of Europeans were frightened by the tomato.

The fruit was termed as poison apple then because it was thought that some of the aristocrats fall sick and eventually died after consuming them. Although, the real reason behind the tragedy was the utensils of wealthy Europeans. These pewter plates have high lead content.

Also Read: Farming Orange for a Perfect Citrus

Since tomatoes are so rich in acidity, the fruit can leach lead from the plate when put on this specific tableware, resulting in numerous deaths from lead poisoning. At that moment, no one related this to plate and poison, and eventually the tomato bore all the blame.

Moreover, the tomato was not only criticized for lead poisoning. Before the fruit found its way to the table in North America, tomato is misunderstood as a lethal nightshade-a family of Solanaceae plants containing toxins called tropane alkaloids.

While as far as the use of tomato concerned, Italian started the use of tomatoes in their cuisines. And, mass migration from Italy to America in the 1800s made tomatoes famous in North American and since then tomato has been in the focus of flavors. It has come so far to be an essential vegetable from the fruit in our everyday cuisines.
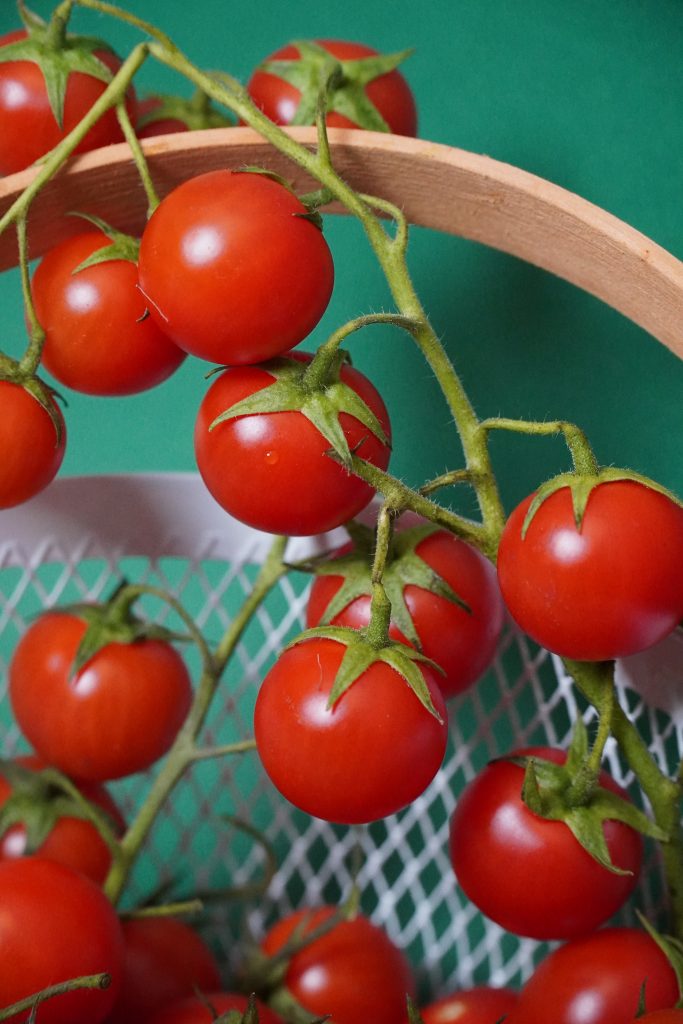
Growing The Tomatoes

Tomatoes are subtropical plants and therefore need a maximum sun position. For the tomato cultivation, this is particularly important for growing areas to have sunshine at a premium. 

Besides, the tomato plants need six to eight hours of daily sunlight to flourish. During the growing season, it needs to be sure to give sufficient room for the growth of each plant.  

Apart from this requirement, the selection of the seed is the utmost variety as the market has thousands of varieties to choose from and some of them can suit your requirements better than others.

Determining the seeds

When it comes to picking a variety, hundreds of varieties are available. You can determine the right one based on some aspects.

According to the growth model. 

You can discover the tomato seed based on the height of a plant. There are two types of plants at maturity.

1. Indeterminate or vining types – a tall plant 

2. Determinate – a short bushy plant

It is better to choose based on your selection of area.

Based on fruit characteristics

These are taste, smell, color, texture, shape, etc. While yield is one of the most important aspects of a variety that is the priority that we need to focus

Growing area 

Is your space outdoor or in a protected setting?

When the seed variety is concluded, it is high time the soil is prepared according to the correct seeding guidelines.

Preparation of Seedlings

Tomato seeding requires a slightly hot environment, especially in indoor conditions. The proper time for tomato seedling is in late February to early March. And, seeding in tomato farming needs the well-mixed compost that can be warm up to the 22 degree celsius. It’s rational that a young seedling will keep warm until the start of the summer with a bit of warm compost.

You can seed at a very short distance often known as sort seeding and will require at least two cubic feet of soil.

Tomato seeds are quite small so you won’t see them again if you grow them too deeply. The tomato seed planting depth should about a quarter-inch, partially filled with a moistened potting mix.

Besides, you can sprinkle 2-3 seeds into the trench and cover them with a mix of potting. Strengthen the blend gently so that the seeds go enough deep into the soil. If it doesn’t sound wet enough, you should spray the surface with water.

Nurturing the Tomato Seedling

You will wait for the plant until a seedling has real leaves. Now it needs better treatment for the young plant. It’s the best moment to continue feeding. At this time, the sunlight is critical and always requires putting the seedlings under sufficient light exposure.

When they are about 6-8 inches high, the seedlings get the first truss flowers. Now, it is time to prepare compost or rusty manure.

Preparing The Soil

Tomato farming is seasonal, especially for warm weather and better suited on well-drained, fertile soils. 

A sloping surface approx two percent is desired for early production with sufficient sunlight in place.

In some cases, it is feasible to also grow tomatoes on pots or containers, whereas in personal usage or a hobby it is favored.

This method needs more intense feeding due to the restricted root area. 

These plants must be drained better, besides plants like tomatoes need to have enough area. If you choose to grow into pots, selecting a well-drained big pot, at least 30 cm tall with a regular potting mix is ideal.

It’s best to change the soil before growing them again. It has been noticed the or soil pests and root diseases can be a serious problem.

Soil Requirements

Before you grow in the field, make sure that during winter, just before you plant, you put in plenty of compost or manure as an overall fertilizer.  

In the case of tomatoes, fertile land is the base for every good harvest. Prepare the soil with a ton of rotting waste and a complete wheelbarrow on 3 square meters.

In case of sowing into pots. The number of seedlings should be two and keep in mind they need to be irrigated and cared more as compared to others.

Transforming and Planting a seedling

The tomato planting distance should be about 18 inches apart, leaving 30 inches between the rows. 

A good plant up to 2 meters high can produce hundreds of fruits while consuming a relatively small size.

As a young tomato plant has been sown in well fertile and nutritious soil. Now it is time to look after these plants.

Nurturing the Plant for Tomato Cultivation

A complete nutrient solution with trace elements (especially in case of use of artificial mixtures) should be provided to transplants at weekly intervals.

They can also be fed with water using a diluting nutrient solution

The latter approach has the benefit that the fertilizer is supplied more according to the needs of the plant: more in hot, warm days; fewer in cool cloudy days.

In each case, following the instructions for feed quantities on the fertilizer label. A fertilizer where the bulk of nitrogen is nitrate instead of ammonium and urea is better than the others.

The issue with the Tomatoes

1. Blighting

Tomato blight spreads fast, leaving a visible brown patch all over the surface, especially with outdoor plants. This is a common problem caused by wet weather. It not only ruins plants, but they also eat the crop.

The moist environment offers perfect environments for early fungal diseases, which first develop dark spots on the bottoms. Make sure any bad or ill leaves are collected during the season.

 The substantial fungal disorder is more destructive and destroys plants fast.

It needs spraying the plants with a fungicide, such as chlorothalonil or copper, to shield them from fungal disorders.

2. Fruit Splitting

Tomatoes with certain strains that are more likely than others to have issues commonly caused by irregular watering. This problem in tomato farming should be fixed by more frequent watering.

3. Pest and insecticides

Search for green and whitefly, as both will spread. As soon as you notice pests, spray your plants with a recommended insecticide. 

Tomato has a significant effect of such incidence while it directly hampers the yielding

Finally a Fruit full Cultivation

Tomatoes continue to develop their color changes, with a subtle pink or yellow blushing, from bright medium-green to light shade. The exact ripeness indications differ with variety, but usually fully mature tomatoes have a dark color.

Can okra and tomatoes grow together?

Finally, tomatoes and other vegetables are a great food source for stink bugs. Planting okra near the tomatoes draws these pests away from your other crops.

Must Read: Planting and Growing Okra Step by Step

Companion planting strives to boost harvests by situating plants that have symbiotic relationships. Used for centuries, selecting the right companions for tomato cannot only reduce pests but also provide a haven for beneficial insects, boost pollination, enrich the soil and in general diversify the plantation – all of which will produce healthier plants that can fend off disease and produce bountiful crops.

Conclusion

Once done with the plucking the proper ripe tomatoes. Last but not least for tomatoes farming is storage. The cooler temperatures will minimize flavor and induce sluggishness in a refrigerator is not to be advised. Although lower temperatures will allow the fruit to stay

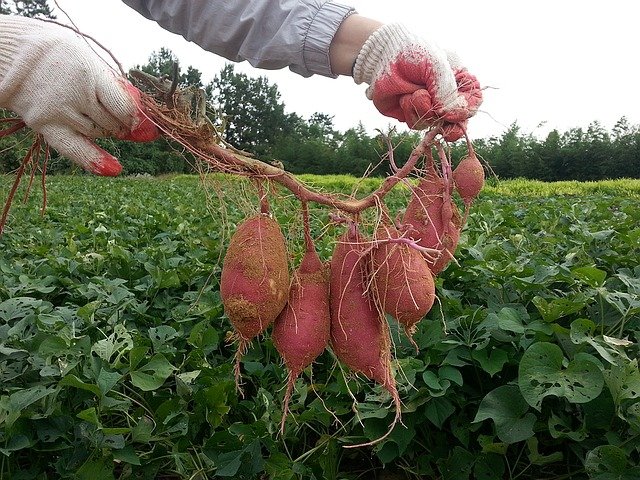
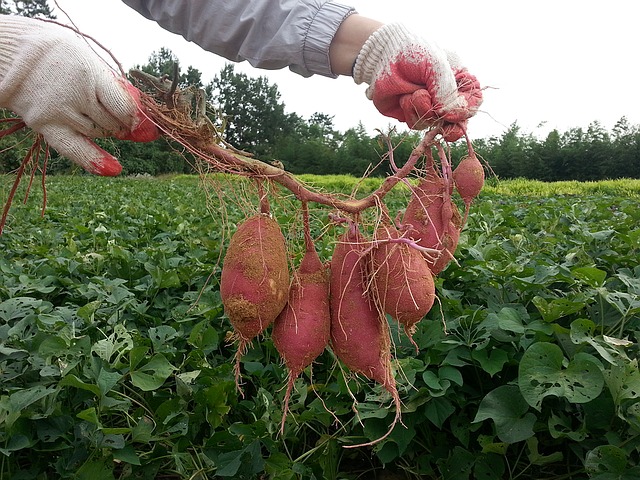
How to Plant, Grow Sweet Potato – Farming Guide

Sweet Potato popularly known as Yams in some parts of North America and is one of the most favorite foods enjoyed by all. It is native to lands of tropical America and generally comes under the family of ‘Convolvulaceae’.

Sweet potatoes are rich in carbohydrates and hence, give a good amount of calories when consumed. Due to its high carbohydrate content, it is used as livestock feed. Sweet potatoes have sweet root tubers. Thus, it is the main source of starch, industrial alcohol, sugar syrup, and glucose.  

How to Plant, Grow Sweet Potato?

sweet potato

Climatic Conditions

Sweet Potato cultivation has a wide color range of tuber skin. This mainly consists of purple, brown, white color tuber skin. Farming is done mainly in tropical and subtropical climatic regions. It is generally cultivated in totally frost-free areas.

Soil specifications

Sweet potato cultivation requires soil that has a pH of 5.8 to 6.7. It can be cultivated in sandy as well as loamy soils. However, the best soil recommended for sweet potato cultivation is sandy loam soil with high fertility and good drainage system. It is advised not to cultivate in areas having light sandy and heavy clayey soil.

It is so because the tuber development in such soil does not occur well. Many varieties of sweet potato are cultivated. Among them, the most common variety is Punjab Sweet Potato- 21. This type gives an average yield of 75 QTL per acre and contains deep red color tubers having white flesh.

Also Read: Growing Mushroom for Your Diet

Other varieties from different states include:

  • Varsha, which is grown in Maharashtra and gives an average yield of 62.5 QTL per acre.
  • SreeArun, which is grown near Sreekariyam gives an average yield of 83 to 116 QTL per acre.
  • KonkanAshwini, which is grown in Maharashtra gives an average yield of 70 QTL per acre.
  • H – 41, Co 3, H – 42, and SreeRetna are some of the improved varieties of sweet potatoes cultivated in the US.  

Land Preparation

Now, a question arises on how to grow sweet potato. Farming requires proper land preparation. It is essential to bring the soil to a fine tilt. Before sowing the seeds, it is essential to plowing the land around three to four times. This should be followed by the planking process. Ensure that the land is free from weed.

This is followed by the sowing process. The best time for sowing tubers in nursery beds in January or February. For planting vines, the best time is between April and July. To sow tubers, keep the depth to 20 to 25 cm. For spacing, it is advised to use the row to row spacing of sixty centimeters and plant to plant spacing of thirty centimeters.

Commonly, sweet potato farming uses vine cutting methods for sowing purposes. In this, the tubers are taken from the old vines and are then planted and prepared on nursery beds. Ridges and flatbeds are used for vine plantation. It is advised to use terminal cutting as it gives a better result. Also, the host plant should have at least four to five nodes.

You can sow around thirty-five to forty kilograms of tubers in half a Kanal land, which is then followed by the planting of vines in one-acre land. You can also treat the tubers by placing them in a plastic bag and soaking them in concentrated sulfuric acid for around ten to forty minutes.

Planting sweet potatoes 

Sweet potatoes have unique properties and hence can be cultivated even in poor soil. There are chances of development of deformed roots if the soil is very clayey or is rich in the excessive sandy dirt. For creating a perfect environment, it is necessary for creating long, wide ridges spacing at least 10 inches. The potatoes are placed at a distance of 3 and a half feet from one another. 

The plantations require plenty of compost. Avoid the use of fertilizers that are rich in nitrogen components. These produce lush vines and stunted tubers. If you are performing sweet potato cultivation in cold areas, remember to cover the soil with a plain plastic. This will help in keeping the soil warm, thereby promoting strong growth to the sweet potatoes.

Sweet potatoes cultivation and crop rotation 

Sweet potato farming can be done along with rice crop rotation. This can be done for maximum usage of land. In such a case, sweet potatoes can be planted in December and January after the second harvest of rice. After sowing, apply a full dose of K2O and P2O5 which acts as fertilizers.

Also, apply nitrogen dose at the time of planting and after five weeks of planting. This fertilizes the soil and helps in providing better results.

After planting the vines, perform irrigation once in 2 days for ten days. After that, perform irrigation once in seven to ten days. Thereafter, before three weeks of harvesting, stop the process of irrigation.

However, irrigate the land before two days of harvesting. This provides better results. This process should be followed to grow sweet potatoes.

Weed Control

Weed control is another essential step undertaken during cultivation. Sweet potato cultivation requires the application of several treatments to prevent the growth of weed around the crops. Treatment solutions such as Metribuzine 70WP with a dosage of 200gram per acre or Alachlor at 2ltr per acre is applied to the field. This needs to be done before the sweet potatoes start sprouting.

Weed infests the plants even after sprouting. When around 5 to 10% sprouts have emerged, the sweet potatoes’ field gets infested with several varieties of weed. At this stageParaquat at 500 to 750 ml per acre is applied

Protecting the plants against pest

Sweet potato weevils are long insects with a length of ¼ inches. These are dark blue heads, orange-red bodies, and wings. They lay their eggs into the stems and tubers. They lay their eggs on the tubers and stems. The fleshy roots contain sufficient nutrients for the larvae to grow, while the vines and leaves are a great source of nutrients for the adults.

Potato foot rot, a common disease in these plants are caused due to these pests. The plants infected with the disease have brown or black stems near the soil and at the ends, that does on enlarging.  

These weevils multiply themselves quickly and can affect the whole field within a few days. Hence, they are hard to eliminate. But, with better-certified disease-resistant chemicals along with crop rotation after every four years.

It is advised to destroy all the plants from their roots that have been infected. Alternatively, you can pick these plants along with their roots, place them in a sealed container, and discard them with other household wastes. 

Irrigating the field

Another important technique that is involved in all types of crop cultivation. Some crops require less water while others require more. Moreover, the amount of irrigation required for different crops is different at every stage.  

Sweet potatoes are irrigated once in every 2 days after the stems are planted. This continues for about 10 days. Thereafter, irrigation is given once in a week or 10 days. The plants stop receiving irrigation before 21 days of harvesting. However, irrigation is just a couple of days before sweet potato harvesting. 

Protecting the plant from different diseases

Apart from the above-mentioned points, it is very important to perform weed control in the initial days. Earthing up should be followed after one month of planting. This removes weeds and results in good yield. Weeds are automatically suppressed once the vines start to grow.

Also, it is important to protect your sweet potato cultivation from various diseases. Various diseases such as black scurf, early blight may destroy your plantation and may cause a great loss to the investment.

A black scarf is observed on tubers which in turn causes the plant to dry up. In this, black color appears on the tuber’s eyes. To avoid this disease, treat the tubers with mercury.

In early blight, some necrotic spots appear on lower leaves of the plant. It happens in areas having high moisture content and low temperature. To avoid this, prevent mono-cropping and follow crop rotation. Check for other diseases like common scab also. It is advised to perform pest control by using appropriate pesticides.

Besides, sweet potatoes are affected immensely due to fungal diseases. One such is the black rot, causing dark and circular depressions on the tubers. Infected sweet potatoes must be discarded properly, followed by curing the healthy roots of the same crop. 

Stem rot is another fungal disease commonly found in these plants. The fungus affects the part of the stems that insects have injured due to careless sweet potato farming. Although plants will not die due to the disease but will result in poor quality yields. It is best to plant healthy slips for farming. This will minimize the chances of the plants from being infected by insects and fungus. 

Are you afraid of mummification of sweet potatoes? Are you wondering how to save them and reduce dry rot? It is easy. Store the healthy and fleshy roots at 55 to 60 degrees. This simple step will help you a lot in saving your sweet potatoes as well as give you high yields. 

 Harvesting sweet potatoes

Lastly, harvesting needs to be done. These crops get mature after around 120 to 125 days of planting. Sweet potato harvesting is done at the time when tubers get mature and the crop’s leaves turn to yellow. But, the longer you keep the crop in the ground, the better yield it will be. How? If the potatoes are left for longer, they will be more nutritious as they will have high vitamin content.

Must Read: Onion Farming Skills? Here’s What To Do

But be careful and keep a track of the climatic conditions. On the arrival of frost, the vines will start to turn dark, and finally black. Beware, the tubers will start rotting and the yield will be wasted. 

What are the best ways of harvesting sweet potatoes? Many often inquire about this, as they are not aware of the best measures. It is better to use a spading fork for digging tubers during sweet potato harvesting.

Harvest them on a bright sunny day. This needs to be done when the soil is completely dry. Store them in a well-ventilated area at 85 to 90 degrees Fahrenheit for a couple of weeks. 

There is a sharp trend in the cultivation of sweet potatoes. Farmers are shifting the areas for cultivation of other cash crops that have a high yield and more demand in the market.  

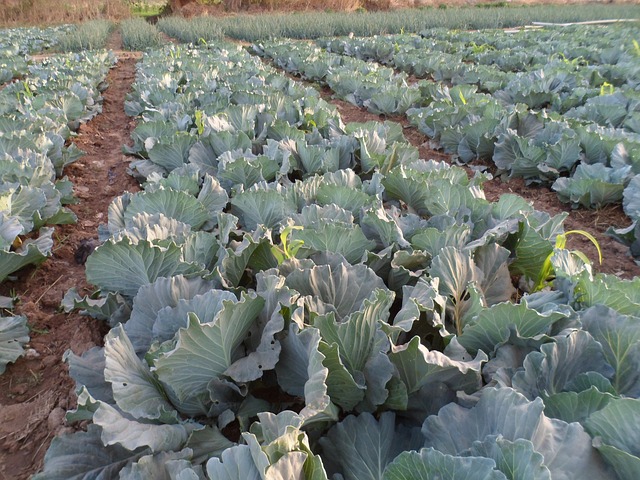
Cabbage Farming Guide

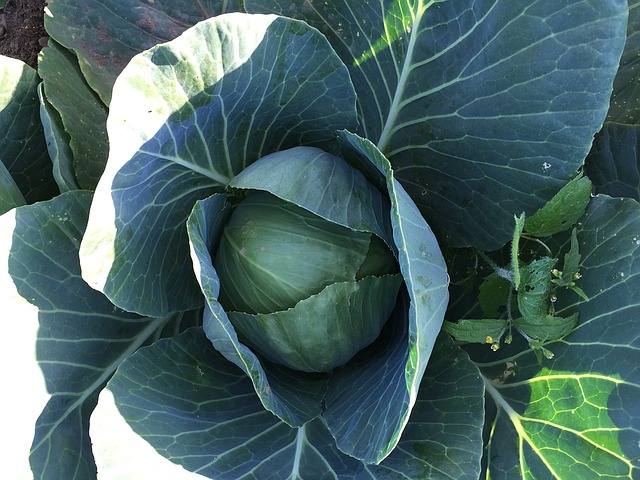
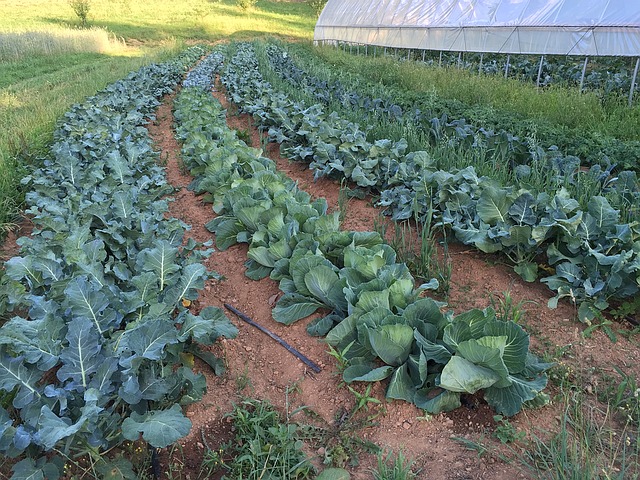
Cabbage also is known as Brassica oleracea var. capitata is a popular temperate and small green-leafy or purple vegetable. The leafy vegetable is also called a biennial plant or as a rabi crop but in certain areas, it is grown as a Kharif crop too.

Cabbages are rich in vitamins C and A and are also filled with minerals such as sodium, calcium, phosphorus, iron, and potassium. Cabbage can be consumed in cooked or raw form depending on the individual. The external appearance of the crop displays a compact mass of smooth leaves wrapped around each other and the structure is referred to as the head of the vegetable.

The leaves on the exterior are large in size than the inner ones. The stem of the plant is stout and short and the flowers of the plant appear in the winter season. Thus, cabbage is a cool-weather crop.

Before initiating cabbage farming, it is essential to understand the basics of cabbage cultivation and the environment necessary for the entire process. Starting to grow cabbage in the late or mid-summer so that it can be harvested in the winter, early spring, or in the autumn season.

The seeds of the crop should be planted indoors approximately 4-6 weeks before the last spring frost and the crop should be ¼ inch deep during the sowing process. The transplants of the crop can be transferred to the outdoor garden once they are around 7-10 cm (3-4 inches) tall and the seedlings are hardened.

The sowing process of the plant can be started as soon as the soil is easy to work on in the spring season. The regions with mild winters can start the seeding process during the late summer so that the crop can be harvested in spring or winter.

Also Read: Are You Embarrassed By Your Onion Farming Skills?

Perfect Environment to Grow Cabbage

How long does cabbage take to grow

Weather and soil are the dominating factors in the proper outcomes of the cabbage. Cabbages are regarded as adaptive in nature when it comes to soils as well as climate. Cabbage quickly depletes the nutrients present in the soil and thus the plant is considered as the heavy feeder.

Organic constituent rich and well-drained soil is ideal for growing cabbage. Heavy to sandy soils rich in nutrients is preferred for cabbage cultivation. The planting bed/soil should be prepared well in advance by combining the aged manure or compost. The well-drained soil aids in inhibiting the rotting of the head that stands in the water.

Light soil is used for early crops whereas late crops require heavy soils to store moisture. Growing the plant on the heavy soil helps in growing the plant slowly thus maintaining the quality. The soil used for cabbage farming should have a pH level in the range of 5.5-6.5. The pH of the soil shouldn’t cross 6.5 and it shouldn’t fall below 4.5 as it can damage the petals of the cabbage plant.

The cabbage plant is prone to various diseases when grown in saline soils. Thus, it is crucial to determine the pH to get the best results in the cabbage planting. Furthermore, crop rotation is practiced to avoid soil-borne diseases and infections to the plant.

The cabbage plant in the Indian subcontinent is grown in moist and cool climatic conditions. The optimum temperature ranges from 15°-21°C for the perfect growth of the head of the cabbage. The flowering intensity of the plant is influenced by the duration of its exposure to low temperatures and the age of the plant.

Popular Varieties of Cabbage

There are different types of cabbages with varied sizes, colours, and shapes. The varieties in green cabbages are Golden Acre, Round-Up, Blue Boy, Green Boy, Badger Ban Head, Market Prize, Blue Ribbon, Flat Dutch, Jersey Wakefield, and Stonehead. Red cabbage varieties are Ruby Perfection, Red ball, Red Acre, and Red Ribbon. Savoy cabbage varieties available are Savoy King and Savoy Ace.

The other varieties available are PusaMukta, Hariana, Bajrang, September Early, Pusa Drum Head, Pride of India, K-1, Pusa Synthetic, Late Large Drum Head, ShriganeshGol, Copenhagen Market, Early Drum Head, Kaveri, and Midseason Market.

Stages of Cabbage Growth

The complete growth of cabbage is divided into 9 stages – Cotyledon (first leaf), Seedling, 6-8 true leaf, 9-12 true leaf, Precupping, Cupping, Early head formation, Head fill, and Mature stage. The seedling goes through these stages to turn into a mature plant.

Cabbage Watering Requirement

Watering the cabbage plant too is an important ingredient necessary in the developmental stage of the plant. The cabbage plant need a continuous moisture supply. Drip system can be installed for better water retaining. Plant bolting occurs in the dry environment and thus prevents from drying. A cabbage plant requires 11/2-inch rain/week and if the environmental condition is not favourable, external watering should be done to keep the plant hydrated.

Around 10 litre water is required for meter square of the land and thus hose and jugs are used. It is essential to be careful while watering the root levels and upper levels. Roots help in retaining the soil moisture and upper levels aids in keeping diseases and pests at bay.

The leaves that have turned yellow should be removed as they can cause a further infestation in the plants. Mushy soil is not a suitable environment for cabbage like other vegetables. If for any unknown reason the soil is dry, the soil has to be dug 3 inches down and then water it. If the moisture level transfers from the upper layer, the plant can be harvested in better shape.

Spacing and Planting Cabbage

Cabbage farming is easy but to understand the correct planting procedure helps in good yield. The distance of planting relies on soil conditions, variety, and planting season. The seedlings are planted in 4-5 levels. The seedlings of cabbage are sowed 0.5-inch-deep and spaced 2.5 cm (1 inch) apart.

Thin plants on the other hand are 45-61 cm (18-24 inches) apart from each other. When there are 4-5 true leaves and are 4-6 weeks old, cabbage can be transplanted to the garden. Cooked stem plants should be planted deep. Seedlings are spaced 45-61 cm (18-24 inches) away from each other and are placed in rows which are apart at 61-91 cm (24-36 inches).

The plants can also be placed near to each other but the size of the mature heads would be smaller. Based on the maturity levels, the following distances are recommended:

Early maturity: 60×30 cm or 45×45 cm

Mid-level maturity: 60×45 cm

Late maturity: 60×60 cm or 75x60cm

A garden fabric set or black plastic can be used to plant cabbage in the early spring season. An x is cut in the fabric or plastic to set the cabbage transplant. Cabbage crop can be planted in succession with the time interval of every 2 weeks so the plant can be harvested at varied times of the season.

Planting Method

Morning or late evening is preferred time for transplanting process. The roots of the seedlings are dipped in Bavistin solution (2 gram/litre of solution) before transplantation. After the process of transplantation, irrigation is immediately carried out. Some countries irrigate the beds first and then the seedlings are transplanted to the bed.

Irrigation Mechanism

The cabbage is a versatile vegetable yet at the same time, it can’t suffer drying out. In the colder time of year season the interim irrigation methodology is used which takes 8-10 days. In any case, in the dry season the method must be constant.

A restricted water quantity ought to be present in furrows in order to re-hydrate the crops during dry climatic conditions. During the rainy season, a remarkable drainage technique needs to be made to deal with the situation. Areas with less rainfall should implement drizzle irrigation to cope up with the water scarcity in the plantation method.

Fertilizers and Manures

The dose of fertilizer depends on the quantity of organic manure used in the crop and the soil fertility. Approximately 4 weeks before transplanting, 15-20 tonnes of FYM is integrated into the soil for better yield. In general, for optimum yield 60-100 kg P2O5, 60-120 kg K2O, and 80-120 kg N is recommended. At the time of transplantation, entire quantity of K and P is given and half dose of N is applied. The remaining N is applied after 6 weeks from transplantation.

Apart from these fertilizers, decomposed cow dung 40 tonnes/ acre, Muriate of Potash 40kg/acre, Single Superphosphate 155kg/acre, and Urea 110kg/acre is applied. Also, look for magnesium or boron deficiency in the plant and accordingly perform soil testing.

Companions of Cabbage

Cabbage can be grown together with onions, fragrant herbs, beet roots, potatoes, sage, thyme, cucumber, dill, spinach, kale, artichoke, lettuce, and celery provide additional benefits to the cabbage plant. Try to avoid growing tomatoes, pole beans, cauliflower,and strawberries as they require the same nutrients and thus can’t be grown together.

Harvesting and Yielding

when do you harvest cabbage / cabbage harvest time?

It takes 90-120 days for the plant to get harvested. The ideal time for harvesting the cabbage is when the head portion is mature and hard and stable. The delay in harvest even for few days after it is matured can cause incidences of disease and split heads of the plant.

The harvesting of heads that are immature results in reduced yield as the heads are not yet mature and are easily prone to damage due to the delicate nature. The life of immature heads is shorter than the mature heads.

The harvesting of head is done by tilting the head on one side and then gradually cutting it with a sharp knife. The stalk of the plant has to be cut in flat form and incision should be done close to the head but stalk has to be long to preserve 2-4 wrapper leaves. The wrapper leaves or extra leaves behave as cushions that helps in protecting cabbages while handling. Certain markets desire the extra leaves for consumption or decoration purposes.

The head of the plant has to be handled carefully and should not be twisted or snapped while removing as it can cause head damage and the length of the stalk becomes inconsistent. The breakage in the stalks causes faster decay.

Depending on the maturity of the heads, the harvest is carried out as different heads require different time for maturity and thus differs in harvest time. Before packing, the harvested produce should be stored in shade conditions. The sorting and grading process is followed after harvesting and it depends on the head size.

The yielding process depends on various factors such as cultivation season, variety, and maturity group. The early varieties have an average yield of 25-30 t/ha and the late level varieties yield is 40-60 t/ha.

Common Diseases and Pests

The growth of the plant attracts various types of pests and diseases. These pests and diseases impact the plant externally as well as internally. The entire system of the plant from roots to leaf is damaged by the catastrophic elements. For instance, it can damage the essence, weight, growth rate, color, and many other things.

The pests infecting the crops are Cutworms, American Bollworms, Flea Beetles, Aphids, Cabbage worms, Nematodes, Cabbage rot maggots, Bagrada Bug, Diamond Back Moth (DBM), and Cabbage loopers.

The diseases that infect the produce are Wire Stem, White Blister, Downy Mildew, Club-root, Target spot/Leaf spot/ Ringspot, White Mould, Blackleg (Dry Rot Canker), Powdery Mildew, White leaf spot, and Dumping off. Most of the diseases are caused by Botrytis and Sclerotinia.

To control these diseases and pests, chemicals like insecticidal soaps, Spinosad, Carbaryl, Permethrin, and Neem oil extracts is used. However, not all the pests and diseases can be controlled and thus a proper consultation with agricultural institute might provide solutions.

Preserving and Storing Cabbage

Cabbage can stay for 1-2 weeks or may be longer in a refrigerator. The seeds of cabbage can be sprouted. Cabbage can also be dried and frozen. It can also be cured in brine to make processed cabbage known as Sauerkraut.

Conclusion

Cabbage farming can yield profits if best practices are implemented at every stage of the process and proper hydration is provided to the plant.

Garlic Farming – Planting, Care, Harvesting-A Complete Guide

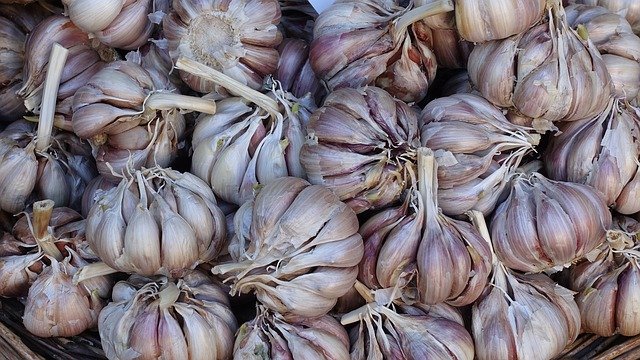
Garlic is an essential bulb crop grown. Its scientific name is Allium sativum. It is used as a spice too. Compared to the other bulb crops, garlic has a high nutritive value. Garlic can be  transformed into different forms like chilled garlic, dehydrated garlic flakes, dehydrated garlic powder, garlic oils etc.

They grow perfectly well 1200-2000m above sea level. These bulb crops are consumed by people as a spice. However, garlic originated in southern europe but it is being consumed all over the world these days. Garlic farming can be carried out in too hot or too cold weather conditions. Maintaining optimum temperature is necessary to get a healthy crop.

It is a low maintenance cash crop. You can gain amazing profits by planting and selling garlic. 

The U.S is the number one importer of garlic in the whole world.

Growing Garlic at Home

Soil requirements for garlic

Firstly discussing the soil, well-drained loamy soil that is rich in humus will be most suitable for garlic cultivation. The soil should also have sufficient potash. Sandy soil or loose stool is not much preferred as it can degrade the quality of the garlic and the difference in weight of the garlic bulbs could also be seen.

 In addition when heavy soil is used for garlic production, then during the harvesting period the bulbs break and become badly discolored. pH range of 5-7 pH is suitable for proper growth and yield.

Climate:

Garlic can be grown in a wide range of climatic conditions however  the extreme conditions are intolerable. A moderate temperature whether hot or cold is suitable for garlic Farming.

Bulb formation will be affected in extremely hot conditions.  Garlic needs some cool and moist conditions for growth. Bulb formation occurs when the weather’s hot  and days are long. 25-30°C is the most suitable temperature for bulb formation.

Diffrent Varieties of Garlic:

Some varieties of garlic like agrifound Parvati, agrifound Parvati 2, agrifound white, yamuna safed, yamuna safed 2, yamuna safed 3, GG-4,  Ooty 1 etc. are very productive and disease resistant. Some other varieties are G-41, bhima omkar , bhilma purple, pant lohit etc.

There are basically two main varieties of garlic that are hardneck and softneck.

1. Hardneck:

This variety of garlic is very cold and should not be grown in winters. In this flower stems are produced that have to be cut off  so that the bulbs can reach their maximum potential. However these flowers or scapes are edible mainly in summers in salads or by adding in fries.

This variety has one ring of the clove around it unlike the other variety. This variety cannot be stored for a very long time as other varieties. It’s taste is also lighter than softneck garlic. For example Korean red ,duganski, Siberian, music, chesnok red, German red, and Spanish Rosa. etc. 

2. Softneck:

Similar to it’s name, this variety remains soft after harvesting. This variety is usually a warm climate variety. Softneck garlics have a strong and intense flavor. This variety has bigger bulbs. For example silverskin, inchelium red, California Early and California late.

Next comes the great headed and the wit and wisdom 

  • Great headed: 

This garlic doesn’t taste much like garlic. It tastes more like the onion than the basic garlic. Bus and cloves are large in size. 

  • Wit and wisdom:

This variety of garlic has healing properties.

Propagation

Propagation for garlic crop is carried out by planting cloves or aerial bulbils. Most of the time aerial bulbils are preferred over cloves as they are very productive.

Garlic planting: 

For planting garlic, the land has to be thoroughly prepared by ploughing repeatedly. After that 10-20 tonnes of well-decomposed FYM should be added per hectare.

Garlic sowing can be done by three following methods : 

1. Dibbling

2. Furrow planting 

3. Broadcasting

When the garlic is planted at small gaps, then the size of the individual garlic decreases however the overall yield increases. Organic manure is also very helpful in good crop production. Hence 20 tonnes of well-decomposed FYM per hectare during field preparation.

Nitrogen, phosphorus, potassium can also be added in the field. Nitrogen has to be given in two doses. The first dose has to be given during plantation and the other one after 30 days of plantation. 10 kg of Borax has to be added per hectare for improved yield and enlarged bulb size. 

Climatic conditions for garlic cultivation: 

A combination of different climatic conditions is necessary for cultivation of garlic crops. It’s basic need is a cool and moist climate for development of bulbs and proper vegetative growth.

However, a warm climate is much suitable for maturation. But garlic cannot tolerate extreme weather conditions. Exposing the crop to low temperature for a long time can decrease the yield of the crop.

Irrigation:

Garlic crops need to be moist because of the special root development. Firstly the field has to be irrigated lightly before plantation. In garlic farming, different types of irrigation systems are used for example drip irrigation, sprinkler irrigation system and the furrow method.

A few years back it was reported that drip irrigation method has a significant effect on crop productivity. In the drip irrigation system the pipelines are laid throughout the field and crops are irrigated drop by drop. In this the wastage of water is very very less. Even evaporation is also less in this system as compared to the sprinkler system.

Although it also has some disadvantages like the watering tapes has to be replaced within 1-3 years. The droppers may also get contaminated.

Sprinkler system: in this method the water is sprinkled all over the field like rain. However this method has some disadvantages too. This method is quite expensive. In this method a lot of water is wasted and a lot of energy is also required to create the water pressure. It may have a negative impact on the cover sheet for example this may cause any disease. 

Inside dirt: It is also called an underground drip irrigation system. In this the system for irrigation purposes need not be changed for years. This system doesn’t obstruct the tillage. It doesn’t require yearly expansion. In this system the water is delivered directly to the roots.

Disadvantages of inside dirt drip irrigation system: It’s difficult to diagnose  the malfunctioning as to check one part the whole system has to be checked which is a quite difficult job. It also needs high maintenance. A care system  also has to be arranged so that the roots don’t grow inside the tubes or pipes. This system has a higher initial cost as compared to a simple drip irrigation system.

These are the few methods of irrigation. In the initial stages, irrigation has to be done every 3rd day. But afterward, the crop can be irrigated once in 15 days. These intervals go on increasing as the crop reaches its maturity stages. When the crop is ready to harvest, the irrigation needs to be stopped.

As we know that garlic being small in size is planted very close to each other so manual weeding could be a very difficult job and expensive too. And not doing this can cause a lot of damage to the crop.

So the only option left to treat weeds is a chemical method, herbicides or weedicides have to be used to vanish off the weeds. Some examples of these weeds are linuron, pendimethalin, and tribunil, etc. 

When is Garlic Ready to Harvest:

After 130-150 days of plantation the garlic crop is ready to harvest  but it also depends on the soil type, climate conditions etc. When the upper part of the crops becomes yellow and starts drying and bending. It should not be harvested too early as it results in poor quality of garlic.

Hence before digging up the whole crop, one should take out the same samples to check out the quality of the crop and also whether it’s ready for harvesting or not.

So slightly pull up one or two bulbs but one must keep in mind that digging should not be started until the top is completely Yellow. When the garlic head is divided into plump cloves and when the bulbs have thick, dry and papery covering the garlic is ready to harvest.

Timing is also very important in this process as if the harvesting is done early, the covering of the bulb would be thin and may Get damaged. And on the other hand, if harvesting is done late, the garlic along with it’s skin can split up and may become prone to diseases.

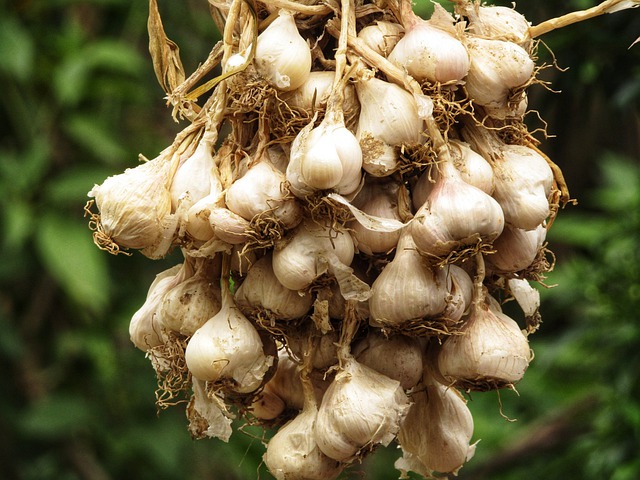
Harvesting has to be done very carefully as directly pulling the garlic out can also damage it hence it has to be first dug up very carefully and then carefully brush the garlic to remove the soil. Then hang them upside down for good air circulation.

Diseases:

Garlic is prone to some diseases like basal rot( Fusarium culmorum ), white rot ( sclerotium cepivorum) Downy mildew (Peronospora destructor), Botrytis Rot (Botrytis porri), and Penicillium Decay (Penicillium hirsutum).

Control: use disease free seeds, avoid overcrowding, one should dispose of the infected part properly, also make use of appropriate fungicides, using well drained soil can also prevent these diseases. Regular weeding should be carried out.

Seeds should be treated with warm water before sowing to avoid infections. Virus-free cloves should be planted. Soil beds should be prepared properly. These are some methods to control these diseases.

How to store garlic

Mainly garlic has to be stored in a well ventilated room. As the garlics have to be hung from the leaves so a proper support should be there in room for hanging the garlics. Cured Garlics can be stored for maximum 8 months at normal temperature.

However, before storing the garlic it should be properly cleaned and trimmed. The outer papery layer has not to be removed but the dirtiest wrappers can be separated. This garlic has to be stored in cool, dry, and dark places.

The temperature for storage should be 4°C or 40°F . In this way these can be stored for several months. It should not be stored in a moist place or refrigerator. The flavor of the bulbs enhance as it dries up.

If the crop is stored properly, it can last throughout the season. If you have to cultivate the crop next year again, then save some of the largest pieces to plant them again. 

Plant protection

Thrips can cause dropping of leaves and degrade the quality of garlic and even the storage quality too. A chemical named methyl  demeton 25EC 1 ml per litre can check on thrips. 

How profitable is garlic farming

One can get an average yield of 32-48 quintals per acre of land.

If one has to grow garlic on a commercial scale then this article may help you to know more about this. Firstly one has to get the good quality seeds according to the demand and quality. For cultivation of garlic land has to be prepared, ploughing has to be done where again some investment would be required for machinery for land preparation.

Plantation is the next step that can be done by different methods like dibbling, furrow planting, or broadcasting and each method has different costs. Then some Intercultural operations have to be carried out like weeding and earthing up etc where again some money has to be applied.

Hereby we can say that at  each step some investment is required like every other crop and it’s worth it as one earn a very good profit from this crop

Conclusion

Garlic is mainly used as a food or spice . It can also be used as a medicinal herb or oil. It has a unique taste and its own different aroma. It adds a very different flavor to food and makes it more delicious as demanding.

Beside food it is helpful in many of the medical conditions and provides great refeif. According to some preclinical studies, garlic is said to have some compounds that are helpful in cancer and cardiovascular diseases.  Garlic has some outstanding roles in human health as well as medicines and is also a very profitable crop.

How to Plant, Grow Okra Step by Step Guide?

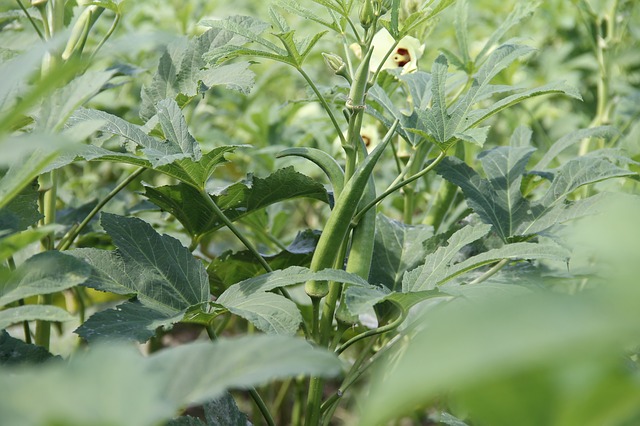
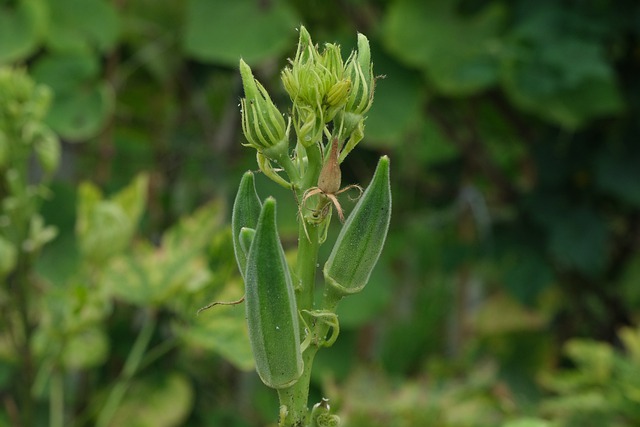
The okra, a long prickly vegetable, is often known as a lady’s finger. Okra can be eaten in several ways, for instance,raw, pickled, or stir-fried, etc.The greengage of okra is mind-blowing and the taste is amazing though. 

The skin of okra could prickle your fingertips at just a gentle touch. And, slicing it exposes nothing more than seeds and slime. Are you wondering how to grow okra?

During the heat and humidity of a heated summer, just a few plants have real tolerance against the scorching sunlight and choking humidity. But, the okra loves heat and warm weather. The okra likes to flourish with the increment in temperature. And, of course, the warm weather eventually prolongs their green dark leaves and notably vivid flowers.

Okra is just different from the other plants in terms of sunlight. Keeping in the mind that the okra thrives in a warm climate, it is ideal to plant okra in early summer once the frost starts to disappear. 

As part of the process, the soil should have a temperature level of not less than 65 degrees Fahrenheit to encourage the germination of seeds which turns into healthy seedlings. 

How to Grow Okra Guide?

Okra Plant
Picking an ideal place

When picking a place to plant okra, it is recommended that the area that has a warm climate throughout the summer is appropriate to grow okra and eventually higher yield.

Also Read: How to Grow Pumpkin

However, okra is known to grow in poor soils. It is better produced on healthy soils that are rich with plenty of organic material. But it is noteworthy that the excessive nitrogen contributes to better development of the plant, but adversely affects the growth of blooms.

So, it will be a wise decision to have a soil test if you have a plan to grow okra commercially. Also, the soil test usually provides a clear and authentic ratio proportion of the essential nutrients.

Sowing of okra seeds

It works great for the growers that have extended cold season to sow the okra seeds in pots indoor. They can propagate the plants once seedling starts to appear and frost disappears entirely. The germination for seeds takes about four to five weeks to become a seedling.

To get the quality results for okra farming, you can use the fresh seed that is soaked overnight. And, it is worth to sow two seeds per pot in case of indoor sowing as later you can remove any weak seedling from the pot if there is any.

Besides, you can sow the seeds directly where the okra plant is to grow for the rest of the season.

Soil preparation for okra cultivation

It is worth preparing the soil and allowing it to age before planting. During this process, this can be done by applying directly more organic compost to the soil. Like any crop, the okra often needs strong water retention and proper drainage.

Moreover, to germinate the seeds properly, you should sow the seeds half an inch below in light soil and one inch deep in hard soil. While it is appropriate to give three inches of space between the plants and approx three feet between the rows.  

Caring the okra plants

The okra plant needs a lot of space around it. In okra farming, the plants sometimes develop six feet high and can spread to a large degree. Thus, planting the seed with enough space is always worth the higher yield. 

Once the okra is around 4 inches high, try to keep weeds away and hold moisture around the roots. Furthermore, it is recommended to water every three or four weeks during dry periods as well as serve the compost on the side of plant roots.

1. Watering

The okra is a plant for the warm weather. Still, it is noteworthy to take care of the irrigation of plants so that they can grow to the full capacity and can produce a higher yield. In this exercise, if a plant has gained considerable height, it should be watered once in a week at least or more frequently if there are severe dry conditions in your local. While okra can survive a brief period of dryness, but it is worth to ensure that the dry period should not extend long.

2. Fertilizer

In case the soil is well prepared, okra would only require light compost dressings for the optimum results throughout the season. 

Besides, the powerful foliar sprays would be beneficial to make sure that each okra plant can give a higher yield. Also, fluid seaweed spray can be used two to three times in the growing season of okra farming.

The early growth of okra is always lazy, but as summer begins to settle, the plants grow much faster. As soon as the temperature rises the plant starts to grow in height. During this process, the okra leaves begin to develop, which are accompanied by tender seeds, to produce a yellow flower. 

Once grown about four to six feet, the plant develops a central stem that gives it a slight appearance just like a short tree.

3. Pollination

The pollinations of the okra largely depend on the climate during the season. The conditions such as temperatures above 90 ° F or under 55 ° F have an adverse effect over the pollination. Inhibiting too little light, water stress and nitrogen overload also may have adverse effects. Thus, plant it in the pleasant light, high in manure, and hold the soil abundantly moist.

Problems with okra farming

1. Root-decaying

The stem rot or the Fusarium is a fungal disease that favors warm soil. It is recommended to drag contaminated plants and drop away from the field. To prevent the fungal disease, leave soil for sunlight in late spring or summer is the utmost necessity.

This fungal infection often results in the death of the young seedlings, which is quite a treat for the okra crop.

Besides, another fungal disease, anthracnose spreads through high moisture and condensation. This has a severe effect over the plant leave and in excess, the plant could deteriorate. If you identify such conditions, it is appropriate to remove contaminated plants and discard them away from the field.

It is recommended to spray at least once in a week with fungicide coated with copper or sulfur.

2. Issues with the pods

1. The fungal traces may occur over the leaves. These are recognized with powdery mildew. This occurs when the humidity is strong. These spores germinate on dry plant surfaces while spores do not sprout on wet plants.

In such conditions, try to toss out leaves and pods that have been decayed. And, keep waste of plants away from the field.

2. A brown caterpillar of up to 2 inches in length can make a tunnel into the pods. This requires picking each insect and destroying them completely.

3. South green bug is a half an inch thick bright green insect. The bug sucks leaves and sap of pod that results in twists and deformation of them. To prevent these insects from okra farming, you can spray the okra plant with insecticidal soap.

4. Aphids are little insects that colonize underneath leaves and look like an oval and yellowish pear. They can leave the oily excrement, termed as the honeydew, behind them which may become a sooty black mold. Spraying the insecticidal soap can turn them down effectively.

Once, the pods start to appear and grow towards maturity.

Harvesting okra

The perfect time for okra cultivation is within three to four days of developing pods. As they mature quickly, they tend to be tougher, stringier, and less adequate to eat. You can pluck the okra but in the meantime, you need to take care of a few things.

  1. The okra is ready as an edible vegetable after 2 months of planting
  2. Once the okra grows to the two to three inches, it can be harvested. It is better to harvest them daily to encourage reproduction from the plants.
  3. After the first harvest, trash the lower leaves to help speed up production.
  4. Okra is covered with the prickle that can hurt your hands while plucking them by bare hands. 
  5. The vegetable might be too hard, signifies that okra is probably too old and should not be used.

You can enjoy okra throughout the winter if it preserved under cold storage. Sufficient cooling conditions prevent them from withering or losing the original taste.

Can okra and tomatoes grow together?

Both okra and tomato have a tall plant once grown to maturity. These may grow up to six feet. If you try to grow both the vegetable all along, it is ideal to keep the distance around four feet between two plants. The tomatoes are a great source of food for the stink bugs. Thus, it is worth having these around your main crops in the case of okra. These practices can keep many insects away from your plant.

The seafood gumbo, a shellfish based dish, has the perfect use of the okra. Besides, young leaves, similar to spinach, are often used in salads. And, seeds may be pressed or roasted for the oil. Apart from this, this plant is commonly used as a thickening agent in soups and stews.

References:
  1. https://www.thespruce.com/growing-okra-in-the-backyard-vegetable-garden-1403473
  2. https://www.planetnatural.com/growing-okra/
  3. https://harvesttotable.com/_okra_can_be/
  4. https://homeguides.sfgate.com/can-plant-okra-48528.html

Ivy Gourd Farming: Planting,Care, and Harvesting

Friend’s today we are adding a new member to your farming list. Ivy gourd farming is new on the bucket list. You will be glad on knowing the benefits it adds to life. 

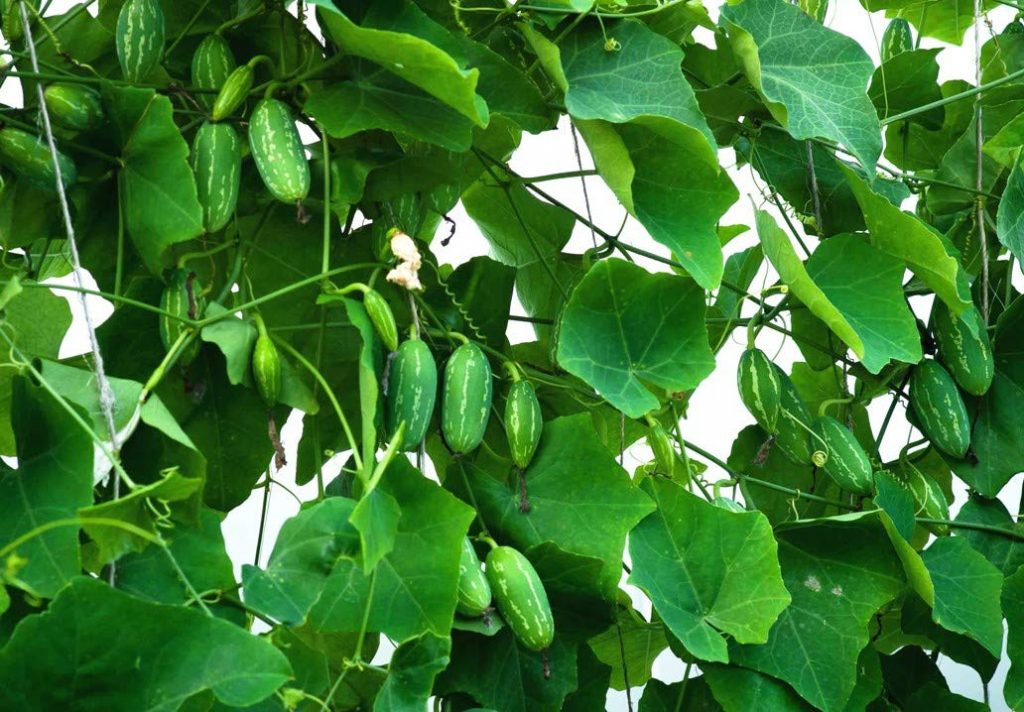
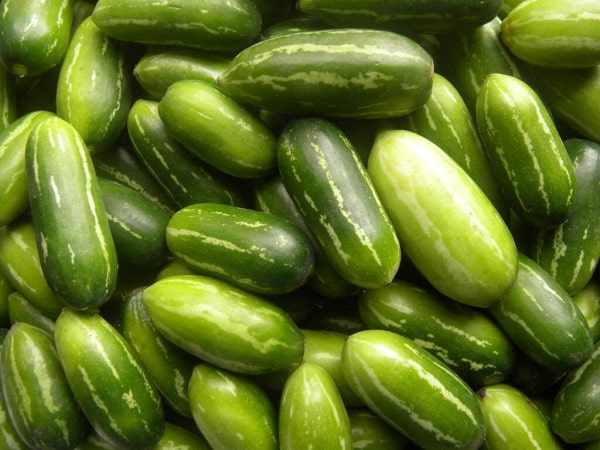
This cucumber-type appearing vegetable belongs to the Eastern part of Africa. It is also cultivated in the tropical part of America, Asia, the Pacific, and the northern part of Australia.

It is also popular by the name of the scarlet gourd. Ivy gourds are inclined towards climbing.

You can find the most commonly used in Indian dishes. But it is adored and relished worldwide for its contribution to health.

To find out what Ivy gourd farming is? This article will cover every nook and corner related to Ivy gourd farming.

Types of Ivy gourd

There are only two types of Ivy gourds: Striped and non-striped.

Soil, Climate requirement, and land preparation

For good Ivy gourd farming, you must have sandy loam soil enriched with nutrients. It should also not waterlog. 

You should restrain from using acidic, alkaline, or other sorts of heavy soils. The PH range of 6-6.5 should be maintained.

A humid and warm climate is what these ivy gourds love and crave. The temperature range should fall between 20 to 32 degrees for a good yield. 

Though the Ivy gourd cultivation can be done at any point of time during the year. For amazing results rainy season or warm weather is preferred.

No great efforts are to be made for getting the land ready for cultivation. Just thoroughly plowing should be done to entangle the soil and check for weeds, if any.

After that, a good quality manure should be applied to the soil. The ground is now ready for Ivy gourd cultivation.

Also Read: Radish Farming: Planting, Harvesting, & Diseases

How to plant Ivy gourd

Vegetative propagation is the planting style popularly practiced in Ivy gourd cultivation. The propagation is processed either using stems or by seeds.

But through seeds they take at least a year to reach a plant. When opting for stem cutting propagation, you should fix the width to 2 cm and the length to 20 cm of the stem.

Those stem cuttings should go 6 cm deep into the soil having a basin width of 60 cm. And the same way you can proceed with other cutting while maintaining a gap of 2 cm. This is the way how to plant Ivy gourd in the field.

How to grow Ivy gourd from seed

How to grow Ivy gourd from seeds is an interesting process. Get some scarlet gourds from the supermarket and cut them to remove the seeds.

After this, you can immediately sow these seeds, without stressing about the weather conditions. That means they can be planted at any time just to avoid scorching summers. 

Remember, the temperature range between 15 to 27 degrees work wonders and promotes sprouting at a faster rate.

Though, planting can be done through seeds also but it is not a good idea. There are harms of adopting this procedure.

There are chances of disagreement between the seeds and true fruit. And it is evident to end up without any fruit, for you need to plant female and male plants next to each other.

Must Read: Snake Gourd Farming

Season for plantation

The Ivy gourd cultivation should be done before the onset of rains or in the spring season. As these are perennial, so replanting should be done at least after 4 years. There must be 2 metre bamboo stick should used to render support to the plant.

Ivy gourd plant care

A proper Ivy gourd plant care ensures a good quality of Ivy gourd. Following things should be kept in mind while taking care of the plant:

  1. Spacing: The spacing pattern remains the same as cucumber plants. At some point in time, they start searching for a company and tend to get attached.
  2. Weed Control: During the early stages of Ivy gourd cultivation weeding is a must to do activity. As it is inclined to reproduce many other small plants and twigs effect the plant growth.
  3. Water Supply: At the budding stage, it should be watered properly. Once attaining growth, the water supply can be stopped.
  4. Pruning: This adds life and energy to the plant. After pruning, don’t dump the cut branches and small twigs as can regenerate.
  5. Pest Control: The major enemies of Ivy gourd cultivation are Thrips, mites, Aphids, and Whiteflies. Their spread can be checked by treating them chemically.

Harvesting Ivy gourd farming

These scarlet gourds are ready for harvesting in a 3-month time. A hand sickle or a cutter is an advisable tool to be used owing to its small size and to avoid any damage to the vine. 

This harvest results in a yield of 12 to 15 tonnes per hectare in Ivy gourd farming.

Benefits of Ivy gourds

  1. Diabetes control: The leaves of this plant when consumed in a raw state helps in controlling the sugar level in the blood.
  2. Checks obesity: It keeps so obesity free by accelerating the metabolism rate.
  3. Reduces fatigue: Rich in iron provides a backup for energy level. As it reduces the iron deficiency in the body.
  4. Corrects the functioning of the nervous system: Ivy gourd is a bag full of nutrients and vitamins which are associated with the healthy functioning of the nervous system.

Conclusion

There is nothing much to discuss Ivy gourd farming. One thing is clearing its farming is not very much profitable like other veggies.

Still is not a bad idea to go for Ivy gourd farming. Not on a large scale but can be executed profitably as a small-scale farming option. 

Go ahead and do share your Ivy gourd farming experience. Stay connected for more updates.

Bitter Gourd Farming: Basic Process And Diseases

Bitter gourd farming or bitter melon farming has become very popular these days. Bitter gourd is popular for its medicinal advantages mainly and some people are in love with its bitter taste also.

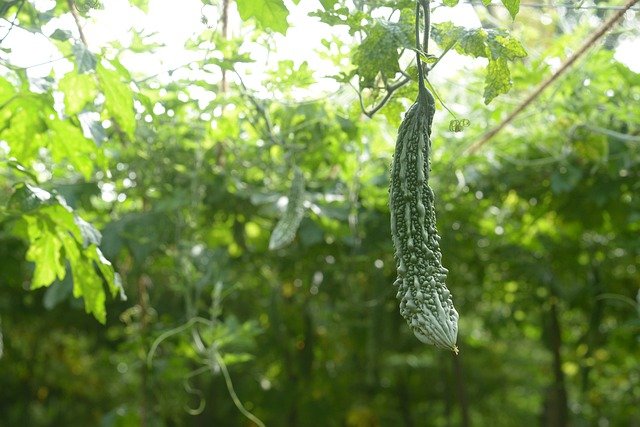
Bitter gourd (Carantia Momordica) is an essential crop that has a distinct bitter taste and bitter gourd yield per acre spread. It has been cultivated for its unripe, tubercular fruits. It is a luscious, slightly smooth, climbing vine, covered in dark green leaves and deeply lobed dioeciously yellow flowers. 

Bitter gourd farming has a drug worth and is used for the treatment of diabetes, hypertension, rheumatism, and blood disorders. Naturopaths are advised to drink fresh bitter gourd milk. In many ayurvedic remedies, roots and wild bitter gourd stems are used.

The fruit is considered a rich vitamin and mineral source and 88 mg per 100 g of vitamin C. After cooking, the fruit is used and after stuffing and frying, delicious preparations are made. Fruits are partly cut, salted, and dried under direct sunlight during times of glut on the market and processed for months. During the glut phase. After baking, this is used. 

Things to Consider Before You Start Bitter Gourd Farming:

The Right Climate Requirment:

It is a mild seasonal plant mostly cultivated in hot and subtropical regions. They are vulnerable to mild frost and are partially protected when grown in the winter months. The 24o- 27oC temperature range is considered optimal for wine growth. When the temperature is above 18oC, the seed germinates best. The crop is sensitive to various fungal diseases due to its high moisture level during vegetative growth.

The Proper Soil

Bitter gourd yield per acre, on well-drained sandy to sandy loam, bitter gourd can be grown; medium-black soils rich in organic matter. Alluvial soil is fine to make bitter gourds in the river beds. An optimum number of pHs between 6.0 and 7.0.

Must Read: Snake Gourd Farming Guide

Planting Method

Land Preparation:

The ground is plucked and tilt-up by 1-2 tilting and flattening cross-sections. Depending on the support scheme to be followed, the furrows are opened at a distance of 1,5-2,5 m.

Method of Planting:

The plant is planted in the plains in autumn, from January to February, while the planting in the rainy season is planted in May. 4-5 kg of seed is needed for the plantation of 1 hectare. Thiram is handled (3 g/kg of seed) before planting.

Plant Support:

As a slow climber Bitter Gourd requires its growth boost. When ploughed without protection, the seedlings traced on the support (bower) still yield for 6-7 months vs 3-4 months.

These vines are less vulnerable to plague and diseases because they are not directly related to the soil. The planting is performed at an interval of 2.5 x 1m in the bower method.

Furs are opened at 2.5 m and canals of drainage are laid at a depth of 5-6 m. On both ends of alternative furrows at a distance of 5 meters are placed timber poles (3 m high). The cables are connected to these poles.

The wires along the furrows are further attached to a network of wires at a 45cm distance. Seminars are sprayed around the furrow at a distance of 1 m and slightly coated in dirt. 

The vines last approximately 1.5 to 2 months to the bower, so the vines are roped until they bower in the first phases of development. If the grapes exceed the height of the bower, the fresh vines travel to the bower.

Manuring and fertilization

The dose of fertilizer to be used would depend on soil variety, soil fertility, temperature, and planting season. The FYM (15-20 t/ha) is generally decomposed well and is mixed during ploughing with the dirt.

The suggested dosage is 50-100 kg N of P2O5 (40-60 kg) and 30-60 kg 25 K2O per hectare. Until planting, half of the N and whole P & K should be included. At the time of flowering, N balance is given. In a 6-7 cm ring from the base of the trunk, the fertilizer is added. Production technology of bitter gourd covers both fertilizer applications should be completed shortly before the fruit is placed.

Irrigation Process

Bitter gourd planting distance or Irrigation may not be required in rainy season crops, where precipitation is well spread between July and September. Bitter gourd planting distance Usually, the ridges are irrigated a day or two before seeds are planted, and, ideally light, they are irrigated for 4 or 5 days after seeds are planted. The irrigation is then conducted weekly. How to grow bitter gourd, To encourage rapid taproot growth, it is important to conserve moisture in the root zone.

Harvesting Tips

How to harvest bitter gourd most common question asked by our audience so here is the answer to it. It takes between 55-60 days to achieve the first harvest for the grapes of it as a bitter gourd growing time. More pickings can be completed 2-3 days after bitter gourd fruits ripen and turn red very quickly.

Fruit selection at the right level of edible maturity depends on individual types and species. Usually, the selection is performed particularly if the fruits are tender and green, so that during transportation the fruits will not turn yellow or yellowish. The harvest should take place in the morning and after harvesting the fruit should be kept in the shade.

Also Read: Ivy Gourd Farming: Planting,Care, and Harvesting

Yield:

Depending on the crop system, variation, season, and various others, the yield of production technology of bitter gourd varies. Fruit yields vary between 8 and 10 t/ha on average.

Post-Harvest Management

Grading: The fruits are classified according to their size and colour. Usually, the green fruits are 20-25 cm long with short neck and tuberculosis.

Packaging: The fruits are bought in baskets of bamboo or crates of wood. Neem leaves or newspapers are spread as lining material on the bottom until they are packaged. Until shipment to the market, the fruits are carefully collected and sealed with gunny sacks.

Storage: The fruit is eaten fresh and is kept briefly in the shade until it is packed and transported.

Diseases:

Powdery Mildew: This illness is favoured by high moisture and occurs first on older plants. Symptoms occur mainly on the top surface of the leaf as white powdery dust. Circular patches or streaks occur on the bottom surface of the leaves. In serious situations, these stretch out, coalesce and spread to the surfaces, stems, and so on. Severe attacks can lead to brown leaves and shrillness and defoliation. The fruits are not completely developed by the infected plants and are thin.

In the Cercospora leaf spot disease, there should be brown spots on the older leaves of the plant. Gummy stem blight is another serious issue for these plants. The symptoms are v-shaped yellow or brown area at the stem portion and also lesions at the stem. The symptoms of scab disease are brown lesions on leaves. 

Conclusion:

Bitter gourd farming is not only beneficial for your health and taste but also your pocket. As the veggie has a good market value, large scale bitter gourd farming can help you make money also. 

You just have to focus on the factors important to keep your bitter gourd plants safe and healthy so that they can bear good fruits. Hope the above-mentioned information is going to help you in the way of bitter gourd farming. Stay healthy, stay blessed.

Bell Pepper Farming: Planting, Growing, Pruning, & Harvesting

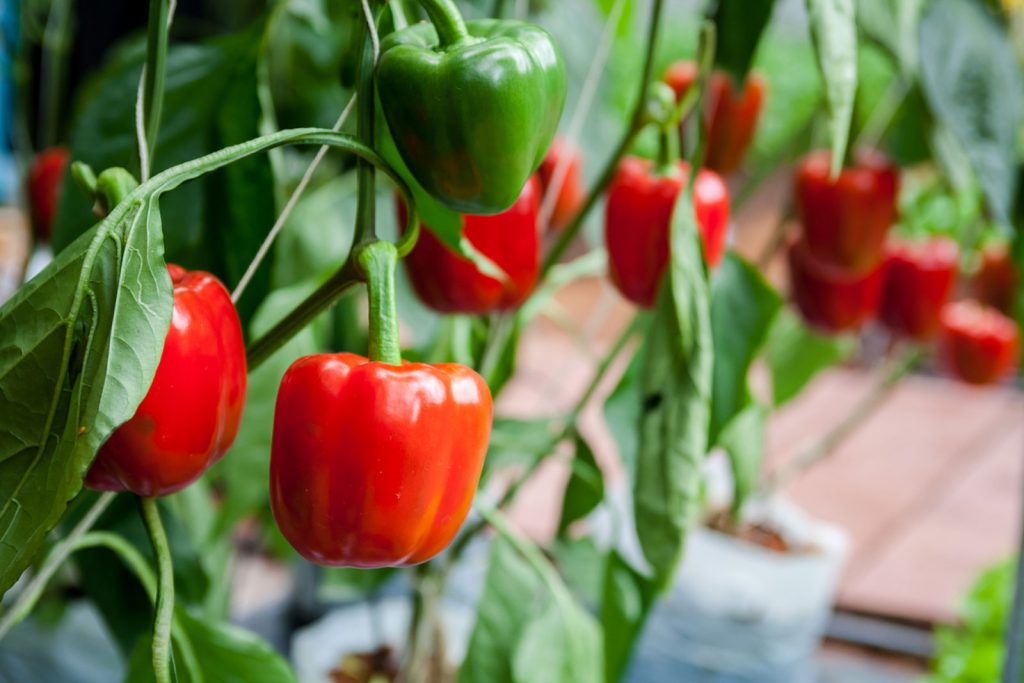
Bell Pepper crop is mainly grown when the weather is warm. These crunchy Bell peppers have some sweetness in them however they lack a component called capsaicin that gives it the heat. The external skin of the bell peppers is very smooth and provides a shield to crunchy flesh present inside.

Bell Peppers are hollow from inside and have so many seeds in the middle, attached to the white-colored membrane that lies along the wall. These are also known as the colored capsicum that is mainly red, yellow, and green. These have vitamin C and vitamin A in them.

Organic capsicum farming needs a temperature of 15 to 25° celsius and these grow very well at a height of about 2000 meters above the sea level. Bell Peppers can be grown in greenHouses and in greenHouse cultivation one can get up to 120 tonnes of yield to each hectare. 

Climatic conditions for growing bell pepper:

Bell Peppers can be cultivated in cool as well as warm conditions however extreme weather conditions are intolerable. So in summers to avoid too much heat, shading can be done. 20 to 25° C is the best temperature for germination as well as fruit set. 

Selecting the planting stuff for bell pepper plantation:

First of all, all the materials that you select for planting should be healthy. All the stuff should be diseases and pest resistant. Coming to the seedlings, for bell pepper plantation, the age of seedlings should be about 40 days. The seeding should be up to 20 cm long.

The crop should have a fine rooting system. The stem of the seedlings should possess a few leaves on it during the plantation. Selecting a good variety of all the planting material is very important for good quality fruit and high yield as well as good production. 

Must Read: How to Germinate Chilli Seeds

Soil preparation for bell pepper: 

The soil has to be properly loosened and make a nice tilth. After this beds are prepared to have heights of 45cm and 75cm wide. But before this step either vermicompost or properly decomposed organic matter along with sand and sawdust should be added to the soil.

Afterward, the beds are soaked with 4 Percent of formaldehyde and then are protected with polythene for about 4 to 5 days. Later on, these polythene covers are removed. Then the beds are to be raked regularly every day to remove the fumes of formaldehyde that are stuck in the soil. Sandy and loamy soil are best for these capsicums. For bell pepper, the pH of the soil should be 6.0- 6.8. Along with all these, this plant also requires a lot of care. 

Planting and Pruning of bell pepper:

When the seedlings are completely ready, then these are planted in the rows that maintain a distance of 60cm between them and the distance between the plants has to be 30cm. Imidacloprid is sprayed on the seedlings to prevent any pest infestation.

Pruning of bell pepper

During plantation, the bed should be watered, as the bed has to be completely wet during this process. After this, the seeds have been sown in two lines on the beds. Plastic mulches can also be used for this purpose as it also helps in controlling weeds and saving water.

Irrigation of the bed has to be done daily until the seeds are set up well. Later on, the drip irrigation method is used to irrigate the field with 2 to 3 liters of water to each square meter every day.

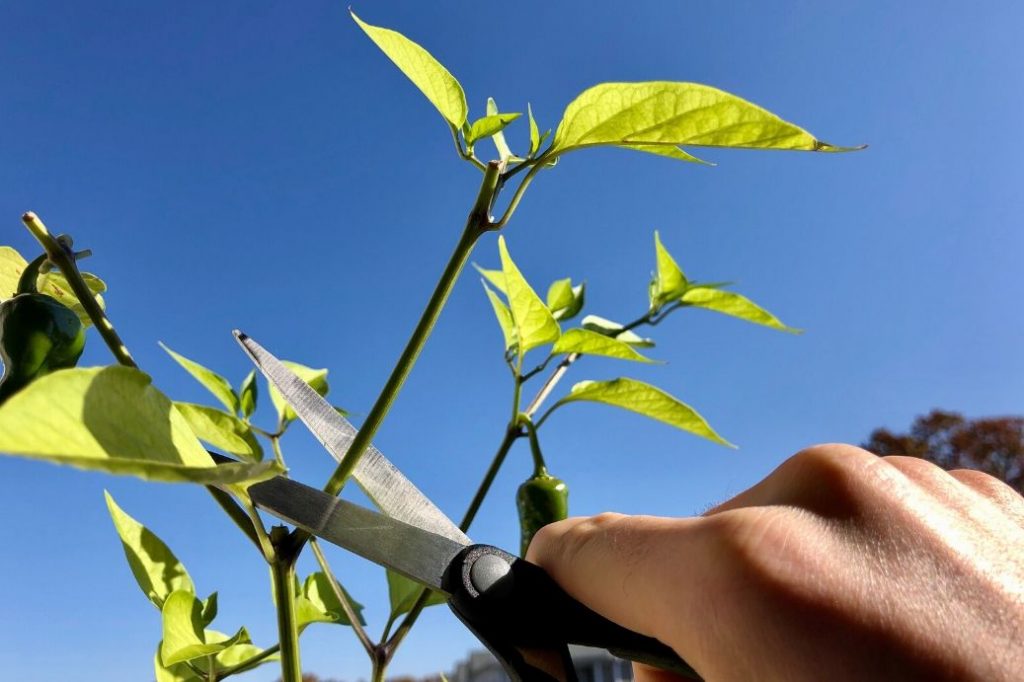
Pruning is started after about 20 days of plantation and this has to be done after every 7 days.

After the completion of 4 months, this activity has to be done once in 10 days. The seedlings of bell pepper are planted in a zig-zag pattern on the beds. 

Diseases of bell pepper: 

Mainly the disease is fungal diseases that include damping off, grey mold, pythium, powdery mildew, fruit rot, etc. 

Damping-off:

This is a disease of seeds that occurs when the plant has just started to grow. Pythium and Rhizoctonia solani are carriers of this fungal disease. In this disease, fungi destroy the root system of the plant. Some plants having this disease may have the potential to grow mature however these fungi will cause root rot and gradually kill the plant.

Growing the seedlings in an inert medium can help avoid this fungal disease however the reason for this disease can be poor sanitation in a greenhouse or improper soil, or climate or not irrigating on time can also be responsible for this.

When this crop is grown at a commercial level, the seedlings are transplanted from the greenhouse to Rockwool where the best conditions are provided and chances of any disease are also very less. Selecting fresh and healthy seeds and growing the plant under ideal conditions can help control the disease. 

Root rot or pythium crown disease:

This disease is not very common and usually occurs after the dumping of the disease. The main reason for this disease is stressful conditions in the greenhouse. This disease can be under control by growing the plant in ideal conditions and maintaining the temperature in the root zone and irrigating them from time to time. 

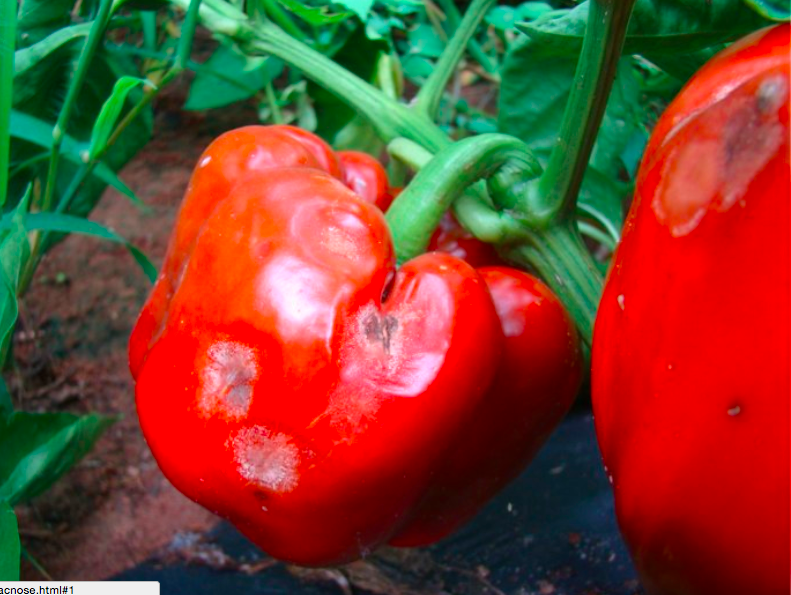
Fusarium stem or fruit rot:

In this dark brown soft, and black lesions appear on the stems. This fungal disease is mainly caused by Fusarium solani. These black lesions may also be seen around the calyx and this degrades the quality of food.

Fusarium stem or fruit rot of bell pepper

To avoid this fungal disease, the greenhouse should be neat and clean and some sanitation should be exercised to prevent fruit rot. The plants that are infected should be immediately and carefully removed from the greenhouse to avoid the spread of disease to every plant.

The greenhouse should be properly ventilated so that it has good air circulation and talking about the humidity, it should not rise more than 85 percent otherwise it will be harmful. 

Also Read: Why Are Bottom of Tomatoes Turning Black: Blossom End Rot

Gray mold fungal disease:

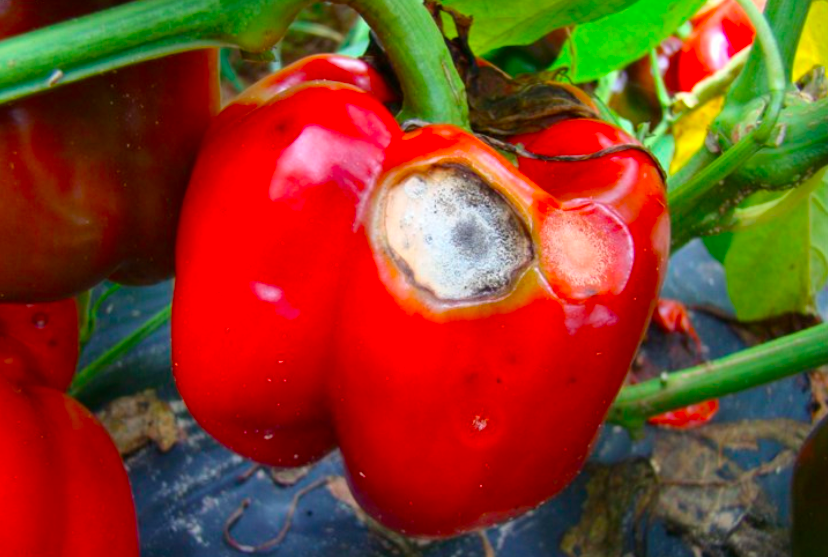
The fungus Botrytis cinerea is responsible for gray mold disease. It is a very common disease. High humidity and bad air circulation favor this disease. In this disease, the fungi get into the crop from the wounded area where greenish colored lesions develop.

gray mold fungal disease in bell-pepper

These lesions griddle the stem and the plant dies at the end. The gray mold infection is usually found in the wounded area or calyx in the beginning. To avoid this fungal infection, proper air circulation has to be maintained and the relative humidity should not be more than 85 percent. 

Powdery mildew:

This is the next disease of bell pepper. This disease is mainly caused by Leveilluta Taura. This disease was first reported in Canada. In this disease, the overall crop yield decreases by 10 to 15 percent. In this disease, the white powdery layer can be seen on the surface of the leaf. 

These were some of the fungal diseases and their symptoms and control. Next comes the diseases caused by viruses. 

  • PMMV:

Pepper mild mottle virus: In this disease, any part of the plant can get infected. This disease is very difficult to detect until the plants start fruiting. In this disease further, the growth of a plant can be infected. Symptoms of this fruit occur well before the stunting symptoms and include the development of obvious bumps on the fruit as well as color streaking and green spotting when the fruit matures to color. The fruit is very sharp from the corners and may also develop sunken brown areas on the external skin.

Daily use of skim milk as a dip while handling the plants helps to prevent the spread of the virus in the crop. Skim milk has the protein that helps to bind to the virus and disables it. The virus is secure in the sap of the plant. This virus easily expands from plant to plant.

Once the plants start fruiting, PMMV (pepper mild mottle virus) can be easily detected in the plant through its symptoms on the vegetative parts of the plant. Infected plants should be pulled out very carefully and crushed because the virus can survive in a dry plant also. If all plants bear normal fruit, then it means that the plant is known disease-free and the use of skim milk can be stopped.

  • Tobacco mosaic virus (TMV)

Tobacco mosaic virus disease can be found in greenhouse pepper throughout the world. Initially, the symptoms of this virus can be noticed on the surface of the leaf-like an injury with the main veins. Along with this wilting and leaf drop can also be observed. Also when the new plants start growing, then also these symptoms and this disease can be found in the plant and even it degrades the growth of a new plant.

To avoid this virus disease-free seeds should be used. The utility of skim milk dip can be helpful. The fully grown plant may carry the disease without showing any symptoms of the disease plants. 

  • Tomato spotted wilt virus (TSWV)

Tomato spotted wilt virus TSWV has a long list of hosts that upsets almost 300 different species of plants. Thrips are the main reason for the spread of this virus, these thrips are the main problem in the greenhouse plants.

There are blackish-brown round shaped spots or tan spots that are surrounded by a black margin. 

 When the fruit ripens, the color of the fruit changes with orange to yellow spots having a green margin. Green spots can also be noticed at the backside of the ripened fruit that is red, yellow, or orange. 

Control of this virus:

This virus can be controlled by checking on the thrips and controlling them. In the starting, knowledge about thrips control and the other reasons for the spread of this disease should be gathered. One should take care of all the symptoms to avoid the disease.

Check on weed is also very important as if you don’t cut off the weeds it will suck all the necessary nutrients and the plant quality will degrade. Ornamental plants should be kept away from the greenhouse as they can also be a source of the virus.

Harvesting of bell pepper: 

The activity of harvesting can be initiated after completion of 2 months after plantation. However red and yellow capsicums take 3 months to become mature. Harvesting is done at the interval of 10 days and is carried out for almost 200 days.

Harvesting of bell pepper

After harvesting these can be stored in a cool place. These fruits are wrapped properly and then stored at a temperature of about 8° C and can be stored maximum for two months. After wrapping the capsicums, these can be packed in cartons of different sizes according to the need.  

Tips for growing bell peppers: 

  1. Mulching should be done from time to time and properly for good quality and high production. 
  2. Irrigation also has to be done properly as bell pepper needs deep watering. Especially in dry conditions watering should be done on time otherwise the fruit will taste bitter.
  3. Bell Peppers are warm climate crops and need proper sunlight for good growth.
  4. Using the correct fertilizer is very important as this greatly affect the crop yield
  5. Staking is not compulsory in bell pepper however it can help the crop to keep it off the floor. 
  6. Keeping a check on the pests is very important to avoid the diseases and hence suitable insecticides or pesticides should be used

Conclusion:

Bell pepper farming is a very fun activity as well as a profitable business. One should take care of all the necessary activities and take proper care of the crop.

Potato Farming, Planting, Growing & Harvesting

This scientifically-backed potato farming guide covers everything from planting to growing, harvesting, and storage. And, also, how to keep them fresh for very long!

Yes, the most common, our very own, very favorite, evergreen vegetable needs to be planted in early gardening season – as soon as the frost appears out of the soil, and you can work on the soil!

Different types of “best-days” are recommended by the folklores

  • Old-timers in England used to plant potatoes when they noticed dandelions in the fields.
  • Gertrude’s Day aka St. Patrick’s Day (March 17) is considered as the “official potato-planting day” by the Pennsylvania Dutch.
  • A lot of Christians used to believe that Good Friday was the best day for planting potatoes because Devil could not do anything wrong on that day!

Isn’t it funny and interesting to know these facts about potatoes? Let’s start this detailed potato planting guide to know more about the farming of potatoes.

What is the best time to plant potatoes?

Cool-weather is suited best for the growth of potatoes. In Northern regions, farmers usually start potato farming in early to mid-April, 6 to 8 weeks before the expected end of the frost days. Potatoes do survive cold weather, but frosts are the real danger for them. If you feel the threat of frost at night, you can use mulch or any other artificial covering like plastic containers or old sheets to cover the sprouted foliage(s). But you must have to remove those covers in the morning.

Also Read: Sweet Potato Farming Information Guide

Here is how to properly fight frosts

Consider planting potatoes at least a couple of weeks after the last spring frost. Yes, you have the option to start it earlier, but frost or overly wet soil can damage some of the crops.

While deciding about the best potato farming season, follow the appearance of soil, instead of the calendar. If you follow the soil, it will tell you, when to plant the potatoes. The ideal temperature of soil for the proper growth of potatoes is a minimum of 50 degrees Fahrenheit (10 degrees Celsius). There should not be excessive moisture in the soil too. Because excessively wet soil will stick together, and you will find it difficult to work on it. If the soil is wet, give it some time to dry. Like most of the other seeds, potato seed pieces will start decaying if the soil is too wet.

In southern parts, the winter season is great for potato crops with September to February as the perfect window for planting. In central Florida, farmers prefer planting potatoes in January, while February is the month of potatoes farming in Georgia.

Preparing the site for planting

  • As already discussed, cool weather is best suited for growing potatoes. And loose, well-drained soil with 50 degrees to 60 degrees Fahrenheit (10 degrees to 15.5 degrees Celsius as optimum temperature.
  • Choosing a location with proper sunlight of at least 6 hours per day is important.
  • If we talk about “plant potatoes how far apart”, potatoes are grown in rows with a distance of 3 feet between two rows.
  • Use a round-point shovel or hoe to 6-inches wide and 8-inches deep trench to ensure proper potatoes planting depth, tapering the bottom with a width of 3-inches.
  • Spread and mix in organic compost or fully-rotted manure in the trench bottom before planting.

How to plant potato slices?

  • In each trench, put a piece of seed potato after cutting side down, maintaining 12 to 14 inches of distance between two seed potatoes, and then cover them all with around 4 inches of soil.
  • If you have rocky soil in your field, place the seed potatoes all around the field. Add a little amount of compost to the soil, and cover them with leaves or straw.
  • Starting the potato farming with seed potatoes is the best idea. And make sure, you don’t get confused with seed potatoes with “potato seeds” or grocery produce. Planting potatoes with sprouts or protruding buds (eyes) is always recommended.
  • Use a sharp, clean knife to make slices of large potatoes, ensuring there are at least two buds in each piece.
  • If you have small potatoes, plant them without cutting.
  • If you are doing the cutting work yourself, do it a couple of days before planting. These two days will give enough “healing” time to the potato slices, and a protective layer will also form on each slice, making them resistant to rots as well as retaining enough moisture.
  • After around a couple of weeks, when you see a few more sprouts out of the soil, fill the trenches with 3 to 4 inches of soil again, exposing out only a few inches of plants. Keep it repeating every 2-3 weeks, and keep the soil 4 to 5 inches above the ground level (this is usually called “hilling”).
  • Once the potato plants flowering starts, add organic mulch in between the rows to ensure enough moisture. It will also help in keeping the soil cold, and will also protect from weeds.

Growing and hilling potatoes

Protecting the tubers from direct sunlight is a very critical part of growing potatoes. If the tubers are exposed to direct sunlight, they will produce solanine, a toxic product, making potatoes inedible, bitter, and potentially nausea-inducing.

“Hilling” is the way to protect potatoes from toxicity and to make them edible.

Hilling is not a very tough process: You will notice multiple main stems with flowering and leaves just where potatoes grow. And during this phase of initial growth, tubers are formed on secondary stems underground which branch off from the main stems. To protect shallow tubers from direct sun exposure and to ensure the production of more tubers, you should “hill-up” a few inches of more soil at regular intervals. For productive growth, hilling is done three to four times during a season.

Some important “hilling” tips

  • You will notice that the plants are at their maximum height in the morning, and that’s the best time for hilling. Plants get drooped with an increase in atmospheric temperature throughout the day.
  • Ensure maintaining enough moisture, especially at the time of appearance of sprouts till the several blossoming weeks. Potatoes growing roots require 1 to 2 inches of water every week. Excessive water in the beginning and then a drop in water quantity at the time of formation of potatoes will make tubers misshaped.
  • You should stop hilling the soil when you see blooming of potato plants, and when the part of the plant is at least one foot tall above the ground. You can support the plant and cover the tubers by hoeing the dirt up.
  • Yearly crop rotation is recommended for the regular growth of potatoes and also for maintaining enough life in the soil.

Pests and diseases related to the potato crop

Colorado potato beetles: You can hand-pick them and remove away from the field. Sometimes, predatory birds also feed on them. Food-grade diatomaceous earth is also effective in controlling when they are in a nymph state. Spinosad, an organic pesticide is an option when the beetles get uncontrolled. There are various types of insects that are beneficial for potatoes farming. So, avoid harming them by using beetles-killing products either at dawn or at dusk.

Potato scabs: Usually caused due to an increase in the pH of the soil. Always remember that potatoes like slightly acidic soil (with a pH of no more than 5.2). Dusting seed potatoes with sulfur is a good idea to avoid scabs. You can also add pine straw on the top of potatoes during planting.

When to harvest potatoes?

“New potatoes” which are usually harvested early in the harvesting season purposefully to keep them tender and smaller, are ready for harvesting two to three weeks after cessation of the flowering period. New potatoes are not suitable for long storage and should be transported and used within a few days of harvesting.

You can harvest “regular potatoes” once the foliage starts to die back. The upper part of plants should completely die for timely and productive harvesting.

potatoes harvest

Don’t water the potatoes much after mid-August (usual end of potato farming season) to keep them tough and hard.

You can check the maturity of potatoes by digging up a test hill. If the skin is firmly attached to the skin and is thick enough, your potatoes are mature and are ready for harvesting. If the skin is easily removable with hands, they are still new and are not yet ready for harvesting especially for long-time storage.

Light frosts are still not very harmful to potatoes, but once there is the beginning of first hard frost, the waiting time is over, and you should start digging the field and get the potatoes out.

“How” to harvest

First of all, cut down the brown foliage and leave the potatoes for a couple of weeks more before finally harvesting. If you follow this method for potato cultivation, potatoes will get enough time to develop a thick skin. But, don’t leave them for more than a couple of weeks, as they may rot.

Choose a dry day to dig the potatoes up. Dig up slowly and gently, avoiding any injury to the potatoes. If the potatoes are damaged while digging, don’t keep them for storage, and use them as soon as possible.

If there is excessive moisture in the soil, leave the potatoes in the air for long enough to dry them properly. Transfer them into containers only when they are completely dried.

Once the potatoes are out on the surface, don’t leave them under the sun exposure for so long, as they may turn green. And green potatoes are bitter due to the presence of solanine. And if eaten regularly, can cause stomach upset, diarrhea and vomiting, etc. You can of course trim off the small green spots, but if half of the potato is green, you should throw it away.

How many potatoes per acre?

It depends on a lot of different factors including soil, weather throughout the season, caring, hilling, irrigation, use of insecticides and pesticides, and diseases, etc. A potato farming yield per acre is considered as “good” if you get 10 tons of potatoes per acre.

Curing Potatoes

  • Freshly dug potatoes should be stored in a cool, dark, and dry place with the temperature between 45 to 60°F/7 to 15°C for a couple of weeks. It will ensure proper curing of skin and will make potatoes ready to store for longer.
  • After a couple of weeks of curing, don’t forget to brush off any soil on the potatoes.
  • Don’t wash potatoes unless you are going to use them. Washing potatoes reduces their life span, and can’t be stored for long.
  • After curing, don’t store potatoes near apples, as apples leave ethylene gas which can spoil the potatoes.

Storage of potatoes

Proper storage is the biggest challenge after the end of potato farming season. Ideal temperature, high humidity, no light, and ventilation, etc. are some of the important aspects of potato storage. You can’t store potatoes just anywhere. Storehouses with root cellars are preferred storage places for potatoes. Potatoes need cool temperature otherwise they may get affected from sprouting – and you are of course storing them for selling, not for farming again 😉

Recommendation for storage

  • There must be high humidity in the storeroom. Potatoes contain as much as 80% of water, and if there is dryness in the atmosphere, they will start drying out. Having a damp cellar is a perfect option. Otherwise, you can also increase humidity by storing perforated bags with tubers. Placing large pans of water near the air source is also a decent idea to maintain humidity.
  • Greening of potatoes is one of the major problems after the end of potato farming season. To avoid greening, store potatoes in dark storerooms. If that’s not possible due to any reason, you can pack potatoes in large, dark, perforated plastic bags to ensure darkness, and at the same time, to ensure proper, inside out air movement.
  • Ventilation is a must for potatoes. They use oxygen and give carbon dioxide even when they are harvested. Avoid putting potatoes in air-tight containers. Use perforated bags as already mentioned above to keep them fresh for long enough.

So, that’s all about our guide on potato farming. You can follow these steps to ensure productive and beneficial farming of perhaps the most evergreen, and the most commonly used vegetables around the world. In addition to “how” and “when” related to potato farming, you must have to be sure about where potatoes grow. So, choose the farming area wisely, follow the soil instead of the calendar to know the right time to start cultivation, and go with the above-mentioned steps to kickstart your potato business in the right direction. Don’t forget to write back to us, if you liked our guide. Happy farming, healthy farming! Cheerio!

Reference:

https://www.almanac.com/plant/potatoes

Eggplant: Planting, Growing, and Harvesting Eggplants

Eggplant, Brinjal, Aubergine is an important crop of the tropical and subtropical regions. The name is derived from the shape of the fruit of some of its varieties.

Eggplant is grown mostly in the warmer regions. Its cultivation is very popular in countries of the far-east region, India, Pakistan Bangladesh, USA, Italy, France, and Egypt. Eggplant farming is very popular in lower altitude regions of India. Commonly known as Brinjal in the country, it is a principal, popular and common vegetable crop grown across the country. Due to its adaptation to various climatic conditions eggplants can be grown throughout the year. There are also many hybrid varieties that are being cultivated in the country.

Here are few tips that will help you in performing eggplant farming and in improving your crop yield.

How to grow eggplant?

In order to obtain desired and good growth of eggplant there are certain conditions to be followed. Despite being easy to grow and high temperature tolerance eggplant could be a little tricky plant to grow.

Here are the conditions that are to be kept in notice when growing eggplant.

Climatic conditions: 

eggplant is a hot weather crop highly intolerable to frost and snow weather. Short days and long cool nights are not suitable for growth of eggplant and tend to make the produce deformed. The desired temperature required is in the range around 13 – 21oc.

Also Read: Yellow and Curling Eggplant Leaves

Soil requirements and conditions:

eggplant can be grown in any type of soil be it light sandy or heavy clay. Soil rich in organic matter with a PH ranging from 6.5-7 is considered the best. To obtain a higher yield it is advised to start planting in heavy clay soil.

The soil should be well ploughed before transferring seedlings as eggplant remains in field for long time. Soil should be incorporated well with manure. Field should be irrigated well transferring seedlings.

Pollinators: 

self-fertilizing flowers of eggplant can be fertilized by the wind. But to obtain a good fruit size buzz pollination by bees is considered suitable. If you have a smaller field and few plants you could also for hand pollination.

Feed the plants timely:

when the plant bloom first set of flower, they can get benefitted from extra nutrients. You can give in extra nutrients by putting in additional organic fertilizers or compost manure. If you are growing eggplants in a container utmost care has to be taken, when putting the feed make sure you are not overfeeding the plant as it causes salt buildup which will cease the growth of the plant.

Battling the flea:

growing an eggplant although is easy, but with this ease comes the fleas. These tiny hoppers make holes in the leaves of the plants. In order to protect plants from these fleas and other insects grow your plants in pots on a raised surface or you can use a tulle net to cover the rows of plants and protect them of fleas.

Eggplant growing stages:

It is important to know about the growing stages of eggplant before planting them in order to obtain a surplus of produce.

Eggplant grows in following stages:

  1. Seeds:  It takes about 1-2 weeks for eggplant seeds to sprout into a seedling. once the seedling germinates within 10weeks or when they develop 4-5 leaves they can be transplanted into the greenhouse farm and stored at a warmer temperature as cold temperature destroys the seedling.
  2. Adult eggplant: number of days required by eggplant to attain maturity depends on the variety being grown. They take approximately 120days to attain full maturity. The sign of maturity is that they grow the main stem with oval-shaped leaves with leathery texture and spine-like hairs.
  3. Flower and fruit: flowers are purple colored and star-shaped. The florals have both male and female parts and are self-pollinating. The female part of the flower develops into the fruit depending on the variety of eggplant grown. The plant bears the fruit for 80days.
  4. Harvest: This is the last stage of eggplant growth. You can tell the fruit is ready to be harvested when it develops glossy skin and firm texture. If you want to harvest the seeds of eggplant you will have to wait until the skin of the fruit become dull and the texture becomes soft to touch.

Watering eggplant:

Watering eggplant adequately is very important, in case of reduced moisture content the fruit loses the flavor and become bitter in taste. In order to prevent this makesure your plants are being watered regularly and plants are being supplied with additional supplemental water based on the conditions required.

During the growing season or hot weather conditions it is best to water eggplant 1inch per week or more based on the conditions. You can also monitor the moisture content of soil using a moisture meter this will help you ensure that the soil is not excessively dried if so you can water the plant efficiently.

It is best to water the plants during the early morning or during the evening as the water evaporation rate is less during these times. Mulching around the plant roots also helps in retaining water near the roots for a longer duration.

Harvesting eggplant:

Proper harvesting of an eggplant yields tender and flavourful fruit.

Time required from planting to harvest is 100-150days

The appearance of the fruit is your guide to know if your fruit is ripened enough to be harvested.  Thin, firm and glossier skin of the fruit is the main sign to be noticed before harvest. If you are someone new to farming before harvesting eggplant you will have to cut the fruit and check the colour of flesh inside the fruit. The flesh should be cream in colour with small seeds.  Once you have learnt how to identify the physical appearance of fruit for harvesting you don’t need to cut the fruit. Eggplants without any seeds are immature whereas eggplants with dark and hard seeds are over-ripened and bitter in taste. Separate the eggplant from the stem by using a pruning shear or sharp knife; keep a stub of stem attached to the fruit.

Eggplant growing time:

It takes approximately 120days for the eggplant to grow and get mature. When you are growing a plant from the seeds it has to be cultivated indoors first which takes around 10weeks time. Then they can be transplanted to the greenhouse farms.

Opt for the variety of eggplant that have faster growth rate and better yield values in few days time. There are various hybrid varieties of eggplant that have more improved qualities and resistance to diseases making them more better option to plant.

By implementing these tips before starting planting you will definitely see a surplus in growth and yield with better quality.

Happy Farming!