You can plant Garlic anytime, but the harvest will be affected if the time isn’t right. Garlic comes in a variety, but two prominent ones are usually grown – Softneck and Hardneck Garlic.
Even though Softneck Garlic can be planted in the very earliest days of spring if necessary, good harvests are acquired by growing in the autumn. Hardneck garlic, in particular, benefits from being planted in the fall.
Planting should begin once the soil temp at 4″ deep reaches 50°F. 9 a.m. is the standard time for temperature readings.
So when soil is not frozen, the garlic root systems will thrive, and the layers will flourish when the average temp is over 40°F.
The primary objective in colder climates is to get the Garlic to develop roots before the cold spell, yet not to contribute to making top development until after the toughest of the cold season has passed.
The main objective in hot climates is to have sufficient top progress in getting a head start during the spring, and though not so high that the foliage can’t survive the winter.
Please read below to know when it is too late to plant Garlic and how not to make a mistake.
Also Read: How Often to Water Eggplant?
Garlic Planting Time

The most significant period to plant Garlic would be in the autumn for most areas. Do not plant Garlic till after the fall season equinox, which occurs in late September.
Garlic, such as onions or other Allium crops, is delicate to time and develops during the summer’s lengthiest days.
It gets a bit of an advantage on the planting season by growing in the autumn, and it’ll be among the first items to sprout in the vegetable patch upcoming spring.
Garlic harvesting can occur anytime between May and August, relying on its date of sowing, weather patterns, and the kind of Garlic grown.
It can’t be taken too soon or too late, and yet how you can say once your Garlic is ready to be harvested when its bulbs are deep into the earth?
It is all about the leaves, in a nutshell.
Beginner Guide to Start Planting Garlic
If you’ve already tried to plant some other bulb in your vegetable patch, you’ll notice that Garlic isn’t all that unique. Below are the guidelines for sowing it step-by-step.
Step 1: Make preparations for the garden bed by removing any crops or weeds that may have grown there previously.
Step 2: Blending in all-purpose fertilizer granules, organic manure, or natural worm castings to soften up the ground. Make sure to get rid of any rock layers or massive twigs as well.
Step 3: Closely separate the bulb into independent cloves, retaining the thin skin.
Step 4: Place the cloves 6-8 inches apart on the soil surface.
Step 5: Plant every 2-3 inches deep with the spiky tip-up.
Step 6: Lightly bundle soil over the top of the cloves to conceal them.
Step 7 (optional): Accommodate the bed with compact gardening mulch when you’re planting during the autumn.
Also Read: Best Potting Soil For Tomatoes
Where Should Garlic Be Planted?
Plant the Garlic in full sun with proper drainage in well-drained soil. Garlic can not endure wet yards, so pick a location where the moisture will drain quickly.
It also thrives in unrestricted, fertile soil with few barriers. So make sure to add worm castings, organic manure, or an all-purpose natural fertilizer to the earth. Also, clear the grass, twigs, and rocks from the ground.
Uses of Garlic
Garlic has traditionally been treated as a medicine and its many culinary applications. Although it is renowned for having anti-bacterial, antiallergic, and antifungal qualities, actual scientific research in human beings has produced mixed results.
Garlic plays a crucial role in lowering the buildup of some forms of cholesterol and regulating blood glucose levels in individuals, but the mechanisms are unclear.
Garlic is used in long-established medicine to cure parasites, inhibit the cold virus, and treat breathing issues.
Garlic is full of protein, vitamin C, calcium, potassium, micronutrients, and other healthy compounds, regardless of how it is consumed.
It can be consumed raw, cooked, and kept in oil, wine, and vinegar. Then it serves as a foundation for a variety of recipes and dips (hummus, pesto, aioli, vinaigrette, to mention a very few) that can all be stored in the fridge and kept healthy for days.
Dried Garlic can even be ground into a fine powder and stored for approximately a year in a sealed container. When using powdered Garlic instead of fresh Garlic, 1/8 teaspoon equals one fresh clove.
Also Read: How to Turn Green Tomatoes Red in the Fall?
Garlic patch upkeep
Mulch well enough with dry leaves after plantation. After stalks have emerged, mulch must be left in the spot to prevent weeds — except if the soil is becoming too wet.
You can also add Mulched leaves to the soil to enhance the surface and loaminess. Water early morning hours, once the top few inches of land feel dry.
Garlic Harvesting: The when How
Harvest your Garlic when the lesser third to half of the foliage has transformed brown and shriveled up, but the top leaves are primarily green between the close of July and August.
It can be challenging to know when to harvest so that the bloom stalks might help. It’s harvest time when the foliage begins to turn dull, and the scapes scrunch up and stand straight.
Garlic Sowing and Distance
Garlic can be grown from garlic cloves or bulblets. Place the cloves inside the surface with the tipped side up and the curvaceous piece down (the root part).
Set the cloves 6 to 8 inches (15-20cm) off and 1–2 inches (2.5-10cm) deep. Rows should be 12 inches (30 cm) off from each other.
When planting, incorporate a tbsp of 5-10-10 fertilizer, bone meal, or fish meal to its lowest part of the pit. Before putting the clove in place, scatter a little soil over the fertilizer.
Plant just pest and disease-free, solid, better, and healthier bulbs or garlic cloves.
Also Read: Why Are My Tomato Flowers Falling Off?
Garlic in the Warmer months: How to Cool It Down
Choose a location that will be partially covered during the sunniest time of the day.
Mulch profoundly with a light-colored substance like straw to reflect sunlight, help shield the ground from high temperatures, and hold moisture, each of which serves to maintain the soil temperature down.
Mulching also protects the Garlic from becoming too chilly in regions where the soil freezes. Mulch alternatives include potting mix, cocoa mulch, and Mega Mulch.
You may use a shade cloth to protect your garlic patch.
The largest garlic cloves produce the most oversized garlic tops. Big garlic cloves have much more power and are therefore more resilient to winter harm, which will aid your Garlic already off to a decent start.
Pick the biggest cloves for sprouting garlic heads and the relatively small cloves for developing spring green garlic while dividing cloves for plantation.
Pick the bigger of your collected garlic tops for plant garlic and cook the tinier tops if you stored a few for planting.
Although the bigger ones are much more appealing, choosing more giant heads for planting this year means you’ll have even more big heads in the coming periods for planting and consumption.
Also Read: Why My Pepper Plants Leaves are Wrinkled?
Garlic Storage for Long – term survival
Utilize fresh Garlic or help treat it for later use. Treat Garlic in a warm, dry, dull, and well-ventilated area. Allow bulbs to cure for 2 to 3 weeks.
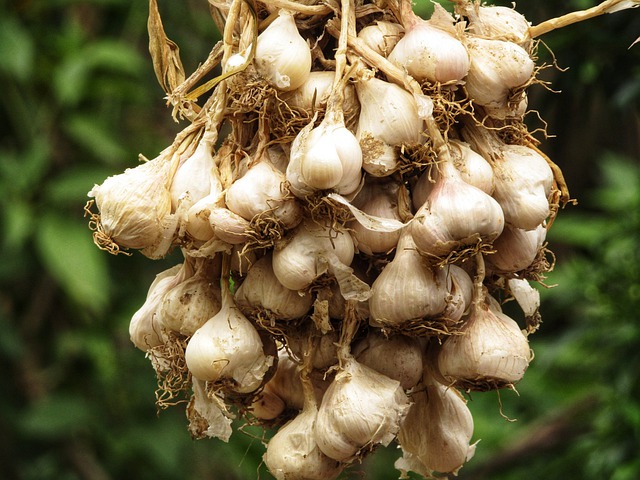
You can cure Garlic by hanging it in small loose clusters. Tie twine around the heads of the plants and place those to dry—cure Garlic between 60 and 90 degrees Fahrenheit (15 and 32 degrees Celsius).
Once the Garlic has cured, eliminate the leaves and stems. Store fully grown bulbs in a chilly, dry place in a sieve or net sack. Garlic can be kept at 35° to 40°F (1.7-4.4°C) for 5 to 8 months.
Cloves that have been peeled and scraped can be cooled in a sealed jar. Garlic cloves that have been peeled can indeed be canned or preserved. Pluck fresh garlic leaves and use them as fresh herbs.

