When Is It Too Late to Plant Garlic and Harvest?

You can plant Garlic anytime, but the harvest will be affected if the time isn’t right. Garlic comes in a variety, but two prominent ones are usually grown – Softneck and Hardneck Garlic.

Even though Softneck Garlic can be planted in the very earliest days of spring if necessary, good harvests are acquired by growing in the autumn. Hardneck garlic, in particular, benefits from being planted in the fall.

Planting should begin once the soil temp at 4″ deep reaches 50°F. 9 a.m. is the standard time for temperature readings.

So when soil is not frozen, the garlic root systems will thrive, and the layers will flourish when the average temp is over 40°F.

The primary objective in colder climates is to get the Garlic to develop roots before the cold spell, yet not to contribute to making top development until after the toughest of the cold season has passed.

The main objective in hot climates is to have sufficient top progress in getting a head start during the spring, and though not so high that the foliage can’t survive the winter.

Please read below to know when it is too late to plant Garlic and how not to make a mistake.

Also Read: How Often to Water Eggplant?

Garlic Planting Time

The most significant period to plant Garlic would be in the autumn for most areas. Do not plant Garlic till after the fall season equinox, which occurs in late September.

Garlic, such as onions or other Allium crops, is delicate to time and develops during the summer’s lengthiest days.

It gets a bit of an advantage on the planting season by growing in the autumn, and it’ll be among the first items to sprout in the vegetable patch upcoming spring.

Garlic harvesting can occur anytime between May and August, relying on its date of sowing, weather patterns, and the kind of Garlic grown.

It can’t be taken too soon or too late, and yet how you can say once your Garlic is ready to be harvested when its bulbs are deep into the earth?

It is all about the leaves, in a nutshell.

Beginner Guide to Start Planting Garlic

If you’ve already tried to plant some other bulb in your vegetable patch, you’ll notice that Garlic isn’t all that unique. Below are the guidelines for sowing it step-by-step.

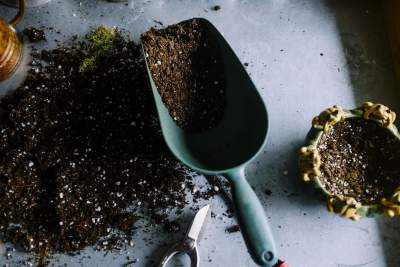
Step 1: Make preparations for the garden bed by removing any crops or weeds that may have grown there previously.

Step 2: Blending in all-purpose fertilizer granules, organic manure, or natural worm castings to soften up the ground. Make sure to get rid of any rock layers or massive twigs as well.

Step 3: Closely separate the bulb into independent cloves, retaining the thin skin.

Step 4: Place the cloves 6-8 inches apart on the soil surface.

Step 5: Plant every 2-3 inches deep with the spiky tip-up.

Step 6: Lightly bundle soil over the top of the cloves to conceal them.

Step 7 (optional): Accommodate the bed with compact gardening mulch when you’re planting during the autumn.

Also Read: Best Potting Soil For Tomatoes

Where Should Garlic Be Planted?

Plant the Garlic in full sun with proper drainage in well-drained soil. Garlic can not endure wet yards, so pick a location where the moisture will drain quickly.

It also thrives in unrestricted, fertile soil with few barriers. So make sure to add worm castings, organic manure, or an all-purpose natural fertilizer to the earth. Also, clear the grass, twigs, and rocks from the ground.

Uses of Garlic

Garlic has traditionally been treated as a medicine and its many culinary applications. Although it is renowned for having anti-bacterial, antiallergic, and antifungal qualities, actual scientific research in human beings has produced mixed results.

Garlic plays a crucial role in lowering the buildup of some forms of cholesterol and regulating blood glucose levels in individuals, but the mechanisms are unclear.

Garlic is used in long-established medicine to cure parasites, inhibit the cold virus, and treat breathing issues.

Garlic is full of protein, vitamin C, calcium, potassium, micronutrients, and other healthy compounds, regardless of how it is consumed.

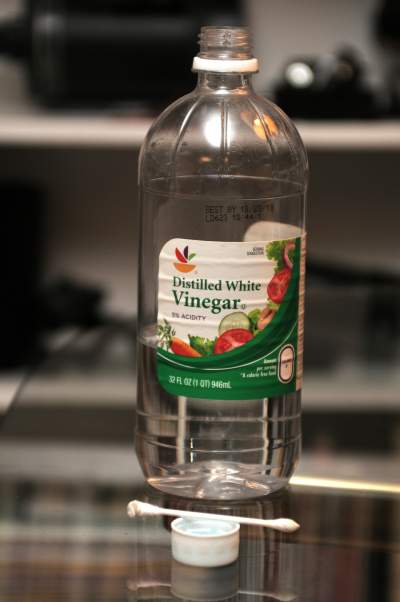
It can be consumed raw, cooked, and kept in oil, wine, and vinegar. Then it serves as a foundation for a variety of recipes and dips (hummus, pesto, aioli, vinaigrette, to mention a very few) that can all be stored in the fridge and kept healthy for days.

Dried Garlic can even be ground into a fine powder and stored for approximately a year in a sealed container. When using powdered Garlic instead of fresh Garlic, 1/8 teaspoon equals one fresh clove.

Also Read: How to Turn Green Tomatoes Red in the Fall?

Garlic patch upkeep

Mulch well enough with dry leaves after plantation. After stalks have emerged, mulch must be left in the spot to prevent weeds — except if the soil is becoming too wet.

You can also add Mulched leaves to the soil to enhance the surface and loaminess. Water early morning hours, once the top few inches of land feel dry.

Garlic Harvesting: The when How

Harvest your Garlic when the lesser third to half of the foliage has transformed brown and shriveled up, but the top leaves are primarily green between the close of July and August.

It can be challenging to know when to harvest so that the bloom stalks might help. It’s harvest time when the foliage begins to turn dull, and the scapes scrunch up and stand straight.

Garlic Sowing and Distance

Garlic can be grown from garlic cloves or bulblets. Place the cloves inside the surface with the tipped side up and the curvaceous piece down (the root part).

Set the cloves 6 to 8 inches (15-20cm) off and 1–2 inches (2.5-10cm) deep. Rows should be 12 inches (30 cm) off from each other.

When planting, incorporate a tbsp of 5-10-10 fertilizer, bone meal, or fish meal to its lowest part of the pit. Before putting the clove in place, scatter a little soil over the fertilizer.

Plant just pest and disease-free, solid, better, and healthier bulbs or garlic cloves.

Also Read: Why Are My Tomato Flowers Falling Off?

Garlic in the Warmer months: How to Cool It Down

Choose a location that will be partially covered during the sunniest time of the day.

Mulch profoundly with a light-colored substance like straw to reflect sunlight, help shield the ground from high temperatures, and hold moisture, each of which serves to maintain the soil temperature down.

Mulching also protects the Garlic from becoming too chilly in regions where the soil freezes. Mulch alternatives include potting mix, cocoa mulch, and Mega Mulch.

You may use a shade cloth to protect your garlic patch.

The largest garlic cloves produce the most oversized garlic tops. Big garlic cloves have much more power and are therefore more resilient to winter harm, which will aid your Garlic already off to a decent start.

Pick the biggest cloves for sprouting garlic heads and the relatively small cloves for developing spring green garlic while dividing cloves for plantation.

Pick the bigger of your collected garlic tops for plant garlic and cook the tinier tops if you stored a few for planting.

Although the bigger ones are much more appealing, choosing more giant heads for planting this year means you’ll have even more big heads in the coming periods for planting and consumption.

Also Read: Why My Pepper Plants Leaves are Wrinkled?

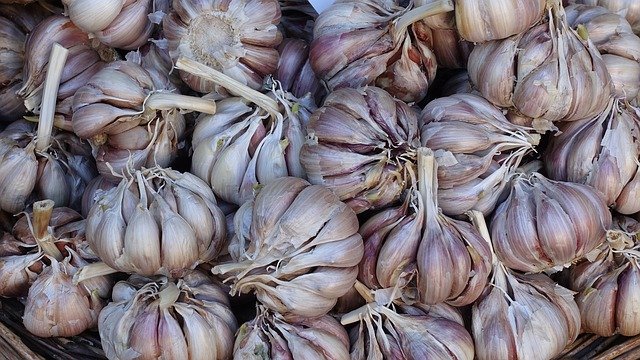
Garlic Storage for Long – term survival

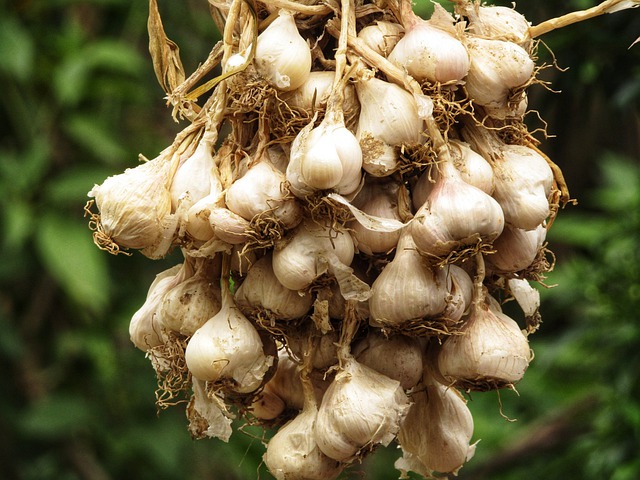
Utilize fresh Garlic or help treat it for later use. Treat Garlic in a warm, dry, dull, and well-ventilated area. Allow bulbs to cure for 2 to 3 weeks.

You can cure Garlic by hanging it in small loose clusters. Tie twine around the heads of the plants and place those to dry—cure Garlic between 60 and 90 degrees Fahrenheit (15 and 32 degrees Celsius).

Once the Garlic has cured, eliminate the leaves and stems. Store fully grown bulbs in a chilly, dry place in a sieve or net sack. Garlic can be kept at 35° to 40°F (1.7-4.4°C) for 5 to 8 months.

Cloves that have been peeled and scraped can be cooled in a sealed jar. Garlic cloves that have been peeled can indeed be canned or preserved. Pluck fresh garlic leaves and use them as fresh herbs.

How Long Does Horseradish Take to Grow?

Horseradish can be grown from crowns or root clippings that are sown 4 to 6 weeks before the usual final frost season in your location.

Horseradish is finest cultivated as just an annual because it is a resistant perennial. Plant horseradish in a pot to prevent it from expanding in the yard.

Horseradish is a tough annual planted for its bitter roots, that can expand to be 2 feet (.6m) tall and narrow.

Horseradish is best grown as a perennial since the roots might become rough and stiff in the following year. Horseradish is best cultivated in pots since it grows quickly and could become out of hand.

Horseradish can be harvested 140 to 160 days after it is planted. Horseradish is a tough, cold-hardy plant that thrives in areas in which the cold is long enough to put the vegetation into hibernation.

Horseradish comes in two varieties: regular horseradish, which has wide, crumpled leaves, versus Bohemian horseradish, which has thinner, smoother leaves.

Guide to Getting a Herb or Veggie Yard Started Growing Horseradish:

Horseradish mixes are available for purchase. Small root pieces (commonly referred to as horseradish sets) are frequently planted straight into the underlying soil while growing horseradish. Horseradish sets are widely accessible in stores, grocery stores, as well as nurseries.

Select the soil. Horseradish may be cultivated in a wide range of soil types, although it prefers mildly acidic & loamy soils with a pH of 6.0 to 7.5.

Select a growing location. To allow adequate area for the root systems to grow without affecting your existing plants, maintain your horseradish sowing location at least one and a half to two feet apart from other crops. Horseradish should be planted in full sun or light shade.

Allow space for root systems to grow. Horseradish taproots spread fast and can reach a depth of up to a foot (or more, if left unattended for too long). In clear, sandy soil, create a hole 3 to 4 inches shallow.

The trench must also be large enough for the horseradish roots to be laid at a 45 ° angle, exposed root face down, in the trench.

Plant to keep as a company. Rhubarb, sweet potatoes, as well as asparagus, are all great horseradish accomplices, and though don’t plant them excessively close around each other.

Horseradish roots require space to expand, and they may contend for supplies or dismantle the root systems of neighboring fruits and vegetables.

Also Read: Best Potting Soil For Tomatoes

Selecting a Location

Horseradish grows best in the broad sun but may take some shelter. Horseradish can grow in practically any soil, except chronically wet circumstances.

Since you won’t like to relocate your horseradish after it’s established, plant this in an out-of-the-way location.

From Seeds to Fruit

Assemble the bed as directed above. Make a trench 3–5 inches deep. Top the seedlings with sandy soil or manure and plant them in the trench. Trim seedlings to one foot away after they emerge.

Narrow them out to 2–3 feet off when plants reach 4 inches high. To keep horseradish from expanding in the yard, create 2 foot-deep boundaries all around crops.

Horseradish in a container – how to plant it

To enhance root development, pick a good pot that is at least 500 mm broad & 700 mm deep. Load the container with excellent potting matter and place it in a bright but rather gently sheltered location.

In late winter/early springtime, plant 15-cm-long roots in the potting medium, making the apex of the root 2.5 cm beneath the top.

Because crops in containers wilt much more rapidly than perennials in soil, hydrate them frequently. Cut down the number of sprouts to 2 to 3 when they mature to promote root development.

Horseradish Planting Instructions

Place horseradish in kind of a 3 to 4 inches shallow dig by placing sets or segments of roots approximately 18 inches away as well as at a 45° inclination. The lower part of most sets is chopped off at the angle to demonstrate which side will lean down.

Foliage will emerge from numerous spots throughout the length of a set if completely horizontal sowing is used, which is less desirable. Following planting, fill with topsoil.

Also Read: How to Turn Green Tomatoes Red in the Fall?

Horseradish: How to Grow It

The crops put on a lot of surface development over the summertime and then start accumulating starch in their roots in the autumn, which makes them larger.

Water and trim on a routine basis, but only when the crops are immature. Defend the plants from diseases like cabbage worms or flea beetles, which typically target cabbage relatives.

Harvest its roots regularly—ideally, every springtime or fall—and shift the bed to a different location periodically, planting pencil-sized pieces split from the primary roots to avoid the transmission of bacteria or viruses.

Horseradish Harvesting Instructions

Although farmers debate over whether spring-dug or late-fall-dug horseradish has the best flavor, many believe that summer-dug roots are unappealing.

After the greenery has been eliminated by cold and just as the soil freezes, they harvest their primary source of roots in late October or the initial November.

Horseradish harvesting is just a straightforward procedure.

Dig a hole a foot or so deep solely on a single end of the planted row. Using a fork or shovel, separate the roots from the opposite end of the row.

Take the plants’ crowns and carefully pull them out of the ground. Prune the leaves to approximately an inch from the ground. Trim the roots on the sides and at the base.

Keep any that are 8 to 10 inches or taller for sowing cuttings the next year. Knot clean root clippings securely and keep them in damp soil in a cold, dark spot around 32 and 40 ℉ if you’re overwintering seedling stock (0-4 C.).

To prepare the root to be used as a dish, clean them thoroughly and peel them. Chop into half-inch pieces and blend with 1/4 cup water and cubed ice inside a food mixer or blender.

Allow 3 minutes for the purée to sit before adding 2-3 tablespoons white wine or even rice vinegar plus 12 teaspoons salt per cup of horseradish purée. Mix the vinegar & salt right upon pureeing if you would like a milder sauce.

Use a fine strainer or cheesecloth to filter most of the fluid if that’s too sloppy for your liking. The finished product can be kept in the fridge for approximately 4-6 weeks in a closed container.

How to Keep Horseradish Fresh

Trim the leaves to around 1 inch in length and rinse the roots using running tap water, wiping away all impurities. Let the roots dry completely before storing them.

Horseradish should be stored in moist sand in a dark corner of the root cellar. It is not advisable that temperatures drop past freezing.

A little number of roots should store well in a zippered plastic sack in the fridge for up to two months for even more instant usage.

Peeling or scraping the roots is by far the most popular method of preparing horseradish for consumption. Shred the root in white wine vinegar or even distilled vinegar straight away.

Cider vinegar should not be used since it creates discolouration in the shredded horseradish in a matter of minutes. You may mix the vinegar according to your preferences.

After shredding the horseradish, jar it and seal the bottles as quickly as possible.

To keep the pungent flavour, keep it refrigerated on all occasions. Newly grated horseradish would only last a couple of weeks.

After that, make a new stock. Horseradish could also be dried, crushed into a powder, and stored in containers in a dried form. Dried horseradish lasts considerably more than newly shredded horseradish, although it’s hardly as good.

Horseradish Plant Maintenance

Sunlight

Horseradish plants may survive a little shadow, although their yield will suffer. On most occasions, they need to get at least 6 hours of bright sunlight.

Soil

The finest roots should grow in the soft, well-draining ground with plenty of natural matter. Horseradish likewise prefers a little acidic to balanced soil pH.

Water

Horseradish does have a low water requirement. Woody roots with such a faint flavour can develop from a lack of water. Excessively water, on the other hand, can result in weak roots with a pungent flavour. It’s best to get 1 to 2 inches of fresh water each week.

Moisture and Temperature

Horseradish prefers chilly temperatures. It thrives in temperatures up from 45 to 75 ℉, with ideal conditions reaching 60 to 65 ° F.

Humidity is usually not an issue especially as the vegetation’ soil moisture standards are fulfilled and there is adequate air circulation around them.

Fertilizer

Fertilize young horseradish when you first saw it and then every 4 weeks or so after that. Organic material, compost tea, or a synthetic 10-10-10 plant fertiliser could all be used (following the product instructions).

Insects

On the horseradish leaf, the horseradish flea beetle is a major pest. It lays egg groups on the petioles of the blades. The larvae dig into the petioles of the leaflets, killing a few of them.

To keep the Beatles away, gently scatter wood ashes upon that plant. Insect protection in the yard is better accomplished by proper cleanliness techniques.

Infections

Horseradish can get root rot every time to time. To serve as a planting resource, just use disease-free roots clippings. Growing locations should be alternated after 3 to 4 years to avoid growing horseradish in the identical spot.

12 Plants You Can Start with One Cutting & A Glass of Water

There are several plants you can start with a cut and a glass of water!

Does this surprise you? Read more below.

If you’re looking for easier ways to care for your houseplants, plants are ideal for you, which you can start with cuttings and a glass of water.

Plants You Can Start with One Cutting

  • Basil

Basil is an aromatic herb, needs moisture and sunlight to grow, so you should always keep a jar in which the herb gets at least 6 hours of sunlight per day.

When grown in water, the water must be changed daily with this it can prevent the growth of algae and bacteria.

 If you have a lot of plants in a large pot, you can change the water about every month. We also recommend mixing each 1L of water with 1g of a balanced fertilizer such as N-P-K 20-20-20.

Also Read: 10 Houseplants That Will Thrive in Your Kitchen

  • Monstera

Monstera is very similar to vineries in that they grow and tend to climb vertical surfaces around them. As they get older, many plant owners want to store them in order to stimulate their growth. I didn’t have to do this yet, but things can change as they develop.

And since it grows like a vine, there is always plenty of room for new growth. New shoots form and grow at the end of each new leaf. As a new leaf grows, the vine forms a knot. These houseplants can survive in indirect sunlight.

 But not in all cases, these nodes end up as aerial roots, which plants use to cling to and climb vertical surfaces.

When preparing to cut, make sure you have a sharp knife or scissors, and you want to make sure it is clean to avoid contaminating the mother plant or cuttings. You will want to cut directly below the knot or above your head.

  • Heartleaf philodendron

This ancient practice is still an excellent way of propagating a variety of plants, including the climbing or soft-bodied varieties of Philodendron.

 Prepare the philodendron to cut and place it in water. The cuttings will have new roots. In a pot or in a garden after rooting, a philodendron is one of the few houseplants that can grow in water for a long time.

 Fill a clear jar or container with tap water, leaving 1 inch of space under the edge. Leave the water overnight to allow the chlorine to dissolve.

 Cut off a 6-inch stem of a healthy philodendron. Cut with scissors, garden shears, or a sharp knife, cutting off the stem just below the set of leaves.

 So that at least two leaf nodes on the stem are exposed. Soak the leafless end of the cut in water. The top leaves should protrude from the top of the container, and the bare leaf nodes from which the leaves were removed should be soaked in water.

 Change the water every three days, letting the water sit overnight before changing it. After about 10 days, the stem will begin to form roots.

 Move the philodendron to a bright place, but not in direct light. Place the plant near a north or west-facing window, or at least 3 to 4 meters from a south-facing window with curtains.

  • Geranium

      Geraniums are easy to propagate in water and in jars. Take a 4-6-inch cut off a healthy plant, place it in a jar, and place it in a bright place, away from direct sunlight. 2-4 weeks, after which you can transplant it into the ground or use it as a centerpiece.

  • Dragon tree

You can easily propagate dragon blood cuttings in water, take a cut with one or two nodules and place it in a bowl of water filled with nodes, after a few weeks the roots will sprout, and then the cut can be transplanted in the pot.

  • Arrowhead vine

Growing arrowheads in water are as easy as growing a lucky bamboo or potholes! Take the cut stem with the healthy leaves of the plant and place it in a cup of chlorine-free water.

  • Spider plant

Spider plants have many nominal interests and needs. This beautiful air-purifying plant can be easily grown in water by cutting off the seedling from the parent plant and placing it in a jug of water.

Also Read: 7 Houseplants that Reduce Dust and Particulate Matter

  • English ivy

English ivy is easy to propagate and grow. It is an excellent houseplant that can only be grown with healthy cuttings and a jar of water.

  • African violet

African violets are easy to grow from leaves in a small glass of water. The roots will form in about 3-4 weeks and the leaves will grow in 6-8 weeks.

  • Inch plant

This vine, also known collectively as stray beans, is easy to cultivate and thrive in an aquatic environment. Take a 5-6-inch cut with 3-5 leaves, place in a cup of water, and place in indirect sunlight. Soon you will get a new plant!

  • Pothos

Growing plants in water are one of the easiest tasks. It’s the best way to easily propagate this heart-shaped foliage air purifier plant! All you need is a warm area with indirect lighting.

  • Croton

Take a 3-6-inch piece of croton with several leaves and place it in a full glass of water, change the water every 2-3 days, and after 4-6 weeks you will see the cut from new roots. You can grow a single croton leaf with the stem attached to it.

Best Potting Soil For Tomatoes?

Do you searching for the best potting soil for tomatoes, then this article can help you to find out the best soil for the growth of tomatoes.

Tomatoes are grown in pots or containers can prefer a moist environment to flourish. They are unable to perform in heavy soil. So, know about the best potting soil for tomatoes go through this article!

Best potting soil for tomatoes?

Soil condition is one of the main reasons for growing healthy tomatoes. Regardless of how you tend your plants, if you want to ensure a good tomato yield for the next growing season, you need to choose the best soil for planting which is sprouted into seedlings and flower products.

Types and textures

Tomatoes cannot be grown in heavy clay soil. It loves the well-drained loose soil such as loam or sandy loam soils which are best for the growth of tomatoes. In your soil, there is a high quantity of clay is there then you can improve the texture by tilting the soil and adding the peat moss, sawdust, and mix sand or other amendments before planting. And the tomatoes cannot grow well in dry soil and avoid planting them in waterlogged soil, excessively wet and anywhere standing rainwater gathering after rainfall.    

Soil pH

The acidity or alkalinity of a soil is measured by its pH. pH 7 is considered neutral, any lower value is acidic, and any higher value is alkaline. Tomatoes grow best in neutral to near-neutral soil, so you may need to adjust the soil pH for the best results. If necessary, you can increase the pH by adding agricultural lime to the soil before planting. You can lower the pH by adding elemental sulfur or a fertilizer containing ammonia sulfate.  

Also Read: Why Are Bottom of Tomatoes Turning Black: Blossom End Rot

Fertility

Tomatoes grow well in moderately fertile soil rich in organic matter. You can add compost while preparing the soil. It may also be helpful to add an all-purpose fertilizer containing potassium and phosphorus. Avoid fertilizers that are high in nitrogen, as they can thicken the plant which bears less fruit.

 A good starting point when preparing your garden is to test the soil. Soil test kits are available at most garden shops and your nearest university office. Soil analysis results will show nutrient content and pH, and provide recommendations for soil improvement.

Growing Tomatoes in Containers

Tomatoes are usually grown in open gardens, but you can also grow them in containers. The advantage of growing in a container is that it gives you complete control over your environment. The ideal potting mix for tomatoes includes soil, perlite, sphagnum peat moss, and compost.

Please note: If you mix it yourself, it will change the composition of the peat compost as indicated on the manufacturer’s label. The amount of soil pH varies, if the nutrients contain will vary, and can lower the pH by affecting the nutrients available to the plant.

 Tomatoes have lowered the pH of the soil produced by the roots, so you should fertilize your tomato plants with garden compost. Garden composts are generally slightly alkaline and therefore resistant to the natural drop in pH. Also, in this context, it would be nice to add a little lime. You will be adding 50 grams (loamy soil) to 100 grams (sandy soil) per square meter of soil, so a heaped teaspoon should be enough for one of your 10-liter plant pots.

To feed tomatoes as they grow, choose fertilizers that are high in potassium and phosphorus (K, P) and many micronutrients. At your garden center, you will likely find one of a range of tomato or flower fertilizers. Avoid herbal fertilizers as they contain too much nitrogen.

Just a little advice on planting quantity: If you are not an avid tomato consumer, six tomato seedlings are usually enough for a family of two, twelve for four, and sixteen for six …

Is Garden soil is good for tomatoes?

The gardening soil does not use directly for growing tomatoes because it is heavy and has harmful pathogens, fungi, and pests that can destroy the plants. Another issue is that the garden soil becomes more compact with each watering cycle and decreasing its oxygen levels and water-absorbing capacity.

What are potting mix and potting soil?

Potting soil is also simply called ordinary garden soil. It is naturally rich in nutrients and thanks to existing minerals and bio-degradable organic matter. It is cheap and most efficient for container gardening.

Potting mix

On the other hand, a soil mixture of organic matter, peat, and other materials provides better aeration and makes it lightweight, which promotes easy root growth. It can be made to order for a specific plant, so it will be more expensive than potting soil.

Homemade recipe of potting mix for tomatoes

Here is the homemade recipe for making a potting mix that is cost-effective while overbuying from the store.

Recipe no.1

  • Sphagnum peat moss
  • Garden soil
  • Perlite, vermiculite, or sand

Combine the three ingredients in a pot with equal proportion.

Recipe no.2

  • Crushed eggshells
  •   Bone meal
  • Compost
  • Garden soil

Mix all of the ingredients in equal amounts and it will have a great pot mixing for planting tomatoes!

Recipe no.3

  • Vermiculite
  • Vermicast
  • Compost
  • Pre-soaked coir peat

Mix all the ingredients with the same quantity and store them mix them in a container and use them as per the requirement.

Tips for growing tomatoes indoors

Use a container that is at least 12-18 inches deep with wide drain holes. Place the pot on any sunny windowsill where it can receive 6-8 hours of sunshine. Prefer south- or west-facing windows so the inside of the container dries up faster than the backyard.

The soil should be watered regularly and thoroughly. Keep the soil moderately moist, but allow the top 1-inch soil to dry before re-watering.

Feed your tomato plants with organic or slow-release fertilizers during the growing season. Use fertilizers with high nitrogen content which stimulate less fruit setting and more leaves.

 Turn the houseplant periodically to get even sunlight and Supports farms and cells when mature.

Common mistakes are done while growing tomatoes in containers

Small containers

Here you have to use a big container because growing tomatoes is a large harvest. I use a small container it cannot hold more soil and water which is not enough for the growth of the tomato plants. So, a bigger container should make a large space and holds more soil and water. It will provide more nutrients for the growth of your plant. Water and food are the most important elements for healthy plant

Too much water

The key to the success of your tomato plant is proper watering. If the excess of water to the plant can cause blossoms to end rot. So keep the soil in the container should moist but not wet.

Maintain water levels in the container 1 inch above the surface of the soil. Please check the soil moisture before watering the container. Add water when the soil must be dry while touching at your fingertip.

Don’t be forgetting about drainage make the hole at the bottom side of the container which helps to drain well.

Too little water

The amount of water your tomato plants need depends on several factors, including the weather: wind, heat, humidity, pot size, and the type of pot used. often you water. Large tomato plants may need to be watered at least once a day, and sometimes twice.

Also Read: How long can a tomato plant go without water?

Not enough sun

Tomatoes love the sun and require full sun, which means they need direct, unobstructed sunlight for 6-8 hours a day, without trickery or jumping around. Many people often overestimate the amount of sunlight entering an area. Sunlight meter before putting on the light bulb. Also, the amount of sunlight entering an area can vary significantly during the growing season, so double-check each week to make sure nothing is blocking sunlight.

Under-fertilizing

Tomatoes are high in nutritional value and should be fertilized regularly unless you are using pre-fertilized potting soil.1 Most potting soil contains very few of the nutrients your plants need to grow and stay healthy, so you will need to add those nutrients into the soil or add nutrients to your mixture, which has a high compost content.

You have a variety of fertilizers to choose from, but good options are either universal slow-release organic fertilizers or those specifically formulated for growing tomatoes or vegetables that can be mixed with potting soil is Emulsion / Liquid from algae once or twice a week or calcium in the form of lime or liquid calcium. Black areas on the lower end of tomato fruit indicate possible rot of the flower heads, which can be caused by irregular watering and/or lack of calcium in the soil.

Caging too late or staking

Waiting too long to stake or cage a tomato is a chronic mistake. Tomatoes grow quickly and are best caged during planting before they get large and bulky.

Conclusion

Tomatoes are easy to grow vegetables. Choose the best soil, container, and fertilizer for your tomatoes. Sow deep, water regularly, fertilize. You will definitely get better and tastier.

How to Turn Green Tomatoes Red in the Fall?

Are you looking for red tomatoes and how to turn your green tomatoes into red in your backyard? 

I hope it will be bright, cherry red color tomatoes ripening on the vine.

And yet, the experienced gardeners have time when their plants are still hard and green.

At any instance in the growing season, but when killing the frost is bearing down, your stress increases by the moment. What can be the gardeners do?

Here, I’m helping you with different factors to encourage tomatoes to turn red on the vine. 

Also Read: Why Are Bottom of Tomatoes Turning Black: Blossom End Rot

Why are ripe tomatoes commonly red?

If your tree is not bright red in color, it is good to know that many gardeners have complained. After all, we all need red tomatoes! How desirable are reds? 

There is a scientific explanation, and knowing this can help you grow your own fruit that stays firm green when you want it to have a beautiful red color.

When the fruits are green, they get this color from chlorophyll. As they move from maturity to ripening, they release a natural hormone called ethylene, which triggers the ripening process, causing the fruit to turn red and soften.

 According to the schedule in which this happens, it usually takes about three weeks for the tomato plants to grow tall enough and bloom after transplanting, about 12 to 18 inches in height for most crops.

When they reach full size, it takes an average of 20 to 30 days to mature and change color from green to yellow and red.

Cherry and grape varieties can often produce small, ripe red berries for a total of 25-30 days from flowering to harvest. 

If you are counting, and the wrong thing is happening in your garden, it’s time to do some more research and determine why your plants are not growing to full maturity.

Few reasons your tomatoes won’t ripen on the vine 

Once survey your plant if one of the reasons might be affecting the ability of your plant to ripen the tomatoes into the red.

Temperatures are too warm

If your tomatoes become green permanently and still it’s warm, then heat could be the cause.

It’s hard to believe that the easy-growing garden vegetables are temperature sensitive, if the pigment will begin to change then temperature dictates along with ethylene.

The optimum temperature for tomatoes to show red is 68-77 ° F, slightly hotter is normal, however, once temperatures exceed 85-90 ° F, ripening stops, or a minimum of slows down or orange-green or light green on the vine, up to almost white, but unfortunately not red.

Temperatures are too cool

As usual cooler weather also stops to keeps change as they turn your crop rosy shade. Once more time you are getting the temperature about 68-77 ° F range for them to ripen a sporty red hue.

If temperatures drop to 55 ° F, add at least a week or possibly two to the average ripening time of the fruit if 65 ° F, depending on the seed packaging or botanical label. 

If your area has night-time temperatures below 50 ° F and daytime temperatures below 60 ° F, and it lasts two weeks or more, the stunning red transition you’re looking for will stop. 

The frozen fruit of the tree will also not ripen when the air is colder than 50 ° F. You may get some green if your tree tries to bear fruit in a climate of 50–55 ° F, but trust them. Strange shapes also develop at the weak point. 

Protect the tree with a bedsheet, old cardboard, or even a plastic tarp. 

You may not be able to get any fruits back at this point, but if it is unlikely that they will end up in cold temperatures, or if reliable sources predict freezing, you can still sort the fruits on your tree. If anyone has begun to show signs of softening or a change in color towards maturity. 

Before that happens, analyze the possible reasons your fruit doesn’t ripen on the vine, and try to address those issues before the frost hits.

Stressed or overgrown vines

Tomato plants also like every living being have so much energy. If the plant using more energy to grow the leaves and flowers then it may not have any energy left behind to turn green fruits red.

To prevent this from happening to your vine, it is recommended that you prune it six weeks before the first expected frost in your area. Cut the vines with scissors or scissors until the stems are ripe.

 Improve airflow, can prevent contamination of fruits and crops. You can also stimulate the redness of green berries by pruning the roots.

5 Tricks to Ripening Tomatoes on the Vine Faster

We are unable to force the plant to ripen tomatoes on the vine, but few things that can help you to ripen them.

Therefore, fall is early approaching and you’re struggling with how to turn green tomatoes to red, hence we have 5 tricks try these to get better results! 

1. Cut off the new growth 

when the growing season comes to end, therefore your plant does not require to waste energy anymore for their new growth

Topping the plant which can distribute growth hormones from the main stem to the branches and cutting off the new leaves produce in the plant which redirects its energy to ripening the tomatoes faster growth.

2. Trim the flowers

After the pollinated flower, it takes few months to ripen the tomatoes but new flowers are not going to amount to anything. Therefore, pick the flowers. 

Also Read: Why Are My Tomato Flowers Falling Off?

3. Pinch the suckers

Suckers are the part which is produced between branch and leaf joint. It sucks energy from the plant so it is called the sucker. Pinch off all the suckers you see on your tomato plant.

4. Pluck off tiny tomatoes

I know that any of the tomatoes remove from the plant is very hard but the little babies don’t have time to mature before frost. So, pull them off then it can focus on the larger green tomatoes to ripen.

5. Prune some of the leaves

Don’t remove all the leaves from the tomato plant. De-leafing the tomatoes is not a good thought. Therefore you can trim a few of them if your plants have huge and healthy green leaves for vigorous growth.

Tomatoes sometimes take a while to ripen, but that doesn’t mean you can’t help but speed up the process. If you’re tired of tomatoes not ripening on your plants, try these simple tricks to make green tomatoes turn red in no time.

How to Store Potatoes So They Last For Months – 5 Methods

Potatoes can be stored last for months on the kitchen counter than most fruits and vegetables, but the green sprouts will start to sprout and lose their freshness and flavor. Can you know how to store them properly, they will store for weeks or even months also.

All you need to keep them fresh for a longer period like a cardboard box, paper or mesh bag, or basket. When stored properly, potatoes will last four to six months.

So, here are the 5 methods to store potatoes so they last for months:

Step 1 Root cellar storage

The traditional method of storing potatoes is to place them in a cool, dark place where they don’t risk freezing, such as in a cellar. If your home is not fully furnished, an unheated garage or a cold corner in the basement will do.

It is not enough to just throw the potatoes into the cellar; you will need to prepare them in advance during the multi-day curing process.

What are the conditions to sort and cure fresh potatoes?

The first step after harvesting potatoes is sorting them to separate the ones that are best for storage.

Freshly harvested potatoes do not have tough skin to protect them from rotting, so be careful when handling them to avoid cutting or damaging them.

You want large potatoes without large punctures or bruises, although small cuts can harden during storage.

Any overly damaged potatoes should be eaten within a few days or otherwise preserved.

Some types of potatoes keep better than others. You will get better thick-skinned red potatoes and other brown potatoes than tender fingerlings and red-skinned varieties.

As a result of this process, the skin hardens and the potatoes are stored longer. Although you can wash it first, the potatoes will last better if you let them dry and get dirty.

Also Read: How to Grow Organic Potatoes in Your Garden

Step 2 Rebury potatoes outdoors

Let’s say your storage goals are a little less ambitious and you just want your potato crop to last until late fall. In such a case, an easy way to preserve is to put the potatoes back into the ground immediately after harvest.

Until the last late fall, if you want to store your potato harvest. Dig a trench about 6 cm deep, place the potatoes on the bottom, cover with loose soil and straw or folded newspaper to cover the rain. This keeps the potato very cool until you dig it up in the fall, and it will start to rot if you let it hold onto the dying plant for a few more months.

Step 3 Slice and Blanche potatoes for freezer storage

After peeling and slicing, raw potatoes quickly discolor in the air because they contain an enzyme called polyphenol oxidase, which reacts with oxygen to give the flesh a gray or brown color. You can prevent discoloration by applying a layer of water to the peeled and cut slices and refrigerating them before use. Now they can absorb too much.

For longer storage, consider vacuum packaging, a method in which all air is removed from the packaging and sealed up to a week in the refrigerator.

Step 4 Pressures can potatoes

Your potatoes can also be store on a long-term basis, independent of the refrigerator. You will need to use pressurized cans as water cans cannot reach the high temperatures required for safe storage.

 Mason’s jar can store about 20 pounds of potatoes, and salt to taste. Peel the potatoes and remove the eyes, then halve and place in a large bowl filled with cold water. Boil a pot of water, then blanch it three times, remove the potatoes and rinse them to remove the starch before placing the potato balls in a sterilized glass jar.

Fill them with hot water, leaving a distance of 2.5 cm between the edges. You can add about a teaspoon of salt per liter if you like. Clean the rim before putting on a clean ring and cap, and the pressure can be 10 pounds for forty minutes.

Step 5 Dehydrate for potato flakes

If you’re willing to put in the effort as early as possible, you can save your potato plants almost indefinitely by dehydrating them into flavourful flakes. Wash and peel the potatoes first before cooking them on the stovetop until they are easy to cut with a knife.

Blender is better!

 Let the water cool and then mash the potatoes directly in the water, use a stand mixer to blend until smooth, or use a hand blender to mash the potatoes directly into the pot and then gently place the potatoes in dehydrating foil. The thinner the layers, the faster they dry.

 Set the temperature to 140 degrees and after about 12 hours check if the potato pieces are dry. The potatoes are ready when they are broken, not bent, but be patient. The whole process can take 36 hours or more. Once dry, grind it into a powder by placing it in a food processor and placing it in an airtight container.

You can spice them up by making mashed potatoes. Put a tablespoon of butter in 2/3 cup water and bring to a boil before turning off the heat and adding ¼ cup milk and 2/3 cup flour. Moisten the potatoes, add butter or milk to taste.

Eating fresh potatoes is equally enjoyable, and you will surely appreciate your efforts even more if you can continue to enjoy your harvest in the middle of winter. Store potatoes properly and they can last for a long time.

Also Read: How to Grow Potatoes in Tires?

Conclusion

Knowing how best to store potatoes can extend their shelf life and reduce food waste. Raw potatoes store in a cool, dark place with good air circulation, and not in the refrigerator.

Avoid browning of slices and skins or vacuum sealing. Boiled potatoes can be stored in the refrigerator for up to 4 days or in an airtight container in the freezer for up to 1 year.

 Home-grown potatoes should be briefly stored at higher temperatures and higher humidity before long-term storage.  Regardless! How they are stored potatoes that will last longer if they are fresh and healthy when purchased, so look for tubers that are firm, smooth, undamaged, and free from sprouting.

Why Are My Tomato Flowers Falling Off?

My tomato plant grew to be over 5 feet tall and produced many flowers, not a single flower turned into any variety of tomato. I was very disappointed because these are the only vegetables I like to eat fresh. 

They are not lacking in water as I have made sure that they are always looked after. I also gave them Miracle-Gro tomato fertilizer and bought a special soil to plant when I received them. As I said, I look forward to it every year. Find out why I never got tomatoes. Once the flower has fallen and the tomato begins to grow, nothing will come out.

Causes of tomato flowers falling off

Flower drop is a common problem when growing tomatoes that can be extremely frustrating for the home gardener. Healthy-looking tomato plants produce flowers. However, they merely wither and fall off the plant before a fruit forms. There can be many causes for flower drop, but the most common are temperatures that are too high or too low.

#1.High or Low-temperature ranges

The high temperature in summer is a common cause of the fall of tomato flowers. When the daytime temperature exceeds 85 degrees Fahrenheit for several days, tomato flowers will usually fall off the vine without fruiting. On the cool spring and autumn nights are temperatures below 55 degrees Fahrenheit can also cause the flowers to fall off.

 Low temperature can interfere with the normal development of tomato flowers and may lead to the formation of sterile pollen. High temperatures can cause defects in tomato pollen, which prevents fertilization and eventually forms unfertilized flowers. Dry and fall from the vine. The sudden temperature change from high temperature during the day to low temperature at night can also cause tomato flowers to fall off. 

#2.Shortage of water

Due to the lack of water or under watering to the tomato plant can be the cause of your tomato flower falling off is the most common reason and simply fix it with properly watering your tomato plants at least about 3 inches of water for a week provide with natural rainfall or with the manual concept. 

Also Read: How long can a tomato plant go without water?

#3.High winds

You can’t control the wind, but plant your tomatoes in reasonably sheltered areas. 

#4.Foliar diseases

Plants infected with foliar diseases can cause the tomato flower to fall. Some of these diseases include severe bacterial stains, botrytis fungus, and dot pressure.

#5.Improper pollination

If several plants aren’t properly pollinated, they’re going not to be able to bear fruit or produce new seeds to grow new plants. On a small scale, a lack of pollination can lead to an unsuccessful tree. In general, this can mean food shortages.

#6.High or Low humidity

Extremely dry or humid air will affect the fertilization of tomato blossoms. Tomato flowers exposed to dry or humid air with a relative humidity lower than 40% or higher than 70% may not be fertilized properly. Dry air causes pollen to stick to the stigmas of flowers, while moist air causes pollen to accumulate. Pollen cannot properly fertilize the flower, causing it to dry out and fall off the plant. 

#7.Pests 

Insects can cause tension to a tomato plant inflicting flowers drop. However, you have to keep away from the use of insecticides that can harm pollinators along with bees which might be essential in your vegetable garden.

#8. Heavy fruits set with too many blossoms

A tomato plant may have too many flowers competing for resources, causing the plant to drop several flowers, but once the first tomato is harvested, this problem should go away.

#9.Over pruning of tomatoes

If you remove those inevitable suckers from tomatoes that emerge from the branch unions. 

When you let them grow, they will become branches and stick to the plants, blocking light and flow of air. These branches will produce fruits, but the results may be too good. 

All these extra tomatoes are competing for the limited available nutrients, resulting in smaller fruits and lower quality. You need to remove the sucker by squeezing it with your fingers on the day of planting the tomatoes. 

If not, it may be best to abandon those that have become branches; but continue to remove new suckers, because they seem to limit future branch growth.

#10.Lack of nutrients

Poor soil can face a lack of nutrients due to this poor growing condition. Roots cannot get a sufficient amount of nutrients. So, the roots can be injuries because of mechanical, insects, and disease.

Make sure that test your garden soil and if you get a lack of nitrogen use tomato fertilizer which is balanced the nutrients deficiency and you can also add compost to your soil for better results.

#11.Overfertilizing

Too much nitrogen on tomato plants can cause flowers to fall off. Nitrogen application to tomato plants can promote the rapid growth of their stems and leaves. Tomato plants that are over-fertilized with nitrogen gas typically have slender stems that can’t support the burden of the tomato.

When planting plants, it is best to use fertilizers with high phosphorus content but moderate nitrogen content, and then avoid re-applying fertilizer before the fruit is set. 

#12.Inadequate irrigation

Tomato plants have a branched root system that is sensitive to dry growing conditions. If the soil around the tomatoes dries out, the flowers will dry out and fall off the vines before they bear fruit. Evenly moistened soil a few meters deep around the plant promotes a healthy root system and ensures that your plant gets the moisture needed for successful results.

Why does my tomato plant have flowers but no fruit?

It’s one of the defeats when you have tomato flowers but not fruits or only tomato plants but no flowers at all. Earlier, you could be produced tomatoes with a little extra from the normal harvest.

Also Read: 11 Best Tomato Varieties for Hanging Baskets

#1.Blossom drop

Air temperatures will play an essential role in the production of tomatoes which are sensitive to low temperatures and extremely high temperatures. In early spring fall flower, drops can occur due to slightly warm daylight and temperature will fall below 55 degrees Fahrenheit at the night as well as the same phenomenon will occur in summer also.

Here we use a shade cloth to block the direct sunlight that falls on the tomato plant at high temperatures.

For cold temperatures use red plastic mulch sheeting or organic mulch enough to promote fruiting.

#2.High humidity

Tomatoes multiply when pollen falls from the stamens and pollinates the stigma. Usually, this pollination occurs due to the wind, movement, and vibration of the bee’s wings. 

High humidity can interfere with this process by making the pollen too wet and unable to move freely in the desired location. 

If you live in high humidity climates, you can help pollinate tomato plants by lightly touching flowers or flower stems. Another option is to gently brush the pollen from flower to flower with a small brush.

#3.Poor air circulation

As I mentioned earlier, flowers self-pollinate and immobilize pollen grains through movement. If the airflow around the tomato is obstructed, the pollen will not be able to fall and pollinate the stigma. To improve air circulation, try some of these options. 

Remove some of the foliage.

Don’t plant tomatoes too close together.

Trim the tomatoes.

Plant tomatoes vertically to improve air circulation and don’t plant behind the building or structure.

Instead, plant tomatoes outdoors on all sides.

#4.Too many flowers

Too many flowers on tomato plants will cause competition between flowers for nutrients because as a conservation method, tomato plants will automatically wilt and fall flowers

 After your plants set fruit, this problem needs to be solved without long intervention for good soil.

What can you do to prevent tomato flowers from falling off?

#1. Use natural pesticides

Use natural pesticides which are environmentally friendly and it will pick out the affected buds from the plant before spreading the problem.

#2. Keep soil evenly moist

Be sure about the soil should be kept moist and not be retaining a huge amount of water and getting soggy, it shouldn’t dry as well. So, mulch can help to regulate the mulching process.

#3. Check soil pH level

Check the soil pH value and maintain it as per the requirement of the seed. If you feel a lack of nutrients in your soil then add a layer of compost to fulfill it. 

#4.Monitor temperature fluctuations

First of all, monitor the temperatures and maintain between 12 to 29 degrees Celsius. If you build wooden or plastic containers which can control the shade for your plant.

How long after flowering does the tomato appears?

The first ripe tomatoes (Solanum Lycopersicum) seem within the garden concerning 45 or over 100 days once transplantation the seedlings outdoors.

The appearance of yellow tomato flowers indicates that the plant has begun the fruiting process. Once opened on a tomato vine, the time it takes for the fruit to ripen depends on the tomato variety and various environmental factors.

  • The right temperature
  • Water properly
  • Use fertilizers
  • Flowers will appear
  • Tomato pollination
  • Tomato growth
  • Look out for pests 

Conclusion

There is no difference to uptake contemporary tomatoes picked from your vegetable garden.

The key is to understand the problems that are causing your tomato flowers to deteriorate and prevent them from happening in the future.

Hopefully, you’ll be able to scale back your tomatoes from dropping flowers by following these methods. 

17 Amazing White Vinegar Uses in the Garden

Are there any White Vinegar Uses in the Garden? Yes, there are! In the yard, vinegar has a variety of lesser-known but highly useful applications. There are several applications for this affordable, commonly available item, ranging from pest management to soil enrichment, providing a less costly, friendlier answer to many garden issues.

You believe it or not, increasingly people are abandoning hazardous cleaning materials in favor of more ecologically sound options which they may have possibly in their cupboard. You could use vinegar throughout the yard as well as in all-natural green cleaning solutions.

If you’d like to cultivate an ecological yard, ditch the chemical products and poisonous plant fertilizers and replace them with vinegar. Vinegar is indeed an organic product that is being used to cleanse as well as destroy bacteria. Vinegar is among the most organic and cost-effective cleansers. It will provide vitality to beautiful blooms, fruits, plus veggies in all of your outside areas if applied appropriately.

Also Read: What Happens If You Use Vinegar in Your Garden: 19 Miracles of Vinegar

17 Amazing White Vinegar Uses in the Garden

It is difficult to know about all White Vinegar Uses in the Garden. So we have compiled the top 17 uses of white vinegar in your garden. Take a look at our ideas for utilizing white vinegar in gardening.

#1 Ants can be killed by it

Do you have a lot of ants in your garden? If yes, do they make gardening extremely difficult for you? If that is the case, you do not need to worry because white vinegar will help you with this situation. To repel ants away, sprinkle ant hills with a solution of equal measures vinegar and water. That’s it, you are good to go then.

Don’t be surprised by this because there are so many wonderful things white vinegar can do. Scroll down further, if you’re interested to know all its uses.

#2 Weeds on the Walls and Pathways can be removed

Using Vinegar is an excellent technique to get rid of weeds that grow in the gaps of your pathway as well as on the yard walls. Just sprinkle the area using undiluted white vinegar to destroy the weeds. It is the easiest way to do this because doing it manually can be a tedious task and certainly you don’t want to go through that.

#3 Assisting with Plant growth

Many seeds, such as nasturtiums, okra, and certain similar drought-resistant plants, are exceedingly difficult to sprout without assistance. To ease the task and to obtain blooms sooner, immerse these tough seedlings in a pool of water with some droplets of white vinegar up overnight. Sow the seeds in the yard the very next day just like you do with your regular seeds to observe faster results. You’ll be astounded at how effective this easy method is!

#4 Clay pots can be cleaned

Clay pots assist plant species to remain healthy by keeping the soil cooler. Such pots develop white spots, germs, bugs, and fungi which can damage your crops as the clay pots get older and are exposed to fertilizer plus hard water. Cleaning them with vinegar is an excellent and inexpensive option. Just rinse them in white vinegar diluted in water, they will do your work.

#5 Vegetables can be cleaned and washed

It’s a wonderful feeling when you finally get your vegetables ready for harvest. But how do you make sure that it is completely free of germs and bacteria that they must have acquired from the garden? We have a solution for that too.

Once you’ve brought your harvest inside, mix a spoonful of white vinegar with just a quart of water, use this solution to quickly clean your vegetables. To eliminate germs and debris, rinse your vegetables with the mixture. Now, you can enjoy the greens with your family without any doubt.

#6 Keeping Animals Out of Your Yard

Although cats, dogs, rabbits, all are great pets to keep, they are very fond of the maintenance of your garden.

So if you want to keep them at bay then simply use white vinegar. The pungent odor of vinegar repels numerous creatures, particularly typical garden invaders such as rats, moles, dogs, cats, rabbits, as well as deer.

By washing many old garments in white vinegar then putting them on poles throughout your yard when they’re most likely to appear, you will keep such unpleasant guests away.

#7 Freshly Cut Flowers Protected with White Vinegar

The possibility to showcase freshly picked flowers inside one’s house is among the benefits of owning a flower bed. Sadly, when the flowers are plucked, their lifetime is drastically shortened. Also, the toughest of flowers will start to crumble after just a few nights without the plant, which is accountable for implementing the nourishment the flower requires to thrive. So here is what you’ll require to make your freshly picked floral centerpieces last longer.

Cover your vase halfway with water. Pour both vinegar plus sugar into the vase then swirl to mix. Toss in some freshly picked flowers. To preserve your newly cut floral arrangement for days, make a new mixture and switch it with the old one after a couple of days. Keep repeating this process and that will give you a few weeks of beautiful centerpieces.

#8 Acid Friendly Plants Can Be Fertilized

Although vinegar is detrimental to most species, acid-loving plants such as azaleas, gardenias, blueberry bushes, as well as rhododendrons benefit from it. You just need to mix a glass of vinegar with three to four liters of water then feed the acid-friendly vegetation. You will see the results only in a couple of days.

#9 Make Garden Gadgets Tidy and Polished

Isn’t it difficult to see your gardening tools go all rusty after some time? And surely you would want them to stay new, so garden equipment such as rakes, hoes, or spades can be soaked in vinegar at the end of every gardening period to make them as new as they were.

It just takes an overnight dip to remove dirt and corrosion. Because vinegar is very good at removing corrosion, you may use this on instruments that have been placed outside and subjected to the weather for an extended period.

#10 Defend Against Fruit Flies

Create a vinegar trap to protect the fruit crops against fruit flies. A glass of water, half a glass of white vinegar, 1/4 cup of sugar, plus 1 tablespoon of molasses are required for such a recipe. Combine everything and place it on the afflicted fruit tree inside an empty bucket or tin can watch how it attracts and traps flies.

#11 Slugs & Snails Can Be Removed

Slugs and snails are among the most well-known and destructive garden parasites. To get away from such garden insects, sprinkle them immediately with a combination of pure vinegar and water, very much like ants or gnats.

#12 Make Bird Baths free from dirt

It is critical to have a sanitary birdbath to protect the wellbeing of the birds. Wash your birdbath with white vinegar & water once a week to keep it healthy. This will ensure that the water is clear of algae, parasites, and pathogens.

#13 Keep Your Patio Furniture Neat

You know how difficult it is to maintain a couple of seats or any other items of patio furniture spotless if you put these close to your yard. Fortunately, vinegar can save the day yet again. Scrub up your patio furniture with a cloth dipped in vinegar, paying special attention to each item. That is all there is to it!

#14 Water Lines Can Be Removed

Watermarks on antique vases are a typical phenomenon that detracts from the vase’s overall lovely appearance. Mineral coatings develop white spots or layers on a crystal vase or antique glass vessel that hasn’t been washed in a great many months.

Combine a half spoonful of salt with an identical amount of white vinegar to form a mixture. This mixture should be carefully rubbed into the vase and kept alone for about 10-15 minutes. Use a paper napkin, sponges, or bottle brush to cleanse it. This is the simplest technique to opt for.

Also Read: 14 Uses Of Baking Soda In The Garden

#15 Fungus can be eradicated

Vinegar will remove a lot of fungi or mold from your houseplants. White vinegar is among the most popular methods of killing mold in households, and it also helps a lot for houseplants. Vinegar is also an excellent fungicide for protecting your crops from these aggravating circumstances. The vinegar fungicide remedy is straightforward to prepare and apply.

Combine the chamomile tea as well as the two teaspoons of vinegar in a teapot. Fill a spraying container with the mixture and treat any mold or fungus-affected flowers in the yard. This remedy is ideal as it is both harmless and natural.

#16 Berry Stains Can Be Removed

Picking berries such as Indian blueberry or strawberry sometimes produce difficult-to-clean spots on your skin. Nevertheless, wiping your hands using white purified vinegar and water is indeed an easy solution to the problem.

#17 Calcium deposits on Yard bricks and pavement can be removed

Most people are aware that scrubbing the brickwork without chipping off a coating can be difficult. Vinegar, on the other hand, is a simple and organic approach to remove calcium and lime buildup from yard bricks or pavement. Take 1 cup of white vinegar with every gallon of water in some kind of a container, then clean the area with a scouring brush dipped in the solution. Wipe away any calcium and lime once the surface has been disinfected.

Conclusion

Vinegar offers several advantages for home gardens. Vinegar may be used in a variety of places throughout your home, not simply the toilet and kitchens. The sole protection you should undertake is to use vinegar straight on the crops as it gets out. Apart from a few species that thrive on acid, vinegar’s acidic characteristics will damage normal vegetation.

Whenever sprinkling a vinegar mixture straight on your houseplants, be careful since it might completely remove their outer cover. Meanwhile, keep in mind that vinegar does have a variety of applications around the property, including in the yard.

Now you know most of the applications of vinegar and it will not be difficult for you to make things easy for yourself when it comes to gardening. Your plants can easily thrive more organically without using hazardous pesticides.

Why Eggplant Flowers Falling Off?

Eggplant, also known as Solanum melongena, grows in hot weather, healthy growth requires direct exposure to sunlight for most of the day. Eggplants are also tropical or subtropical, so they grow best at high temperatures.

 In cold weather, these plants grow more slowly. Eggplant is a self-pollinating plant because it has male and female organs. Most gardeners get annoyed when the flowers fall. Eggplant falling flowers are a common problem for many gardeners. Let’s take a look at the causes of eggplant flower shedding and find a solution together.

Also Read: How Often to Water Egg Plant?

Why are the eggplant flowers falling off?

Eggplant is a tropical plant that grows in high-temperature areas. They need well-drained soil to grow. The falling off eggplant flowers maybe the combination of many factors, but there are several reasons for the fall of eggplant flowers are:

Lack of nutrients in the soil 

Eggplant is a tropical plant that grows in high-temperature areas. You need well-drained soil to grow. Eggplant flower falling off can be the result of a combination of many factors as follows:

The reason the flowers fall without producing fruit is likely to frustrate the gardener. Every gardener goes out of his way to take care of the plant they have grown with all the information they have and it is perfectly obvious and understandable.

To prevent this from happening, let’s take a look at the steps and add precautions that every gardener should follow to keep flowers from falling off.

High temperature

Eggplants are tropical plants and grow best at high temperatures, but if the temperature rises above 32 degrees Celsius, the eggplant should be covered with a shade cloth to protect it from possible damage from the extremely high temperatures and cover your eggplant with the shade cloth if necessary.

In case you have grown your eggplant in containers, temperature control will be easier for you as you can move the eggplant to a place that won’t get direct sunlight during the days.

Improper fertilizers

Insufficient fertilization can also cause eggplant flowers to fall off. Improper fertilization means a lack of nutrients needed for eggplant growth. This lack will put pressure on the eggplant and cause the flowers to fall off without fruit.

 It is important to add horse manure or cow manure to the soil regularly as this adds nitrogen to the soil. Nitrogen is essential for the production of plant protein. Adding organic fertilizers is also important because they add phosphorus to the soil, thereby stimulating the growth and development of healthy flowers and fruits.

Climatic conditions

Unsuitable weather conditions may be one of the possible reasons for eggplant flower shedding. Eggplant grows well at high temperatures but grows slowly at low temperatures.

If your eggplant does not receive at least 6 hours of sunlight during the day, the flowers may fall off or fail to develop. Therefore, it is important to grow eggplants in sunny places during the day.

Absence of pollination

Eggplants are self-pollinated because they contain male and female organs. They do not rely on insects or bees for pollination, but people often find it difficult to self-pollinate eggplants.

Eggplants are usually pollinated by wind. But there may be problems with pollination when the weather is very humid or humid. In very hot weather, pollen becomes inactive because it thinks that it cannot withstand the pressure of extra fruit in very hot weather.

It can also be said that the eggplant interrupts its fruit in order not to bear greater pressure. In a humid climate, the pollen becomes very viscous, so it becomes very viscous due to excessive moisture in the air. He cannot reach the pistil to pollinate the flower.

 If the eggplant flowers fall off due to lack of pollination, you will need to act as a pollinator and try manual pollination.

In addition to eggplant blooms, there may be other factors related to the above two points. Let’s take a look at them too.

Shortage of water

Eggplant is a very nutritious plant and requires constant watering to keep it healthy. Lack of water puts pressure on plants because they have to withstand extremely high temperatures.

Due to this lack of water pressure, the eggplant will lose its flowers, believing that it cannot meet the demand for new fruits. Therefore, if you find that the flowers of your plants are falling off, make sure to water them regularly. Eggplants need at least 18 inches of water in the soil to prevent moisture loss from their roots and thus prevent moisture loss for the entire plant.

 In addition, forming about 4 inches of mulch around the eggplant will help retain moisture in the soil, which is essential for a healthy harvest.

How to stop eggplant flowers from falling off?

The falling eggplant flowers indicate that something is missing, whether it’s nutrients, fertilizer, or water. To avoid falling flowers, you must take care of your eggplants and make sure that they are nothing is lacking.

Read on to learn how to prevent eggplant flowers from falling off.

As mentioned earlier, eggplants are tropical or subtropical, so warm temperatures and direct sunlight are needed to get a healthy harvest at least six hours a day. In the container, choose a location in your home that is exposed to direct sunlight most of the time.

Second, you need to add water to the soil regularly. The roots of eggplant go deep into the ground, so you should add water at least 18 inches below the ground. Since eggplant grows at a higher temperature, it is obvious that heat will quickly evaporate water. Lack of water puts pressure on plants, so the flowers will fall off early and bear fruit.

Therefore, if you want a healthy harvest, start watering the plants regularly. It is also recommended to form a melting layer at least three inches around the eggplant, as this will help the plant and retain moisture in the soil during long periods of weather. If the climate is very hot or very humid, the eggplant will not self-pollinate and cause falling flowers. In this case, damage to the crop can be prevented; you need to pollinate the eggplant flowers. This is a very simple process that does not take a long time, and the result is well worth it with minimum effort. Later we will discuss how to pollinate eggplant manually.

Plants feed on available nutrients, and the next important step that you must not skip is regular soil fertilization. Add compost and regularly add nitrogen to the soil, which is necessary for plants to make protein.

In addition, use organic fertilizers regularly, as they will help your plants meet their daily nutritional needs, resulting in a healthy harvest. Sun protection is an important step that most gardeners do not consider. Hungry for sunlight and is known to grow better at higher temperatures, it is also important to note that when the temperature rises above 32 degrees Celsius, getting direct sunlight will do more harm than good to your plants. Use shade cloth to protect your plants from direct sunlight.

 Indoor growers should move the eggplant container to a place where the temperature is not so high. This step should not be skipped, otherwise, the flowers will dry out and fall off, and it will also increase the likelihood that the plant will dry out completely.

How to hand pollination done on eggplants?

Eggplant is self-pollinated, but if you find that the eggplant has fallen out, it may be due to lack of pollination. Self-pollination usually occurs due to the movement of the eggplant due to wind or rain in very hot or humid weather. Self-pollination usually does not occur during the temperature process, so you need to act as a proxy and pollinate the eggplant to get the fruit.

Artificial pollination of eggplant is very simple and can be done immediately. What kind of artificial pollination can be done?

Take the clean brush. Now use this brush to pollinate your eggplant. Move this brush into the eggplant flower. Repeat this process for all the flowers in the eggplant. This will help the pollen reach the pistil, which means it can act as a pollinator for the eggplant.

Another form of hand pollination can be to simply touch the plant to make it vibrate. These vibrations help the eggplant to pollinate and bear fruit. However, it is much more effective to pollinate plants with a brush. Remember all the above to get a healthy harvest and prevent premature flowering. Always pay attention to changes in weather conditions and their impact on your plant.

Also Read: Why My Eggplant Leaves Turning Yellow and Curling

Problems with eggplant

Your eggplant flowers can be dropping off if they do not get sufficient water or pollination of eggplant cannot occur. Lack of water can be dried your eggplant flowers and fall off, you can prevent it by watering your eggplant twice a week and moist the soil around 6 inches from the surface of the ground which can help the roots of your eggplant moist in the soil.

Another cause for flower dropping in eggplant is lack of pollination. So hand pollination can be done by vibrating each plant to transferring the pollen from male to female parts of the eggplant flower.

Conclusion

You have to take specific measures and control to protect the eggplant flower from falling off for better crop yield.

How Often to Water Jade Plants?

The Jade plant is commonly known as Crassula ovata. Lucky plants, money trees, and money plants are succulent plants with small white or pink flowers. It is native to the province of South Africa and commonly as a houseplant worldwide. The jade plant needs little water and can survive in indoor climatic conditions.

This jade plant has sturdy branches, smooth, shiny evergreen trees, which can grow in pairs along the branches. The leaves are dark green, but some can also be yellow-green. In strong sunlight, the edge of the leaves of some varieties can be displayed in red. The new buds on the stem have the same color and texture as the leaves turn into woody brown with age.

Jade plants are also known for their ease of propagation, which can be achieved through cuttings and even leaves falling from the plant. The Jade plants can be easily propagated and their success rate is higher than cuttings. Propagation is the main breeding method for Jade plants. The branches of wild Jade often fall off and these branches can take root and grow into new plants.

How often to water jade plants?

Improve growth of the jade plant maintains the watering schedule. Keep the jade plant in a clay pot and water every 10 to 14 days. In plastic pot water the jade plant about every 2-3 weeks.

They don’t like to seat in wet or moist soil. So the succulent of jade plants holds the water in their leaves. While watering, water it thoroughly and excess water should be well-drained. Don’t water again before the mix dries completely.

Here are the few factors to consider while watering the jade plant

  • Soil
  • Light
  • Temperature and
  • Fertilizer

Which type of soil is used for a potting mix for the jade plant?

Remember, the roots of succulents need to dry quickly.

Ordinary potting soil is usually sufficient, but it will stay moist for a long time.

 If you use succulent, well-draining soil, you may need to water more than ordinary potting soil.

You can also use quick-drying mixtures or modify conventional potting soil with inorganic substances such as perlite and pumice to increase drainage.

I found that a mixture of sandy loam, organic matter, and peat provides good growth conditions. Play with potting soil and get high-quality succulent soil.

If you planted your jade plant in an outdoor flowerpot, please water it every 10-14 days. The leaves should be thick. When the leaves are white and wrinkled, it is time to water them. Listen to your plants.

What did he say? No Before deciding to plant Crassula ovata plants in a new container, remember that they like to hang slightly from the roots.

Make sure that the pot has drainage holes. Put enough drainage material in the bottom of the container. This will help to drain the excess water from the root. Overwatering can cause root rot.

The jade plants are grown indoors as indoor plants also require well-drained soil. The most important rule applies when watering indoors, don’t water too much. If you water the jade every 2-3 weeks, the plants will get better. Plants are strong and resilient. The main reason for your failure indoors is root rot. Excess water can cause rotten roots!

How much the jade plant requires sunlight?

With direct sunlight, your jade plant can survive?

Yes, it is! If you allow your jade plant to sunlight for four hours every day then it will grow strong and thick.

I suggest placing the jade plant next to the south-facing window so that it can get enough daylight but not too much sunlight. If you still need sunlight, you can consider a grow light.

You may not be wonder about your jade plant become taller.

If the high amount of sunlight receives by the jade plant can be critical for its survival.

As an outcome, the jade plant tends to stretch out when it does not receive enough light.

Be careful about the plant while the leaves and stems are full of water.

This plant is very sensitive, if sunburns the leaves of the jade plant can turn yellow and brown. So the severe sunburn can be fatal to the jade plant.

As the Temperature Change, How often to water the jade plant?

Jade plants can withstand a variety of temperatures, except for freezing temperatures. It works best at day temperatures of 65 to 75 degrees Fahrenheit (18 to 24 degrees Celsius) and night temperatures of 50 to 55 degrees Fahrenheit (10 to 13 degrees Celsius).

The temperature in winter usually drops, which will kill your Jade plants. If possible, take the plants home and water them once or twice a month.

High temperature, dry air, and colder temperature will change the amount and frequency of watering.

 You’re not picky about temperature, but never let the temperature drop below 50 degrees Fahrenheit.

 High temperature and dry air will dry the potting soil. The lower temperature keeps the soil moisture longer.

 Also, note that your jade plant will sleep in winter. Water only when the leaves are drooping or wrinkled.

Also Read: 9 Best Black Succulents those are Incredibly Beautiful

Location

If your home is not too humid, jade plants will dry out quickly. You may need to water it every 5 to 7 days. If you live in a humid area, you may only need to water it every two weeks or less.

If you think your jade plants are more suitable for higher humidity, I suggest you spray the leaves in the morning so that they can dry before the cool night.

Fertilizers

I use balanced water-soluble fertilizer with that you can fertilize your jade plant in spring and summer growing seasons. Don’t fertilize in the winter season.

It is best to give organic fertilizer to jade plants in an appropriate amount every six months.

Use liquid fertilizers which are designed from cactus or succulent plants, because it has less nitrogen than regular houseplant fertilizer.

 Only fertilize the soil when the soil is wet because dry soil will damage the plants and excessive fertilization will produce salt. Overfertilization in the ground, you can also burn jade plants.

We recently tested this pre-formulated fertilizer with a slow release rate. We think this is great because you don’t have to think about quantity and time.

Add succulent fertilizer for plants and booms then fertilizer will work automatically.

How much and how do you water jade succulent?

  • Water your succulent rigorously and permit excess water to drain out through the hole.
  • Place the pot in a plastic container.
  • Fill the container with filtered or distilled water.
  • Permit the potting mix to thread up the water.
  • If the plant stops wicking water then dump the excess water in the pot to drain.
  • Keep the grow pot in the existing space.

If you cannot choose bottom-up watering, water the plants slowly along the soil line. Try to drain water from the stem.

Be careful not to sprinkle water on the leaves, as this will promote decay. Excessive water jade plants or any succulents must never stand in the water.

Also Read: Lavender Farming Guide: How to Grow Lavender with Maximum Productivity?

Underwatering jade plant

It is better but a little thirsty and never permits the potting soil of your jade plant to dry out completely.

If the plants are dried out or under watered then the leaves of the plant must be wrinkled, limp, and start to drop off and the remaining may grow with brown spots.

Roots begin to dry out and it will take time to recover.

What can you do with the jade plant?

Water the plants gently to allow the potting soil to absorb some water.

Soaking and pouring the potting soil will only cause the problem like edema.

Overwatered the jade plant

Watering the jade too much will cause the branches to become elastic and fall off. The leaves become moist and soft, the roots may begin to rot.

Consider growing plants in the water for a long period. Use fresh potting soil when transplanting. After transplanting the plants, stop watering for about a week then pour the water thoroughly.

Let the soil dry completely before watering again. Do not fertilize for at least four weeks after transplanting.

If a diseased root of jade is found, cut off some healthy leaves or stems for propagation after transplanting. If your mature plants cannot survive, this will ensure that you have alternative plants.