How to Grow Organic Potatoes in Your Garden?

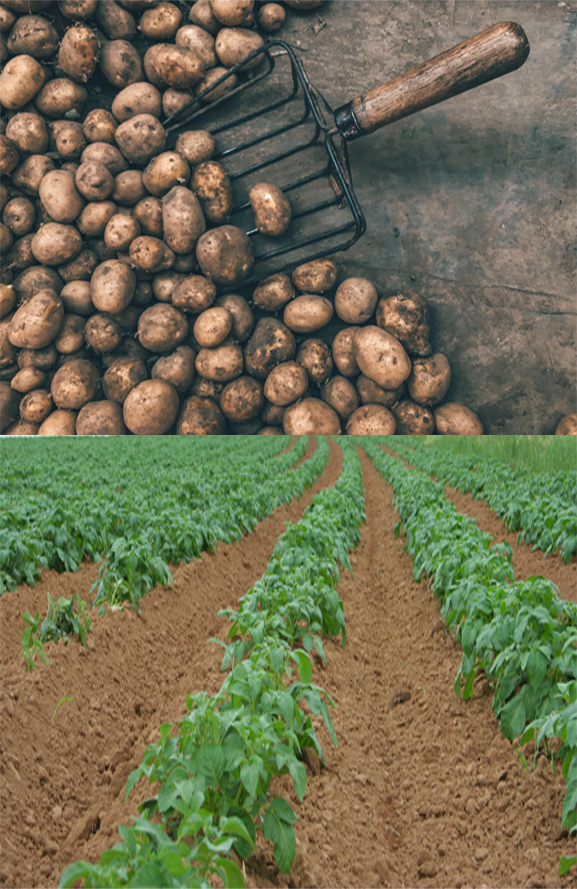
Growing organic potatoes in your backyard need to take few cautious attention while soil preparation, selecting early producing disease resistant potato varieties with the usage of natural fertilizers, row covers, crop rotation and if needed, the careful applications of organic pesticides for the growth of your garden.

Organic potatoes can be grown without pesticides or synthetic fertilizers. Potatoes can be grown neither in cool weather or freeze nor above 80 degree Fahrenheit which decrease tubular production. Early producing varieties can give a good crop before enhance the diseases and insects. Best varieties to start with include Irish Cobbler, Red Duke of York, Norland, Orla, and Yukon Gold.

Site and soil

In the area where the sunlight can falls at least six to eight hours in that potatoes should be grown with a basic fertility and well drained. Planting plants in well drained soil rich in organic matter can avoid few diseases such as green manure are sown earlier in autumn, sowed in the field before sowing, or composted during sowing.

In acidic soil potatoes can grow well and not easy to get sick. Soil can be more acidic due to natural sulphur. To know your soil pH test contact your county extension office (ceo).

Potato plant needs fertilizers but not too much which cause leggy, disease prone growth. Add basic required amount of compost, or while planting dig in a small amount of natural fertilizer or organic poultry manure. After planting, second application of fertilizer can improve yields.

Full size tubers can be difficult to form heavy clay soil. It should be the spot where from past 2 years there is no crop of potatoes, pepper, tomatoes and eggplants to prevent the soil borne diseases.

Planting

Early season varieties can be planted as soon as soil can be worked when its temperature reaches 40 degree Fahrenheit. Mid and late season varieties can be planted before the last weeks of late spring frost. You can plant only those seed potatoes which are certified disease free. These are available in garden centres, nurseries, and catalogs.

For early potatoes, laying your tubers eye side up in a cool and dry place in a container for 1 to 2 weeks, until the eyes sprout. Just plant the tubers whenever you’re ready. The larger potatoes can be cut in the form of 1 to 3 eyes per piece and for smaller potatoes can be planted whole. Be sure that the cut pieces of potatoes can be place outside for at least 24 hours before planting due to that cut sides callous over and they don’t rot.

Also Read: Potato Farming Techniques

There many methods for planting potatoes in your garden

Planting in trenches: cultivate a trench of about 7 to 8 inch and place the potato in 12 inches apart and cover with four inches of soil.

Planting in individual planting holes: drill a hole of about 7 to 8 inch deep and wide, keep the potatoes in a hole cover them with four inches soil.

In containers place the six inches of soil mix them in a bottom, keep the potatoes in an upper layer of the container and cover with a four inches of soil.

Growing potatoes

Potatoes can be grown in your garden is very easy and it needs one inch of water per week. You have to hill your potatoes regularly to keep that area watered and weed free. If you’re altering your soil with compost, won’t require fertilizers. If you’re not amended the soil with fertilizer then use organic fertilizer while planting time and follow the instructions of the product how to use. When the foliage of your soil reaches 12 inches then add soil to the top of the trench or hole leaving behind 4 inches of foliage exposed. You have to do this for every couple of weeks.

Pests and diseases

Few common diseases and pests for potatoes are including:

Colorado potato beetle: larvae, handpick beetles, and eggs from plants

Flea beetles: make the area weed-free so you don’t provide cover for flea beetles, spray with insecticidal soap

Leafhoppers: burst with water from the hose

Aphids: burst with water from the hose

Scab: plant resistant varieties, crop rotation

Late Blight: clean up previous season’s foliage and tubers, plant resistant varieties, crop rotation

If you have above mentioned pests in your garden, it is preferable to cover your potatoes patch with a floating row cover to avoid problems.

Also Read: Growing Your Favorite Peanuts or Groundnuts

Harvesting

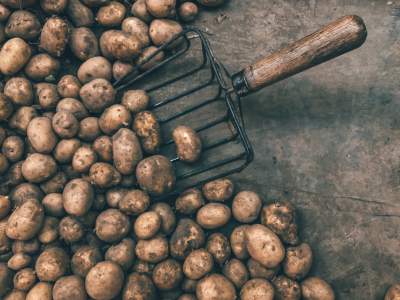
At any time of the year, as long as you see flowers on the plants, you can dig up young potatoes. If you are growing potatoes for storage, let the leaves turn brown. The best way to harvest potatoes is to use a digging pitchfork and start from the outer edge of a trench. Try to get the fork as deep into the soil and lift to collect potatoes as much as possible. You can save garden seed potatoes year after year, Just store healthy tubers in a cool, dry place.

The good news is that over time, you will end up with a variety of potatoes suitable for your garden environment. To store potatoes, store them in a dark, cool, but not frost-free place with little moisture. Do not wash them before storing, let them sit for a few minutes. A few days after harvest, allow the soil attached to the tubers to completely dry out.

Usually the one plant produces two to ten pounds of potatoes.

Also Read: Sweet Potato Farming Information Guide

What is Mango Farming all about – A Complete Guide

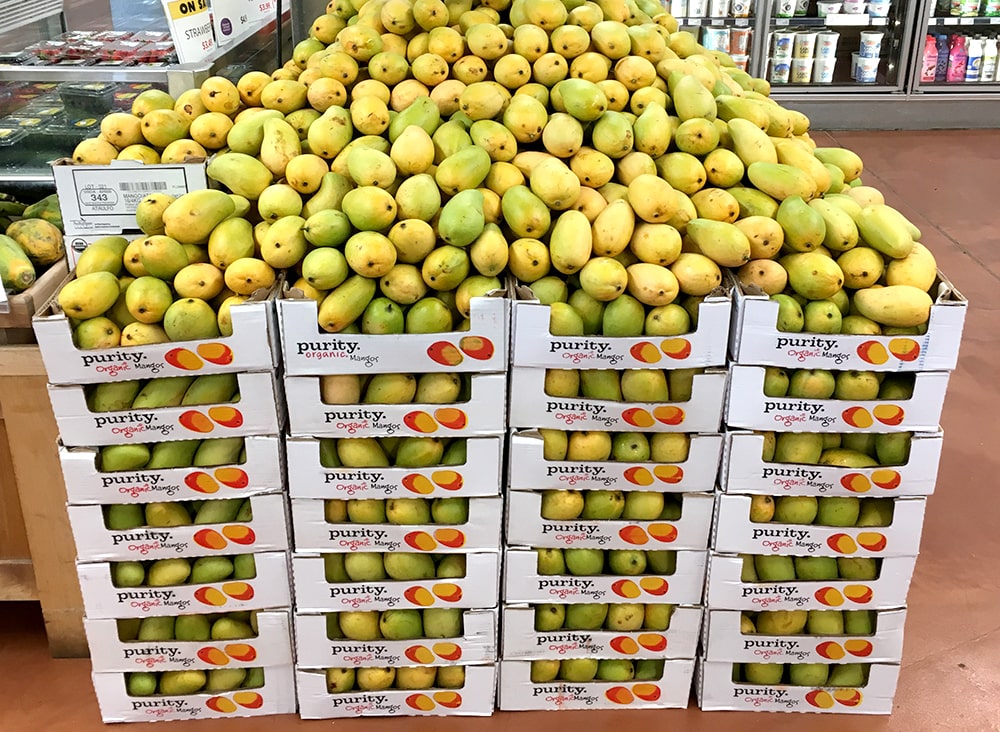
Do you know what is mango known as? Aam, as we call it in India is crowned with the title of King of Fruits. Mango Farming is the most dominant and money-making venture in the world. 

It is loved and relished for its taste, appearance, and low upkeep cost. The perk of cultivating mango is that it can be consumed at any stage. 

Like the raw mango has a delightful taste as chutney, Aam Panna, pickle, sauce. A full grown, mango can be consumed as shakes, juice, jelly, ice-cream, and desserts.

India exports a huge quantity of mangoes to the USA, Europe, and Middle-East. Mango farming is the most money extracting fruit grown in the Indian sub-continent. 

If you want to start your mango farm, you need to gather all relevant about its cultivation. Here, is an outline of important steps to be executed to ensure good mango production.

Types of Mangoes

Here is a list of mangoes with their place of origin. Let’s get a quick look through it:

  1. Alphonso- Ratnagiri, Maharastra
  2. Kesar- Junahgadh, Gujarat
  3. Dasheri – Lucknow, Uttar Pradesh
  4. Himsagar and Kishan-bhog, West Bengal
  5. Chausa- Uttar Pradesh 
  6. Safeda -Andhra Pradesh
  7. Totapari
  8. Amrapali
  9. Langda

Sweetest mango variety

Sweetest mango varieties

For all the beginners and mango lovers, it is difficult to figure which the best variety of fruit among all. Carabao, the manilla mango is the best and sweetest mango in the world.

However, if we talk about Indian mangoes, Alphonso, the king of all is the best and sweetest mango among all. But don’t forget that mango itself is a sweet fruit loved by all. Every variety is sweet and unique in its way.

Requirements for mango farming

Mango can be planted through seeds or by vegetative propagation. The propagation is carried out through techniques like veneer grafting, epicotyl grafting, and inarching. 

Surely, vegetative propagation is a rapid process of germination. It should be carried out through grafting trees.

The spacing of mango trees

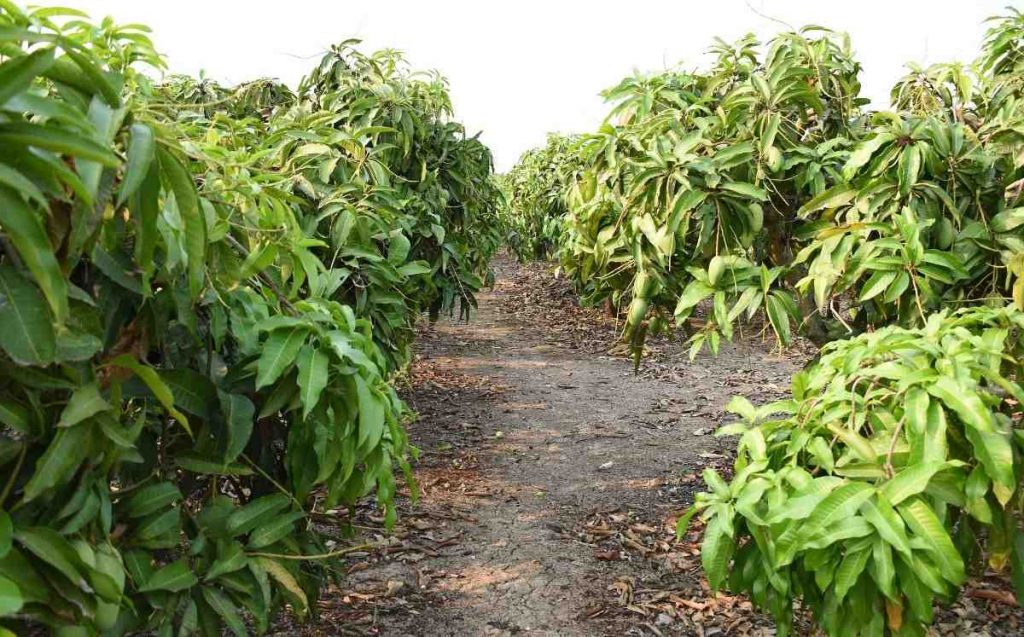
The spacing pattern of the trees should be 10 m * 10 m. This is the ideal pattern to be followed to ensure a good yield. 

The mango trees are tall and wide. So, they require adequate space to expand themselves. If you compromise with its space, the growth of the tree would be hampered.

As a result, you will be deprived of a desired and profitable yield.

Mango plants training

Training mango plants is an essential step to ensure the proper shape of the fruit. It becomes unavoidable in the case of low branched grafting.

The plant should attain a minimum height of 1 meter for training to be executed well. Regular trimming of branches and leaves ensures th healthy growth of the plant.

The plantation is disease-free and the energy of the plant is centered towards the growth only. Therefore, a continuous training process is maintained to get the desired fruit quality.

In mango farming, it is a mandatory step.

The season for mango plantation

For rain prone areas, the plantation is done in July-August, for irrigation-based areas it is carried out in February-March, and at the end of rainfall in rain prone areas.

Rainfall is a good factor to enhance the growth of the tree. As heavy water intake is needed for the thriving of mango trees.

Also Read: Custard Apple Farming Was Never So Fruitful – Read This Guide Till The End

Fertilization of mango trees

The process of fertilization is carried out in 2 doses. First one, immediately after planting, and the next in the young plants. A spread of urea (normally 3%) is advised in the case of sandy soil before the plant starts flowering.

Soil and light requirement for mango seeds

A mango seedling requires a good amount of sunlight but not direct sunlight. For nurturing the plant, a minimum of 6 hours of sunlight is required and 8-10 hours of sunlight will work wonders.

When planting mango seeds it should be kept in mind, that a good drainage system should be there. Like on watering the soil could flush out excess water.

In summers the plant needs water in excess, do remember excess doesn’t mean water overflow. The water should be well enough to keep the soil hydrated.

How to sprout a mango seed

To sprout a mango seed you need to remove the flesh from the fruit, the seed needs to be cleaned, to ensure that they are ready to plant. 

Now, with the help of a sharp knife, chop off the edges of the seed. Ensure the visibility of the pod inside.

Take a container of 11 liter capacity. Place some soil beneath the container providing an outlet at the edge. For settling the soil fill some water in it.

The container is ready to plant the seed inside placing the pointed side downwards. One-fourth of the pod should be popping out of the soil.

Keep watering the seed and place it in a warm place ensuring sunlight but not directly.

Germination time of mango seed

The mango seeds germinate in a period of 2 to 4 weeks. A fully grown-up tree bears fruit in 5 years. These mango seeds germinate at a temperature range between 4-40 degrees.

mango seed germination

But a higher range of temperature is ideal for germination. Seeds restore water in them, dies when dry. All the favorable conditions facilitate the process of germination.

A small bunch of leaves shoots up and the roots start getting firm deep into the soil.

Planting mango seed

A suitable temperature, enough sunlight, and adequate water content is a perfect recipe for  healthy fruit. When you have all the necessities for mango farming, you can go for it.

You need to have a spacious place for the mango canopy. A mango tree has a stature of 90 feet with long leaves. So, it is recommended to plant them separately allowing proper space for them to thrive.

How long does it take a mango tree to grow?

This is the most common query among mango farming. Beginners are curious to know how long does it take a mango tree to grow? Before proceeding, this question needs to be answered.

From planting the seed in the soil to ultimately bearing fruits, it is a package of 5 years. It takes 5 years complete for a mango tree to produce your favorite mango fruit. 

But a lot of rigorous hard work is required to nurture the mango plantation in these 5 years. Regular pruning of branches and leaves is necessary. Plus, after bearing flowers the water intake of the tree is around 26 gallons per week.

This should be maintained to prevent the tree from drying. The proper spread of fertilizers should be done to curb the spread of diseases.

The resultant is the delicious, tasty, and lip-smacking mango fruit.

Diseases infecting mango farming

Mango farming is threatened by aphids, bugs, and mites. Infections prevailing in the plantation can be witnessed in the form of webs on the leaves, white residue, or insects crawling over the leaves.

These infections need to be curbed in, timely before they hinder the growth of the plantation.

mango infecting diseases

Mango farming is prone to anthracnose, a sort of fungal infection. They can be checked by the use of copper-based fungicide. It should be used after 14 days of planting.

How to take care of flowering mango tree

Some of the flowers are formed through the process of self-pollination. However, few of them are pollinated through fruit bats, humming birds, and bees. It must be noted that all the flowering trees don’t produce fruits.

Taking care of a flowering mango tree is a must. Proper care must be taken of those trees who produced heavily during the previous season. 

They should be trimmed regularly. And should also provide more fodder to ensure a better flowering and fruit production in the present season as well.

The much-branched inflorescence needs to be detached or trimmed compulsorily. It ensures better flowering and fruit production.

In the regions where the evening temperatures trips below 30 degrees, these white creamy flowers become steady. On reaching the temperature range back, they tend to bear fruits immediately.

Mango yield per acre

The mango yield per acre varies. This depends on the quality of seeds sown and the good upkeep of the mango farming. Ideally, the yield ranges from 2.5 to 3 tonnes per year. Exceptionally, it can reach 9-10 tonnes per year.

Mango yield per acre

A good spacing in the orchard, among the trees, and favorable climatic range shoots up the yield of a mango farm.

Mango farmers must adhere to these 2 most important factors apart from other upkeep necessities. A little extra care can make you earn higher profits.

When to harvest mango?

After flowering and bearing fruits, now the point arise when to harvest mangoes. The tasty tropical fruit of mango is grown in various parts of the world, favorable to mango farming. 

The harvesting of the fruit is directly proportional to the amount of care taken of the tree in the 5 years of the plantation.

On average a good harvesting time prevails after the completion of 100-150 days from the flowering stage. Generally, flowering ends up producing fruits and you can observe the fruit grow in shape and size.

harvesting mango

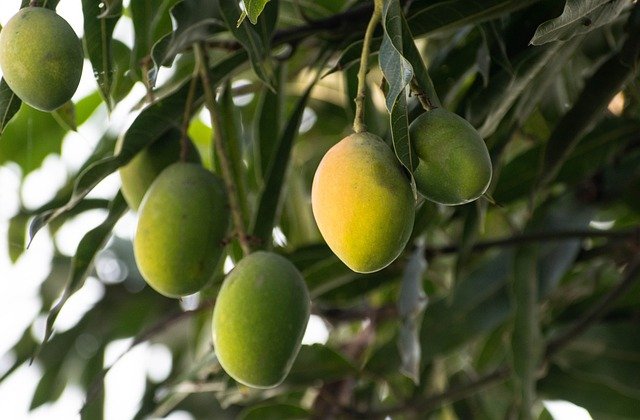
In 3 months, the fruits become ripe, this can be felt on touching the mango, as it becomes soft on ripening. The color turns into a proper yellow shade of the fruit.

Heavy fruit can be seen bulging downwards from the branches. This is an indication the fruit is ready to pluck.

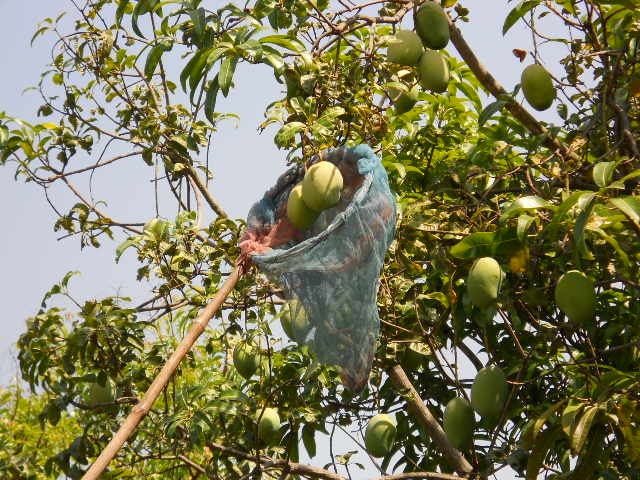
Now, you have 2 ways to get the fruit down either shaking the tree or thrashing the branches to chop off ripen fruits.

Shaking tends to damage the roots and branches of the tree. Also, unripe fruits get disturbed as well. It is highly recommended to thrash the branches by the use of a rope or stick.

This the best way out to spank down your favorite mango fruit. The fruit is ready to explore the markets.

Must Read: Papaya Farming Ultimate Guide

Transporting mango to markets

Once you are done with mango harvesting, it is time to get a reward for the 5 years of hard work done. Proper steps should be taken to avoid any sort of damage to the fruit during the transit period.

mangoes in market

For transporting mangoes, the packaging is done in two ways either using a wooden crate or by using CFB boxes. However, for long-distance transit it advisable to store mangoes in CFB boxes as it is a perishable item.

Wooden crates can hold the mangoes for 8 days maximum. After that, they tend to perish.

When transporting to local nearby markets, wooden crates are the best open as they keep the fruit safe and fresh. And the fruit is ready to consume. 

Is mango farming profitable?

To find out the profit ratio of mango farming, let’s calculate the cost of production involved. The cost of the land stands on whether it is owned or rented.

Then comes the plantation cost. This comes to around 2 lakhs per acre per year. And it gives a normal yield of 2.5 -3 tonnes or even up to 9-10 tonnes.

It is a profitable deal. A deal with huge profits. It is one of the most profitable ventures in horticulture. Profitability has a direct relationship with demand for the product in the market.

Mangoes are high in demand. The reason for this is the limited availability and good taste. This fruit is relished by everyone.

This tropical fruit is an evergreen fruit and never will lose it’s charm. Nothing can beat the demand for mango fruit.

Yes, you can say it is a tedious job but the hard work is paid off well. Whether its appreciation in taste or money, a mango farmer lands in huge profits after selling his mangoes in the markets.

People wait for those delicious mangoes in the market every year for their limited availability. So, the idea of mango farming is a sure shot profit deal. Crack this deal and enjoy the benefits.
Growing Mint – Ultimate Guide

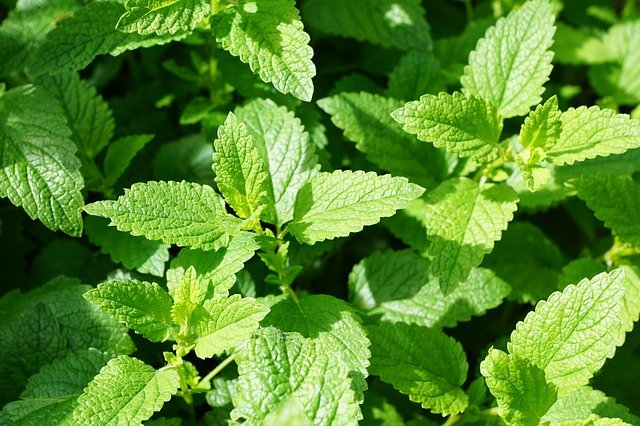
Mint is a tasty, versatile herb used to flavor a fruit salad, lamb or fish dish, or even an iced tea or cocktail and you should know how to grow mint. Mint comes in various flavors, each of which is simple to care for and can last for several years if properly cared for.

However, if left to grow unchecked, the plant may become invasive and compete for nearby plants’ resources. To grow mint, you’ll need to either plant it in containers or find a way to keep its roots from extending too far below ground. Know about how to grow mint and make your garden greener.

List of things you should take care of for mint plant

Light Mint grows best in part shade, but it can be grown in full sun if watered regularly. Planning to know about how to grow Mint at home should include the following steps.

Know about the things you should consider before growing Mint. 

  1. The soil

Mint grows best in a thick, slightly acidic soil with a pH of 6.5 to 7.0.

If the soil is deficient, top-dress with the organic matter once a year and add an organic fertilizer after shearing in the middle of the season. You can also grow Mint from cuttings.

  1. Source of water

Mint needs consistently moist soil with good drainage. Mint plants love water, but they can’t tolerate wet feet or soggy dirt.

It’s probably best to water the plants first thing in the morning so that they have plenty of moisture by the time the afternoon sun arrives.

  1. Humidity and Temperature

The hardiness of your mints can vary depending on the species, but they are very adaptable. Peppermint is a hardy plant that can withstand the cold in USDA hardiness zone 3.

Spearmint is the best heat-tolerant plant and can be grown in zones 11 and 12. Increase humidity by m if you’re raising Mint indoors. You should know how to care for the mint plant.

  1. Type of fertilizer

As new growth emerges in the early spring, feed container mint a healthy, all-purpose liquid fertilizer. After that, fertilize every four to six weeks for the rest of the growing season. Potted plants that are constantly watered lose nutrients more quickly.

How can you grow Mint?

Mint is a fast-growing plant that prefers an organically rich, well-draining soil with a pH of 6.0 to 7.0. USDA Hardiness Zones 3–8 are suitable for the plants. Plants prefer full to partial sun, and variegated varieties can need shade from the hot afternoon sun.

Feed with a portion of all-purpose, water-soluble plant food, such as 10-10-10, until new growth emerges in the spring (NPK). If required, fertilize again in the middle of the growing season. Harvest leaves regularly after the plants have formed themselves.

How can you grow plants in containers?

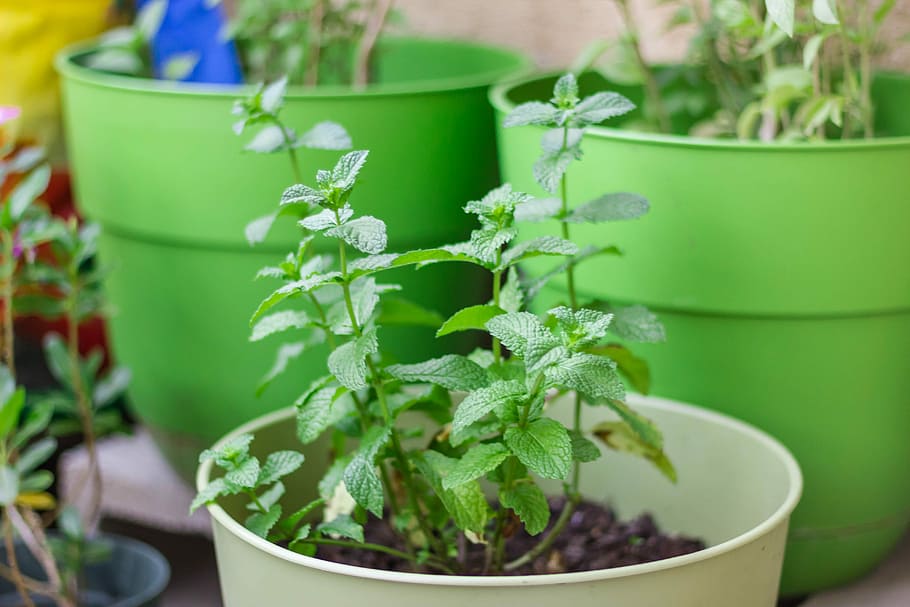
Mint plants in containers should be spaced 12 to 24 inches apart in the garden to keep growth under control. You can use wide containers with a diameter of 8 to 24 inches and a similar width.

The boxes should be sunk into the garden beds, with the top two inches of the rim remaining above ground. This prevents runners from escaping and establishing new plants in fertile soil. To boost drainage, amend the soil with 1/3 aged compost or other rich organic matter and 1/3 landscape sand.

To avoid the roots from resting in water, make sure there is plenty of material covering the drainage holes in the pots, such as coir, pebbles, or broken pottery. To prevent the roots from spreading through the drainage holes, turn the banks in the ground every 14 to 28 days. 

Must Read: How To Grow Cilantro

How can you take care of your mint plant?

To keep the plant from taking over, bury some metal flashing or landscape edging 8 inches deep around it. Mulch potted and in-ground plants with a 2-inch layer of straw to keep weeds at bay and maintain moisture.

Mint plants can survive a light freeze, but their top growth may die back in the winter. If your winters are rough, cut back stems to the ground in the fall and cover with a 2-inch layer of mulch. You should also be aware of how to grow Mint at home.

Can we grow the mint indoors?

If necessary, add 1/3 of landscape sand to help with drainage. You should know that how to grow Mint indoors. Ensure that the bottom of the pots has plenty of drainage material, such as broken pottery, gravel, or pebbles, and that the soil is moist but not wet.

Fertilize in the spring and again in the middle of the growing season with an all-purpose liquid plant food like 10-10-10 (NPK). Give your containers some afternoon shade to avoid heat stress and ensure a consistent harvest. Plants in containers should be divided every 3 to 4 years to keep them healthy.

How can you take care of your mint plant?

Keep the following tips in mind for fast growth and a plentiful harvest.

  • Enable the soil to remain moist; these plants need a lot of moisture.
  • In places where the sun is hot in the afternoon, have some light shade.
  • Plants can be kept from spreading by growing them in containers or using landscape barriers. The mint growing season is autumn.
  • To attract pollinators, encourage some plants to flower in the garden.
  • To help plants conserve moisture, cover them with a 2-inch layer of mulch.

Harvesting of mint plant

If you’re starting from seed, this should take about two months, but if you’re buying nursery plants, it should take less time. To avoid weakening the plants and bringing them into decline, never harvest more than one-third of the plant at a time. You should be aware of when you can start harvesting Mint.

As required, snip sprigs and leaves. If you don’t harvest your Mint regularly, shearing it in the middle of the season would greatly help it. You’ll probably see the stems getting longer and the leaves getting shorter at some point. Now is the time to cut the plants back by one-third to one-half of their original size. This will motivate them to send out new messages.

Conclusion 

Mint doesn’t need anything other than moisture and fertile soil. It’s difficult to destroy a mint plant. If you let it, it will take over your backyard. To keep the plants lush with leaves, harvest or shear them.

Sow seeds outdoors in late spring or indoors eight to ten weeks before the last frost. Maintain a moist atmosphere before the seed germinates. Mint seed takes 10 to 15 days to germinate. Within two months, seed-grown plants should be ready to harvest. 

Top 10 Tips to Keep Your Laying Hens Happy Through the Winter

Do you think your flocks will be stressful during the first winter in the farmer’s shed?

You might be worry about unhappy hens, frozen water, lack of eggs and cold. With the help of few key details your hens will be laying eggs much of the winter, though the production may be slow. It’s important that you will take rest easily when you know your hens are warm and comfortable.

Keep your Hens Happy in Winter

1. Chicken does not need a heater

You don’t think of putting fire or heater in your chicken coop for winter warmth and don’t seal up the coop completely ventilation is requires to prevent moisture build-up, they huddle together for warmth in the coop.

Also Read: How to Start a Chicken Farm Business

2. Use deep litter to keep warm

This deep litter method is one of the ways to give bedding material to chicken coop to build up in a spring, summer and fall. So, in winter you have the composting material on the floor of the coop and the bedding material both will gives the heat to the chicken coop naturally.

3. Don’t lie down unless you provide supplement lighting

The sunlight affects the reproductive cycle of the hen. In early spring, when the sun reaches 14 hours a day, the chickens begin to lay eggs. When the length of the day reaches 16 hours per day, the maximum egg laying appears. This is a biological miracle and the ideal design allows the chicks to hatch in the spring and mature in the warm summer.

The chicks that hatch in the warm spring and summer are more likely to survive than the chicks born in the harsh winter, which gives commercial egg producers and some backyards. Poultry farmers brought in to provide lighting for their houses in the dark winter to prevent chickens from laying eggs for as long as possible.

4. Feed them corns at night to keep them warm all night

Corns are the favourite food for the chicken. So, every evening time in winter feed them with cracked corns before bed and give them something with that digest their food, during the night keep it warmer and it will be happier with full bellies.

5. Hang a head of cabbage as a toy for the chicken

As like human beings chickens can be bored and stir crazy in winter. Make sure that seem to be enjoys a head of cabbage hang to string in between the coop. They go wild picking it with this simple trick you can make your chickens happy.

6. Make them nice sun room

Are you worried about your chicken they don’t have enough space in the coop, you can make the green house style structure cover it with a clear plastic. They will wander out with it and get a more space on nice days and you will take rest easy knowing they are not too restricted and getting some fresh air.

7. Combs and Wattles protects from frostbite through petroleum jelly

In winter season the combs and wattles are prone due to frostbite. So that protect them from this frostbite smear their combs and wattles with petroleum jelly. Hence, if you’re chicken can frostbite nothing serious only the tip of the combs will be affected and it can be look icky?

8. Chicken don’t like snow

In generally if the temperature decreases about the 20 degree Fahrenheit range chicken would not like to walk into the snow. You can disperse on the ground and it will make tastier for them. When the temperature increases nearly 30 degree Fahrenheit then they won’t be walk on the snow as much.

Also Read: The A to Z of Commercial Sheep Farming – A Step to Step Guide

9. Chicken don’t have to be put inside in bad weather

If the chickens are dont want to go outdoors, simply let them to do what they want. They head into their coops and there are harder than your thinking. They are not against the cold as the people assume. Don’t waste your precious time and energy trying to get inside during snow or rain.

10. Roosts are keys

The chicken sit curled together, this keeps them warm and also prevents them from cooling. The stall should be at least 2-3 feet off the ground. Therefore, please make sure that you have enough space for all the chickens to rest comfortably. Check with a flashlight at night when a bird is on the ground, there is not enough space.

Hope these tips can help you relax and make your chickens happy during the colder months. If you have not built a chicken coop before, be sure to visit other people in your area in winter to see with your own eyes how the birds adapt to colder temperatures.

How to Grow Squash – A Step-by-Step Guide

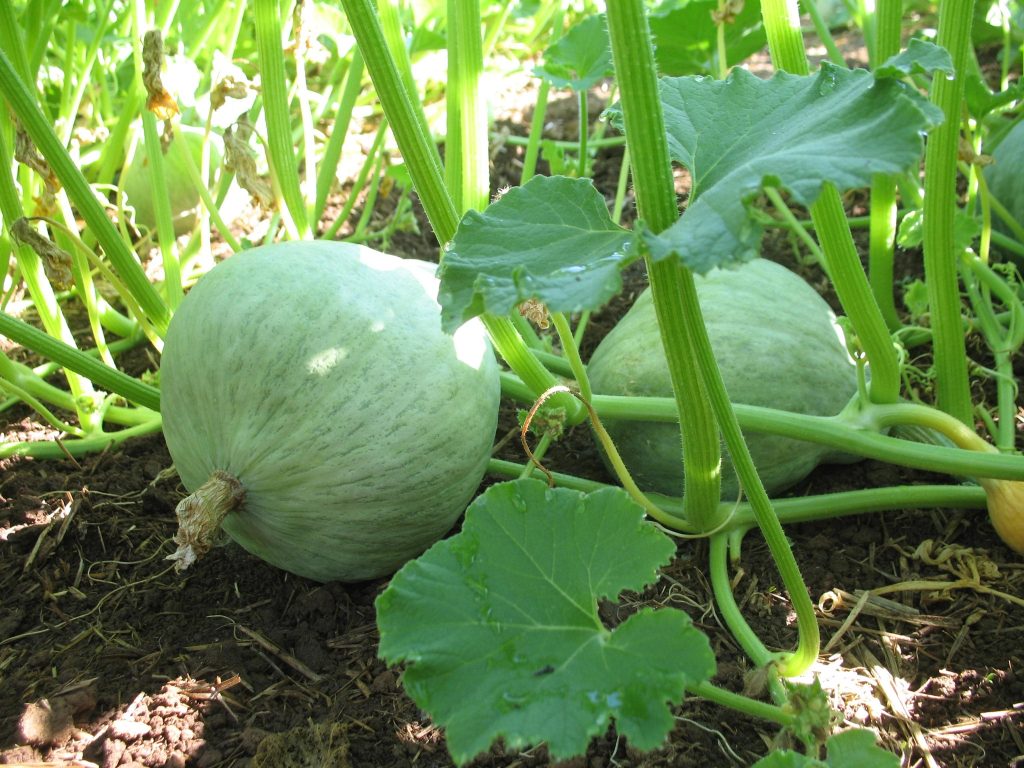
Squash is one of the easy veggies to grow in your garden or backyard. Squash can be grown easily in most of the regions of The United States. 

In this article, you will know everything about how to grow squash, varieties of squash, growing stages, and harvest period.  Before heading towards how to grow squash let us first know about its varieties.

Varieties Of Squash

Squash comes in many varieties which can be grown both in summer as well as winter. Few popular varieties of winter squash are as follows

Winter Squash Variety

Winter squash comes in dozen varieties, it can be kept for months after harvesting as it has tough exterior. 

  1. Butternut Squash

Butternut squash is a popular pick for cold weather dishes like soups and risotto. It comes in a shape of a bulb with tan yellow skin and orange fleshy pulp. Its taste is similar like pumpkin, sweet, and nutty. It grows on a vine and its taste becomes sweeter and richer as it gets ripe. 

  1. Spaghetti Squash

Spaghetti squash is the most trendiest among all the varieties. It has got shredded flesh that is the reason it is called as spaghetti squash. It is one of the healthy substitution of pasta, with low carbs. 

  1. Acorn Squash 

Acorn squash is also known as pepper squash. This squash has green exterior and yellow orange flesh. It can be used for roasting or stuffing and has mild sweet flavor. 

  1. Sweet Dumpling Squash

Sweet dumpling squash comes in much smaller size when compared to other squashes. It resembles a small pumpkin and can be used as a bowl for soups or stuffed with meat and other veggies. Its flesh is sweet and tender and tastes similar to sweet potato. 

  1. Red Kuri Squash

Red kuri squash has a tear top shape with orange skin which can be consumed once cooked. This squash can be best consumed when stuffed with rice, meat or vegetables.

Summer Squash Variety

Well, summer brings sunshine as well as new varieties of squash. These are harvested mush earlier than winter squash. The shelf life of summer squash is one or two weeks only. It is very soft and takes less time to cook. 

  1. Yellow Squash

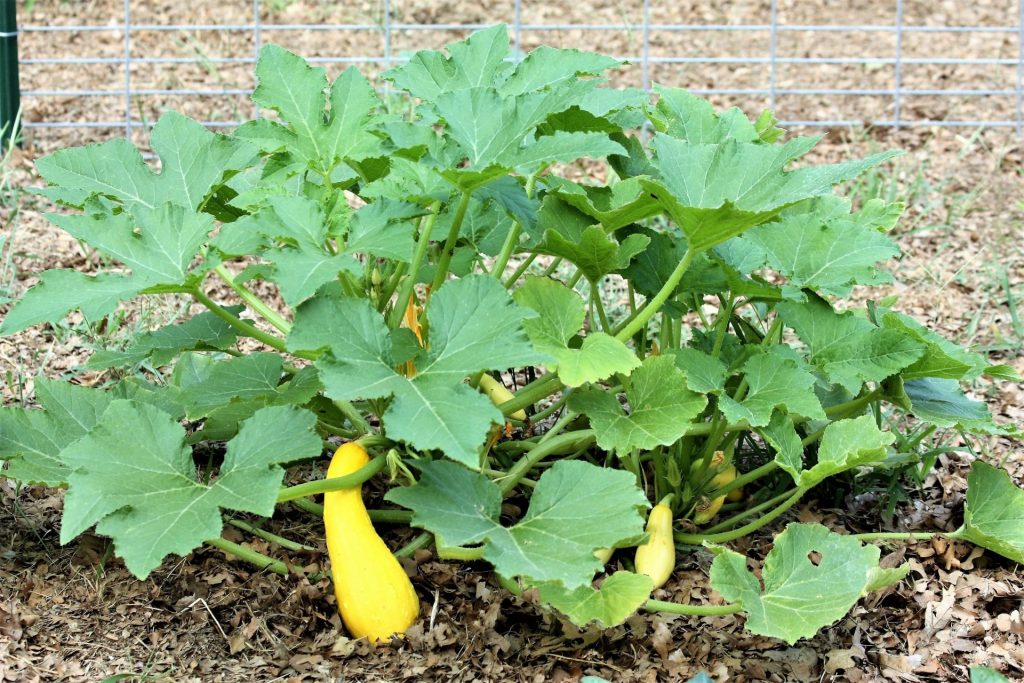
It has a bright yellow exterior and comes in two varieties which can be distinguished by the shape of its neck, straight neck or crooked neck. It has tender and thin skin that can be easily peeled and chopped. 

  1. Zucchini Squash

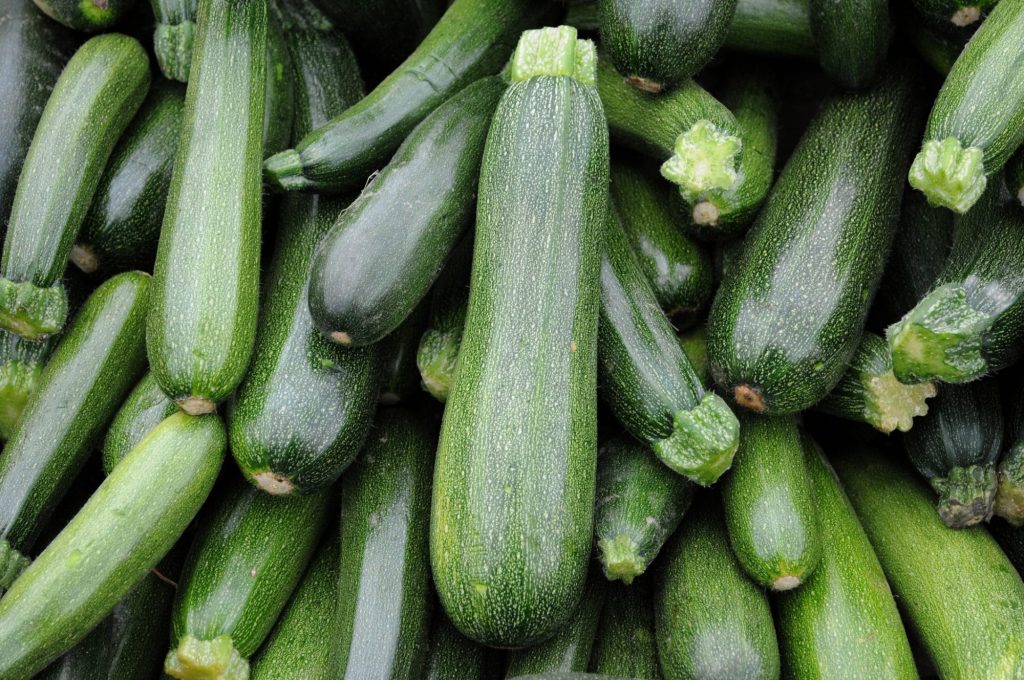
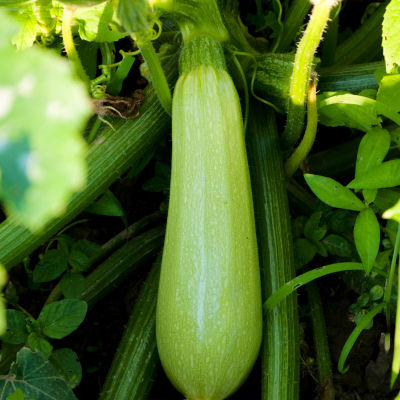
Zucchini is the favorite squash of all the chefs as it is perfect for grilling, baking, sauteing, and much more. It is dark green in color and most loved summer squash. It is the best low-carb substitution for noodles and fries. 

  1. Chayote Squash

This squash is originally from Mexico and resembles a lot like pear. Chayote squash is low in calorie and tastes similar to that of cucumber. It can be made in various ways which makes it versatile. 

Also Read: How to grow cauliflower: All The Information Regarding It

Planting Squash

Let us know about squash growing stages, what month to plant, how long will it take to grow squash, and when to harvest as well. 

If you are planting winter squash then you must know what month to plant. The best time to plant winter squash is after the last frost is over. 

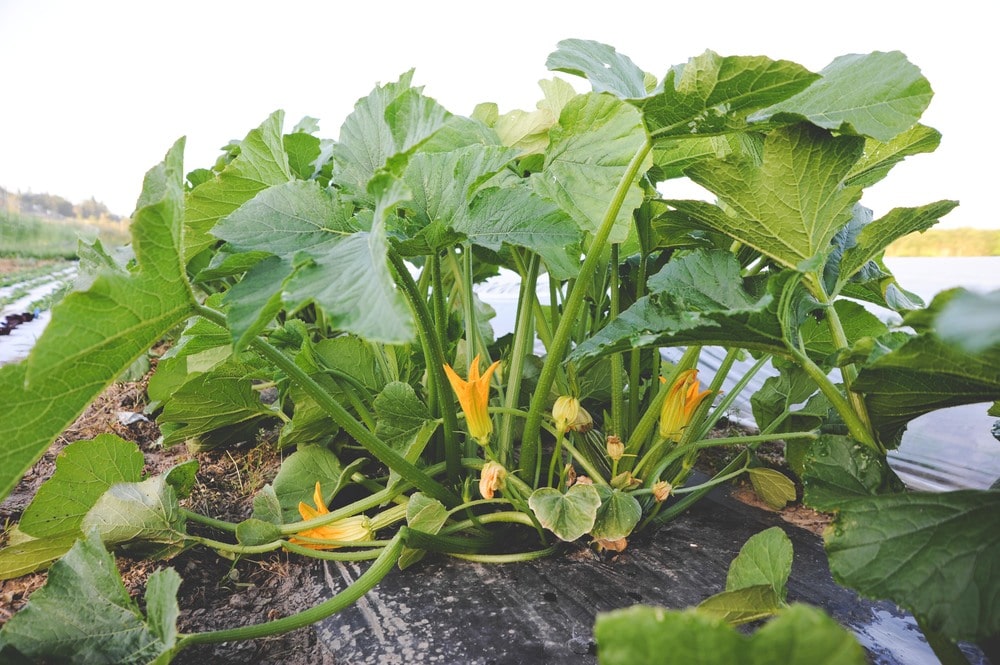
The first thing to be done is to make the soil ready for planting, you need quite open space as it grows in vine and spreads quickly. Spread at least 3 inch of compost and make the land ready. Make sure to provide nutritious fertilizer as well. Squash need full sun and good air circulation so choose the place accordingly. The condition for summer and winter squash are the same, except the harvest time. 

Here is the way on how to grow squash from seeds. Sow the seeds 1-2 inch deep in the soil and give a gap of at least 4-6 feet after every seed. The seedlings will emerge within 3-4 days of planting. 

After this is done now you will be eager to know how long will it take to grow squash. The plant takes 70-100 days to mature, but it depends on the type of plant and the weather as well. 

Harvesting Squash

Harvesting or picking squash is fun, its so good to see different varieties with different shapes and sizes. You can expect about 1-10 fruits from each plant, depending on the variety. Look for the below mentioned points before harvesting winter squash

  • Harvest after at least 50-55 days from the time fruit has set.
  • You should hear a hollow sound when tapped gently.
  • Harvest it before the frost arrive.
  • The rind should change from light green to tan.
  • Cut the rind with a short stub of vine attached. 

After harvesting the squashes need to be kept in a cool and dry place. Winter squash can be kept for as long as 1-2 months, they can even be used for decoration. Where as summer squash cant survive this longer. It needs to be cooked or consumed withing 2-3 weeks. 

Turnip Farming Information Guide

Turnip farming can be performed on commercial or personal scale very easily and with minimal efforts. Gaining much needed knowledge gets you ready to start. Check out this full guide on turnip farming. 

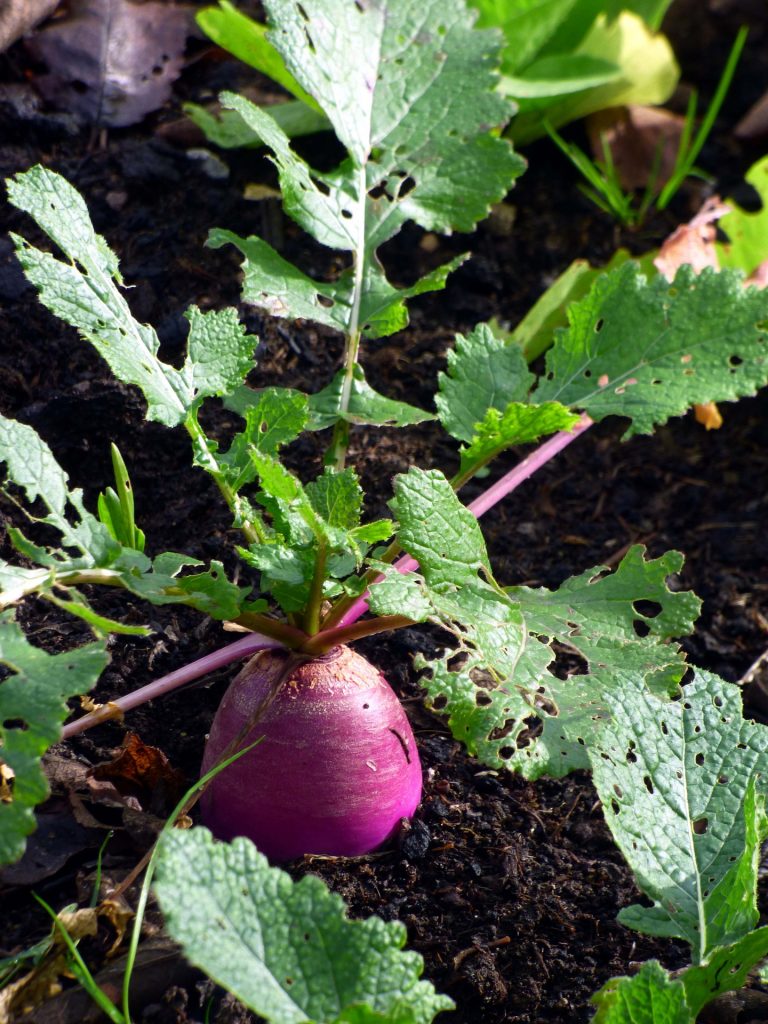
Turnips are cool weather vegetables and its botanical name is Brassica rapa. These are considered as staple food for humans and livestock too. They have a rosette of bright green leaves that grows from tubers or swollen roots. Turnips are consumed for their swollen roots and greens. Also, they are biennial but grown as annual.

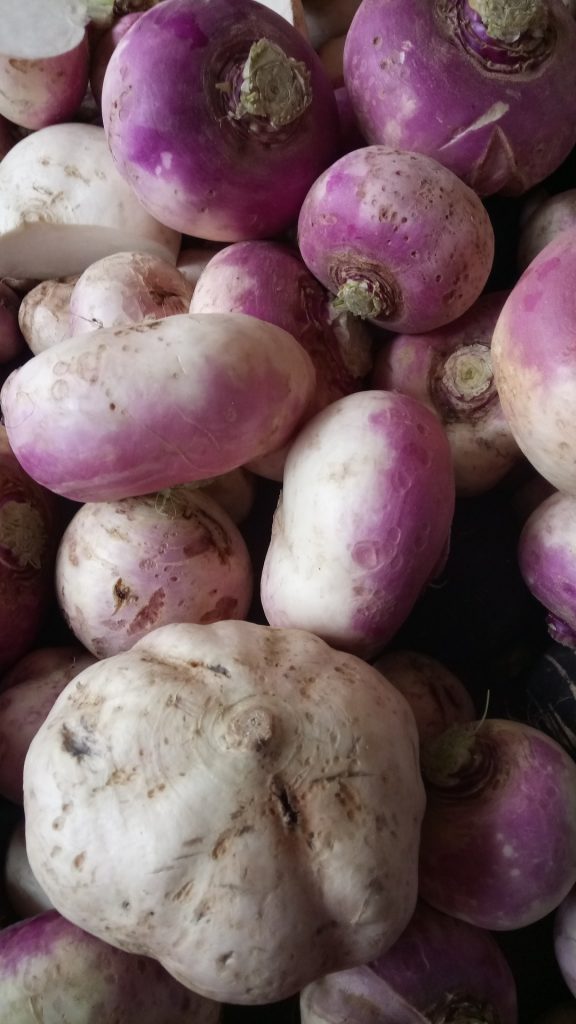
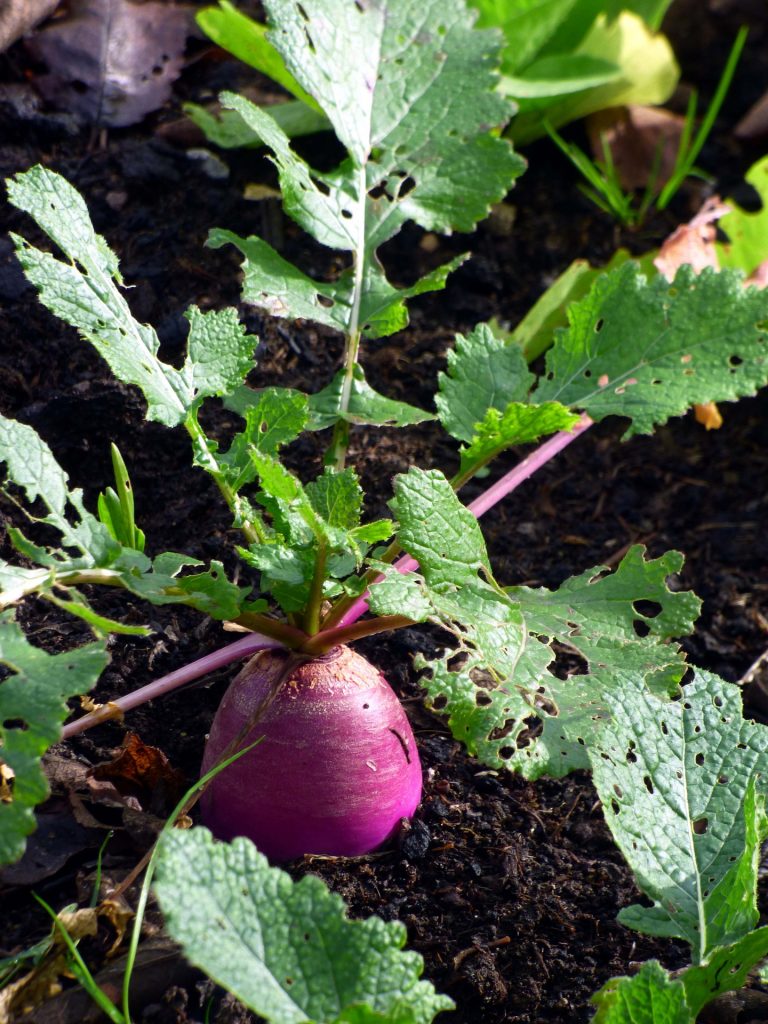
Most commonly found turnips are light purple in colour from top and white from bottom. However, more than 30 varieties of turnip are  found over the globe. All of these vary in shape, sizes, and colours. Some might taste as sweet as carrots and others might taste like a potato. 

Swollen turnip is eaten by people all over the world. It can be either consumed raw or stewed, roasted, boiled, mashed with other root crops to consume. Greens of turnips can be consumed too. People cook and eat them in the same manner as spinach as kale are. 

They generally grow in spring and fall.temperate climates are best suites for turnips. Therefore, they are mostly grown in the USA, UK, Poland, China, France etc. They have been grown and consumed for over 3000 years by our ancestors. 

It is advised to avoid hot summer weather for their growth. Turnips tend to become woody and bitter in hot temperatures. They mature rapidly and are very easy to grow in home gardens.

Turnips are considered biennials hardly. They are mostly grown by people as an autumn crop. 

As mentioned earlier, turnips can be fed to livestock too. Animals can be fed upon turnips after they are harvested. Or browsing animals can consume them in fields too. Few people plant turnips to attract deers to their fields.

Also Read: Sweet Potato Farming Information Guide

Varieties of turnip

There are various varieties of turnips. Most popular varieties of turnip are Purple top, Royal Gloss, Just Right ( 40-60 days), White globe( 57 days), Tokyo Express, Market express, Shogoin, and mild Hakurei. Best varieties in the case of greens are Alltop (50 days greens), Topper, Royal Crown (52 days) and Seven top( 45 days,greens). 

Yellow Globe produces golden turnip roots and is great for roasting. For upper midwest and canada, Green Globe and York Globe are the most suitable varieties. 

Health benefits of turnips

Turnip is full of nutrition and anti-disease properties. Moreover, the health benefits of turnip are immense too. 

  • Nutritional value-

1 medium turnip is laced with following nutrients-

Calories- 34g

Fat- 0.1g

Carbs-7g

Proteins-1g

Fiber- 2g

Sugar- 4g 

Cholesterol- 0g

  • Vitamins and minerals 

Calcium- 3% of daily value (DV)

Folate- 5% of DV

Magnesium

Potassium- 115% of DV

Phosphorus- 3% of DV

Vitamin C- 30% of DV

Turnip greens are also full of nutrition. Vitamin A and C are found in abundance in turnip leaves. One cup of greens contains 6373 IU of vitamin A and 33mg of Vitamin C. 

Health benefits

Vitamin C is helpful in protecting the body from free radical damage. To add to this, it increases iron absorption and regulates blood cholesterol. 

Vitamin K, on the other hand, prevents excessive bleeding. Vitamin A regulates eye, skin and lung health. 

Anti cancer properties Turnip is famous all around the globe for its anti cancer properties. It helps prevent growth and spread of cancerous cells. Also, turnips are rich in glucosinolates. Glucosinolates are a group of bioactive plant compounds. These compounds have antioxidant properties and therefore, reduce risk of various cancers like lung cancer, colon cancer, rectal cancer etc. 

Along with this, they are also enriched with flavonoids. Mainly anthocyanins are found in turnips and they are known to have anti cancer properties too. Plus, they lower the risk of chronic and degenerative disease. 

Control blood sugar Turnip swollen roots and greens are believed to have anti-diabetic effects. They can control metabolic disorders like high blood cholesterol, high triglyceride levels. Further, they increase blood sugar clearage and lower production of glucose from the liver. Also, they reduce the absorption of carbohydrates. 

Anti inflammatory– Many diseases cause inflammation in the body part as symptoms like arthritis, cancer or high blood pressure. Turnip can be helpful in such a condition due to the presence of glucosinolates. It breaks down into indoles and isothiocyanates which have anti-inflammatory properties. 

Protect against Bacteria– Turnip has antibacterial and antimicrobial properties also. Turnip ensures inhibition of bacterial or microbial growth in the human body. 

Weight management– It is a non starch edible, full of fibre, and has very low calorie count. Therefore, consuming this will help you stay full for longer periods and healthy.  

Promote bone healthMaterials present in turnip have the power to maintain good bone health. Vitamin K found in turnip helps in bone metabolism. 

Liver protectionConsuming turnip ensures lesser glucose production and thus less stress on the liver of the human body. 

How to grow turnips

First of all, you must be aware of when to grow turnips. Turnip growth months vary with region. For late spring harvest, you can sow seeds directly in your garden around 2-3 weeks before the average last frost date. For instance, in USA zone 2a, the best time for sowing seeds of turnip is august and September for autumn harvest. You can easily check out the best month of growth of your region. 

For autumn harvest seeds are sown in late summers. These seeds are generally sowed after summer crops of onion,squash, beans or sweetcorn. Seeds can be sowed in early autumn too to get a late autumn harvest.

They grow in temperatures ranging from 40F to 70F ( 7-24C). They must be reaped out before temperature exceeds 24 C. 

Next thing that you need to focus upon is the planting site. The place for growing turnips must receive full sunlight for maximum hours. Soil of the area must be well drained to ensure good growth and sweet and tender vegetables. If soil is heavy or clayey, you can fix it by adding sand in it before seeding. Remove any stones at the site to provide a bigger area for roots to expand. pH of soil must be ranging between 5.5 to 6.8.

Addition of compost and well aged manure is suggested. Manure or organic compost is enriched with nutrients and minerals. Therefore, it is very beneficial in the growth of turnips. 

Soil bed must be weed free. But keep in mind that removal of weeds can disturb roots of young turnip plants. Therefore be careful while removing weeds. Usage of mulch is proven beneficial. It helps in retaining moisture in soil and suppresses weeds too. Addition of peat moss, compost,coconut coir or well aged manure is also favoured.

Although not much care is needed for turnip plants but do provide them with enough moisture at all times of growing period. Watering must be done upto 1 inch per week to avoid bitter and tough roots. It is observed that they demand dry bed but wet heads. Plus, soil must be kept moist at all times. 

Overcrowding must be avoided in case of turnip plants. It results in small roots in turnips. 

How to sow turnip seeds

Turnip seeds are sowed directly into the soil. Just scatter the seeds in your garden. Dig a small hole of ½ inch depth. Place the seed in it and cover it with soil and then patt a little.  Further, they must be placed 2 inch apart wide rows of 12 inches. In later stages,thin them upto 4-6 inches apart for large turnips while 2-4 inches apart for greens. Overcrowding can be an issue for turnip plants. Therefore, work out these beforehand. 

You can also grow turnips in pots or containers. The container taken for turnip growth must be 8inch deep at least. This depth will ensure proper growth of roots. 

Further, for summer harvest, seeds should be sown in early spring, 4-6 weeks before the last expected frost date. And in the case of autumn harvest, sow seeds 6-8 weeks before the first expected frost date. You can expect mature turnips in early spring and after 2 months of first frost date respectively. 

Germination time of turnips

Turnip seeds take around 3 – 10 days approximately to germinate. Soil beds are required to be moist all the time for faster and better germination of turnip seeds. The temperature conditions must be favourable and the best temperature for germination is 71F or 21C. Also, colder temperatures can delay germination. Optimum Temperature for turnip growth is 16C. 

Diseases in Turnip

Pests can affect turnip plants in various ways. Some might cause defects in vegetables or some can affect leaves of the turnip plant. Whatever, it is they ,ust be taken care of to ensure healthy plants. 

Aphids and flea beetles are disastrous for turnips. Aphids can be removed by pinching out the foliage. While on the other hand, flea beetles can be removed or avoided by getting rid of weeds in the area of turnip plantation. 

White rust of fungus is also a disease seen in turnips. It results in small white cottony blisters on the upper surface of the leaves. Yellow discolouration is also observed on the underside in this disease. 

Alternaria leaf spot- In this disease, small black spots appear on leaves which turn into brown or grey. It is caused by fungus and can be treated with a fungicide. 

Anthracnose- Small circular shaped spots appear on leaves. High number of spots can kill the leaves of turnip plants. Lesions turn leaves into yellow and make them wilt. The cause of this disease is fungus. Sanitary practices must be considered to avoid fungus and cruciferous weeds should be gotten rid off. 

Black rot- dark rings appear on the cross section of stem in black rot. Lesions of v shape can also be seen. Leaves can turn into yellow or brown. Cause of disease is a bacteria. Good sanitation must be ensured and avoid sprinkler irrigation. 

Club root- slow and stunted growth is observed.roots become distorted in this disease. It is caused by fungus. Treatment of this disease is economically unfeasible. In future,purchase certified plants from a renowned nursery.  

Downy mildew- irregular yellow patches on the leaves are observed and gray growth is observed on underside of leaves. Apply appropriate fungicide and  remove crop debris. 

Root maggots- This insect leads to root damage and scars on the turnip. 

Growth time for turnips

It takes from 5 weeks to 2 months to grow turnips. Growth time for turnip varies on the basis of a variety of turnip-like greens, tender roots to eat, or larger roots to store. It takes 60 days to grow fully but if you pull them out in 30 days, they will be very small in size. 

Growing for 60 days helps in making them more flavoured and avoid watery or bland taste. 

Along with time, take care of proper water supply too, in order to receive sweeter and tender turnips. 

When to harvest turnips

Small, young and tender turnips can be harvested after 5 weeks of sowing seeds. Main crop can be harvested from 6 weeks to 10 weeks. 

Fall turnips are harvested after light frost and they are known to be sweeter than other harvests. Do harvest them before hard breeze for best results. 

Lift roots when they are 2-3 inch in diameter. Further, you can cut leaves of turnips when they are 12 inch long. Keep in mind to lift them very carefully with a garden fork.  

After harvesting turnips, you can store them for 3 or 4 months in cool,dark and humid places.  Turnips can also be stored in the root cellar, a vegetable drawer for the fridge in a perforated plastic bag. 

Turnips plant  is such a plant that doesn’t require much effort for growing. You just need to take care of the water supply and good soil condition for them to be best. Ensure good fertility in the sowing and growing period to receive sweet and tender turnips. Above mentioned knowledge is enough for you to get started. Then what are you waiting for, just begin. 

Sheep Farming – A Step to Step Guide

Sheep farming is generally described as ‘commercial breeding of sheep for meat, milk and wool processing.’ It is a traditional business for the communities of several countries worldwide. However, sheep farming is not a successful choice for industrial milk processing. Sheep are ideal for the processing of meat and wool.

You must have adequate facilities such that both small and big Sheep can be raised. It should be acknowledged that the sector of sheep farming is a very lucrative venture. You can desire to earn handsome sheep farming profit within a short period, you can get your savings back. However, create a solid business plan and operate accordingly before beginning a sheep farming company.

Here we will tell you about the benefits of sheep farming. Why should you raise Sheep? What are the conventional sheep breeding methods? And the right ideas for sheep raising.

Also read; Biofloc Fish Farming – A Complete Guide

Sheep Farming Profit – Why Should You Go For It?

Sheep

Sheep are primarily bred for their development of fur, meat, skin, and manure. Sheep meat is not only quite tasty; it is healthy and famous among all styles of people worldwide. If you decide to find the most successful business then sheep farming may be an outstanding idea as it is a decent source of revenue and for eradicating deprivation from the dry, desert, semi-arid, and mountainous regions.

Look at some of the points below that are must know before you dream to accumulate sheep farming profit.

  • Sheep farming needs less labor than any other cattle growing business.
  • You don’t have to have significant capital to start this venture.
  • An expensive sheep’s house is not needed since they require lesser living space. Sheep should be fed like other cattle.
  • Sheep ingest different kinds of vegetables, just like any other animal group. The good thing about them is that they can survive on low-quality grass. It means that you don’t need to do anything extensive to feed them.
  • One more great thing about the Sheep is they are so adaptable that they can survive in almost all sorts of environments. Be it sheep farming in the USA or somewhere else.
  • Some unemployed young people may even create a reliable source of income and education by growing sheep farming businesses.
Steps To Start Sheep Farming Business

To begin learning to start the first-ever successful sheep farming business, you need to know about the various steps involved in it. No matter whether you do sheep farming in New Zealand, or USA. So, without any ado, let’s quickly dive in. 

1. Plan It The Right Way

The exciting news is that it is straightforward to start a profitable sheep farming venture. First, always make the right plan when starting up a business. And obey that and begin with a stepwise procedure.

2. Suitable location

Then choose a convenient place to start a rather valuable sheep farm. Take charge of the necessary sheep raising facilities. Good clean and freshwater must be available, adequate green areas, right medication, transport, and proper marketing are essential resources for beginning commercial sheep farming. Consequently, the following things must be held in mind when choosing a suitable location for sheep farming.

3.  Quality of breeds

You should try to buy quality breeds from renowned breeders. There are various sheep types worldwide. However, you must be mindful that not all such kinds are ideal for farming in all regions. On the one side, certain varieties are suitable for producing industrial meat and others to produce wool. Choose the appropriate breed according to your desired output. Local races should be taken into consideration.

4. Housing

Interestingly, sheep do not need expensive housing. They will be comfortable even if you meet the basic housing needs. You can also breed them on a small scale with other farm animals. However, if you want to rear them commercially, then you would require an appropriate place. You will also have to take care of their safety—the safety from adverse weather along with some dangerous animals.

An adult sheep needs roughly 20 square feet of space available. Like, you will make a house of 10×20 feet, if you want to raise ten goats. The roof will be at least 6 feet high from the ground with a strong airflow structure. It should be clean and dry, with ample light and air inside the room. It will be helpful if you have a drainage system inside the building. 

5. Feeding the Sheep

Healthy nutrition of Sheep is a must for proper growth and optimum output. High-quality food makes them safe, active, and free from diseases. Therefore, always consider feeding your Sheep with good food of high quality. Usually, all grasses, plants, and maize are their favorite. In addition to the above, please offer your Sheep enough fresh and clean water on demand.

6. Fencing

You must fence around the field if you allow them to graze on the ground. The fence must be sturdy enough to keep them from escaping and remaining securely inside. This can serve to keep all sorts of animals away if the fencing is secure. It is best to construct a wire or a woven fence.

7. Caring   

To ensure maximum benefit from your sheep farming venture, you must care and manage your Sheep properly. It is recommended to buy quality and productive cattle, feed them nutritious meals. Also, make a comfortable house for them. 

8. Vaccinate the Sheep

Vaccinate the pets properly. It will protect them from different disease forms. One ought to have a good relationship with the veterinarian, so you can always ask for support.

9. Marketing Hack

For marketing, try your nearest livestock market. Identify marketing tactics before starting a business. Also, a foreign exchange may be regarded if you have enough facilities. Sheep goods have strong international demand. Therefore, foreign currency can be gained by selling sheep products. It will also boost national income directly. Poor people can win extra money by rearing small-scale goats.

Look at some popular sheep breeds

As mentioned above, there are various sheep breeds. So, you need to be very choosy when it comes to making this business profitable. Here we are only going to discuss some of the most famous sheep breeds concerning the USA and New Zealand.

Sheep farming in the USA: Breeds

More than 60 sheep species are recognized by the American Sheep Industry Association (ASI). A few were recently added through semen and embryos. Others have been introduced to the American colonies with early settlers and helped to develop trade. Katahdin, Berkshire, Essex, Dorper, Dorset, and Southdown are the six groups with the most ethnic records. While not in the top six breeds, the Rambouillet is perhaps the most significant breed in the United States, as it forms the basis of most Western flocks. The Livestock Conservancy categorizes fewer common species, whose aim is to prevent the disappearance of endangered animals and breeds of poultry.

Awassi

It is one of the prominent breeds when it comes to sheep farming in the USA. It is a fat-tailed sheep, which is also the highest milk producing cattle, too. Awassi has heads and legs in white and brown colors. So, it won’t be wrong to call them multicolored. Its long and drooping ears are what make them even more attractive. Rams are horned, and the ewe is pounded. It has excellent adaptability for even poor feeding. In 2012, Awassi was first introduced in the USA via embryos.

American Blackbelly

The American Blackbelly is indeed the result of the Mouflon and Rambouillet crossing of the Barbados Blackbelly mainly to raise rams for trophy hunting. And is very popular when talking about sheep farming in the USA. Rams exhibit impressive horns usually, whereas ewes are polled. Without it, American Blackbelly has characteristics identical to Barbados Blackbelly.

Babydoll Southdown

The Babydoll Southdown is a smaller variant of Southdown, created by breeders who decided to return the Southdown to the roots until selective breeding. To apply for the entry, sheep must weigh shorter than 24 inches (during shearing). Babydolls are also marketed for the field and vineyard farming because of their limited size. They are mostly born as poultry.

Black Welsh Mountain

The Black Welsh Mountain is a little sheep generating a thick black fleece. Ewes are polled. Nevertheless, rams have incredible horns. In 1973, this breed was founded in the United States. Semen imports introduced genetic variation to these flocks in the late 1990s. The protection of livestock implies that this sheep breed is threatened.

Sheep farming in New Zealand

New Zealand, too, has a wide range of sheep breeds. Knowing about them may help you in exploring some more productive sheep breed.

Corriedale

Since its roots, sheep farming in New Zealand has been strongly associated with this flock. Export revenue stemmed mostly from wool purchases, but early in the century, a booming export meat trade with the United Kingdom (which was quite diversified), with the introduction of cooling meat transportation and meat processing, became significant.

There is also a vast region of New Zealand between the sparser grass that fits the Merino and the more fertile grasslands that are the ideal for the Romney and another British longwool. Crosses of these two forms were regarded early in the pastoral tradition of New Zealand.

Border Leicester

This breed is Dishley Leicesters’ linear descendants. In 1767, Matthew and George Culley, who were disciples of the English geneticist Bakewell, started to bring them to Northumberland and eventually became popular in England and southern Scotland.

The Border Leicester offers the crossbred progeny with healthy fertility and reasonable mothering consistency and is used for growing reproduction in commercial flocks such as Romney, Corriedale, and Merino. The Leicester Line was used to create the Border-Romney crossing and the Border-Corriedale hence also called Borderdale in New Zealand.

Dorper

The South African Department of Agriculture agreed in the 1930s to grow a new breed of sheep that had a decent portion of lambing and created a good quality carcass. The Dorper is a cross between the Dorset Horn and the Persian Blackhead. The breeding system led to the Black and the White Dorper. The breed is set to give the features and characteristics a robust replication.

Keep these vital functions of sheep farming in mind:

  • Sheep collection and purchasing
  • lamb feeding, weaning,
  • housing and shelter maintenance,
  • culling, record keeping, marking

Bonus Tip:

To run any business competitively, every owner needs to update him to the latest changes in the sheep rearing industry and technology. In this case, reading journals, newspapers, or sheep farming webpages may be handy. You can even visit some farms in your town, gather experience and finally do it.

Conclusion

It is not, so that sheep farming business is risk-free. There are so many issues that need more significant consideration on the owner’s part. Many questions come up in sheep farming, such as defending the Sheep from threats, housing arrangements, cold weather protection, diseases, etc.

Among these issues, sheep suffer most from diseases and predators. Create adequate fencing to cover your goats. Vaccinate diseases early to avoid goats. They are safe from various forms of diseases, which are the most dangerous challenge.

Know Everything About Cow Farm – A Comprehensive Guide

Cow farm implies “commercial raising of high-milk cows for the processing of milk. It is a part of agriculture or husbandry. Dairy cow raising is not a new idea. People breed dairy cows from ancient times for milk processing. Dairy cow raising appears to be a lucrative industry worldwide. 

There are several modern and quite well-established cow farms worldwide. Here we explain more about the benefits of dairy cow farming and how this thriving sector can be established.

Dairy farming calls for the experience to thrive. The selection of a strong cow race is one of the significant factors for productive dairy farming anywhere in the world. It is an enormous task and challenge to select the right cattle for commercial dairy farms. 

What Are The Advantages Of Dairy Farming?

cow farming

The launch of a thriving dairy cow farming venture has many advantages. Here we describe the significant benefits of the business.

  • Milk and dairy products are in high demand worldwide. This is one of the first and most important benefits of starting a cow farm.
  • Today, the dairy farm is one of the most in-demand businesses as the demand for milk is always going to be there. It may never die as milk is a part of daily life.
  • You don’t have to think about marketing. Since it is one of the traditional business models so you can rest assured to sell your goods quickly.
  • The dairy farm doesn’t pollute the environment, unlike other manufacturing industries. So, it’s eco-friendly.
  • You can start milk production with your family members. Isn’t it great flexibility that most of the other business models don’t offer? And it’s always a great idea, to begin with, the minimum investment. In this case, starting a dairy farm with your family members won’t force you to push on your budget.
  • Proper strategic plans and good management and care will ensure maximum benefit. For the unemployed trained young people, it can be a great income source and employment opportunity as well. 

Starting A Dairy Farm Business

It is not so easy to start a dairy cow farming business. You must proceed step by step to make high-profit margins from this venture. Here we will identify the critical steps towards starting a successful dairy cow farm. The cycle begins with the collection of proper races, houses, feeds, treatment & administration, and marketing. Consider the follow-up during the start of this project.

Steps To Start A Dairy Farm:

Great. You are all set to begin your first ever venture into cow farming. But keep these things in mind beforehand to avoid any sort of trouble. 

1. Ask Yourself Some Questions

Try first to decide your business aim. Ask yourself a few prominent questions. To say, why would you like to start milk cow farming? Will you have enough cow-raising facilities? Would you have the time to care for your cows? Will you handle all the cows’ facilities? 

2. Take Some Idea

It’s great if you can visit any of your local dairy cow farms. Try to understand the techniques, processes, and business models. So that you may apply them to creating a successful business. It’s indeed an effective way to do it in the right direction.

3. Spend A Few Days In Cow Farm

If you can invest a few days in an existing farm, it will be better. You will be capable of learning more from farmers about this sector. There is one more thing. You can consult the veterinarian and talk about dairy cow farming possibilities in your locality.

4. Feeding Cattle

 Be sure that ‘you can feed cows nutritiously all year round.’ To learn more about feeding prices, visit your local market. If you want to make your food, consider reserving certain products for hot or rainy seasons.

5. Cow For Dairy Farm

Not all the cows are good, to begin with. Each race of the cows has its pros and cons. Some cow races are known for their excellent milking potential, whereas some might be good to save you some dime. So, it’s always better to do some research on the best cow for a dairy farm, before you make any choice.

6. Training Of The Dairy And Farm Workers

In large commercial farms, professional people are working. The point is you can learn their way of working and then replicate the same when you train your workers.

7. Selling Strategy

Seek to sell your goods on the local market in the event of marketing. This reduces the expense of advertisement or transport.

Also read; Biofloc Fish Farming – A Complete Guide

What Kind Of Dairy Cow Breeds Are The Best?

Many dairy cow breeds are available all over the world. You can choose something according to your location, local facilities, and production. Below are a few most popular cow breeds for the farm.

  • Ayrshire
  • Brown Swiss
  • Guernsey
  • Holstein Friesian
  • Jersey
  • Milking Shorthorn

Apart from the kinds mentioned above, Red Sindhi, Sahiwal, Tharparkar, are also some of the most prominent and popular dairy cattle breeds. So first, Consider the environment, local facilities, and demand on the market for dairy products and choose races for your dairy cow farming accordingly. Okay, let’s discuss a few of the cow breeds one by one.

Cow Farming: Holstein Breed

The Holstein or Holstein-Friesians are the most identifiable breed of the dairy cow breeds. In the 1850s, they were introduced from Holland and became a common cow in the dairy farm of America. Many of them have black and white color but are recognized in red and white. Some are mainly white and often all-black cows. The Holstein cows are known for their sweetness, gentleness, and good instincts. 

Brown Swiss

Raised in Switzerland, Brown Swiss is one of the popular dairy cow breeds. The Brown Swiss is not only perfect; they are quick to mature, which means that their age at first is much older than Holstein. Brown Swiss has good milk production ability, which is right for your business.

It is a big race with a grayish color called a brown swiss. In the late 1800s, Brown Swiss was introduced to the dairy farm of America. Brown Swiss are about 1500 pounds. The average milk production per year is 2200 pounds, with 919 pounds of butterfat and 750 pounds of protein.

It is a successful breed and is frequently sought after for the agriculture of cheese. As the race fits well in many different climates, it is a strong race for many farm types.

Guernsey                         

Guernsey came from Guernsey Island next to Jersey Island. The creamy golden milk provided by the cows was a famous race in the early 1900s. Unfortunately, the Guernsey race had neither the development nor the construction to adapt to the commercial milk business.

Guernseys are one of America’s rarest dairy cow breeds. The competition is excellent for hand milking, and several small family farms love the race. Fourteen thousand pounds of milk per year with high butterfat and protein content differentiates Guernsey.

The milk also contains significant amounts of beta carotene. The cows eat less feed per pound of milk than the larger milk cows. The breed standards have been carefully maintained since their introduction in the late 1800s. This race is reviving in the dairy sector.

What’s Next On The Cow Farming Guide?

Until now, you might have gotten a decent idea about the various types of cow breeds. Advantages of cow farming and the steps to set the best foot forward to start your first ever venture. Now you need to know about the ways you can grow this business and make the maximum out of it. Also, you would know some other requirements to get into the business of cow farming.

Housing

The first on the list is housing. Decent housing is essential to keep your cows healthy, competitive, and ailments free. Provide space for your cows inside the house according to the breeds. Usually, 80 square feet of room and 40 square feet of house space are needed for each cow. It can vary according to the size of the cattle. Make an appropriate ventilation system and ensure ample fresh air and light flow into the room. The concrete house is healthy for cows.

Feeding

Good food ensures good health and optimum production. Seek to provide your cows with high quality and nutritious food in adequate quantities to ensure healthy growth and well-being. The most popular form of feed used for growing dairy cows is foraging, which mainly refers to hay or straw. Apply cereal grains to the feed of the dairy cow to fulfill energy requirements.

Greens contribute to the overall production of milk. Add greens to their daily foods as much as possible. Greens also contribute to reducing the cost of food. Alfalfa, timothy, clover, etc. are healthy greens for milky cows. Build a pasture for your cows, if possible—provision of enough safe and freshwater in tandem with enough nutritious foods.

Dairy cows need more water than any animal. Since their milk is primarily increased, and their milk contains a lot of water. A milk cow typically needs approximately 5 liters of water to produce 1 liter of milk. Provide them with enough water to satisfy their demand.

Cow Needs Good Care & Management

The right treatment and proper management are a critical step to success in any livestock sector. So please seek to look after your cows well. Feed them with healthy food and supply them with ample fresh and clean water. Vaccinate them in time so you can keep them free of any illness or disease. Do store some necessary drugs if possible. Keep your house clean and frequently wash the cow.

Milking The Cow

Find a peaceful place to milk your cows. It’s safer if you can afford a separate milking room for the cow. You can both milk the cows by hand and use milking machines. Make sure you have a good practice to keep your cows happy during milking.

Marketing Dairy Farm Products

Set your marketing strategies before commencing your business. Ask why? To ensure that you wouldn’t have to struggle hard to set your foot as we have already discussed that dairy products are in huge demand across the world. But initially, you can’t target the world market. So, it’s better to give it a start from your local market. 

Conclusion

You are now aware enough about dairy farming and its various facets. Our aim in this guide about dairy farming, cow breeds, and kickstarting your first dairy farm business we have tried to keep the things as short and as concise as possible.

So, we hope that this guide may come handy, and you are able, to begin with, your dream project. However, we make no recommendations. All the facts have been presented as it is.

How to Nurture the Dragon Fruit –An Exotic Tropical Fruit

Do you know that some of the fruits are healthier than others? Dragon fruit is one of them with plenty of health benefits. Dragon fruit, or pitaya, is a cactus fruit, well known for its peculiar look.
The healthy fruit is loaded with vitamin C, fiber, and antioxidants. This improves the immune system of the human body and is also used for diabetes treatment. The farming dragon fruit is profitable as well as satisfying experience.

Besides, medicine extracted from the flower and stem can be used in treatment to improve blood circulation. Therefore Dragon fruit can be branded as prestigious health food.

Moreover, the flowers of the plant are unique; indeed it is one of the world’s largest flowers. Their size is not the only specialty of dragon fruit. But the flower of the dragon plant just blossoms for one night and the fragrances on this night are beautiful with added tropical fruitiness. 

Also Read: Growing Orange with Perfection

 The hot summer months are suitable for dragon fruit cultivation. It won’t grow for the rest of the year but grows quickly once it starts growing. The fruit begins to form after the flowering takes place. For around 20 to 30 years, one plant can produce fruit. Thus, your one plant can deliver plenty of ready to eat delicious dragon fruit.

How to Grow Dragon Fruit?

The dragon plant requires little support to grow. As it is a subtropical plant, which needs a great deal of heat and humidity, here is a breakdown what do you need to feed and produce dragon fruit.

Deciding the Place and Soil

Dragon fruits must be cultivated in an open field with a clear exposure to the sun. It is not encouraging the planting of crops in areas with good rainfall. The place must be safe with a strong organic sandy loam soil with sufficient drainage.

Besides, this plant may thrive in any well-drained soil but likes to develop in slightly acidic soil, with a pH range of six to seven. For this plant, sandy soil is the best option.

In one single growing season, the dense fleshy stems can grow up to 4 m and must be accustomed and tied to a single 1.8 m high pole or trellis support. There is one another option of precast concrete poles that are widely used, and between three and four plants on one pole can be mounted. 

Farming dragon fruit is done by two methods. First is germinating the seeds and others by using stem cuttings. Let’s have a look.

1. Germinating Dragon Fruit Seeds

Growing dragon fruit plants from seeds depend on the same process as other plants. It involves preparing the soil with a well-mixed with potting mix. Then mix the seeds into the soil gently.

The soil needs the proper moisture with a cover over it with some plastic sheet. These seeds may take up to a month to germinate.

But there is an advantage to this method. The seedling grows slowly and cannot be propagated efficiently.

2. Using the Mature Stem

But it is ideal to use safe mature stem parts that have a length between three to six inches. 

Once the cutting has been sliced into three to six inches. Make a slanted cut at the base of the stem and add a fungicide at the ends and put it in a shaded area for about 5-7 days before being placed on the field directly. 

This is not necessary. But it does promote growth. When you dry or cure the stems, normally two to five days. You will get to know that when the cutting tips turn white, it’s ready to plant.

Besides, these cuttings can be obtained from the commercial nurseries as well as from pitaya growers. 

Next, you should plant the cutting in the field, they have to be about 2 inches into the soil and the cut must be positioned in the same direction as the parent plant. Water the plant every day unless the weather stays warm otherwise skips a day. 

Finally, you’re going to begin to see roots. You will soon see new growth if the growth is successful. It takes normally about 3 and 4 weeks. This young cutting will produce the fruit of its own in a few years.

At this stage of dragon fruit farming, it is necessary to focus on these few points:
  • Fertilizer – Give it fertilizer per month during the active growing season to ensure that the dragon fruit grows well. You’ll want to stop feeding your plant for a couple of months in the cold winter months.
  • Water – Since this plant is a cactus plant, it is important to ensure that it is properly watered. Water only the plant when the top of the field is dry and don’t let the plant rest in water. The soil must be wet, not drenched.
  • Light – The plant base can see a little shade, but the plant tips require full sun to ensure the plant blooms correctly. When the plant gets too much water, the fruit doesn’t perform well.
  • Temperature – Dragon fruit does not thrive in cold weather, so make sure the temperature is higher than 40 degrees Fahrenheit. The temperature needs to vary from 65 to 80 degrees Fahrenheit for optimal growth.

Dragon Fruit Pollination

The proper pollination of dragon fruit is done by the Moths, bats, and bees. But some varieties do not self fertilize at all.

In this case, the pollination techniques come into play. This technique requires the collection of the pollen from two dragon fruits. Using cotton swab softly to mark it with cross-pollinate on the stigma of the opposite herb.

This requires to be done at night, so the time between eight at night and eight in the morning is the best. 

In the case of pollinating various plants, it is recommended to use a new cotton swab for each one of these.

After this process, it will take about a month for the fruit to grow.

The fruit has a direct threat from animals such as animals, birds, and monkeys, and of course, they love the dragon fruit. 

Some growers use the shade net to shield maturing fruit from damage caused by the birds and hail. 

In Dragon Fruit Farming, the emphasis should always be on pesticides and disease control.

Pests include mites, thrips, bees, spiders, mealy bugs, slugs, nematodes, fruit flies, and mice. The birds are the most commonly reported.

Though, the diseases of dragon fruits contain stem purple, anthracnose and fungal pathogens such as fusarium. 

Identification of Ripeness of Dragon fruit

When it’s not mature, dragon fruit is green. Once, the fruit starts to mature. The exterior of the fruit shifts to red or yellow depending on the size.

Once the wings of the dragon tend to dry, to grow brown and fade. It signifies that fruit has been starting to mature and ready to eat. In case the wings are still bright. It shows that the fruit is underweight and will take more time to mature.

Once, the dragon fruit attains the stage of maturity. It can press just by a delicate touch of the thumb or fingertips on the surface. The fruit is presumably overripe if it is too pulpy. On the other hand, it’ll take several days to mature if your touch feels solid.

The rugged handling and shipping malfunctions can cause the dragon fruit a damaged skin. For instance, if the fruit is not adequately wrapped during shipping, they may hit each other. 

These may even be broken if they dropped. 

When the fruit is damaged, the flaws are visible and often smaller this is because of the lack of moisture.

Considering these few points is beneficial for the daily harvesting of dragon fruit.

  • Dragon fruits do not grow after harvesting as many other fruits and it is recommended that they should be picked once mature completely. 
  • The fruit is at its mature stage for processing once the color shifts from green to reddish.
  • If the fruit matures, the tiny leaves on the fruit side may often tend to appear gray.
  • Once the color of the fruit shifts, it is the right time to pluck the fruit. However, it is necessary to harvest a day after the color changes if the fruit is exported.
  • When a dragon fruit is ripe and ready for harvest, it can quickly twist away from the plant. When you ever pull the fruit so fast, it definitely would not be harvested

Conclusion

Besides the health benefits of dragon fruit, it has such a delicious taste once it matures perfectly. It is the right ingredient for a yummy smoothie and is often mixed with the lychee smoothie.

These fruits that contain the red or pink, leathery skin is tasted by the spooning out otherwise it is eaten in pieces. It is possible to process fruits into juice, ice cream or wine. The beautiful flowers, only blowing at night, are applied for the aromatherapy.

Must Read: Custard Apple Farming

10 Common Raised Bed Gardening Mistakes

A smart way to increase your gardening will be lightened with the growing of raised beds and improve the aesthetic of your garden. If you are new to gardening reduce the margin for error with the help of growing raised bed.

Raised bed gardening is not the perfect technique for getting success. But every technique should have certain mistakes to hide the success.

If you have limited space for gardening, then the raised bed gardening is perfect. Here are the best tips to fill your raised beds for cheaper and also made the pallet gardens which are fit in the space. Raised bed technique is a better choice to do but it requires more work and effort. 

1. Raised beds are too wide

One of the best advantages of the raised bed gardening is to avoid soil compaction. You can easily work on them without stepping into it. Which gives ultimately strong and healthier plants due to better soil structure?

The gardening raised beds width is too large then it prevents you while working on it within your reach, so you have stepped inside the bed it will defeat the major purpose of the raised bed.

Because of this reason raised beds are not more than four feet wide. Without any issue or problem, most of the people will reach within the center comfortably in four feet wide raised bed. I have experienced about this four feet wide span is more comfortable for me.

While choosing your raised bed, firstly you have to consider the location of the bed where to place it. If the location must be next to fence. I recommend not exceed than thirty inches with this you can work on it easily from one side itself.

 2. Don’t plan to irrigation

Hand watering is good for irrigation but you have to plan how to irrigate the beds within a specified time with new techniques.

Mostly I recommend drip irrigation or soaker hoses for raised beds. If you have a large number of raised beds then drip irrigation is fine for that and it works great and cost less also. Soaker hoses are for a few raised beds they will perform fine.

Also Read: Importance of farming in our life

3. Unsafe material used

It is important to know where you live and how was the climate then decide what kind of material should be used to build raised beds. Wood is a common choice for the raised bed because it is inexpensive and easy to obtain.

But don’t use the pressure-treated wood for raised beds because before 2003 manufactured pressure-treated wood contains chromate copper arsenate and it will harmful.

Many people are using chemical-free and rot-resistant wood such as cedar or redwood but it was somewhat expensive.

Before build raised beds, do you research first and avoid old railways ties which contain creosote which is harmful to human and plants also.

4. Lack of nutrients in soil

Are you thinking about using native soil which is cheap because it is already there? But most of them don’t have good soil to start with. Then you have to test the soil you will get the information about the soil and decide it can amend your native soil to work with it or you have to start from starch.

The best thing for raised beds is by using a combination of garden soil with compost. But it depends upon your budget and availability.

5. Skipping to mulch

Normal gardens cant dry as quickly as raised beds so keep your plants happy with the help of mulching it will retain moisture and cut down on weeds.

In wet seasons it acts like a sponge absorbs the water while excess rainfall in dry times and it will regulate the moisture in heat of summer. You can compare mulched raised beds healthier than without them.

6. Neglecting your pathways

Harmful chemicals used nearby raised beds can destroy your garden. Even if you used these kinds of chemicals in your yard the toxins can flow through the wind into the beds and kill your plants. So take precautions for the safety of your raised beds from harmful chemicals.

The pathways among your raised beds will likely develop weeds and grass at a few points. However, in preference to making plans to mow and spray them, you may create a barrier. Flattened cardboard containers with a small layer of natural mulch on the pinnacle are a clean cure, and the substances will remain longer than different options.

7. Label everything

The one common mishap goes for all gardening, but it is always repeating. Label your plants while planting them and what they are. You can also use it to set up a spreadsheet or else label them physically in the beds.

This is very important while dealing with boxes of dirt it looks like the same until the growth will be started. So you can’t get an idea about the things that are growing in the eastern corner of the fourth bed until the end of July.

Also Read: Growing the Microgreen Broccoli

8. Failing Poly tunnels

If you do not connect the tunnel to the raised bed, you will seriously miss the opportunity. You already have the ideal setup for a raised bed tunnel. You can easily extend the growing season on both sides by building flower beds on them. Once the spring gets warmer, you can remove the tunnel and add it back when the weather gets cold again at the end of the season.

9. Orientation

If you planting your garden in the wrong place is a big mistake and it is very difficult to correct or relocate the correct location once you fill the soil in the raised bed, watering system, and plants too.

Now set up the raised beds as per the sun rays fall on the plants. It requires five to six hours of sunlight each day for vegetable plants.

Placing plants north-south side is better to get sunlight. It will receive the maximum amount of sunlight.

10. Doing the same crop every year in the same location

You can rotate your crops for a single year because it will overrepresented certain fungal diseases, nutrients, and pests in the soil if you don’t rotate the crop in the field. While planting thought about the same crop will not be planted in the same location for every year.

Of course, no matter how you plan, there is no better teacher than experience. When pulling up the bunk, you may encounter an obstacle that you never dreamed of. This is good. Take this lesson and upgrade your raised bed in the next season, please be sure to let us know what your difficulties are so that we can learn too.