Innovative Ways to Integrate Chickens into Your Permaculture Garden

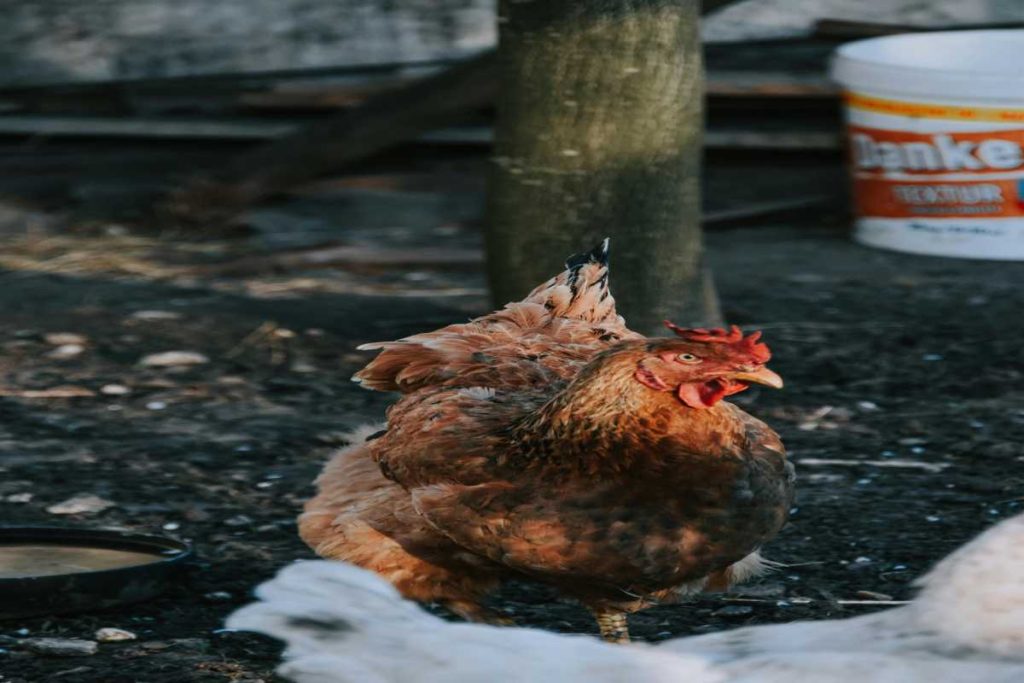
Chickens and permaculture go hand in hand. Chickens are natural foragers, excellent at pest control, and provide valuable manure that enriches the soil. By integrating chickens into your permaculture garden, you can create a harmonious, sustainable ecosystem that benefits both your plants and your flock. Here are some innovative ways to integrate chickens into your permaculture garden to maximize the potential of both.
1. Chicken Tractors: Portable Poultry Paddocks

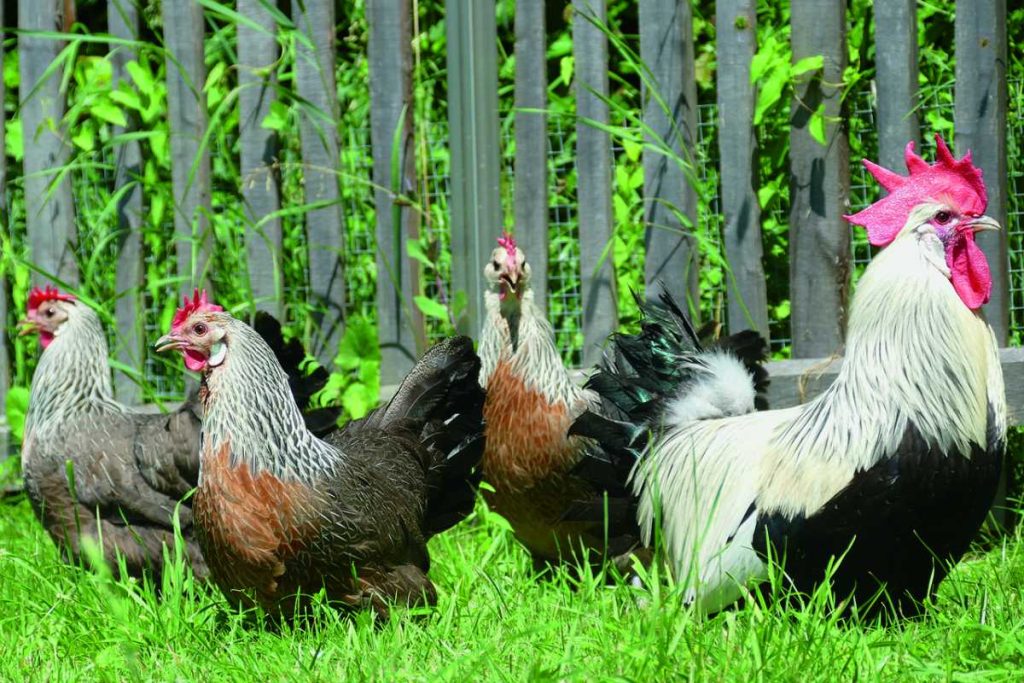
One of the most innovative ways to integrate chickens into a permaculture garden is through the use of chicken tractors. A chicken tractor is a portable, moveable coop that allows chickens to graze, scratch, and fertilize different areas of your garden, all while keeping them contained.

  • How It Works: A chicken tractor is essentially a movable pen with no floor, allowing chickens to roam freely and graze on grass, weeds, and insects in different garden areas. By moving the tractor regularly, you give your chickens access to fresh food and provide your garden with a nutrient boost.
  • Benefits: This practice reduces the need for artificial fertilizers, controls pests naturally, and aerates the soil with chicken scratching. The manure also acts as a natural fertilizer, improving soil quality.

Bonus Tip: Include a layer of straw or bedding in the tractor, which will mix with manure, creating a nutrient-rich compost as it breaks down.


2. Use Chickens for Pest Control in Your Garden Beds

Chickens are natural pest controllers. They love to eat insects, bugs, slugs, and even small rodents. Incorporating them into your permaculture garden can drastically reduce your need for chemical pesticides and herbicides.

  • How It Works: Allow chickens to free-range or graze in areas where pests are a problem, such as vegetable or herb gardens. They’ll naturally keep pests in check while providing you with the additional benefit of fresh eggs.
  • Benefits: Chickens can help control common garden pests like aphids, beetles, and grasshoppers, as well as smaller rodents like mice or voles. This creates a more balanced and healthy garden ecosystem.

Bonus Tip: Use chicken-friendly plants like comfrey, nasturtiums, or marigolds around your garden. These plants can help attract beneficial insects that chickens won’t harm, further enhancing the natural pest control in your garden.


3. Create Mulch Layers with Chicken Manure

Chicken manure is an excellent source of nitrogen, and when properly composted, it can provide rich, organic matter that improves soil health. By integrating chickens into your permaculture garden, you can effectively use their manure to create mulch layers for your plants.

  • How It Works: Collect chicken droppings and mix them with other organic materials like straw, leaves, or grass clippings to create a nutrient-dense mulch. Spread this mulch in your garden beds to help retain moisture, suppress weeds, and improve soil structure.
  • Benefits: Using chicken manure in your mulch not only helps nourish your plants but also reduces the need for synthetic fertilizers, which can harm the environment. Additionally, the mulch helps to keep the soil cool in the summer and warm in the winter.

Bonus Tip: Be sure to compost chicken manure before using it directly in the garden, as fresh manure can be too “hot” and may burn your plants. Composting for a few weeks or months makes it safe to use.


4. Chickens as Soil Aerators
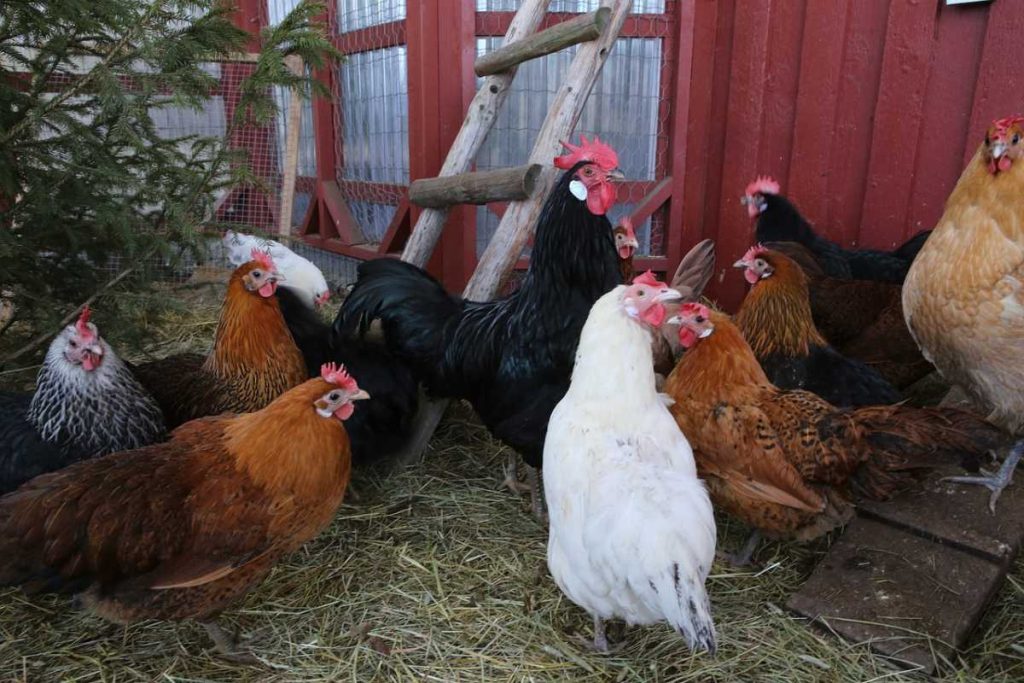
Chickens are natural soil aerators. Their constant scratching and pecking break up the soil, making it easier for water, air, and nutrients to penetrate. This behavior is highly beneficial for garden beds and can help improve soil health and structure.

  • How It Works: Allow chickens to roam freely in areas of your garden where you want to improve the soil. Their scratching will break up compacted soil, creating better air and water flow for plants.
  • Benefits: By naturally aerating the soil, chickens help prevent compaction, improve drainage, and create a healthier environment for plants to grow. This is especially helpful in raised garden beds or areas with clay-heavy soil.

Bonus Tip: Rotate your chickens between different sections of your garden to ensure that no single area is overworked and that soil health is continually improving across your entire permaculture system.


5. Chickens and Cover Crops for Soil Enrichment

Integrating chickens with cover crops is an innovative way to enhance both the garden and the health of your chickens. Cover crops like clover, alfalfa, and rye are great for soil health, and chickens can help you manage them naturally.

  • How It Works: Let your chickens roam over the cover crops after they’ve reached a certain maturity. Chickens will eat seeds, weeds, and insects that might otherwise damage the cover crops while fertilizing the soil with their manure.
  • Benefits: Chickens can help prevent weeds from taking over your cover crops while also feeding on pests. As they graze, their manure adds valuable nutrients back into the soil, enriching the earth for your next planting season. The roots of the cover crops help to prevent erosion, improve soil structure, and increase nitrogen levels in the soil.

Bonus Tip: Use a mix of fast-growing cover crops like clover for spring and legumes like peas or beans in the summer to continuously enrich the soil and give your chickens a steady food supply.


6. Design Chicken-Friendly Zones Around Your Garden

Incorporating chickens into your permaculture garden requires smart planning to ensure your chickens are safe and your plants thrive. Designate chicken-friendly zones where your chickens can roam freely and other areas where your plants can grow undisturbed.

  • How It Works: Design a garden layout that includes areas where chickens can forage without damaging delicate plants. Use fences or barriers to keep chickens away from crops that require more protection, such as young seedlings or fruit trees.
  • Benefits: Creating these designated zones helps chickens act as beneficial workers for the garden while ensuring they don’t destroy plants or crops you want to keep safe. This also helps you create a harmonious relationship between your chickens and your permaculture system.

Bonus Tip: Include shade structures or trees in the chicken zones to provide them with a cool place to rest during the hotter parts of the day. This will help reduce stress on your chickens and encourage them to be more productive.


7. Integrating Chickens with Aquaponics Systems

Aquaponics is a symbiotic system that combines aquaculture (raising fish) with hydroponics (growing plants without soil). By integrating chickens into an aquaponics system, you can create a complete permaculture cycle where both plants and animals thrive together.

  • How It Works: Chickens can be kept in a separate area near your aquaponics system, and their manure can be used as fertilizer for the plants. Additionally, chickens can help control pests in the aquaponics environment by pecking at insects around the water source.
  • Benefits: The nutrient-rich chicken manure can be used to fertilize plants, while the plants in your aquaponics system clean and filter the water for the fish. This closed-loop system enhances both your garden’s productivity and your chickens’ health.

Bonus Tip: Be sure to maintain a balance between the fish, plants, and chickens so that the system remains sustainable and beneficial for all components.


Conclusion

Integrating chickens into your permaculture garden isn’t just about adding animals—it’s about creating a synergistic, sustainable system that works with nature. From utilizing chickens for pest control and natural aeration to using their manure for soil enrichment and employing chicken tractors, there are countless ways to harness the benefits of chickens in your permaculture garden. By thoughtfully planning and designing your space, you can cultivate a thriving garden while ensuring the health and happiness of your flock.

With these innovative strategies, you’ll not only create a productive permaculture system but also foster a harmonious relationship between your plants, chickens, and the environment.

Top 5 Mistakes to Avoid When Handling Chicken Eggs

Raising chickens is a rewarding experience, but it comes with its own set of responsibilities—especially when it comes to collecting and handling chicken eggs. Eggs are delicate and need to be handled with care to ensure their safety, quality, and hygiene. From improper storage to cleaning mistakes, even small oversights can impact the eggs’ freshness or introduce health risks. To help you avoid common pitfalls, here are the Top 5 Mistakes to Avoid When Handling Chicken Eggs.

1. Storing Eggs at the Wrong Temperature

One of the most critical factors in maintaining the quality of chicken eggs is proper storage. Incorrect storage temperatures can cause eggs to spoil quickly, affecting both taste and safety.

  • Mistake to Avoid: Storing eggs at room temperature for extended periods.
  • Correct Practice: Eggs should be stored in a cool, dry place. Ideally, fresh eggs should be refrigerated to extend their shelf life. The USDA recommends refrigerating eggs at or below 40°F (4°C) to prevent the growth of bacteria like Salmonella.

Bonus Tip: If you have collected eggs from your hens and plan to use them within a week, they can be stored at room temperature (up to 68°F/20°C). However, if you don’t plan to use them soon, refrigerating them is always the safest option.


2. Washing Eggs Improperly or Too Early

While it’s tempting to wash eggs immediately after collecting them, doing so improperly can strip away protective layers, increasing the risk of contamination.

  • Mistake to Avoid: Washing eggs right after collecting them, which can remove the natural protective coating.
  • Correct Practice: Do not wash eggs until just before use. Freshly laid eggs have a protective coating called the bloom that helps keep bacteria out and moisture in. Washing eggs before storing them can remove this protective layer, causing them to spoil faster. If eggs need to be cleaned, use warm water (never cold or hot) and gently scrub them with a soft brush or cloth, and only do so right before use.

Bonus Tip: If the eggs are excessively dirty (due to mud or manure), it’s best to clean them using a dry brush or sandpaper instead of water.


3. Handling Eggs Roughly

Eggs are fragile, and rough handling can cause cracks or breaks, leading to contamination and spoilage. Cracked eggs are more likely to develop bacteria, so it’s important to treat them gently.

  • Mistake to Avoid: Dropping or tossing eggs into baskets or containers.
  • Correct Practice: Always handle eggs gently, cradling them in your hands and placing them carefully in a basket or container. Avoid dropping them from any height, as even a small fall can cause hairline cracks that may not be visible immediately but can lead to bacteria getting inside the egg.

Bonus Tip: Use baskets with soft liners or cushioned containers to reduce the risk of cracking. If you collect eggs in an area with rough terrain, consider using a padded egg carton.


4. Using Old or Expired Eggs Without Checking Freshness

Eggs can lose their freshness over time, and eating old or expired eggs can cause foodborne illness. Not all eggs are laid on the same day, and they can still be good to eat for a while, but it’s important to check for freshness before using them.

  • Mistake to Avoid: Using eggs without checking for freshness or disregarding the “best-before” date.
  • Correct Practice: Always test eggs for freshness before using them. A simple water test can help you check if your eggs are still good:
    • Fill a bowl with water and place the eggs inside. If the eggs sink and lay flat on the bottom, they are still fresh.
    • If the eggs stand upright or float, they are likely past their prime and should be discarded.

Bonus Tip: Eggs generally last about 3-5 weeks in the fridge, depending on their freshness when laid. It’s also good practice to label the eggs with the date they were collected, so you can track their age.


5. Storing Eggs in the Wrong Container

How you store your eggs can significantly impact their quality. Many people simply place eggs in any container they have available, but this can lead to accidental damage or contamination.

  • Mistake to Avoid: Storing eggs in a flimsy or improperly ventilated container.
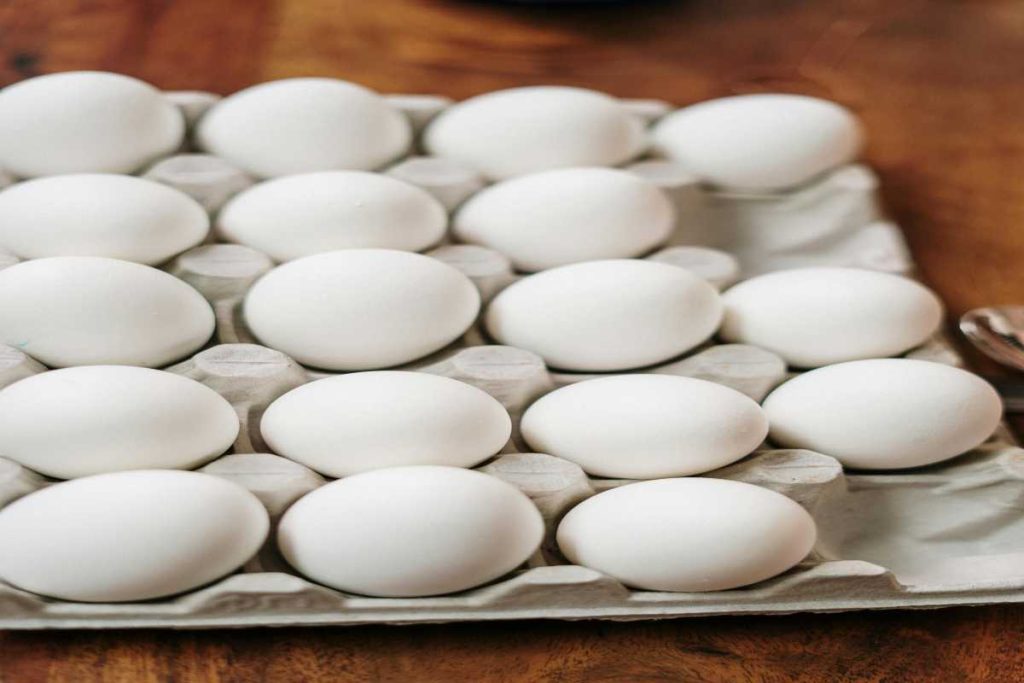
  • Correct Practice: Store eggs in a carton that is designed for egg storage. Egg cartons provide protection from accidental bumps or drops and allow air circulation. The best cartons are made of materials that absorb moisture (like cardboard) rather than plastic, which can trap moisture and encourage bacteria growth.

Bonus Tip: Always store eggs with the pointy end down in the carton. This positioning helps keep the yolk centered and prevents air from entering the egg through the wider end, which can affect freshness.


Conclusion

By avoiding these common mistakes when handling chicken eggs, you can ensure that your eggs stay fresh, safe, and tasty for longer. From storing eggs at the correct temperature and cleaning them properly to handling them gently and checking for freshness, these small adjustments will make a big difference in the quality of the eggs you collect.

Proper care not only extends the shelf life of your eggs but also minimizes the risk of contamination, ensuring that your fresh farm eggs are both delicious and safe to eat!

7 Essential Tips for Raising Chickens

Raising chickens can be an incredibly rewarding experience, whether you’re looking for fresh eggs, natural pest control, or simply the joy of keeping animals. However, to ensure that your chickens thrive and that your venture is successful, there are a few key considerations to keep in mind. From providing the right environment to understanding their diet, here are 7 essential tips for raising chickens that will help you build a happy, healthy flock.

1. Provide a Safe and Comfortable Coop

The foundation of a successful chicken-raising experience is a well-built, safe, and comfortable chicken coop. Your chickens will spend a significant portion of their time in the coop, especially at night, so it’s essential to ensure it meets their needs. Here’s how to create the perfect chicken coop:

  • Space: Ensure there is enough room for each chicken to move comfortably. A good rule of thumb is at least 2-3 square feet per chicken inside the coop and 8-10 square feet in the outdoor run.
  • Ventilation: Proper ventilation is crucial to avoid the buildup of moisture, ammonia, and heat. Consider windows or vents that can be opened to improve airflow.
  • Security: Protect your flock from predators such as raccoons, foxes, and hawks by making sure the coop is well-secured. Use hardware cloth or strong wire mesh, and check for gaps where predators could enter.

Bonus Tip: Make sure your coop is predator-proof, including a secure door, roof, and covered floor.


2. Feed Them the Right Diet

Chickens need a balanced and nutritious diet to stay healthy and productive. While they are excellent foragers and can find a lot of their food in your yard, you will still need to supplement their diet with commercial chicken feed.

  • Layer Feed: Once hens start laying eggs (usually around 18-20 weeks), they need layer feed, which contains extra calcium for strong eggshells.
  • Treats & Snacks: Offer treats like kitchen scraps, vegetables, and grains, but avoid foods that can harm chickens, such as onions, garlic, or citrus fruits.
  • Free-Range Grazing: If you allow your chickens to free-range, they will forage for insects, seeds, and small plants, which enriches their diet.

Bonus Tip: Provide grit (small stones) to help chickens digest food properly, especially if they forage for a significant portion of their diet.


3. Ensure Access to Clean Water

Chickens need access to clean, fresh water at all times. Water is crucial for digestion, egg production, and overall health. Without enough clean water, chickens can become dehydrated, which can impact their health and laying capacity.

  • Water Dispensers: Use clean, easily accessible water dispensers. These can be automatic or manual, depending on the size of your flock.
  • Keep It Clean: Regularly clean the water containers to prevent bacteria build-up and algae growth.

Bonus Tip: In the winter months, you may need a heated waterer to prevent the water from freezing and to ensure your chickens always have access to hydration.


4. Create a Comfortable Nesting Area

If you’re raising chickens for egg production, you’ll need to provide them with a comfortable and quiet nesting area. A well-designed nesting box will encourage hens to lay their eggs in a specific location, preventing them from laying in hidden or inappropriate areas.

  • Nesting Boxes: Provide one nesting box for every 3-4 hens. Each box should be around 12 x 12 inches and filled with clean straw or hay to make them soft and inviting.
  • Cleanliness: Keep the nesting boxes clean and dry to avoid infections and pests. Replace the bedding regularly to ensure a comfortable and hygienic environment.
Bonus Tip: Place the nesting boxes in a quiet area of the coop, away from high-traffic zones and noisy roosters, to make the hens feel safe and secure when laying.


5. Offer Space to Roam and Forage

Chickens are naturally curious creatures and benefit greatly from having space to roam and forage. A secure outdoor run or free-range area will allow them to engage in natural behaviors like scratching, dust-bathing, and pecking, which is essential for their mental and physical well-being.

  • Run Area: If you don’t want your chickens roaming freely, create a spacious, secure chicken run that is predator-proof. Make sure it’s large enough for your flock to exercise and stretch their wings.
  • Free-Range: If possible, let your chickens free-range during the day. This will help them access natural food sources like bugs and plants, and they’ll enjoy the fresh air and sunlight.

Bonus Tip: Rotate the chickens between different sections of your yard or pasture to avoid over-grazing and keep them active.


6. Regular Health Checks and Cleanliness

Maintaining a healthy flock is critical to ensuring their long-term productivity. Regular health checks will help you spot potential issues early, preventing serious problems down the line.

  • Check for Parasites: Keep an eye out for common poultry parasites like mites, lice, and worms. Regularly check under their feathers and in the coop for signs of infestations.
  • Vaccination and Vet Care: Depending on your location and flock size, you may want to vaccinate your chickens against common diseases. Schedule regular vet visits if necessary.
  • Clean the Coop: Regularly clean the coop and replace bedding to reduce the risk of diseases and parasites. A clean coop also prevents foul odors and creates a healthier living environment.

Bonus Tip: Introduce dust baths in a sandy area for chickens to naturally help them rid themselves of parasites.


7. Prepare for Winter and Extreme Weather

Chickens are fairly hardy creatures, but extreme weather conditions, like cold winters or intense heat, can affect their health and egg production. Proper preparation can ensure your chickens stay comfortable year-round.

  • Winter Care: In the winter, ensure the coop is well-ventilated but also insulated enough to protect your chickens from freezing temperatures. Add extra bedding for warmth and ensure water doesn’t freeze.
  • Summer Care: In the summer, ensure your chickens have access to shade and plenty of water to stay cool. You can also add fans to the coop or provide misters to help regulate temperature.

Bonus Tip: If you live in an area with harsh winters, consider using a heat lamp (but always with caution to avoid fire hazards) or providing heated water bowls to keep water from freezing.


Conclusion

Raising chickens requires thoughtful planning and care, but by following these 7 essential tips for raising chickens, you can ensure that your flock thrives. From providing them with a safe, secure coop and nourishing their diet to offering space to roam and regular health checks, these steps will help you raise happy, healthy chickens that can provide you with fresh eggs and joy for years to come.

Whether you’re a beginner or an experienced chicken keeper, keeping these tips in mind will make your chicken-raising journey a success!

Understanding Eggshell Color in Chickens: The Role of Genetics

The color of chicken eggs is not just a matter of aesthetics. It can also provide insight into the genetics of your flock. Different breeds of chickens lay eggs in a variety of colors, from white and brown to blue, green, and even speckled. While the color of the eggshell may not affect the taste or nutritional value of the eggs, it is a unique trait that is influenced by genetics. Let’s take a deeper dive into the science behind eggshell color and what genetics has to say about it.

1. The Genetics Behind Eggshell Color

Eggshell color in chickens is determined by a combination of genetics and breed-specific traits. The genes responsible for eggshell color are carried by the hen and passed down through generations. There are several major genes and factors involved in determining the eggshell color:

a. The Oocyanin Gene

One of the key players in eggshell color is the Oocyanin gene, which is responsible for producing blue and green eggs. This gene is dominant in breeds like the Araucana and Ameraucana, which are known for their blue-green eggs.

  • Blue eggs are produced when hens have two copies of the blue egg gene (often symbolized as O), leading to the deposit of a blue pigment called biliverdin on the eggshell.
  • Green eggs result when the blue pigment (from the O gene) is laid over the brown pigment (from the b gene). Thus, green eggs are a mix of blue and brown pigments.

b. The Brown Egg Gene

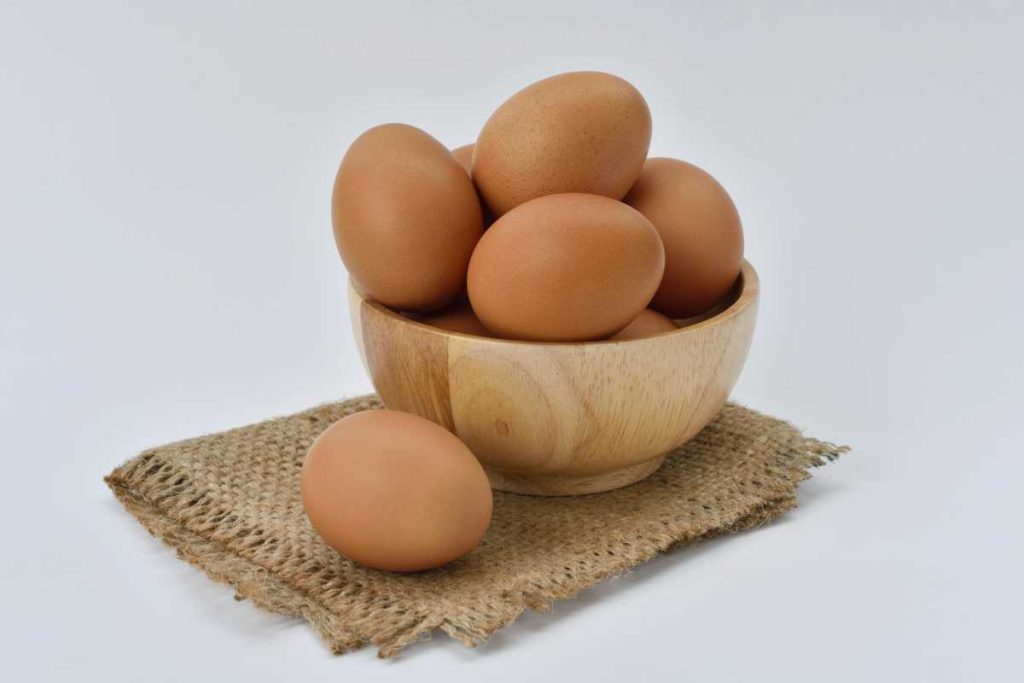
In contrast to the blue egg gene, brown eggs are the most common and are produced by hens with a gene known as “e” for brown eggs. Brown egg color comes from a pigment called protoporphyrin, which is deposited onto the eggshell during the formation process in the hen’s oviduct.

  • Brown eggs are associated with breeds like Rhode Island Reds, Sussex, and Leghorns. Hens that lay brown eggs tend to have a more extensive and well-developed pigment layer.

c. White Eggs

Eggs that are white result from hens that do not produce any additional pigments on the eggshell. This trait is typically associated with white-feathered breeds, like White Leghorns. White eggs are often seen as a simpler, more natural option, with no pigmentation added during the egg-laying process.

2. The Role of the Hen’s Genetics

Different breeds carry distinct combinations of the genes that affect eggshell color. Here’s a breakdown of some common breeds and the color eggs they produce:

  • White Leghorn – White eggs. These chickens are commonly used in commercial egg production due to their prolific laying and white eggs.
  • Rhode Island Red – Brown eggs. Known for their hardiness and egg-laying abilities, these chickens produce rich brown eggs.
  • Ameraucana and Araucana – Blue eggs. These breeds are famous for their unique blue eggs, which are a result of the Oocyanin gene.
  • Olive Egger – Olive-green eggs. This is the result of crossbreeding between blue egg layers (e.g., Ameraucana) and brown egg layers (e.g., Rhode Island Red).

3. How the Eggshell is Formed

To understand the color of the eggs, it helps to know a bit about how eggshells are created. The eggshell starts forming in the hen’s oviduct, where various layers of proteins and pigments are added. Here’s a simplified process:

  1. First Stage: The egg is initially created with a protein shell (the egg white or albumin).
  2. Pigment Layering: In the final stages of shell development, pigments are deposited onto the surface of the eggshell. This is where the color comes into play:
    • Brown eggs are colored by protoporphyrin.
    • Blue eggs are colored by biliverdin.
    • Green eggs are a combination of brown and blue pigments.
  3. Final Stages: Once the pigment is laid over the shell, the eggs are complete and ready for laying.

4. Genetics of Eggshell Color in Crossbreeds

When you breed chickens from different breeds, the genetics of eggshell color can mix in interesting ways. For example:

  • Olive Eggers: If a blue egg-laying breed, like the Ameraucana, is crossed with a brown egg-laying breed, such as the Rhode Island Red, the result is chickens that lay eggs in varying shades of olive green. This is a cross of the Oocyanin gene and the protoporphyrin pigment gene.

These crossbreeds often create a wider variety of egg colors and can be desirable for backyard chicken keepers who enjoy having different colors of eggs in their nests.

5. Eggshell Color and Chicken Behavior

There is no scientific evidence to suggest that hens who lay different-colored eggs have different behaviors or care requirements. However, it’s commonly believed that certain traits, like feather color or the size of the chicken, may indirectly affect the breed’s egg-laying habits.

For instance:

  • Blue or green eggs tend to come from smaller chickens that may not lay as frequently as those that lay brown eggs.
  • Brown egg-layers are often larger and more hardy, contributing to their higher egg production rates.

However, in terms of genetics, the key difference is in the pigmentation genes that affect the final eggshell color, and these do not generally correlate with egg size or laying frequency.

6. Does Eggshell Color Affect Egg Quality?

From a nutritional perspective, the color of the eggshell doesn’t impact the taste or nutritional content of the egg. However, some people may perceive brown eggs as being more “natural” or “organic,” while others appreciate the uniqueness of blue and green eggs.

What’s important to note is that the eggshell color is entirely based on the hen’s genetics and does not affect the internal quality of the egg, including the egg white or yolk.

7. Why Do Some Hens Lay Lighter or Darker Eggs?

Several factors can influence the shade of the eggs laid by a hen:

  • Age of the hen: Younger hens tend to lay lighter eggs, while older hens may lay darker eggs.
  • Breed: Different breeds have variations in their egg color. For instance, a Rhode Island Red will typically lay a darker brown egg than a Sussex, even though they both lay brown eggs.
  • Health and Nutrition: A hen’s diet and overall health can also impact the hue of the eggs they produce. For example, a diet rich in carotenoids (from foods like corn and marigolds) can make eggs slightly more vibrant in color.

Conclusion

The color of chicken eggs is largely dictated by genetics, with specific genes responsible for blue, green, and brown eggs. Understanding these genetic factors can help you predict what colors to expect from your chickens, whether you’re raising purebred birds or crossing breeds for unique hues. While eggshell color doesn’t affect the quality of the egg itself, it adds an interesting and beautiful layer to the world of poultry keeping. With this knowledge, you can better understand your chickens’ egg-laying patterns and appreciate the colorful eggs they produce!

How to Start Your Own Chicken Therapy Program: A Step-by-Step Guide

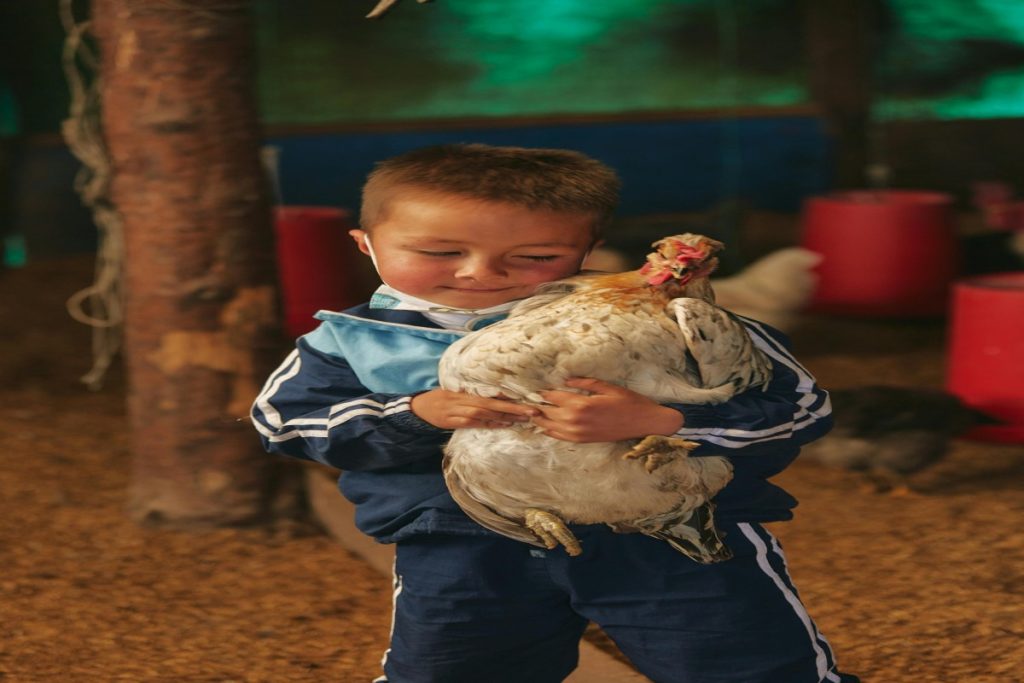
Chickens are not only delightful pets but also incredible therapy animals. Their gentle nature and amusing behaviors can bring joy and comfort to individuals dealing with stress, anxiety, or other emotional challenges. If you’re considering starting your own chicken therapy program, here’s a comprehensive guide to help you through the process.


Step 1: Research and Understand the Benefits

Before diving in, it’s crucial to understand the benefits of chicken therapy. Research the positive impacts chickens can have on mental health, such as reducing anxiety, improving mood, and providing companionship. Familiarize yourself with existing programs to gain insights into how they operate.


Step 2: Determine Your Target Audience

Identify who your therapy program will serve. This could include children, seniors, individuals with disabilities, or those in rehabilitation. Understanding your audience will help you tailor your program to meet their specific needs and interests.


Step 3: Create a Business Plan

Develop a detailed business plan that outlines the following:

  • Mission Statement: Define the purpose of your chicken therapy program.
  • Goals and Objectives: Set clear, measurable goals for your program.
  • Budget: Estimate costs for setup, ongoing maintenance, and marketing.
  • Location: Determine where your program will operate (e.g., at home, a community center, or a local farm).
  • Program Structure: Outline how sessions will be conducted, including duration, frequency, and activities involved.

Step 4: Select the Right Chicken Breeds

Choosing the right chicken breeds is crucial for a successful therapy program. Opt for calm, friendly, and docile breeds, such as:

  • Silkies: Known for their friendly nature and soft feathers.
  • Orpingtons: Gentle and easy to handle.
  • Cochins: Friendly and good with people.
  • Plymouth Rocks: Adaptable and sociable.

Consider adopting hens that are already socialized and accustomed to human interaction.


Step 5: Set Up a Safe and Comfortable Environment

Create a welcoming space for your chickens and therapy sessions. Ensure the following:

  • Coop and Run: Provide a secure and spacious coop with an outdoor run for the chickens to roam.
  • Cleanliness: Keep the environment clean to maintain the chickens’ health and hygiene.
  • Comfort: Include comfortable seating for participants and shaded areas for chickens.
  • Accessibility: Ensure the space is accessible for individuals with mobility challenges.

Step 6: Obtain Necessary Permits and Licenses

Check local regulations regarding keeping chickens and running a therapy program. You may need permits for zoning, animal welfare, and health and safety. Contact your local government or agricultural extension office for guidance.


Step 7: Develop a Program Curriculum

Create a structured program curriculum that outlines activities and interactions. This could include:

  • Feeding and Care: Teach participants how to properly feed and care for chickens.
  • Gentle Interaction: Encourage gentle handling, petting, and interacting with the chickens.
  • Educational Components: Provide information about chicken behavior, care, and the benefits of animal therapy.
  • Mindfulness and Relaxation: Incorporate mindfulness activities, such as sitting quietly with the chickens or observing their behaviors.

Step 8: Recruit and Train Volunteers

Consider recruiting volunteers to assist with your program. Look for individuals who are passionate about animals and have experience working with children or individuals with special needs. Provide training on chicken handling, safety, and program facilitation to ensure a positive experience for participants.


Step 9: Market Your Program

Promote your chicken therapy program through various channels:

  • Social Media: Utilize platforms like Facebook, Instagram, and Twitter to share updates and success stories.
  • Local Community Centers: Connect with local schools, senior centers, and rehabilitation facilities to introduce your program.
  • Workshops and Events: Host open houses or workshops to showcase your program and attract participants.

Step 10: Gather Feedback and Adjust

After launching your program, seek feedback from participants and their families. Use surveys or informal conversations to gather insights about their experiences. Be open to making adjustments based on their suggestions to continually improve the program.


Step 11: Establish Partnerships

Consider forming partnerships with local organizations, schools, or healthcare facilities. Collaborating with professionals in mental health, education, or animal therapy can enhance your program’s credibility and reach.


Step 12: Monitor Progress and Celebrate Success

Keep track of the progress of your participants and the overall impact of the program. Celebrate milestones and successes, whether big or small. Sharing these achievements can help build community support and attract more participants.


Conclusion

Starting a chicken therapy program can be a fulfilling way to bring joy and comfort to individuals in your community. By following these steps, you can create a safe, welcoming environment for both chickens and participants. Embrace the journey, and enjoy the process of sharing the therapeutic benefits of these wonderful animals!

What is Chicken Coop Ventilation

Chicken coop ventilation is a crucial aspect of poultry management that ensures a healthy living environment for your flock. Proper ventilation involves allowing fresh air to circulate within the coop while simultaneously expelling stale air, moisture, and harmful gases like ammonia.

Chickens produce moisture through respiration and droppings, leading to increased humidity levels if not adequately managed. Without proper ventilation, this can result in respiratory problems, heat stress, and the proliferation of harmful bacteria, ultimately impacting the health and productivity of your chickens.

In this blog, we’ll explore the importance of chicken coop ventilation and five effective methods to ensure your coop remains well-ventilated throughout the year.


Why is Ventilation Important?

Before diving into the practical methods of ventilation, it’s essential to understand why it matters:

  • Respiratory Health: Chickens are susceptible to respiratory diseases, and poor ventilation can lead to a buildup of ammonia and other harmful gases. Proper ventilation reduces these risks, promoting better overall health.
  • Humidity Control: Excess moisture can create a breeding ground for pathogens and mold, which can negatively affect your flock. Good airflow helps maintain optimal humidity levels, preventing issues such as respiratory infections and footpad dermatitis.
  • Temperature Regulation: During hot summer months, chickens can suffer from heat stress, which affects their appetite, egg production, and overall health. Ventilation helps regulate temperatures within the coop, keeping it cooler during the day.
  • Odor Management: Adequate ventilation helps minimize unpleasant odors associated with chicken droppings, creating a more pleasant environment for both the chickens and their caretakers.

5 Ways to Utilize Chicken Coop Ventilation

Here are five effective methods for ensuring proper ventilation in your chicken coop:

1. Windows and Openings

Strategically Placed Windows

  • Functionality: Installing windows in your coop can significantly enhance natural airflow. Positioning them high on the walls allows warm, moist air to escape while enabling fresh air to enter from lower openings.
  • Screening: Use sturdy screens to keep pests and wild birds out while allowing fresh air in. Ensure windows can be opened and closed easily to adjust airflow according to the weather.

Adjustable Openings

  • Flexibility: Create adjustable vents or openings that can be opened or closed based on environmental conditions. During hot summer days, keeping windows and vents open will promote airflow, while in winter, you might want to reduce openings to conserve heat.
  • Types of Vents: Consider using louvered vents or sliding windows that can easily be modified as conditions change, providing you with full control over the ventilation.

2. Roof Ventilation

Ventilation Caps

  • Purpose: Installing ventilation caps or ridge vents on the roof allows hot air to rise and escape. These vents should be designed to prevent rain from entering the coop while promoting sufficient airflow.
  • Types of Roof Vents: You can choose from static vents, turbine vents, or even powered exhaust vents depending on your coop design and local climate.

Overhangs

  • Design Considerations: Roof overhangs not only add style to your coop but also protect windows and vents from rain and snow, ensuring that air can circulate freely without letting moisture in.
  • Weather Protection: This design helps maintain airflow while providing shelter for chickens during inclement weather, allowing them to stay dry and comfortable.

3. Fans and Air Circulation Devices

Exhaust Fans

  • Benefits of Exhaust Fans: Installing exhaust fans in the coop can help actively draw out stale air, particularly on hot days. Exhaust fans can be connected to a thermostat, automatically turning on when temperatures rise above a certain point.
  • Power Considerations: Choose energy-efficient models to minimize electricity costs, especially if you plan to run them for extended periods during peak summer heat.

Ceiling Fans

  • Enhancing Airflow: If your coop has sufficient height, consider installing ceiling fans. These fans can help circulate air evenly throughout the coop without creating uncomfortable drafts.
  • Durability: Ensure that the ceiling fans are suitable for outdoor use to withstand humidity and potential dust exposure in the coop environment.

4. Cross Ventilation

Opposing Vents

  • Encouraging Cross Breezes: Creating opposing vents on either side of the coop promotes cross ventilation, allowing fresh air to flow through one vent and push stale air out through the other. This method is especially effective on windy days.
  • Placement Tips: Position vents to take advantage of prevailing winds, and consider using adjustable flaps to control airflow direction during varying weather conditions.

Wind Direction Awareness

  • Maximizing Natural Airflow: Understanding the prevailing wind direction in your area can help you design your coop for optimal airflow. Positioning vents in alignment with the wind can significantly improve the effectiveness of your ventilation system.
  • Seasonal Adjustments: Adjust the positioning of movable vents or openings based on seasonal wind patterns to ensure your chickens get the best airflow throughout the year.

5. Seasonal Adjustments

Flexible Ventilation Strategies

  • Adapting to Weather Changes: Different seasons require different ventilation strategies. In winter, reducing airflow is important to retain heat, while in summer, increased ventilation is vital to keep the coop cool.
  • Insulation and Vent Covers: Use insulated covers for vents during colder months to minimize heat loss while still allowing for some degree of airflow. This can help maintain a comfortable environment without excessive cold drafts.

Monitoring Conditions

  • Regular Observations: Regularly monitor the temperature and humidity inside the coop using thermometers and hygrometers. This will help you understand when to adjust your ventilation system to keep conditions optimal for your flock.
  • Be Prepared for Weather Changes: Be ready to adjust your ventilation strategy during unexpected weather changes, such as sudden temperature drops or heatwaves, to protect your chickens’ health.

Conclusion

Effective chicken coop ventilation is essential for maintaining a healthy and comfortable environment for your flock. By utilizing windows and openings, roof ventilation, fans, cross ventilation, and seasonal adjustments, you can create a dynamic airflow system that benefits your chickens year-round.

Ensuring proper ventilation not only improves the health and productivity of your chickens but also makes chicken-keeping a more enjoyable experience. By taking the time to invest in your coop’s ventilation, you can create a safe, healthy, and thriving environment for your feathered friends.

Exploring Traditional Traits Through Raising Heritage Breeds

In a world increasingly dominated by industrial agriculture, raising heritage breeds has become a way to reconnect with our agricultural roots and preserve traditional traits. Heritage breeds of livestock and poultry are known for their unique genetic traits, resilience, and flavor. In this blog, we’ll explore what heritage breeds are, their importance in sustainable agriculture, and the traditional traits they embody.

1. What Are Heritage Breeds?

Heritage breeds refer to livestock and poultry varieties that have been bred for generations under traditional farming practices. These breeds are typically characterized by:

  • Genetic Diversity: Heritage breeds have a wider gene pool compared to commercial breeds, making them more resilient to diseases and environmental changes. For example, the genetic diversity in heritage pig breeds like the Large Black or Berkshire can help mitigate the effects of a disease outbreak, as not all animals will be susceptible.
  • Traditional Characteristics: They often possess traits that have been selected for specific local conditions, such as adaptability, hardiness, and productivity. For instance, the Tamworth pig is known for its ability to thrive in outdoor environments, making it a popular choice for pasture-based farming.
  • Flavor and Quality: Many heritage breeds are known for their superior flavor, texture, and overall quality of meat, milk, and eggs. The flavor profile of heritage chicken breeds, such as the Bresse, is often described as richer and more nuanced compared to conventional broilers.

2. The Importance of Raising Heritage Breeds

a. Preserving Genetic Diversity

Raising heritage breeds helps maintain genetic diversity within our livestock populations. This diversity is crucial for food security and can protect against diseases and climate change. As commercial breeds dominate the market, many heritage breeds face extinction. According to the United Nations Food and Agriculture Organization (FAO), approximately 1,000 livestock breeds have become extinct over the last 100 years, highlighting the urgent need for conservation efforts. By choosing to raise heritage breeds, farmers contribute to the preservation of biodiversity and the resilience of agricultural systems.

b. Sustainable Farming Practices

Heritage breeds are often better adapted to local environments, requiring fewer resources than commercial breeds. They thrive on pasture, eat less grain, and can often forage for their food. This adaptability reduces the need for artificial feed and lowers the environmental impact of livestock farming. For example, the Delaware chicken is known for its excellent foraging ability, allowing it to produce meat and eggs with minimal feed input. This sustainability aspect not only benefits the environment but also promotes economic viability for small-scale farmers.

c. Connecting to Tradition

Raising heritage breeds fosters a connection to traditional farming methods and local cultures. Many heritage breeds are tied to specific regions and have historical significance. By raising them, farmers keep these traditions alive and promote local agricultural heritage. The Bourbon Red turkey, once a staple in American households, embodies the rich culinary traditions of the past. By incorporating heritage breeds into your farm, you contribute to the preservation of these cultural legacies.

3. Traditional Traits of Heritage Breeds

a. Hardiness

Heritage breeds are known for their robustness and ability to thrive in various conditions. They often exhibit natural instincts and behaviors that allow them to adapt to their environment effectively. For example, the Rhode Island Red chicken is renowned for its hardiness in both cold and hot climates, making it a reliable choice for diverse farming conditions. This hardiness reduces the need for costly veterinary interventions and specialized housing, ultimately benefiting the farmer’s bottom line.

b. Flavorful Products

Many heritage breeds are prized for the exceptional quality of their meat, milk, and eggs. The Dorking chicken, for example, is celebrated for its tender, flavorful meat, while the Jersey cow is renowned for its rich milk, high in butterfat content. Studies have shown that grass-fed heritage breeds produce meat with a more favorable omega-3 to omega-6 fatty acid ratio, which is healthier for consumers. The unique flavor profiles of heritage breeds can also provide chefs and home cooks with distinctive ingredients to elevate their culinary creations.

c. Low Input Requirements

Heritage breeds often require fewer inputs compared to commercial varieties. They can efficiently convert forage into high-quality protein, making them more sustainable for small-scale farming. The American Guinea Hog is an excellent example, thriving on pasture and producing rich, flavorful meat without needing extensive grain feed. This ability to thrive on minimal inputs aligns with the growing demand for sustainable and ethical farming practices.

4. How to Get Started with Heritage Breeds

a. Research

Before diving into raising heritage breeds, research which breeds are best suited for your local climate, resources, and goals. Organizations like the American Livestock Breeds Conservancy can provide valuable information on available breeds and their traits. Attend workshops, read books, and engage with online forums to learn about the characteristics and needs of specific heritage breeds.

b. Find a Reputable Source

Look for local breeders or hatcheries specializing in heritage breeds. Purchasing animals from reputable sources ensures you are getting healthy stock and can provide you with information on their care and management. Many heritage breed associations maintain directories of certified breeders, making it easier to find quality stock.

c. Create a Suitable Environment

Heritage breeds often thrive in more traditional farming environments. Ensure you provide adequate space for foraging, appropriate shelter, and a balanced diet to help them reach their full potential. Consider rotational grazing practices to enhance pasture health and promote natural foraging behavior in your animals.

d. Join Community Groups

Connecting with other heritage breed enthusiasts can be invaluable. Local farming groups, online forums, and social media platforms can provide support, advice, and shared experiences. Participate in local agricultural fairs and exhibitions to meet other farmers and showcase your heritage breed animals. Building a network can lead to knowledge exchange and potential breeding partnerships.

5. Conclusion

Raising heritage breeds is more than just a farming choice; it’s a commitment to preserving our agricultural heritage, promoting sustainability, and celebrating traditional traits. By choosing to raise these unique animals, farmers and enthusiasts contribute to biodiversity and ensure the availability of flavorful, high-quality products for future generations.

Whether you’re a seasoned farmer or a novice looking to start your journey, exploring heritage breeds offers an enriching experience that connects you to the past while promoting a sustainable future. Embrace the beauty of traditional traits and help keep these unique breeds alive for generations to come.

8 Winning Strategies for Showcasing Your Prize Chickens

Entering your chickens in a show can be an exciting experience that allows you to showcase your hard work and dedication to poultry keeping. However, standing out among the competition requires careful planning and attention to detail. Here are eight winning strategies to help you showcase your prize chickens effectively.

1. Choose the Right Birds

Overview

Selecting the right chickens for a show is crucial. You want to showcase birds that not only meet breed standards but also exhibit excellent health and temperament.

Strategy

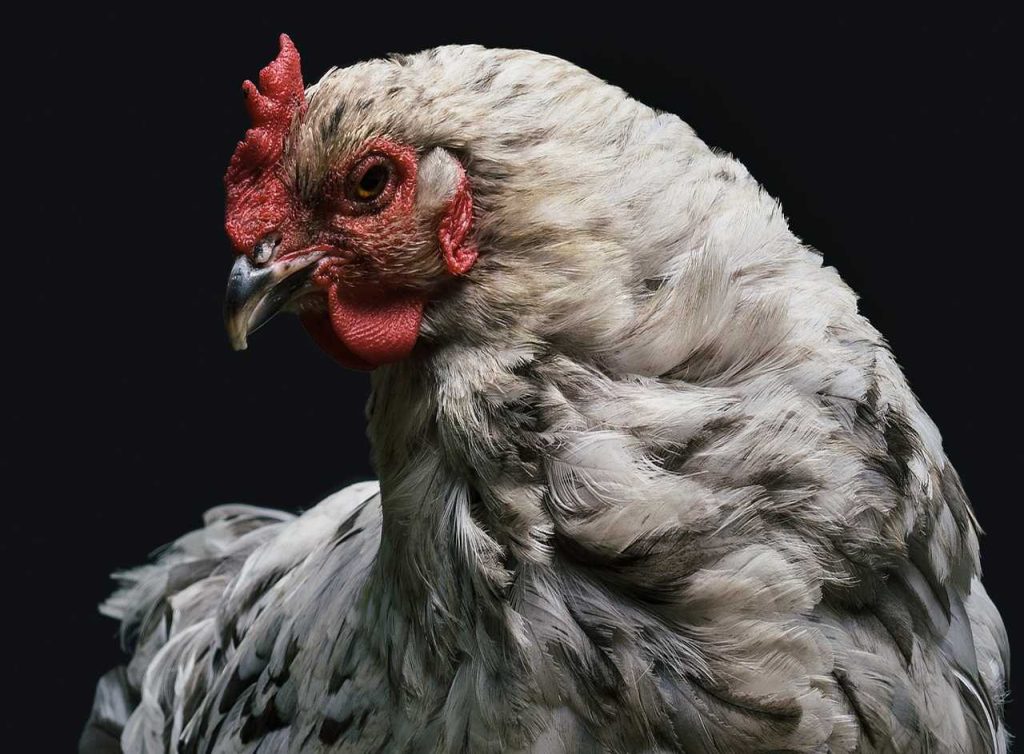
  • Research Breed Standards: Familiarize yourself with the specific standards for the breeds you are entering. The American Poultry Association (APA) provides detailed breed standards that can guide your selection.
  • Health First: Choose birds that are healthy, with no signs of illness. Healthy plumage, clear eyes, and a clean vent are indicators of a strong contender.

2. Proper Grooming

Overview

Grooming is an essential aspect of preparing your chickens for a show. A well-groomed bird not only looks more appealing but also demonstrates the care you provide.

Strategy

  • Bathing: Give your chickens a gentle bath a day or two before the show. Use mild soap and ensure they are thoroughly dried to prevent chilling.
  • Feather Care: Trim any excess feathers and ensure the plumage is clean and well-maintained. Use a fine brush to smooth the feathers and remove any dirt or debris.

3. Create a Comfortable Transport Environment

Overview

Transporting your chickens can be stressful, so it’s important to create a comfortable environment for them during the journey.

Strategy

  • Secure Containers: Use sturdy, well-ventilated crates or carriers that provide ample space for your chickens to move.
  • Familiar Items: Include familiar bedding or items from their home environment to help reduce stress during transport.

4. Practice Handling Your Chickens

Overview

Getting your chickens accustomed to handling can help them remain calm during the judging process.

Strategy

  • Regular Handling: Spend time each day handling your chickens gently. This builds trust and reduces anxiety when they are in a show environment.
  • Practice Showing: Simulate the show experience at home by practicing how you will hold and present your birds to judges.

5. Understand the Judging Criteria

Overview

Familiarizing yourself with the judging criteria can help you prepare your chickens for what the judges will be looking for.

Strategy

  • Attend Workshops: Participate in poultry workshops or seminars to learn about the judging process and criteria.
  • Talk to Experienced Exhibitors: Networking with seasoned exhibitors can provide valuable insights into what judges prioritize.

6. Provide Proper Nutrition

Overview

Good nutrition is key to ensuring your chickens are in optimal condition for a show.

Strategy

  • Quality Feed: Provide a high-quality feed that meets the nutritional needs of your chickens. Ensure they are well-fed in the weeks leading up to the show.
  • Supplements: Consider adding supplements like vitamins and minerals to enhance their health and appearance.

7. Maintain a Clean Living Environment

Overview

A clean and well-maintained living space contributes to the overall health and appearance of your chickens.

Strategy

  • Regular Cleaning: Keep the coop clean and dry, and change bedding frequently to prevent the buildup of waste and parasites.
  • Free Range: Allow your chickens to forage in a safe, clean area to promote natural behavior and well-being.

8. Prepare Your Presentation

Overview

Your presentation can significantly impact how judges perceive your chickens. A confident and knowledgeable presentation can make a lasting impression.

Strategy

  • Know Your Birds: Be prepared to discuss the breed, lineage, and specific characteristics of your chickens. This knowledge demonstrates your commitment and expertise.
  • Stay Calm and Confident: Approach the judging area with confidence. Take deep breaths, smile, and engage positively with the judges.

Conclusion

Showcasing your prize chickens is an opportunity to celebrate your dedication to poultry keeping. By following these eight winning strategies, you can ensure that your birds are presented in the best light possible. From choosing the right birds and grooming to understanding the judging criteria and presenting confidently, preparation is key to success at any poultry show. Good luck, and may your chickens shine in the spotlight!

10 Must-Have Items for Your Chicken First Aid Kit

Keeping chickens is a rewarding experience, but it also comes with the responsibility of ensuring their health and well-being. Accidents and illnesses can happen, so it’s essential to have a well-stocked first aid kit ready for your flock. Here are ten must-have items for your chicken first aid kit to help you address common health issues and emergencies.

1. Antiseptic Solution

Overview

An antiseptic solution is crucial for cleaning wounds and preventing infections.

Recommendation

  • Use: Betadine or hydrogen peroxide can be used to clean cuts, scrapes, or any minor wounds before applying dressings.
  • Note: Avoid using alcohol, as it can be too harsh and painful for chickens.

2. Bandages and Gauze

Overview

Bandages and gauze are necessary for protecting wounds and aiding in the healing process.

Recommendation

  • Use: Keep a variety of sizes on hand, including self-adhesive bandages and sterile gauze pads. These can be used to cover wounds or hold dressings in place.
  • Tip: Use Vetrap, a flexible bandage, for wrapping injured feet or limbs.

3. Electrolyte Solutions

Overview

Electrolyte solutions help rehydrate chickens, especially during hot weather or after illness.

Recommendation

  • Use: Provide an electrolyte solution in their water to restore hydration levels and essential minerals.
  • Note: Look for commercial electrolyte powders designed specifically for poultry.

4. Wound Spray or Ointment

Overview

A wound spray or ointment is vital for promoting healing and preventing infection.

Recommendation

  • Use: Products like Blu-Kote or Neosporin (without pain relief ingredients) can be applied to wounds to keep them clean and promote healing.
  • Tip: Use Blu-Kote to mask wounds, which can deter pecking from other chickens.

5. Tweezers and Scissors

Overview

Tweezers and scissors are handy tools for various tasks, from removing splinters to cutting bandages.

Recommendation

  • Use: Keep a pair of sterilized tweezers for removing foreign objects and a pair of scissors for cutting gauze or bandages.
  • Tip: Have these tools readily accessible in your first aid kit for quick use.

6. Thermometer

Overview

Monitoring your chickens’ temperature is essential for diagnosing potential health issues.

Recommendation

  • Use: A digital or veterinary thermometer can be used to check for fever. A normal chicken temperature ranges from 104°F to 107°F (40°C to 42°C).
  • Tip: Use lubricant (like petroleum jelly) for easier insertion when taking the temperature.

7. Poultry Vitamins and Supplements

Overview

Vitamins and supplements can help boost your chickens’ immune systems and overall health.

Recommendation

  • Use: Consider products containing vitamins A, D, and E, along with probiotics to aid digestion.
  • Note: Administer these supplements during stressful situations, such as after illness or transport.

8. Syringes and Droppers

Overview

Syringes and droppers are useful for administering medications or fluids directly to your chickens.

Recommendation

  • Use: Have a few different sizes on hand (5ml and 10ml) for administering oral medications, electrolytes, or water.
  • Tip: Always ensure the syringe is clean and free of any residues before use.

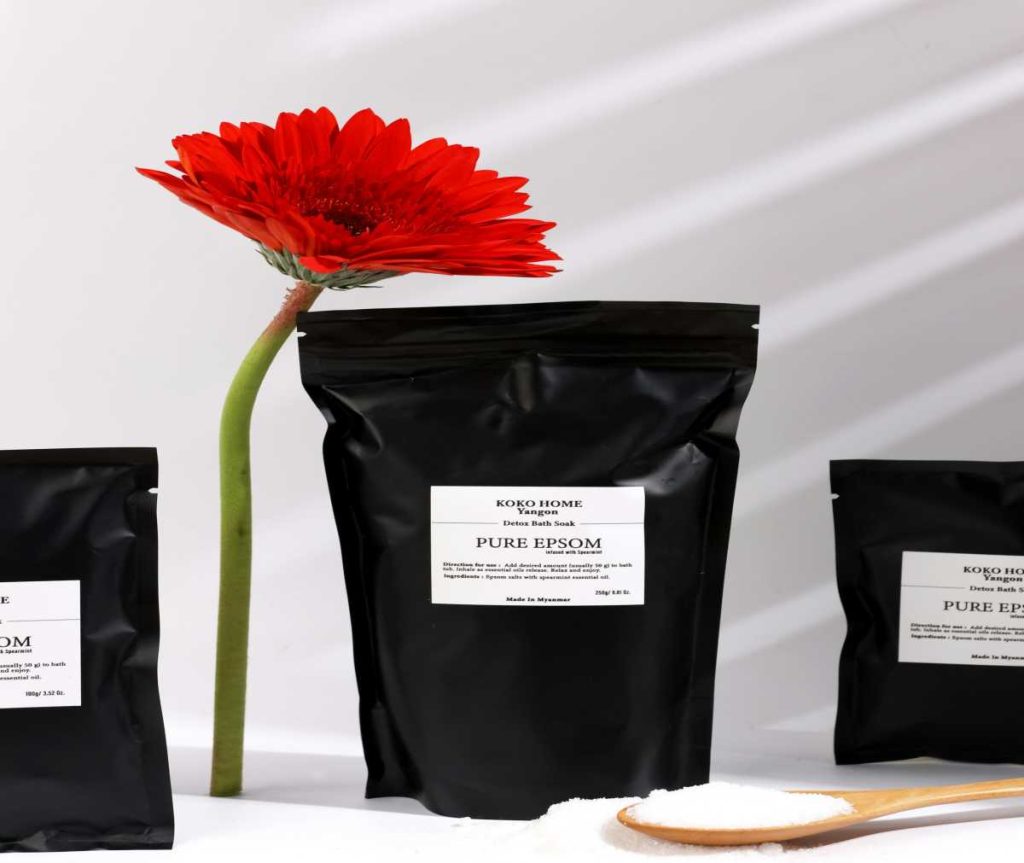
9. Epsom Salt

Overview

Epsom salt can be beneficial for treating various ailments, particularly foot problems.

Recommendation

  • Use: Dissolve Epsom salt in warm water to create a soak for injured or swollen feet to reduce inflammation and promote healing.
  • Tip: Soaking for 15–20 minutes can be effective, followed by gentle drying.

10. Flea and Tick Treatment

Overview

Keeping your chickens free from parasites is essential for their health.

Recommendation

  • Use: Consult with your veterinarian for safe flea and tick treatments suitable for poultry. Common products include diatomaceous earth and natural essential oils.
  • Note: Regularly check your chickens for signs of parasites and apply treatment as needed.

Conclusion

Having a well-stocked first aid kit is essential for every chicken keeper. By including these ten must-have items, you’ll be better prepared to handle minor injuries and health issues promptly. Regularly check your first aid kit to ensure everything is up-to-date and replace any used items. Remember, if a health issue arises that you cannot manage, consult a veterinarian specializing in poultry for professional assistance. Keeping your flock healthy and happy is the ultimate goal!

5 Companion Plants to Boost Your Chicken-Friendly Garden

Creating a chicken-friendly garden can enhance both the well-being of your flock and the productivity of your garden. Companion planting is a technique that can help you achieve a harmonious balance, where plants support each other and provide benefits to your chickens. In this blog, we’ll explore five companion plants that will boost your chicken-friendly garden.

1. Marigolds

Overview

Marigolds are a colorful addition to any garden, and they offer several benefits for both your plants and chickens.

Benefits

  • Pest Control: Marigolds emit a strong scent that deters pests such as aphids, nematodes, and mosquitoes, helping to protect your garden.
  • Nutritional Boost: The vibrant petals can enhance the color of your chickens’ egg yolks and provide some additional nutrients.

How to Use

Plant marigolds around your garden beds and the perimeter of the chicken coop. They are easy to grow and can thrive in various conditions. Your chickens will enjoy pecking at the petals, and the flowers will help keep pests at bay.

2. Lavender

Overview

Lavender is well-known for its soothing aroma and beautiful blooms, making it a lovely addition to your garden.

Benefits

  • Insect Repellent: Lavender naturally repels mosquitoes and other unwanted insects, creating a healthier environment for your chickens.
  • Stress Relief: The calming scent can help reduce stress and anxiety in chickens, making them feel more relaxed.

How to Use

Grow lavender near your chicken coop or in areas where your chickens forage. It thrives in sunny locations and well-drained soil. The scent can also make your garden more enjoyable for you and your family.

3. Comfrey

Overview

Comfrey is a nutrient-rich plant that can serve multiple purposes in your chicken-friendly garden.

Benefits

  • Natural Fertilizer: Comfrey has deep roots that draw nutrients from the soil, which can enhance the fertility of your garden.
  • Chicken Feed: The leaves are high in protein and can be fed to your chickens as a nutritional supplement.

How to Use

Plant comfrey in a dedicated area where chickens can access it. You can also harvest the leaves to mix into their feed or use them in compost to enrich the soil.

4. Nasturtiums

Overview

Nasturtiums are beautiful, edible flowers that add a pop of color to your garden while providing numerous benefits.

Benefits

  • Pest Deterrent: These plants help repel aphids and whiteflies, protecting your other plants from infestations.
  • Nutrient-Rich Snack: The leaves and flowers are safe for chickens to eat and are packed with vitamins, particularly vitamin C.

How to Use

Plant nasturtiums throughout your garden, especially near vulnerable plants. They can be grown as ground cover or in pots. Chickens will enjoy foraging for the leaves and flowers, adding diversity to their diet.

5. Sunflowers

Overview

Sunflowers are not only visually striking but also serve as a great addition to your chicken-friendly garden.

Benefits

  • Shade Provider: Tall sunflower stalks provide shade for your chickens during hot summer days, helping them stay cool.
  • Nutritional Seeds: Once the flowers bloom, chickens can forage on fallen seeds, which are high in protein and healthy fats.

How to Use

Plant sunflowers along the edges of your garden or near the chicken run. Allow your chickens to access the fallen seeds, or harvest them to supplement their feed.

Conclusion

Incorporating these companion plants into your chicken-friendly garden can lead to a thriving ecosystem that benefits both your chickens and your plants. By promoting pest control, providing nutritious snacks, and enhancing the overall environment, these plants help create a harmonious balance. A well-planned garden not only supports your flock’s health and well-being but also contributes to a productive and enjoyable gardening experience. Start planting these companions today and watch your chicken-friendly garden flourish!