How to: Growing the Avocado in Backyard?

Do you ever realize that what happens to your body after eating an avocado? The fruit is loaded with fiber just like many other vegetables and fruits. Besides, the potassium-rich avocado helps to reduce the blood pressure and, regular use of avocado attenuates weight gain to normal individuals over time.

Meanwhile, it is interesting to know where avocado grow.

This fruit crop is native to tropical America. And, it has been grown in Mexico initially, later it expanded to Central America as well as surrounding areas. Today, it is grown in the USA, Dominican Republic India, Colombia, New Zealand, Indonesia, Brazil, and many other countriesall over the world.

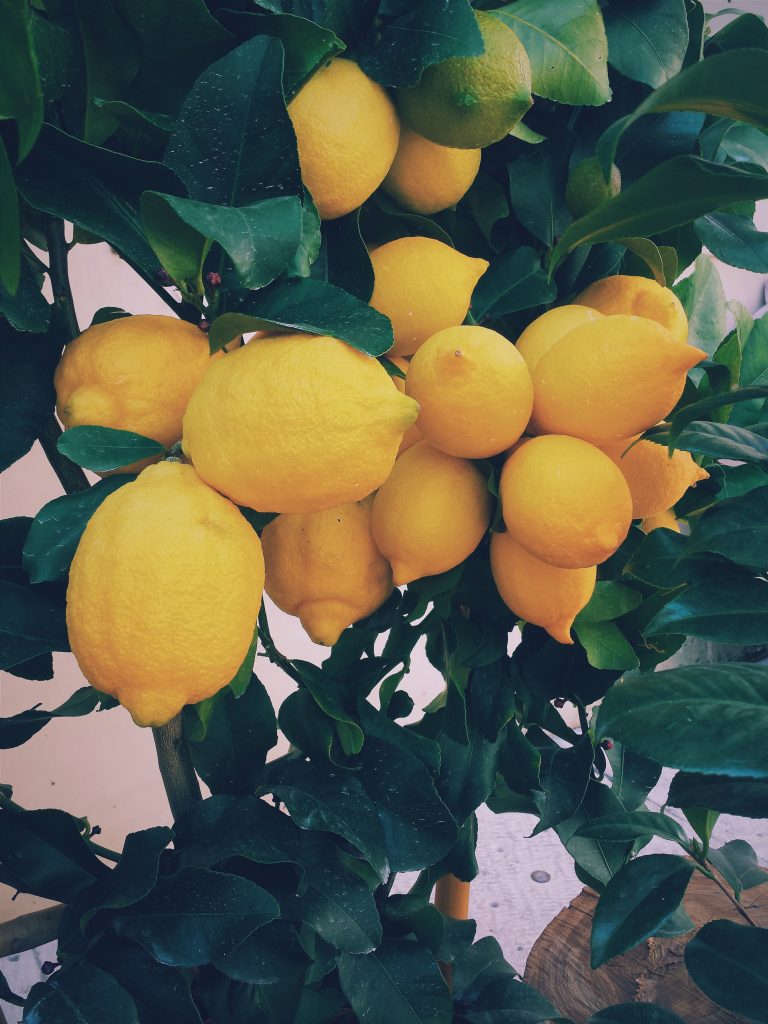
Also Read: Farming Orange for a Perfect Citrus

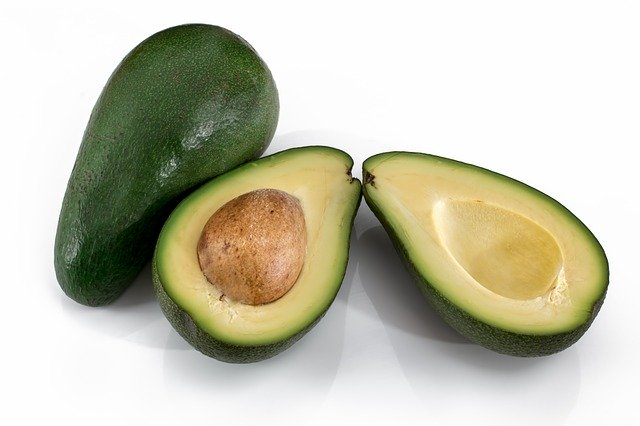
This fruit is a single seed and is primarily eaten for its outstanding health content. Avocados can be a portion of a superfood diet, loaded with nutrients, many of which are lacking in the contemporary diet.

Initially, the avocado trees were planted to protect the other crops. Today, however, this fruit is mainly cultivated as a cash crop. It can thrive in all climates and environments. Moreover, the capital required for the cultivation of avocado fruit is less and it provides the greatest return on a successful yield in a season.

Today, it is the best decision to start a business venture of avocado farming because the starting cost for growing an avocado tree is relatively less to other fruit plants. 

Moreover, this fruit crop needs little care and maintenance to reach the highest fruit yield.

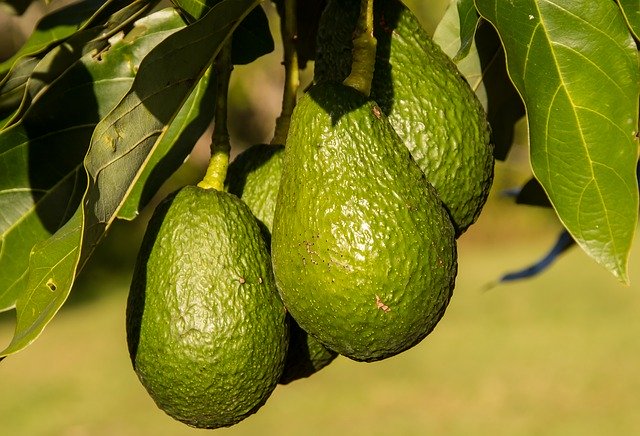
Growing Avocado Tree

 It is hard to deny the nutritious value of the avocados. But, in case, you are contemplating avocado farming. It requires huge patience. And, once a plant starts to produce fruits, you will not regret your decision.

The price of avocado is relatively high because of its high consumption and nutritious values. The high demand for this healthy fruit is determined by its benefit to the human body.

The growth of a successful avocado farm depends on proper preparation and the right place.

Deciding the site for avocado trees

The atmosphere and weather play the most critical role in the growth of an avocado tree. There is a need for suitable climate conditions for the safe growth of plants and optimal yield in the case of commercial production.

The temperature varying from 15 degrees Celsius to 30 degrees Celsius is the finest for the avocado farming. 

It is recommended throughout cultivation time. This signifies that throughout its whole existence a pleasant environment is expected. 

It is noteworthy that if the temperature falls below freezing or increases above 40 degrees Celsius, avocado trees tend to die. 

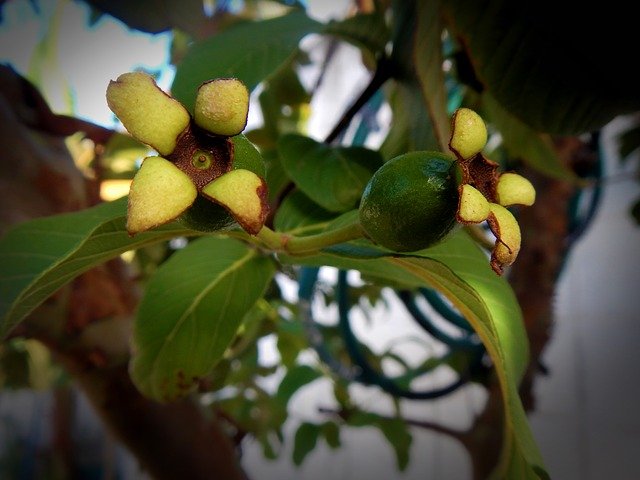
In the short period of spring, when the flowers bloom, if the weather gets cooler and rainy, bees won’t come to the air and eventually, fruits won’t flourish.

Just like other crops, avocado cultivation thrives well in highly organic and fertile soil. In the process of determining the quality of soils, it highly recommended getting the soil tested for the exact information for nutrients presence.

This helps in adding the appropriate amount of fertilizer to your field. Thus, at the time of soil preparation, the shortage of micronutrients and macronutrients may be covered.

Avocado trees and plants can grow to red soil, dark brown soil or in almost any kind of soil even the reddish-brown soil. 

However, the safest way to high yield is developing avocado plants or trees on reddish-brown soil or dark brown soil.

As soil is the most crucial criterion when deciding a place. The avocados are highly responsive to poor drainage and sensitive to the Phytophthora which thrives in poorly drained soils. 

Moreover, the soil should be rendered in such a manner that there is no issue with water stagnation. The soil’s strength and efficiency must also be strengthened by well-rotting manure.

It is worth to avoid windy areas. Placing the plant on slopes faced away from the winds and discard planting on western slopes in warm areas as the sun may be very warm and could sunburnt fruits. It is appropriate to sow windbreaks for securing your trees from the heavy winds.

How to Plant Avocado

Choosing the variety for avocado farming 

The avocado has several varieties to choose from but Hass is better than the others because it has the potential to grow year long.

Moreover, it contains more than twenty percent oil with high-fat flesh and buttery texture. While the rough and robust surface makes durable to transport.

Method of Propagation

If you are trying to establish a commercial farm it worth use the grafting method and budding method for plantation of an avocado tree. The plantation with grafting method also assures stable growth and early fruit-bearing in the crop.

While growing an avocado from the seeds require a different level of care and maintenanceYou may have to wait for several years with the seedling before you see the fruits.

How to graft the avocado tree?

The major commercial production of avocados comes from grafted avocado plants. Yet, it is not feasible to say in the avocado cultivation that anyone can graft them.

In this process, one young tree is combined with a separately obtained branch contains single and multiple buds.

As both of them grow together, a reinvented tree is produced. However, when grafting, if the scion is grafted near the base plant’s root, but still on a stem, it has a higher chance of success.

If you want to do it on your own, follow these steps carefully.

  1. Make a vertical cut in the center of the stem
  2. Next, interpolate one or two externally obtained branches with healthy buds in this cut, 
  3. Including two or three buds into stems increase the chances of success

Planting Distance

avocado

The distance between plants is crucial in avocado farming because the avocado is a long term crop. And, it would be wise to make sure that there should be enough plants on the farm, so recovery is possible in case some plants do not succeed in the case of the grafting.

While one can decide the density for the plants and each method have its pros and cons.

1. High Density

In high-density plantings, ensure that two trees have the distance from the 3m to 6m. Such plants give fruits earlier than the others but they require pruning of plants at a certain period. While in warmer areas, it is not suitable to grow avocado too much dense.

2. Low Density 

In low-density plantings, ensure that two trees have a distance ranging between the 8m to 10m. They are easier to manage but might have high maintenance costs because trees have much space between them that allows sunburn or birds to deter the fruit more than the others.

The medium-density spacing, for example, 6m to 8m, works as a solution to the multiple problems for the spacing.

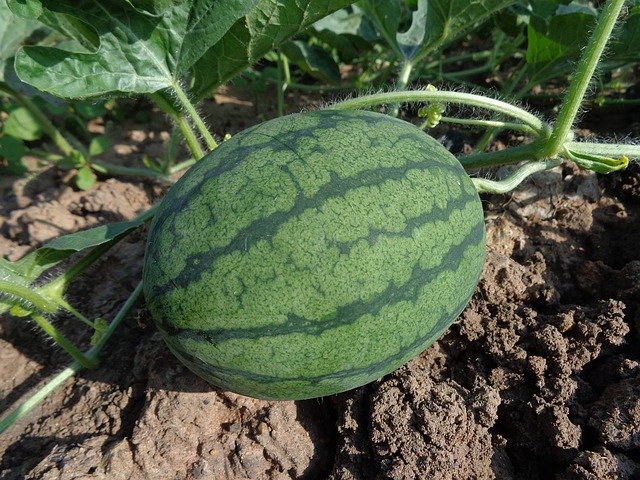
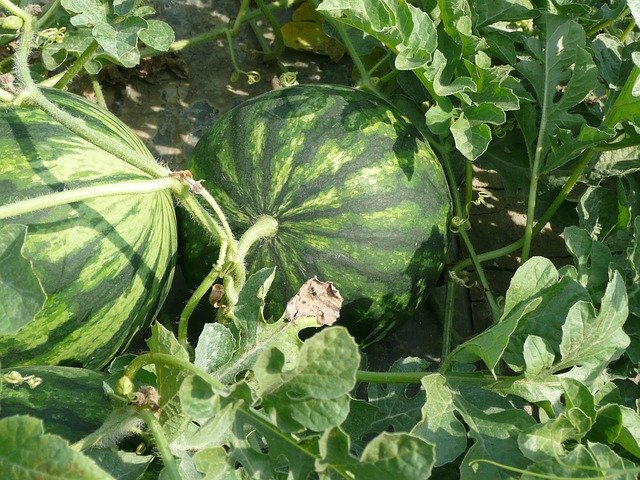
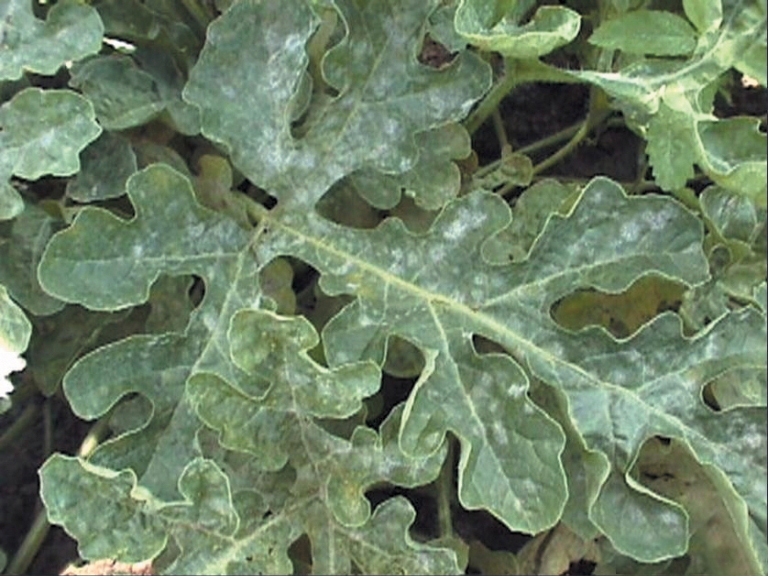
Must Read : How To Do Watermelon Farming

In total, an avocado tree requires about 10 years to be able to produce fruit. 

Nowadays, however, with an improved avocado variety, the planting of commercial avocados will yield fruit in their plant age 4-5 years. 

Irrigation of avocado trees

Systematic irrigation has a strong effect on avocado cultivation. For the successful planting, it is recommended to give water to this seed just after the planting. Then, try to irrigate the seed at a period of three or four weeks. During the hot and dry season, the crop requires to be irrigated more frequently such as two-three weeks.

Besides, in cold weather, it is worth doing the mulching. For this, shade the plants with dry leaves and grass. 

Fertilization

Relevant manure and fertilizers play a significant role in increasing productivity up to several times. This crop reacted quite well to the high nitrogen content of the high manure. Potash, Potassium, and Phosphorus are needed in an equal portion for new plants.

Diseases in Avocado Farming

1. Phytophthora root rot

Root rot, caused by the soil-borne Phytophthora fungus, is very prone to avocado plants. It requires continuous care. Once infected, the tree would disregard an appropriate root structure and would not be able to function without root maintenance.

Chemical root treatment, as well as replanting, could help to cure this disease.

2. Tree Cankers 

 Sores are considerably not so serious; however, they are extremely visible. In some cases, these sores, especially in the trunk, can leak gum. The cankers can cut out the branches.
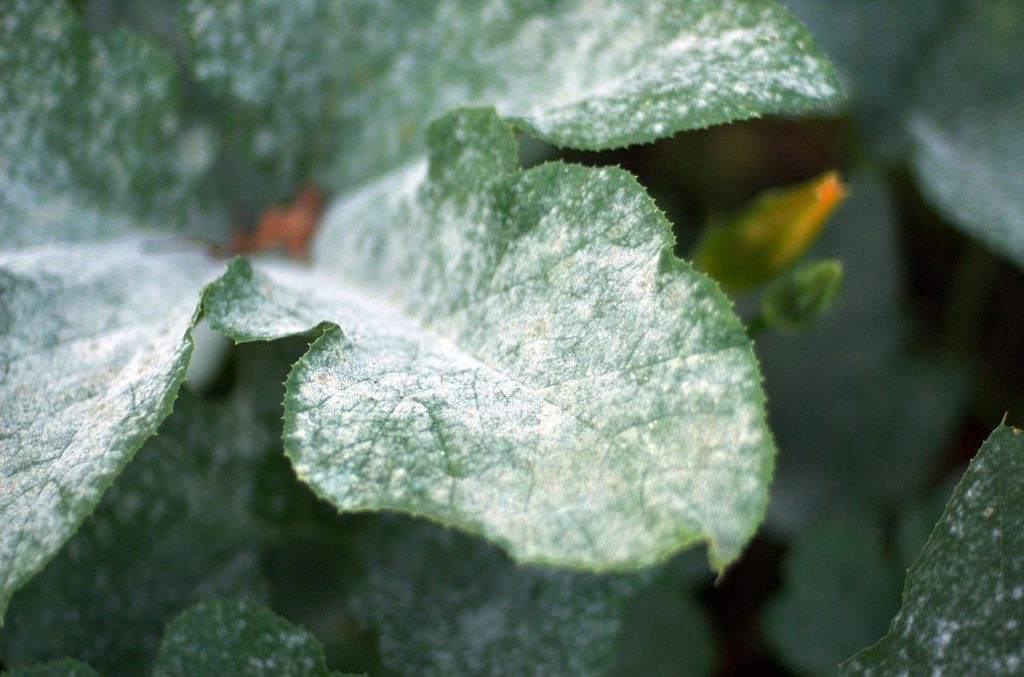
3. Sun blotch 

 The dangerous incurable illness can affect avocado tree farming. Fruits generally are scarred, twigs can become red or yellow or triangular cracks in the bark. Infected trees are typically smaller, but they do not show any sign than the reduction in the yield.

4. Pests 

Tree borers, caterpillars, or mites can destroy the growth of the plant as well as fruit. Thus, it is recommended to spray a considerable amount of insecticide to prevent any harmful pest or insect.

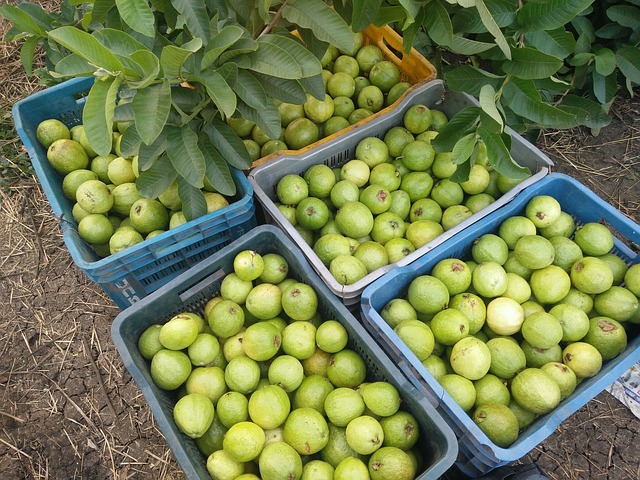
The avocados should be picked at a mature age in avocado farming California. Once the color of the fruits changed in the case of green to yellow, the fruits get maturity. 

Is Custard Apple Farming Profitable?

The custard apple, Annonareticulata L., is commonly ranked among the influential representatives of this family, both in the tree and in the berries. Its descriptive English name has been widely misapplied to particular species and the hybrid ATEMOYA, and it is often incorrectly referred to as “sugar apple,” “sweetsop” and, by Spanish-speaking men, “anon” or “onion,” in India as “Ramphal.”

It also received very few appropriate geographic titles. Most widely used as an alternative term in English-speaking regions is bullock’s heart or bull’s heart.

The custard apple tree isn’t pretty. It’s upright with a rounded or spreading crown and 10-14 in (25-35 cm) thick base. Height from 15-35 ft (4.5-10 m). The poorly smelling leaves are evergreen, alternating, oblong or narrow-lanceolate, 10-20 cm long, 2-5 cm thick, with visible veins. The flowers are fragrant, small, with three outer fleshy, thin petals up to 2-3 cm long, light green outside and pale-yellow with a dark-red or purple patch within in the middle. Never completely open bulbs.

Origin of the Custard Apple

The custard apple is thought to be native to the West Indies but was brought to southern Mexico in early times from Central America. Fostered and naturalized as far south as Peru and Brazil. It is usually grown in the Bahamas, often in Bermuda and southern Florida. It was planted in South Africa in the early 17th century and is cultivated as a fruit tree in South Africa.

The tree grows in India, particularly around Calcutta, and runs wild in other places. It has become relatively popular on Malaya’s east coast, and across Southeast Asia and the Philippines, though especially esteemed nowhere. This was stated extensively naturalized in Guam eighty years ago. It’s unclear in Hawaii.

Custard Apple Quality

No named cultivars are registered, but the fruit quality from various trees differs considerably. The yellow-skinned forms are preferable to the brownish and have smoother, juicier meat when well packed. Seeds of a purple-skinned, purple-fleshed type were planted in Florida, and the tree developed unremarkable quality fruit. Keep the quality factor in mind when planning about custard apple farming.

Must Read: How To Do Watermelon Farming?

Propagation techniques

Custard apples can be propagated in three ways: gene, budding, and grafting processes. Seed: seeds usually produce custard Apple. Budding: Chip-and-shield budding will even spread it. Budding happens in spring as the sap begins flowering. Grafting: Whip grafting succeeded in increasing yield and efficiency. Plants usually propagate custard apples.

For rain-fed conditions, when they attain a height of around 20-25 cm, seedlings can be grown in polythene bags packed with garden soil and planted in the field when the monsoon begins.  

Custard Apple farming zone

The custard apple prefers low-lying, dark, fertile soil with enough moisture and durable drainage. It develops to full size on oolitic calcareous in south Florida and grows wild in light sand, and numerous other soil types in the New and Old-World tropics but is undoubtedly less competitive in less suitable locations.

Custard Apple Farming: Planting Custard Apple

Here we are going to discuss various steps associated with custard apple farming, and in other words, agriculture begins with the planting. So, let’s explore it step by step.

 1. Getting seeds

You can get sugar apple seeds from your nearest garden center or, if you have a friend, you can get seeds from the flesh with the help of your friend. You can also order seeds from the online retailer. If you get seeds from the flesh of a custard apple, you will have to wait a week before planting the seeds from the fruit. They don’t germinate well if you immediately place them in the dirt.

Cut the custard apple fruit and extract the big, black seeds. Put them in a seed envelope, wait a week before planting. If you bought seeds from a garden center, you need not wait until planting.

2. Soak the seeds

While germination can take thirty days, soaking your seeds will speed the process. Wrap the seeds in a paper towel. Soak seeds with some water. Place the paper towel seeds in a bag. Let your seeds soak three days before planting.

3. Finding a sunny spot

Because custard apple is a tropical tree, you want a bright spot to start seedlings. You’ll want to place your seedling tray in front of a window facing south, so the seed gets more than enough warmth and light. If you don’t have a window facing south, you will grow lights. So, all in all, you need a sunny spot for custard apple farming.

4. Putting potting soil in a seedling tray

You’ll need at least two to three inches deep seeding tray with drainage holes that you can find at a garden store. Fill the seed tray with new compost from the garden shop, as opposed to garden soil. You would like to moisten the soil until planting the seeds.

5. Put the seeds in the soil

Plant two or three centimeters deep in your seedling tray. They will be one-and-a-half cm apart. The plants will germinate within 30 days. 

Moving to the next step

Now it’s time to move outside. And transplant the seed out there.

Also Read, Papaya Farming Ultimate Guide

1. Choose warm climates

In hot or near-tropical weather, plant your custard apple tree. Since sugar apples can survive drought, you can plant it in a dryer environment. Cooler temperatures are not anticipated, so stop planting it outdoors in winter or night cold areas.

2. Transplant in the spring

In spring, you can transplant your custard apple tree or whenever the climate reaches between 23-24 Celsius. You will consider a place with a wind cover, plenty of suns, and not prone to waterlogging.

3. Choose the sunny area

Custard apple is a tropical plant growing well in South America, Asia, and Africa, so enjoy the sun! You will plant it in a warm, wind-protected spot.

4. Soil should get good drainage

Use fertile, well-draining apple-tree soil. You can grow it in sandy, calcareous or hard loam soil because it tolerates a variety of soil types. However, avoid waterlogged soil and ensure proper drainage.

5. Dig a hole

As custard apple trees have deep root systems, the planting hole should be twice as full as the seedling root ball. The hole depth will suit the root ball size. Place the root ball in the hole, cover and cover the seedling

6. Watering the plant

Water your tree rarely but extensively. Custard apples have mild watering requirements and withstand drought, although they drop leaves if the drought is severe.

7. Using organic fertilizer

To get the tree started, you’ll want a full fertilizer. Using organic fertilizer to boost root system growth.Using 3-10-10 fertilizer to increase yield in later years.

8. Giving shape

To shape your custard apple tree, you’ll want to trim it in spring. You’ll find it grows in several parts, which can get very unwieldy. You’ll want to trim back to shape the tree and extract any old berries.      

custard apples
Irrigation of Custard Apple

Custard apple cultivation does not require watering to grow relatively good crops if successful water storage is impaired by micro catchment in the rainy season. Irrigation during flowering and fruit production is essential.

However, in the absence of water harvesting in the post-monsoon season, two or three irrigations aid in fruit quality and higher growth. Fruit collection yield per field and consistency are superior in pulp/segment irrigated plantations.

With each carrying, plants receiving daily water thrive. Pruning, fertilization, and irrigation are essential for optimum production. For regions with water-limiting schemes, pool, trickle or drip irrigation help in the judicious usage of water. Fruits are grown in low rainfall zones.

Land forming may be used to drain rainwater around the plantation. Contour terraces, contourite, and micro-catchments often help effectively using water. Plowing and mulching during rainy season allows retaining moisture further

Custard Apple Varieties

Some custard apple fruits are tiny and produce plenty of seeds and nothing to consume. On the other side, certain custard apple varieties grow broad fruits with just 5-7 seeds and all substance to enjoy. Custard apples are two major types, both short, juicy and flavored. Break them in two, pinch the meat with a tablespoon and enjoy.

  • Pink Mammoth: Good quality fruits are enormous. It may weigh up to 3 kg and have very few seeds, nearly seedless. This is custard apple’s most popular commercial form.
  • African Pride: The fruits are smaller up to 500-800 gm. But this type of variety of custard Apple has more seeds than the Pink Mammoth. This fruit starts growing sooner. Skin blackening and other fruit issues are susceptible.
Custard Apple Cultivation: Seed benefits and business opportunities

We know that the benefits of the seed of custard apple have nothing a lot to do with its cultivation. But when you plan for custard apple cultivation, you must be aware of the benefits of its seeds. The reason is straightforward, its seeds are in massive demand in the market.

So, more needs will create more opportunities for you in terms of business. For say, through custard apple farming, you will not only be able to sell the product but also its seeds can give you some good company. So, without wasting any time, let’s quickly get to know about the same.

1. Eradication of head lice

Are you sick to scratch your head because of the insects and nit? Has everything failed, such as the dandruff shampoos? Seek the seeds of the custard apple. Only take some, grind in powdered shape and blend into a paste with a little water. Apply on the head and give 10 minutes to rest.

Wash with sparkling, clear water. This process will yield great results twice a week for a month and leave your head entirely safe.

2. Works as a pesticide

The same blend can also be used for your home garden as a pesticide. Regularly spray a few of the riddled plants for 10 to 15 days, to avoid leaf-eating insects.

3. Use in pharmaceuticals

Its seeds are commonly used by drug makers because of their emergency contraceptive properties that have been scientifically confirmed. It’s used to manufacture drugs to cause abortion.

4. Use in Biogas

Countries like Germany and several other European countries use these few wonders to generate biogas for commercial purposes. The grains of this fruit contains methyl-ester-rich trapped fatty acids that cause gas production.

5. Commercial pesticides farming

The custard apple seeds are also combined with neem seeds to create a new powerful bacterial pesticide used in industrial agriculture. The pesticide produced from such seeds is natural and ecologically harmless. The use of custard apple seed pesticide is perfect for human health.

We have not mentioned these benefits for the sake of mentioning. Instead, we have tried to broaden your idea about the business opportunities you can develop out of these benefits. You can transform any of the benefits into a profit-making business when it comes to custard apple cultivation.

Caution!

The custard fruit is excellent, but the seeds are very poisonous, and unintentional ingestion can lead to abortion, as it is slightly hazardous. The insecticides developed from the grains should be kept from the eyes because they are capable of even temporarily blinding a person. So although you enjoy a dish packed with this healthful fruit, first take care to take off all the seeds.

Reference

https://www.farmers.co.ke/article/2001339100/a-step-by-step-guide-to-custard-apple-farming

How to Do Watermelon Farming?

Watermelon is a highly cultivated vine-like flowering plant present in more than thousands of varieties. A fleshy sweet Plantae helps to relax blood vessels with high nutrition and low in calories. 

Watermelon has its fondness among the people by its sauce preferences among the varieties of fruits. The presence of potassium, vitamin A and C make it mealier and provide multiple health benefits i.e., prevent stroke, control blood pressure, obesity, and overweight as well. 

Watermelon farming needs a temperature higher than 25-degree Celcius. They have an extended, delicate, and climbing stem throughout his farming life cycle through germination to growing into a whole fruit. 

In the early stage of farming, watermelon has highly dense fleecy hair which is muddy in color and vanishes in the passing time. 

Also Read: How to Nurture the Dragon Fruit

Watermelon Cultivation 

Watermelon seeds implant in a pot and relocate in the loamy soil for mid-level of nitrogen for enhancing the growth of the fruit. In an excess humid climate, watermelon suffers from pests like root-knot nematodes, fruit flies, and aphids.

Watermelon requires more than 85 days becoming a full-grown fruit than the other melon. Horticulture in Japan grows cubic watermelons for their convenience to store as they use metal and glass boxes for improving grain.

Due to present in the variety of cubic, square, and pyramid shape, they are pricy to purchase rather than the original shaped one. This shaped type of watermelon only belongs to the wealthy class of the consumer or buyers.

Watermelon cultivation can be done in numerous ways according to its harvest time and weight.     

The Carolina cross produced the heaviest watermelon 29to 68 kilograms in about 90 days.

The little golden person takes 70 days from sowing to harvest. 

Orangelo weight 9 to 14 kilogram and take 90 to 100 days till the fruit harvest 

Cream of Saskatchewan grows in cold climate and harvest in 80 to 85 days

Moon and star are weighing 9 to 23 kilograms and harvest in 90 days 

Densuke watermelon is firstly harvest and weighing 11 kgs

Melitopolski is highly cultivated in the region of Russia and take 95 days to harvest

watermelon farming

Watermelon farming in horticulture shows a variety of improvements for the production of watermelon. Its hard crust made it more accessible to transport it from one place to another due to its oblong shape as well. Improvement in geographical conditions also provides to get an elastic environment for the cultivation of watermelons.

Watermelon is the garden-variety fruit that every grocery sells more often. China is the largest producer, and more than 40 states of the United States are cultivating watermelons. It is a smaller shaped variety of melons known as icebox melons as they have red and yellow color flesh. 

Some of the groups are also seen in the variety of watermelon, which shows the variation in taste and texture of its flesh.

·        Citroides group is a fleecy melon cultivated in the world for fodder with sweet yellow flesh.

·        The Lanatus group is food for the traveler in the Kalahari Desert. Seeds are edible in this group and having juicy white meat. 

·         Vulgaris group is widely cultivated for the consumption of human and cattle feed as well.

Watermelon is mainly consumed in summer; it contains water more than 85%, and the rest is sugar with low-fat properties. It mixes with other fruit juices, wine, or pickles. Watermelon seeds are also consumed by a human after the roast and dried up.

In China, people consume seeds of watermelon on the eve of china new year, and in Vietnamese, people consume seeds as a snack on the Vietnamese New Year holiday.

Watermelon zest has vile flavors, which is used in making pickles, and people were making vegetables by stewing and stir-frying. Watermelon zest produces Amino acid citrulline.

Only vitamin c present in a significant amount and a low amount of nutrients with 30 calories per 100 grams of serving. It is also known as state vegetable or fruit in Oklahoma State due to its versatility of consumption. 

Watermelon Farming Through Seeds

Watermelons grow from seed. You might be tempted to use seed from a melon you purchased, but it would just be time wasted. There are chances of it being a hybrid one. Hybrid is somewhat different from crosses not true to nature. Then, you would probably end up cultivating what is generally termed as pig-melons, which is nice to feed pigs only and not human beings. 

What Kind Of Seeds To Buy For Watermelon Farming?

If possible, pick the open-pollinated heirloom variety of seed, if necessary. You will find far better and fascinating types in the heirlooms than in the regular collections at the local gardening center. 

Start your watermelon seeds in the field, where they will spread. To germinate, the soil should be at least 18 ° C.

 What Is The Right Approach To Watermelon Farming?

Do NOT plant your watermelon seed in a container or big bowl, unless you have an incredibly short growing season. Neither buys watermelon seedlings from a nursery. Watermelon seeds germinate within a few days, simply and rapidly. 

Watermelon plants quite quickly outgrow the seedling stage and do not like transplantation. You don’t save a great deal of time, and you end up with a poorer vine.

Avoid all this needless hard work and stick your seeds in the dirt, about 2 cm or an inch deep.

Watermelon Vines Need A Lot Of Care

The watermelons need soils that are dark, warm, and permeable. It allows the land to develop melons. There are some benefits of growing the soil: A slab or hill is free draining. If you have thick clay dirt, bring the bed certainly up.

Mounds are beautiful even when the soil is somewhat unfortunate. To raise watermelons, make a mound of healthy soil with plenty of compost in it. Often, after using much of the compost, farmers plant them in what’s remaining over from a compost pile.

When you want to grow stuff in tidy circles, or if you’re going to plant a broad field, raise watermelons on ridges, much as the growers do.

 The Benefit Of Mulching

Watermelon cultivation needs to be very diligently done. A few things like mulching that one needs to keep in mind. Melons have deep roots and require plenty of water. Therefore, you need to ensure that the field is never dry out, in case it dries, so mulch helps. 

Mulch holds weeds down. Weeding may disrupt the strong roots, so it’s best not to let them rise. Watermelons are starving animals. 

If your mulch is like compost or old animal manures, it’s excellent. Watermelons can tolerate relatively fresh manure and fertilizers. 

Otherwise, periodically feed the watermelons with anything like pelleted manure or other sustainable fertilizer.

Once the vines are two meters thick, pinch the ends. Encourage branching. When your watermelon vines get bigger, they seek to take up more space. Unless they start smothering specific stuff, you should warn them to keep to their region by smoothing the ends of the vines, so they develop in the right direction.

Watermelon Harvesting 

watermelon harvest

Watermelon is a summer delight fruit loved by all ages. In addition to its great taste, it provides lycopene refreshment in the hot summer. It requires relocation after the germination of seeds more than 75-degree F and for growth more than 65 degrees F. 

Throughout the watermelon cultivation, watermelon requires a warm season to grow as their sizes, shape and texture of zest vary from climate, so their best production came from the south and southwest regions of the United States.

Must Read: How to plant, grow, and harvest pumpkins correctly 

For cultivating watermelon, it requires a heavier feeder than the other fruits. Before planting, the soil has to be compost and manure was rotted in it to provide the warmness to the sown seeds. 

Sown seeds start growing in the form of fruit; then fertilizers were mainly starting dressing up side by side. It requires a ph scale of 6 to 6.5 and more than 80 days of the warm summer season to grow up.

It is a fragile fruit to time in sandy, muddy soil. The soil will be moist, and water needed in the field will be 1 to 2 inches per week. Watermelon farming soil contains a high amount of nitrogen, phosphorus, and potassium, but after illuminating it into flowers, it needs less nitrogen for further growth. 

Watermelon elevates in a row sun-dried atmosphere, as they are not much sweeter as they are ripe, so the harvesting part plays a vital role in the life span of watermelon. The texture and color of a watermelon show whether the fruit is ripe or not.

Pests of Watermelon: 

The leading watermelon killer is leaf-eating beetles (also destroying the flowers), including painted and dotted flea beetles, pumpkin beetles with or without markings, whatever you call them.

They all look alike, all doing the very same: nibble away on your watermelon plants. However, if they are a significant concern, it’s just an indication that your watermelon is stressed.

In a safe climate and decent soil, stable watermelon does not draw so many beetles. A watermelon should also grow quickly enough to manage any beetles.

The other primary concern with rising watermelons is mildew, a disease that makes the leaves appear like white dust. Fungus thrives in wet environments.

In the tropics, you may not be able to avoid beetles or mildew until the rainy season build-up starts. And it’s not worth it anyway… 

The unbearable heat and humidity aren’t healthy produced watermelon conditions. Develop anything that needs rain, waiting for another dry season to produce watermelons.

Conclusion

In this guide on how to do watermelon farming, we have tried to explain all those steps and techniques that are required to produce a quality crop. However, you are solely responsible for crop failure for any reason. Don’t worry, this is not a kind of alarming signal. It’s just a precautionary statement. In the end, we would like to advise you to take any watermelon farming-related decisions at your discretion.  

Pumpkin Farming: how to plant, grow, and harvest pumpkins correctly and properly

There is no fall without pumpkins. Be it big, mini, orange, white, carved, and most importantly pie or any other kind, almost all love pumpkins. Pumpkin farming is done mostly over a large patch of land, for better quality and size. Pumpkins are used in cooking as well as in carving during Halloween for decorations. Several pumpkin farms sell well in other seasons. Farming is easy to maintain if you have sufficient space. These crops will flourish just about anywhere with the right care.

Steps to Follow for the Best Fruit

Pre planting preparation

Pre-planning is important even if you are growing pumpkins as they are very tender. Pumpkin plants grow as a vine, which can easily reach 20 to 30 feet long in the course of its growing season. 

Also Read: Sweet Potato Farming Information Guide

Pre-plan the time to plant seeds:

Pumpkins do require a long growing season. Generally, it takes 75 to 100 frost-free days to grow. So, it is advised to carry pumpkin cultivation by late May in Northern locations and by early July in the extreme Southern places. Plant the seeds after the frost has passed. If you are planning for a fall harvest, then plant them in late spring or early summer. Again, if pumpkins are planted too early, they may soften and rot.

Selecting a site to plant seeds:

Pumpkins prefer full sun. Pick a site with full sunlight to light shade. A spot under a tree or in the shadow of a building would not serve your purpose. Pumpkins grow annually on heavy grown vines. The site should also have lots of space for sprawling vines. An open space of 25 to 30 feet will serve your purpose of pumpkin cultivation. A Pumpkin farm does not take the whole yard. Besides, it should also have a good drainage system. The site should not have standing water after heavy rains as well as a shelter from cold wind.

Preparing the soil to plant seeds:

Pumpkin seeds do not germinate if your soil is cold. Beware; the seedlings are destroyed by frost. They prefer very rich soil, which is not too soggy. Checking the soil temperature is also very important. The soil temperature should be at least 70 degrees Fahrenheit as pumpkin is a tender crop. You need to wait until the soil is warmed, naturally. Otherwise, pumpkins will start to rot. An extra boost for your pumpkin farming is to prepare your soil beforehand. Digging holes to plant the pumpkin seeds and filling them with a mixture of compost one week before planting seeds is advisable. 

Choosing the seeds:

You can choose your yield from three different varieties of pumpkins. Here are three varieties of pumpkins for you to grow in your backyard: pie-pumpkins for cooking. Large decorative pumpkins to carve out for Halloween.Mini pumpkins for decorating purposes again.

Planting the seeds

Pumpkins grow well when the seeds are planted in the ground directly.

Plant the seeds in wide-spaced rows:

Plant the pumpkin seeds in rows. They will creep along with the vines. Depending on the variety of your pumpkin seeds space the rows 6 to 10 feet apart. Mini pumpkins will take small space to grow while the larger ones need more space. The Bush-type variety of pumpkins needs 8feet space in all directions to grow fully. They grow on shorter vines.

The perfect depth to plant the seeds:

The most important step towards pumpkin cultivation is to build the pumpkin-hills. The pumpkin-hill is a small hill built on the ground. Accumulate the soil where you want to plant the seed then give it a shape of a hill using your palms. The hill keeps the soil warmer by allowing the sun to heat it faster. It improves the cultivation by providing natural drainage. Plant the seeds 1-2 inches deep in the hills. You can plant 2 or 3 seeds within a few inches from one another.

Covering the seeds:

After you have properly planted, your seeds now cover them up with compost. The compost mixture prevents the growth of weeds and nourishes the seeds planted. A thin layer of compost mixture in the areas where you have planted your seeds is enough to nurture your seeds properly.

Taking care of the plants

Taking the right care of your seeds will do the magic for your pumpkin farming. With proper care, the plants will sprout within about a week.

  • Watering:

Every plant needs watering, and pumpkin is no different. When the soil temperature is low, it is the right time to water the pumpkin plants. Pumpkins are very sensitive to moisture. Over moisture will injure the plants. Adding more water to wet soil will do no good for farming. Rather adding less water to dry soil is ideal. Let the water soak deep into the soil before adding further water. As the roots grow deep into the soil, the water must reach the plants deeply.

In pumpkin cultivation, you need to water deep down at least 6 inches to moisten the soil. Water only the stem of the plant. Avoid watering the leaves. Wet leaves are the ideal place for fungus to grow. Powdery mildew is one of them. It causes the plant to die by bewildering the leaves of the plants. Watering in the sun is more preferable than in the night. Use a garden hose equipped with a mist ling nozzle for watering the plant. Decrease the amount of water as the pumpkins grow and turn orange in color.

  • Pollinating the blossoms:

The first thing that comes to anyone’s mind is how do pumpkins grow. Pumpkins depend on bees to pollinate their blossoms. If you do not see active bees in your gardens, self-pollinate using your hands. You must get your female flowers fertilized to get the pumpkins.

Must Read: Growing the Avocado – The Healthiest food

The female flowers show up later with a swollen base below the petals, which helps you to identify them. Male flowers show up first. They are thin and straight flowers. Self-pollination includes transferring pollen from the male flower to the female flower. An artist’s brush will help you in this process.

Wear gloves on your hands. Brush the male flower with the artist’s brush to collect the pollen from it. Going to the female flowers, brush only the center of the female flower to allow the pollen to settle on them. Be gentle with the blossoms as they are very delicate. In the mornings, the female flowers remain open for half a day.

After that, they shut themselves up and do not open until the next morning. If you accurately do the self-pollination then you will surely get the best results out of them. Too many fertilizers will reduce the rate of pollination. It will negatively influence your fruit set.

  • Fertilizing:

Adding fertilizers to your pumpkin farm encourages the growth of the plants. When the plants first sprout add the fertilizer to keep them healthy. Go to a local nursery and choose the fertilizer accordingly from them. Side dressing is also important. It means spreading the fertilizer around the plants close enough for their roots to eat-up.it is ideal to side-dress the vines once a week after the blossoms start appearing.

  • Controlling weeds and pests:

To make most out of your pumpkin cultivation, make sure you control the weeds and pests growing around them. Monitor your pumpkin farm throughout its growing process to have control over them. Weed the patch often to prevent the growth of them around your pumpkin plants.

Planning a weed a few times a week is good for your farming. Conserving your soil moisture by cleaning the weeds is also important. Beetles grow on the plant leaves and eat the plant tissues. Check the leaves to remove them. Scrape them off the whole plants twice a week to save the plants. Aphids threaten garden plants a lot.

They mostly grow on the underside of the leaves of the plant. Taking care of a pumpkin farm is highly recommended, otherwise, they will kill your plants. Spraying water on them will do the work. But, spray the water in the morning so the leaves get enough time to dry under the sun.

Squash bugs are another variety of pests that grow especially later in summer. Poor light will enhance the growth of pests. Go to your local nursery and ask about organic pesticides if necessary. 

Harvesting the pumpkins

pumpkin harvest time
Check the pumpkins:

Pumpkins typically take 95 to 120 days to fully mature after they are planted. Check to see whether they are ready to harvest or not. They should have a bright orange color. Their shell should be hard. Do not harvest the pumpkins if they are still soft. Allow them to become hard before cutting them from their plants. Their stems will remain soft. But, the vine will start drying out itself. They will also start to wither on their own.

Cut the stems:

Do not break the stems; it will destroy your pumpkins. Cut the pumpkins from the stems with the help of a pair of shears to keep them intact. While you cut the stem make sure to leave the stem a few inches long. A liberal amount of stem (3 to 4 inches) will increase the life of the pumpkins never after cutting.

Store the pumpkins:

After cutting the pumpkins from the plants keep them in a cool and dry place. Wet and moisture places can make them rot. Keeping them away from humidity, damp, and direct sunlight is advisable. They do not need any kind of refrigeration also. Pumpkins can be kept for many months after harvesting. To avoid molds and fungi, a little spray of mild chlorine before storage does the work perfectly. Maintain a storage temperature of around 55 degrees Fahrenheit. 

Conclusion

Just remember to water well and often. Watch the plants often for pests. Clean the ground and make it weed-free. Fertilize regularly. Last but not least is to watch the fruit grow bigger and bigger! Handle the pumpkins gently or they may bruise. Follow the above-given steps to make the most out of your cultivation.

Kiwi Farming, Planting, Growing & Harvesting

Kiwi farming is predominantly carried out in the USA, Japan, Italy, China, Chile, France, Spain, Australia, and New Zealand.  Kiwi is also known as Chinese gooseberry is an edible berry that has high medicinal and nutritional value. Kiwi is a deciduous vine fruit which is oval in shape and it is about the size of a Chicken’s egg.

The fruit grows on a vine that is as high as 30 feet tall and is woody. The fruit has fibrous, thin, tart, and fuzzy edible skin. The fruit is similar to grapes as it is also grown in clusters. Kiwi has light green or golden colour flesh inside and has tiny black edible seeds. Kiwi is soft-textured and has a unique flavour.

Kiwi is rich in Vitamin C and vitamin B and other minerals such as calcium, phosphorus, and potassium. Kiwi can be consumed fresh or can be mixed with other fruits in desserts and salads. The kiwi fruit is also used in the preparation of wines and squash. In India, Kiwi farming is done in Kerala, Himachal Pradesh, Sikkim, Arunachal Pradesh, Uttar Pradesh, Meghalaya, and Jammu & Kashmir.

Health Benefits

Kiwi fruits are excellent antioxidants and anti-aging agent. Thus it aids in the improvement of the skin. The respiratory and cardiovascular system also benefits from the consumption of the fruit. The presence of serotonin is beneficial to treat sleep issues. Furthermore, the kiwi fruit also has antifungal and antibacterial properties.

Types of Kiwi Fruit

Hayward is a New Zealand variety that is grown globally. However, kiwi fruit is majorly available in three varieties: Hardy kiwifruit (Actinidiaarguta), Super-hardy kiwifruit (Actinidiakolomikta), and Grocery store kiwifruit (Actinidiadeliciosa).

Hardy kiwifruit is also known as ‘bowerberry’ and it grows on the trees that are as tall as 100 feet in Siberia, Korea, Japan, and China. This variety of kiwi fruit can tolerate low temperatures.

Super-hardy kiwi fruit is smaller but smooth-skinned. It can grow in temperature as low as -40°F. The fruit is also known as ‘arctic beauty kiwi fruit’.

Grocery store kiwi fruit is also known as fuzzy kiwifruit. This variety of kiwi is large in size and is the most common and edible variety.

The other types of kiwi fruit known are Tewi, Bruno, Monty, Tomuri, Elmwood, Saanicheton, Abbott, Chico, Gracie, Dexter, Matua, Allison, and Vincent.

Where do Kiwis Grow?

It is essential to cultivate a crop in a correct season and with ideal soil requirements. Kiwi fruit can be grown in well-drained, fertile, and moist soil. The presence of potassium, nitrogen, and phosphorus is essential during the vegetative stage of the fruit.

The best pH range of the soil should be from 6.3-7.3 to get maximum yield from the crop. The ideal kiwi fruit farming weather is low temperatures. However, kiwi needs protection from moisture throughout the year. The fruit should also be shielded against frosts. The ideal temperature for growing kiwis is below 38°C. A temperature higher than 38°C can cause sunburn to the crop.

Kiwi fruits can be grown where almonds, citrus, and peaches are abundant. However, the leaves are more susceptible to cold in comparison to the peach or orange trees. The young plant of kiwi fruit can be harmed if the temperature falls below -1°C while the vines that are mature can handle the temperature lower than -12°C. It is essential to protect the young flowering shoots from wind as it can damage the crop easily.

How to Grow Kiwi from Seed?

To grow kiwi from the seeds or planting a kiwi from seed is not a hard job. The first step is to collect the seeds of the kiwi fruit from the available ripe fruit. The gooey membrane needs to be separated from the seeds and thus seeds have to be placed in water and then blended. With the help of the colander, wash the seeds in the sink. The cleaned seeds can then be transferred to the paper towel.

A plastic ziplock is used to store the paper towel containing the seeds. The ziplock is later placed into warm container. The sprouting process takes around 2-6 weeks. Once the seeds start the sprouting or germinating, the paper towel is split into small pieces. The seedlings are then transplanted into the pit made on the small pot for 2-3 months. Keep the kiwi vines in adequate sunlight as the plant requires light.

Also Read: Strawberry Farming – A business that promises a “delicious” future

Steps of Kiwi Fruit Germination

  1. Separate seeds out of a ripe and organic kiwi and then clean them by water rinsing. The easy way is to place the seeds in the cup, add water and then swish them. Later on, remove the water out of the cup. This process has to be repeated multiple times for proper cleaning.
  2. The small container or cup is then filled with lukewarm water and the kiwi seeds are transferred to it. The cup or container hasto be placed in the warm environment such on the warm window sill, in front of heater, or on the top of the computer. The seeds are to be kept in water for about a week or until they start separating. The water present in the cup has to be changed daily to inhibit the bacterial growth.
  3. As soon as the seeds begin to open, they are ready to get transferred to mini greenhouse. The paper towel is soaked in lukewarm water and placed on the plate on which the seeds are distributed. The distributed germinating seeds are then covered with plastic container and placed in the area getting sufficient sunlight. It is recommended to make small holes in the container to allow the air to flow smoothly. This is the ideal condition for the seed to germinate faster. The kiwi seeds would be ready for planting only after 2 days in the greenhouse.
  4. Once the seeds are germinated properly, it is the right time for the planting process. But before planting it is mandatory to prepare the container or pot. The soil in the pot should contain sufficient moisture and this should be done by transferring the soil in a bucket and then mixing water to the soil until it is damp in nature.
  5. The container should be completely filled with the moist soil. An inch of space should be left below the rim of the pot.
  6. Now the seeds are ready to be planted. The pots are then sprinkled with the seeds keeping few inches distance from each other. It is advisable to plant each seed in a separate tiny pot to make the transplanting process easy and smooth. Once the seeds are in the pot, spread a thin layer of soil over them. The seeds should be planted at a depth of around two times their length.
  7. Once planting is done, water the seeds using can or squirt bottle. Transfer the pot in a warm and sunny area to get sufficient light. Take care of the seeds by watering and feeding them regularly.

Nutritional requirements and Fertilizers for Kiwi Plant

A dose of fertilizer consisting of 0.5 kg NPK mixture with 15% N and 20 kg farmyard manure is suggested every year for the plant.  High amount of chlorine is also required by the plant as its deficiency can negatively influence the development of roots and shoots of the plant.

Contrary, high level of sodium and boron can be very harmful to the plant. The two equal doses of nitrogen are applied. The young vines get the necessary nutrients of the fertilizer from the soil as the fertilizer is mixed to the soil. The entire soil surface is provided with fertilizer once the plant attains maturity.

Propagation in Kiwi Farming

On the commercial level, the crop is propagated by planting vegetative cuttings or via grafting technique.

Spacing in Kiwi Farming

Planting the crop at a sufficient distance is essential to get maximum yield out of the crop. The distance varies depending on the propagation method used. For the commercial plantation of kiwi, Pergola Training system or T-bar training system are used. In the Pergola system, the row to row distance is about 6m and the plant-to-plant distance is 5-6m. In case of T-bar training system, row-to-row spacing is 3.5m whereas plant-to-plant distance is approximately 6m.

To increase the pollination rate, male plants should also be planted in the garden and the ratio should be 1 male to 6-8 female plants. Insects are also a useful vehicle for pollination of the crop as this fruit plant aren’t self-pollinating plants.

Intercropping in Kiwi Crop

The initial kiwi farming can get the benefits if vegetables and leguminous crops are planted together with the kiwi crop.

Diseases and Pests in Kiwi Plants

Rots in the roots of the plant can be caused by Phytophthora soil fungi and majorly in the soil containing water. The humid conditions results in the development of Botrytis cinera rot that causes infestation in young fruit.

Irrigation in Kiwi Fruit Farming

Watering the plant at regular intervals is essential for the setting of crop as well as fruit. The complete growth cycle of the crop requires adequate amount of water. The hardy kiwi crop gets ready for harvesting in 3-4 years. Thus, this crop is in need of water for at least 3 yearsin the field.

However, it is essential not to over water the crop. Once the crop gets the necessary water content, it spreads its foliage to the surface of the soil resulting in the mulch formation. The process of mulching lowers the water requirement of the plant by reducing the evaporation rate. Mulching also aids in controlling the weeds.

A kiwi crop needs a regular water supply mainly during the drought and hot conditions. The commercial farming of kiwi requires irrigation in around 10-14 days’ interval is preferred for best yield. Providing the water as per the need of the plant is one of the best ways to get the maximum production. 

Harvesting and Yielding of Kiwi Fruit

The plant starts producing fruit after 4-5 years. The initial yield is small but it increases gradually as the plant attains maturity. The ripening season of kiwi fruit is September and October. If there is presence of frost, the plant needs to be harvested before the fruit ripens. The ripening process can be done in refrigeration. Once the skin of the kiwi fruit starts to turn brown in colour, it can be snapped from the stalk. The other method to check whether fruit is ready for harvesting is to observe black seeds in the sample kiwi fruit.

Due to the difference in temperature, the fruit matures later at high altitudes and early at lower altitudes. After the harvesting is done, the stiff hairs present on the surface of the fruit are removed by rubbing the fruit against coarse cloth.  The fruits that are hard are sent to the market and within two weeks they become edible.

The yield of the crop relies on various attributes such as method of irrigation, soil type, tree age, variety, and climatic conditions. On an average, approximately 100 kgs of fruit can be collected per harvesting season.

Storage of Kiwi Fruit

The harvested fruits can be stored in the cool place for approximately two months. This storage doesn’t require refrigeration.

Papaya Farming – Ultimate Guide

Do you want to start a Papaya farming business? Here we have listed a comprehensive business strategy roadmap for beginners with profit margin, expense, and papaya farming techniques. However, before we tell you anything about Papaya farming, let’s first get familiar with this plant and the cultivation techniques that you should use to get the maximum output.

About Papaya

Papaya (Carica papaya) could be an early-living and dying fruit tree. These fast-growing trees can bear fruit in the first year of planting, if possible. However, a multi-hour sub-freezing temperature will destroy an exposed plant. Papaya plants are so cold sensitive that they should be grown in warm areas. Throughout the year, warm areas will have papaya flowers and fruit on the plant.

How long does Papaya farm take to grow?

It may take eight to 10 months before the fruit is ready to be harvested after planting a small plant in the field. In the number of months that Papaya will develop and bear mature fruit, the environment has a role to play. In hot areas, harvesting from seed can take six to nine months, but zones that are more temperate need 9 to 11 months to be able to grow fruit from seed. When planted later in the year, the colder autumn and winter weather slows down growth and increases the time required by the plant to produce fruits for harvest.

Also Read: How to Nurture the Dragon Fruit –An Exotic Tropical Fruit

Papaya cultivation and harvesting

When the tree has bloomed, wait for five to eight months for the fruit to be harvested. This time depends on the temperature and the state of the fruit. Papaya trees bloom during the year. After the first year, the fruit and flowers on the tree should be supplied continuously.

The form of flowers on a tree decides whether, after many months, you can see fruit. If the tree has male flowers only, it won’t be fruitful. Trees that have only female flowers, or both, can bear fruit if adequately pollinated. Vigorous flora hangs from long stalks, while female vegetation has short stalks and a bulge at the ovary’s base.

Edible flowers like female flowers are available on short stalks and have the stems that are typical of male flowers.

How to know if your papaya plant has fully grown-up

As there are often fruits in various stages of tree development, it will help to recognize the ripe ones when to pick them. The fruit’s color is the primary measure of maturity. Choose fruits of one to three-fourths of the yellow rind.

The green fruit is not ripe and after harvest does not sweeten. Depending on your growing conditions, 30 to 150 fruit can be obtained each year from your papaya tree.

Papaya farming blueprint for business

You must conduct an economic analysis to validate the use of various production inputs and the revenues received. Fixed costs are primarily in initial land growth in papaya farming. Fixed prices may include fixed labor salaries and repair of farm machinery and other miscellaneous expenses.

The cost varies between manufacturing methods and input costs, including fertilizers and pesticides. It also includes payments for irrigation, intercultural, mining, transportation, and other management activities. Calculate the gross production expense. Calculate and record the anticipated profitability and ROI in your business plan.

The more uses, the better business prospect
  • Papaya is used in many ways. And, its several uses opens the opportunity to explore the business scope from the same. So, let’s know more about it.
  • Sometimes Papaya is taken in the breakfast or dessert fruit.
  • Papaya is also loved as a diet fruit.
  • The culled Papaya can be fed to the pigs and or other cattle.
  • Papaya is used as an ingredient in a variety of fruits across the world whereas unripe fruits and leaves are also used as a vegetable.
  • Papain, which is milky latex obtained from the Papaya after a process of the incision. And, then latex is dried and sold in the powder form.
  • The latex powder is then used in digestion aids, tooth-cleaning powders, and so on.

Papaya farming and health benefits

1. Papayas are high in starch, vitamin C, and antioxidants that avoid arterial cholesterol build-up.

2. Single Papaya will meet more than 200% of your daily vitamin C requirements, which makes it ideal for developing a more robust immune system.

3. Papayas have a low sugar content (8.3 gm. in a cup of Papaya) and glycemic index. This property produces excellent papaya fruits for diabetics.

4. Papayas are rich in vitamin A and flavonoids such as beta-carotene, zeaxanthin, cryptoxanthin, lutein that keep mucous membranes safe in the body.

5. Just 120 calories include one medium-sized Papaya. It also helps in the pursuit of weight loss.

6. Papaya is rich in many nutrients, such as vitamin C, which will keep you stress-free.

Papaya cultivation and agro-climatic condition

A tropical fruit, Papaya. Sub-tropical sections, however, also develop well. It’s frost-sensitive. The ideal temperature is 25-30 ° C and 16 ° C minimum. Appropriate pH is between 6 and 6.5. The foothills enjoying mild winters are suitable for papaya cultivation. Low temperature and frost restrict higher-altitude cultivation. Excessively cold nights cause slow fruit maturation and mediocre quality in the winter season.

papaya plant

Papaya cultivation and soil suitability

The right soil type is well-drained or sandy loam soil with enough organic matter. Sticky and calcareous soils aren’t pleasant because the soil can trap rainwater. It could be lethal to the crop. In this scenario, create a better-raised ground and drainage ditch. Furthermore, you must keep the field with enough soil moisture required to grow papaya plants.

Also, a ripening dry climate is fantastic for fruit quality. Additionally, in the same region, continuous cropping can result in reduced production. A slightly messy field is compared to a perfectly flat area. The region’s hilly soil is ideally suited to well-drained organic matter.

Steps involved in papaya farming

Now, it’s time to dive deeper into the steps involved in papaya farming. Therefore, those to better utilize your farming skills.

Propagation

You’ll need seed papaya propagation. Second, you must collect seeds. You can receive from ripe, big, healthy fruits, mainly from pest-free female plants. Often seeds fail to germinate because seed viability is lost in about 45 days.

Germination of seed

The equilibrium temperature is 21-27 ° C, and 19-29 ° C of extreme emergence. It takes 1-4 weeks after sowing, depending on the weather. Treat with Thiram (TMTD) W.P. Until, sowing young to combat fungal diseases.

Sowing the seed

In 8 – 9 cm long, 8 cm long, and 8 cm high or black soft plastic containers, you can use the clear plastic bag. The bags require drainage space. You may also use a plastic seedling tray. It is a new form of seedling for good seedlings.

Transplantation

When the seedlings are 15-20 cm tall, a razor blade will open the bag. Now the seedlings are set for evening transplantation in pits. You may plant three seedlings about 15 cm apart in each hole. Watering is vital after transplantation for rapid recovery from transplant shock.

Adding Manure

The plant requires continuous fertilization as fruiting begins at maturity. From day one, you will prepare for fertilization. Because a five-month transplant-to-first flowering cycle is essential for papaya plant nutrition. You will stop manuring 6 months before harvesting the crop.

Now it’s about cropping

Male papaya plants typically thrive and start flowering after three months of transplantation. When their presence is detected, you will delete most of them. Of successful female flowers, however, around one male tree is kept for every ten female trees. Papaya starts flowering about five to six months after transplantation.

Irrigation

Currently, irrigate every winter ten days or every summer week. However, it varies with soil, climate, and irrigation methods. You may use a loop, furrow, or drip irrigation. Be sure, however, to avoid water meeting the stem. Irrigation can avoid frost damage to plants.

Papaya cultivation and plant protection

You need proper disease management to get the optimum yield. The major diseases are powdery mildew (OidiumCaricae), anthracnose, and stem rot.

Another possible condition is a root-knot nematode (Meloidogyne incognita) frequently and gently extracts weeds at the early stage. Never deep soil tillage, however, because the plant has shallow roots. With 43% lasso E.C, you can apply herbicide once before an emergency.  

Harvesting

Overall, Papaya takes six months to bloom. And, five more for processing. However, it can vary with climatic conditions and management. For shipment to distant markets, fruits should be harvested when the apical starts to turn yellow, and latex is no longer milky.

In the cold months, fruits will stay on the tree to produce deeper colors and get a better flavor. In papaya cultivation, in the first 15 to 18 months, a tree with proper management produces 25-40 fruits weighing 40-60 kg.

Pest and disease control

The frequently found pests are fruit flies, aphids, red spider mite, stem borer, gray weevil, snail, and grasshoppers. They are all regulated by spraying prophylactic substances including 0.3% dimethoate and 0.05% methyl gemstone.

The growing diseases are powdery mildew, anthracnose, damping off, black spot, nematode, and stem rot. Essential control measures are growing disease-resistant crops, choosing well-drained soils, practicing crop rotation, and growing seedlings or plants under net households.

Intercropping with a barrier crop such as corn mulching the bed with silver and plastic film that immediately destroys infected plants and replants the crop to avoid this virus infection.

Yield from papaya farming

All cultivar yields are different. Suitable plants are estimated to produce 34 kg fruit per plant per year, which amounts to around 38,000 kg fruit per hectare. The total area under Indian papaya farming has increased in recent years. Papaya’s nutritional and medicinal value has resulted in heavy consumption within the country, i.e., only 0.08 percent is exported. Thanks to conventional agricultural methods, exports are also less competitive. Delhi and Mumbai are Papaya’s main markets. The country’s overall production accounts for 54-lakh tones/year.

What is the cost of papaya farming?

Papaya farming costs will rely primarily on the farmland location. The cost components are farmland acquisition, planting expenses, irrigation expenses, fertilization facilities like labor shed, and land growth. Other than farmland costs, papaya farming costs aren’t much.

How much profit can you mine?

The margin of profit in papaya farming depends on the land area and the diversity of Papaya growth. In general, papaya farmers get their entire investment payback in around 2-2, 5 years. However, in the end, we would say that the amount of profit entirely depends upon your practices and techniques you use for farming.

Guava Farming – Planting, Spacing, & Cultivation Guide

Guava fruit is well known for its good flavor and aroma. Its scientific name is Psidium guajava. Guava is also called the ‘apple of the tropics’. Guava is rich in vitamin c and minerals. It is also rich in antioxidants. Guava has many health benefits. Guava is mainly cultivated in tropical and subtropical regions.

Guava Farming is a very profitable business. Guava helps in curing many diseases. Guava is also helpful in losing weight. In 2019 the production of guava all over the world was 55 million tonnes. Guava trees start fruiting after 3-4 years of plantation. Guava is mainly grown from seeds or by vegetative propagation. Guava trees are very productive and adaptable.

Guava Farming: 

  • Description of the guava plant:

Guava tree has smooth, thin, and brown bark that peels off and reveals a greenish layer below it. The maximum height that a guava tree can reach is 33ft or 10m with a trunk of 10 in (25cm).

The leaves of this tree are evergreen. These leaves are oval and long, having a short petiole. These leaves are leathery in texture and when guava leaves are crushed, they have a nice aroma. The white flowers grow independently in the leaf axils. These flowers have 4 to 5 petals. 

  • Description of guava fruit:

The skin color of the fruit ranges from light yellow to pale green or sometimes pink. When you peel off the skin of guava, a layer of sweet flavor full and tangy flesh is present. The color of flesh can be white, yellowish, light pink, dark pink, red.

When the fruit is immature, it is very hard and astringent. When guava ripens, some of its varieties have custard-like consistency however the others are crispy. Mainly the central pulp is of the same color even if the surrounding flesh is lighter or darker. It is very juicy and has hard yellow seeds in it. 

  • Different types of guava fruit:

Guava fruit has many different varieties. Some of these common varieties are given below:

  1. Ruby supreme: This variety of guava is oval. It has a medium to large size. It has a pungent smell. Its flesh is thick and sweet. Comparatively fewer seeds are present in this variety. Ruby supreme guavas are excellent to eat fresh. This variety has good productivity.
  2. Red Indian: red Indian guavas are round in shape and have medium to large size. This variety has a strong odor. It has a sweet flavor and its flesh is red. It also has good productivity. 
  3. Beaumont: The fruit of this variety is large. Its color is either green or light yellow and has pink flesh. Beaumont guava fruit can weigh up to a pound. 
  4. Red Malaysian: This variety has very unique foliage and flowers that are deep red. These flowers are also used for decoration. This variety is frequently grown for ornamental uses. 
  5. Mexican cream: It is our next variety of guava fruit. These guavas have yellow skin and cream-colored flesh that is a bit spicy. It is mainly medium-sized. 
  6. Safeda: In this variety, the skin of the fruit is very thin however the flesh is thick and white. Fewer seeds are present in this variety. This is a very famous variety and grown widely. However, branches of safeda are brittle and can break continuously. 
  7. Bangkok apple: These fruits are large-sized and have thick flesh. It has fine color and taste.
  8. Lucknow: It is medium-sized fruit and round shaped. It has creamy white soft flesh with a sweet and pleasant flavor. It is a good quality fruit and has fewer seeds.

Propagation of the guava plant: 

Propagation of guava depends on the variety of fruit, the fertility of the soil, and the available irrigation provisions.

At what distance the trees should be planted?

A distance of 5to 8 m should be maintained between the trees. Standing spacing between them should be 6 × 6 m where 112 trees could be planted in one acre. High-density planting can lead the branches to grow towards the sky. This results in long compact trees that give a high yield in the initial years. 

Usually, seed propagation for guavas is not much preferred as the juvenile phase of seeds is very long. Seed propagation gives lower yields and poor quality of fruit.

However, if seeds have to be used for propagation, then these seeds should be sown immediately after it’s extraction from the ripened fruit. Soaking these seeds in water for 12 hours a day or soaking them in hydrochloric acid for 3 minutes gives 90% of germination. After one year the seeding is ready for budding.

Inarching is another way for the propagation of guava but this method gives a limited number of plants from the mother plant. Though budding is a very successful method of propagation it needs a large amount of labor. Another successful method is layering but again the condition is that a limited number of plants can be produced from a mother plant. 

The easiest and pocket-friendly vegetative method for the propagation of guava is marcotting. In this method, the parts of the hardened shoots of a selected variety are dragged. After this step, a mixture of moist earth, compost, rooting hormones is gathered at the spot. If this method is successful, roots will appear in 3 weeks. Seedbeds are also a good method for vegetative propagation of guava 

Must Read: How Long Does it take a Kiwi Plant to Produce Fruit

Fertilization of guava trees:

Different fertilizers are used in different regions. Fertilizers have to be provided regularly to produce high-quality flowers and fruit. Regular fertilization also helps the plant to grow faster. Nitrogen, phosphorus, potassium, and magnesium in the ratio of 6:6:6:2 are applied to the guava tree. 

Pruning of guava plants: 

Pruning of the plants is very important at younger stages as this helps to build a strong framework and avoid week crotches. Pruning if fruiting trees is important to prevent overcrowding. The plants are aimed as low headed trees as this makes the hand picking of fruits easy. Pruning is also helpful in increasing the size of the fruit and yield as well. 

Pest and diseases: 

Pest control is very important for good productivity and disease-free plants. Mainly fruit flies, stem borers, nematodes, thrips, mealy bugs, scale insects, and some more are the pests found in the guava field. These pests can be controlled by chemical spraying or using pesticides. 

Some other cultural practices can also be adopted to avoid fruit from getting destroyed. For example, removing the infected fruit or plant part so that it doesn’t infect the whole plant.

Diseases:

Some of the diseases of Guava plants are fruit canker, will, fruit rot, anthracnose, grey leaf spot, or more. More details about the diseases are given below:

Guava wilt:

The symptoms of this disease are: in the early monsoon, light yellow foliage starts appearing and loss of turgidity and epinasty can also be noticed. Later on, plants can show unthriftiness along with this, premature shedding and defoliation can also be seen.

Some of the small branches can become bare and may stop producing new leaves and flowers and eventually dry up. Fruits on all these affected branches are left underdeveloped, hard, and Stony. And finally, the plant dies at the end. In this disease, the roots also get rotted from the basal region. The bark also gets weak and can be easily removed. Discoloration can also be noted. 

How is it spread? This can be spread from the sick soil in Virgin areas. It can also be spread from water. Any root injury also promotes wilt diseases.

Fruit rot:

Symptoms of this disease can be mainly seen in the rainy season. White cotton-like growth can be noticed on the affected part that develops very fast. This pathogen can cover the entire surface within 3 to 4 days. When the humidity is very high, at that time the fruits that are near the soil get affected very easily. Below the white covering, the skin of the fruit becomes very slushy and its color becomes light brown to dark. 

How does it spread? This disease is mainly spread through wind or rain. It is also spread through pathogens. It can be also spread from the infected plant material like soil etc.

Fruit canker:

The symptoms of fruit canker can be seen mainly on the green fruit and rarely on the leaves. At first, brown-colored or rust like unbroken circular and harmful patches can be seen on the fruit that leads to infection. The crater-like thing can also be noticed. In some severe cases, a large number of cankerous stops can also be seen. The infected fruit doesn’t develop completely and is very hard. Sometimes tiny rusty spots can also be noticed on the leaves. 

How do fruit cankers spread? This disease is mainly spread through Pathogens. Anyone infected or injured by fruit or plant part can also be responsible for this. 

Also Read: How to Nurture the Dragon Fruit –An Exotic Tropical Fruit

Alga leaf and fruit spot: 

In this, the algae infect the Immature fruit and in this small brown velvety lesions can be seen on the leaves or leaf tip. The spots on the leaves may vary in size, there may be small tiny spots or big patches. The color of the fruit can change to dark green, black, or brown. In this, the size of fruit enlarges 

How does this disease spread? This disease is an air-borne disease and hence air and rain can be the carrier of the disease. Pathogens are another carrier of this disease. 

Stylar end rot:

The main symptom of this disease is a change in the color of the region lying just below and adjoining the persistent calyx. Such areas gradually increase in size and turn dark brown.

Afterward, the affected part becomes slushy. Despite these all symptoms of the discoloration of the pericarp, the mesocarp tissue also shows the change in color, and the diseased area is marked by being pulpy and light brown in color in contrast to the bright white. 

How does the disease spread? Again pathogens are responsible for this disease and these are spread through the wind. 

Irrigation if guavas: 

Usually, no irrigation is needed during the monsoon months unless and until there are long spells of drought. In the initial year when the plants are very young with a shallow root system, they should be irrigated even at 2 to 3 days interval in the dry season. Trees in the age group of 2-5 years should be irrigated at intervals of 4 to 5 days. 

How to harvest guavas? 

Fruiting starts after about 2 to 3 years of plantation. However, the yield of the fruit depends on the age of the trees, or how the trees are planted ( pattern ), and other cultural practices. The proper yield can be seen after 10 years. After 10 years 100 to 150 kg of yield can be seen every year. Guavas can be harvested at any time in the year. However if one wants the best taste, flavor, and aroma it can be obtained when the fruits are ripened. 

When these guavas are grown at a commercial level, the ripening can be noticed when the fruit starts turning yellow. If the fruits are to be transported to some faraway place, then they should be harvested when they are light yellow and yellow can be harvested for locals. 

Conclusion:

Guava farming is a profitable business but it needs a lot of hard work and time. 

With harvesting possible at any time of year, it can bring profits to you for a lifetime. All you need to do is beware of the necessities of guava plants and then you can get fruits whenever you wish.

Reference:

http://nhb.gov.in/pdf/fruits/guava/gua005.pdf

https://www.apnikheti.com/en/pn/agriculture/horticulture/fruit/guava

https://www-krishisandesh-com.cdn.ampproject.org/v/s/www.krishisandesh.com/guava-cultivation-guide/?amp_js_v=a6&amp_gsa=1&amp&usqp=mq331AQHKAFQArABIA%3D%3D#aoh=16109678432103&referrer=https%3A%2F%2Fwww.google.com&amp_tf=From%20%251%24s

Powdery Mildew of Pumpkin

This is a type of fungal disease that can occur in a large variety of plants. Different types of fungi are responsible for this disease. Due to their different symptoms, these diseases can be easily diagnosed. In this disease, powdery spots of white color can be seen on the stems and leaves.

The leaves on the lower part are mostly affected however this effect can be noticed on any part above the ground. In this disease with time the size of spots increases. In this the affected plant becomes weak and due to this the size and taste of fruit also get affected. Powdery mildew of pumpkin can be avoided by separating off the affected part from the plant, planting the plants at more distance so that they can get sufficient air.    

What causes powdery mildew on pumpkin plant :

To treat or prevent the disease properly, it is important to know the cause of the disease. This common disease is caused by fungi. The fungi named Erysiphe cichoracearum is responsible for powdery mildew in pumpkin. It affects the leaves, flowers as well as stem of the plant. It also has an impact on the yield. Due to the microscopic spores that exist in chains, the white-colored powder can be seen. 

These spores germinate without water. Hence they grow very fast in dry and warm weather conditions. More spores are produced within days. The wind is the agent that spreads it to other plants. Sometimes the weather conditions also support the growth of this powdery mildew. These conditions include dry days and cool nights with humidity. In these conditions, the infection spreads rapidly. Other than this the temperature range from 68°F to 80°F also favors the disease. 

Must Read: how to plant, grow, and harvest pumpkins correctly and properly

Some other reasons for the disease can be: maintaining less distance between the plants. If the air circulation is not proper, the chances of the disease are more. Hence proper distance should be there between the plants and the greenhouse or the garden should be well ventilated. 

The next reason is the lack of light. When the plant doesn’t get sufficient light, it also favors the infection. Hence the leaves of the plant should be planted in such a way that it gets sufficient light. Exposing the leaves to shade for a longer time will help in the production of buds hence adding to the disease. 

Next not treating the disease after discovering it or not keeping a check on it will be carelessness. Due to this, the leaves first turn yellow, and then they will die and fall. Along with this, the white spots can lead to a sunburn of pumpkin.

How can you treat the powdery mildew of Pumpkin:

There are a lot of different methods that can be adapted to treat this disease. From these so many methods, the organic method is considered the best way to treat this infection. However chemical treatments are also available.

Also Read: Why Are Bottom of Tomatoes Turning Black: Blossom End Rot 

Some of the preventive measures for powdery mildew are: 

  1. Planting the pumpkins in a way that they get proper sunlight. As we know that insufficient sunlight can lead to this disease therefore proper arrangements for enough sunlight should be there.
  2. The next preventive measure can be planting the plant at the correct distances. A lot of distance should be maintained in each plant as planting them closely leads to infection. Hence to ensure proper air circulation, well distance has to be maintained and the garden or greenhouse should be well ventilated. 
  3. When you water the plant, try to water near the plant and make sure that leaves don’t come in contact with water. 
  4. If you see the symptoms of the disease or see the spots, immediately remove the part of the plant to avoid the spread of infection to the whole field. Cut off the infected part and dispose of it. Also, check all the other plants carefully as it spreads very easily through air or wind. 
  5. Further, do sterilize all the tools used for pruning to prevent the spread of disease to other plants. For this keep the scissors in a solution made of one part of bleach and four of water. Also, make sure that you wash your hands properly after you deal with the infected plant. Spray the foliage in the field so that the powdery mildew doesn’t occur again. Put 2 tables of aspirin in the water and then dissolve it well and spray the solution on the leaves. The best time to spray this can be early morning. 
  6. If the plant still doesn’t get rid of the disease and the infection occurs again and again then you have to detach the whole plant and fungicides have to be sprayed to the soil to prevent the infection from spreading to the whole field. 
  7. Keeping a check on weeds and removing them from time to time is also a very important step as weeds can act as an obstacle for the sunlight and plants may not get proper sunlight.
  8. However, if you are growing the plant at home in your garden then there’s a simple home remedy for the disease. For this, you have to mix the water and milk in equal amounts and then spray it on the plant two times a week. 
  9. One can use organic compounds like sulfur or potassium bicarbonate. These organic compounds are very effective for powdery mildew.
  10. One should check the plant at least once a week to avoid the disease.

Bottom line:

The disease powdery mildew of Pumpkin is very common and also spreads very easily. Hence it needs proper care. To avoid the disease or to prevent it, the above given preventive measures should be taken. This fungal disease can affect the yield as well as the taste of the plant hence one should keep a check on the plant. 

Why Is My Strawberry Plant Not Growing?

Strawberry plants are renowned for their red delicious fruits. Apart from beautifying your garden, this plant gives your surplus amount of delicious strawberries that are known for it’s nutrients.

It is nice to be able to pick bright red sweet strawberries from your plants. If your plants are not growing, don’t be discouraged. Keep trying!

In this post, we will figure out why some strawberry plants do not grow much. We will also learn how to fix it.

If you are growing strawberries, read this to find out why they might not be growing. It doesn’t matter if you just started or have been doing it for a while. You can also learn what to do now.

Why Are Strawberry Plants Not Growing?

Many people like to grow strawberry plants, but sometimes they don’t do well and don’t produce many strawberries. If your strawberry plants are not growing, you might be wondering why.Strawberry plants can grow slowly or not at all if something is wrong. It could be how the plant was planted, how the soil is, pests, or a disease. Figure out what could be wrong to help the plant grow better.

#1 Insufficient Sunlight

Your strawberry plants need lots of sun. They need 6 hours of direct sunlight each day for them to grow well. If the plants do not get enough light, they will not be able to make food for themselves.

#2 Poor Soil Quality

If you want to grow strawberries in your garden, the soil needs to be healthy and full of good things for the plants. Ensure that the soil is abundant in essential nutrients and permeated with oxygen, while all weeds have been removed.

#3 Not Enough Water

Water your strawberry plant every day. If you don’t, the roots won’t get enough water and food. This can cause it to not grow very well or even die.

#4 Pest or Disease Infestation

Pests and diseases can hurt your strawberry plant. They can make the leaves, flowers, and fruits smaller. Look out for small bugs like aphids, mites, slugs and caterpillars. Also look for fungal diseases such as powdery mildew or leaf spot.

#5 Poor Pruning Practices

If you don’t prune your strawberry plant correctly, the plants will not get enough space or sunlight. This means they won’t grow very well. Read the instructions and make sure you prune your plant correctly.

#6 Too Much Fertilizer

Gardeners sometimes give their strawberries too much fertilizer. This can be bad because it might stop the plant from growing and make the fruit taste bad. Follow the directions for how much fertilizer to use for best results.

Now that we know why strawberry plants might not be growing well, let’s find out how to make them stronger.

Also Read: Why are my Strawberry Leaves Turning Red?

How to Fix A Lack Of Growth In Strawberry Plants?

If your strawberry plants are not healthy, there are things you can do to help them. Get them lots of sunlight and water, give them soil that has nutrients in it and make sure bugs don’t bother them. Doing these things will help your strawberries grow big and strong.

Check soil condition to promote optimal growth of strawberry plants

When growing strawberries, the soil is very important. It should have nutrients, good drainage, and be cool enough for the plants to grow well. To make sure it’s good soil, check things like the pH levels and if there is organic matter in it.

Preparing your soil is important for growing good strawberry plants. Get to know your soil and give the plants the care they need. The hard work will be worth it when you get juicy, sweet berries.

Sunlight – Ensure Strawberries need 6-8 hours of direct sunlight

Strawberries are yummy and healthy. To make sure they grow big and strong, give them 6 to 8 hours of sunlight every day. Not enough sun can mean the strawberries will be small or there won’t be a lot of them.

Look at your strawberry plants every day. Make sure they are getting enough sunlight. If they get the right amount of light, you will have yummy strawberries soon.

Also Read: How Long Does it take a Kiwi Plant to Produce Fruit?

Watering Strawberry in moderation to prevent root rot

Water your plants the right amount. Make sure you give them enough water, but not too much. Too little or too much can hurt them. Make sure to do just enough, not too much and not too little. Too much water can hurt the roots and make them die.

Not giving enough water to plants can make them dehydrated. The leaves will be wilted and brown. Examine the soil’s moisture level to ensure it is neither overly wet nor too dry. Monitor your plants vigilantly to ensure they are not exhibiting any signs of distress.

Check this out: Why Are My Papaya Leaves Wilting?

Monitor pests and diseases

Strawberry plants can be hurt by pests and diseases. These are like aphids, mites, powdery mildew, anthracnose and more. These bad things can damage your strawberry plants so they don’t grow as well or make good strawberries.

You need to watch your plants closely. That way you can make sure they are growing healthy and strong. If there is a problem, like pests or sickness, take action right away. That will help keep your strawberry plants safe and healthy.

Fertilizing your strawberry plants

Strawberries are delicious and nutritious. To get lots of yummy strawberries, you need to give them fertilizer. Fertilizer helps the strawberry plants grow strong and healthy. Without it, there might not be as many strawberries or they won’t taste as good.

You should check your strawberry plants to see how much fertilizer they need. By doing this, your children can remain nourished with the vital nutrients they need when they need them most. This will make them grow really well and give you lots of yummy strawberries.

Pruning

Spring is a time when plants start to grow and become stronger. We need to prune our plants regularly. This means cutting off the dead or dying leaves and stems. Doing this helps the plant stay healthy, helps it grow, and stops diseases from spreading. Pruning also keeps your plant looking neat and tidy.

When we get ready for gardening this season, don’t forget to prune the plants. Pruning helps the plants stay healthy.

What could be the reason my strawberry plants are not growing?

If your strawberry plants are not doing well, there could be different reasons. These potential causes could be a result of insufficient sunlight, dehydration or overwatering, infestations and diseases, nutrient deficiency in the soil composition, poor quality soil structure, or inclement temperatures.

How do I ensure my strawberries get enough sunlight?

Strawberries need sunlight to grow and make lots of fruit. The best place for them should get 6 hours of sun each day. Try and find a place with some shade for your berries so they don’t get too hot in the afternoon.

What is the right balance between under and over watering?

It is important to water your strawberry plants correctly. Too much or too little water can hurt the plant.

How can I identify if pests or diseases are affecting my strawberry plants?

Look for signs that your plants may be sick. This could mean spots, unusual colors, or leaves falling off. If you think your plants are not healthy, take action quickly. You can use things like bugs that help eat pests or remove the unhealthy plants. Sometimes you need to use special sprays to get rid of pests.

Does fertilizer really help with strawberry plant growth?

Fertilizer is important for plants, like strawberries, to grow. It gives the plant the nutrients it needs to be healthy and strong.

When should I prune my strawberry plants for optimal growth and health?

In the spring, you should trim your strawberry plants. This will help them stay healthy and make more fruit. It will also help them look better.

Conclusion

Growing strawberries is fun. If you take good care of them, you can get lots of delicious berries! Make sure the plants get enough sunshine. Check for bugs and diseases. Give them fertilizer when needed. Prune the plants often to help them grow better in the future.

Take care of your strawberry plants. Adjust the care if needed. This way you can have lots of tasty strawberries all summer.

How to Grow a Lemon Tree in Pot | Care and Growing Lemon Tree

Hot and bitter lemon adds flavour to every cuisine. With all the information you need in this article, learn how easy it is to grow lemon trees in pots!

Do you want to grow lemons but have limited space? So planting lemon tree pots is a good idea. Plant it on your terrace or even indoors, it will emit fragrant flowers and soft citrus yellow fruits. In the balcony can also be planted! See how easy it is to plant a lemon tree in a flower pot!

The Best Varieties of Lemon Tree to Grow in Pots

Planting lemon trees with seeds is a bad idea because it can take up to 4-5 years to bear fruit. Instead, check if your local nursery has dwarf varieties suitable for potting.

The most suitable varieties for containers are Modified Meyer, Lisbon Lemon and Dwarf Eureka. However, lemon trees do not grow very large, so almost any variety can be grown in pots.

 Buy a healthy lemon plant that’s a minimum of 2-3 years old therefore you do not have to be compelled to watch for it to bloom.

How can you grow lemon tree in a pot?

Choose a pot that is 25% larger than the root ball of the plant. The clay pot is ideal because, unlike plastic, it is porous and the water evaporates from the side. This will help the lemon tree grow well because it doesn’t like it.

The quality and type of potting soil is also an important factor. Use well-drained potting soil and a lot of organic matter, and deposit fertilizer for high-yielding plants.

For any other small spaces, take care of your thorns and place plants in the corners.

Also Read: 7 Common Lemon Tree Problems & How to Fix Them

Requirements for lemon tree to grow in a pot

 Location

All citrus plants like full sun and need 7 to 8 hours of sunshine. If you grow lemon trees indoors, place the pot near a sunny window. You can also replace the missing direct light with artificial light.

Soil

This plant prefers neutral to slightly acidic soil. You can also use garden soil, coconut peat and compost in equal parts.

 Watering

Lemon trees need constant watering to produce healthy fruits. Too much or too little water will cause flowering and fruiting in autumn, sometimes plants die. Before watering, make sure the top 2 inches of soil is dry. More frequent watering and slightly moist soil are needed on hot and windy days.

Humidity

If you grow a lemon tree indoors, it needs a certain amount of humidity to grow-50% is ideal. You can place it on a gravel bowl or use a humidifier to keep it moist.

Repotting

According to the scale of your tree pot size must be maintained. Avoid pots that are too large or too small; please note that you need to use a container that is one size larger than the pot you used before.

Lemon tree care

Planting potted lemon trees in USDA Zones 9-11 does not require you to be so careful in severe cold, but you need to be extra careful in these areas during severe winters. Temperatures below 30°F (1°C) are fatal to lemon trees, aside from the Meyer lemon variety, which may face mild cold up to 24°F (4°C).

 Low temperature will kill citrus plants. The best temperature is 10°C to 28°C (50°F to 82°F). When the temperature is below 35°F, put the plant in an indoor pot or greenhouse for the winter (2°C).

Pruning and pinching lemon tree

Pinches can promote lusher growth-pinch the plant tree to grow at the beginning of new growth in spring (February to March) and in fall best or late winter in a frost-free area.

Be careful before pruning, and only cut off diseased or dead branches, or branches that reduce airflow, because lemons will store excess food in the leaves, and excessive pruning will cause the quality of the fruit to decrease. In addition, please keep looking for the suction cup and cut it as soon as you find it.

Fertilizers for lemon tree growth in a pot

All plants in the Citrus family eat a lot. Lemons need fertilizer to produce juicy fruits, lush leaves and fragrant flowers. Use a specific citrus fertilizer for each kinds of citrus plant; if not please use slow release fertilizer containing NPK 12-6-6 or 20-20-20.

Look for fertilizers that contain trace elements, especially iron, manganese, and zinc. If you do not use slow-release fertilizers, please apply water-soluble fertilizers once a month during the growing season to improve your lemon tree. Sprinkle chopped compost or fertilizer on the plants from time to time.

Also Read: How to Grow Lemon from Seeds

Pests and Diseases

Pests such as spider mites, aphids, mealy bugs and scales are periodically attracts towards. Apply neem oil or pesticides, insecticidal soap when you observed the infestation.

Harvesting

It depends upon the varieties which are growing and the climatic conditions. It stops ripening once cut off from the tree. To determine the fruit is ripened observe the fruit colour, weight and softness.