16 Banana Peel Uses in the Garden You Should Try Once

After reading this article, you’ll never throw away Banana peels as like before. Bananas are a superb source of phosphorus and potassium for us, and their peels also do the same for plants. So, just cut it up and put it in the planting hole for tomatoes or peppers, it is one of the usages of banana peel in the garden. You can know more about the uses of Banana peels below!

Uses of Banana peels

1. Banana Peel Spray-On Fertilizer

Feeding banana peel to plants is an old wives tale. It can be used to make foliar spray to boost the nutrient to your plants. For making the recipe, you will need Epsom salt, eggshells, banana peels and water.

Take the dried banana peels and egg shells grind it in a blender until it becomes powder. Add Epsom salt to these banana peel and eggshells powder with water. Fill it in a spray bottle and shake the bottle until the salt and powder dissolves in water. You can use this solution in your household or in garden plants.

2. Make a Compost Tea

Drop few banana peels into a bucket which is filled with water and keep it for few days then you will get a rich amount of minerals in banana tea that will be enrich your vegetable beds and flowers with nutrients and promote aggressive growth organically.

3. Blooming in Plants

It contains high concentration of potassium which is the key nutrient to that plants need to form big and bright blooms. Potassium also promotes the transfer of nutrients and water among plant cells and protect them from diseases. To acquire benefits, cut it into small pieces and use it as mulch.

4. Fortify Your Soil

To your garden soil give a direct impact of nourishment by planting a banana peel or two in it. Simply dip up a trench three inches deep and long enough to accommodate the peels. Place them flat with inside facing up and cover them with some soil.

If you required fast decomposition, grind them in a grinder and follow the other steps. Over time, they release vital nutrients like calcium, potassium, and phosphorous.

5. Make a Fruit Fly Trap

If the flies are the major issue, and you are trying to deal with them in non-toxic way then use banana with its peel is your answer.

Simply chop it up, keep it in a plastic container, and pour some amount of apple cider vinegar. Then punch it with large holes in the lid to allow the entry of fruit flies. The scent of banana and vinegar will attract them and enters through the hole, finally drown to die in the liquid.

6. Aphid Control

Here we don’t have any solid proof yet, but you can try! Use dried banana peel pieces for this hack.Cover or bury dry pieces 2-5 inches deep in the soil at the base of the affected plant.

As they detest the smell of bananas then the aphids’ will be soon gone from the affected plants. 

7. Add to Compost

Banana peels are biodegradable and it also quickly breaks down. Here we have the best usage of banana peel is to add them to the compost pile. Be sure you only add chopped or soaked, or semi-solid slurry. If you add whole it will attract by raccoons and shunks.

8. Attract Butterflies and Birds

Encouraging birds and butterflies by keeping ripe banana peels on a raised platform in your garden. You can also cut them into pieces or make holes, which seem to be the most attractive and easily obtainable fruit for insects.It is quite likely to bring out the bees, wasps, and caterpillars as well. Ensure that you can place it on a platform above the plants.

9. Fertilizer for Air Plants

Regular air plants and epiphytic perennials like Elkhorn fern and staghorn fern are not form roots to grow in the soil like common plants. Instead, they acquire all its nourishment from their surrounding air.

In a smart way the banana water spray gives their requisite dose of nutrients for growth and survival. For this place banana peels in a blender or in a food processor to make a smooth consistency and then dilute the paste in water. Use this water to spray on air plants.

10. Feed Your Plants Banana Vinegar

Acid-loving plants like blueberries, rhododendrons, gardenias, and azaleas benefits from the application of banana vinegar.

If the brew has strong vinegar smell, then dilute it with equal amount of water to avoid burning the plant.

11. Prepare Your Garden Bed

For the preparation of garden beds banana peels fertilizing and nutritive nature make them perfect as asoil amendment substance. Simply chop them up and toss them into the farming soil.

It will improve the quality of soil and as well as boost the microbial growth and enable the benefits of worms to aerate.

Also Read: Custard Apple Farming Was Never So Fruitful – Read This Guide Till The End

12. Establish Air Plants with a Banana Peel

For the decorative air plants setting add a banana peel at the base, cover it with few amount of mulch and mount the entire plant over it. The peels act as compost and decay to release several nutrients that benefits the plants for further growth.

13. Fertilize Tomato Plants

Don’t forget add banana peels to your tomato plants because it will flourish the plants and produce the harvest prolifically. As banana peels upgrades the soil with the help of nutrients like potassium, iron, and calcium this will helps the tomatoes.

Also Read: How long can a tomato plant go without water?

14. Feed Seedlings

Few amount of banana peel cut into a tiny pieces and bury them in the soil, exactly below the topsoil of the garden bed or at the bottom of the container, at any time you plant seedlings. It will produce a much needed boost of nutrients to the young plants. You can also use it as a banana peel spray on them.

15. Amend Potting Soil

Composted Banana peel can be directly used as a soil amendment in the fall while you were preparing the vegetable and flower beds for winter. For this, chop banana peels up and add it with potting mix.

Make sure about to conceal them deeply under mulch if you want to add the peels to avoid attracting any mammalian nocturnal invaders.

16. Boost Blooms in Roses

Banana peels are the best source of minerals like phosphate, magnesium, sulfur and calcium that roses require to grow with their potential. These minerals not only help to boost the plants but also produce brighter flowers.

There are several ways to do this: you can hide the banana peel pieces in the rose container or bed, or side dress of rose bushes with dried banana peels on it and mulch is also an another option. Banana peel spray will also work as well.

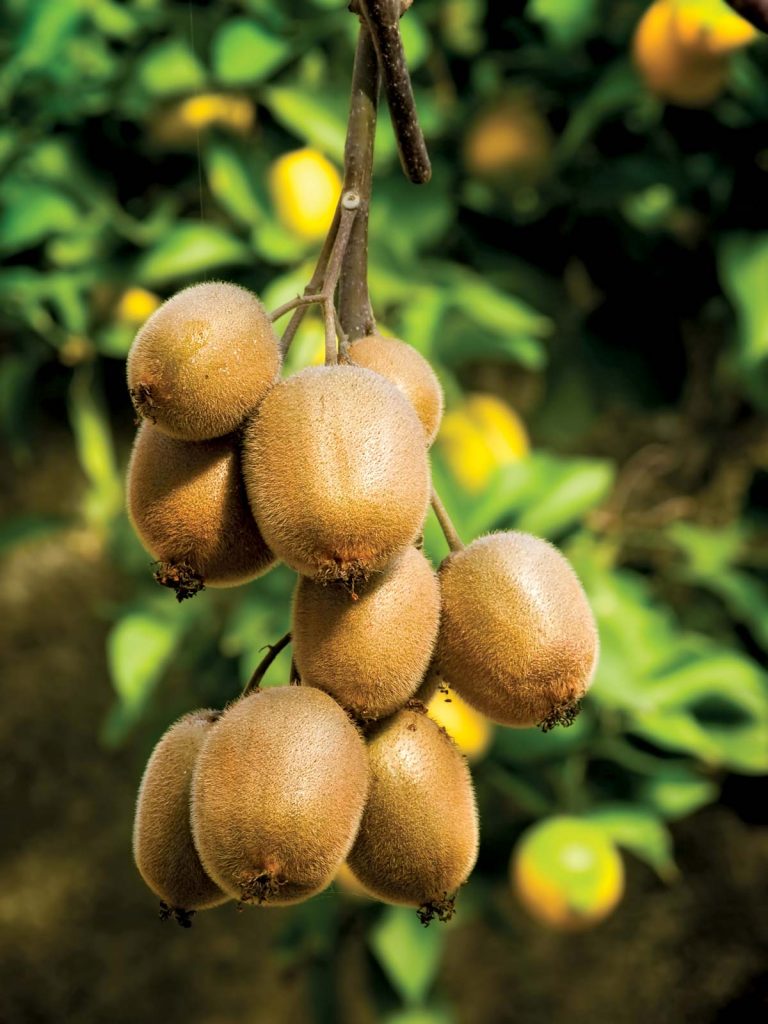
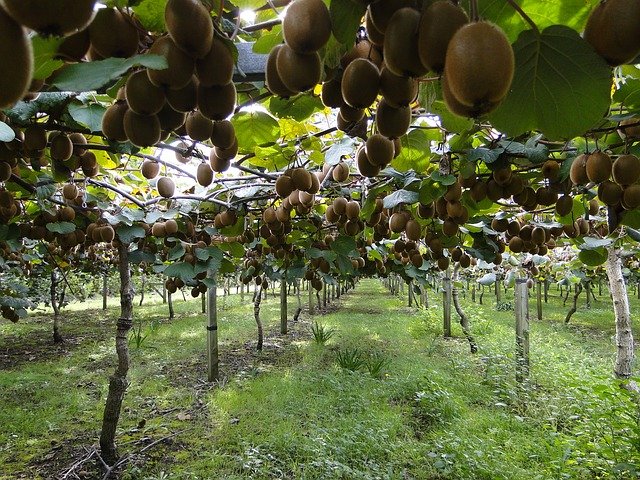
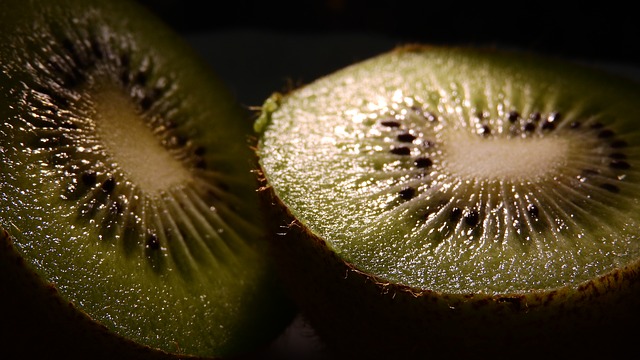
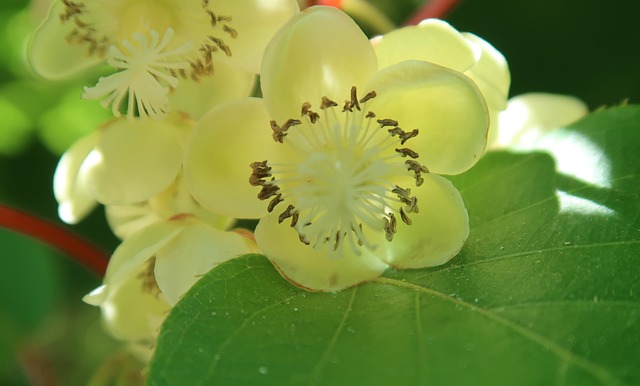
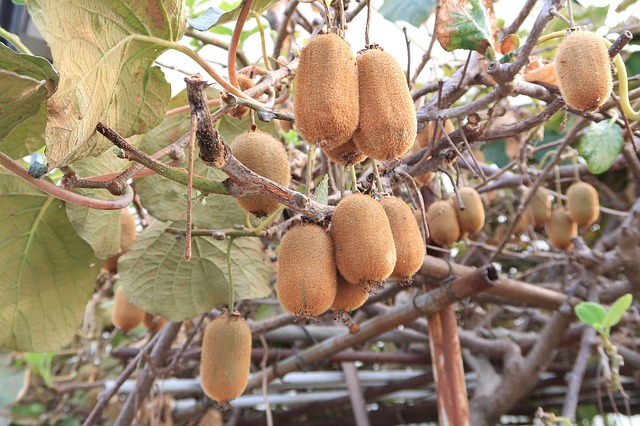
Also Read: How Long Does it take a Kiwi Plant to Produce Fruit

7 Common Lemon Tree Problems & How to Fix Them

Really citrus tree is unique in the garden. It looks great and makes any space as a summer paradise. Lemon tree is a special to grow, because it is relatively easy to care. It can be grown in various climatic conditions with more benefits. Depending upon how quickly they produce fruits?

They are suspecting that long list of pest, diseases, and problems. If you not identified in time then you can’t get any fruit at all. Few of these problems have due to bad gardening habits.

Although, we have few preventive measures and solutions for making lemonade in no time.

Care guide to lemon tree

Before entering into the list of lemon tree issues, just revise the best way to protect for your lemon tree.          

Lemon tree should be planted in the sunniest spot in your garden. So, the sunlight falls on the tree is about 6 hour’s minimum for every day. Tropical and the semi tropical are the best climate for the lemon tree.

Most of the lemon tree need well drained, textured soil with lightly acidic in nature. Avoid mulching at the base of the tree and be sure that there is no pooling water when you water it. Maintain the moist soil throughout the summer. Sometimes younger plants need water twice a week. For older ones became more to drought-tolerant and don’t skip out on watering altogether.

Younger citrus tree needs more cutting back to encourage healthy branch growth. Cutting is also allow flowing air easily between branches and leaves and allows excess light to reach all areas of the tree.

Let’s enter into the problems of citrus tree and how to dive into them.

7 Common Lemon Tree Problems

#1.Lesions on Leaves – Citrus Canker

The most common devastating lemon tree disease is citrus canker. This disease occurs due to the bacterium Xanthomonas citri. In early nineteen century it was discovered in Texas and Florida. Many of them believed that it is originated in Japan and finding their ways to the states by shipping the citrus seeds.

It is first appears on your lemon tree leaves such as small lesions pop up are observed on both sides of the leaves and they are raised like a small carters. This spots have a yellow ring around them with water stains. It will spread all over the stems and fruits.

It is not harmful for humans but still devastate your lemon tree and their citrus family. Shoot dieback, defoliation, fruit drop are the symptoms of the citrus canker.

This disease can be spread through cross contamination of plants, winds and rains. Even birds also spread citrus canker. These citrus cankers survive for 10 months on leaves, plant debris, barks and it is difficult to control.

Prevention for citrus canker bacteria

When these citrus canker diseases appeared in agricultural lemon trees, the solution is to burn all the trees which are infected as well as around 50 foot radius trees also burnt too.

Also Read: How to Grow Lemon from Seeds

#2.Black Moldy Spots – Sooty Mold (And Aphids)

Many plants are effected by sooty mold disease especially for those who loved by aphids. It will grow on sticky substance secreted by aphids called as honeydew. While it is black and not harmful and it prevents photosynthesis having devastating results. With high infestation causes defoliation which leads to death of your lemon tree.

If you identified that your citrus tree have an aphid and sooty mold problem then you observed your lemon tree leaves and branches have been dusted in ash and covered with black grime.

The best way to prevent sooty mold from your lemon tree to get rid of aphids. Simply make soapy water in a bucket and allow the effected leaves to dip into the solution. Another way with trusty water spray bottle in that add aphid killer, horticulture oil, and alcohol thrown in the bottle then spray it over the effected leaves of lemon tree.

 #3.Fuzzy Gray Mold and Brown Spots – Botrytis Blight

Botrytis blight is a diseases caused by fungus, grow in high humidity and in long period of rains. It lives at plant debris and spread easily by rain and wind. Once it occurs on your lemon tree needs to germinate little bit of moisture. It is quickly effects the leaves, stems, small branches and lemons leaving back dark brown spot and gray fuzzy mold. The gray mold ends the covering a fruit that which already set causes the branches to die back.

It can be easily prevented. Citrus trees are planted at the maximum sunlight falls on the site in the garden and space them to eliminate correctly in which botrytis blight thrives in few conditions. Lemon trees dries in sun with good air circulation. For prevention of botrytis blight throw away dead foliage and plant debris near the citrus tree in the garden to avoid attracting diseases.

#4.Tan Spots with Dark Outlines – Anthracnose

Another fungal disease that needs attention is anthracnose. Like gray mold, it attacks lemon leaves, branches, and spots. Anthrax is easy to detect like most fungal diseases, it first appears strangely colour lesions on the affected area (e.g. leaves). These spots are tan with obvious black outlines and look like healing bruises.

The anthracnose of lemon fruit looks a little different sunken and dark brown. When it spreads in the fruit, the centre of these spores turns pink and the fruit begins to rot. Small branches and twigs are also affected, causing the leaves to die and fall.

Anthracnose thrives in cool, humid and humid conditions. It can spread quickly and easily, especially in the wettest season. Splashing water on the contaminated plant remains help to spread disease to your lemon tree. As destructive as anthracnose, it is easy to control. Just remove any plant debris from the roots of the lemon tree. From there you must prune and destroy all infected trees, branches and leaves.

Proper watering and special care for lemon tree will help to prevent the development of anthracnose. You can use copper and neem oil-based fungicides to prevent fungi from rooting, but they do affect beneficial insects.

 #5.Brown Scabs – Lemon Scab

This fungal infection does no harm to the fruits, you can still eat them, but they don’t look good. If you don’t take care of them adequately, the health and fruiting ability of your trees will deteriorate.

 They look like terrible brown shells. At first they look like small pustules, but as the disease spreads, they become very hard.

 Lemon scab can also affect branches and leaves

The branches and leaves became deformed and withered. When a lemon tree is infested with lemon scab, it will appear short and dense.

Like other fungal infections at wet and humid conditions are ideal places for disease to develop and spread.

 As always, your first line of defense is to maintain good garden hygiene and proper watering methods. Many people recommend removing infected trees to replace harmful fungicides that may harm other plants in the garden.

Also Read: Guava Farming: Planting, Spacing, & Cultivation Guide

#6.Yellowing Leaves – Chlorosis

If you notice a yellowish tint on the leaves of the lemon tree, you may have chlorosis on your hands.

Many factors can cause the leaves to turn yellow. Sometimes it may be due to poor drainage or too alkaline soil, compacted soil and damaged roots can also cause chlorosis.

However, sometimes you will notice yellow veins passing through the lush green leaves. This form of chlorosis, called yellow vein chlorosis, which can indicate your trees, has lack of nitrogen. Fertilize for one day, and your tree will take care of itself.

But yellow veins chlorosis may also be the result of trauma to your lemon tree. This phenomenon may be caused by physical damage or by gardening tools, pests and diseases.

Always use your gardening tools carefully, maintain a high standard of garden hygiene, and take care of your lemon tree. Make sure you also fight against pests and diseases. Chlorosis, especially caused by trauma which results to fall of fruit and leaves.

#7. Leaves with silver streaks – Citrus Leaf Miner

Citrus moths are native to Asia and the adults are concerning to larvae. The small pests get unique name due to the tunnel across citrus leaves. If the leaves are distorted growth of younger ones can be affected.

Adult citrus leaf miners are small and these silver moths have a black spot on their scaled wings. The larvae are also small, but green, similar to glass.

 Female butterflies usually lay their eggs under the leaves. It completed this operation in less than a month. In just a week, you will find their traces on all the leaves.

 It should be noted that these small pests will not affect the fruit itself, only the leaves. However, lemon trees are particularly fragile because small citrus fruits can infect young leaves.

The good way to deal with citrus leaf minors is to announce beneficial insects. So many insects destroy your plants. Spider and parasitic wasps are introduced into your garden which eliminate majority of larvae and pupae.

If you want to add more fruit trees in your backyard, check few of these great dwarf options. Or might be don’t have outdoor space, you can also grow fruit trees indoor itself.

Also Read: What is Mango Farming all about? A complete guide

How Long Does it take a Kiwi Plant to Produce Fruit

Kiwi (Actinidia deliciosa) is a berry fruit. It is mainly oval and with brown skin and green flesh. It also has tiny black seeds that are edible. Though it is a bit sour but doesn’t have citric acid in it. It has a sweet and tangy taste. This plant is mainly grown in the winter season as it requires a temperature of less than 7° C.

Kiwi farming is carried out in sandy and loamy soil. This soil should be rich and well-drained. Kiwi is grown at a depth of 800-1500 m. So now the question arises: How long does it take a kiwi plant to produce fruit? Fruiting mainly depends upon the age of vines.

However, the yield of the plant increases after 1 year. Kiwi has high nutritive values, it is rich in vitamins and minerals. It has vitamin c, vitamin k, fibers, and potassium. Hence kiwi farming is very profitable.

Mainly there are 3 types of kiwi fruit. It has several health benefits. These are the grocery store kiwi ( Actinidia deliciosa), the next is a hardy kiwi (Actinidia arguta ), the last type is (Actinidia kolomikta).  

Kiwi plantation: 

In this, first of all, one would require one male vine for eight female vines. These vines are vegetatively propagated so these vines will be made to reproduce when you buy. The growth of hardy kiwis is very very fast. 

Which type of soil is best for kiwi farming? 

The soil should be well-drained and should have a higher amount of organic matter in it. Sandy and loamy soil are best for kiwi farming. The pH of soil required is a little less than 6.9.

At this pH maximum yield has been reported however if the pH increases to 7.3 it can badly affect the yield. As the cropping starts, nitrogen, phosphorus, potassium has to be supplied at regular intervals. 200kg of nitrogen, 55 kg of phosphorus, about 150kg of potassium are the doses required per hectare.

Suitable climatic conditions for growing kiwi: 

As told earlier a cool climate is preferable for kiwi plantation however they can grow in almost every climate. The vines require a cold climate to set fruit. Less than 45° F is suitable for kiwi. These plants need to be protected from strong winds and frost.

Hence kiwi has to be protected from wind, autumn, and spring frost. The soil needs to be rich in moisture throughout the year. About 150cm of Rainfall is enough per year and it should be well distributed especially during growth periods. 

kiwi plantation

During summer the temperature is more and the humidity is very low and this can cause scorching of leaves. Usually, heat stress and sunscald are the main problems in kiwi farming. 

How to prepare the land for kiwi fruit production

A steep land with rows is required for growing kiwis. The land should be prepared in such a way that enough sunlight falls towards the rows. The land has to be prepared thoroughly for the cultivation of kiwi.

The land should be plowed about 2 to 4 times and then followed by two harrowings. It is necessary to keep the soil free from any type of weeds otherwise the crop yield would be poor. While preparing pits for the kiwis, a mixture of farmyard manures and upper soil should be added to get high quality and productivity of the fruit.  

Planting a kiwi fruit: 

For kiwi plantation, it is very important to plant the fruit at correct distances and suitable methods have to be followed. 

When the kiwi is grown at a commercial level, that time grafting method is mainly used for propagation. If this crop is grown at a proper distance then one can attain maximum fruit production. The distance between each row should be at least 3.5m whereas the distance between each plant has to be 6m. Usually, 2 main methods are used for plantation.

These two methods are: T- bar training system and the other is the Pergola training system. In the T-bar system, the above-mentioned spacing is required. In the Pergola system, the distance between each row should be 6m and the distance between the plants should be 5 to 6 m. 

Also Read: Guide for Beginners of Kiwi Farming

Procedure to grow kiwifruit from the seed: 

The first step is to get some kiwi seeds from the available kiwi fruit. Then place all these seeds in water and blend them to separate the gooey membrane from the seed. After this use a colander to water the kiwi seeds. Then soak these seeds by placing them smoothly on a paper towel. The next step is to put them in a ziplock and place it in a warm place.

kiwi fruit seeds

When you notice sprouting in the seeds, split the paper towel into tiny pieces and transplant them in the prepared put or the pot. Therefore take proper care of your plant for good quality fruit. 

Irrigation in kiwi farming:

For a good quality crop, from time to time irrigation is a must. Like other crops, kiwi also needs regular water supplies. The hard variety of the kiwi fruit takes 3-4 years to become mature. Hence water has to be supplied regularly for 3 years of the plantation. But don’t overwater the plant as this may lead to mulch in the crop.

In hot and dry conditions water has to be supplied at regular intervals. At commercial level kiso farming, irrigating at intervals of 10-14 days is best for maximum production.

Application of manures and fertilizers: 

The application of manures and fertilizers is also very necessary for high productivity. From time to time enough dose of suitable manure and fertilizers has to be supplied for a good yield. So one should use soil rich in organic matter like nitrogen, phosphorus, potassium, and other micronutrients and macronutrients.

Other than this a dose of farmyard manure should be added before planting it in the main field. After 5 years of plantation, adding these manures and fertilizers have excellent results. A high amount of Cl is also necessary for the crop as its deficiency can cause adverse effects on the growth of the crop and even on roots and shoots. On the other hand surplus amounts of boron and sodium can be harmful to crops.

Pruning and training of kiwi crop: 

For better production of the crop, pruning and training are very important. In training Wooden, concrete, or iron pillars are used to provide support to the vines. Adjust these pillars 5 to 6 meters apart. The pillars should be 1.6 to 2.1 m long above the ground. Fence or wire can be used to provide support to the pillars. 

Pruning: Along with proper training, pruning is also very essential for high yield. It is very important to remove or cut off the unwanted and undesirable parts that may suck the essential nutrients from the plant.

Hence canes from the making part of the flower have to be removed along the excessive wood grown along with the plant. Also, separate off the extra tangles from the plant.

As kiwi is not a self-pollinating plant, hence there’s a need for good pollination also. 

Harvesting of kiwi

Mainly kiwi attains its full size after monsoons however it still may not be ready for harvesting. It could be ready to harvest in early winter as till then the seeds become black and sugar levels also rise however after harvesting the kiwi, the starch turns into sugar. And finally, the fruit is ready to eat.

Harvesting of Kiwi Plant

Also, a refractometer can be used to determine if the sugar level is optional and the kiwi is ready to harvest or not. About 6.5 percent or more is the optimal sugar level. Vine-ripened kiwi has the best Taste however cannot be stored for much time.

When the kiwi is grown at a commercial level, harvesting has to be done all at one time however if one grows it in a home garden then they can harvest it according to their need in the harvesting period but harvest the large-sized kiwi first and let others remain inside to grow more. Kiwi has to be handled with care during harvesting and the kiwi that has been damaged cannot be stored.

Diseases: Armillaria Root Rot (4/13), Bacterial Blight (4/13)

Bleeding Canker (4/13),

Botrytis Fruit Rot (6/16)

Crown Gall (4/13)

Phytophthora Root and Crown Rot (6/16)

Water Staining, Juice Blotch, and Sooty Mold of Fruit (4/13) are some kiwi diseases whose symptoms are Vines may completely collapse; white mycelial mats may be present under bark close to the soil line,  there’s a change in the color of cortical tissue and white mycelial strands are also present; root-like rhizomorphs extend from roots into the soil.

These needed to be controlled as soon as possible. Make sure that land being used for new kiwi plantings is gotten rid of roots which have diameter greater than 1 inch; ensure kiwi vines are properly watered but not too much. Further, diseases can be controlled by avoiding injuries that lead a way for pathogens to enter the body. At this time, no chemical control strategies are available. 

Health Benefits of kiwi:

Kiwi has several health benefits and many nutritional values. Some of the benefits are as follows:

1. Kiwi is an incredible source of vitamin C, vitamin E, and antioxidants.

2. Kiwi fruit has anti-aging properties and is also very beneficial for the skin. It improves skin health.

3. Kiwi fruit also helps in enhancing the respiratory system of the body. 

4. Kiwi is very good for the eyes. It improves eyesight and is also helpful in protecting our eyes from several diseases.  

5. Kiwi fruit helps us to improve our digestive system from where a large number of disorders and diseases can happen if digestion is not proper. 

6. It is also very helpful in the improvement of cardiovascular diseases The kiwifruit possesses properties that lower blood pressure. By helping to maintain healthy blood pressure and providing a boost of Vitamin C, the kiwifruit can reduce the risk of stroke and heart disease.

7. Kiwi is a rich source of vitamin k that helps to make the bones strong. 

8. It has many antibacterial and antifungal properties. 

9. It helps with sleep disorders. 

10. Along with the fruit its roots also have good properties. 

It is also good for immunity asKiwi contains abundant amounts of Vitamin C, which stimulates the body’s immune response. The kiwifruit contains roughly 230% of the daily recommended intake of Vitamin C. This amazing fruit is loaded with immune-boosting nutrients in every bite.

In  kiwi fruit. high amounts of dietary fiber are present in skin as well as in flesh. Fiber aids reduction of constipation and  

 other gastrointestinal issues and discomfort.

Treatment of Asthma 

The presence of Vitamin C in kiwis has been proven to  reduce wheezing symptoms in some asthma patients. This is true in children, who are benefitted the most from the consumption of kiwis.

Ocular Health

The high levels of antioxidant vitamins and carotenoids found in the kiwifruit may help in preventing eye disease and promote ocular health but only if it is consumed with other healthy and mineral rich vegetables and fruits. 

Conclusion:

Kiwi is a very healthy profitable crop with high nutritive values. Kiwi is said to be a treasure of health benefits. 

Reference link:

https://www.agrifarming.in/kiwi-farming-information#

https://agriculturegoods.com/kiwi-fruit-cultivation-guide-for-beginners-of-kiwi-farming/

https://www.gardeningknowhow.com/edible/fruits/kiwi/harvesting-kiwi-fruit.htm

Why Are My Papaya Leaves Wilting

Papaya, also known as Carica papaya is herbaceous perennial. It belongs to family caricaceae. They are known to have originated in Caribbean in Central America. Papaya plants are generally grown in tropical or subtropical regions. They are native to Mexico and Southern America. In the USA,  they are grown in Florida, Texas,southern California and hawaii. Based on their region of growth, the colour of this fruit varies.

The papaya plant bears edible fruit called papaya. The plant is treelike and usually unbranched. Stem of the papaya plant is hollow along with the petioles. Leaves are palmately lobed and arranged spirally on the top.height of plant is 2-10 m and its life span is around 25 years. This plant is found as males, females and hermaphrodites too.

Papaya is a tropical plant that bears pear shaped or melon like fruits. It is a little difficult to grow it because of its sensitive nature. Also, they cannot bear too cold temperatures, high winds and shades. Plus, papaya plants are very susceptible to diseases. Shortage of water, disease and attack by nematodes can result in wilting of leaves in papaya plants. 

Male plants usually bear many flowers while female flowers bear either clusters of solitary flowers or very few flowers. Fruit of papaya is edible and is consumed by masses. It is a fleshy berry which has smooth skin on it. Skin of papaya is green and turns red, yellow or orange as it matures. Flesh of fruit is succulent and thick. Its colours vary from yellow,red to orange. Also, it contains numerous blackwrinkled seeds in it. 

Basics of Papaya Plant 

Plantation should be replaced every 3 years to ensure productivity to be maximum. Another name of papaya is pawpaw. 

They can be eaten fresh. Along with this,  people make jams, jellies, candies, and juice of papaya too. Young  leaves and green fruit of papaya can be cooked and consumed as a vegetable. 

Growth of papaya

papaya is a tropical plant. It grows very well in temperatures ranging from 21C to 33C. They require rainfall of at least 4 inches per month for proper growth. However, proper irrigation can also ensure undisturbed growth of papaya in dry areas. Avoid growing papaya plants in areas with risk of floods or waterlogged soils. They are also very sensitive to high winds and can easily get toppled in winds. Therefore, avoid their growth in windy areas. 

Seeds can be planted out in soil and areas which receive good sunlight. But they can also grow well in containers at the start. They are grown in sterilized soils in nursery to keep diseases at bay. You can sow 3-4 seeds in one container.

Once they reach a height of 20 cm, they are ready to be planted outside. They generally grow well on hills or ridges. This is because of these places aid drainage. In addition to this, space them 2-3 m apart to ensure proper development.

Care and maintenance of Papaya

First of all seeds of papaya plants must be sown properly in well-drained soil. Proper Water supply must be ensured. Proper watering is required to grow papaya successfully. If water is not provided in the required amount that results into dropping of leaves, fruits, or flowers. Small fruits of papaya have a very small sugar content and cannot be consumed raw. In later stages, the supply of water can be reduced. 

 They are highly susceptible to diseases and weeds. Keep the area clean and weed free. 

Mulch can be used to suppress weeds around papaya plants. Moreover, mulch has added benefits and retains moisture in soil. Regular use of fertilizer is advised to provide proper nutrition to plants. Giving required nutrients to plants helps is production of sweet and healthy fruits. 

Commercial plants can be fertilized for about 2-4 times in a year. While, plants grown for personal use in gardens can be fertilized with ¼ cup of  fertilizer every fortnight. When plants grow and reach the age of 7-8 months, fertilize them with 1-2 lbs of fertilizer every couple of months. 

Also, these plants do not require pruning. But you can remove dead leaves from the plant without worrying. 

Harvesting of Papaya

Harvesting takes around 22- 26 weeks for plants to mature. However, fruits can be picked anytime when ⅕ of fruit surface turns yellow. In addition to this, sweetness of fruit increases with time. Therefore, if you wish your fruits to have high sugar content, pick them a little later than usual. For removal of fruits, they can be either twisted or snapped. You can also use a knife to remove them. 

Common diseases and pests- papaya plants are very susceptible to diseases. There are numerous microorganisms and pests that can affect these plants badly. Some of the common diseases and pests of papaya plants are mentioned below.

  • Anthracnose and charcoal spot- This disease is caused by fungi named Colletotrichum gloeosporioides. It causes light brown margins in circular lesions on plants. Also, small water soaked lesions are found on plants. Fungicide can be used to control the disease. 
  • Black rot- Mycosphaerella caricae is responsible for this disease. It causes black sunken rot on young fruits. Young fruits start withering and dropping from the plant. This disease can be controlled by proper use of fungicide. Alos, fruits can be dipped in 48C hot water for 20 min to kill the fungus. 
  • Black spot- This is also a fungal disease. It leads to formation of circular water soaked lesions. Centre of lesions becomes bleached in later stages. It can be controlled with fungicide. 
  • Powdery mildew- Infection of all tree parts is observed in this disease. White mycelial growth occurs on the upper leaf surface. Infected area on the plant becomes light green. For getting rid of infection, avoid sprinkler irrigation systems. Also, remove the infected part to avoid further spread. Fungicides can be applied in case of severity.
  • Pest called as Papaya mealybug feeds on papaya plant and destroys it. It also causes plant stunting, early leaf and fruit drop. Lady beetles can be used as a natural enemy against mealybug. However, usage of chemicals can kill lady beetles and result in an outbreak of mealybug. 

Cause Of Wilting Leaves In Papaya Plant 

The Main reason behind wilting of leaves is insufficient watering, attack of nematodes and diseases. 

Here are a few diseases mentioned that can result in wilting of papaya leaves. 

  • Apical necrosis-  this is a viral infection. In this disease,papaya leaves start curling downwards and wilt. Leaf margins turn brown and young leaves become small and have shortened petioles. As the name suggests, the disease basically begins at the top and infects other plant eventually. Gradually, it kills whole plant. Organism responsible for this deadly disease is still unknown and so is the cure. Diseased plant must be isolated to protect other plants from dying. 
  • Phytophthora blight- This disease is caused by fungi and is extremely destructive. It leads to the death of infected plant. Root, stem and fruit of plants begin to rot in such conditions. Rapid wilting is observed and the plant dies after that. Water soaked lesions are also observed on the stem. On fruits water soaked lesions appear with white fungal growth. Further, fruit shrivels and drops. In this manner, fungus comes in contact with ground and infects roots too. This fungus is spread by wind too. 

Fungicide for this disease is available but it requires good cultivation practice too. Ensure good draining soil to treat this disease. Remove destroyed or fallen fruits as fast as possible. Remove any afrucan snails from the planting site as they spread this disease. 

  • Nematodes – these organisms are microscopic worms that attack and lead to the formation of galls in the roots of papaya plants. Galls interfere with the ability of plants to take in water and nutrients. Therefore,this results in wilting of leaves, stunting, yellowing and reduced crop yield and death of plants eventually. 

These organisms can be present in any type of soil. Before planting,make sure to turn soil several times and leave it so that nematodes are exposed to sunlight.this practice results in death of nematodes. 

Crop rotation also helps in handling the disease. Remove Plant debris after harvesting. To add to this, usage of resistant varieties like cassava, taro and heatmaster of tomato can be helpful

  • Bacterial canker and decline- Angular water soaked lesions are seen on leaves. Wilting of leaves also occurs in this disease. Water soaked lesions and cankers on the stem are observed.

Why are my papaya leaves turning yellow

The reason behind yellowing leaves infection by lethal virus. The name of this virus is Papaya Lethal Yellowing  Virus (PYLV). It occurs only in Northeastern Brazil. 

It results in progressive leaf yellowing and growth  of greenish circular spots. The leaves wilt after becoming yellow and die. Whole plant dies eventually due to the infection. 

Must Read: Why are my Strawberry Leaves Turning Red

Virus that infects plants and causes this disease generally belongs to the genus Sobemovirus. Papaya plant species that are generally infected are C.papaya, Jacaratia heterophylla, V. monicca, J.spinosa, etc. 

This disease can be managed and avoided by using virus free certified plantings. Further, plants that are infected must be isolated. Usage of disinfectants to clean agricultural equipment is advised.  

How to identify male and female plant seeds?

It is not possible to identify the gender of papaya seeds from naked eyes.DNA analysis is required to figure out the gender of seed. However, you identify male and female seeds once they turn into seedlings. 

Male seedlings produce single straight root but female seedlings produce 2 or more branched rootlets. 

Be careful while checking the gender of the seedling and avoid root damage. Just wait for plants to develop 1 or 2 true leaves and then check their rootlets. 

How to pollinate papaya flowers?

One way of pollinating papaya flowers is hand pollination.

Papaya Flower

Pollination generally occurs through wind or insects. 

Hermaphrodite plants have both male and female reproductive organs present in them. They do not require pollen from other plants to pollinate themselves. In other words, papaya plants undergo self pollination. 

Why is my papaya tree not fruiting?

Papaya plants in home gardens fail to bear fruits sometimes. A few other times, they bear fruits but drop them  as time passes. This situation can occur because of wrong pollination. Sometimes, male flowers get pollinated. But due to lack of ovary it does not bear any fruits. In rare conditions, male flowers start bearing fruit too but that fruit does not mature and drops off at a young stage. 

If a tree is a female, it requires pollen to bearfruits.in case, the female plant does not receive pollen then it does not bear any fruits. Pistils of such plants start turning brown and non functional after some time. 

In few cases, trees become summer sterile bisexual. Though they have both reproductive plant parts but hot weather in summer can lead to infertility. However, in cool months trees begin to function normally.

Insufficient water supply can result in a non- fruiting condition in plants. If a proper amount of water is not provided then plants cease to bear flowers and therefore there is no fruit formation too.

Excessive dryness in plants can lead to death eventually. 

If the tree looks perfectly fine from outside and a proper water supply is ensured with good soil drainage and still there are no fruits. This can be a sign that the tree is starving to death. Lack of nutrients is the cause of this problem.

Provide proper nutrition to plant to get rid of problem.

Pests and diseases can also lead to no fruiting in papaya plants. When the natural functioning of plants is disturbed, they fail to fruit. Diseases like mildew and root diseases lead to non fruiting. 

There are various conditions that can lead to problems and death in papaya plants. But the cure and treatment is also known to mankind. You can deal with diseases and make your plants healthy. Papaya is a herbaceous perennial and a little care of it will bring sweet fruits to you.

Why are my Strawberry Leaves Turning Red

Strawberries are a staple for numerous home gardens. These fleshy, sweet berries are so delicious to eat and are so versatile too. They can be used to prepare jams, sauces, desserts, and much more. Growing strawberries ourselves and then eating them bring so much pleasure. Even if you need them for business, it brings profit then too. But sometimes, diseases can effect growth of strawberries dramatically. If you are here, you might be thinking, Why my strawberry leaves are turning red. 

Yes, it is something that you need to pay attention to. Here we have all the reasons for strawberry leaves turning red along with preventive measures and solutions for you. So, do check these out. 

Strawberries have natural red pigment in them. The occurrence of red stems in strawberry plants is due to their genetic expression. Moreover, it is considered completely normal. However, in case leaves of your strawberry plant start turning red, you need to worry about them. Redness of leaves is a sign of a plant being affected by a disease or some nutrient deficiency. Whatever the reason might be, the redness of leaves is a disastrous condition. It basically implies that your plant is dying. 

Below we have mentioned all the possible reasons of reddening of leaves- 

Diseases in Strawberry plants 

There is not a single disease or ailment that results in red leaves in strawberry plants. Various diseases can lead to such conditions. In order to deal with ailment, you must be aware of what problem you are going through. Given below is the list of diseases which lead to red or purple leaves in strawberry plants. Match symptoms and figure yours out. 

1. Red Stele Root Rot

This is a very potential disease and is commonly seen in strawberry plants. 

  • Causing agent 

Red Stele Root Rot is caused by a pathogen named Phytophthora fragariae. This pathogen resides in soil. The soil which makes home to this pathogen is generally moist, poorly drained and clay laden. 

This pathogen generally spreads through planting equipment or soil like pot soil etc. The planting equipment gets contaminated and when it is used on strawberry plants, they get infected as well. 

  • Occurrence

This disease usually occurs in early spring, late winter and late fall. At these times of year, soil is more conducive to growth of this pathogen. Generally, this fungus is attracted to either poorly drained conditions or overly wet soil.

  • Symptoms

Strawberry plants get affected by this disease dramatically. Early symptoms include stunted growth and lack of shiny luster in strawberry plants. Further, leaves start turning red, yellow, blue in plants. 

Older leaves start turning yellow or red in plants. Also, they begin to wilt and die eventually. Rust coloured roots are also observed in plants. In advanced stages,fungi can kill the whole plant.

You can easily check if your strawberry plants are also suffering from this disease. First, dig out the roots of the plant. Then cut the root into two halves. If the centre of the root is dark reddish, it conveys that the stele of the plant has turned red. Therefore, it confirms that the plant has been infected by Phytophthora fragariae. 

  • Treatment 

Soil fumigation is an effective measure to remove fungus completely from the growing site.However, such a measure is difficult to carry out in a home garden. Metalaxyl fungicides can control this disease. But you need to follow proper cultural practices for better results.

Diseased parts of infected plants can be removed or pruned. 

For further growth of strawberry plants, you can purchase highly resistant plants from a good nursery. In addition to this, grow future plants in another area of garden for minimal risk of infection.

  • Prevention

This species of fungi is quite persistent. They can easily survive in soil for years even without host plants. Due to its nature, it is a little difficult to grow strawberry plants in such conditions. Red steel root rot occurs in most common and is very destructive for plants. 

Soil chosen for growing strawberry plants should be well drained, light and also not compacted so that diseases stay at bay. 

2.Black Root Rot

Black root rot is a disease seen in strawberry plants that results in redness of leaves. You can check these symptoms given below to check out if your plants are suffering from the same. 

  • Causing Factors

This disease is also caused by fungi. The reasons behind this can be- 

  • Over fertility 
  • Microscopic soil nematodes
  • Inconsistent irrigating
  • Damage due to frost 

These reasons can lead to black root rot in strawberry plants. 

  • Symptoms 

In this disease,black roots are seen clearly. Also, leaves turn red or purple in colour and growth is stunted. 

  • Treatment 

Improved cultural conditions can help in treating this infection and save our strawberry  plants. Furthermore, mulch is considered really effective in this condition. It retains moisture in the soiland is very beneficial for plants. 

3. Leaf Scorch 

  • Causing agent 

Leaf scorch is caused by fungus diplocarpon earliana. This fungus causes the appearance of dark brown, disk shaped lesions on the upper surface of leaves.

  • Symptoms 

As stated above, disk shaped lesions are seen commonly on the upper surface of leaves. There is an appearance of dark spots at first. These spots give a sense of burned look. The spots can be around ¼ inch in diameter. As these spots grow in size, they resemble small droplets of tar. It is due to production of minute, black fungal structures in abundance. 

When infection hikes up, leaves appear all red. They dry up and appear scorched. These lesions can also be seen on other plant parts like flowers or young fruits. Petioles, runners, fruit stems can also get infected in this condition.

  • Management

Strawberry plants should be grown in proper air circulation and good sun exposure. Treatment can be carried with fungicide in the flowering period, during late summer and late fall. Keep the level of moisture low and avoid providing too much water supply. 

4. Nutrient Deficiency

Giving proper nutrition to strawberry plants is necessary for proper growth of plants. Nutrients such as potassium, nitrogen, and phosphorus are responsible for various processes being undertaken in plant physiology. In case the levels of these nutrients are compromised so does plant health. It leads to purplish or red color in the leaves of strawberry plants. 

Along with the redness of leaves, fruit yield is also compromised in strawberry plants by one third due to deficiency of nitrogen. 

If potassium is supplied in minimal amounts to plants then red color appears on the margins of the leaves of plants. Strawberry leaves turning red at edges should also be treated to avoid complications.  Further, runner number and fruit production decreases dramatically. 

Control Measures for reddening of leaves in strawberry plants 

  1. Use disease resistant cultivars for growth of healthy and disease free strawberry plants. Resistant varieties are extremely resistant to various types of diseases. These  varieties require minimal effort and can be grown easily to produce delicious fruits. 
  2. Start your gardening with certified plants only. Do not just get them from any place you find them. But purchase certified and healthy strawberry plants from a renowned nursery of your area. Taking this step at start will ensure great results and fruits at the same time.
  3. Plant them in areas which receive good quality sunlight for maximum hours. Air circulation should also be very good in the gardening area. 

Prevent The growth of weeds by using chemical methods or cultural practices. In addition to this, space runner plants in matted row cultures. Overpopulation should be strictly abandoned in strawberry plants. It affects growth and stresses plants. Also, it has an obvious effect on fruit production. 

  1. You can apply nitrogen fertilizers at the time of renovation. Use a spray to cover a larger area with less amounts of products. These plants are very prone to fungi diseases. Using a fungicide is really helpful to keep those diseases at bay. 

Fungicide controls fruit roots and leaf diseases. Set a proper schedule for spraying. For June cultivars, starting fungicide should be sprayed at a gap of 7 to 10 days. After the primary fruiting period is over, gaps can be hiked upto 2 to 3 weeks. 

  1. Application of fungicide should be on all plant parts present above the ground. Leaf scorch is commonly seen on the surface of leaves so cover leads with fungicide carefully and properly. 

As Spray lasts longer and is more effective that dust so choose it for your plants. 

Also Read: Strawberry Farming Guide for Beginners

Prevention 

You can prevent your plants from.catching these deadly diseases by taking care of small things. You do not need to run any hard operations to fulfil the task. Small steps can ensure you healthy strawberry plants that give healthy and delicious fruits. Various ways for preventing are mentioned below- 

  • Soil must be drained properly with water. Water is essential for all living organisms and strawberry plants are not an exception. However, too much water can deteriorate the quality of plant and fruit yield. Therefore, use your judgment and provide a required amount of water to plants regularly. Inconsistent irrigation can lead to diseases such as black root rot as mentioned earlier. 
  • In case too much water is added to plants, then shallow roots suffer a lot. As plants get all of their food through roots therefore all of the plant will suffer from detected roots. 
  • Plants must be placed in a spacious area. Overcrowding can cause stress in strawberry plants and effect growth negatively. Plants must be placed 15 inch apart for best results. 
  • Air circulation should be properly taken care of. Due to air circulation, plants do not stay wet or moist and as a result occurrence of fungal disease can be avoided. This is because fungus grows in moist conditions. Dry leaves will ensure a non fungus and healthy environment. 
  • Strawberry plants grow best in bright and sunny locations. California, Florida and North Carolina are regions in the USA where strawberry growing conditions are very favourable. Kent, Sussex and Wales have the most suitable climate for strawberries cultivation. 
  • Use fertilizers to provide plants with required nutrients. 

You can even prepare fertilizers at home using organic materials. Such fertilizers are much more useful and safe for strawberry plants.

How to Make Homemade Fertilizers 

Homemade fertilizers are full of vital nutrients. They ensure overall good growth in strawberry plants. Preparing fertilizers at home is easy and requires you to take a few steps. Check out fertilizers mentioned below which you can create at home and are best for plants. 

  • Fertilizer Tea

All purpose liquid fertilizer can be prepared from organic compost and is called fertilizer tea. To make fertilizer tea, you need a large container and well aged manure or organic compost. Add material to the container and fill 5 parts of water in it. Keep the mixture away for 7 to 10 days to brew it. Once it’s brewed, pour into a spray pump and cover strawberry plants from top to bottom with this liquid. 

  • Fish Waste fertilizer 

Fish emulsion is highly enriched with nitrogen. Using this can help in proper growth and healthy fruit yield. It also repairs pale green leaves in strawberry plants. 

You can prepare this homemade fertilizer by adding 1 part of fish waste to 2 parts of water. Keep the mixture away for several weeks. Spray it on the ground in quantities of 3 gallons on 100 square feet.  

  • Plant based fertilizer

Plant based homemade fertilizers can be prepared from seaweed, nettle or chamomile.  Seaweed is enriched with mannitol. Mannitol is proven to increase nutrient absorption in soil. Add seaweed in 5 gallons of lukewarm water. Soak it in there for around 3 weeks. Cover it loosely with a lid. After 3 weeks, spray it onto the strawberry plants. In case of nettle or chamomile, take 5 gallons of water and put plant texture in  it. Rest it for 3 weeks and then spray onto plants. 

  • Manure 

NPK value varies ik cow, horse, rabbit and poultry pasture. After 4 weeks of planting, June bearing adds 8 pounds of cow or horse manure to plants. If you are using rabbit or poultry manure lower it down to 2 pounds only.

Strawberry plants can be affected by various diseases that lead to symptoms like reddening of leaves. But it doesn’t mean that those diseases cannot be recovered or prevented. All you need is to be careful while buying plants and at the growth or cultivation practices. Prevention and control measures described above provide you much needed insight. 

How to Grow Lemon from Seeds

When life blesses you with lemon, don’t forget to grow lemon from seed!

If you’ve witnessed the growth of a lemon tree, you’ll know why the growing lemon tree is not only productive but very exciting too! And if you haven’t, please allow me to make you understand! Lemon trees have dark green, lush, oval-shaped leaves that shimmer in bright sunlight. They have a glossy texture with beautiful white flowers that bloom with a soothing citrus fragrance and are unbelievably soft to touch.

Something is alluring about the exotic nature lemon trees provide, and finally, you get an exciting chance to get some juicy, tangy, and healthy fruits!

What Is the Best Time to Grow Lemon from Seeds?

Usually, lemon trees grow perfectly in year-round hot, outdoor climates with proper sunlight, but planting lemon seeds in winter isn’t a bad idea either. They can survive indoors as houseplants, and even in cold climates.

Lemon farming is surely a productive idea. You will also be giving an impressive sight of your lemon field to the people throughout the growing season!

Also Read: Farming Orange for a Perfect Citrus

What Are the Different Ways of Planting?

The growing lemon tree from root cuttings is the most preferred method, but unfortunately, cuttings are not always available in different parts of the world. But here is something exciting for you! The growing lemon tree from cuttings may take as many as 3 to 6 years until you get fruits, growing lemons from seed is surely extra rewarding.

You can grow a lemon tree from as little as six to eight germinated seedlings. And the best part is, germination takes place without much effort! And watching the plants growing is going to be a fascinating experience for you!

Here is a detailed, step-by-step guide to starting a growing lemon tree, right from the word go!

How to Grow Lemon Tree from Scratch?

Things You Will Need

Of course, you would want to have the healthiest lemon seeds to ensure proper, timely, and healthy growth of the lemon plants. Make sure you get an organic lemon because non-organic lemons usually have “duds” seeds and may be incapable of proper germinating.

  • Organic lemon of any type will be suitable, but if you can get a specific variety called “Meyer” lemon, you will have the maximum productivity chances. Meyer lemons are smaller in size, often used for ornamental purposes, and suited for indoor and outdoor planting. The unavailability of Meyer lemon seeds is not the worst thing at all; you can purchase organic lemon of any variety, but of course, without compromising on the quality.
  • Potting Soil: Any potting soil will be suitable for growing a lemon tree from seed. But for best results, you should use the soil with a blend of organic fertilizer, perlite, peat, and vermiculite. This type of soil is best suited for the growth of lemon trees, and the chances of productivity increase to a decent as well.
Lemon Flower
  • Container: A 5-6 inches deep container with a few inches of diameter and drainage holes is usually enough for growing lemons from seed. Once the sprouts are visible, you will have to transfer the seedlings into a much bigger container. Mature lemon trees grow properly in wider rather than deeper containers.

So, we would recommend using a pot with 12-18 inches diameter and 10-16 inches depth. Your lemon tree will grow happily in the larger container for at least a few years; then, you would love to upgrade.

  • Light: Lemon trees require a lot of sunlight for healthy growth. They need at least 10 to 14 hours of direct sunlight every day, especially while sprouting. You can get a grow light if you don’t have a window with constant sunlight. They are pretty affordable and will be proved very handy.

Method for Sprouting:

If you ask “how to grow your own lemon tree from seed,” this is the most important segment for you, because proper sprouting is a must if you want to see your lemon plant growing consistently.

Step 1:

Moist the potting soil before planting. Add some water to moisten the soil to ensure the soil is damp enough.

Step 2:

Add the soil to the container and leave some space (about one inch) below the container’s rim.

Step 3:

Cut the lemon and select a completely-grown seed. Take it into your mouth (Yes! 😉) and suck for a few seconds to remove the flesh and the tangy, lemon flavor. Keeping the seed inside your mouth until you are ready to plant is a good idea. The motive is to maintain the moisture throughout.

Step 4:

Plant the seed ½ inch below the soil level while both seed and the soil are moist.

Step 5:

Cover the seed properly with soil and water. You can use a watering can or squirt bottle for covering.

Step 6:

Use a breathable plastic to cover the container so that the seeds are moist and warm. You can use a clean garbage bag with multiple holes. Place the plastic securely over the container using a rubber band.

Step 7:

Grow lemon from seed perfectly, keep the container in a warm area, and observe continuously for a few days. Don’t forget that seeds require enough moisture and warmth for proper germination. Never allow the potting soil to get completely dry. Also, avoid “cooking” your seeds in the little greenhouse, because excessive heat isn’t suitable for lemon plants. Maintaining a nice temperature and moisture balance is very important. If you feel that the soil is warm enough, you don’t even need to cover it with plastic.

Step 8:

You will notice a few sprouts coming out of the soil after a couple of weeks. Once the sprouts are visible, remove the plastic (if it is still there), and place the little plant under plenty of direct sunlight. You can get some help from grow light if there is insufficient direct sunlight.

Step 9:

Here is another very important question: “How to care for a lemon tree.” Of course, it is a very important aspect if you want to see your plant growing without any barrier.

Here are some important caring tips:
  • Water: Maintaining the dampness of soil is very, very important, especially when the tree is still young. You would like to avoid excessive accumulation of water, though, and of course, we’ve already talked about those drainage holes 😊.
  • Sunlight: As discussed earlier, direct sunlight is a must throughout the growth of the lemon plant. Ensure placing the plant so that it can receive eight hours of direct sunlight every day or use a grow light in case there is dampness in the weather. Cities like Minnesota, Michigan, Alaska, Montana, etc. don’t get any sunlight in winter; hence if you are planting lemon seeds in winter, you must arrange a grow light for at least 10 hours.
  • Food: If you want to keep your lemon plants healthy (you certainly would 😉), you will have to provide enough nutrition to the plants. We would suggest feeding your plants an organic fertilizer, like compost or vermicompost, especially once there are enough sets of leaves on the little branches.

How? You should dig a little trench around the plant base, fill it with compost, provide enough water, or use a compost tea. Feeding twice a year or as needed is recommended. Avoid overfeeding to ensure healthy and proper growth. Using as little fertilizer as possible is the best idea.

  • Love: When it is about “how to care for a lemon tree,” keeping a few points in mind is very, very important. We would suggest you continuously look around your citrus friend, always have a track of its growth, feel the growth, talk to the plant, sing with it, and avoid dancing with it 😁! You should develop a habit of taking care of your lemon plants, keep an eye on the browning of leaves, check the underside of leaves to avoid pests. Just like you, your plants need proper care and love too! Your lemon plant may also get affected by bugs and diseases, and sometimes, may require extra care and love.

Once the plant is overgrown through the seedling pot, you would want to transfer it into a planting pot and ensure proper and timely watering. Older plants don’t require a lot of water, but maintaining the soil’s moisture is still a must.

You will have to be very patient with lemon plants, as they start producing fruits after the third year. And once the process of fruiting starts, you will be able to harvest them every year, especially if they get the right climate and soil conditions.

Once the plant starts blossoming (usually after two to two and a half years), you will have to wait four to twelve months before harvesting. And the time between summer and winter is the best for it.

So, that’s all about “how to grow a lemon tree from seeds.” Hopefully, you loved this guide, and there is no doubt in your mind anymore. Once there are lemons on your plants, harvest them, sell them, make lemon cupcakes, lemonade, and many other healthy and tangy recipes!

References:

https://www.farmersalmanac.com/grow-lemon-tree-from-seed-26627

https://growingwildceeds.wordpress.com/2012/03/10/how-to-grow-a-lemon-tree-from-seed/