How to Add Seaweed to Your Compost for Extra Nutrients

Seaweed is a fantastic addition to your compost pile, offering a natural, nutrient-rich boost for your garden. Packed with essential trace elements like potassium, magnesium, iodine, and nitrogen, seaweed acts as a natural fertilizer and accelerates decomposition. Whether you collect it from the beach or purchase it, incorporating seaweed into your compost is simple and beneficial.

This guide explains why seaweed is valuable, how to prepare it for composting, and the best practices for adding it to your compost pile.


Benefits of Adding Seaweed to Compost

  1. Rich in Nutrients: Seaweed contains vital nutrients like potassium, calcium, and magnesium that enhance soil health.
  2. Natural Compost Activator: Its high nitrogen content speeds up microbial activity, accelerating decomposition.
  3. Improves Soil Structure: Compost enriched with seaweed improves water retention and aeration in soil.
  4. Free of Weeds and Pests: Unlike some organic matter, seaweed doesn’t carry seeds or attract pests.
  5. Sustainable Resource: Seaweed is abundant and renewable, making it an eco-friendly addition.

Step-by-Step Guide to Adding Seaweed to Your Compost

Step 1: Collect Seaweed Responsibly

  • If harvesting from the beach, ensure it’s legal in your area. Many coastal areas have restrictions to protect ecosystems.
  • Rinse the seaweed thoroughly to remove excess salt, sand, or debris. While some salt is tolerable, too much can harm plants.

Tip: Collect fresh seaweed instead of decomposing or dried varieties for maximum nutrient content.


Step 2: Prepare the Seaweed

  • Chop or shred large pieces of seaweed into smaller fragments. This increases the surface area for microbes to break down, speeding up decomposition.
  • Lay the seaweed in the sun for a day or two if it’s overly wet. Excess water can make your compost pile soggy and slow down decomposition.

Step 3: Layer Seaweed in Your Compost Pile

  • Seaweed is a “green” material, rich in nitrogen. Layer it with carbon-rich “browns” like dry leaves, straw, or shredded paper.
  • Aim for a balance of 2–3 parts browns to 1 part greens to maintain an optimal carbon-to-nitrogen ratio.
  • Spread the seaweed evenly to avoid clumping, which can create anaerobic pockets.

Step 4: Monitor the Pile

  • Turn the compost pile regularly to ensure even distribution of seaweed and proper aeration.
  • Check the moisture level. If the pile is too wet from the seaweed, add more dry materials like wood chips or straw.

Alternative Ways to Use Seaweed in Gardening
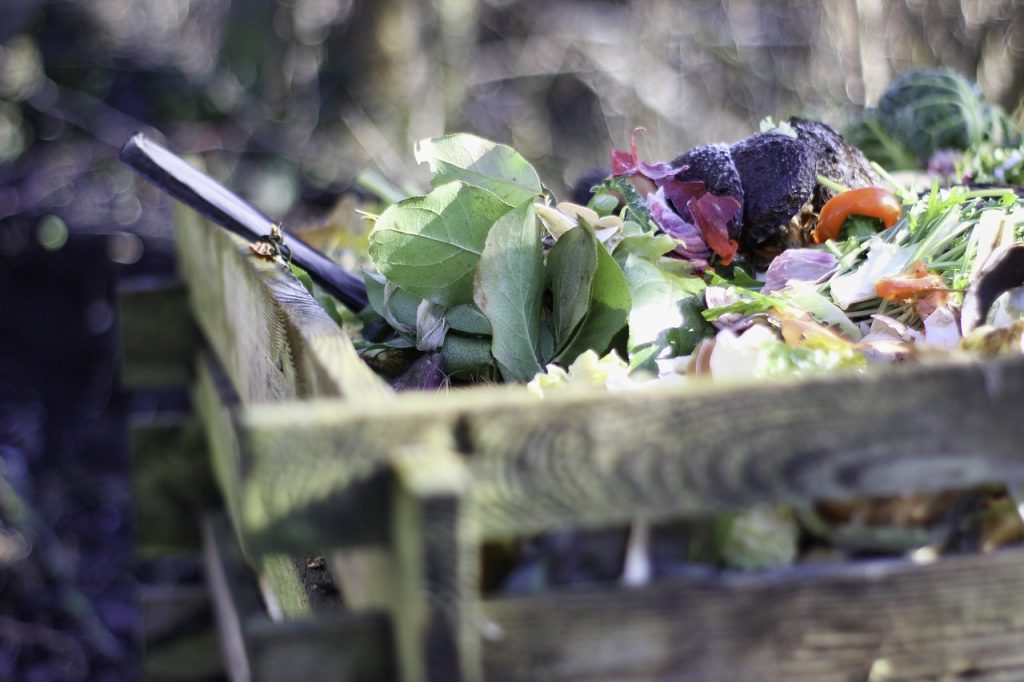
If you don’t want to compost seaweed, you can use it directly in the garden:

  1. As Mulch: Lay seaweed around the base of plants to retain moisture and suppress weeds.
  2. As Liquid Fertilizer: Soak seaweed in water for 2–3 weeks to create a nutrient-rich “tea” for plants.
  3. Direct Soil Amendment: Dig fresh or dried seaweed directly into garden beds for immediate nutrient benefits.

Tips for Using Seaweed in Compost

  1. Avoid Overloading: Too much seaweed can create a slimy, overly wet pile. Use it in moderation and balance with dry materials.
  2. Mix with Other Greens: Combine seaweed with kitchen scraps, grass clippings, or garden trimmings for variety.
  3. Compost in Layers: Alternate seaweed with layers of browns to maintain airflow and prevent odor.
  4. Use Freshwater Rinse: If you’re concerned about salt, rinse seaweed thoroughly before adding it to your pile.

Benefits of Seaweed-Enriched Compost

  • Boosts plant growth and improves crop yield.
  • Enhances soil fertility with essential trace minerals.
  • Improves soil texture for better drainage and aeration.
  • Encourages beneficial microbial activity in the soil.

Common Questions About Composting Seaweed

1. Does salt in seaweed harm compost?

Rinsing seaweed removes most of the surface salt, making it safe for composting. Small amounts of salt can be beneficial, as it helps improve soil structure and deter pests.

2. Can I use dried seaweed?

Yes, dried seaweed works just as well. Rehydrate it or chop it finely before adding it to your compost pile.

3. How much seaweed can I add?

Moderation is key. Add seaweed in small amounts and balance it with sufficient brown materials to maintain a healthy compost pile.


Conclusion

Adding seaweed to your compost is a simple way to enhance its nutrient content and promote faster decomposition. By responsibly sourcing and preparing seaweed, you can create a balanced compost that enriches your soil and supports healthy plant growth. Whether you’re a seasoned gardener or a composting beginner, seaweed is a valuable and sustainable resource to incorporate into your composting routine.

How to Make a No-Turn Compost Pile

Composting is a great way to recycle organic waste into nutrient-rich soil, but not everyone has the time or energy to maintain a traditional compost pile that requires frequent turning. A no-turn compost pile offers a low-maintenance alternative, using natural aeration and layering techniques to achieve decomposition without the need for constant mixing.

In this guide, we’ll walk you through the steps of setting up a no-turn compost pile, discuss the benefits, and provide tips for optimizing the process.


What is a No-Turn Compost Pile?

A no-turn compost pile is a composting method that doesn’t require physically mixing the materials. Instead, it relies on strategic layering and natural aeration to break down organic materials. This method is ideal for people with limited time or physical mobility, or for those who simply prefer a “set-it-and-forget-it” approach to composting.


Benefits of a No-Turn Compost Pile

  1. Low Maintenance: No need for regular turning or aerating.
  2. Saves Time and Effort: Perfect for busy schedules or those with limited physical ability.
  3. Suitable for Small Spaces: Can be set up in a compact area using bins or a designated pile.
  4. Encourages Natural Decomposition: Worms and microbes help break down the materials without interference.
  5. Reduces Odors: Proper layering minimizes unpleasant smells.

Materials Needed

  • “Green” Materials (Nitrogen-Rich): Grass clippings, fruit and vegetable scraps, coffee grounds, and garden trimmings.
  • “Brown” Materials (Carbon-Rich): Dry leaves, straw, shredded paper, cardboard, and wood chips.
  • Aeration Materials: Coarse materials like twigs, branches, or small sticks.
  • Optional: A compost bin, pallet structure, or designated outdoor space.

Step-by-Step Guide to Making a No-Turn Compost Pile

Step 1: Choose a Location

  • Pick a spot with good drainage and partial sunlight.
  • Ensure it’s easily accessible for adding materials but far enough from your home to avoid attracting pests.

Step 2: Create a Base Layer

  • Start with a 6-8 inch layer of coarse materials like twigs, branches, or straw. This base promotes airflow and helps prevent waterlogging at the bottom of the pile.

Step 3: Alternate Layers of Green and Brown Materials

  • Add a 4-6 inch layer of green materials (kitchen scraps, grass clippings).
  • Follow with a 6-8 inch layer of brown materials (dry leaves, cardboard).
  • Alternate these layers until your pile reaches 3-4 feet high.

Tip: Always cover green materials with a layer of browns to reduce odors and deter pests.

Step 4: Moisturize the Pile

  • Sprinkle water between layers to keep the pile moist but not soggy. The texture should resemble a damp sponge.
  • Avoid overwatering, as it can lead to anaerobic conditions and slow decomposition.

Step 5: Add Aeration Pipes or Channels (Optional)

  • To enhance airflow, insert perforated PVC pipes vertically into the pile or create small air channels with sticks. This step helps oxygen circulate without turning the pile.

Step 6: Let Nature Work

  • Once your pile is assembled, let it decompose naturally. Worms, bacteria, and fungi will do the work of breaking down the materials.
  • Check the moisture level occasionally and add water if the pile becomes too dry.

Tips for Optimizing Your No-Turn Compost Pile

  1. Use Small Pieces: Chop or shred large items (like branches or cardboard) to speed up decomposition.
  2. Avoid Adding Problematic Items: Keep meat, dairy, and oily foods out of your pile to prevent attracting pests.
  3. Monitor Moisture: If the pile is too dry, decomposition will slow down. If it’s too wet, it can become anaerobic and smell bad.
  4. Protect from Pests: Use a compost bin with a lid or cover the pile with a tarp to keep out animals.
  5. Add Compost Activators: If desired, sprinkle a handful of garden soil or a commercial compost starter between layers to boost microbial activity.

How Long Does It Take?

  • A no-turn compost pile may take 6 months to a year to fully decompose, depending on the materials used, the climate, and how well it’s maintained.
  • The finished compost will be dark, crumbly, and have an earthy smell.

Advantages of a No-Turn Pile vs. Traditional Composting

FeatureNo-Turn Compost PileTraditional Composting
MaintenanceLowHigh
Time Required to ManageMinimalRegular (turning every 1-2 weeks)
Decomposition SpeedSlowerFaster
Physical Effort NeededNoneModerate to High
Suitability for Small SpacesHighModerate

Common Problems and Solutions

  1. Pile Smells Bad:
    • Cause: Too many green materials or excess moisture.
    • Solution: Add more brown materials and ensure proper aeration.
  2. Pile is Too Dry:
    • Cause: Lack of water or high heat.
    • Solution: Add water gradually and mix in damp greens.
  3. Pile Attracts Pests:
    • Cause: Adding meat, dairy, or exposed food scraps.
    • Solution: Stick to approved compost materials and keep greens covered with browns.
  4. Pile Decomposes Slowly:
    • Cause: Poor balance of green and brown materials or lack of aeration.
    • Solution: Check the carbon-to-nitrogen ratio (Cratio should be about 30:1) and ensure moisture is balanced.

Conclusion

A no-turn compost pile is an excellent option for anyone seeking a low-maintenance way to recycle organic waste into nutrient-rich compost. With the right balance of greens, browns, and aeration, your compost pile will break down naturally with minimal effort on your part. By following this guide, you can create a sustainable system that enriches your garden soil and reduces waste—all without lifting a pitchfork!

Understanding the Composting Process: From Start to Finish

Composting is a natural process of recycling organic matter, such as food scraps and yard waste, into nutrient-rich soil called compost. This process involves microorganisms, fungi, and other decomposers breaking down organic material into a form that plants can easily use. Understanding the stages of composting can help you manage your pile effectively and produce high-quality compost for your garden.


Why Composting Matters

Composting has numerous environmental and practical benefits:

  1. Reduces Waste: Diverts organic waste from landfills, cutting down on methane emissions.
  2. Enriches Soil: Improves soil structure, aeration, and water retention.
  3. Reduces Chemical Use: Provides a natural alternative to synthetic fertilizers.
  4. Promotes Sustainability: Closes the loop on organic waste by recycling it into usable material.

The Composting Process: Step-by-Step

The composting process can be broken down into three key stages, each involving specific biological activities and environmental conditions.


1. Collection and Preparation of Materials

What Happens:
This is the preparation phase where organic materials are gathered, sorted, and prepped for composting. Materials are categorized into two main types:

  • Greens (Nitrogen-Rich): Fruit and vegetable scraps, coffee grounds, grass clippings.
  • Browns (Carbon-Rich): Dry leaves, wood chips, shredded paper, straw.

Tips for Success:

  • Maintain a balance between greens and browns, ideally a carbon-to-nitrogen ratio of 30:1.
  • Chop or shred large materials to speed up decomposition.
  • Avoid adding non-compostable items like meat, dairy, and oily foods.

2. Active Decomposition (Thermophilic Stage)

What Happens:

  • Microorganisms like bacteria and fungi begin breaking down organic matter, producing heat as a byproduct.
  • The pile’s internal temperature can rise to 135–160°F (57–71°C), which helps kill pathogens and weed seeds.
  • Materials start breaking down into smaller particles.

Key Activities:

  • Aeration: Oxygen is essential for aerobic decomposition. Turn the pile regularly to maintain airflow.
  • Moisture Management: Keep the pile as damp as a wrung-out sponge. Too much water can make it anaerobic, while too little slows decomposition.
  • Monitoring Temperature: A hot pile indicates active decomposition. If the pile cools prematurely, add greens and turn it.

3. Curing and Maturation (Mesophilic Stage)

What Happens:

  • After the active phase, the pile enters a slower, cooler stage where beneficial microbes and earthworms complete the decomposition process.
  • Materials stabilize and mature into dark, crumbly compost with an earthy smell.

Timeframe:

  • The curing stage can take 1–6 months depending on the materials and conditions.

Key Indicators of Completion:

  • The compost is dark brown, crumbly, and smells like fresh soil.
  • Original materials are no longer recognizable.

Factors That Affect Composting

  1. Carbon-to-Nitrogen Ratio:
    • A proper balance ensures efficient decomposition. Too much carbon (browns) slows the process, while too much nitrogen (greens) leads to odors.
  2. Moisture:
    • A moist environment supports microbial activity but avoid waterlogging, which can cause anaerobic conditions.
  3. Aeration:
    • Oxygen is critical for aerobic microbes. Regular turning ensures even decomposition and prevents foul odors.
  4. Pile Size:
    • A pile that is at least 3×3 feet retains heat better, speeding up the process.
  5. Temperature:
    • Decomposition occurs most efficiently between 135–160°F during the active phase.

The Role of Microorganisms in Composting

Microorganisms are the unsung heroes of the composting process. Here’s how they work:

  • Bacteria: Break down simple organic matter like sugars and proteins during the active phase.
  • Fungi: Decompose tougher materials like lignin and cellulose (e.g., wood and leaves).
  • Actinomycetes: Help break down complex organic compounds, producing the earthy smell of finished compost.

How Long Does Composting Take?

The time required depends on the method and conditions:

  • Hot Composting: With proper management, compost can be ready in 6–8 weeks.
  • Cold Composting: A slower process that can take 6 months to 2 years, requiring minimal effort.
  • Vermicomposting: Using worms can produce compost in 2–3 months under ideal conditions.

How to Use Finished Compost

  1. Soil Amendment: Mix compost into garden beds to enrich the soil.
  2. Mulch: Spread it around plants to retain moisture and suppress weeds.
  3. Potting Mix: Blend compost with soil and other ingredients for container gardening.
  4. Top Dressing: Apply a thin layer over lawns or flower beds to improve fertility.

Common Composting Challenges and Solutions

ProblemCauseSolution
Pile smells badToo much nitrogen or excess waterAdd more browns; aerate the pile
Pile is too dryLack of moistureSprinkle water to dampen the pile
Pile isn’t heating upPoor Cratio or small sizeAdd greens and ensure proper pile size
Attracting pestsFood scraps exposedCover greens with a layer of browns
Slow decompositionLack of aeration or imbalanceTurn the pile; balance greens and browns

Conclusion

Composting is a rewarding process that transforms waste into a valuable resource for your garden. By understanding the stages of composting and the factors that influence it, you can create nutrient-rich compost that supports healthy plants and sustainable gardening practices. Whether you’re a beginner or an experienced composter, mastering these basics will ensure your success from start to finish.

The Benefits of Composting Grass Clippings and Lawn Waste

Composting grass clippings and lawn waste is an excellent way to recycle organic matter, improve your garden soil, and reduce the environmental impact of waste. Many homeowners often dispose of their grass clippings by bagging them and throwing them away, but composting them offers numerous benefits for both your garden and the planet. This guide explores the advantages of composting grass clippings, tips on how to do it effectively, and why you should make it a regular part of your lawn care routine.


1. Reduces Waste in Landfills

Benefit:
In many areas, grass clippings make up a significant portion of landfill waste. By composting your lawn waste, you can help reduce the amount of organic material that ends up in landfills, where it takes up valuable space and contributes to harmful greenhouse gas emissions as it decomposes anaerobically (without oxygen).

Why It Matters:
Organic waste in landfills, including grass clippings, produces methane—a potent greenhouse gas. Composting helps avoid this issue by allowing grass clippings to break down in an aerobic (oxygen-rich) environment, which releases far fewer harmful gases.


2. Creates Nutrient-Rich Soil for Your Garden

Benefit:
Composting grass clippings adds valuable nutrients to your garden soil. Grass clippings are rich in nitrogen, which is an essential nutrient for plant growth. When added to compost, grass clippings help create a balanced compost mix that can improve soil fertility.

Why It Matters:
The nitrogen in grass clippings helps plants thrive by promoting healthy foliage growth. When used as compost, these nutrients become readily available to your plants, resulting in healthier crops, more vibrant flowers, and lush lawn growth.


3. Improves Soil Structure and Drainage

Benefit:
Composting grass clippings, along with other organic materials, enhances the structure of your soil. As compost breaks down, it adds organic matter to the soil, improving its texture, aeration, and moisture retention. This is particularly beneficial for sandy soils, which tend to drain too quickly, and clay soils, which can become compacted and waterlogged.

Why It Matters:
Improved soil structure helps water penetrate more effectively, reduces erosion, and allows roots to grow deeper and more efficiently. The better your soil quality, the healthier your garden will be.


4. Prevents Excessive Lawn Fertilizer Use

Benefit:
By composting grass clippings, you can reduce the need for chemical fertilizers. Grass clippings contain nutrients that naturally replenish the soil, such as nitrogen, phosphorus, and potassium. When you use them as part of your compost, you are creating a more sustainable way to nourish your lawn and garden.

Why It Matters:
Using compost made from grass clippings allows you to provide your garden with the essential nutrients it needs without relying on synthetic fertilizers, which can be harmful to the environment. Composting also helps reduce your carbon footprint by reducing the need to buy and apply chemical products.


5. Reduces Lawn Maintenance Costs

Benefit:
Composting your grass clippings can save you money in the long run. By using the compost to improve your soil, you reduce the need for expensive soil amendments, fertilizers, and other lawn care products. Furthermore, instead of paying for waste disposal services to collect and haul away your clippings, you can use them to enhance your garden.

Why It Matters:
With the rising costs of lawn care products and waste management, composting is a simple way to reduce your overall expenses and make your lawn and garden more self-sustaining.


6. Reduces the Risk of Lawn Thatch Build-Up

Benefit:
Thatch is a layer of dead grass, roots, and other organic matter that can build up on the surface of your lawn. If it becomes too thick, it can block water and nutrients from reaching the soil and promote the growth of lawn pests and diseases. When you compost your grass clippings, you help break down thatch naturally.

Why It Matters:
Composting grass clippings helps prevent thatch from accumulating and keeps your lawn healthy by ensuring that water, air, and nutrients can reach the grass roots more effectively.


7. Promotes a Healthier Lawn

Benefit:
Using compost made from grass clippings can directly benefit your lawn by enriching the soil with organic matter and nutrients. When applied as a top dressing or mixed into the soil, compost improves root health and supports the overall growth of the grass. This can result in a greener, thicker, and more drought-resistant lawn.

Why It Matters:
A healthy lawn is more resilient to pests, diseases, and environmental stressors. It also requires less water and fertilizer, making it a more sustainable choice for homeowners.


8. Encourages a Greener, More Sustainable Lifestyle

Benefit:
Composting your grass clippings is a simple yet powerful way to contribute to a more sustainable and eco-friendly lifestyle. It helps reduce landfill waste, decreases your need for chemical fertilizers, and reduces the amount of synthetic products you use in your lawn care routine.

Why It Matters:
Small changes like composting lawn waste have a big impact on the environment. By adopting eco-friendly practices, you are not only improving your garden but also playing a part in promoting sustainability in your community.


How to Compost Grass Clippings Effectively

To compost your grass clippings effectively, follow these tips:

  • Alternate Layers: Grass clippings are high in nitrogen, so to avoid creating a smelly, slimy compost pile, mix them with brown materials like leaves, straw, or cardboard. This helps balance the carbon-to-nitrogen ratio and promotes better aeration.
  • Avoid Clumping: Grass clippings can mat together and create a dense, wet layer that doesn’t decompose properly. To prevent this, spread the clippings out in thin layers and turn the compost pile regularly.
  • Dry Out Wet Clippings: If the clippings are wet from rain or dew, allow them to dry out before adding them to your compost. Wet clippings can become compacted, leading to poor airflow and slower decomposition.
  • Shred or Chop Large Clippings: If the grass clippings are long or thick, chop or shred them to increase surface area and speed up the decomposition process.

Conclusion

Composting grass clippings and lawn waste is a simple and highly beneficial practice for any homeowner looking to improve their garden, reduce waste, and promote sustainability. By composting, you not only recycle nutrients back into your soil but also save money, improve your lawn’s health, and help protect the environment. Whether you’re composting for the first time or you’re a seasoned gardener, using grass clippings in your compost pile is a smart and eco-friendly way to enhance your garden’s success.

How to Build a Pallet Compost Bin for Free

Composting is an eco-friendly and cost-effective way to recycle organic waste, but buying a compost bin can be expensive. Luckily, with a few free wooden pallets, you can build a functional and sturdy compost bin that will help you create nutrient-rich soil for your garden. Not only is this a budget-friendly solution, but it’s also an easy project that can be completed in a day or less!

In this guide, we’ll walk you through the steps of building your very own pallet compost bin using free materials. Plus, we’ll share some helpful tips for making sure your compost bin works efficiently.


Materials Needed:

  • 4 Wooden Pallets: Try to find pallets that are in good condition, ideally the standard 40″ x 48″ size.
  • Nails or Screws: To assemble the pallets together. Screws tend to be more secure and durable, but nails can work as well.
  • Hammer or Drill: For fastening the pallets together.
  • Optional: Wire or bungee cords (to secure the bin if you don’t want to permanently fasten the pallets together).

Step-by-Step Guide to Building Your Pallet Compost Bin

Step 1: Find and Prepare Your Pallets

Look for pallets that are free or easy to find. You can often find them behind grocery stores, hardware stores, or from people who are getting rid of old furniture. Be sure to pick pallets that are sturdy and not broken or splintered.

Once you’ve gathered your pallets, you may want to remove any nails or staples that could be sticking out to avoid injury when handling the wood.

Step 2: Choose the Right Location

Select a location for your compost bin that:

  • Is in a sunny spot to help speed up the composting process.
  • Has good drainage, ideally a spot on bare soil so worms and microorganisms can access the pile.
  • Is convenient for adding materials and turning the compost.

Step 3: Position the Pallets

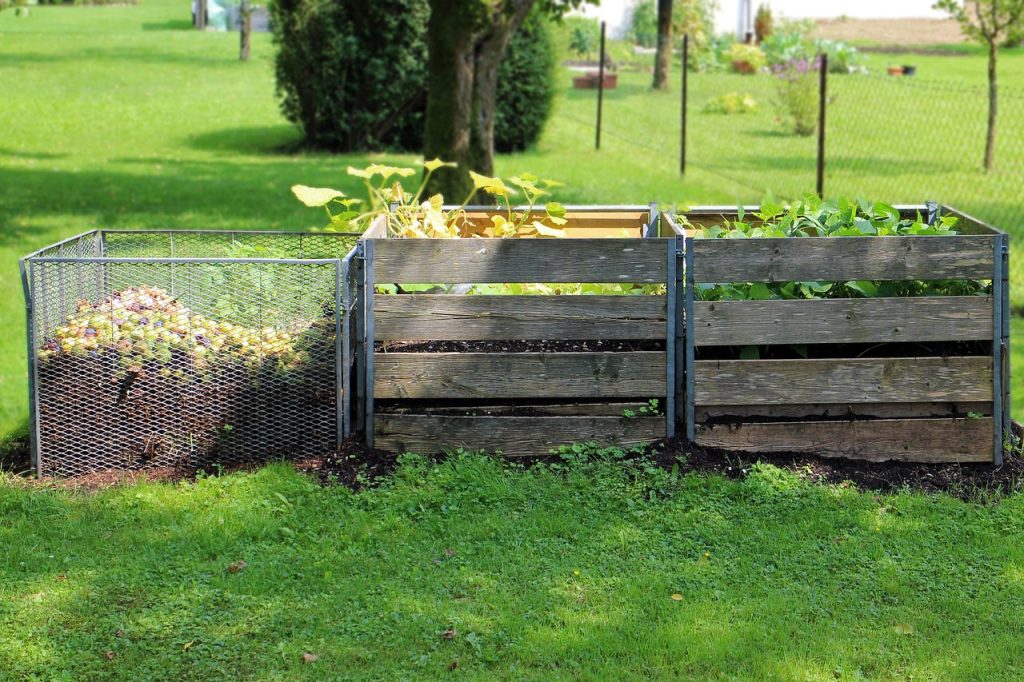
Place three of the pallets vertically in a U-shape. These three pallets will form the sides of your compost bin. Lay one pallet on each of the back, left, and right sides, leaving the front open. The open front will make it easy to access the compost and turn it when needed.

For the front side, you have a few options:

  • Option 1: Free-standing front – You can leave the front open entirely, which will make it easier to access your compost.
  • Option 2: Hinged or removable front – If you want a more secure front, you can attach one of the pallets to the others using hinges, so you can open it like a door.
  • Option 3: Wire or bungee cords – If you don’t want to permanently attach the pallets, you can use wire or bungee cords to keep the pallets together.

Step 4: Secure the Pallets Together

To keep the pallets in place and form a stable structure, fasten them together:

  • Use nails or screws to attach the corners where the pallets meet.
  • If you’re using wire or bungee cords, wrap them around the edges of the pallets to secure them together.

If you have a fourth pallet, you can use it to create a lid for the compost bin to help keep it insulated. This isn’t necessary, but it can help retain heat, especially in cooler climates.

Step 5: Fill the Bin with Organic Waste

Once your bin is assembled, you can begin adding your compost materials. Start by adding a layer of coarse materials (like small branches or twigs) to the bottom to help with drainage. Then, layer in your kitchen scraps (vegetable peelings, coffee grounds, etc.), grass clippings, and yard waste (leaves, weeds, etc.).

Be sure to alternate between nitrogen-rich “green” materials (like food scraps and grass clippings) and carbon-rich “brown” materials (like dried leaves, straw, and cardboard). This balance helps the pile decompose more efficiently.


Step 6: Maintain the Compost Bin

  • Turn the Pile Regularly: To speed up decomposition, you should turn your compost every couple of weeks. Use a pitchfork or compost aerator to mix the compost pile, which helps introduce air and keep it aerobic.
  • Monitor Moisture: Keep your compost pile moist, like a damp sponge. If it gets too dry, add water, and if it’s too wet, add more brown materials like leaves or cardboard.
  • Harvest the Compost: After a few months, you should have rich, dark, crumbly compost at the bottom of the bin. You can use it to enrich your garden beds.

Benefits of a Pallet Compost Bin

  • Free and Sustainable: Using wooden pallets is a free and eco-friendly way to build your compost bin, making it an affordable and sustainable solution.
  • Durable and Sturdy: Pallets are designed to carry heavy loads, making them strong enough to withstand the elements and last for years.
  • Easy to Build: With minimal materials and tools, you can easily build a functional compost bin in just a few hours.
  • Good Airflow: The slatted sides of the pallet bin allow for plenty of airflow, which is essential for the aerobic decomposition process.

Tips for Success

  • Make the Pile High: The higher the compost pile, the hotter it will get, speeding up decomposition. Aim for a pile that’s at least 3 feet tall.
  • Avoid Adding Animal Products: Avoid putting meat, dairy, and oily foods in your compost bin as they can attract pests and cause odors.
  • Use a Compost Thermometer: If you’re serious about composting, a compost thermometer can help you monitor the temperature of your pile. The ideal temperature is between 130°F and 160°F (54°C to 71°C) for optimal decomposition.
  • Keep It Covered (Optional): If you’re composting in a wetter climate, consider adding a tarp or plastic covering to keep the pile from getting too soggy.

Conclusion

Building a compost bin from pallets is a simple, free, and effective way to start composting at home. Not only will you be reducing your waste and enriching your garden soil, but you’ll also be creating a sustainable solution using materials that would otherwise go to waste. With just a few free pallets and some basic tools, you can create a compost bin that works efficiently and stands the test of time.

Happy composting!

Trouhooting Slow Compost Piles: Tips for Faster Decomposition

Composting is an excellent way to recycle organic waste and create nutrient-rich soil for your garden. However, sometimes your compost pile may not decompose as quickly as you’d like. If your compost pile is slow to break down, it could be due to several factors, such as poor aeration, incorrect moisture levels, or an imbalance between nitrogen and carbon-rich materials. Understanding the common issues and knowing how to address them can speed up the decomposition process and help you create high-quality compost faster.

In this guide, we’ll explore the most common reasons why your compost pile might be slow and provide practical tips for troubleshooting and accelerating the decomposition process.


1. Incorrect Moisture Levels

Problem:
Composting requires a balance of moisture to keep the microorganisms in the pile active. If your compost is too dry, the microorganisms won’t be able to break down the organic matter properly. On the other hand, if the pile is too wet, it can become compacted, leading to anaerobic conditions (without oxygen), which slows down decomposition.

Solution:

  • Aim for a moisture level that feels like a wrung-out sponge—moist but not dripping wet.
  • If your compost is too dry, add water gradually while mixing the pile. You can also add moist materials like fruit scraps, coffee grounds, or grass clippings.
  • If your compost is too wet, add dry carbon-rich materials (like straw, shredded leaves, or cardboard) to absorb the excess moisture. Turn the pile to allow for better airflow and help the moisture disperse.

2. Poor Aeration (Lack of Oxygen)

Problem:
Composting is an aerobic process, meaning it requires oxygen to break down organic material efficiently. If your compost pile is compacted or doesn’t get enough airflow, the microorganisms responsible for decomposition won’t thrive, and your pile will decompose more slowly.

Solution:

  • Turn the compost pile regularly to introduce oxygen and mix the materials. Aim to turn it every 2-3 weeks.
  • If your compost is large and dense, consider using a compost aerator or pitchfork to loosen the material.
  • Ensure the pile is not too tightly packed. If needed, make smaller piles to improve airflow.

3. Imbalance of Green and Brown Materials (Carbon to Nitrogen Ratio)

Problem:
For a compost pile to break down efficiently, it needs a balance between carbon-rich “brown” materials (such as leaves, straw, or cardboard) and nitrogen-rich “green” materials (like food scraps, grass clippings, and coffee grounds). Too much of one type can slow down decomposition. A typical ideal ratio is about 25:1 or 30:1, with carbon (brown) to nitrogen (green).

Solution:

  • If your compost pile is too rich in nitrogen (greens), it may be too wet and smellier than usual. Add more carbon-rich materials (browns) to balance it out.
  • If your compost pile is too rich in carbon (browns), it may be too dry and slow to decompose. Add more nitrogen-rich materials (greens), such as fresh grass clippings, vegetable scraps, or coffee grounds.
  • When adding new materials, mix them together to create a well-balanced pile from the start.

4. Too Much of One Material

Problem:
While variety is key to a successful compost pile, sometimes adding too much of a single material can slow down the process. For example, if you add too many large woody materials (like thick branches or logs), the pile may not decompose quickly. Similarly, too much citrus peel can make the pile too acidic, slowing down the process.

Solution:

  • Add a variety of materials to your compost, ensuring a good mix of greens and browns.
  • Chop up larger materials like branches, twigs, or thick stems to allow for quicker breakdown.
  • If you’re using citrus peel, limit the amount, as high acidity can inhibit the growth of beneficial microorganisms.

5. Low Temperature in the Pile

Problem:
If your compost pile is too cold, decomposition will slow down significantly. Microorganisms responsible for breaking down organic material need warmth to work efficiently, and temperatures below 40°F (4°C) can significantly slow the process.

Solution:

  • If you’re composting in colder climates, consider using a compost bin with insulation or build a larger pile, as bigger piles retain heat better.
  • Keep the pile in a sunny location to take advantage of natural warmth. Alternatively, try adding warm materials (like kitchen scraps) to raise the temperature.
  • If you need to speed up the process in the winter, try a composting accelerator or activator to introduce more heat.

6. Too Little or Too Much Moisture in the Pile

Problem:
The moisture level in your compost pile is one of the most important factors for decomposition. Too much moisture leads to anaerobic conditions and an unpleasant smell, while too little moisture means the microorganisms can’t break down materials properly.

Solution:

  • To ensure proper moisture, add water gradually until the pile feels moist but not soggy.
  • For a dry pile, try adding wet kitchen scraps, leaves, or grass clippings to introduce moisture.
  • If the pile is too wet, increase airflow and add dry materials such as shredded paper, sawdust, or dried leaves to help balance the moisture.

7. Lack of Microorganisms

Problem:
Microorganisms are essential for breaking down organic material in your compost pile. If your compost doesn’t have enough of the right microorganisms, decomposition will slow down or even stop.

Solution:

  • To jump-start the decomposition process, you can introduce composting worms or “compost starters” or activators that contain beneficial microorganisms.
  • Adding finished compost or soil to your pile can also help introduce beneficial microbes that speed up decomposition.
  • Keep your compost pile moist and turn it regularly to help create an environment where microorganisms can thrive.

8. Pile Size and Structure

Problem:
Compost piles that are too small may not generate enough heat to decompose efficiently. On the other hand, piles that are too large may become too compacted and prevent proper airflow, slowing decomposition.

Solution:

  • Aim for a compost pile that’s at least 3 feet by 3 feet (1 meter by 1 meter) in size. This ensures that the pile generates enough heat to break down organic matter efficiently.
  • For larger piles, make sure to turn and aerate regularly. Consider building a compost bin to keep the pile from spreading out too thinly.

Conclusion

A slow compost pile can be frustrating, but by identifying and correcting the issues, you can get your composting process back on track. Ensure a balanced mix of carbon and nitrogen, keep the pile moist and aerated, and avoid overloading it with any one material. By making these adjustments, you’ll help your compost pile break down more efficiently, providing you with rich, nutrient-packed soil for your garden in less time.

Happy composting!

How to Compost with Bokashi: Fermenting Your Food Waste

Composting is a fantastic way to reduce food waste and create nutrient-rich soil for your garden, but did you know there’s a faster, cleaner, and more odor-free way to compost? Bokashi composting is an anaerobic fermentation process that allows you to compost food waste—including meat, dairy, and cooked food—that traditional composting methods cannot handle. This method is especially useful for apartment dwellers or anyone looking for a quicker composting solution.

In this guide, we’ll explore what Bokashi composting is, how it works, and the steps you need to follow to start fermenting your food waste today.


What Is Bokashi Composting?

Bokashi is a Japanese term meaning “fermented organic matter,” and it refers to a composting method that uses a special inoculated bran (Bokashi bran) to ferment food waste in an airtight container. Unlike traditional composting, which relies on aerobic decomposition (using oxygen), Bokashi composting is anaerobic, meaning it occurs without oxygen. This fermentation process allows you to compost food waste more quickly, even materials like meat, dairy, and cooked foods that would normally attract pests and produce odors in traditional composting systems.

The Benefits of Bokashi Composting

  • Handles all food waste: Bokashi can compost almost anything, including meat, dairy, cooked food, and even citrus peels—materials that are typically not recommended in traditional composting systems.
  • Odor-free process: Unlike traditional composting, which can produce unpleasant odors, Bokashi is mostly odor-free, making it ideal for use indoors.
  • Fast process: The fermentation process of Bokashi takes only 2-4 weeks, much faster than traditional composting, which can take months.
  • Nutrient-rich soil: The end result of Bokashi is a nutrient-rich soil conditioner that can be used to enrich your garden.

How Bokashi Composting Works

  1. Prepare Your Bokashi Bucket A Bokashi composting system typically consists of a bucket with a tight-fitting lid, a spigot (for draining liquid), and air-tight seals. The bucket is used to contain food scraps, and the spigot helps release the liquid byproduct of the fermentation process, called “Bokashi tea,” which can be used as a fertilizer.
  2. Add Bokashi Bran Bokashi bran is the key ingredient in the Bokashi composting process. It is made from wheat bran that has been inoculated with beneficial microorganisms, such as lactic acid bacteria, yeasts, and phototrophic bacteria, that speed up the fermentation process. The bran is sprinkled over each layer of food scraps to promote anaerobic fermentation.
  3. Layering Your Food Scraps Start by placing a layer of food scraps in the bottom of the bucket. As you add food waste, sprinkle a small amount of Bokashi bran on top of each layer. This helps to inoculate the scraps with the beneficial microorganisms needed for fermentation. Once you fill the bucket with scraps and bran, compact the materials down to remove excess air, ensuring an airtight seal.
  4. Seal and Wait After each layer of food scraps and bran, make sure to firmly press down the contents to eliminate air pockets. Close the lid tightly to maintain an anaerobic environment, which is essential for the fermentation process. You should wait for 2-3 weeks for the food waste to ferment.
  5. Drain the Bokashi Tea During fermentation, a liquid called Bokashi tea is produced. This liquid can be drained from the bucket using the spigot at the bottom. Bokashi tea is rich in nutrients and can be diluted with water to use as a liquid fertilizer for your plants. Be sure to drain it regularly to prevent it from accumulating and to maintain the fermentation process.
  6. Buried in the Soil or Transfer to a Compost Bin After 2-3 weeks, your food scraps will have fermented into a pickled, slightly smelly mass. At this point, the Bokashi compost isn’t fully decomposed, but it’s ready for the next stage. You can either bury the fermented scraps in your garden soil or transfer them to a traditional compost pile or bin. In the soil, the scraps will break down completely within a few weeks, enriching the soil with valuable nutrients.

Step-by-Step Guide to Bokashi Composting

  1. Choose a Bokashi bucket – Invest in a Bokashi composting bucket, which can be purchased online or at a garden store. Some systems come with all the essentials, including the bin, spigot, and Bokashi bran.
  2. Add your food scraps – Place your kitchen waste in the bucket. Be sure to chop large pieces into smaller ones for quicker fermentation. You can add meat, dairy, cooked food, and other typical food waste without issue.
  3. Sprinkle with Bokashi bran – After each layer of food scraps, sprinkle a handful of Bokashi bran. Be generous with the bran, but you don’t need to overdo it. The bran is key to starting the fermentation process.
  4. Press down the contents – Use a tamper or your hands to compact the scraps and remove air from the bucket. This ensures an anaerobic environment, which is essential for fermentation.
  5. Close the lid – Once the bucket is full, make sure to seal the lid tightly. The fermentation process requires no oxygen, so sealing the bucket is crucial.
  6. Wait 2-3 weeks – Allow the food scraps to ferment for at least 2-3 weeks. You’ll notice the contents becoming pickled and sour-smelling. During this time, drain the Bokashi tea every few days to prevent it from building up.
  7. Use the fermented material – After 2-3 weeks, you can either bury the fermented food scraps in your garden soil or add them to a traditional compost pile. If burying, dig a hole or trench and cover the scraps with soil. In the garden, the scraps will fully break down and provide valuable nutrients.

Things to Avoid Composting with Bokashi

While Bokashi is versatile, there are still some items you should avoid adding to your Bokashi compost bucket:

  • Non-organic materials: Avoid plastic, metals, or synthetic materials.
  • Bones: While Bokashi can handle most food scraps, large bones may not break down quickly, so it’s best to avoid them.
  • Citrus in excess: A small amount of citrus can be composted in the Bokashi system, but too much can make the fermentation process slower due to acidity.
  • Oil, fats, or greasy foods: These can create an imbalanced mixture and might lead to foul odors.

Troubleshooting Bokashi Composting

  • Smelly liquid: If you notice that your Bokashi tea is overly smelly, it could indicate that the food scraps in the bucket are not being properly compacted or sealed. Be sure to drain the liquid regularly and make sure your bucket is airtight.
  • Not breaking down: If your food scraps are not fermenting as expected, check that you’re adding enough Bokashi bran and pressing down the scraps to eliminate air pockets. Also, make sure the bucket is tightly sealed to maintain the anaerobic environment.

Conclusion

Bokashi composting is an excellent way to handle food waste, especially in urban settings or households that generate a lot of food scraps. This anaerobic fermentation process is fast, odor-free, and efficient, allowing you to compost almost anything that can’t be handled by traditional methods. By following the steps above, you can reduce waste, enhance soil health, and enrich your garden with nutrient-packed compost.

The Best Kitchen Scraps for a Thriving Compost Pile

Composting kitchen scraps is one of the easiest and most sustainable ways to reduce waste while enriching your garden soil. By composting organic waste, you can transform leftover food scraps into nutrient-rich compost that will help your plants thrive. However, not all kitchen scraps are created equal when it comes to composting. Some materials decompose more efficiently than others and provide a good balance of essential nutrients for your compost pile.

In this guide, we’ll explore the best kitchen scraps to add to your compost pile, as well as tips on balancing your composting materials for optimal results.


1. Fruit Scraps

Why they’re great for composting:
Fruit scraps are rich in nitrogen, an essential component for composting. They provide moisture and help balance the carbon-rich materials in your pile, such as leaves or paper. Common fruit scraps include apple cores, banana peels, citrus rinds, and berry stems.

  • Examples: Apple cores, banana peels, orange peels, melon rinds, pineapple skins, and peach pits.
  • Tip: Cut larger fruit scraps into smaller pieces to help speed up the decomposition process. Avoid citrus peels in excess, as they can be slow to break down.

2. Vegetable Scraps

Why they’re great for composting:
Vegetables are another excellent source of nitrogen for your compost pile. Leftover vegetable peels, stems, and leaves break down easily and help balance the compost’s nutrient content.

  • Examples: Carrot tops, potato peels, cucumber ends, broccoli stalks, lettuce leaves, and onion skins.
  • Tip: Like fruit scraps, chop or shred larger vegetable pieces to promote faster breakdown. Avoid adding large amounts of garlic and onions to your compost, as they may attract pests.

3. Coffee Grounds

Why they’re great for composting:
Used coffee grounds are rich in nitrogen and can improve the overall structure of your compost pile. They also help balance the carbon-to-nitrogen ratio, which is essential for healthy decomposition.

  • Examples: Used coffee grounds from your coffee maker or French press.
  • Tip: You can add coffee filters to your compost as well, as they’re typically made of unbleached paper, which decomposes easily. Be sure to mix the coffee grounds with other materials to avoid clumping.

4. Eggshells

Why they’re great for composting:
Eggshells are high in calcium, which is beneficial for plant growth. While they decompose slowly, they help to aerate the compost pile, allowing air to reach the lower layers of organic matter.

  • Examples: Crushed eggshells from any type of egg.
  • Tip: Crush the eggshells into smaller pieces to speed up decomposition. If you have a lot of eggshells, you can grind them in a food processor to break them down more quickly.

5. Tea Bags (Non-Synthetic)

Why they’re great for composting:
Tea bags are an excellent source of nitrogen for your compost pile. Be sure to use tea bags made from biodegradable materials such as paper, cotton, or hemp, as synthetic bags will not break down.

  • Examples: Tea bags, both used and unbleached.
  • Tip: Always check the packaging of your tea bags to ensure they’re made from natural materials. Remove any staples or non-compostable components before adding them to your compost pile.

6. Fruit and Vegetable Scraps from Cooking

Why they’re great for composting:
When preparing meals, you often end up with various vegetable and fruit scraps, such as peels, cores, and stems. These materials break down quickly and contribute valuable nutrients to your compost pile.

  • Examples: Avocado pits, corn cobs, watermelon rinds, and bell pepper stems.
  • Tip: Cut large scraps into smaller pieces to encourage faster breakdown. Avoid adding excessive amounts of starchy vegetables (like potatoes) to your compost, as they can slow down the decomposition process.

7. Nut Shells (Not Salted or Roasted)

Why they’re great for composting:
Nut shells, such as those from almonds, walnuts, and pecans, add a good source of carbon to your compost. They also provide texture, helping to break up dense compost and allowing air to flow through it.

  • Examples: Almond shells, walnut shells, pistachio shells, and peanut shells.
  • Tip: Avoid salted or roasted nut shells, as they may contain unhealthy additives that can affect your compost. Crush or break the shells into smaller pieces to help speed up the decomposition process.

8. Paper Towels and Napkins (Used)

Why they’re great for composting:
Used paper towels and napkins can be added to your compost pile, as they’re typically made from natural materials. They add carbon and help balance out the moisture in your compost.

  • Examples: Used paper towels and napkins (without chemicals, oils, or grease).
  • Tip: Avoid paper towels that are greasy or have strong chemicals on them, as they can affect the quality of your compost. Shred the towels to help speed up decomposition.

9. Crushed Leaves and Grass Clippings

Why they’re great for composting:
While not exactly kitchen scraps, crushed leaves and grass clippings are excellent carbon-rich additions to your compost pile. These materials are high in fiber and break down slowly over time.

  • Examples: Fallen leaves, grass clippings, straw, and hay.
  • Tip: Layer leaves and grass clippings with kitchen scraps to create a balanced compost mix. Make sure to shred the leaves to increase surface area and speed up decomposition.

10. Leftover Rice, Pasta, and Bread (in Moderation)

Why they’re great for composting:
Carbohydrates, such as rice, pasta, and bread, add carbon to your compost pile, making them a good balance to nitrogen-rich kitchen scraps like fruit and vegetable peels. However, you should only add these in moderation, as too much starch can slow down decomposition and attract pests.

  • Examples: Leftover rice, pasta, and bread crumbs.
  • Tip: Cut or tear bread into small pieces, and don’t overdo it with starchy foods. Be mindful of food waste and keep the pile balanced with other materials.

Things to Avoid in Your Compost Pile

While many kitchen scraps are great for composting, there are a few items you should avoid:

  • Meat and dairy products: These attract pests and break down slowly.
  • Oils and fats: They can create a greasy compost pile that’s hard to manage.
  • Cooked foods with spices or sauces: These can upset the balance of your compost and attract pests.
  • Citrus peels: These take a long time to break down in the compost.

Conclusion

Composting kitchen scraps is an easy and eco-friendly way to reduce waste and nourish your garden. By focusing on a mix of nitrogen-rich scraps (such as fruit and vegetable peels) and carbon-rich materials (like paper towels, leaves, and nut shells), you’ll create a thriving compost pile that benefits both your plants and the environment. Just be sure to maintain a balanced compost mixture and avoid adding materials that could hinder the decomposition process. Happy composting!

Composting with Chickens: How Your Flock Can Help

If you’re a backyard farmer or have a small flock of chickens, you might be surprised to learn that they can be a big help when it comes to composting. Chickens can turn food scraps, garden waste, and organic matter into nutrient-rich compost while providing additional benefits to your garden and reducing waste. Let’s explore how you can integrate chickens into your composting system and maximize the benefits of your flock!


How Chickens Can Help with Composting

Chickens are natural foragers and have a tendency to scratch, peck, and dig through organic material. When integrated into your composting system, they can help break down organic waste, speed up the composting process, and create healthy soil for your garden. Here’s how:


1. Chickens Help Aerate the Compost

One of the key elements of successful composting is oxygen, which is required by the microorganisms that break down organic matter. Chickens love to scratch around in piles of organic material, which helps to aerate the compost and introduce air into the pile.

  • Benefit: The scratching action ensures that the compost remains loose and prevents it from becoming compacted, which can slow down decomposition. A well-aerated compost pile decomposes more quickly and efficiently.

2. Chickens Consume Kitchen Scraps

Chickens are great at consuming food scraps that would otherwise go to a landfill, including vegetable peels, fruit scraps, and even some cooked foods. They help to reduce kitchen waste and convert these scraps into valuable organic matter that will eventually contribute to your compost pile.

  • Benefit: By allowing chickens to eat your kitchen scraps, you reduce the amount of waste you send to landfills and speed up the composting process since the materials are partially broken down by the chickens’ digestive systems before they get added to the compost.

3. Chicken Manure is a Great Source of Nitrogen

Chicken manure is rich in nitrogen, which is an essential component of compost. Nitrogen helps to break down carbon-rich materials (such as leaves, straw, or wood chips) into compost. Adding chicken manure to your compost pile provides an extra boost of nitrogen, speeding up the decomposition process.

  • Benefit: Chicken manure is considered “hot” compost material, meaning it breaks down quickly and helps balance the carbon-to-nitrogen ratio in the compost pile. Be sure to mix it with carbon-rich materials to avoid burning your plants when you apply the finished compost.

4. Chickens Can Help Control Pests in the Compost Pile

Chickens are natural foragers and will peck at insects, pests, and even small rodents that might try to invade your compost pile. They’re particularly effective at keeping the compost pile free of unwanted pests like flies, grubs, and other critters.

  • Benefit: The chickens will help keep the compost healthy by removing pests that could otherwise slow down the decomposition process. However, be cautious not to let them over-scratch or disturb the pile too much, as this could break down the pile’s structure and lead to an imbalanced mix.

5. Chickens Produce High-Quality Compost

As the chickens scratch, peck, and add their manure to the compost pile, they contribute to the overall process of decomposition. The materials in the compost pile will break down faster and turn into dark, crumbly compost that can be used to enrich your garden soil.

  • Benefit: The compost produced with the help of chickens tends to be rich in nutrients, providing your plants with the necessary organic matter to thrive. Chicken manure-based compost is especially good for adding fertility to your garden beds and vegetable patches.

How to Compost with Chickens

While chickens can significantly help with the composting process, it’s important to manage the system properly to avoid any issues. Here are some tips on how to successfully compost with chickens:


1. Set Up a Chicken-Friendly Composting Area

Create a designated compost area in your chicken run or coop where chickens can safely scratch and peck. This can be a pile of organic matter, a compost bin, or even a large composting system that you move around the yard. You can also use a compost tumbler or a mesh bin that allows chickens to forage and contribute without being overwhelmed by the materials.

  • Tip: If you’re using a compost bin, make sure it has enough ventilation for air to circulate and that it’s easy for chickens to access. You can also let them into the compost area periodically to help mix things up.

2. Mix Carbon and Nitrogen

To ensure a balanced compost pile, be sure to include both carbon-rich materials (such as leaves, straw, or cardboard) and nitrogen-rich materials (such as chicken manure and kitchen scraps). The chickens will help mix these materials together, which is essential for a healthy composting process.

  • Tip: Aim for a carbon-to-nitrogen ratio of about 3:1 or 4:1. This ensures that the compost will break down efficiently and produce high-quality soil.

3. Monitor the Pile’s Moisture and Temperature

While chickens can help aerate and break down the compost, they can’t control the moisture levels or temperature. Be sure to keep an eye on your compost pile to ensure it stays damp (but not soaking wet) and that the temperature stays within the ideal range (130°F to 160°F or 54°C to 71°C).

  • Tip: If the compost pile is too dry, add some water or more green materials to help balance the moisture. If it’s too wet, add more brown materials to absorb the excess moisture.

4. Avoid Adding Certain Items

While chickens can consume many types of food scraps, avoid adding bones, dairy products, oily foods, or meat scraps to your compost pile. These items can attract pests, create odors, and are not easily compostable. Stick to vegetable scraps, fruit peels, eggshells, and small amounts of cooked food.

  • Tip: If you want to compost these types of items, consider using a Bokashi bin or separate composting system specifically designed for food waste.

5. Give Chickens Time to Rest

Chickens are great foraging helpers, but they can over-scratch a compost pile if given too much time in the same area. Rotate them through different parts of the compost pile or give them time to rest between foraging sessions to avoid over-disturbing the materials.

  • Tip: If you’re using a large compost pile, rotate the chickens every few days to allow for sufficient rest for each area.

Conclusion

Composting with chickens is an efficient, sustainable, and natural way to reduce waste, improve the composting process, and create nutrient-rich soil for your garden. By leveraging your flock’s natural behavior and adding chicken manure to the mix, you can create high-quality compost while also helping to manage pests and recycle organic waste. Just make sure to manage the composting process carefully and maintain a balance of materials to avoid issues.

Should We Microwave Our Compost?

The idea of microwaving compost may sound strange at first, but some people have considered using a microwave to speed up the composting process. However, there are several factors to consider before microwaving your compost, as it’s not a common or recommended method. Let’s explore the pros and cons of microwaving compost and whether it’s a good idea.


What Happens When You Microwave Compost?

When you microwave compost, the heat kills or neutralizes many microorganisms, including the beneficial bacteria, fungi, and earthworms that are essential for the composting process. The microwave heats the material rapidly and unevenly, which could harm or destroy the microorganisms responsible for breaking down organic matter.

  • What you might achieve:
    Microwaving could sterilize a portion of the compost by killing off pathogens or weed seeds, but it is unlikely to help in the overall decomposition process. Instead, you would just be drying out and killing any beneficial organisms in the pile.
  • Not a long-term solution:
    While microwaving may destroy harmful pathogens, it doesn’t speed up the natural process of composting. Composting requires a balance of materials (greens and browns), proper aeration, moisture, and time—factors that microwaving simply can’t replicate effectively.

Potential Pros of Microwaving Compost:

  1. Killing Weed Seeds and Pathogens:
    One potential benefit of microwaving compost is that it can kill certain weed seeds, pests, and pathogens. If you’re composting a batch with garden waste or food scraps that might harbor harmful elements, microwaving it could help to sterilize the materials.
  2. Quick Sterilization:
    If you’re looking to sterilize small batches of compost or soil for specific purposes (e.g., seed starting), microwaving for short periods may be effective in killing off potential pathogens.

The Cons of Microwaving Compost:

  1. Destroys Beneficial Microorganisms:
    One of the major downsides of microwaving compost is that it destroys the very organisms you need to break down organic materials. The decomposition process is carried out by beneficial bacteria, fungi, and invertebrates (such as worms), all of which can be wiped out by microwave heat.
  2. Uneven Heating:
    Microwaving organic material may lead to uneven heating. Some parts of the compost may become too hot, while others stay cooler, leading to inconsistent results. This can hinder the natural composting process and make the materials harder to break down.
  3. Not a Substitute for Proper Composting:
    Composting relies on a specific set of conditions (proper airflow, moisture, and temperature). Microwaving doesn’t replicate these conditions and won’t provide the same long-term benefits as traditional composting methods.

So, Should You Microwave Your Compost?

In general, no, microwaving your compost is not recommended if your goal is to efficiently break down organic matter. Composting is a natural process that requires patience, balance, and the right conditions to be effective. Microwaving might be useful for sterilizing small amounts of soil or compost in specific situations, but it should not be considered a regular or effective method for composting.

If you want to speed up the composting process, there are better ways to do it:

  • Turn the compost regularly to introduce oxygen and improve airflow.
  • Maintain the right moisture levels to keep microbes active.
  • Balance the green and brown materials in the pile to encourage faster decomposition.
  • Use a compost accelerator or a worm composting system (vermicomposting) for quicker results.

Conclusion

While microwaving your compost may seem like a quick fix, it’s unlikely to provide the same benefits as traditional composting methods. If you want to improve your composting process, focus on maintaining proper conditions such as turning the pile, balancing materials, and ensuring good airflow. By doing so, you can create nutrient-rich compost that will enrich your soil without the need for a microwave.