How To Plant Sugarcane – A Complete Beginner’s Guide

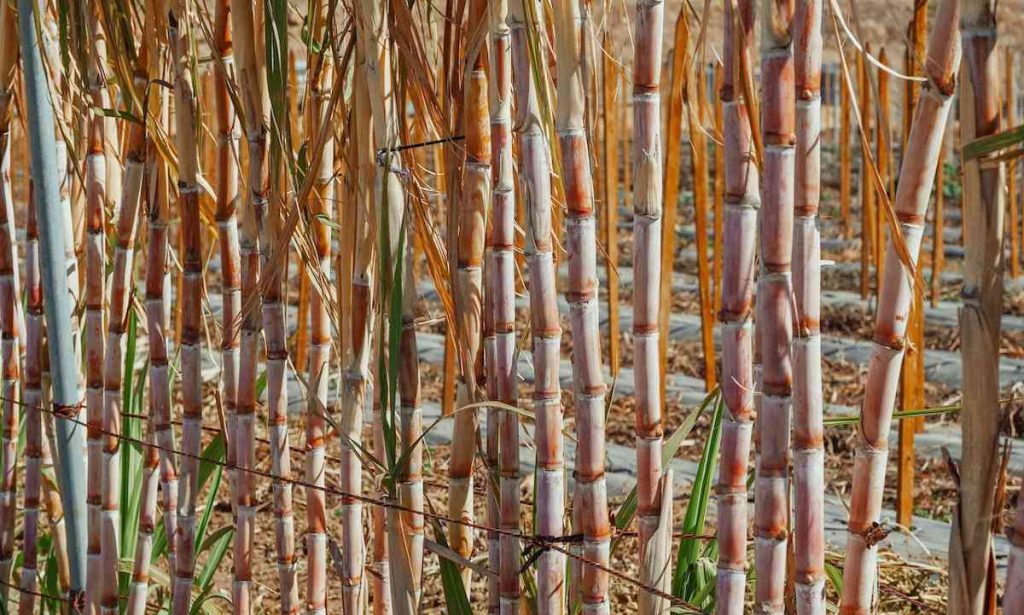
Sugarcane is a high perpetual crop from South East Asia in parts of the South Pacific region. It grows in warm temperate or tropical climates. The plant stalk’s internodes are rich in sugar, and the plants can grow around two to six meters above sea level.

A complex hybrid between several species and subspecies is found in any crop of commercially grown sugar cane. Sugarcane is one of the greenest cultivations because it requires minimum nitrogen and pesticides. So, let’s see what are the things to consider before planting sugarcane.

Climate      

Although sugarcane can be grown in temperate climates, production in tropical climates is much higher. Short, sunny and hot (1100 to 1500 mm over the whole) and warm, colder (12 ° C to 14 ° C, 54 ° F to 57 ° F) harvest season, is suitable in combination with a medium to high rain docks (32 ° C to 38 ° C, 90 ° F to 100 ° F). The sugar produced during the dry weight of harvest varies greatly, and during the various phases of plant growth depends on the environment.

Soil Type

Sugarcane is cultivated in a range of habitats, such as red volcanic soils and alluvial river soils. The perfect ground is a combination of organic material sand, silt, and clay particles. The fields are plowed and left for a while before subsoiling is carried out. The plant needs well-drained soil, and drainages are made concerning the topographic conditions of the fields on the surface, endured, or both.

Also Read: How to Mushroom Farming

Sugarcane can thrive in the soil of different kinds: acid and alkaline soils, sandy, loamy, and rocky soils. A pH of approximately 6.5 well-drained loam is perfectly suitable, but mechanical considerations, such as compaction, are far more critical than soil composition and pH for cultivation.

Land Preparation For Sugarcane Farming

Deep tillage is required for the sugarcane. Deep tillage consists of molding board plastic, and farmers with no tractor use wood-based Sarkar tin. The sugar cane consists of two types of sowing. Cannes are planted in the moist field because the plant needs water. The width from the row is 3-5 ft.

Plowing

The conventional method of preparing tillage is to plug the soil and tilt it. Sprinkle with the tractor driven disks or triumph plow 2 to 4 times at a depth of 50-60 cm.

Harrowing

In the sugar cane field, the secondary tillage has used those pullovers, smooth, and compacts the soil to retain humidity. Harrowing is carried out at a small depth of 12-15 cm to crush disks or rotators the clods

Know-How To Plant Sugarcane

Sugarcane is planted by replanting the mature stem of the cane. Farmers then cut some of the fully grown cane stalks to 40 centimeters in size. Special agro machinery plants sugarcane stalks that drop them into furrows and apply nitrogen to cover them in the dirt.

Poor sugar cane production results in reduced yields and a downward spiral of productivity. Efficient sugarcane production would increase productivity and levels of profit for a whole plant cycle over 5 to 7 years, as sugar cane is a multi-year crop.

Think About Mechanized Way

The average failure rate is 20–25 percent for mechanized sugarcane plantation. Considering that the grower can fix 50% of sugar cane seed failure via a secondary replant, up to 10-12% of the yield for all subsequent growing seasons can be predicted.

Culture Planting

Cuttings primarily propagate culture Sugarcane. The parts of the unmatured cane stalk, which were used to grow, are called cane seed or cane sets and have three or more buds (eyes). Seed cane in well-worked fields is cultivated. It is commonly used to open furrow artificial trees, fertilize the cane, lower this, and cover it with dirt.

Growing

Growing of Sugarcane requires 2,000 to 2,300 mm of water in the growing period to achieve good yields. If there is a lack of moisture, irrigation will account for the deficit by either watering or spreading water in furrows. In Texas, the USA, 8-9 months, 15 months, Japan, China, and 18–22 months, in Hawaii, South Africa, and Perú vary widely in the field. Thus, depending on the environment, growing sugarcane can take from 9 to 24 months for harvest.

One main crop is planted, followed by 3-4’ ratoon,’ or re-growth harvests. In areas with annual precipitation below 1500 millimeters, irrigation of the plant is essential. The lowest temperature is about 20 ° C (68 ° F) for good cane plant growth.

Continuous cooling weather, as well as water retention, leads to cane maturation. In a warm, relatively fresh season of the year, harvest and browning continue and last five to six months.

Using Fertilizers To Grow Sugarcane

From the start of planting, but not during the ripening phase, the fertilizer will be applied for sugar cane. Optimum fertilizer levels (nitrogen, phosphorus, and potassium) are very different from soil types and the environment and the form and length of the growth cycle.

Weeds in cane fields must be destroyed to secure a good crop until the cane stuffing establishes a healthy canopy to control the growth of plants. While mechanical cinnamon weeders with rakes have been built, still mostly manual, are made with a hoe. There is extensive use of chemical herbicides.

Ripening 

Matured for nearly three months, the stalk is dried out, and the sugar synthesis and its preparation accelerates. Natural sugars such as fructose during maturation are converted to sucrose. The application of foliar chemicals to increase the sugar cane yield was proved useful.

Polaris and Ethrelare commonly used in numerous chemistry tests. Spray Chemical Balsario in 1000 liters of water at 4.5 kg per hectare. Sugarcane ripens 6-8 weeks earlier with the spray of this compound. Chemical mûrers such as Polaris and Sodium Metasilicate, which are sprayed 6-8 weeks more first, boost sucrose milk.

Save From Diseases

There are many diseases in the sugarcane crop. Sarah is caused by an East Indian virus and is blackening and degeneration of the fanlike tops. Infection by any one of many illnesses is due to the mosaic that causes foliage mottling or spotting and sometimes curling, dwarfing, and narrowing of the leaves.

Red rot (essential in Indonesia and South Asia) has disrupted patches of red and white inside the cane, with a foul alcoholic odor when opening the rod. Caused by the Colletotrichumfalcatum fungus, red rot attracts attention by yellowing and withering of the skin and finally dies of the whole plant.

Gummy disease (important in New South Wales, Australia) is characterized by gummy development, which is induced by cell degeneration, defective gum production and by

Xanthomonas vascular bacterial. Fiji disease, an infectious disease that first occurs on Fiji Islands, has elongated white to brown swellings, followed by stunting and decay on the bottom of the stems.

Ripening In A Nutshell

Incidence of sunshine, temperature, and rainfall in sugarcane ripening (Saccharum spp.) was investigated by picking five interspecific subtropical hybrids. Ripening has been linked to sunshine and temperature events, but not precipitation.

Partial observations confirmed the freedom of sunlight ripening; however, it revealed that temperature ripening interactions had been falsified. The interacting influence of sunlight and temperature on maturation differed with the cultivar was also partly related. In the correlations between maturation and sample time, there was a significant difference between varieties.

Harvest 

Sugarcane harvesting is one of the most important and exciting parts of the whole cultivation process. As this is the time to see the results of your great work and dedication. To raising the full stalks and cut them into smaller segments, a cane harvester is used (approximately 30 cm). A cane transport that gathers the billets is used to track the reaper. Whether manually and mechanically, the mature cane is harvested. Any mechanical types of equipment can hack off or cut the tops of erect plants, which are transported by a tractor or light railcar into a bin trailer to the factory.

Sugarcane Farming In USA

Sugar has been a family business since its earliest days for most of the U.S. families. Today’s sugar family includes not only multigenerational farmers. The farmers who grow, harvest and care for sugar beets and or sugar cane, but also those truck drivers who transport the crops from the fields; the employees who work in factories, or processing plants and refineries.

As they collect, purify and store sugar; and all the people who work to get sugar from the packaging facilities to your table. And the best part is that Sugarcane Farming in the USA is seeing a hike. U.S. sugar industry grows sugar cane, and beets run sugar refineries and manufacture and sell refined sugars, sugar-sweetened foods, and other products.

Historically, sugar production has been significant in slavery development in Louisiana and Hawaii’s U.S. annexation. The Sugar Association is the U.S. sugar industry trade association.

Areas Where Sugarcane Farming Happens in the USA

Through the 2010s, sugar cane was produced commercially in Florida, Hawaii, Louisiana, Texas, and Puerto Rico. Florida sugar cane production has increased significantly since the United States stopped importing sugar from Cuba in 1960. Florida is America’s largest cane-producing region.

The majority of sugar cane is grown in organic soil along Lake Okeechobee, Southern Florida, which is situated on the southern and south-east coast of Lake Okeechobee. Sugarcane production was primarily limited to the Mississippi River Delta, which is the Northernmost cane-producing state of Louisiana, with fertile soils and warmer climates.

Must Read: How Much Long Does Sugarcane Take To Grow

The Louisianan sugar industry has grown into non-traditional sugarcane-growing areas to the north and west. The bulk of sugarcane expansion happened when the return on rival plants, including rice and soya, has declined. Louisiana has also grown with investment in new mixed harvests as the launch of high-yield sugar cane varieties has been implemented.

A Bit About Sugar Beet

The other primary sugar source in the United States is sugar beets. This is a versatile crop cultivated and planted annually in a wide range of temperate climates. Sugar beets can be processed for a short time but must be handled before sugar degradation. Genetically-modified crop varieties have recently been introduced. GMO plants accounted for approximately 95% of crops in the 2009/10 harvest year, up from about 60% in 2008/2009.

To Sum Up

Therefore, there is no denying the fact that the Sugarcane industry is at its peak. With the continuous rise in demand for sugar and related products, this industry may even see a boom. However, a proper sugarcane planting to harvest is required to achieve the desired results. Or the results to be proud of. For that, some traditions, along with a significant part of modern cultivation techniques, should be used.

How To Plant Spinach? Here Is Everything You Need To Know

All right, you want to know more about “How to plant Spinach?”

As both cold weather and long days cause spinach to grow easily, the trick to progress with such a plant is to start planting seeds as early as possible in spring; make low, regular plantings in delayed spring and summer; and focus on fall as the main crop season.

The key to success with this crop has been to start sowing grains in spring as soon as possible and to make small regular plantings in late spring and summer and focus on falling as a season for the main crop. Because hot and long days lead to fast spinach to bolt.

Spinach rose in the seventh century in China and spread to the Middle East and Europe. If you talk about salads, fresh spinach leaves are perfect and older spinach leaves are used in sandwiches or soups, along with stir-fry.

Also Read: Easy to grow the Fresh and Pure Cucumbers

Spinach, a super-green leafy plant, is a common plant that can be planted in certain places in spring, autumn, and winter.

Spinach has standard growth requirements and criteria, and is more flexible in raw or fried feeding and drinking. This is richer in magnesium, calcium, and vitamins than other greens and one of vitamin A, B, and C’s best sources.

Unlike other fresh seasonal vegetables, spinach is a “spring ephemeral,” beginning as a low rosette. Spinach thrives at cold temperatures; however, “bolts” or sends a stalk as summer temperatures increase.

There is a fleeting opportunity everywhere it grows as spring advances into summer, where spinach flourishes and spinach becomes effortless.

Long-regions, fortunate farmers have a second chance at dropping spinach.

Spinach Spring may be planted as long as the fertilizer functions correctly. Spinach will seed as soon as possible for six weeks of cold weather from seed to harvest.

For optimal germination, the soil should not reach 70oF (21 ° C).

• Every two weeks, there will be successive spring plantations.

• In northern climates, gardeners harvest spinach in early spring while they are planted in autumn just before cold weather. Cover young plants in winter, use a cold frame or dense mulch, and eliminate protection when soil temperatures reach 40 ° F in your region (5 ° F).

• You may also plant in fall if you live in a place with mild winters (for summer harvest, consider New Zealand Spinach or Malabar Spinach, two related heat-leafy greens). Wait until the planting area is cold enough.

Choose any place with full sun (or partial sun) and well-soil.

Start to prepare the growing field with aged manure around a week before planting. Or you might be prepared to sow seeds outside early spring when the soil thaws.

How To Plant Spinach And Garden Preparation

How to plant Spinach

We are still answering your question “How To Plant Spinach?”  Meantime, let’s also take into consideration another related question with our topic and that is “How to Grow Spinach Plants?”

Spinach grows well in every fast-garden loam. It thrives in fertile soil as long as it is not too acidic. Incorporate 3″(8 cm) compost into bed during planting.

Put 2 pounds (2 kg) of alfalfa meal in the field (per 100 square feet—9 square meters) for spring and summer season planting privileges. Mix fishmeal with 1 lb (1/2 kg) or some other cool-nitrogen from livestock for autumn and winter crops.

Spinach thrives in a more significant alkaline soil than other plants (pH 6.5-). Use finely broken shells of eggs, ground lobster covers, or woods ash when it is acidic. For most garden soils, 1-lbs (1/2-kg) per 100 square meters is enough.

See Adjusting soil pH for other ways to increase soil ph. Spinach Planting

• While seed that starts at home, seedlings are not recommended because they are difficult to transplant.

• Seeds will be 1⁄2-inch thick, slightly soil-. Sow about 12 grains, or scatter over long lines or fields.

Feed wellspring seedlings.

Until now, you might have got the answer to your question of “How To Plant Spinach?” coming up next is the steps to keep the proper spacing between Spinach plants.

Spinach Plant Spacing And Growing

1. Because of slow growth, fertilize only if needed, or use as a replacement if your soil pH is insufficient.

2. When seedlings grow to around 2 “thin to 3-” apart.

3. No planting beyond thinning. Roots are fragile, easily destroyed.

4. Mulching soil hot

5. Regular water

Spinach can withstand rain, can withstand frost and time to 15 ° F(-9 ° C).  Spinach happens to be more tender, so cover if it expects cold weather.

Spinach Plant Spacing

This step is more an answer to your question “How to plant Spinach?” So let’s begin.

·        Sow medium, or small, 1⁄2 “(1.3 cm) of deep seeds per 6” (15 cm) along the way or sow more seeds. Fill 1⁄2 “(1.3 cm) fine mulch

·        Sow in 3-4 “(7-10 cm) 3⁄4” (2 cm) baby spinach centers, 40-50 seeds per foot—harvesting 3-5 weeks

Watering

In the next step of this guide on “How to plant Spinach?” we’ll explain to you all the things. Promise, nothing will be left! So, get ready.

Spinach Growing requires daily irrigation, especially with heat waves in the spring. Drip irrigation works very well, but when the leaves get muddy, most spring ephemerals work better.

During a humid day, a spray of overhead water cools the leaves and the vegetation in the afternoon under the plant and reduces the overnight temperature to 60-70 ° C (15-21 ° F).

Spinach Plant Spacing – For Garden

Before you begin for anything. You first need to understand the area, so you know whether it’s for you.  When it comes to a garden, it may stretch from a small part of your yard to a vast plot of land.

However, the size of your rows can vary based on your planting, repair, and harvesting equipment needs.  So, it’s good, to begin with, a smaller garden field.

Spinach seed kits have been designed for medium-sized gardens and large farms.  The specifications that are usually defined here would be suitable for your room.

You want to plant each seed about 3 to 6 inches apart.  The explanation this has a variety is because the scale of the spinach plant growing varies.

You will notice that most of the spinach plants have a diameter of around 4-5 inches. This can be noticed when the spinach is ready for harvesting.

For baby spinach, you should grow spinach plants early so that it can be smaller in diameter.

A classic farm or a decent size garden plot would need to have perfect rows of the distance between the spinach plants.  A row is required to cultivate, grow, water, and harvest your spinach plants safely.

The soil where spinach plants will stay remarkably undisturbed. It is better than the soil is almost loose and shallow to ensure the roots of spinach plants grow efficiently.

Getting large enough rows allows you the requisite exposure to the spinach plants.  Most of the gardeners prefer the average row width of spinach plants in between 12 and 18 inches. 

Spinach Plant Spacing – Square Foot Garden

Square foot planting is something that gardeners love in 2020.  A square foot garden is a way of utilizing a square foot area for every herb.  Let’s presume you’ve got a garden area measuring 4 feet by 4 feet.  You’d have 16 square feet or 16 micro square areas to grow your vegetables.

If we talk about per square foot, then the landscape area is 12 inches by 12 inches. Spacing recommendation for planting the spinach requires you to plant a total of 9 spinach plants in a growing square-foot field.

You leave a spacing of approximately 4 inches in diameter between each plant.

The most simple and easy way is to draw two horizontal and two vertical lines to get the spinach plant room correct in the square foot. Remember, the lines should be evenly spaced.  It will provide you with an option of nine mini squares to plant your spinach seeds.

You each spinach seed in the center of this mini squares.

Gardeners or planters consider this method to be one of the best and easiest ways as you can draw these grid lines.

Don’t forget that you ought to be prepared to cultivate, to grow, and to harvest your spinach plants. We will talk in detail about How to harvest spinach later in this article. Before that don’t miss the fact that

To harvest your spinach plants you can only have a limit of 4 square feet if you can reach them on opposite sides.

This will differ because you can just achieve this level, so bear this in mind when designing your square foot garden field.

Spinach Plant Spacing – For A Container

Should you want to appreciate the delicious food, planting spinach in a pot is a perfect way.  With a few basic guidelines, you can quickly find out the place for your jar.  Bear in mind that such instructions are focused on our knowledge.  However, container gardening can be a little different based on your needs, so use these tips as a reference.

The depth of your container will eventually decide how many spinach plants you should bring there. You would need to plant the spinach plant in a way to give it a distance of around 3-5 inches in diameter.

How To Harvest Spinach?

The trick to harvesting spinach leaves is to collect leaves from outside the plant to enable the centers to develop larger. It helps the plants alive so that they can start growing more seeds.

If you want baby spinach leaves, collect them when they are around 2 inches wide.  Usually, baby spinach is eaten raw or sautéed gently since it is delicate.  If you’re trying to prepare or freeze spinach, you’ll get more solid yields if you’re waiting for larger-4 inches or longer plants.  Many leaves reach 6 inches or longer, depending on the type.

Usually, while processing spinach, you may pinch the leaf at the stems with a fingernail.  You may also use scissors or kitchen shears to cut the seeds.  Only make sure you have the entire blade and a little bit of the plant.  If you cut off a leaf without a base, it’s going to go pretty quickly.

The spinach plants continue to grow in the morning.

Bolting is where they continue sending a seed stalk and finally fruit.  Unless you allow that to happen, the leaves can turn acidic and nearly inedible. When you observe that the mature plants are developing taller in a short period, it is a warning that a seed stalk is growing.  At this stage, pull the whole plant up and pick all the leaves.

How To Harvest Spinach Plant – Know-How

During the autumn, mature spinach plants should hang on to sharp frosts.  If you find out or expect that the temperatures seem like they’re going to drop below 30 degrees F at night, go ahead and dig out the plants and pick all the leaves you can find.

We recommend freezing spinach for long-term preservation.  To extract some soil or dust, wash the leaves.  Instead, you can blanch them while plunging them in boiling water for at least 1 minute. 

Then pull them out and dive them into an ice-cold bath to cool off.  It will allow them to maintain their vivid green hue.  When the spinach leaves get cold, drain them quickly on the paper towels. 

So, bring together a couple of leaves to turn them into a ball-we want ours about the size of a baseball. Squeeze the ball to wrong as much water as you can. 

Then, cover the spinach ball in plastic wrap and place it in an airtight bag and lock it in the freezer.

You can put a few spinach balls into a 1-gallon jar. The spinach can last up to a year in the fridge.

Conclusion

We are sure that the steps are given above present to you a clear idea from Planting Spinach to its harvesting and so on. Using this guide, you can grow the perfect spinach. You need to follow all the detailed steps wisely and strictly adhere to them. 

Must Read: Planting and Growing Okra Step by Step

How to Do Watermelon Farming?

Watermelon is a highly cultivated vine-like flowering plant present in more than thousands of varieties. A fleshy sweet Plantae helps to relax blood vessels with high nutrition and low in calories. 

Watermelon has its fondness among the people by its sauce preferences among the varieties of fruits. The presence of potassium, vitamin A and C make it mealier and provide multiple health benefits i.e., prevent stroke, control blood pressure, obesity, and overweight as well. 

Watermelon farming needs a temperature higher than 25-degree Celcius. They have an extended, delicate, and climbing stem throughout his farming life cycle through germination to growing into a whole fruit. 

In the early stage of farming, watermelon has highly dense fleecy hair which is muddy in color and vanishes in the passing time. 

Also Read: How to Nurture the Dragon Fruit

Watermelon Cultivation 

Watermelon seeds implant in a pot and relocate in the loamy soil for mid-level of nitrogen for enhancing the growth of the fruit. In an excess humid climate, watermelon suffers from pests like root-knot nematodes, fruit flies, and aphids.

Watermelon requires more than 85 days becoming a full-grown fruit than the other melon. Horticulture in Japan grows cubic watermelons for their convenience to store as they use metal and glass boxes for improving grain.

Due to present in the variety of cubic, square, and pyramid shape, they are pricy to purchase rather than the original shaped one. This shaped type of watermelon only belongs to the wealthy class of the consumer or buyers.

Watermelon cultivation can be done in numerous ways according to its harvest time and weight.     

The Carolina cross produced the heaviest watermelon 29to 68 kilograms in about 90 days.

The little golden person takes 70 days from sowing to harvest. 

Orangelo weight 9 to 14 kilogram and take 90 to 100 days till the fruit harvest 

Cream of Saskatchewan grows in cold climate and harvest in 80 to 85 days

Moon and star are weighing 9 to 23 kilograms and harvest in 90 days 

Densuke watermelon is firstly harvest and weighing 11 kgs

Melitopolski is highly cultivated in the region of Russia and take 95 days to harvest

watermelon farming

Watermelon farming in horticulture shows a variety of improvements for the production of watermelon. Its hard crust made it more accessible to transport it from one place to another due to its oblong shape as well. Improvement in geographical conditions also provides to get an elastic environment for the cultivation of watermelons.

Watermelon is the garden-variety fruit that every grocery sells more often. China is the largest producer, and more than 40 states of the United States are cultivating watermelons. It is a smaller shaped variety of melons known as icebox melons as they have red and yellow color flesh. 

Some of the groups are also seen in the variety of watermelon, which shows the variation in taste and texture of its flesh.

·        Citroides group is a fleecy melon cultivated in the world for fodder with sweet yellow flesh.

·        The Lanatus group is food for the traveler in the Kalahari Desert. Seeds are edible in this group and having juicy white meat. 

·         Vulgaris group is widely cultivated for the consumption of human and cattle feed as well.

Watermelon is mainly consumed in summer; it contains water more than 85%, and the rest is sugar with low-fat properties. It mixes with other fruit juices, wine, or pickles. Watermelon seeds are also consumed by a human after the roast and dried up.

In China, people consume seeds of watermelon on the eve of china new year, and in Vietnamese, people consume seeds as a snack on the Vietnamese New Year holiday.

Watermelon zest has vile flavors, which is used in making pickles, and people were making vegetables by stewing and stir-frying. Watermelon zest produces Amino acid citrulline.

Only vitamin c present in a significant amount and a low amount of nutrients with 30 calories per 100 grams of serving. It is also known as state vegetable or fruit in Oklahoma State due to its versatility of consumption. 

Watermelon Farming Through Seeds

Watermelons grow from seed. You might be tempted to use seed from a melon you purchased, but it would just be time wasted. There are chances of it being a hybrid one. Hybrid is somewhat different from crosses not true to nature. Then, you would probably end up cultivating what is generally termed as pig-melons, which is nice to feed pigs only and not human beings. 

What Kind Of Seeds To Buy For Watermelon Farming?

If possible, pick the open-pollinated heirloom variety of seed, if necessary. You will find far better and fascinating types in the heirlooms than in the regular collections at the local gardening center. 

Start your watermelon seeds in the field, where they will spread. To germinate, the soil should be at least 18 ° C.

 What Is The Right Approach To Watermelon Farming?

Do NOT plant your watermelon seed in a container or big bowl, unless you have an incredibly short growing season. Neither buys watermelon seedlings from a nursery. Watermelon seeds germinate within a few days, simply and rapidly. 

Watermelon plants quite quickly outgrow the seedling stage and do not like transplantation. You don’t save a great deal of time, and you end up with a poorer vine.

Avoid all this needless hard work and stick your seeds in the dirt, about 2 cm or an inch deep.

Watermelon Vines Need A Lot Of Care

The watermelons need soils that are dark, warm, and permeable. It allows the land to develop melons. There are some benefits of growing the soil: A slab or hill is free draining. If you have thick clay dirt, bring the bed certainly up.

Mounds are beautiful even when the soil is somewhat unfortunate. To raise watermelons, make a mound of healthy soil with plenty of compost in it. Often, after using much of the compost, farmers plant them in what’s remaining over from a compost pile.

When you want to grow stuff in tidy circles, or if you’re going to plant a broad field, raise watermelons on ridges, much as the growers do.

 The Benefit Of Mulching

Watermelon cultivation needs to be very diligently done. A few things like mulching that one needs to keep in mind. Melons have deep roots and require plenty of water. Therefore, you need to ensure that the field is never dry out, in case it dries, so mulch helps. 

Mulch holds weeds down. Weeding may disrupt the strong roots, so it’s best not to let them rise. Watermelons are starving animals. 

If your mulch is like compost or old animal manures, it’s excellent. Watermelons can tolerate relatively fresh manure and fertilizers. 

Otherwise, periodically feed the watermelons with anything like pelleted manure or other sustainable fertilizer.

Once the vines are two meters thick, pinch the ends. Encourage branching. When your watermelon vines get bigger, they seek to take up more space. Unless they start smothering specific stuff, you should warn them to keep to their region by smoothing the ends of the vines, so they develop in the right direction.

Watermelon Harvesting 

watermelon harvest

Watermelon is a summer delight fruit loved by all ages. In addition to its great taste, it provides lycopene refreshment in the hot summer. It requires relocation after the germination of seeds more than 75-degree F and for growth more than 65 degrees F. 

Throughout the watermelon cultivation, watermelon requires a warm season to grow as their sizes, shape and texture of zest vary from climate, so their best production came from the south and southwest regions of the United States.

Must Read: How to plant, grow, and harvest pumpkins correctly 

For cultivating watermelon, it requires a heavier feeder than the other fruits. Before planting, the soil has to be compost and manure was rotted in it to provide the warmness to the sown seeds. 

Sown seeds start growing in the form of fruit; then fertilizers were mainly starting dressing up side by side. It requires a ph scale of 6 to 6.5 and more than 80 days of the warm summer season to grow up.

It is a fragile fruit to time in sandy, muddy soil. The soil will be moist, and water needed in the field will be 1 to 2 inches per week. Watermelon farming soil contains a high amount of nitrogen, phosphorus, and potassium, but after illuminating it into flowers, it needs less nitrogen for further growth. 

Watermelon elevates in a row sun-dried atmosphere, as they are not much sweeter as they are ripe, so the harvesting part plays a vital role in the life span of watermelon. The texture and color of a watermelon show whether the fruit is ripe or not.

Pests of Watermelon: 

The leading watermelon killer is leaf-eating beetles (also destroying the flowers), including painted and dotted flea beetles, pumpkin beetles with or without markings, whatever you call them.

They all look alike, all doing the very same: nibble away on your watermelon plants. However, if they are a significant concern, it’s just an indication that your watermelon is stressed.

In a safe climate and decent soil, stable watermelon does not draw so many beetles. A watermelon should also grow quickly enough to manage any beetles.

The other primary concern with rising watermelons is mildew, a disease that makes the leaves appear like white dust. Fungus thrives in wet environments.

In the tropics, you may not be able to avoid beetles or mildew until the rainy season build-up starts. And it’s not worth it anyway… 

The unbearable heat and humidity aren’t healthy produced watermelon conditions. Develop anything that needs rain, waiting for another dry season to produce watermelons.

Conclusion

In this guide on how to do watermelon farming, we have tried to explain all those steps and techniques that are required to produce a quality crop. However, you are solely responsible for crop failure for any reason. Don’t worry, this is not a kind of alarming signal. It’s just a precautionary statement. In the end, we would like to advise you to take any watermelon farming-related decisions at your discretion.  

Pumpkin Farming: how to plant, grow, and harvest pumpkins correctly and properly

There is no fall without pumpkins. Be it big, mini, orange, white, carved, and most importantly pie or any other kind, almost all love pumpkins. Pumpkin farming is done mostly over a large patch of land, for better quality and size. Pumpkins are used in cooking as well as in carving during Halloween for decorations. Several pumpkin farms sell well in other seasons. Farming is easy to maintain if you have sufficient space. These crops will flourish just about anywhere with the right care.

Steps to Follow for the Best Fruit

Pre planting preparation

Pre-planning is important even if you are growing pumpkins as they are very tender. Pumpkin plants grow as a vine, which can easily reach 20 to 30 feet long in the course of its growing season. 

Also Read: Sweet Potato Farming Information Guide

Pre-plan the time to plant seeds:

Pumpkins do require a long growing season. Generally, it takes 75 to 100 frost-free days to grow. So, it is advised to carry pumpkin cultivation by late May in Northern locations and by early July in the extreme Southern places. Plant the seeds after the frost has passed. If you are planning for a fall harvest, then plant them in late spring or early summer. Again, if pumpkins are planted too early, they may soften and rot.

Selecting a site to plant seeds:

Pumpkins prefer full sun. Pick a site with full sunlight to light shade. A spot under a tree or in the shadow of a building would not serve your purpose. Pumpkins grow annually on heavy grown vines. The site should also have lots of space for sprawling vines. An open space of 25 to 30 feet will serve your purpose of pumpkin cultivation. A Pumpkin farm does not take the whole yard. Besides, it should also have a good drainage system. The site should not have standing water after heavy rains as well as a shelter from cold wind.

Preparing the soil to plant seeds:

Pumpkin seeds do not germinate if your soil is cold. Beware; the seedlings are destroyed by frost. They prefer very rich soil, which is not too soggy. Checking the soil temperature is also very important. The soil temperature should be at least 70 degrees Fahrenheit as pumpkin is a tender crop. You need to wait until the soil is warmed, naturally. Otherwise, pumpkins will start to rot. An extra boost for your pumpkin farming is to prepare your soil beforehand. Digging holes to plant the pumpkin seeds and filling them with a mixture of compost one week before planting seeds is advisable. 

Choosing the seeds:

You can choose your yield from three different varieties of pumpkins. Here are three varieties of pumpkins for you to grow in your backyard: pie-pumpkins for cooking. Large decorative pumpkins to carve out for Halloween.Mini pumpkins for decorating purposes again.

Planting the seeds

Pumpkins grow well when the seeds are planted in the ground directly.

Plant the seeds in wide-spaced rows:

Plant the pumpkin seeds in rows. They will creep along with the vines. Depending on the variety of your pumpkin seeds space the rows 6 to 10 feet apart. Mini pumpkins will take small space to grow while the larger ones need more space. The Bush-type variety of pumpkins needs 8feet space in all directions to grow fully. They grow on shorter vines.

The perfect depth to plant the seeds:

The most important step towards pumpkin cultivation is to build the pumpkin-hills. The pumpkin-hill is a small hill built on the ground. Accumulate the soil where you want to plant the seed then give it a shape of a hill using your palms. The hill keeps the soil warmer by allowing the sun to heat it faster. It improves the cultivation by providing natural drainage. Plant the seeds 1-2 inches deep in the hills. You can plant 2 or 3 seeds within a few inches from one another.

Covering the seeds:

After you have properly planted, your seeds now cover them up with compost. The compost mixture prevents the growth of weeds and nourishes the seeds planted. A thin layer of compost mixture in the areas where you have planted your seeds is enough to nurture your seeds properly.

Taking care of the plants

Taking the right care of your seeds will do the magic for your pumpkin farming. With proper care, the plants will sprout within about a week.

  • Watering:

Every plant needs watering, and pumpkin is no different. When the soil temperature is low, it is the right time to water the pumpkin plants. Pumpkins are very sensitive to moisture. Over moisture will injure the plants. Adding more water to wet soil will do no good for farming. Rather adding less water to dry soil is ideal. Let the water soak deep into the soil before adding further water. As the roots grow deep into the soil, the water must reach the plants deeply.

In pumpkin cultivation, you need to water deep down at least 6 inches to moisten the soil. Water only the stem of the plant. Avoid watering the leaves. Wet leaves are the ideal place for fungus to grow. Powdery mildew is one of them. It causes the plant to die by bewildering the leaves of the plants. Watering in the sun is more preferable than in the night. Use a garden hose equipped with a mist ling nozzle for watering the plant. Decrease the amount of water as the pumpkins grow and turn orange in color.

  • Pollinating the blossoms:

The first thing that comes to anyone’s mind is how do pumpkins grow. Pumpkins depend on bees to pollinate their blossoms. If you do not see active bees in your gardens, self-pollinate using your hands. You must get your female flowers fertilized to get the pumpkins.

Must Read: Growing the Avocado – The Healthiest food

The female flowers show up later with a swollen base below the petals, which helps you to identify them. Male flowers show up first. They are thin and straight flowers. Self-pollination includes transferring pollen from the male flower to the female flower. An artist’s brush will help you in this process.

Wear gloves on your hands. Brush the male flower with the artist’s brush to collect the pollen from it. Going to the female flowers, brush only the center of the female flower to allow the pollen to settle on them. Be gentle with the blossoms as they are very delicate. In the mornings, the female flowers remain open for half a day.

After that, they shut themselves up and do not open until the next morning. If you accurately do the self-pollination then you will surely get the best results out of them. Too many fertilizers will reduce the rate of pollination. It will negatively influence your fruit set.

  • Fertilizing:

Adding fertilizers to your pumpkin farm encourages the growth of the plants. When the plants first sprout add the fertilizer to keep them healthy. Go to a local nursery and choose the fertilizer accordingly from them. Side dressing is also important. It means spreading the fertilizer around the plants close enough for their roots to eat-up.it is ideal to side-dress the vines once a week after the blossoms start appearing.

  • Controlling weeds and pests:

To make most out of your pumpkin cultivation, make sure you control the weeds and pests growing around them. Monitor your pumpkin farm throughout its growing process to have control over them. Weed the patch often to prevent the growth of them around your pumpkin plants.

Planning a weed a few times a week is good for your farming. Conserving your soil moisture by cleaning the weeds is also important. Beetles grow on the plant leaves and eat the plant tissues. Check the leaves to remove them. Scrape them off the whole plants twice a week to save the plants. Aphids threaten garden plants a lot.

They mostly grow on the underside of the leaves of the plant. Taking care of a pumpkin farm is highly recommended, otherwise, they will kill your plants. Spraying water on them will do the work. But, spray the water in the morning so the leaves get enough time to dry under the sun.

Squash bugs are another variety of pests that grow especially later in summer. Poor light will enhance the growth of pests. Go to your local nursery and ask about organic pesticides if necessary. 

Harvesting the pumpkins

pumpkin harvest time
Check the pumpkins:

Pumpkins typically take 95 to 120 days to fully mature after they are planted. Check to see whether they are ready to harvest or not. They should have a bright orange color. Their shell should be hard. Do not harvest the pumpkins if they are still soft. Allow them to become hard before cutting them from their plants. Their stems will remain soft. But, the vine will start drying out itself. They will also start to wither on their own.

Cut the stems:

Do not break the stems; it will destroy your pumpkins. Cut the pumpkins from the stems with the help of a pair of shears to keep them intact. While you cut the stem make sure to leave the stem a few inches long. A liberal amount of stem (3 to 4 inches) will increase the life of the pumpkins never after cutting.

Store the pumpkins:

After cutting the pumpkins from the plants keep them in a cool and dry place. Wet and moisture places can make them rot. Keeping them away from humidity, damp, and direct sunlight is advisable. They do not need any kind of refrigeration also. Pumpkins can be kept for many months after harvesting. To avoid molds and fungi, a little spray of mild chlorine before storage does the work perfectly. Maintain a storage temperature of around 55 degrees Fahrenheit. 

Conclusion

Just remember to water well and often. Watch the plants often for pests. Clean the ground and make it weed-free. Fertilize regularly. Last but not least is to watch the fruit grow bigger and bigger! Handle the pumpkins gently or they may bruise. Follow the above-given steps to make the most out of your cultivation.

Is Quail Farming a Profitable Business?

Raising and nurturing quails for commercial purposes, like many other poultry birds, is known as “quail farming.” It is an immensely profitable business, especially for small farmers struggling with their budgets. As a quail farmer, you can produce both eggs and meat and make decent money by selling them.

Raising quail is surprisingly easy, entertaining, and lucrative. You don’t have to do a lot of work to maintain your quail farm, because quails are one of the smallest poultry birds and are pretty easy to maintain.

Japanese scientists are known for starting the farming of quail birds, and the commercial quail farming gained a lot of property in Japan, and then almost all around the world. Like all other bird farming ventures, including chicken, duck, and turkey, quail farming is very profitable. You can start your quail farming business without thinking much about the area, conditions, and weather, etc. In this guide, we are trying to deal with various aspects of quail farming. Let’s discuss everything in detail.

Also Read: The A to Z of Commercial Sheep Farming – A Step to Step Guide

Why quail farming is a great business idea?

  • Quail eggs are considered as the most nutritious eggs, especially when compared to other poultry eggs.
  • These little eggs are even suitable for diabetic patients.
  • Quail eggs contain a decent amount of protein, iron, phosphorus, vitamin A, B1, and B2.
  • The demand for food and nutrition is only increasing with time, and quail bird farming can play a crucial role in meeting that demand.
  • Farming of quail birds requires very small initial labour and capital.
  • Farmers can raise quail birds even with other poultry birds for egg and meat production.

Other interesting qualities of quail birds.

  • They are very small in size, and hence it is very easy to raise a lot of birds in a small area.
  • The average weight of an adult quail is between 150 to 200 grams, and the weight of eggs is around 7 to 15 grams.
  • Female quails usually start laying eggs at the 6th or 7th week of their life, and they can continuously lay one egg every day, of course, if they remain healthy.
  • A healthy female quail lays as many as 300 birds in the first year of its life. The production of eggs reduces gradually after the first year, and the bird produces almost half the number of eggs in the second year.
  • The Californian quail is considered as the most beautiful and handsome of all quail breeds around the world. It is California’s state bird since 1932 and is mainly raised as a pet or simply as a hobby.
  • Quail egg is very healthy for humans, as it contains 2.47% less fat than a chicken egg.
  • A lot of people also believe that quail egg helps prevent diabetes and blood pressure.
  • Like other birds, quail don’t incubate their eggs themselves. You will have to use brooder chickens or an incubator to hatch their eggs.

Life cycle and laying habits of quail birds

A healthy quail usually survives for 3 to 4 years. The average weight of a newly born quail chick is around 6 to 7 grams. They are very weak and sensitive in the beginning and become stronger after a couple of weeks. As mentioned earlier, they don’t incubate their eggs at all, and hence, you should keep one male quail for every five female quails. Quails generally lay their eggs in the afternoon, and the presence of decent light enhances the egg-producing capacity of quails. Eggs weighing around 9 to 11 grams having a hard and smooth shell are ready to hatch and produce chicks.

Starting a quail farming business

Quail bird farming is very easy and straightforward to start, as it doesn’t require a huge space. But having a proper business plan can make life very easy for you. Your plan should include breeding, feeding, caring, housing, and strong marketing strategies. Let’s have a look at the initial steps for a successful quail farming business.

Selecting from a wide range of quail breeds

Presently, there are as many as 18 quail species are available. It means the scope for profit is immense. Some of the species are suitable for meat production, while some are very good for producing eggs. So, if you are clear whether you will be raising quail for meat or eggs, it will be massively helpful for the future. Some of the most popular quail breeds for farming are mainly divided into two groups.

Layer Quail Breeds

  • British Range
  • English White
  • Pharaoh
  • Tuxedo
  • Manchurian Golden

Broiler Quail Breeds

  • American Bobwhite
  • Indian White-Breasted

Management Practice

  • Keep the cage clean

This is massively important if you want to keep your quails healthy. Clean the cage thoroughly at least every couple of weeks to prevent diseases due to bacteria and mites. Wash the water containers and feeders regularly, and refill them every day with fresh food and water.

  • Lighting

Ensure decent enough exposure of light to your quails. It doesn’t matter what types of quail you are raising; proper lighting is a must. Almost all quail breeds need at least 8 hours, but not more than 15 hours of lighting.

  • Keep the surrounding calm.

Avoid unnecessary noise around the quails. Try to keep the surroundings as calm as possible. A noisy atmosphere can be dangerous for quails like most of the other farming birds. Quails need proper sleep to stay active, funny, and healthy. Either transfer them in a dark room in the evening or adjust the place accordingly to balance enough light throughout the day and darkness after evening.

  • Don’t forget to collect eggs daily.

If you want to have fresh and healthy eggs, ensure collecting them at once every day, especially during summer. Try to keep eggs in a cool place; keeping them in a fridge is a great idea!

  • Ensure gentle taming

Taming is important, as well as a tough part of raising quail. It is pretty challenging to tam the fully-grown quail. But, if you know how to handle them, it can be fairly easy. Try grabbing them and playing with them occasionally. Offer them foods with your hands, visit them multiple times throughout the day. In short, always be very gentle while taming your quails.

  • Clipping

You wouldn’t want to do this, but you don’t have any other option either! Unlike chickens and ducks, quails are amazing flyers, and they can go a very long distance, especially if they are afraid. Clip their wings regularly to ensure they don’t fly easily. Sounds a bit harsh? But, that’s the part of bird farming business.

  • Feeding

If you want to gain decent profit through your quail farming business, feeding your quails adequately is very important. Provide them with healthy, nutritious, and well-balanced food. And they don’t require a lot of food either! A healthy quail munches on only 20 to 30 grams of food in a day! That’s it! Feed them with healthy and fresh foods to maintain their health and, in result, decent productivity.

Here is the age-wise diet chart for raising quail healthily

IngredientsAge
 0-3 Weeks4-5 WeeksAdult
Broken wheat485050
Sesame cake232222
Kipper fish201614
Rice Bran689
Broken oyster shell2.253.254.25
Salt0.500.500.50
Mineral mix0.250.250.25
Total (percentage)100100100
  • Water

In addition to ensuring a healthy and nutritious diet, you will also have to maintain the availability of enough fresh and clean water for your quails. They won’t drink a lot of water, but there should be multiple pots of water every time so that they can drink whenever they want.

  • Egg Production

As already discussed earlier, quails need adequate light to produce eggs on time. Providing artificial heat and light is also a great idea.

To maintain the breeding process properly, keep one male quail for every five females.

Keep the surrounding very clean as well as dry.

Select highly productive breeds to ensure better egg production.

Different types of quail at different ages need different periods of light. You can understand this through this chart.

AgeTemperature (Celsius)Light (Hour)
1 Week3524
2 Week3024
3 Week2512
4 Week21-2212
5 Week2112
6 Week2113
7 Week2114
8 Week2115
9 Week2116
Beyond Ninth Week2116
Some essential equipment to keep your quails healthy and happy
  • Water container

Quails are pretty small in size. And hence, all types of quail need small containers of water. Avoid placing deep too deep containers to ensure they get water very easily, and to avoid the risk of drowning. Keep the container full of fresh, clean water.

  • Feeder

To ensure feeding all birds adequately, keep the number of feeders equal to the number of birds. Your aim should be to ensure all the birds can have easy access to both food and water.

  • Small plants

Quails love small plants, and if you can pot a few small plants around their housing, they will be very happy. Quails are very curious about their surroundings and love a little bit of nature around them. Just ensure that the plants are not toxic to your quails.

  • Provide enough hiding spots

Quails love small hiding spots. And you can provide those spots by placing a few large hamster huts inside the cages.

  • Sand Tub

Dust is a massively important part of quails’ survival. They need a dust bath on a daily basis to be happy and healthy. And dust can also play a key role in keeping parasites away. Place a few sand tubs around the quails, but away from water containers to make your quails feel comfortable.

  • Diseases affecting quails

Diseases are not very common in quails as compared to poultry birds like chickens and ducks. Proper care, clean atmosphere, and healthy nutrition, etc. are enough to avoid diseases while raising quail. Although diseases in quails are not common, a couple of diseases noticed in quails are:

  • Coccidiosis:

It is the most common condition affecting quail. Improper hygiene around the quails is responsible for this condition, as the protozoa invade the intestinal walls of quails. Some clinical signs of coccidiosis are diarrhea with a bit of blood, decreased feed and water consumption, sudden weight loss, ruffled feathers, and droopiness, etc. If you notice any of these signs, don’t waste any time and contact a qualified veterinarian.

TIP: You can mix two grams of coaxial 20 per two-liter of water and give them thrice a day to manage coccidiosis.

Must Read: Growing the Avocado – The Healthiest food

  • Ulcerative enteritis:

It is a highly contagious, acute condition affecting chickens and quails. Bacterium clostridium colinum causes this disease. There are ulcers in the caecae and intestines of the quails. Ulcerative enteritis is the biggest cause of quails’ death worldwide, with a mortality of 100%! Clinical signs may include drooping wings, listlessness, watery white feces, anemia, diarrhea, ruffled feathers, retracted necks. Ulcerative enteritis can completely derail your efforts of quail bird farming. Therefore, even in one bird, if you notice any of these symptoms, don’t waste any time and give proper treatment. Otherwise, it won’t take so long to affect all other birds!

TIP: One-gram streptomycin with a little amount of water is pretty effective against ulcerative colitis. But you should not forget to get in touch with a veterinarian.

So, that’s all about our guide for quail farming. Whether you are raising quail for meat or eggs, you should keep these basic but important points in mind. If you are smart enough, you can earn decent benefits from this low investment farming. Hopefully, you are now in a better space to start your own business. Both quail meat and eggs are a rich source of nutrients and are in demand from shop owners and the general public. Don’t think much about marketing scopes, as you will find it pretty easy to market your products. Good luck for the future!

Kiwi Farming, Planting, Growing & Harvesting

Kiwi farming is predominantly carried out in the USA, Japan, Italy, China, Chile, France, Spain, Australia, and New Zealand.  Kiwi is also known as Chinese gooseberry is an edible berry that has high medicinal and nutritional value. Kiwi is a deciduous vine fruit which is oval in shape and it is about the size of a Chicken’s egg.

The fruit grows on a vine that is as high as 30 feet tall and is woody. The fruit has fibrous, thin, tart, and fuzzy edible skin. The fruit is similar to grapes as it is also grown in clusters. Kiwi has light green or golden colour flesh inside and has tiny black edible seeds. Kiwi is soft-textured and has a unique flavour.

Kiwi is rich in Vitamin C and vitamin B and other minerals such as calcium, phosphorus, and potassium. Kiwi can be consumed fresh or can be mixed with other fruits in desserts and salads. The kiwi fruit is also used in the preparation of wines and squash. In India, Kiwi farming is done in Kerala, Himachal Pradesh, Sikkim, Arunachal Pradesh, Uttar Pradesh, Meghalaya, and Jammu & Kashmir.

Health Benefits

Kiwi fruits are excellent antioxidants and anti-aging agent. Thus it aids in the improvement of the skin. The respiratory and cardiovascular system also benefits from the consumption of the fruit. The presence of serotonin is beneficial to treat sleep issues. Furthermore, the kiwi fruit also has antifungal and antibacterial properties.

Types of Kiwi Fruit

Hayward is a New Zealand variety that is grown globally. However, kiwi fruit is majorly available in three varieties: Hardy kiwifruit (Actinidiaarguta), Super-hardy kiwifruit (Actinidiakolomikta), and Grocery store kiwifruit (Actinidiadeliciosa).

Hardy kiwifruit is also known as ‘bowerberry’ and it grows on the trees that are as tall as 100 feet in Siberia, Korea, Japan, and China. This variety of kiwi fruit can tolerate low temperatures.

Super-hardy kiwi fruit is smaller but smooth-skinned. It can grow in temperature as low as -40°F. The fruit is also known as ‘arctic beauty kiwi fruit’.

Grocery store kiwi fruit is also known as fuzzy kiwifruit. This variety of kiwi is large in size and is the most common and edible variety.

The other types of kiwi fruit known are Tewi, Bruno, Monty, Tomuri, Elmwood, Saanicheton, Abbott, Chico, Gracie, Dexter, Matua, Allison, and Vincent.

Where do Kiwis Grow?

It is essential to cultivate a crop in a correct season and with ideal soil requirements. Kiwi fruit can be grown in well-drained, fertile, and moist soil. The presence of potassium, nitrogen, and phosphorus is essential during the vegetative stage of the fruit.

The best pH range of the soil should be from 6.3-7.3 to get maximum yield from the crop. The ideal kiwi fruit farming weather is low temperatures. However, kiwi needs protection from moisture throughout the year. The fruit should also be shielded against frosts. The ideal temperature for growing kiwis is below 38°C. A temperature higher than 38°C can cause sunburn to the crop.

Kiwi fruits can be grown where almonds, citrus, and peaches are abundant. However, the leaves are more susceptible to cold in comparison to the peach or orange trees. The young plant of kiwi fruit can be harmed if the temperature falls below -1°C while the vines that are mature can handle the temperature lower than -12°C. It is essential to protect the young flowering shoots from wind as it can damage the crop easily.

How to Grow Kiwi from Seed?

To grow kiwi from the seeds or planting a kiwi from seed is not a hard job. The first step is to collect the seeds of the kiwi fruit from the available ripe fruit. The gooey membrane needs to be separated from the seeds and thus seeds have to be placed in water and then blended. With the help of the colander, wash the seeds in the sink. The cleaned seeds can then be transferred to the paper towel.

A plastic ziplock is used to store the paper towel containing the seeds. The ziplock is later placed into warm container. The sprouting process takes around 2-6 weeks. Once the seeds start the sprouting or germinating, the paper towel is split into small pieces. The seedlings are then transplanted into the pit made on the small pot for 2-3 months. Keep the kiwi vines in adequate sunlight as the plant requires light.

Also Read: Strawberry Farming – A business that promises a “delicious” future

Steps of Kiwi Fruit Germination

  1. Separate seeds out of a ripe and organic kiwi and then clean them by water rinsing. The easy way is to place the seeds in the cup, add water and then swish them. Later on, remove the water out of the cup. This process has to be repeated multiple times for proper cleaning.
  2. The small container or cup is then filled with lukewarm water and the kiwi seeds are transferred to it. The cup or container hasto be placed in the warm environment such on the warm window sill, in front of heater, or on the top of the computer. The seeds are to be kept in water for about a week or until they start separating. The water present in the cup has to be changed daily to inhibit the bacterial growth.
  3. As soon as the seeds begin to open, they are ready to get transferred to mini greenhouse. The paper towel is soaked in lukewarm water and placed on the plate on which the seeds are distributed. The distributed germinating seeds are then covered with plastic container and placed in the area getting sufficient sunlight. It is recommended to make small holes in the container to allow the air to flow smoothly. This is the ideal condition for the seed to germinate faster. The kiwi seeds would be ready for planting only after 2 days in the greenhouse.
  4. Once the seeds are germinated properly, it is the right time for the planting process. But before planting it is mandatory to prepare the container or pot. The soil in the pot should contain sufficient moisture and this should be done by transferring the soil in a bucket and then mixing water to the soil until it is damp in nature.
  5. The container should be completely filled with the moist soil. An inch of space should be left below the rim of the pot.
  6. Now the seeds are ready to be planted. The pots are then sprinkled with the seeds keeping few inches distance from each other. It is advisable to plant each seed in a separate tiny pot to make the transplanting process easy and smooth. Once the seeds are in the pot, spread a thin layer of soil over them. The seeds should be planted at a depth of around two times their length.
  7. Once planting is done, water the seeds using can or squirt bottle. Transfer the pot in a warm and sunny area to get sufficient light. Take care of the seeds by watering and feeding them regularly.

Nutritional requirements and Fertilizers for Kiwi Plant

A dose of fertilizer consisting of 0.5 kg NPK mixture with 15% N and 20 kg farmyard manure is suggested every year for the plant.  High amount of chlorine is also required by the plant as its deficiency can negatively influence the development of roots and shoots of the plant.

Contrary, high level of sodium and boron can be very harmful to the plant. The two equal doses of nitrogen are applied. The young vines get the necessary nutrients of the fertilizer from the soil as the fertilizer is mixed to the soil. The entire soil surface is provided with fertilizer once the plant attains maturity.

Propagation in Kiwi Farming

On the commercial level, the crop is propagated by planting vegetative cuttings or via grafting technique.

Spacing in Kiwi Farming

Planting the crop at a sufficient distance is essential to get maximum yield out of the crop. The distance varies depending on the propagation method used. For the commercial plantation of kiwi, Pergola Training system or T-bar training system are used. In the Pergola system, the row to row distance is about 6m and the plant-to-plant distance is 5-6m. In case of T-bar training system, row-to-row spacing is 3.5m whereas plant-to-plant distance is approximately 6m.

To increase the pollination rate, male plants should also be planted in the garden and the ratio should be 1 male to 6-8 female plants. Insects are also a useful vehicle for pollination of the crop as this fruit plant aren’t self-pollinating plants.

Intercropping in Kiwi Crop

The initial kiwi farming can get the benefits if vegetables and leguminous crops are planted together with the kiwi crop.

Diseases and Pests in Kiwi Plants

Rots in the roots of the plant can be caused by Phytophthora soil fungi and majorly in the soil containing water. The humid conditions results in the development of Botrytis cinera rot that causes infestation in young fruit.

Irrigation in Kiwi Fruit Farming

Watering the plant at regular intervals is essential for the setting of crop as well as fruit. The complete growth cycle of the crop requires adequate amount of water. The hardy kiwi crop gets ready for harvesting in 3-4 years. Thus, this crop is in need of water for at least 3 yearsin the field.

However, it is essential not to over water the crop. Once the crop gets the necessary water content, it spreads its foliage to the surface of the soil resulting in the mulch formation. The process of mulching lowers the water requirement of the plant by reducing the evaporation rate. Mulching also aids in controlling the weeds.

A kiwi crop needs a regular water supply mainly during the drought and hot conditions. The commercial farming of kiwi requires irrigation in around 10-14 days’ interval is preferred for best yield. Providing the water as per the need of the plant is one of the best ways to get the maximum production. 

Harvesting and Yielding of Kiwi Fruit

The plant starts producing fruit after 4-5 years. The initial yield is small but it increases gradually as the plant attains maturity. The ripening season of kiwi fruit is September and October. If there is presence of frost, the plant needs to be harvested before the fruit ripens. The ripening process can be done in refrigeration. Once the skin of the kiwi fruit starts to turn brown in colour, it can be snapped from the stalk. The other method to check whether fruit is ready for harvesting is to observe black seeds in the sample kiwi fruit.

Due to the difference in temperature, the fruit matures later at high altitudes and early at lower altitudes. After the harvesting is done, the stiff hairs present on the surface of the fruit are removed by rubbing the fruit against coarse cloth.  The fruits that are hard are sent to the market and within two weeks they become edible.

The yield of the crop relies on various attributes such as method of irrigation, soil type, tree age, variety, and climatic conditions. On an average, approximately 100 kgs of fruit can be collected per harvesting season.

Storage of Kiwi Fruit

The harvested fruits can be stored in the cool place for approximately two months. This storage doesn’t require refrigeration.

Cabbage Farming Guide

Cabbage also is known as Brassica oleracea var. capitata is a popular temperate and small green-leafy or purple vegetable. The leafy vegetable is also called a biennial plant or as a rabi crop but in certain areas, it is grown as a Kharif crop too.

Cabbages are rich in vitamins C and A and are also filled with minerals such as sodium, calcium, phosphorus, iron, and potassium. Cabbage can be consumed in cooked or raw form depending on the individual. The external appearance of the crop displays a compact mass of smooth leaves wrapped around each other and the structure is referred to as the head of the vegetable.

The leaves on the exterior are large in size than the inner ones. The stem of the plant is stout and short and the flowers of the plant appear in the winter season. Thus, cabbage is a cool-weather crop.

Before initiating cabbage farming, it is essential to understand the basics of cabbage cultivation and the environment necessary for the entire process. Starting to grow cabbage in the late or mid-summer so that it can be harvested in the winter, early spring, or in the autumn season.

The seeds of the crop should be planted indoors approximately 4-6 weeks before the last spring frost and the crop should be ¼ inch deep during the sowing process. The transplants of the crop can be transferred to the outdoor garden once they are around 7-10 cm (3-4 inches) tall and the seedlings are hardened.

The sowing process of the plant can be started as soon as the soil is easy to work on in the spring season. The regions with mild winters can start the seeding process during the late summer so that the crop can be harvested in spring or winter.

Also Read: Are You Embarrassed By Your Onion Farming Skills?

Perfect Environment to Grow Cabbage

How long does cabbage take to grow

Weather and soil are the dominating factors in the proper outcomes of the cabbage. Cabbages are regarded as adaptive in nature when it comes to soils as well as climate. Cabbage quickly depletes the nutrients present in the soil and thus the plant is considered as the heavy feeder.

Organic constituent rich and well-drained soil is ideal for growing cabbage. Heavy to sandy soils rich in nutrients is preferred for cabbage cultivation. The planting bed/soil should be prepared well in advance by combining the aged manure or compost. The well-drained soil aids in inhibiting the rotting of the head that stands in the water.

Light soil is used for early crops whereas late crops require heavy soils to store moisture. Growing the plant on the heavy soil helps in growing the plant slowly thus maintaining the quality. The soil used for cabbage farming should have a pH level in the range of 5.5-6.5. The pH of the soil shouldn’t cross 6.5 and it shouldn’t fall below 4.5 as it can damage the petals of the cabbage plant.

The cabbage plant is prone to various diseases when grown in saline soils. Thus, it is crucial to determine the pH to get the best results in the cabbage planting. Furthermore, crop rotation is practiced to avoid soil-borne diseases and infections to the plant.

The cabbage plant in the Indian subcontinent is grown in moist and cool climatic conditions. The optimum temperature ranges from 15°-21°C for the perfect growth of the head of the cabbage. The flowering intensity of the plant is influenced by the duration of its exposure to low temperatures and the age of the plant.

Popular Varieties of Cabbage

There are different types of cabbages with varied sizes, colours, and shapes. The varieties in green cabbages are Golden Acre, Round-Up, Blue Boy, Green Boy, Badger Ban Head, Market Prize, Blue Ribbon, Flat Dutch, Jersey Wakefield, and Stonehead. Red cabbage varieties are Ruby Perfection, Red ball, Red Acre, and Red Ribbon. Savoy cabbage varieties available are Savoy King and Savoy Ace.

The other varieties available are PusaMukta, Hariana, Bajrang, September Early, Pusa Drum Head, Pride of India, K-1, Pusa Synthetic, Late Large Drum Head, ShriganeshGol, Copenhagen Market, Early Drum Head, Kaveri, and Midseason Market.

Stages of Cabbage Growth

The complete growth of cabbage is divided into 9 stages – Cotyledon (first leaf), Seedling, 6-8 true leaf, 9-12 true leaf, Precupping, Cupping, Early head formation, Head fill, and Mature stage. The seedling goes through these stages to turn into a mature plant.

Cabbage Watering Requirement

Watering the cabbage plant too is an important ingredient necessary in the developmental stage of the plant. The cabbage plant need a continuous moisture supply. Drip system can be installed for better water retaining. Plant bolting occurs in the dry environment and thus prevents from drying. A cabbage plant requires 11/2-inch rain/week and if the environmental condition is not favourable, external watering should be done to keep the plant hydrated.

Around 10 litre water is required for meter square of the land and thus hose and jugs are used. It is essential to be careful while watering the root levels and upper levels. Roots help in retaining the soil moisture and upper levels aids in keeping diseases and pests at bay.

The leaves that have turned yellow should be removed as they can cause a further infestation in the plants. Mushy soil is not a suitable environment for cabbage like other vegetables. If for any unknown reason the soil is dry, the soil has to be dug 3 inches down and then water it. If the moisture level transfers from the upper layer, the plant can be harvested in better shape.

Spacing and Planting Cabbage

Cabbage farming is easy but to understand the correct planting procedure helps in good yield. The distance of planting relies on soil conditions, variety, and planting season. The seedlings are planted in 4-5 levels. The seedlings of cabbage are sowed 0.5-inch-deep and spaced 2.5 cm (1 inch) apart.

Thin plants on the other hand are 45-61 cm (18-24 inches) apart from each other. When there are 4-5 true leaves and are 4-6 weeks old, cabbage can be transplanted to the garden. Cooked stem plants should be planted deep. Seedlings are spaced 45-61 cm (18-24 inches) away from each other and are placed in rows which are apart at 61-91 cm (24-36 inches).

The plants can also be placed near to each other but the size of the mature heads would be smaller. Based on the maturity levels, the following distances are recommended:

Early maturity: 60×30 cm or 45×45 cm

Mid-level maturity: 60×45 cm

Late maturity: 60×60 cm or 75x60cm

A garden fabric set or black plastic can be used to plant cabbage in the early spring season. An x is cut in the fabric or plastic to set the cabbage transplant. Cabbage crop can be planted in succession with the time interval of every 2 weeks so the plant can be harvested at varied times of the season.

Planting Method

Morning or late evening is preferred time for transplanting process. The roots of the seedlings are dipped in Bavistin solution (2 gram/litre of solution) before transplantation. After the process of transplantation, irrigation is immediately carried out. Some countries irrigate the beds first and then the seedlings are transplanted to the bed.

Irrigation Mechanism

The cabbage is a versatile vegetable yet at the same time, it can’t suffer drying out. In the colder time of year season the interim irrigation methodology is used which takes 8-10 days. In any case, in the dry season the method must be constant.

A restricted water quantity ought to be present in furrows in order to re-hydrate the crops during dry climatic conditions. During the rainy season, a remarkable drainage technique needs to be made to deal with the situation. Areas with less rainfall should implement drizzle irrigation to cope up with the water scarcity in the plantation method.

Fertilizers and Manures

The dose of fertilizer depends on the quantity of organic manure used in the crop and the soil fertility. Approximately 4 weeks before transplanting, 15-20 tonnes of FYM is integrated into the soil for better yield. In general, for optimum yield 60-100 kg P2O5, 60-120 kg K2O, and 80-120 kg N is recommended. At the time of transplantation, entire quantity of K and P is given and half dose of N is applied. The remaining N is applied after 6 weeks from transplantation.

Apart from these fertilizers, decomposed cow dung 40 tonnes/ acre, Muriate of Potash 40kg/acre, Single Superphosphate 155kg/acre, and Urea 110kg/acre is applied. Also, look for magnesium or boron deficiency in the plant and accordingly perform soil testing.

Companions of Cabbage

Cabbage can be grown together with onions, fragrant herbs, beet roots, potatoes, sage, thyme, cucumber, dill, spinach, kale, artichoke, lettuce, and celery provide additional benefits to the cabbage plant. Try to avoid growing tomatoes, pole beans, cauliflower,and strawberries as they require the same nutrients and thus can’t be grown together.

Harvesting and Yielding

when do you harvest cabbage / cabbage harvest time?

It takes 90-120 days for the plant to get harvested. The ideal time for harvesting the cabbage is when the head portion is mature and hard and stable. The delay in harvest even for few days after it is matured can cause incidences of disease and split heads of the plant.

The harvesting of heads that are immature results in reduced yield as the heads are not yet mature and are easily prone to damage due to the delicate nature. The life of immature heads is shorter than the mature heads.

The harvesting of head is done by tilting the head on one side and then gradually cutting it with a sharp knife. The stalk of the plant has to be cut in flat form and incision should be done close to the head but stalk has to be long to preserve 2-4 wrapper leaves. The wrapper leaves or extra leaves behave as cushions that helps in protecting cabbages while handling. Certain markets desire the extra leaves for consumption or decoration purposes.

The head of the plant has to be handled carefully and should not be twisted or snapped while removing as it can cause head damage and the length of the stalk becomes inconsistent. The breakage in the stalks causes faster decay.

Depending on the maturity of the heads, the harvest is carried out as different heads require different time for maturity and thus differs in harvest time. Before packing, the harvested produce should be stored in shade conditions. The sorting and grading process is followed after harvesting and it depends on the head size.

The yielding process depends on various factors such as cultivation season, variety, and maturity group. The early varieties have an average yield of 25-30 t/ha and the late level varieties yield is 40-60 t/ha.

Common Diseases and Pests

The growth of the plant attracts various types of pests and diseases. These pests and diseases impact the plant externally as well as internally. The entire system of the plant from roots to leaf is damaged by the catastrophic elements. For instance, it can damage the essence, weight, growth rate, color, and many other things.

The pests infecting the crops are Cutworms, American Bollworms, Flea Beetles, Aphids, Cabbage worms, Nematodes, Cabbage rot maggots, Bagrada Bug, Diamond Back Moth (DBM), and Cabbage loopers.

The diseases that infect the produce are Wire Stem, White Blister, Downy Mildew, Club-root, Target spot/Leaf spot/ Ringspot, White Mould, Blackleg (Dry Rot Canker), Powdery Mildew, White leaf spot, and Dumping off. Most of the diseases are caused by Botrytis and Sclerotinia.

To control these diseases and pests, chemicals like insecticidal soaps, Spinosad, Carbaryl, Permethrin, and Neem oil extracts is used. However, not all the pests and diseases can be controlled and thus a proper consultation with agricultural institute might provide solutions.

Preserving and Storing Cabbage

Cabbage can stay for 1-2 weeks or may be longer in a refrigerator. The seeds of cabbage can be sprouted. Cabbage can also be dried and frozen. It can also be cured in brine to make processed cabbage known as Sauerkraut.

Conclusion

Cabbage farming can yield profits if best practices are implemented at every stage of the process and proper hydration is provided to the plant.

12 Best Perennial Flowers for Your Garden

What does perennial mean?

In short, these are plants which blooms in spring and summer season but not in winter or autumn season. They bloom back on its own after winter season and can live two years or even longer.

The perennial flowers are of various colours and sizes. Short but beautiful in appearance. The name itself tells that through the years which means they bloom back every year; these plants are of low maintenance once they are planted. People who wish for long lasting beauties for their garden or back yard can choose this type of plants.

Perennial plants are of two different types. Where some of them are short lived that means they only bloom for few years before they die completely. While some of them only bloom for one day each year such as Daylily.

Perennial flowers come with different shapes and sizes also in different colours. The garden with perennial flowers is feast to eyes. Perennials maintain soil cover and have deeper root systems thus provides soil stability and soil health.This means that they can tap available nutrients, enhance biodiversity making more water available to plants. So, if you do not water them regularly also, they can grow well.

These plants are deep rooting and are habituated to slow growth that means they can survive with less fertilizers and less water. Growing perennial plants and maintaining them doesn’t require much efforts. As we know these can grow two years or even longer, so you don’t need to worry about planting or re-potting each time. They bloom back on their own with the propagation of soil when planted.

12 Best Perennial flowers that You Can Grow in your Garden

If well maintained, these flowering plants can be your best houseplants indoors.

#1 Hostas

These are low maintenance plants which bring tropical look to garden with variety of green shades containing white or purple flowers that blooms in summer or fall. The leaves of these plants are lighter so that it needs more sun to thrive and can live for years if maintained properly. Also, prefers partial shade.

#2 Shasta Daisy

These are short-lived plants and grows in clumps looks like chrysanthemum but are of smaller size. These are of white colour with yellow spots in middle. These flowers can also be used for flower vases to light up surroundings in living room. They will regrow within no time; prefers full sun and blooms from late spring to fall.

#3 False Indigo

They bloom after one year of planting flowers will pop-up. The flowers are in shades of blue, purple, and green. The best benefit with these plants is they are disease and pest free, meaning that nothing can stop them from growing. They can grow up to a person’s height and fills like shrub with over years. They prefer full sun and blooms late spring to early summer.

#4 Daylily

These are popular among all the perennial flowers that are known also called as perfect perennial. This daylily’s can survive through anything like fluctuating temperatures, irregular watering as such. They come in various colours and sizes; you can choose the best option that suit your surroundings. As we know they only bloom for one day. Prefers full sun and blooms in early summer.

#5 Phlox

They look pleasing in nature but are slow growing. In summer, tall phlox are visible anywhere from three to five feet height, they pop up creating a beautiful backdrop in your garden, no matter what height they are all of these are star shaped and emit strong fragrance. They prefer full sun but can tolerate shade and blooms spring to summer.

#6 Lupines

These are frequently spotted in wild these can be growing these flowers in your garden too. They grow up to five feet tall in entire lifetime with red in colour and comes in various colours like white, yellow, pink, and purple resembling pea flowers. They need partial or full sun and blooms from spring to summer.

#7 Summer lilacs

These are also known as butterfly bush as the name itself tells that they attract tons of butterflies throughout they bloom. Flowers often come in white and dark purple but lavender pink flowers are pleasing in nature. They require annual pruning; prefers full sun and blooms from summer to fall.

#8 Hydrangeas

 These are one of my favourites among all the perennial flowers that are available. The larger the life flowers heads bend emitting elegance and charm with the touches of pink, lavender, pink, and whites. To have a long-life plant them in spring after frost or in fall before the frost. They prefer partial sun and blooms from summer to fall.

#9 Sedum

These are also known as stonecrop with star shaped clustered flowers which attracts pollinators. These are of two types low growing sedum or upright sedum you can choose the best depending on your garden size. No matter what variety you choose they bloom same flowers with succulent leaves having coloured with pink, red, or yellow flowers. They prefer full sun and blooms from summer to fall.

#10 Asters

These are also known as Astereae with star shaped flowers which look like daisies, but these are entirely different type of perennial flowers. This plan can grow anywhere of height from eight inches to eight feet and blooms in late summer. They also attract bees and butterflies for late summer pollen supply. These plants prefer full sun and blooms from late summer to fall.

#11 Allium

These are purple pompom flowers are part of onion family; flowers looking like the shape of onion. Once they are planted should left untouched for years especially deer and pests to avoid them. They have skinny stems can rise to 30 inches height, makes them stand out against ground covers. They prefer full sun and blooms from fall to summer.

#12 Lavender

Bring the sights and smells of this plant from Mediterranean to your garden by growing these plants which has fantastic aroma. This plant requires extremely high temperatures and can grow well in such regions with little rain. They prefer full sun and bloom from late spring to early summer.

All the above given are some of the best perennial plants which can be perfectly grown in your very own garden. Not only this there are so many perennial flowers that can be grown. They add colour to your garden and smells divine.

There are so many perennial flowers that are available in nature. Choose the best plant among the wide range of varieties which you feel that suits best to your garden. Happy planting!

Garlic Farming – Planting, Care, Harvesting-A Complete Guide

Garlic is an essential bulb crop grown. Its scientific name is Allium sativum. It is used as a spice too. Compared to the other bulb crops, garlic has a high nutritive value. Garlic can be  transformed into different forms like chilled garlic, dehydrated garlic flakes, dehydrated garlic powder, garlic oils etc.

They grow perfectly well 1200-2000m above sea level. These bulb crops are consumed by people as a spice. However, garlic originated in southern europe but it is being consumed all over the world these days. Garlic farming can be carried out in too hot or too cold weather conditions. Maintaining optimum temperature is necessary to get a healthy crop.

It is a low maintenance cash crop. You can gain amazing profits by planting and selling garlic. 

The U.S is the number one importer of garlic in the whole world.

Growing Garlic at Home

Soil requirements for garlic

Firstly discussing the soil, well-drained loamy soil that is rich in humus will be most suitable for garlic cultivation. The soil should also have sufficient potash. Sandy soil or loose stool is not much preferred as it can degrade the quality of the garlic and the difference in weight of the garlic bulbs could also be seen.

 In addition when heavy soil is used for garlic production, then during the harvesting period the bulbs break and become badly discolored. pH range of 5-7 pH is suitable for proper growth and yield.

Climate:

Garlic can be grown in a wide range of climatic conditions however  the extreme conditions are intolerable. A moderate temperature whether hot or cold is suitable for garlic Farming.

Bulb formation will be affected in extremely hot conditions.  Garlic needs some cool and moist conditions for growth. Bulb formation occurs when the weather’s hot  and days are long. 25-30°C is the most suitable temperature for bulb formation.

Diffrent Varieties of Garlic:

Some varieties of garlic like agrifound Parvati, agrifound Parvati 2, agrifound white, yamuna safed, yamuna safed 2, yamuna safed 3, GG-4,  Ooty 1 etc. are very productive and disease resistant. Some other varieties are G-41, bhima omkar , bhilma purple, pant lohit etc.

There are basically two main varieties of garlic that are hardneck and softneck.

1. Hardneck:

This variety of garlic is very cold and should not be grown in winters. In this flower stems are produced that have to be cut off  so that the bulbs can reach their maximum potential. However these flowers or scapes are edible mainly in summers in salads or by adding in fries.

This variety has one ring of the clove around it unlike the other variety. This variety cannot be stored for a very long time as other varieties. It’s taste is also lighter than softneck garlic. For example Korean red ,duganski, Siberian, music, chesnok red, German red, and Spanish Rosa. etc. 

2. Softneck:

Similar to it’s name, this variety remains soft after harvesting. This variety is usually a warm climate variety. Softneck garlics have a strong and intense flavor. This variety has bigger bulbs. For example silverskin, inchelium red, California Early and California late.

Next comes the great headed and the wit and wisdom 

  • Great headed: 

This garlic doesn’t taste much like garlic. It tastes more like the onion than the basic garlic. Bus and cloves are large in size. 

  • Wit and wisdom:

This variety of garlic has healing properties.

Propagation

Propagation for garlic crop is carried out by planting cloves or aerial bulbils. Most of the time aerial bulbils are preferred over cloves as they are very productive.

Garlic planting: 

For planting garlic, the land has to be thoroughly prepared by ploughing repeatedly. After that 10-20 tonnes of well-decomposed FYM should be added per hectare.

Garlic sowing can be done by three following methods : 

1. Dibbling

2. Furrow planting 

3. Broadcasting

When the garlic is planted at small gaps, then the size of the individual garlic decreases however the overall yield increases. Organic manure is also very helpful in good crop production. Hence 20 tonnes of well-decomposed FYM per hectare during field preparation.

Nitrogen, phosphorus, potassium can also be added in the field. Nitrogen has to be given in two doses. The first dose has to be given during plantation and the other one after 30 days of plantation. 10 kg of Borax has to be added per hectare for improved yield and enlarged bulb size. 

Climatic conditions for garlic cultivation: 

A combination of different climatic conditions is necessary for cultivation of garlic crops. It’s basic need is a cool and moist climate for development of bulbs and proper vegetative growth.

However, a warm climate is much suitable for maturation. But garlic cannot tolerate extreme weather conditions. Exposing the crop to low temperature for a long time can decrease the yield of the crop.

Irrigation:

Garlic crops need to be moist because of the special root development. Firstly the field has to be irrigated lightly before plantation. In garlic farming, different types of irrigation systems are used for example drip irrigation, sprinkler irrigation system and the furrow method.

A few years back it was reported that drip irrigation method has a significant effect on crop productivity. In the drip irrigation system the pipelines are laid throughout the field and crops are irrigated drop by drop. In this the wastage of water is very very less. Even evaporation is also less in this system as compared to the sprinkler system.

Although it also has some disadvantages like the watering tapes has to be replaced within 1-3 years. The droppers may also get contaminated.

Sprinkler system: in this method the water is sprinkled all over the field like rain. However this method has some disadvantages too. This method is quite expensive. In this method a lot of water is wasted and a lot of energy is also required to create the water pressure. It may have a negative impact on the cover sheet for example this may cause any disease. 

Inside dirt: It is also called an underground drip irrigation system. In this the system for irrigation purposes need not be changed for years. This system doesn’t obstruct the tillage. It doesn’t require yearly expansion. In this system the water is delivered directly to the roots.

Disadvantages of inside dirt drip irrigation system: It’s difficult to diagnose  the malfunctioning as to check one part the whole system has to be checked which is a quite difficult job. It also needs high maintenance. A care system  also has to be arranged so that the roots don’t grow inside the tubes or pipes. This system has a higher initial cost as compared to a simple drip irrigation system.

These are the few methods of irrigation. In the initial stages, irrigation has to be done every 3rd day. But afterward, the crop can be irrigated once in 15 days. These intervals go on increasing as the crop reaches its maturity stages. When the crop is ready to harvest, the irrigation needs to be stopped.

As we know that garlic being small in size is planted very close to each other so manual weeding could be a very difficult job and expensive too. And not doing this can cause a lot of damage to the crop.

So the only option left to treat weeds is a chemical method, herbicides or weedicides have to be used to vanish off the weeds. Some examples of these weeds are linuron, pendimethalin, and tribunil, etc. 

When is Garlic Ready to Harvest:

After 130-150 days of plantation the garlic crop is ready to harvest  but it also depends on the soil type, climate conditions etc. When the upper part of the crops becomes yellow and starts drying and bending. It should not be harvested too early as it results in poor quality of garlic.

Hence before digging up the whole crop, one should take out the same samples to check out the quality of the crop and also whether it’s ready for harvesting or not.

So slightly pull up one or two bulbs but one must keep in mind that digging should not be started until the top is completely Yellow. When the garlic head is divided into plump cloves and when the bulbs have thick, dry and papery covering the garlic is ready to harvest.

Timing is also very important in this process as if the harvesting is done early, the covering of the bulb would be thin and may Get damaged. And on the other hand, if harvesting is done late, the garlic along with it’s skin can split up and may become prone to diseases.

Harvesting has to be done very carefully as directly pulling the garlic out can also damage it hence it has to be first dug up very carefully and then carefully brush the garlic to remove the soil. Then hang them upside down for good air circulation.

Diseases:

Garlic is prone to some diseases like basal rot( Fusarium culmorum ), white rot ( sclerotium cepivorum) Downy mildew (Peronospora destructor), Botrytis Rot (Botrytis porri), and Penicillium Decay (Penicillium hirsutum).

Control: use disease free seeds, avoid overcrowding, one should dispose of the infected part properly, also make use of appropriate fungicides, using well drained soil can also prevent these diseases. Regular weeding should be carried out.

Seeds should be treated with warm water before sowing to avoid infections. Virus-free cloves should be planted. Soil beds should be prepared properly. These are some methods to control these diseases.

How to store garlic

Mainly garlic has to be stored in a well ventilated room. As the garlics have to be hung from the leaves so a proper support should be there in room for hanging the garlics. Cured Garlics can be stored for maximum 8 months at normal temperature.

However, before storing the garlic it should be properly cleaned and trimmed. The outer papery layer has not to be removed but the dirtiest wrappers can be separated. This garlic has to be stored in cool, dry, and dark places.

The temperature for storage should be 4°C or 40°F . In this way these can be stored for several months. It should not be stored in a moist place or refrigerator. The flavor of the bulbs enhance as it dries up.

If the crop is stored properly, it can last throughout the season. If you have to cultivate the crop next year again, then save some of the largest pieces to plant them again. 

Plant protection

Thrips can cause dropping of leaves and degrade the quality of garlic and even the storage quality too. A chemical named methyl  demeton 25EC 1 ml per litre can check on thrips. 

How profitable is garlic farming

One can get an average yield of 32-48 quintals per acre of land.

If one has to grow garlic on a commercial scale then this article may help you to know more about this. Firstly one has to get the good quality seeds according to the demand and quality. For cultivation of garlic land has to be prepared, ploughing has to be done where again some investment would be required for machinery for land preparation.

Plantation is the next step that can be done by different methods like dibbling, furrow planting, or broadcasting and each method has different costs. Then some Intercultural operations have to be carried out like weeding and earthing up etc where again some money has to be applied.

Hereby we can say that at  each step some investment is required like every other crop and it’s worth it as one earn a very good profit from this crop

Conclusion

Garlic is mainly used as a food or spice . It can also be used as a medicinal herb or oil. It has a unique taste and its own different aroma. It adds a very different flavor to food and makes it more delicious as demanding.

Beside food it is helpful in many of the medical conditions and provides great refeif. According to some preclinical studies, garlic is said to have some compounds that are helpful in cancer and cardiovascular diseases.  Garlic has some outstanding roles in human health as well as medicines and is also a very profitable crop.

Papaya Farming – Ultimate Guide

Do you want to start a Papaya farming business? Here we have listed a comprehensive business strategy roadmap for beginners with profit margin, expense, and papaya farming techniques. However, before we tell you anything about Papaya farming, let’s first get familiar with this plant and the cultivation techniques that you should use to get the maximum output.

About Papaya

Papaya (Carica papaya) could be an early-living and dying fruit tree. These fast-growing trees can bear fruit in the first year of planting, if possible. However, a multi-hour sub-freezing temperature will destroy an exposed plant. Papaya plants are so cold sensitive that they should be grown in warm areas. Throughout the year, warm areas will have papaya flowers and fruit on the plant.

How long does Papaya farm take to grow?

It may take eight to 10 months before the fruit is ready to be harvested after planting a small plant in the field. In the number of months that Papaya will develop and bear mature fruit, the environment has a role to play. In hot areas, harvesting from seed can take six to nine months, but zones that are more temperate need 9 to 11 months to be able to grow fruit from seed. When planted later in the year, the colder autumn and winter weather slows down growth and increases the time required by the plant to produce fruits for harvest.

Also Read: How to Nurture the Dragon Fruit –An Exotic Tropical Fruit

Papaya cultivation and harvesting

When the tree has bloomed, wait for five to eight months for the fruit to be harvested. This time depends on the temperature and the state of the fruit. Papaya trees bloom during the year. After the first year, the fruit and flowers on the tree should be supplied continuously.

The form of flowers on a tree decides whether, after many months, you can see fruit. If the tree has male flowers only, it won’t be fruitful. Trees that have only female flowers, or both, can bear fruit if adequately pollinated. Vigorous flora hangs from long stalks, while female vegetation has short stalks and a bulge at the ovary’s base.

Edible flowers like female flowers are available on short stalks and have the stems that are typical of male flowers.

How to know if your papaya plant has fully grown-up

As there are often fruits in various stages of tree development, it will help to recognize the ripe ones when to pick them. The fruit’s color is the primary measure of maturity. Choose fruits of one to three-fourths of the yellow rind.

The green fruit is not ripe and after harvest does not sweeten. Depending on your growing conditions, 30 to 150 fruit can be obtained each year from your papaya tree.

Papaya farming blueprint for business

You must conduct an economic analysis to validate the use of various production inputs and the revenues received. Fixed costs are primarily in initial land growth in papaya farming. Fixed prices may include fixed labor salaries and repair of farm machinery and other miscellaneous expenses.

The cost varies between manufacturing methods and input costs, including fertilizers and pesticides. It also includes payments for irrigation, intercultural, mining, transportation, and other management activities. Calculate the gross production expense. Calculate and record the anticipated profitability and ROI in your business plan.

The more uses, the better business prospect
  • Papaya is used in many ways. And, its several uses opens the opportunity to explore the business scope from the same. So, let’s know more about it.
  • Sometimes Papaya is taken in the breakfast or dessert fruit.
  • Papaya is also loved as a diet fruit.
  • The culled Papaya can be fed to the pigs and or other cattle.
  • Papaya is used as an ingredient in a variety of fruits across the world whereas unripe fruits and leaves are also used as a vegetable.
  • Papain, which is milky latex obtained from the Papaya after a process of the incision. And, then latex is dried and sold in the powder form.
  • The latex powder is then used in digestion aids, tooth-cleaning powders, and so on.

Papaya farming and health benefits

1. Papayas are high in starch, vitamin C, and antioxidants that avoid arterial cholesterol build-up.

2. Single Papaya will meet more than 200% of your daily vitamin C requirements, which makes it ideal for developing a more robust immune system.

3. Papayas have a low sugar content (8.3 gm. in a cup of Papaya) and glycemic index. This property produces excellent papaya fruits for diabetics.

4. Papayas are rich in vitamin A and flavonoids such as beta-carotene, zeaxanthin, cryptoxanthin, lutein that keep mucous membranes safe in the body.

5. Just 120 calories include one medium-sized Papaya. It also helps in the pursuit of weight loss.

6. Papaya is rich in many nutrients, such as vitamin C, which will keep you stress-free.

Papaya cultivation and agro-climatic condition

A tropical fruit, Papaya. Sub-tropical sections, however, also develop well. It’s frost-sensitive. The ideal temperature is 25-30 ° C and 16 ° C minimum. Appropriate pH is between 6 and 6.5. The foothills enjoying mild winters are suitable for papaya cultivation. Low temperature and frost restrict higher-altitude cultivation. Excessively cold nights cause slow fruit maturation and mediocre quality in the winter season.

papaya plant

Papaya cultivation and soil suitability

The right soil type is well-drained or sandy loam soil with enough organic matter. Sticky and calcareous soils aren’t pleasant because the soil can trap rainwater. It could be lethal to the crop. In this scenario, create a better-raised ground and drainage ditch. Furthermore, you must keep the field with enough soil moisture required to grow papaya plants.

Also, a ripening dry climate is fantastic for fruit quality. Additionally, in the same region, continuous cropping can result in reduced production. A slightly messy field is compared to a perfectly flat area. The region’s hilly soil is ideally suited to well-drained organic matter.

Steps involved in papaya farming

Now, it’s time to dive deeper into the steps involved in papaya farming. Therefore, those to better utilize your farming skills.

Propagation

You’ll need seed papaya propagation. Second, you must collect seeds. You can receive from ripe, big, healthy fruits, mainly from pest-free female plants. Often seeds fail to germinate because seed viability is lost in about 45 days.

Germination of seed

The equilibrium temperature is 21-27 ° C, and 19-29 ° C of extreme emergence. It takes 1-4 weeks after sowing, depending on the weather. Treat with Thiram (TMTD) W.P. Until, sowing young to combat fungal diseases.

Sowing the seed

In 8 – 9 cm long, 8 cm long, and 8 cm high or black soft plastic containers, you can use the clear plastic bag. The bags require drainage space. You may also use a plastic seedling tray. It is a new form of seedling for good seedlings.

Transplantation

When the seedlings are 15-20 cm tall, a razor blade will open the bag. Now the seedlings are set for evening transplantation in pits. You may plant three seedlings about 15 cm apart in each hole. Watering is vital after transplantation for rapid recovery from transplant shock.

Adding Manure

The plant requires continuous fertilization as fruiting begins at maturity. From day one, you will prepare for fertilization. Because a five-month transplant-to-first flowering cycle is essential for papaya plant nutrition. You will stop manuring 6 months before harvesting the crop.

Now it’s about cropping

Male papaya plants typically thrive and start flowering after three months of transplantation. When their presence is detected, you will delete most of them. Of successful female flowers, however, around one male tree is kept for every ten female trees. Papaya starts flowering about five to six months after transplantation.

Irrigation

Currently, irrigate every winter ten days or every summer week. However, it varies with soil, climate, and irrigation methods. You may use a loop, furrow, or drip irrigation. Be sure, however, to avoid water meeting the stem. Irrigation can avoid frost damage to plants.

Papaya cultivation and plant protection

You need proper disease management to get the optimum yield. The major diseases are powdery mildew (OidiumCaricae), anthracnose, and stem rot.

Another possible condition is a root-knot nematode (Meloidogyne incognita) frequently and gently extracts weeds at the early stage. Never deep soil tillage, however, because the plant has shallow roots. With 43% lasso E.C, you can apply herbicide once before an emergency.  

Harvesting

Overall, Papaya takes six months to bloom. And, five more for processing. However, it can vary with climatic conditions and management. For shipment to distant markets, fruits should be harvested when the apical starts to turn yellow, and latex is no longer milky.

In the cold months, fruits will stay on the tree to produce deeper colors and get a better flavor. In papaya cultivation, in the first 15 to 18 months, a tree with proper management produces 25-40 fruits weighing 40-60 kg.

Pest and disease control

The frequently found pests are fruit flies, aphids, red spider mite, stem borer, gray weevil, snail, and grasshoppers. They are all regulated by spraying prophylactic substances including 0.3% dimethoate and 0.05% methyl gemstone.

The growing diseases are powdery mildew, anthracnose, damping off, black spot, nematode, and stem rot. Essential control measures are growing disease-resistant crops, choosing well-drained soils, practicing crop rotation, and growing seedlings or plants under net households.

Intercropping with a barrier crop such as corn mulching the bed with silver and plastic film that immediately destroys infected plants and replants the crop to avoid this virus infection.

Yield from papaya farming

All cultivar yields are different. Suitable plants are estimated to produce 34 kg fruit per plant per year, which amounts to around 38,000 kg fruit per hectare. The total area under Indian papaya farming has increased in recent years. Papaya’s nutritional and medicinal value has resulted in heavy consumption within the country, i.e., only 0.08 percent is exported. Thanks to conventional agricultural methods, exports are also less competitive. Delhi and Mumbai are Papaya’s main markets. The country’s overall production accounts for 54-lakh tones/year.

What is the cost of papaya farming?

Papaya farming costs will rely primarily on the farmland location. The cost components are farmland acquisition, planting expenses, irrigation expenses, fertilization facilities like labor shed, and land growth. Other than farmland costs, papaya farming costs aren’t much.

How much profit can you mine?

The margin of profit in papaya farming depends on the land area and the diversity of Papaya growth. In general, papaya farmers get their entire investment payback in around 2-2, 5 years. However, in the end, we would say that the amount of profit entirely depends upon your practices and techniques you use for farming.