The Pros and Cons of Planting a Chicken Garden

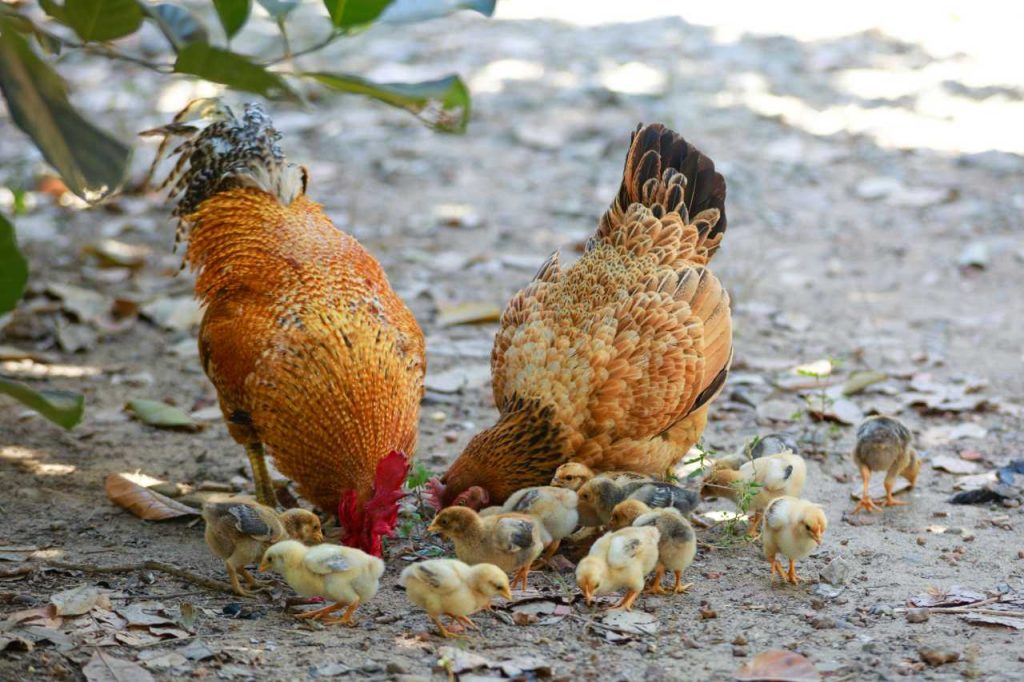
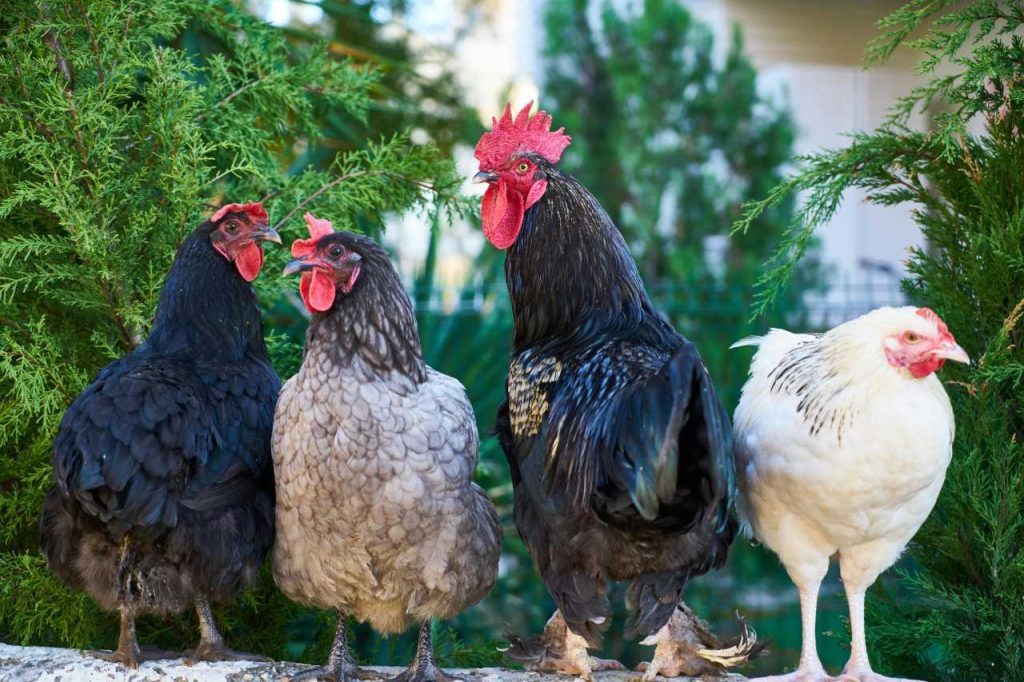
Creating a chicken garden is becoming a popular trend among backyard chicken keepers and small-scale poultry farmers. The idea behind it is to plant a garden that not only provides fresh produce for your household but also acts as a natural, nutrient-rich supplement for your chickens.

A well-planned chicken garden can be a sustainable way to boost your flock’s diet, improve their living environment, and even cut down on feed costs. However, like any farming activity, there are both benefits and challenges to consider before you take the plunge.

In this detailed article, we’ll look at the pros and cons of planting a chicken garden, helping you decide if it’s the right fit for your poultry-keeping setup.

What Is a Chicken Garden?

Before we delve into the pros and cons, it’s important to understand what a chicken garden entails. A chicken garden is a designated area where you grow plants that are safe and beneficial for chickens to eat. These gardens are typically designed to provide fresh greens, herbs, fruits, and vegetables that supplement a chicken’s diet. Additionally, chicken gardens can include plants that attract beneficial insects, create shade, and improve the overall environment of the chicken run.

Now, let’s explore the benefits and drawbacks of establishing a chicken garden.

Pros of Planting a Chicken Garden

1. Natural and Nutrient-Rich Diet

One of the most significant benefits of planting a chicken garden is the ability to provide your chickens with a natural and nutrient-rich diet. Fresh greens, herbs, and vegetables are excellent sources of vitamins, minerals, and antioxidants that can improve your chickens’ health and egg production.

For example, leafy greens like kale and spinach are high in calcium, which is essential for strong eggshells, while herbs like oregano and thyme have natural antibacterial properties that can boost the immune system.

Moreover, chickens are omnivores and enjoy a varied diet. A chicken garden can offer them a diverse array of food options, keeping their diet balanced and reducing the need for commercial feed. The diversity of plants can also encourage natural foraging behavior, which is beneficial for their physical and mental well-being.

2. Cost Savings on Chicken Feed

Another advantage of a chicken garden is the potential for cost savings on chicken feed. While you may still need to provide some commercial feed, the fresh produce from the garden can significantly reduce the amount needed. Over time, this can lead to substantial savings, especially if you have a large flock. Additionally, growing your own chicken feed can be more economical in the long run compared to purchasing organic or specialty feeds from the market.

3. Environmental Enrichment for Chickens

Chickens are naturally curious and active animals that benefit from an enriched environment. A chicken garden offers an engaging space where chickens can scratch, peck, and forage. This not only keeps them physically active but also mentally stimulated, reducing the likelihood of boredom-related behaviors such as feather pecking or egg eating.

Moreover, a garden can provide shade, shelter, and even dust-bathing areas for the chickens, enhancing their overall living conditions. Plants like sunflowers, corn, and amaranth can create natural shade, while soft soil areas can serve as dust baths, helping chickens keep their feathers clean and free from parasites.

4. Sustainability and Self-Sufficiency

For those interested in sustainable living, a chicken garden is a step toward greater self-sufficiency. By growing your own chicken feed and reducing reliance on store-bought products, you can decrease your environmental footprint. This is particularly important for those who are mindful of the impact of industrial agriculture on the environment.

Furthermore, a chicken garden can be integrated into a broader permaculture system, where plants, animals, and waste are recycled to create a closed-loop, sustainable farming practice. For example, chicken manure can be composted and used to fertilize the garden, while the garden, in turn, provides food and shelter for the chickens.

5. Improved Egg Quality

A diet enriched with fresh greens and herbs can lead to better egg quality. Chickens that have access to a diverse range of plants often produce eggs with richer yolk color, firmer whites, and better overall flavor. The presence of certain nutrients in plants, such as omega-3 fatty acids from flaxseed or other seeds, can also improve the nutritional profile of the eggs.

Cons of Planting a Chicken Garden

1. Time and Labor-Intensive

One of the main drawbacks of establishing a chicken garden is the time and effort required. Gardening itself is a labor-intensive activity, and when you add the responsibility of maintaining a chicken-friendly garden, the workload increases. You’ll need to regularly water, weed, prune, and protect the plants, all while managing your chickens.

Additionally, chickens are notorious for their ability to destroy plants. They love to scratch the soil, dig for insects, and peck at tender shoots, which can quickly turn a well-tended garden into a barren patch of dirt. To prevent this, you may need to invest in protective barriers or designated planting areas, adding to the overall maintenance.

2. Potential for Overgrazing

Chickens can be voracious eaters, and if not managed properly, they can easily overgraze a garden. Overgrazing occurs when chickens eat plants faster than they can grow back, leading to the depletion of garden resources. This can result in bare patches of soil, increased erosion, and a lack of fresh greens for your flock.

To mitigate this risk, you’ll need to carefully plan and rotate grazing areas, ensuring that plants have time to recover. This requires a good understanding of plant growth cycles and careful management of your chickens’ access to different parts of the garden.

3. Initial Costs and Setup

While a chicken garden can save money in the long run, the initial setup can be costly. You’ll need to invest in seeds, soil amendments, fencing, and other gardening supplies. If you’re new to gardening, you may also need to purchase tools and equipment, which can add to the expenses.

Moreover, depending on your climate and soil conditions, you may need to invest in irrigation systems, shade structures, or protective coverings to ensure the success of your garden. These upfront costs can be a barrier for some chicken keepers, especially those on a tight budget.

4. Risk of Toxic Plants

Not all plants are safe for chickens, and planting the wrong species can pose serious health risks. Certain plants, such as nightshade family members (e.g., tomatoes, potatoes, and eggplants), azaleas, rhubarb leaves, and foxglove, are toxic to chickens and can cause illness or death if ingested.

Therefore, careful planning and research are required to ensure that your garden is free from harmful plants. This adds another layer of complexity to the process, as you’ll need to be vigilant about what grows in your garden and remove any potentially dangerous plants immediately.

5. Weather and Pest Challenges

Weather conditions and pests can also pose challenges to a chicken garden. Extreme weather, such as droughts, heavy rains, or frost, can damage or destroy crops, leaving your chickens without the fresh produce you intended to provide. In regions with harsh climates, maintaining a productive garden year-round can be difficult.

Pests, including insects, rodents, and larger animals, can also threaten the success of your garden. While chickens are natural pest controllers, they may not be able to fend off all invaders, especially if you’re growing a wide variety of plants. This means you may need to implement additional pest control measures, which can add to the time and cost of garden maintenance.

Conclusion

Planting a chicken garden offers a range of benefits, from providing a natural and nutrient-rich diet for your flock to enhancing their environment and reducing feed costs. It aligns well with sustainable living practices and can improve the quality of the eggs your chickens produce. However, it also comes with challenges, including the time and labor involved, the risk of overgrazing, and the potential for toxic plants and pest problems.

10 Chicken Facts You Should Know

Chickens are fascinating creatures that have become integral to agriculture and domestic life worldwide. While many people are familiar with the basics of chickens—such as their role in egg production and as a source of meat—there’s so much more to these birds than meets the eye.

Whether you’re a seasoned poultry enthusiast or just curious about these charming animals, here are ten chicken facts that will enrich your understanding of them.

1. Chickens Are Descendants of Wild Birds

Chickens are domesticated descendants of the red junglefowl, a wild bird native to Southeast Asia. Genetic studies indicate that domestication began over 8,000 years ago. Understanding this lineage helps explain some of their behaviors and characteristics.

  • Wild Origins: The red junglefowl is known for its adaptability, which is a trait still found in many domesticated breeds today. Chickens have inherited various survival instincts from their wild ancestors, such as foraging for food and being alert to potential predators.
  • Evolutionary Traits: Modern chickens exhibit behaviors that reflect their wild ancestry, such as dust-bathing, foraging, and establishing social hierarchies. These traits can be observed even in domestic breeds.

2. Chickens Are Social Animals

Chickens are highly social creatures that thrive in flocks. They have a complex social structure known as a “pecking order,” which determines their hierarchy and social interactions. Each chicken has a specific rank, and this structure helps minimize conflict within the group.

  • Social Bonds: Chickens form strong social bonds with their flock mates. They communicate through vocalizations, body language, and even facial expressions, creating a cohesive community. Observing these interactions can be quite fascinating, as it reveals the depth of their social dynamics.
  • Stress Reduction: Keeping chickens in a group helps reduce stress, as they feel safer and more secure when surrounded by their flock. Chickens will often comfort each other when feeling threatened or stressed, showcasing their empathetic behavior.

3. Chickens Can Recognize Human Faces

Research has shown that chickens have impressive cognitive abilities, including the capacity to recognize and remember human faces. They can differentiate between familiar and unfamiliar people, which is particularly useful for farmers and poultry keepers.

  • Recognition Skills: Chickens can remember up to 100 different faces, including humans and other chickens. This ability helps them navigate their social environment effectively. Farmers often notice that their chickens can recognize them and respond differently to familiar faces compared to strangers.
  • Positive Reinforcement: Chickens often respond better to caregivers who treat them kindly and provide food rewards. Building a trusting relationship with your chickens can lead to calmer and more sociable birds.

4. They Lay Eggs Regularly

Chickens are known for their ability to lay eggs consistently. The average hen can lay about 300 eggs per year, depending on the breed and care. Factors such as age, diet, and lighting conditions can influence egg production.

  • Egg Color Variations: Chicken eggs come in various colors, including white, brown, blue, and green. The color is determined by the breed of the chicken and does not affect the taste or nutritional value of the egg. The breed of chicken you choose can impact not only the color but also the size and flavor of the eggs.
  • Egg-laying Cycle: Hens typically lay eggs every 24-26 hours. The laying cycle can be influenced by factors like stress, temperature, and daylight exposure. Providing adequate lighting and reducing stress can help maintain consistent egg production.

5. Chickens Have Unique Personalities

Just like other animals, chickens have unique personalities and temperaments. Some may be friendly and curious, while others can be shy or aggressive. Understanding their individual personalities can enhance the experience of keeping chickens.

  • Curiosity: Chickens are naturally curious and love to explore their environment. Providing them with interesting activities and toys can keep them engaged and mentally stimulated. For example, hanging vegetables or using treat dispensers can encourage foraging behavior.
  • Social Interaction: Some breeds are more sociable than others. For example, breeds like the Orpington and Silkie are known for their friendly and calm demeanor, making them excellent pets. Observing the interactions between different breeds can provide insights into their social behaviors.

6. Chickens Have Excellent Hearing

Chickens possess a keen sense of hearing, allowing them to detect sounds that humans cannot. They can hear a range of frequencies and are particularly responsive to higher pitches. This heightened sense helps them stay aware of their surroundings and potential dangers.

  • Alarm Calls: Chickens have distinct vocalizations for different situations, including alarm calls that warn their flock of predators. Understanding these sounds can help caregivers ensure the safety of their flock. Chickens will often sound an alarm call when they see a hawk or other potential threat.
  • Communication: Chickens communicate using over 30 different vocalizations, each serving a unique purpose, such as attracting mates, signaling distress, or indicating hunger. Being attuned to these vocalizations can enhance the bond between chickens and their caretakers.

7. They Have a Diverse Diet

Chickens are omnivores, meaning they eat a wide variety of foods. Their diet typically consists of grains, seeds, fruits, vegetables, insects, and even small animals. This varied diet is essential for their health and egg production.

  • Foraging Behavior: Chickens love to forage for food, which stimulates their natural instincts. Providing access to free-range environments allows them to explore and find additional food sources. This natural behavior contributes to their overall well-being and happiness.
  • Balanced Nutrition: A balanced diet is crucial for maintaining the health and productivity of chickens. Commercial feed can be supplemented with kitchen scraps and garden produce to enhance their diet. Ensuring they receive a variety of nutrients helps promote optimal health and egg production.

8. Chickens Can Live for a Long Time

With proper care, chickens can live for several years. The average lifespan of a chicken is between 5 to 10 years, depending on the breed and environmental conditions. Some heritage breeds may even live longer.

  • Care Requirements: Regular veterinary care, a balanced diet, and a safe living environment contribute to the longevity of chickens. Providing enrichment activities, such as perches and dust baths, can also help keep them physically and mentally healthy.
  • Retirement Hens: Many backyard chicken keepers allow their hens to live out their natural lives, even after they stop laying eggs. Retired hens can still be valuable members of the flock and make wonderful pets, often bonding closely with their human caretakers.

9. Chickens Contribute to the Ecosystem

Chickens play a vital role in sustainable agriculture and gardening. They help control pests, fertilize the soil, and contribute to composting efforts. Their natural foraging behavior can improve the health of gardens and farms.

  • Pest Control: Chickens love to eat insects, helping to reduce pest populations in gardens and yards. This natural pest control reduces the need for chemical pesticides, making them an eco-friendly addition to any garden.
  • Fertilization: Chicken droppings are rich in nutrients and can be composted to create high-quality fertilizer for gardens. Their foraging activities also help aerate the soil, promoting healthy plant growth.

10. Chickens Are Popular Worldwide

Chickens are one of the most widely kept domesticated animals around the globe. They are found in various cultures, serving different purposes, from providing food to serving as pets or even participating in traditional ceremonies.

  • Cultural Significance: In many cultures, chickens symbolize prosperity, fertility, and abundance. They hold important roles in festivals, rituals, and culinary traditions. In some cultures, the presence of chickens is believed to bring good fortune.
  • Economic Importance: The poultry industry is a significant contributor to the economy, providing employment and food security in many regions. Raising chickens can be a profitable venture for small farmers and homesteaders, offering a sustainable source of income and food.

Conclusion

Chickens are more than just a source of eggs and meat; they are complex animals with unique personalities and behaviors. Understanding these fascinating creatures enhances the experience of keeping chickens and helps promote their welfare. By appreciating the intricacies of chicken life, we can ensure they thrive in our care, contributing to sustainable practices and enriching our lives with their presence. Whether you’re a backyard flock keeper or simply a chicken enthusiast, these facts deepen our appreciation for these remarkable birds, allowing us to forge stronger connections with them and enjoy their companionship in our lives.

How to Create a Backup Plan for Chicken Emergencies

Keeping chickens is not only a rewarding hobby but also a commitment that comes with various responsibilities, especially when it comes to their health and safety. Emergencies can arise unexpectedly, ranging from health issues and natural disasters to accidents and supply chain disruptions.

To ensure the well-being of your flock, creating a comprehensive backup plan is essential. Here’s an in-depth guide to help you prepare for chicken emergencies effectively, ensuring that your chickens remain safe and healthy.


1. Assess Potential Risks

The first step in creating a backup plan is to conduct a thorough assessment of the potential risks that could impact your chickens. Understanding these risks allows you to tailor your emergency strategies accordingly. Here are some common emergencies to consider:

  • Health Issues: Chickens can be susceptible to various diseases, parasites, and injuries. Common ailments include respiratory infections, coccidiosis, and mites. Outbreaks can happen unexpectedly, leading to significant health problems within your flock.
  • Environmental Hazards: Extreme weather conditions, such as heatwaves, heavy rain, snow, or cold spells, can threaten your chickens’ safety. Additionally, predators like raccoons, hawks, or stray dogs can pose a risk, especially during nighttime or in vulnerable conditions.
  • Natural Disasters: Floods, fires, earthquakes, or severe storms can disrupt your chicken’s habitat, leading to the loss of shelter and food sources. Knowing the natural disaster risks in your area can help you prepare accordingly.
  • Food Supply Disruptions: Shortages of feed or clean water can occur due to supply chain issues, market fluctuations, or increased demand. In a pinch, having alternative sources of nutrition or emergency feed stored can be a lifesaver.

By understanding these risks, you can develop a more tailored and effective emergency plan for your chickens.


2. Establish an Emergency Contact List

An emergency contact list is crucial for a swift response during a crisis. Compile a list of important contacts that may need to be reached during an emergency, including:

  • Veterinarian: Identify a veterinarian who specializes in poultry or has experience with chickens. Having their contact information readily available can save precious time during health emergencies, ensuring your chickens receive prompt care.
  • Local Animal Control: For issues related to predators or stray animals, knowing who to call can help protect your flock. Many local animal control agencies can assist in managing wildlife threats.
  • Neighbors or Friends: Identify nearby neighbors or friends who can assist in an emergency, especially if you’re unavailable. Having a trusted friend or neighbor who understands chicken care can make a significant difference.
  • Local Feed Suppliers: Keep a list of local feed suppliers to ensure you can quickly access food and supplies when needed. Establishing a good relationship with suppliers can also provide insights into future supply chain issues.

Make sure this contact list is easily accessible, perhaps on your phone or posted in a prominent place in your coop, and share it with anyone involved in your chickens’ care.


3. Create a Health Care Plan

Developing a comprehensive health care plan is crucial for managing potential health emergencies. This plan should include:

  • Routine Check-Ups: Schedule regular veterinary visits to keep your flock healthy and catch any potential issues early. Regular check-ups can help identify problems before they become serious.
  • Vaccination Schedule: Stay updated on vaccinations necessary for your chickens, such as those for Marek’s disease, avian influenza, or Newcastle disease. Consult with your veterinarian to establish a vaccination schedule based on your flock’s needs.
  • First Aid Kit: Assemble a chicken first aid kit that includes essential items like antiseptic, bandages, and medications for common issues (e.g., electrolytes for dehydration, antibiotics for infections). Familiarize yourself with how to use these supplies effectively.
  • Signs of Illness: Educate yourself on the common signs of illness in chickens, such as lethargy, changes in appetite, respiratory issues, or abnormal droppings. Early detection can lead to more effective treatment and recovery.

By having a proactive health care plan, you can minimize the impact of health emergencies on your flock and ensure that they receive timely care when needed.


4. Prepare for Environmental Hazards

Environmental hazards can pose a significant risk to your chickens, so it’s important to prepare accordingly:

  • Shelter: Ensure that your chicken coop is sturdy and weather-resistant. Inspect it regularly for any potential vulnerabilities, such as leaks or weak points that could allow predators to enter. Reinforce the coop and run as needed.
  • Ventilation: Proper ventilation is crucial to prevent overheating during hot weather. Ensure that your coop has adequate airflow while still providing protection from predators. Consider installing adjustable vents that can be opened or closed based on the weather conditions.
  • Predator Prevention: Install sturdy fencing around your chicken coop and run. Use buried fencing to prevent digging and consider adding motion-activated lights or sound devices to deter predators. Regularly inspect the area around your coop for signs of predator activity and make necessary adjustments.
  • Emergency Shelter: Consider having a temporary shelter or portable coop on hand that can be quickly set up in case of extreme weather or a predator threat. This shelter can be made from easy-to-assemble materials and should be lightweight for easy transport.

Taking these proactive steps will help safeguard your chickens from environmental dangers and ensure they have a secure living space.


5. Plan for Food and Water Supply

A reliable food and water supply is essential for your chickens’ well-being, especially during emergencies. Consider the following:

  • Stock Up on Supplies: Keep an emergency stockpile of chicken feed and clean water. A general rule of thumb is to have at least a week’s worth of feed stored, as well as several gallons of fresh water. This can be especially important during natural disasters when access to supplies may be limited.
  • Water Sources: Ensure you have backup water sources, such as large containers, buckets, or rain barrels, to provide water in case of supply interruptions. Regularly check and clean water sources to prevent contamination and ensure they are filled during emergencies.
  • Feeding Schedule: Maintain a consistent feeding schedule to ensure your chickens are well-nourished. Familiarize yourself with the amount of feed your flock requires daily, taking into account factors like age, breed, and production needs (e.g., layers vs. broilers).
  • Alternative Nutrition Sources: Consider keeping alternative sources of nutrition, such as grains, kitchen scraps (vegetable peels, grains), or even sprouted seeds, to supplement their diet in case of feed shortages.

By planning for food and water supplies, you will keep your flock healthy and well-nourished during emergencies.


6. Create an Evacuation Plan

In the event of a natural disaster or other emergencies, having an evacuation plan is crucial. Consider the following steps:

  • Identify Safe Locations: Determine where you could relocate your chickens in case of an emergency. This could be a friend’s farm, a neighbor’s property, or an emergency shelter designated for livestock.
  • Transportation: Have a means of transport ready, such as carriers or crates, to safely transport your chickens if needed. Make sure these are easily accessible and familiar to your birds to reduce stress during transport. Practice loading your chickens into these carriers to make the process smoother in an emergency.
  • Practice Evacuation Drills: Conduct practice drills to ensure that you and anyone helping you can quickly and efficiently evacuate the chickens. This will help reduce panic and confusion during a real emergency.
  • Emergency Supplies: Prepare an emergency kit that includes food, water, and necessary health supplies for your chickens during evacuation. Having these essentials on hand will make the transition easier.

An effective evacuation plan will ensure the safety of your flock during emergencies and provide peace of mind knowing you’re prepared.


7. Document Important Information

Keeping a record of important information related to your chickens can assist in emergencies. This documentation can include:

  • Health Records: Maintain records of vaccinations, health check-ups, and any medications administered. This information will be useful for your veterinarian if issues arise and can help streamline treatment.
  • Contact Information: Keep a list of all emergency contacts and their roles in your backup plan. This will streamline communication during a crisis, ensuring everyone knows their responsibilities.
  • Feeding and Care Instructions: Document feeding schedules, dietary needs, and care instructions to share with anyone who may need to care for your chickens in your absence. This can be especially helpful for neighbors or friends stepping in during emergencies.
  • Emergency Procedures: Write down detailed emergency procedures, including steps to take for various situations (e.g., disease outbreaks, natural disasters). Share these procedures with your emergency contacts.

Having organized documentation will facilitate quick decision-making during emergencies and help maintain the care standards for your chickens.


8. Stay Informed and Educated

Continuously educate yourself about chicken care and emergency preparedness. This ongoing education can help you feel more equipped to handle any situation. Consider the following approaches:

  • Researching Best Practices: Read articles, books, and join online forums or local groups focused on chicken care and emergency management. Understanding the latest research and best practices can enhance your preparedness.
  • Attending Workshops: Participate in workshops or webinars related to poultry health, emergency preparedness, and sustainable farming practices. Learning from experts in the field can provide valuable insights and practical strategies.
  • Networking: Connect with other chicken owners to share experiences and strategies for managing emergencies effectively. Joining local poultry clubs or online communities can foster a sense of support and resource sharing.
  • Emergency Training: Consider training courses in basic animal care, first aid, and emergency response. This knowledge can significantly enhance your ability to handle emergencies with confidence.

Staying informed will empower you to respond to emergencies confidently and efficiently, ensuring the health and safety of your chickens.


Conclusion

Creating a backup plan for chicken emergencies is essential for the health and safety of your flock. By assessing potential risks, establishing an emergency contact list, developing a health care plan, preparing for environmental hazards, and documenting important information, you can mitigate the impact of unforeseen circumstances. Staying informed and educated about chicken care will further strengthen your ability to respond to emergencies. With a solid backup plan in place, you can ensure that your chickens thrive, no matter what challenges arise.

Chicken Boredom Busters to Keep Them Entertained

Chickens are curious and intelligent creatures that require more than just food, water, and shelter to thrive. When they get bored, it can lead to unhealthy behaviors like feather pecking, egg eating, or even aggression toward other flock members. In their natural environment, chickens would spend hours foraging and exploring, so it’s essential to keep them entertained, especially if they’re confined to a coop or run for extended periods.

To maintain a happy, healthy flock, you’ll need to introduce boredom busters—fun and stimulating activities or objects that keep your chickens engaged. In this guide, we’ll explore a variety of ideas to keep your chickens entertained, so they stay active, healthy, and productive.

Why is Chicken Boredom a Problem?

Boredom can negatively impact your flock in multiple ways. If chickens aren’t given the mental and physical stimulation they need, they might start developing bad habits or health problems. Here are some of the common issues related to chicken boredom:

  • Feather Pecking: Bored chickens may start pecking at each other’s feathers, causing injury and stress.
  • Egg Eating: If a chicken becomes bored, it may start eating its own eggs or the eggs of others.
  • Aggression: Boredom can lead to aggression and fighting among flock members.
  • Weight Gain or Loss: Without regular activity, chickens may become either overweight or lose weight due to stress or lack of exercise.

Preventing boredom is a simple but essential aspect of raising chickens. With a few easy boredom busters, you can keep your flock entertained, healthy, and happy.

1. Add Perches and Ladders for Climbing Fun

Chickens love to climb and perch. Giving them different levels and places to roost will keep them physically active and mentally stimulated. Add perches and ladders inside the coop or run, varying the height to make it more challenging and fun for your chickens.

  • Natural Perches: Use tree branches or fallen logs to create natural perches. Chickens will enjoy hopping on and off, and it mimics the environment they would find in the wild.
  • Swinging Perch: You can make or buy a swinging perch that moves slightly when chickens jump on it. The movement adds an extra level of entertainment and keeps them engaged.
  • Ladders: Simple wooden ladders or ramps give your chickens something to climb, helping to prevent boredom while also offering exercise.

2. Offer Treat Toys and Feeders

Chickens love food, so using treats as a way to engage them can be a fun boredom buster. Here are a few treat-based activities that will keep your chickens entertained:

Hanging Treats

Hang treats like leafy greens (cabbage, kale, or lettuce) from a string just above their reach. Chickens will enjoy jumping to grab bites of the treat. It keeps them busy for hours, and they get some extra nutrition in the process.

  • DIY Veggie Feeder: You can create a vegetable feeder by poking a hole through a cabbage or lettuce head, threading string through it, and hanging it in the coop or run.

Treat Balls

A treat ball is a rolling ball with small holes that you can fill with chicken feed, seeds, or scratch. As the chickens push the ball around, treats fall out. This gives them a chance to forage, stimulates their natural instincts, and keeps them moving.

  • DIY Treat Ball: You can make your own treat ball using a hollow plastic toy or container with small holes drilled in it. Fill it with mealworms, seeds, or pellets.

Treat Puzzles

There are also chicken-specific treat puzzles available that challenge your chickens to peck or pull to release treats. These toys are a fantastic way to stimulate your chickens mentally and physically.

3. Provide Dust Bath Areas

Chickens love taking dust baths to clean their feathers and get rid of parasites. Dust baths are not only essential for their hygiene, but they also provide entertainment and relaxation. Create a dedicated dust bath area to keep your chickens engaged.

  • Simple Dust Bath: In a shady corner of the run, place a shallow container filled with sand, dirt, and a bit of wood ash or diatomaceous earth. Chickens will spend hours rolling around and fluffing their feathers.
  • Rotating Dust Baths: You can change the location of the dust bath area occasionally to keep things fresh for your chickens. They’ll enjoy exploring new spots to bathe.

4. Use Mirrors and Reflective Surfaces

Chickens are naturally curious about shiny objects and their own reflections. By placing a mirror or reflective surface in their coop or run, you can offer them endless entertainment.

  • Small Mirrors: Attach a small, unbreakable mirror to the side of the coop or run. Chickens may peck at their reflections, interact with what they think is another chicken, and stay entertained.
  • Reflective Objects: Try hanging a CD or shiny piece of metal at chicken height. The way the light reflects off these objects will catch their attention and encourage them to investigate.

5. Scatter Scratch Feed for Foraging

Chickens are natural foragers, and scratching at the ground is a big part of their daily activity. Even if your chickens don’t have a large free-range area, you can simulate foraging by scattering scratch grains or mealworms in the run or coop. This gives them the opportunity to hunt for food, which keeps them occupied and satisfies their natural instincts.

  • Daily Foraging Time: Set aside time each day to scatter a small amount of scratch feed in different areas of the coop or run. Vary the location so they don’t know where to expect it, which keeps things exciting.
  • Layer Feed with Straw: Another way to encourage foraging is by sprinkling some feed into a pile of straw or leaves. The chickens will spend hours scratching through the material, looking for hidden treasures.

6. Introduce New Environments and Hiding Spots

Chickens love exploring new spaces, so periodically rearranging their environment can help stave off boredom. Adding new hiding spots and structures for them to investigate will keep them curious and engaged.

  • Cardboard Boxes or Tunnels: Provide simple cardboard boxes or tunnels for your chickens to explore. They’ll enjoy crawling through, jumping on top, or hiding inside.
  • Logs and Stumps: Adding logs, stumps, or branches to the run will give chickens something new to peck at and climb on. Every time you introduce a new item, it’ll be an adventure for them.
  • Rotating Structures: If you have a chicken tractor or mobile run, rotate it to different areas of the yard. This allows chickens to explore new patches of grass, bugs, and dirt.

7. Provide Toys and Chicken Swings

Toys aren’t just for pets like dogs or cats—chickens enjoy them too! Introducing simple toys into your chicken run can offer hours of fun and exercise for your flock.

  • Chicken Swings: A chicken swing is exactly what it sounds like—a swing for your chickens to perch on and enjoy. Chickens love balancing on them and swinging slightly, especially when they’re feeling playful.
  • Hanging Mobiles: You can create hanging mobiles using natural materials like pinecones, twine, or wooden beads. Hang them in the coop, and chickens will be entertained by pecking and knocking them around.
  • DIY Toys: Make your own toys by hanging plastic bottles or wooden blocks from strings. Chickens love pecking at dangling objects, and it keeps them occupied.

8. Offer Different Textures and Materials

Chickens love exploring different textures and materials. By providing a variety of surfaces for them to peck at, climb on, or scratch, you’ll stimulate their natural curiosity.

  • Hay or Straw Bales: Place a bale of hay or straw in the run and let your chickens peck at it. They’ll love tearing it apart and finding hidden seeds or insects inside.
  • Tree Branches: Lay some tree branches in the coop or run for chickens to peck, scratch, and explore. Chickens enjoy stripping bark and searching for bugs.
  • Sand Pits: A small sandpit or gravel area can be fun for chickens to scratch in. The change in texture keeps them interested, and they can find small rocks or insects to investigate.

Conclusion: Happy Chickens Are Productive Chickens

Preventing boredom in chickens is crucial for their overall health and well-being. A bored chicken is likely to develop negative behaviors like feather pecking or aggression. However, with these simple boredom busters, you can keep your flock entertained, active, and happy.

Whether it’s providing treat puzzles, adding perches and swings, or offering foraging opportunities, keeping chickens engaged doesn’t have to be difficult or expensive. Incorporating these activities into your flock’s daily routine will lead to healthier, more content chickens—and likely better egg production too!

How Long Do Chickens Lay Eggs?

If you’ve ever kept chickens or are planning to start, understanding the egg-laying timeline of your hens is crucial. Chickens are wonderful egg producers, but they don’t lay eggs indefinitely. So, how long do chickens lay eggs, and what factors affect their egg-laying capabilities?

In this blog, we’ll explore the average lifespan of a hen’s egg-laying productivity, what influences egg production, and how you can ensure your hens lay eggs as long as possible. Let’s dive in!

1. When Do Chickens Start Laying Eggs?

Chickens typically begin laying eggs when they reach sexual maturity, which is usually between 18 to 24 weeks of age. This can vary slightly depending on the breed, diet, and environmental conditions, but most hens will begin laying by this time.

  • Light Breeds: Breeds such as Leghorns and other high-production hens tend to start laying earlier, sometimes around 16 weeks.
  • Heavy Breeds: Larger breeds like Brahmas or Cochins may take a bit longer, starting to lay around 22–24 weeks.

2. How Long Do Chickens Lay Eggs?

Once a hen starts laying eggs, her most productive egg-laying period is during her first 2–3 years of life. After this, egg production declines gradually, but many chickens continue to lay sporadically for several more years.

Year-by-Year Breakdown:

  • First Year: In the first year of laying, hens can produce an impressive number of eggs. Most breeds lay around 250–300 eggs per year, which equates to about 5–7 eggs per week.
  • Second Year: After the first year, egg production typically decreases by around 10–20%. In the second year, hens may produce 200–250 eggs annually.
  • Third Year: By the third year, egg production slows further. Expect around 150–200 eggs per year, depending on the breed.
  • Fourth Year and Beyond: After three years, most hens will produce fewer than 150 eggs annually, and some may only lay 50–100 eggs per year. Older hens can still lay eggs but much less frequently and often not year-round.

3. Factors That Affect How Long Chickens Lay Eggs

Several factors can influence a hen’s egg-laying capacity, including breed, diet, light exposure, and health. Here’s a closer look at these key factors:

Breed

Some chicken breeds are naturally better egg layers than others. For instance:

  • High-production breeds like the Leghorn, Rhode Island Red, and Plymouth Rock are known for their excellent egg production. These breeds can continue laying a significant number of eggs even into their later years.
  • Ornamental breeds such as Silkies and Polish are more likely to be sporadic layers and may lay fewer eggs overall.

Nutrition

A well-balanced diet plays a crucial role in a hen’s ability to lay eggs consistently. Layer feed, which contains around 16–18% protein and plenty of calcium, ensures that hens have the nutrients they need for egg production.

  • Protein is vital for feather development, growth, and the production of high-quality eggs. During times of molting, hens require even more protein to regrow feathers and continue laying.
  • Calcium is necessary for the formation of strong eggshells. A lack of calcium can result in soft-shelled eggs or cause hens to stop laying altogether.

Daylight Exposure

Daylight is one of the biggest influences on a chicken’s egg-laying cycle. Chickens need around 14–16 hours of daylight to maintain consistent egg production. When daylight hours shorten in the fall and winter, hens naturally produce fewer eggs, as their bodies conserve energy during darker months.

  • Artificial lighting: Some chicken keepers use artificial lighting in the coop to extend daylight hours and encourage egg production during the winter. This can help maintain egg-laying consistency but may cause earlier burnout in the hens.

Health and Stress

  • Molting: Chickens go through a natural molting process, usually in the fall, where they shed old feathers and grow new ones. During this time, hens may stop laying altogether as they focus on feather regrowth.
  • Stress: Changes in the environment, such as moving the coop or introducing new flock members, can cause stress and disrupt egg production. Predators, illness, or poor living conditions also contribute to stress and can reduce egg-laying frequency.
  • Illness: Chickens that are sick or suffering from parasitic infestations like lice or mites may stop laying eggs. Regular health checks and proper coop management are essential to keep your hens healthy and productive.

4. Extending Egg-Laying Productivity

While the natural decline in egg production is inevitable, there are ways to help your chickens lay eggs for a longer period:

Provide a High-Quality Diet

A balanced diet with sufficient protein and calcium can support ongoing egg production. Consider supplementing their regular feed with high-protein snacks like mealworms, sunflower seeds, or scrambled eggs during molting or times of stress.

Keep Stress Levels Low

Ensuring a calm and consistent environment can go a long way in maintaining egg production. Keep the coop clean, provide ample space for your chickens, and avoid unnecessary changes in their routine.

Provide Adequate Light

If you live in an area with short daylight hours during the winter months, adding artificial lighting can help keep egg production steady. Make sure the light is timed to ensure at least 14 hours of light per day, but avoid overexposing the hens to too much artificial light, which can lead to premature exhaustion of their egg-laying capacity.

5. When Do Chickens Stop Laying Eggs?

Chickens usually begin laying fewer eggs after their third year, but they can continue laying intermittently for many years. However, by the time hens are 6–7 years old, most will have significantly reduced egg production or stopped laying altogether.

Older Hens:

Even though older hens may stop laying, they still contribute to the flock in other ways. They are excellent foragers and often act as flock leaders, helping younger hens navigate pecking orders and learn behaviors.

Some chicken owners keep older hens as part of the flock for their companionship and pest control abilities, while others may choose to cull non-laying hens to maintain a productive flock.

Conclusion

Chickens can lay eggs for several years, but their most productive period typically lasts for the first 2–3 years. After that, egg production gradually declines, but with the right care, proper nutrition, and adequate light, you can help your hens maintain good egg-laying habits for as long as possible. While older hens may not lay as frequently, they can still be valuable members of your flock.

By understanding how long chickens lay eggs and the factors that affect egg production, you can better plan your flock’s management and ensure a steady supply of fresh eggs for years to come!

Why Chickens Molt? And 3 Tips to Help Your Flocks

Molting is one of the most fascinating processes that chickens experience in their lifecycle. To the untrained eye, it might seem alarming to see your once healthy and full-feathered birds suddenly looking ragged or even partially bald. However, understanding why chickens molt and how to support them through this natural, energy-demanding process is key to ensuring your flock remains healthy and productive.

In this blog, we’ll dive deeper into the science behind molting, discuss the various types of molting, and provide actionable tips to help your flock through this challenging period.

What is Molting?

Molting is an essential biological process where chickens shed their old, worn-out feathers and replace them with new ones. This process not only rejuvenates the chicken’s appearance but also enhances their ability to stay warm and healthy. Just like how humans lose hair daily and regrow it, chickens experience a more periodic and thorough overhaul of their feather coverage.

Molting generally occurs annually and can vary depending on several factors such as age, breed, and environment. The loss of feathers may look concerning, but it’s a natural and necessary occurrence that ensures chickens can regulate their body temperature, maintain good health, and prepare for future egg production cycles.

Types of Molting

Molting isn’t a one-size-fits-all process. Chickens can experience different types of molting throughout their lives. Here are a few main types:

1. Juvenile Molt

Chicks undergo their first molt when they lose their downy feathers and grow their first set of real feathers. This happens when they’re around 6 to 8 weeks old. During this time, baby chicks look scruffy, but it’s a sign of growth and maturity.

2. Partial Molt

A partial molt refers to when only some of the chicken’s feathers are shed and regrown. Typically, the neck and head feathers are replaced. Partial molts can happen in young pullets and cockerels as they mature but aren’t limited to young birds.

3. Annual Molt

The most significant molt occurs annually, typically in late summer or early fall. This is a full-body molt where the chicken sheds most or all of its feathers. This molt prepares them for the cold winter months by providing a fresh set of feathers that offer better insulation.

4. Stress Molt

Sometimes, chickens can experience molting as a result of stress, such as poor nutrition, changes in environment, or illness. Stress molts can happen unexpectedly and don’t necessarily follow the seasonal patterns of a normal molt.

Why Do Chickens Molt?

Molting happens for three primary reasons:

  1. Feather Maintenance:
    Feathers provide insulation, protect against weather, and help in flight (although domestic chickens don’t fly much). Over time, feathers wear down due to exposure to the sun, rain, dirt, and dust. Molting helps refresh and replace these feathers so that chickens remain well-insulated, waterproof, and protected.
  2. Seasonal Adjustment:
    As daylight hours shorten in late summer and early fall, a chicken’s biological clock triggers the molting process. This aligns with nature’s way of preparing the bird for colder weather, where fully functional feathers become crucial for warmth.
  3. Rest for the Reproductive System:
    Egg laying is a labor-intensive process for hens. During molting, most chickens stop laying eggs altogether. The molt gives their bodies a chance to recuperate and redirect energy toward feather production. This temporary pause in egg production helps maintain the long-term health and productivity of your hens.

How Molting Affects Chickens

Molting is not only a visually dramatic process but also an energy-draining one. During this time, chickens may exhibit the following:

  1. Drop in Egg Production:
    Most hens will stop laying eggs entirely during their molt. If your flock is primarily for egg production, be prepared for a temporary dip in output.
  2. Change in Behavior:
    Molting can make chickens feel vulnerable, irritated, or less active. You may notice your chickens avoiding social interactions or appearing less energetic during this time. In some cases, they may even hide from the rest of the flock.
  3. Increased Nutritional Needs:
    Molting is physically demanding. Chickens need more nutrients, especially protein, to grow new feathers. Without adequate nutrition, the molting process can be prolonged, leading to further stress.

The Biological Process of Feather Growth

Once a chicken begins to lose its feathers, it starts the regrowth process almost immediately. Feathers grow from follicles in the skin and start as tiny pin feathers, which are small and covered with a keratin sheath. Over time, these pin feathers mature into full-sized feathers, providing the chicken with insulation and protection.

The body prioritizes certain areas for feather regrowth. Typically, the neck feathers are replaced first, followed by the back, wings, chest, and finally, the tail. Each of these new feathers requires a great deal of protein to form and develop properly, which is why chickens need a high-protein diet during the molt.

3 Essential Tips to Help Your Flock During Molting

1. Increase Protein Intake:

Since feathers are composed of approximately 85% protein, chickens need more protein in their diets while they molt. Regular layer feed, which typically contains around 16% protein, may not be sufficient. You can boost their protein intake with the following:

  • High-protein feed: Switch to a feed specifically designed for molting birds, which usually has around 20% protein.
  • Protein-rich treats: Offer mealworms, sunflower seeds, black soldier fly larvae, or cooked eggs as a supplement to their diet.
  • Legumes and peas: These plant-based protein sources are easy to mix into their diet and provide a healthy, natural protein boost.

2. Minimize Stress:

Chickens are creatures of habit, and any disruption to their routine can cause stress. Since molting already places a strain on their bodies, you should aim to minimize any external stressors. Here’s how you can do that:

  • Avoid moving the coop: Don’t introduce any drastic changes to their environment. Keep everything stable to reduce anxiety.
  • Limit handling: Molting chickens have sensitive skin, so it’s best to avoid too much physical contact during this time.
  • Create a calm environment: Make sure the coop is well-ventilated, clean, and free from any predators or disturbances.

3. Maintain Warmth and Comfort:

Without their full set of feathers, chickens are more vulnerable to the elements, especially if molting coincides with cooler weather. To keep your flock comfortable:

  • Provide extra bedding: Add more straw or wood shavings in the coop to keep them warm and dry.
  • Ensure proper ventilation: While it’s important to keep the coop warm, you also need to make sure it’s well-ventilated to prevent respiratory issues.
  • Add roosting space: Chickens need more space while they’re molting, as their new pin feathers can be sensitive. Avoid crowding by adding extra roosting bars.

Additional Tips for Managing Molting Season

  • Keep dust baths clean: Chickens love dust baths, but during molting, their skin can become more sensitive. Clean the dust bath area and mix in soft sand and diatomaceous earth.
  • Monitor health closely: During molting, chickens are more prone to illness due to weakened immune systems. Keep an eye out for signs of respiratory issues, lethargy, or weight loss.
  • Continue hydration: Molting can make chickens thirsty, so ensure they have access to fresh, clean water at all times.

Conclusion

Molting can be a stressful time for both chickens and their owners, but with the right care and attention, your flock will come through stronger and healthier. By understanding why chickens molt, providing them with a protein-rich diet, minimizing stress, and maintaining a warm environment, you’ll ensure they grow back beautiful, healthy feathers and stay in good spirits.

With these expanded tips, you’ll be well-prepared to support your flock through molting season, and your chickens will thank you with a fresh set of plumage, renewed energy, and, eventually, a return to egg production.

Can You Raise Chickens with No Land?

Raising chickens is often seen as a rural activity, requiring open spaces, fresh air, and plenty of land for chickens to roam freely. But what if you don’t have any land at all? Is it possible to raise chickens in an urban environment like a city apartment, rooftop, or even indoors? The answer is yes, you can absolutely raise chickens with no traditional land—if you get creative and plan carefully.

This guide will take you through everything you need to know about raising chickens with no land, including space management tips, the best chicken breeds for small areas, housing options, feeding strategies, and how to ensure your chickens are happy, healthy, and productive.

Why People Raise Chickens with No Land

Raising chickens isn’t just for farmers anymore. People living in cities or homes with limited outdoor space are increasingly taking up urban farming, including raising chickens, to enjoy fresh eggs, sustainable food production, and the joy of keeping animals. There are several reasons why people with no land decide to raise chickens:

  1. Fresh Eggs: Raising chickens is one of the most cost-effective ways to have a constant supply of fresh, organic eggs. Even with no land, chickens can lay a good number of eggs if they are healthy and well-cared for.
  2. Sustainable Living: Keeping chickens can be part of a broader sustainability plan, allowing people to recycle kitchen scraps, compost manure, and reduce food waste. Urban chickens fit into the eco-friendly lifestyle many city dwellers aspire to.
  3. Connection to Nature: Chickens offer a wonderful way for people in urban settings to reconnect with nature. Watching them forage and care for themselves can be a calming, rewarding experience.

With these motivations in mind, let’s explore how you can make raising chickens work even without traditional land.

1. Finding the Right Space to Raise Chickens

Location, Location, Location! Raising chickens without land is all about making the most of the space you do have. Whether it’s a small patio, rooftop, or even a balcony, chickens don’t need acres of land to be happy. What they do need is a safe, secure, and comfortable environment.

Balcony Chicken Keeping

If you live in an apartment with a balcony, that space could serve as the perfect home for a couple of chickens. Ensure your balcony is enclosed with secure fencing or netting to prevent chickens from falling. Be mindful of the weather conditions—cover part of the balcony with a roof or a tarp to protect your chickens from rain, wind, and direct sunlight.

Rooftop Chicken Keeping

A rooftop coop is an ideal solution if you live in an apartment building with access to the roof. You can design a coop with lightweight materials to ensure it’s easy to manage and move if necessary. The rooftop coop should have proper drainage and shade to prevent overheating. City rooftops can be breezy, so create wind barriers to keep the chickens comfortable.

Indoor Chicken Keeping

Believe it or not, some urban chicken enthusiasts have successfully raised chickens indoors. While this is a less traditional option, with the right setup, you can keep chickens inside your apartment. You’ll need to build a secure indoor coop and provide them with ample opportunities to get outdoor exercise. Use a portable coop or harness to bring your chickens outside when possible.

Chicken Tractors for Small Yards

If you have a small yard, consider using a chicken tractor. This is a mobile coop that you can move around your yard, allowing chickens to forage for bugs and plants in different spots. A chicken tractor prevents the grass in one area from becoming too worn down, and it keeps your chickens busy and healthy.

2. Housing Your Chickens

Without land, housing becomes even more important for your chickens’ health and happiness. The chicken coop should be safe from predators, easy to clean, and provide adequate shelter from the elements. Here’s how you can set up housing for chickens without land:

Compact Coops

If you’re working with limited space, such as a balcony or rooftop, you’ll want a compact chicken coop. There are many designs that are small yet functional, offering space for roosting, nesting, and scratching. Multi-level coops or coops with attached runs work well in urban settings, maximizing space without compromising comfort.

Vertical Chicken Coops

In urban environments, space can be tight, but you can get creative by going vertical. A multi-level chicken coop can provide chickens with roosting space up top and a scratching area below. Think of it like an apartment building for chickens! This type of setup is ideal for small backyards, patios, or even rooftop setups.

Indoor Coops and Pens

Indoor chicken keeping requires careful planning. Create a dedicated area inside your home for your chickens, using portable pens or indoor coops that are easy to clean. It’s important to place the coop in a well-ventilated area to avoid the buildup of smells. Use absorbent bedding, like straw or wood shavings, and clean the area frequently to keep it sanitary.

3. Choosing the Right Chicken Breeds

Not all chicken breeds are well-suited for small spaces or urban environments. You’ll need to choose calm, adaptable breeds that don’t mind confinement and are quieter than others (especially if you have close neighbors).

Silkies

Silkies are a popular breed for urban chicken keepers because of their small size, friendly disposition, and fluffy appearance. They are docile and tend to adapt well to confined spaces.

Bantams

Bantams are essentially miniature chickens, making them perfect for those with very limited space. They are active and good foragers, so they’ll enjoy scratching around in a small coop or pen.

Orpingtons

Orpingtons are a larger breed but known for being gentle and adaptable. They are good layers and don’t mind being confined to a small space as long as their needs are met.

Leghorns

If egg production is a priority, Leghorns are excellent layers and can adapt to smaller coops or urban environments. They are active but manageable in a small space if you provide them with enough stimulation.

4. Feeding and Watering in Small Spaces

Even without land, chickens need the same level of care and nutrition as their country cousins. You can set up compact feeders and waterers to ensure your chickens have constant access to fresh food and water. Here are some ways to make feeding efficient in small areas:

  • Hanging Feeders: Hanging feeders save floor space and keep the food cleaner.
  • Automatic Waterers: Automatic waterers can provide a constant source of fresh water and are ideal for small coops or balconies where space is limited.
  • Scraps and Treats: Chickens love scraps, and you can feed them leftover fruits, vegetables, and grains from your kitchen. Just be sure to avoid giving them harmful foods like onions, garlic, or chocolate.

5. Managing Waste and Cleanliness

Waste management is critical when raising chickens in small spaces, especially indoors or on a balcony. Chickens produce a lot of manure, but you can handle it effectively with the right strategies.

Deep Litter Method

In small outdoor spaces, consider using the deep litter method. This involves layering straw, wood shavings, or other organic materials on the coop floor, which composts over time and reduces odors. You can clean out the litter every few months, adding it to a compost pile if you have access to one.

Daily Cleaning for Indoors

If you’re raising chickens indoors, daily cleaning is essential. Use removable mats or poop trays in the coop for easy cleanup. Regularly replace bedding materials and ensure good ventilation to keep the air fresh.

Composting Waste

Chicken manure is rich in nutrients and can be an excellent fertilizer. If you don’t have land, find a community garden or urban composting project where you can donate your chicken manure.

6. Legal and Neighborhood Considerations

Before you start raising chickens with no land, it’s essential to check local laws and regulations. Many urban areas have specific rules about:

  • The number of chickens you can keep.
  • Whether or not you can keep roosters.
  • The distance a coop must be from neighboring homes.
  • Noise and odor control.

Some cities also require permits or inspections, so make sure you comply with any regulations to avoid fines or other issues. Additionally, speak with your neighbors before bringing chickens into a shared space to ensure they’re comfortable with the idea.

Conclusion: Raising Chickens Without Land Is Possible

Raising chickens with no land is not only possible but also highly rewarding. With thoughtful planning, the right space, proper care, and attention to cleanliness, your chickens can thrive in small areas like rooftops, balconies, or even indoors. Whether you’re after fresh eggs or a sustainable living experience, urban chicken-keeping can bring a little farm life to your city dwelling.

By choosing the right breed, setting up a compact but efficient coop, and managing waste properly, you can enjoy all the benefits of raising chickens without the need for a traditional farm. Get ready to embrace the joy of urban chicken farming and start your flock today!

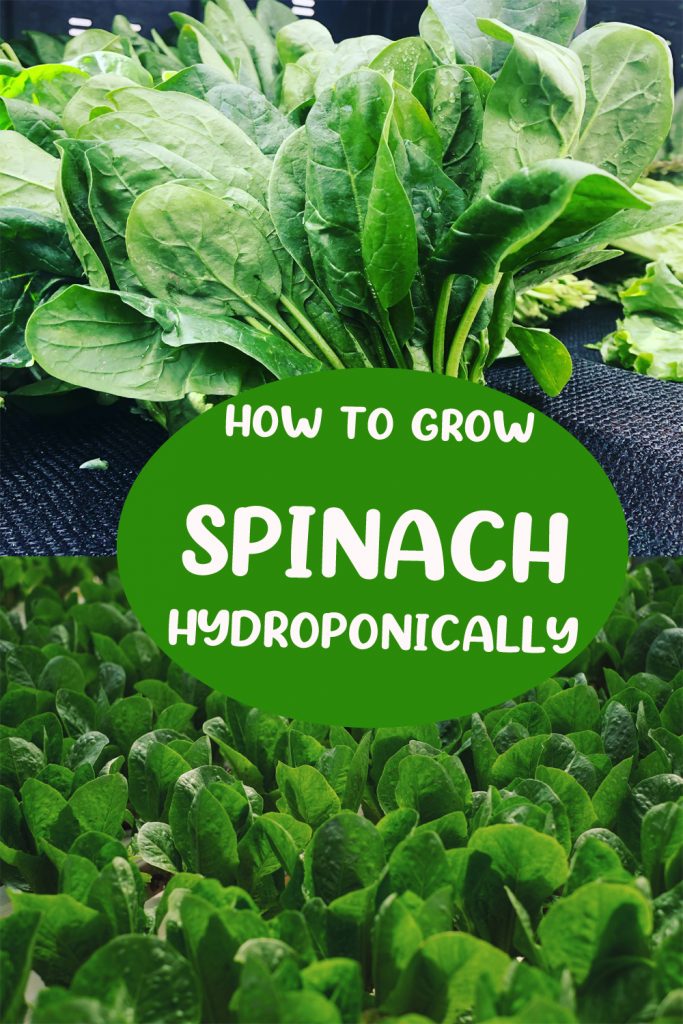
How to Grow Spinach Hydroponically?

Spinach is not only a leave but it has the source of exceptional nutrients and has many health and beauty benefits. It was regarded as a plant with evident abilities to restore energy, increase liveliness and refine the quality of blood.

It has a rich amount of iron, vitamin K, vitamin C, vitamin A, and it is a reliable source of magnesium, manganese, and vitamin B2. Spinach is best vegetable which contains rich amount of vitamin K and it helps to maintain bone health. With these indefinite qualities, spinach is easy to grow at home with more desirable efforts.

The preference of high quality vegetable and fruit to harvest fresh for the part of healthy food is often decided when stepping first into hydroponic gardening.

Delicious, crispy, and high nutritious leafy green just pick off from an indoor garden have the most rewarding aspect by growing your own plant hydroponically without put down any efforts.  Now, we can discuss how to grow spinach hydroponically at home.

Spinach is a existing family member of Chenopodiaceous family, a family of dietary power houses along with plants like chard, beets, and quinoa. Growing spinach hydroponic is easy and there are many immense reasons for it. When you grow hydroponic spinach, you can harvest delicious and nutritious plants from seeds very quickly, over and over again.

Spinach germination

The first step for growing spinach hydroponically is to obtain the spinach seeds to germinate. Before germination soak spinach seeds for 5-10 hours in water to speed the germination process. For instance spinach seeds germination takes place in three stages: soaking up moisture, developing new cells inside the seed, and the visible emergence of the sprout.

Germination of spinach seed occurs between 32 and 65F. it is a cool weather crop so keep away from heating pads when germinating spinach seeds.

For hydroponic garden, it’s better to germinate the seeds without soil such as paper towel germination. In this method it controls the moisture easily, we can know easily when the seeds are germinated, and damp the paper towel retains the seeds cool.

Give 12 hours of light daily for your seeds. Blue light increase the production of chlorophyll and facilitate leafy growth. It is good for spinach.

Within 4 days start to sprout with germinated pre-soaked seeds. If you don’t soak the seeds, you have to wait for 10+ days for germination. If the spinach seedlings are about 2 inches tall then they are ready to transplant into your hydroponic system.

Once the seeds began to germinate, I placed the seeds in a starter soaked in 0.6 EC nutrient solution before they had time to develop most of the root system. My favorite launcher plug-in is called Rapid Rooter. They are particularly useful because they are suitable for hydroponics and ground cultivation.

Also Read: How To Plant Spinach? Here Is Everything You Need To Know

How to germinate spinach seed hydroponically?

For the germination of spinach seeds hydroponically, you have to grow a medium the seeds can start in.

Familiar seed starter plugs are coconut coir, Rockwool, or product like Rapid Rooter from general hydroponics.

While using Rockwool, before planting seeds make sure to balance pH. For this, you need to soak the plugs in 5.5 pH water for 20 seconds. 

Rapid Rooter Plugs need to soak for a few hours before planting seeds. Okay, honestly, I never soaked them for more than a few minutes and always had great results. If you want to give them a 3 hour bath, do it. These plugs are designed to hold a certain amount of water that is ideal for germination. So don’t water them unless they dry out.

  • Put 2-3 spinach seeds in each starter plug and place the plug in a bowl.
  • Cover the starter seed pan with a moisture dome. Moisture helps start the germination process.
  • Once the seeds begin to sprout and develop their first leaves, remove the moisture dome to keep mold and mildew at bay.
  • The first set of real leaves will begin to develop, the seedling is ready to be transferred to your hydroponic system.

Bottom watering with Rock wool

Bottom watering refers to adding water to the seed bowl and not directly above the seed plug. This method will help to reduce the mold growth and keep the seeds healthier. To water your Rockwool starter plugs, simply add water to the bowl that the plugs are in. Just enough water to soak the underside of the plugs. The stoppers suck the water down to the seed.

Growing tips for hydroponically spinach

Use fresh seed

Spinach will take 5 to 15 days to sprout. It’s disappointed to wait nearly three week to have poor germination rates due to old seeds usage. So, use fresh seed for the improvement of better germination rate and it gives better results.

Sow 5 to 6 seeds per hole

For commercial growers each of them has their favorite germination medium. In which medium heavy sowing guarantees at least one strong , healthy seedling per hole.

Cold stratify seeds

Few commercial growers believe that before sowing the spinach seeds place it in a refrigerator for 1 to 3 weeks. They trust that the period of cold stratification produce the healthier plants.

Keep spinach seeds moist

While germination process takes place sowing seeds are allowed to dry out due to poor germination rate.

Don’t use seed heating mats

It is a cool weather crop, in which germination takes place between 5 -25C. In higher temperatures poor germination occurs.

Stagger planting

Sow seeds for every two weeks  to have a fresh spinach to harvest continuously.

Also Read: Why Are My Spinach Leaves Turning Yellow

Control the temperature

As we know it’s a cool weather crop, spinach grow in day light temperature between 15 to 20C  and in night temperature between 12 to 18C. In warmer climatic conditions, causes spinach to bolt which increase in its bitterness.

Don’t over fertilize spinach

Start to feed  spinach seeds when they are transplant into hydroponic system. Commercial growers recommends that start with weaker solution of hydroponic nutrients and increase their strength gradually. Indication for nitrogen level is too high then leaf tip burns.

Reduce fertilizer strength and temperature prior to harvest

The simple trick to produce sweeter taste in spinach is to reduce ambient temperature for few degrees and decrease the strength of hydroponic  nutrients as spinach plants are matured.

While growing hydroponic spinach at home requires more attention than other plants, it is well worth the effort to produce an edible plant from seed to harvest in just five and a half week.

Also Read: Growing Different Types of Beans-Bean varieties

How to Grow Pumpkins in Pots – An Ultimate Guide to Grow Pumpkins in Containers

Growing pumpkins in containers is beneficial, allowing you to have a fresh harvest all year round. Learn how easy to grow them in this article!

 Pumpkins are valued for their taste and decorative appearance. Growing pumpkins in containers is not difficult and does not require a lot of maintenance. It is actually a kind of undemanding vegetable that adapts to any climate!

Growing Pumpkins in Container

You can plant pumpkin seeds or buy seedlings from a nursery. It can be planted from April to the end of May in very cold climates, and until July in slightly warmer climates. If you live in a subtropical climate or without tropical frost, you can grow it for most of the year.

Also Read: Powdery mildew of Pumpkin

Choosing a Pot

Choose a large pot of 10 gallons or at least 16-20 inches (for small pumpkins). For larger varieties, it is better to use a larger pot. Just make sure it has a drain hole at the bottom.

Small varieties of pumpkins are best for containers and small gardening. However, you can also grow a wide variety of pumpkins. Few of the best are listed below:

The First Pumpkin

It is a family heirloom that was originally used to feed cows and is now used as a delicious pumpkin pie.

Lumina Pumpkin

 It is similar to the crescent variety. Lumin has smooth-skinned white pumpkins.

Porcelain Doll

The fruit is unusually pink. The medium-sized pumpkin has bright orange flesh.

Goosebumps

At first, your skin is smooth, but as it grows, warts gradually appear.

New Moon

It is one of the largest varieties and has thick white flesh. The crescent moon is named for its fair skin.

Prize winner

This diversity is very large. The winner can make a large pumpkin that usually weighs between 75 and 150 pounds.

Baby Boo

Baby Boo is ghostly white, named “Baby” because of its small size. It grows to 2-3 inches.

Sugar Pie

This strain is as cute as its name and much smaller. Used for baking cakes, biscuits and pies.

Jack-o’-Lanterns

The midsole round pumpkin is a great choice for carving.

Jack-Be-Little

This small variety of squash can only grow to 3-4 inches tall, and it takes about 80-90 days to mature. You can plant rows to get a bright and rich harvest.

Also Read: Pumpkin farming: how to plant, grow, and harvest pumpkins correctly and properly

Pumpkin care

#1.Mulching

Once your plant grows to a few inches, do mulching. It reduces water evaporation and helps maintain moisture in the soil.

#2.Fertilizers

 Pumpkin plants are rich in nutrients and require a lot of fertilization. Most importantly, it is important to have fertile soil so that the pumpkin can become bigger and fleshier. It is best to use balanced fertilizer in the early stage of growth.

It is a good idea to switch to low-nitrogen, high-potassium, and high-phosphorus fertilizers, such as water-soluble fertilizer for every two weeks (when the plants are long enough to bloom).

#3.Pests and Diseases

Pumpkin is a hardy plant, but it still suffers from many diseases, especially powdery mildew. Try to keep the leaves dry to prevent diseases.

For pests, look out for common garden pests such as aphids, fleas, mealy bugs, cucumbers and worms. Use organic insecticides such as neem oil to treat them. If the pests increase, try using commercial insecticides.

Pumpkins can be harvested 90-120 days after planting (depending on the variety and growing conditions).

 Immature and green pumpkins are also used in gourmet recipes and many exotic dishes.

 But to pick mature pumpkins, check if they harden into a deep and uniform colour (most common varieties are orange). When the peel hardens and looks empty, it’s time to reap the benefits. The bark must also withstand the pressure from the nails. There should be an interval of approximately 100 days between the sowing of the vegetable pulp and the fully mature harvest.

 To pick a pumpkin, use scissors or a sharp knife to carefully remove it from the branch. However, do not cut too close to the fruit; leave long stems (about 10 cm) to extend the shelf life. Store pumpkins in a dry, cool and dark place.

Also Read: Planting and Growing Okra Step by Step

Create an organic pumpkin container garden and maximize your harvest

  • Sowing pumpkins in spring when the danger of frost has passed and the soil temperature reaches 65°F.
  • It is best to grow pumpkins with seeds, but you can use seedlings grown in biodegradable pots to reduce exposure.
  • For growing pumpkins require a huge container, usually at least 20-25 gallons, to hold pumpkin plants.
  • Your pumpkin plant needs a support system to help the vine grow.
  • Pumpkin is a good fodder crop, so add enough compost to the soil before planting. Then plan to fertilize frequently during the growing season.
  • Depending on the selected pumpkin variety, it may take 90-120 frost-free days for the pumpkin to fully mature.

Your pumpkin plants will grow happily in their pots, but now you need them to be happy. Here, we explain how to take care of pumpkin plants growing in pots.

11 Simple Ways to Improve Garden Soil and Boost the Yield

Excavation and fork over the soil allow you to loosen any condensation, eliminating weeds plus debris as well as giving the absolute possibility to add organic matter.

All plants require healthy soil conditions if they provide great outcomes. Enhancing soil with a lot of organic elements in the form of manure benefits in drainage plus aeration on damp soils and maintains the moisture required for light ones.

Benefits of Improving the Garden soil

You must be questioning why it is necessary to have good soil for the garden? The reason for soil condition is that good soil can store plus processes more water.

Bad health, wasted soil, will not prevent water, and this will make it difficult for your plants to grow and persevere.

  • The key to best, high-quality soil is a lot of natural organic material, the things produced by living organisms. Take care of one thing that soil is a living plus dynamic ecosystem in itself.
  • This ecosystem hosts areas within soil particles that permit the way or maintenance of water and nutrient.
  • For instance, fine soil particles, like as those found in clays, and keep water much more efficiently than bigger particles in sand. The quantity of water appears in your soil has substantial outcomes for your garden.

Not only has this whole influenced the health of your plants and the volume of water you use in irrigation. Though it will help stabilise the surface temperature of the soil plus manage the heat of the soil, which in turn influences the germination and flowering action.

  • Organic matter is the core of water maintenance plus soil health. Organic component can be anything, including carbon compounds. This is the things made by living organisms.
  • Organic materials can be from garden clippings, leave to stems plus branches, moss, algae, lichen, compost, kitchen scraps, sawdust, worms and microorganisms.
  • While native vegetation adjusts to its soil, greatest of the garden crops prefer organic matter and a solid horticultural soil in a half-porous location and with a neutral or somewhat acidic pH.

This type of soil keeps water without water logging. It is further let air into the garden soil so that roots and soil organisms can flourish.

11 Simple Ways to Improve Garden Soil and Boost the Yield

1. Compost

You can make compost with organic matter. You can use kitchen scraps and other many household things to make your compost.

Once these items broke down, they are an excellent enhancement to your garden. They better fix the soil collectively in an aerated form.

Depending on your soil requirements, you must add about 3-4 inches in your first year. Add two inches of compost per year to your garden or lawn each year.

2. Mulch

The mulch is another excellent addition to your garden soil. It must be added throughout the rest of your plants while planting.

After applying the mulch to the plant base, it will benefit retain any dampness that is used in the plant through rain or watering it by hands. It further helps to hold the soil throughout the plant cool, which is excellent for both for your plant and soil.

3. Covering crops help

When winter comes, we prune the garden. The ground is left empty and exposed, often meaning that nutrients have been stripped from the soil as there is no protection left.

If this is a matter of concern for you, and you see a disadvantageous impact in your soil to the following spring, then you must think of planting a cover crop.

Cover crops are plants like as wheat that come in coarse or dispersal plus cover the ground in which way we have planted them. Through covering the soil, they defend it from the components.

4. Worms can help your soil

You can buy worms or pick them up yourself. You can add them straight to your garden or add them to your compost as well. In both ways, they will help your garden.

Worms are an excellent addition to your garden soil as they can change what you can into your soil into useful products that soil requires vitamins, minerals, plus nutrients.

Also, they help in rotating the garden soil. Their excrement is a natural soil binder.

5. Keep away from your soil

Though you are gardening in a raised bed or a small area, make sure you do not step on the soil of your garden. Which signifies that your garden has a walkway between rows, or you need to make sure that you can easily reach your raised bed.

By avoiding walking on your garden soil, you help maintain the soil aerated. The weight of our feet compresses the air plus removes the aerated advantages that benefit plants.

6. Your garden soil can’t work when it wet

Wanting to work in your garden, as soon as a thunderstorm moves, it attracts. The point is, you should not work on your soil when it is thoroughly wet. The purpose is that when you work in wet soil, you expel air from it, which has the opposite effect.

You will know by taking a ball of soil in your hand and squeezing it the soil is too wet to work. If water comes out of it, you must wait some days to a week to examine it again.

7. Collect the rainwater

Rainwater is the most suitable choice for watering vegetables. Rainwater is softer, has more limited contaminants, and is at a pH that is favored by most of the plants, leading to better all-round growth.

Therefore if you are yet using treated water for irrigation of your crops, then now it is the time to install barrels of excess water and collect as much rainwater as possible. You can use the connector kit to join multiple barrels simultaneously.

8. Check the nitrogen scale

When you add most of the vitamins, nutrients plus minerals to the garden soil, they stick throughout. Nitrogen is the one that seems simplest from the garden soil.

You can examine your garden soil to find out what it lacks, or you can also wait till you grow something in your garden. Usually, you will notice that green plants are not as green as required as they have a shortage of nitrogen.

9. Space your plants in a right way

If you plant your crops too close then, your crops will fail to grow correctly and be likely to disease. But with the correct spacing, you can overcome this situation.

Garden Planner shows you how many plants can be grown in your available area. Best soil can help you push limits by growing vegetables a little closer than suggested. Square foot gardening takes it to the ultimate, with plants spun five times closer. 

10. Companion planting

Some plants are commonly useful. When grown together, they can help boost up the total productivity. Companion planting takes various methods.

As per instance, tall corn can be used as a support for growing legumes, while lettuce grown in between carrots or onions helps to destroy weeds, whereas these slow-growing crops establish. The garden planner also takes care of companion planting.

11. Defensive pest control

Take a defensive action to prevent pests in their tracks. For instance, constraints on susceptible plants should reduce a nuisance population by protecting them from flying pests, or by eliminating hiding areas in growing areas or surrounding areas, or also in long grasses.