Nutritious Chicken Treat Recipes to Brighten Your Flock’s Day

Chickens, like any pets, deserve a special treat now and then. Not only do treats make them happy, but they can also provide additional nutrients and enhance their overall health. Here are some nutritious chicken treat recipes that will delight your flock and contribute to their well-being.

1. Vegetable Medley Mash
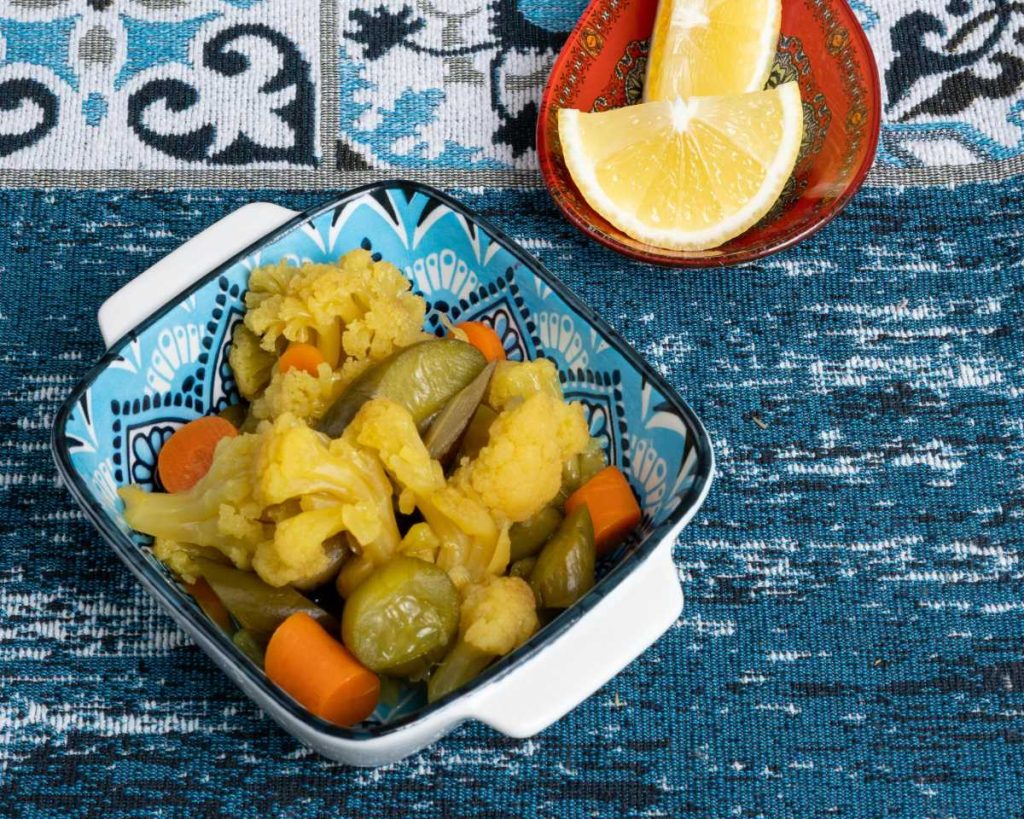
Ingredients:

  • 1 cup of mixed vegetables (carrots, peas, spinach, and bell peppers)
  • 1/2 cup of cooked quinoa or rice
  • 1 tablespoon of olive oil
  • 1/4 cup of chopped parsley or cilantro (optional)

Instructions:

  1. Cook the Vegetables: Steam or lightly boil the mixed vegetables until they are soft.
  2. Mix Ingredients: In a large bowl, combine the cooked vegetables with quinoa or rice.
  3. Add Olive Oil: Drizzle olive oil over the mixture and stir well to combine.
  4. Garnish (Optional): If using, add chopped parsley or cilantro for added flavor and nutrients.
  5. Serve: Allow the mash to cool before serving it to your chickens. This dish is packed with vitamins and minerals, making it a perfect nutritious treat.

2. Fruit Salad Surprise

Ingredients:

  • 1 cup of diced fruit (such as apples, strawberries, blueberries, and melons)
  • 1/2 cup of plain yogurt (unsweetened and unflavored)
  • 1 tablespoon of honey (optional)

Instructions:

  1. Prepare the Fruit: Wash and dice the fruits into bite-sized pieces.
  2. Mix Yogurt and Honey: In a small bowl, combine the yogurt and honey (if using) until well blended.
  3. Combine: In a larger bowl, mix the diced fruits with the yogurt mixture until evenly coated.
  4. Serve: Offer this delicious fruit salad to your chickens as a refreshing treat that is rich in vitamins and antioxidants.

3. Chicken Crack

Ingredients:

  • 1 cup of rolled oats
  • 1 cup of sunflower seeds
  • 1/2 cup of crushed nuts (almonds, walnuts, or peanuts)
  • 1/2 cup of dried fruits (raisins, cranberries, or chopped apricots)
  • 1/2 cup of melted coconut oil

Instructions:

  1. Combine Ingredients: In a large bowl, mix rolled oats, sunflower seeds, crushed nuts, and dried fruits.
  2. Add Coconut Oil: Pour in the melted coconut oil and mix until all ingredients are well coated.
  3. Press Mixture: Spread the mixture evenly in a greased baking dish and press it down firmly.
  4. Chill: Place the dish in the refrigerator for at least 1-2 hours until it firms up.
  5. Cut and Serve: Once set, cut into small squares and offer them to your chickens as a crunchy treat. This recipe provides healthy fats and energy.

4. Eggshell Calcium Treats

Ingredients:

  • 5-6 clean and dried eggshells
  • 1/2 cup of mixed seeds (pumpkin, sesame, and flaxseed)

Instructions:

  1. Prepare Eggshells: Rinse the eggshells thoroughly and bake them in the oven at 200°F (93°C) for about 10-15 minutes to sterilize and dry them out.
  2. Grind: Once cooled, grind the eggshells into a fine powder using a food processor or blender.
  3. Combine: Mix the eggshell powder with the mixed seeds.
  4. Serve: Sprinkle this calcium-rich mixture on your chickens’ regular feed or offer it in a separate bowl. Calcium is crucial for strong eggshells and overall health.

5. Pumpkin and Corn Treats

Ingredients:

  • 1 cup of cooked pumpkin (mashed)
  • 1/2 cup of corn (canned or frozen)
  • 1/4 cup of rolled oats
  • 1 tablespoon of flaxseed (optional)

Instructions:

  1. Mix Ingredients: In a bowl, combine the mashed pumpkin, corn, rolled oats, and flaxseed until well mixed.
  2. Shape Treats: Form the mixture into small balls or patties.
  3. Cook (Optional): You can bake them at 350°F (175°C) for about 15-20 minutes for a firmer texture or serve them raw.
  4. Serve: Allow them to cool before serving. This treat is high in fiber and great for digestion.

Conclusion

Treating your chickens with nutritious snacks not only keeps them happy but also contributes to their overall health. These recipes are easy to make, and you can customize them based on the preferences of your flock. Remember to introduce any new treats gradually and in moderation to prevent digestive issues. Happy cooking, and enjoy watching your chickens enjoy their delightful new treats!

9 Expert Tips for Incubating Chicken Eggs Successfully

Incubating chicken eggs can be a rewarding and exciting experience, whether you’re a seasoned poultry keeper or a first-time hatchery enthusiast. Successfully hatching eggs requires careful attention to detail and an understanding of the incubation process. Here are nine expert tips to help you achieve a successful hatch.

1. Choose the Right Eggs

What to Look For:

Selecting high-quality, fertilized eggs is the first step in a successful incubation process. Ensure that the eggs are:

  • Fresh: Use eggs that are no more than seven days old for optimal hatch rates.
  • Clean: Only incubate eggs that are clean and free from cracks. Dirty or cracked eggs can harbor bacteria and reduce hatchability.

Where to Get Eggs:

Consider sourcing eggs from reputable breeders or local farms. This ensures that you receive eggs from healthy birds with a strong breeding history.

2. Maintain Proper Temperature

Ideal Conditions:

The ideal incubation temperature for chicken eggs is between 99.5°F and 100°F (37.5°C to 37.8°C).

Temperature Control:

  • Use a Reliable Incubator: Invest in a high-quality incubator with a reliable thermostat to maintain consistent temperatures.
  • Monitor Regularly: Use a digital thermometer and hygrometer to check temperature and humidity levels. Adjust the incubator settings as needed.

3. Ensure Adequate Humidity

Why It Matters:

Humidity plays a crucial role in the hatching process. Too much or too little humidity can lead to poor hatching results.

Optimal Levels:

  • Maintain humidity levels around 40-50% during the first 18 days of incubation.
  • Increase humidity to 65-75% during the last few days (the hatch period) to help chicks break through their shells.

How to Control Humidity:

  • Water Reservoirs: Most incubators come with water trays. Ensure these are filled appropriately, and add sponges or towels soaked in water if necessary.
  • Ventilation: Good airflow helps regulate humidity levels. Make sure your incubator is ventilated properly.

4. Turn the Eggs Regularly

Importance of Turning:

Turning the eggs is crucial for proper embryo development. It helps prevent the yolk from sticking to the shell and ensures even heat distribution.

Turning Schedule:

  • Frequency: Turn the eggs at least 3-5 times per day.
  • Automatic Turners: Consider using an automatic egg turner to simplify this process and maintain consistent turning.

5. Monitor Egg Development

Candling Eggs:

Candling is a process that allows you to observe the development of embryos inside the eggs.

When to Candle:

  • First Candling: About 7 days into the incubation process.
  • Second Candling: Again at around 14 days.

What to Look For:

  • Fertility Signs: Look for signs of development, such as visible veins and movement within the egg. If an egg appears clear with no signs of development, it may be infertile.

6. Maintain Cleanliness

Hygiene Practices:

Keeping the incubator and eggs clean is essential for preventing bacteria growth and ensuring a healthy environment for the developing chicks.

How to Keep Things Clean:

  • Wash Your Hands: Always wash your hands before handling eggs.
  • Disinfect Equipment: Regularly clean and disinfect incubators, trays, and any tools used during the incubation process.
  • Avoid Overcrowding: Do not overcrowd eggs in the incubator to allow for adequate airflow and easy access for turning.

7. Provide Adequate Ventilation

Importance of Airflow:

Chick embryos need oxygen for development. Ensuring proper ventilation in the incubator is crucial.

How to Ensure Ventilation:

  • Open Vents: Make sure the incubator vents are open and unobstructed to allow fresh air exchange.
  • Monitor Air Quality: Regularly check for airflow and adjust if needed. Some incubators may require adjustment of vents based on the developmental stage of the embryos.

8. Be Patient and Observant

Understanding the Timeline:

The incubation period for chicken eggs typically lasts about 21 days.

Observing Changes:

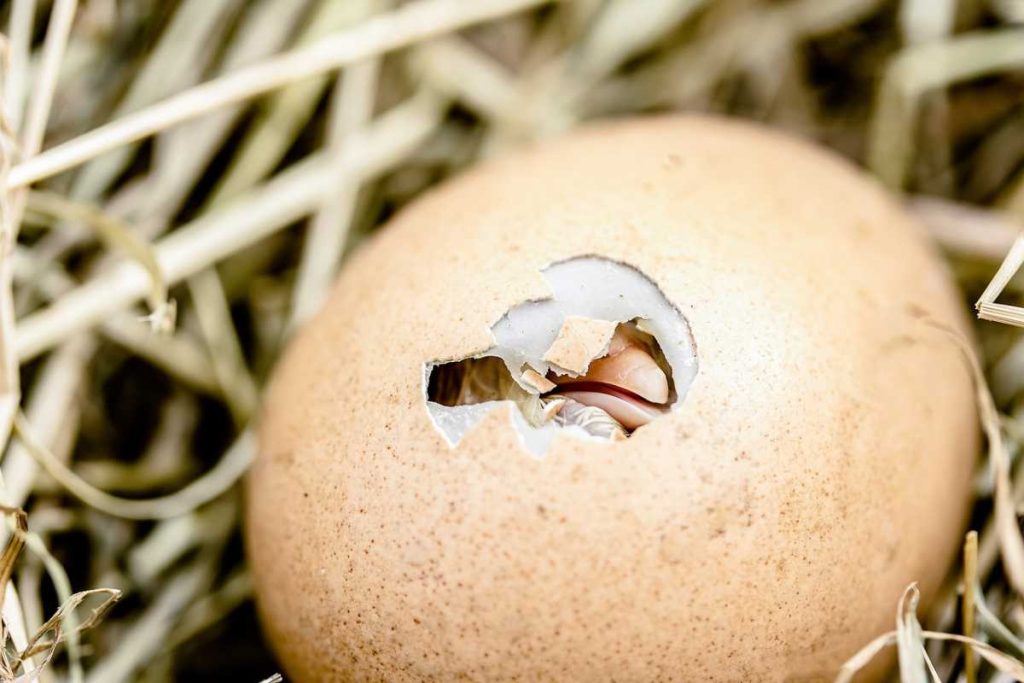
  • Watch for Behavior Changes: As hatching day approaches, you may see chicks beginning to move inside the eggs or hear peeping noises.
  • Do Not Disturb: Once the chicks start hatching, minimize interference. Allow them to break out of their shells naturally.

9. Provide Post-Hatch Care

What to Do After Hatching:

Once the chicks have hatched, they need proper care to ensure their health and growth.

Essential Steps:

  • Drying: Allow chicks to dry off completely in the incubator before transferring them to a brooder.
  • Brooder Setup: Prepare a brooder with heat, food, and water. Maintain a temperature of 90°F to 95°F (32°C to 35°C) for the first week, decreasing gradually each week.

Conclusion

Successfully incubating chicken eggs requires careful attention to detail and a nurturing environment. By following these expert tips, you can increase your chances of a successful hatch and ensure healthy chicks. Remember that each incubation cycle may present unique challenges, so stay observant and adaptable. Happy hatching!

6 Natural Remedies for Chicken Mites and Lice

Chicken mites and lice can be a nuisance for your flock, causing discomfort and stress to your birds. While there are various commercial treatments available, many chicken keepers prefer natural remedies that are gentle on the chickens and the environment. Here are six effective natural remedies to help you combat chicken mites and lice.

1. Diatomaceous Earth (DE)

What It Is:

Diatomaceous Earth is a fine powder made from the fossilized remains of tiny aquatic organisms called diatoms.

How It Works:

When applied to your chickens and their living environment, DE works by physically damaging the exoskeletons of mites and lice, leading to dehydration and death.

How to Use:

  • Application: Dust your chickens lightly with food-grade diatomaceous earth, focusing on areas where mites and lice tend to hide, such as under the wings and around the vent.
  • Bedding: Sprinkle DE in the bedding of your coop to help eliminate pests in the environment. Be sure to replace the bedding regularly for maximum effectiveness.

2. Neem Oil

What It Is:

Neem oil is derived from the seeds of the neem tree and has natural insecticidal properties.

How It Works:

Neem oil disrupts the life cycle of mites and lice by affecting their hormonal systems, preventing them from reproducing.

How to Use:

  • Dilution: Mix neem oil with a carrier oil (like coconut oil) in a spray bottle, using a ratio of about 1:10 (one part neem oil to ten parts carrier oil).
  • Application: Spray the diluted neem oil directly on the chickens, making sure to coat their feathers well. Repeat every few days until the infestation is gone.

3. Essential Oils

What They Are:

Certain essential oils, such as lavender, tea tree, and eucalyptus, possess natural insect-repelling properties.

How They Work:

These oils can deter mites and lice and may also provide soothing effects to your chickens.

How to Use:

  • Dilution: Mix a few drops of essential oil with water in a spray bottle. A good ratio is 10 drops of essential oil to 1 cup of water.
  • Application: Spray the mixture on your chickens and in their coop. Avoid over-saturating to prevent irritation.

4. Apple Cider Vinegar (ACV)

What It Is:

Apple cider vinegar is a fermented liquid made from crushed apples, and it has numerous health benefits.

How It Works:

ACV can help improve your chickens’ overall health, making them less susceptible to infestations. It may also create an environment that is unfavorable for mites and lice.

How to Use:

  • Drinking Water: Add 1 tablespoon of apple cider vinegar to 1 gallon of drinking water. Ensure your chickens have access to this mixture regularly.
  • Direct Application: You can also dilute ACV with water (50:50) and apply it directly to the chickens’ feathers, particularly around the vent and under the wings.

5. Garlic

What It Is:

Garlic is a natural herb known for its medicinal properties and pest-repelling abilities.

How It Works:

Garlic contains sulfur compounds that can deter mites and lice, and it also boosts your chickens’ immune systems.

How to Use:

  • Garlic Water: Crush a few cloves of garlic and steep them in water overnight. Strain the liquid and mix it into your chickens’ drinking water.
  • Garlic Powder: You can also sprinkle garlic powder in the feed, which can help create a protective effect against parasites.

6. Herbal Sprays

What They Are:

Herbal sprays can be made from a combination of natural ingredients known for their insect-repelling properties.

How They Work:

By using a blend of herbs, you can create a spray that is not only effective against mites and lice but also safe for your chickens.

How to Use:

  • Recipe: Boil 2 cups of water and add a mix of dried herbs such as rosemary, thyme, and peppermint. Let the mixture steep until cool, then strain and transfer it to a spray bottle.
  • Application: Spray the herbal mixture on your chickens, focusing on areas where mites and lice are likely to hide.

Conclusion

Dealing with chicken mites and lice can be a challenge, but using natural remedies can help you maintain a healthy flock without the use of harsh chemicals. Diatomaceous earth, neem oil, essential oils, apple cider vinegar, garlic, and herbal sprays are all effective solutions that promote the well-being of your chickens. Remember to monitor your flock regularly and combine these remedies with good husbandry practices, such as regular cleaning of the coop, to prevent infestations in the future. If the infestation persists or worsens, consult a veterinarian for further advice.

4o mini

Essential Chicken Biosecurity Measures for 2024

As we move into 2024, maintaining a safe and healthy environment for your chickens is more important than ever. Biosecurity measures are crucial for preventing the spread of diseases and ensuring the overall well-being of your flock. Whether you’re a seasoned chicken keeper or just starting out, implementing effective biosecurity practices can protect your birds and improve their productivity. Here’s a comprehensive guide on essential chicken biosecurity measures for 2024.

1. Establish a Biosecurity Plan

Before diving into specific measures, it’s essential to create a comprehensive biosecurity plan tailored to your farm or backyard setup. This plan should outline specific protocols for daily management, emergency procedures, and how to respond to potential disease outbreaks. Ensure that everyone involved in caring for the chickens understands and follows this plan.

2. Limit Access to the Chicken Area

Controlling who has access to your chickens is vital for preventing disease introduction. Limit visitors and discourage unnecessary foot traffic around the coop and run. If someone needs to enter, provide them with clean footwear and clothing, or require them to wear disposable boots. Implement a sign-in sheet to keep track of who has been on your property.

3. Maintain Cleanliness and Sanitation

Regular cleaning and sanitation of your coop and surrounding areas help minimize disease risks.

  • Daily Tasks: Remove droppings and leftover feed daily to prevent the attraction of pests and the buildup of harmful bacteria.
  • Weekly Cleaning: Wash waterers, feeders, and surfaces with soap and water, then disinfect them using a safe poultry disinfectant.
  • Deep Cleaning: Schedule deep cleanings monthly or quarterly to thoroughly scrub down the entire coop, including nesting boxes and roosting bars.

4. Control Wildlife and Pests

Wild animals and pests can carry diseases that affect chickens. Implement measures to deter these animals:

  • Secure Coops: Ensure that your coop is predator-proof by sealing off openings and using sturdy materials.
  • Remove Attractants: Keep feed stored in airtight containers and clean up spilled grains to avoid attracting rodents and wild birds.
  • Monitor for Pests: Regularly check for signs of rodents or wild birds around the coop and take action to eliminate these problems promptly.

5. Implement Strict Hygiene Practices

Good hygiene practices are essential to minimize the risk of disease transmission:

  • Hand Washing: Always wash your hands before and after handling your chickens, feed, and equipment.
  • Separate Equipment: Use dedicated tools and equipment for different flocks, especially if you keep multiple species of poultry.
  • Disposable Items: Whenever possible, use disposable gloves and other items that can be discarded after use to further reduce cross-contamination risk.

6. Quarantine New Additions

Before introducing new chickens to your flock, quarantine them for at least 30 days to monitor for signs of illness. During this period, keep them away from your established flock, and observe them for any symptoms of disease. Testing new birds for common poultry diseases before introduction is also a smart move.

7. Vaccination and Health Monitoring

Vaccinations are a critical component of biosecurity for poultry. Consult with your veterinarian about which vaccinations are appropriate for your flock based on your geographical location and specific risks. Additionally, perform regular health checks on your chickens to identify any signs of illness early, allowing for prompt treatment and reducing the risk of spreading disease.

8. Manage Feed and Water Sources

Ensure that your chickens have access to clean, uncontaminated food and water:

  • Feed Storage: Store feed in airtight containers to keep it dry and pest-free.
  • Water Hygiene: Change water daily and clean waterers regularly to prevent bacterial growth and contamination.
  • Use High-Quality Feed: Invest in high-quality feed from reputable sources to minimize the risk of introducing diseases through contaminated feed.

9. Stay Informed About Local Disease Outbreaks

Keeping up-to-date with local poultry disease outbreaks is vital. Join local poultry associations or forums to stay informed about any health alerts or recommended practices. Your local agricultural extension office can also provide valuable resources and information on maintaining flock health.

10. Educate Yourself and Others

Education is key to effective biosecurity. Stay informed about best practices, new diseases, and vaccination protocols. Share this knowledge with family members or anyone who assists with your chickens to ensure everyone is on the same page regarding biosecurity measures.

Conclusion

Implementing and maintaining strict biosecurity measures is essential for the health and productivity of your chickens in 2024. By following these essential practices, you can protect your flock from diseases, ensure their well-being, and ultimately contribute to a successful and sustainable poultry operation. Remember, a proactive approach to biosecurity not only safeguards your chickens but also supports the larger poultry community.

5 Common Signs of Illness in Chickens and How to Treat Them

Raising chickens can be a rewarding experience, but it also comes with the responsibility of ensuring their health and well-being. Chickens are generally hardy animals, but they can become ill, and it’s crucial to recognize the signs early on. Here are five common signs of illness in chickens, along with tips on how to treat them.

1. Changes in Appetite or Weight Loss

Signs to Look For:

  • Decreased food intake or refusal to eat
  • Noticeable weight loss or a lack of weight gain in growing chicks
  • Picking at food but not consuming it

Possible Causes:

  • Illness such as coccidiosis, worms, or bacterial infections
  • Stress from environmental changes or poor housing conditions
  • Dietary deficiencies or unpalatable feed

Treatment:

  • Isolation: Separate the affected chicken to monitor its condition and prevent the spread of illness.
  • Veterinary Care: Consult a vet to diagnose the problem and recommend appropriate treatments, such as deworming medications or antibiotics.
  • Diet Improvement: Ensure a balanced diet with access to fresh, clean water. You may also consider introducing supplements, such as vitamins or electrolytes.

2. Respiratory Issues

Signs to Look For:

  • Coughing, sneezing, or wheezing
  • Nasal discharge or watery eyes
  • Open-mouth breathing or extended necks

Possible Causes:

  • Respiratory infections, such as infectious bronchitis or mycoplasma
  • Poor ventilation or high humidity levels in the coop
  • Exposure to dust, mold, or ammonia fumes

Treatment:

  • Improve Ventilation: Ensure that the coop is well-ventilated to reduce humidity and airborne pathogens.
  • Isolate Affected Birds: Separate sick chickens to prevent the spread of illness.
  • Consult a Veterinarian: Seek professional advice for proper diagnosis and treatment, which may include antibiotics or anti-inflammatory medications.

3. Changes in Egg Production

Signs to Look For:

  • Sudden drop in egg production or complete cessation
  • Abnormal egg shapes, sizes, or colors
  • Presence of blood or abnormalities in eggs

Possible Causes:

  • Stress from environmental changes, such as weather or housing
  • Illnesses like infectious bronchitis or egg drop syndrome
  • Nutritional deficiencies or lack of proper lighting

Treatment:

  • Assess Environment: Check for sources of stress, including temperature fluctuations, overcrowding, or bullying by other birds.
  • Nutritional Evaluation: Ensure the hens are receiving a balanced diet with adequate calcium and protein.
  • Consult a Vet: If changes persist, seek professional help to rule out infections or diseases.

4. Diarrhea or Abnormal Droppings

Signs to Look For:

  • Watery, runny droppings that differ from the usual consistency
  • Presence of blood or unusual colors (green, yellow, or white)
  • Foul odor in droppings

Possible Causes:

  • Intestinal parasites, bacterial infections, or viral infections
  • Dietary changes or spoiled feed
  • Stress or sudden changes in environment

Treatment:

  • Diet Review: Analyze recent dietary changes and adjust as necessary. Ensure access to clean, fresh water.
  • Medication: Consult a veterinarian for fecal testing and appropriate deworming or antibiotic treatments if needed.
  • Hygiene Practices: Maintain a clean coop and remove droppings regularly to minimize the risk of spreading disease.

5. Lethargy and Behavioral Changes

Signs to Look For:

  • Reduced activity levels or reluctance to move
  • Sitting or huddling alone, away from the flock
  • Changes in social interactions or aggression towards other birds

Possible Causes:

  • Illness such as avian influenza or other infections
  • Pain or discomfort due to injury or illness
  • Stress from environmental factors or bullying

Treatment:

  • Isolation: Separate lethargic chickens to monitor their behavior and prevent the spread of illness.
  • Environmental Assessment: Check for potential stressors, such as overcrowding, poor ventilation, or aggressive flock members.
  • Veterinary Consultation: Seek a professional diagnosis to address underlying health issues or injuries.

Conclusion

Being vigilant about the health of your chickens is crucial for their well-being and productivity. By recognizing the signs of illness early and taking appropriate action, you can effectively manage their health. Regular check-ups, maintaining a clean living environment, and providing a balanced diet will help keep your flock happy and healthy. Always consult a veterinarian for persistent or severe symptoms to ensure your chickens receive the best care possible.

8 Steps to Constructing a Functional Chicken Coop

Building a functional chicken coop is essential for providing a safe and comfortable environment for your hens. A well-designed coop will protect them from predators, provide adequate shelter, and promote their overall health and productivity. Here’s a step-by-step guide to constructing a functional chicken coop.

Step 1: Plan Your Coop

Determine Your Needs

  • Size: Decide how many chickens you plan to keep. A general rule is to allow 3-4 square feet of space per bird inside the coop and 10 square feet per bird in the outdoor run.
  • Design: Choose a design that fits your available space and style. Consider factors like ventilation, nesting boxes, and roosting areas.

Check Local Regulations

  • Before construction, check local zoning laws and regulations regarding keeping chickens. This may include coop size, setbacks from property lines, and permits.

Step 2: Gather Materials

Basic Materials

  • Wood: Use pressure-treated lumber for the base and untreated lumber for the walls and roof.
  • Wire Mesh: Use sturdy chicken wire or hardware cloth to protect against predators.
  • Roofing Material: Choose materials like shingles or metal for durability and weather resistance.
  • Insulation: Consider adding insulation for temperature control if you live in extreme climates.

Tools Needed

  • Basic Tools: Hammer, saw, drill, measuring tape, level, and square.
  • Safety Gear: Gloves and goggles for protection.

Step 3: Build the Foundation

Level the Ground

  • Select a suitable location that is well-drained and level. Clear any debris, rocks, or vegetation.

Construct the Base

  • Build a sturdy base using pressure-treated lumber. Ensure it is elevated off the ground to prevent moisture damage and deter pests. A height of 1-2 feet is generally recommended.

Step 4: Construct the Walls

Frame the Coop

  • Use 2×4 lumber to frame the walls. Create openings for windows and doors to ensure proper ventilation and access.

Add Wall Panels

  • Attach plywood or siding to the frame, ensuring it is well-sealed to protect against moisture and drafts. Cut out openings for windows and doors.

Step 5: Install the Roof

Choose a Design

  • Decide on a sloped or flat roof. A sloped roof is ideal for rain drainage.

Attach Roofing Material

  • Secure the roofing material to the frame, ensuring it is watertight. If using shingles, overlap them appropriately to prevent leaks.

Step 6: Create Ventilation

Importance of Ventilation

  • Proper ventilation helps regulate temperature and humidity inside the coop, reducing the risk of respiratory issues in chickens.

Install Vents

  • Cut openings near the top of the coop for ventilation, covering them with wire mesh to keep predators out. Consider installing adjustable vents for temperature control.

Step 7: Add Nesting Boxes and Roosts

Nesting Boxes

  • Provide one nesting box for every 3-4 hens. The boxes should be 12×12 inches or larger and placed in a quiet, dark area of the coop.

Roosting Bars

  • Install roosting bars at least 2-3 feet off the ground. Use 2×4 lumber for comfortable perching. Ensure there’s enough space for all hens to roost comfortably.

Step 8: Build the Run

Attach the Run

  • Create a secure outdoor run that is at least 10 square feet per bird. Use sturdy wire mesh to enclose the area.

Include Features

  • Add features like shaded areas, dust baths, and foraging spaces to enrich the environment for your chickens.

Final Touches

Ensure Safety

  • Check all joints, seams, and openings to ensure there are no gaps where predators can enter. Secure all doors and windows properly.

Decorate and Personalize

  • Once construction is complete, you can paint or decorate the coop to match your style. Add feeders and waterers for functionality.

Introduce Your Chickens

  • After everything is set up, introduce your chickens to their new home gradually. Monitor them for stress or discomfort as they adjust to their environment.

Conclusion

Constructing a functional chicken coop doesn’t have to be a daunting task. By following these eight steps, you can create a safe and comfortable space for your hens, ensuring they thrive and provide you with fresh eggs. With careful planning and attention to detail, your chicken coop will be a valuable addition to your backyard for years to come. Happy coop building!

The Ultimate Guide to High-Laying Hens for Egg Production

If you’re interested in raising chickens primarily for egg production, choosing the right breed of hens is crucial. Some hens are renowned for their prolific egg-laying abilities, providing a steady supply of fresh eggs. In this ultimate guide, we’ll explore the top high-laying hen breeds, their characteristics, and tips for optimal egg production.

Understanding Egg Production

Before diving into specific breeds, it’s essential to understand what contributes to high egg production. Factors that influence egg-laying include:

  • Breed: Some breeds are genetically predisposed to lay more eggs than others.
  • Age: Hens typically start laying eggs between 5 to 6 months and reach peak production during their first year.
  • Nutrition: A balanced diet rich in protein, vitamins, and minerals is vital for maintaining good health and egg production.
  • Lighting: Hens require around 14 to 16 hours of light per day to stimulate laying. Supplemental lighting may be needed during shorter days.
  • Environment: Comfortable housing and low-stress conditions are essential for encouraging egg-laying.

Top High-Laying Hen Breeds

Here’s a list of some of the best high-laying hen breeds known for their prolific egg production:

1. Leghorn

  • Egg Production: Leghorns are among the best egg-layers, producing approximately 280-300 eggs per year.
  • Egg Size: They primarily lay medium to large white eggs.
  • Temperament: Active and hardy, Leghorns are excellent foragers and thrive in various environments.
  • Notes: They are not as friendly as some other breeds, making them less suitable for backyard pet scenarios.

2. Rhode Island Red

  • Egg Production: Known for their reliability, Rhode Island Reds produce about 250-300 eggs annually.
  • Egg Size: They lay large brown eggs.
  • Temperament: Friendly and adaptable, they do well in both free-range and confinement settings.
  • Notes: Their hardiness makes them ideal for various climates.

3. Sussex

  • Egg Production: Sussex hens lay around 250-300 eggs per year.
  • Egg Size: They produce medium to large brown eggs.
  • Temperament: Known for their calm demeanor, Sussex hens are friendly and great for families.
  • Notes: They are also good foragers, making them suitable for free-range systems.

4. Plymouth Rock

  • Egg Production: Plymouth Rocks lay approximately 200-250 eggs annually.
  • Egg Size: They typically produce medium brown eggs.
  • Temperament: Friendly and easy to handle, they are excellent for families and beginners.
  • Notes: Their striking appearance and good temperament make them popular backyard chickens.

5. Austrian Blue

  • Egg Production: Austrian Blues can lay around 220-250 eggs per year.
  • Egg Size: They lay medium-sized brown eggs.
  • Temperament: They are friendly and docile, making them good companions.
  • Notes: These birds are also known for their unique blue feathers, adding beauty to any flock.

6. Orpington

  • Egg Production: Orpingtons typically produce 180-200 eggs per year.
  • Egg Size: They lay large brown eggs.
  • Temperament: Known for their friendly and calm nature, they are great for families and children.
  • Notes: They are excellent foragers and adapt well to various environments.

7. Marans

  • Egg Production: Marans lay about 150-200 eggs annually.
  • Egg Size: They are famous for their dark chocolate-brown eggs.
  • Temperament: Generally friendly and docile, they make good pets.
  • Notes: Their unique egg color can add diversity to your egg basket.

Tips for Optimal Egg Production

To maximize egg production from your hens, consider the following tips:

1. Provide a Balanced Diet

Ensure your hens receive a high-quality layer feed that meets their nutritional needs. A balanced diet rich in protein, calcium, and essential vitamins will support their overall health and egg production.

2. Ensure Adequate Lighting

If your hens are not getting enough natural light, consider adding supplemental lighting in the coop during shorter days. Aim for around 14-16 hours of light daily to stimulate consistent egg laying.

3. Maintain a Comfortable Environment

Keep the coop clean and well-ventilated to reduce stress and promote health. A comfortable environment will encourage your hens to lay eggs more consistently.

4. Monitor Health Regularly

Regular health checks and vaccinations can help prevent diseases that might affect egg production. Consult with a veterinarian to establish a health management plan for your flock.

5. Encourage Nesting Behavior

Provide sufficient nesting boxes (one box for every 3-4 hens) to encourage laying. Ensure boxes are comfortable, clean, and situated in a quiet area of the coop.

6. Limit Stress Factors

Minimize stress by handling your hens gently and providing a calm environment. Avoid sudden changes in their routine, which can disrupt their laying habits.

Conclusion

Choosing the right high-laying hen breeds is crucial for maximizing egg production and ensuring a steady supply of fresh eggs for your household. By considering factors such as breed characteristics, nutrition, lighting, and overall care, you can create an ideal environment for your hens to thrive. With the right approach, raising chickens can be a delightful and productive endeavor, providing you with delicious eggs and the joy of caring for these wonderful animals. Happy chicken keeping!

Top 7 Must-Have Supplies for Raising Chickens

Raising chickens can be a rewarding and enjoyable experience, whether you’re looking to produce fresh eggs, improve your garden’s health, or simply enjoy the companionship of these fascinating birds. However, successful chicken keeping requires proper supplies and equipment to ensure their health and happiness. Here are the top seven must-have supplies for raising chickens:

1. Chicken Coop

A well-designed chicken coop is essential for providing shelter, safety, and a comfortable living space for your chickens. When choosing or building a coop, consider the following:

  • Size: Ensure the coop provides enough space for each chicken, typically about 4 square feet per bird inside the coop and 10 square feet in an outdoor run.
  • Ventilation: Proper airflow is crucial to prevent moisture buildup and maintain a healthy environment.
  • Security: Make sure the coop is predator-proof with strong materials and locks to protect your chickens from raccoons, foxes, and other potential threats.

2. Chicken Run

In addition to a coop, a secure outdoor run allows chickens to roam and exercise safely. A chicken run should:

  • Be enclosed: Use sturdy fencing to protect chickens from predators and keep them safe.
  • Provide shade and shelter: Include shaded areas where chickens can escape the sun and sheltered spots for protection from rain.
  • Encourage foraging: An outdoor run should have dirt or grass for chickens to scratch and peck at, satisfying their natural behaviors.

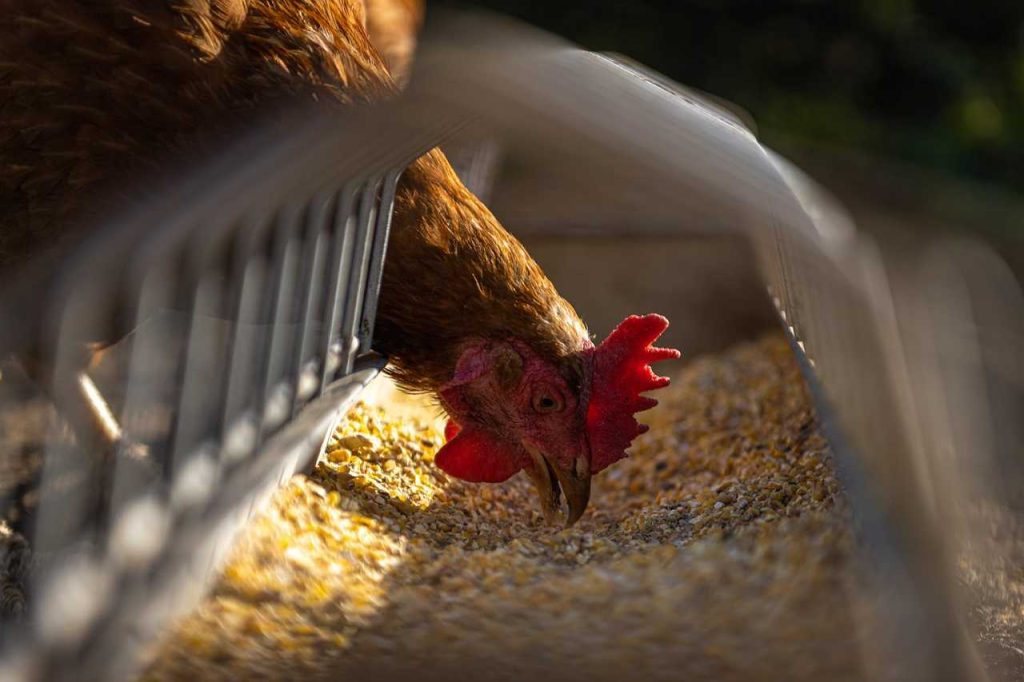
3. Feeder and Waterer

Providing fresh food and water is essential for your chickens’ health. Invest in good quality feeders and waterers that are:

  • Easy to clean: Choose materials that can be easily disinfected to prevent the growth of bacteria.
  • Designed for chickens: Ensure that the feeder is appropriate for the size of your chickens and prevents spills and waste.
  • Sufficient in size: Select feeders and waterers that can hold enough feed and water for your flock, ensuring they don’t run out, especially during hot weather.

4. Bedding Material

Choosing the right bedding for your chickens is vital for their comfort and health. Common bedding options include:

  • Straw: Good for insulation and absorbs moisture, but may need frequent changing.
  • Wood shavings: A popular choice that is absorbent and provides a comfortable surface.
  • Pine pellets: These are highly absorbent and help control odors effectively.

Regularly clean and change the bedding to maintain a healthy living environment and reduce the risk of pests and diseases.

5. Nesting Boxes

Nesting boxes provide a safe and comfortable space for hens to lay their eggs. When setting up nesting boxes, consider the following:

  • Size: Each nesting box should be about 12 inches by 12 inches and ideally placed about 18 inches off the ground.
  • Comfort: Line the boxes with soft bedding material to encourage hens to use them.
  • Privacy: Place nesting boxes in a quiet, secluded area of the coop to give hens a sense of security when laying eggs.

6. Grit and Calcium Supplements

Chickens require additional nutrients to maintain their health and improve egg production. Two essential supplements include:

  • Grit: Chickens don’t have teeth, so they need grit (small stones) to aid in digestion. Provide free access to grit, especially if they are foraging.
  • Calcium: Laying hens require extra calcium to produce strong eggshells. Offer crushed oyster shells or limestone as a supplement to their diet.

7. Health and First Aid Supplies

Keeping a basic first aid kit for your chickens is crucial for addressing minor injuries or illnesses. Include the following supplies:

  • Antibiotic ointment: For treating cuts or abrasions.
  • Electrolytes: Useful for rehydrating sick or stressed chickens.
  • Vet-approved medications: Consult a veterinarian to stock essential medications for common chicken ailments.

Additionally, having a reliable source for veterinary care is important in case of more serious health issues.

Conclusion

Raising chickens can be an incredibly fulfilling endeavor, but it requires the right supplies to ensure their health, safety, and happiness. By investing in a good coop, secure run, proper feeders and waterers, suitable bedding, nesting boxes, essential supplements, and health supplies, you’ll create a thriving environment for your chickens. With the right setup, you’ll be on your way to enjoying the many benefits of chicken keeping, from fresh eggs to the joy of watching your flock flourish. Happy chicken raising!

What is Chicken Yoga? Explained

In the realm of wellness and animal therapy, Chicken Yoga has emerged as a quirky yet meaningful trend that blends the calming practice of yoga with the delightful presence of chickens. This innovative concept promotes relaxation, mindfulness, and community through a unique interaction with these charming birds. Let’s delve into what Chicken Yoga is, how it works, its benefits, and how you can get involved.

The Concept of Chicken Yoga

Chicken Yoga is rooted in the idea of animal-assisted therapy, where interaction with animals enhances emotional healing and well-being. By integrating chickens into yoga sessions, practitioners can experience the soothing effects of both yoga and the gentle nature of these feathered friends. This playful practice encourages participants to reconnect with nature and find joy in simple, everyday moments.

How Chicken Yoga Works

1. Setting the Scene

Typically conducted in serene outdoor environments—such as gardens, farms, or backyards—Chicken Yoga classes create a peaceful atmosphere for participants. The setup often includes:

  • Yoga Mats: Participants bring their own mats to practice on, ensuring comfort and cleanliness.
  • Natural Surroundings: Classes take place in spaces with greenery and fresh air, allowing for a deeper connection to nature.
  • Roaming Chickens: Chickens are allowed to roam freely, creating a relaxed and enjoyable environment for both participants and the birds.

2. Interacting with Chickens

During the class, chickens may wander around the mats, perch on participants’ laps, or even curiously peck at the ground. This interaction is essential to the experience, as it fosters:

  • Laughter and Joy: The unpredictable behavior of chickens can lead to spontaneous moments of joy, contributing to an uplifting atmosphere.
  • Mindfulness: Participants are encouraged to be present and attentive, observing the chickens and their movements, which enhances the overall mindfulness practice.

3. The Yoga Practice

Led by an instructor, the yoga session typically involves:

  • Gentle Yoga Poses: Classes often incorporate a mix of gentle and restorative poses suitable for all skill levels.
  • Breathwork and Meditation: In addition to physical movement, instructors may guide participants through breathing exercises and meditative practices.
  • Focus on Presence: Instructors encourage participants to be aware of their surroundings, including the chickens, promoting a sense of connection to nature.

Benefits of Chicken Yoga

1. Stress Relief

One of the primary benefits of Chicken Yoga is its ability to reduce stress and anxiety. The combination of yoga’s calming effects and the soothing presence of chickens can help participants unwind and escape the pressures of daily life.

2. Mindfulness and Presence

Practicing yoga alongside chickens encourages mindfulness, as participants must stay attuned to both their movements and the chickens’ behavior. This heightened awareness fosters self-acceptance and a deeper connection to the present moment.

3. Enhanced Mood

Interacting with animals has been shown to boost mood and promote feelings of happiness. The playful nature of chickens can elicit laughter and create a positive, lighthearted environment, which is particularly beneficial during challenging times.

4. Connection with Nature

Chicken Yoga promotes a deeper appreciation for nature and encourages participants to embrace the beauty of the outdoors. This connection can enhance overall well-being and foster a sense of tranquility.

5. Community Building

Chicken Yoga classes are often group-oriented, fostering a sense of community among participants. Sharing this unique experience can lead to new friendships and connections, making the practice even more enjoyable.

Getting Started with Chicken Yoga

If you’re interested in trying Chicken Yoga, here are some tips to help you get started:

1. Find a Local Class

Look for local farms, wellness centers, or yoga studios that offer Chicken Yoga classes. Many farms with chickens are beginning to host these unique sessions.

2. Dress Comfortably

Wear comfortable, breathable clothing that allows for freedom of movement. Closed-toe shoes are advisable, especially if the ground is uneven.

3. Bring Your Own Yoga Mat

While some locations may provide mats, bringing your own ensures comfort and cleanliness during your practice.

4. Be Mindful of Chickens

Approach the chickens gently and respect their space. Avoid sudden movements that might startle them, and enjoy their company with patience.

5. Stay Open-Minded

Embrace the unpredictable nature of practicing yoga with animals. Each session may be unique, filled with surprises and delightful moments.

Conclusion

Chicken Yoga is a fun and innovative way to combine physical activity, mindfulness, and the joy of animal companionship. Whether you’re a seasoned yogi or a newcomer to the practice, this unique approach offers a refreshing opportunity to relax, connect with nature, and enjoy the company of charming chickens. As this trend continues to grow, it serves as a delightful reminder of the happiness that can be found in the simplest moments spent with animals. If you’re looking for a new way to enhance your yoga practice and bring a little joy into your routine, consider giving Chicken Yoga a try!

Expert Tips for Creating a Stress-Free Environment for Your Chickens

A stress-free environment is essential for raising happy and healthy chickens. Chickens, like any animals, can experience stress from overcrowding, poor nutrition, predators, and even environmental changes. Stress can lead to decreased egg production, weakened immune systems, and behavioral issues. To ensure your flock thrives, it’s crucial to create an environment that minimizes stress. Here are expert tips for fostering a calm and healthy space for your chickens.

1. Provide Adequate Space

Overcrowding is one of the biggest sources of stress for chickens. When chickens don’t have enough space to move freely, it can lead to aggressive behavior, pecking, and bullying within the flock.

Tips:

  • Indoor Space: Each chicken should have at least 3 to 4 square feet of space inside the coop.
  • Outdoor Space: Provide at least 10 square feet per chicken in the run for them to scratch, forage, and exercise.
  • Perches: Include enough roosting perches to prevent fighting and to ensure every chicken has a spot to rest at night.

2. Offer a Balanced Diet

Nutrition plays a critical role in reducing stress. Poor-quality feed, lack of access to fresh water, or an imbalanced diet can weaken your chickens’ health and lead to unnecessary stress.

Tips:

  • Quality Feed: Ensure your chickens receive a well-balanced, complete feed appropriate for their age and purpose (layer, broiler, etc.).
  • Treats in Moderation: While treats like scratch grains or kitchen scraps are fun, limit them to no more than 10% of their diet to ensure they get proper nutrients from their regular feed.
  • Fresh Water: Provide clean, fresh water at all times, especially during hot weather. Dehydration can quickly lead to stress and health problems.

3. Maintain Proper Coop Ventilation

Good airflow is vital for maintaining a healthy coop environment. Poor ventilation can lead to a buildup of ammonia from droppings, moisture, and heat, all of which can stress chickens and lead to respiratory issues.

Tips:

  • Windows and Vents: Install windows and vents to ensure cross-ventilation, but avoid drafts that could chill chickens in cold weather.
  • Bedding Maintenance: Keep bedding dry and clean to reduce ammonia buildup. Regularly remove soiled bedding and replace it with fresh material like straw, wood shavings, or hemp.
  • Positioning: If possible, face the coop toward the prevailing breeze to naturally help with ventilation, but avoid exposing the coop to direct winds.

4. Create Safe and Secure Housing

Fear of predators is a significant cause of stress for chickens. Chickens are naturally wary animals, and any sign of a threat can trigger anxiety within the flock.

Tips:

  • Predator-Proof Coop: Reinforce the coop and run with hardware cloth rather than chicken wire to prevent predators like raccoons, foxes, or snakes from getting in.
  • Secure Perimeter: Make sure the coop and run are completely enclosed, including an apron of wire buried underground to prevent digging predators.
  • Routine Checks: Regularly inspect the coop for holes, gaps, or signs of predator activity to keep your chickens safe and calm.

5. Provide Mental and Physical Enrichment

Boredom can lead to stress in chickens, resulting in feather-pecking, bullying, and restlessness. Keeping chickens entertained and mentally stimulated is essential for reducing stress and promoting natural behaviors like foraging.

Tips:

  • Foraging Opportunities: Scatter feed or scratch grains in the run to encourage natural foraging behaviors.
  • Toys and Perches: Add logs, roosts, or chicken toys for climbing and exploration.
  • Dust Baths: Provide a designated dust bathing area with fine sand or dirt, which allows chickens to clean themselves and helps with mite control.
  • Rotational Grazing: If possible, rotate the chickens’ access to different areas of the yard or pasture to keep their environment fresh and exciting.

6. Limit Environmental Changes

Chickens thrive on routine, and sudden changes to their environment or care can lead to stress. Avoid unnecessary disruptions and introduce changes gradually whenever possible.

Tips:

  • Stable Routine: Keep a consistent feeding, cleaning, and care schedule.
  • Gradual Introduction of New Flock Members: If you’re adding new chickens to the flock, introduce them slowly to prevent fighting and stress. Use a partition to let the existing and new chickens see each other without direct contact until they become accustomed.
  • Minimize Loud Noises: Chickens can be startled by loud noises, so keep your coop away from areas with excessive traffic or sudden sounds.

7. Provide a Quiet and Safe Roosting Area

Chickens need a quiet, safe place to rest and sleep at night. If they are disturbed by predators, noise, or cramped roosts, their stress levels can increase.

Tips:

  • Roosting Bars: Make sure there are enough roosting bars for all chickens, and they are positioned at least 2 feet off the ground.
  • Dark and Quiet: The coop should be dark and quiet at night. Use solid walls and doors to prevent outside light and noise from disturbing their rest.
  • Reduce Roosting Conflicts: Space out perches to prevent overcrowding and fighting over roosting spots.

8. Monitor Health Regularly

Illness and injury can cause stress in chickens, and stress can in turn weaken their immune system. Regular health checks help you catch problems early and treat them before they become major issues.

Tips:

  • Weekly Health Inspections: Check your chickens weekly for signs of illness, such as pale combs, lethargy, loss of appetite, or unusual droppings.
  • Isolate Sick Birds: If a chicken becomes sick, isolate it from the flock to prevent the spread of disease and reduce stress on the other birds.
  • First Aid Kit: Keep a chicken first aid kit on hand with essentials like wound spray, electrolytes, and wormers to treat issues quickly.

Conclusion

Creating a stress-free environment for your chickens is key to their overall health, well-being, and productivity. By providing enough space, proper nutrition, secure housing, mental enrichment, and consistent care, you can significantly reduce stress and ensure a happy, healthy flock. Keeping chickens should be an enjoyable experience for both you and your birds, and by following these expert tips, you’ll create a peaceful, thriving environment for your feathered friends.