12 Reasons Everyone Should Start Growing Lemon Balm

Lemon Balm, also known as Melissa officinalis, is a versatile herb that has been used for centuries for its numerous health, beauty, and culinary benefits. This herb is easy to grow and can be grown indoors or outdoors, making it a great addition to any garden or home. 

From its anti-anxiety properties to its versatility in the kitchen, Lemon Balm is a must-have herb that is not only beneficial but also affordable and easy to grow.

lemon balm benefits

1. Health Benefits

Lemon Balm is known for its numerous health benefits, including digestive benefits and can help with nausea, bloating, and indigestion. In addition, it supports the immune system and has antiviral properties, making it a great herb to have during cold and flu season.

Lemon Balm contains rosmarinic acid, a natural anti-inflammatory that has been shown to reduce swelling and redness, making it great for those with skin irritations.

2. Beauty and Skincare Benefits

The herb’s anti-inflammatory and antioxidant properties make it great for reducing redness, and swelling, and helping to protect the skin from damage caused by free radicals. This makes it a great natural remedy for those with skin irritations or conditions such as eczema, psoriasis, or acne.

Lemon Balm has moisturizing properties, making it great for those with dry or sensitive skin. It can help to soothe and hydrate the skin, leaving it looking and feeling smooth and refreshed.

Read this: 10 Best Air-Purifying Plants For Better Sleep

3. Helps bees

One of the ways Lemon Balm helps the environment is by providing food for bees. The herb is a popular food source for bees, especially honeybees, and provides them with a rich source of nectar and pollen.

Bees are vital pollinators, responsible for 80% of plant pollination on Earth. This results in 1 in 4 of our food bites being from their efforts. If they were to disappear, our food supply would greatly decrease and drastically change our lives.

4. Medicinal Properties

Lemon Balm is a highly valued herb for its medicinal properties and has been used for centuries for its healing benefits. The herb contains compounds such as rosmarinic acid, eucalyptol, and citronellal, which give it its unique medicinal properties.

Lemon Balm has a calming effect on the mind and body, making it a great natural remedy for those who suffer from anxiety, stress, or insomnia. The herb has a relaxing effect on the nervous system and has been shown to reduce symptoms of anxiety, depression, and insomnia.

5. Repel Mosquitoes

Lemon Balm is not only beneficial for your health, but it can also help to keep annoying pests like mosquitoes at bay. The strong citrus scent of Lemon Balm is known to be a natural mosquito repellent, making it a great herb to grow in your garden or have in your home.

Crush fresh leaves and apply them directly to your skin, focusing on exposed areas like ankles and arms that are most susceptible to mosquito bites. Whether you are looking for a natural alternative to chemical-based mosquito repellents or simply want to enjoy the benefits of this versatile herb, Lemon Balm is a must-have for your home and garden.

Check this out: 8 Reasons Why You Should Use Vinegar for Your Houseplants

6. Culinary Benefits

Lemon Balm is not only valued for its numerous health and beauty benefits, but also for its culinary uses. This herb has a fresh, lemon-like flavour that can add a bright, citrusy note to a variety of dishes, from salads and sauces to baked goods and beverages.

Lemon Balm is a versatile herb that can be used fresh or dried, making it a great addition to any kitchen. The leaves of Lemon Balm can be chopped and added to salads, sauces, and marinades for a burst of flavour. The herb can also be used to make a flavorful tea, which can be enjoyed hot or iced, or added to lemonade or other beverages.

7. Control blood sugar levels

Lemon Balm has been shown to have an insulin-like effect, helping to regulate blood sugar levels by increasing insulin sensitivity and reducing glucose production by the liver. In addition, Lemon Balm has been shown to have a positive effect on blood lipid levels, helping to lower cholesterol levels and reduce the risk of heart disease.

8. Ease muscle soreness

Lemon Balm contains compounds that have a soothing and anti-inflammatory effect on the body, making it a useful herb for reducing muscle soreness and discomfort. When applied topically or consumed, Lemon Balm can help to reduce inflammation, ease muscle pain and discomfort, and promote faster recovery from exercise or physical activity.

9. Enhance Liver Health

Lemon Balm has been shown to have a positive effect on liver health, making it a valuable herb for those looking to maintain optimal liver function. The liver is a vital organ that plays a crucial role in filtering toxins from the body, producing bile, and regulating metabolic processes. Maintaining healthy liver function is essential for overall health and well-being. 

10. Improving memory 

People who consumed lemon balm have improved memory in comparison to others. Lemon balm had a favourable effect on fragments of brain tissue and chemical receptors in Alzheimer’s patient’s brains, according to the study. 

Lemon balm is easy to grow and can be found at most nurseries or online. Start growing lemon balm today and see how it can help improve your memory!

Also Read: 6 Amazing Composting Ways Everyone Should Try, No Matter Where You Live

11. Aid cold sores

Lemon balm has antiviral properties that have been found to be effective in reducing the severity and duration of cold sores. The herb’s active compounds, such as rosmarinic acid, can inhibit the replication of the herpes simplex virus (HSV) that causes cold sores. 

In addition, the anti-inflammatory and soothing properties of lemon balm can help reduce pain and promote healing. By applying lemon balm topically or consuming it in tea or supplement form, individuals can potentially reduce the frequency and severity of outbreaks.

12. Sleep better

Lemon balm has been found to have a calming effect on the body and mind, making it a useful herb for improving sleep quality. The herb’s active compounds, such as rosmarinic acid, have a sedative effect on the central nervous system, promoting relaxation and reducing stress and anxiety. 

Additionally, the herb’s ability to soothe the digestive system can also contribute to improved sleep by reducing discomfort or restlessness during the night.

Conclusion

Lemon balm is a versatile and beneficial herb that offers numerous health and wellness advantages. From its anti-inflammatory and antiviral properties to its ability to promote better sleep and soothe digestive discomfort, lemon balm is a natural solution for many common health concerns. Its ease of growth, attractive appearance, and fragrant aroma make it a great addition to any garden or balcony. Whether using it for cooking, tea, or skincare, the potential benefits of incorporating lemon balm into one’s life are numerous and appealing.

10 Best Air-Purifying Plants For Better Sleep

Good quality air is crucial for sound and restful sleep. That is where air-purifying plants come into play. These plants not only add aesthetic appeal to a space but also help to remove harmful pollutants and improve indoor air quality.

From snake plants to English ivy plants, peace lilies to rubber trees, there are many options to choose from.

air purifying houseplants

1. Snake Plant (Sansevieria)

When it comes to air purification, snake plants are truly top-notch. They are known to remove harmful pollutants such as formaldehyde, xylene, and toluene from the air. This makes them a great choice for bedrooms and other spaces where you want to improve air quality for better sleep.

They are also known to be easy to care for, as they can withstand a range of conditions and are happy in low light levels. 

2. Peace Lily

Peace Lily is a popular air-purifying plant known for its beautiful white flowers and lush, green foliage. Not only does it add visual appeal to a space, but it also helps to remove harmful pollutants from the air.

One of the standout benefits of peace lilies is their ease of care. They thrive in low to medium light and prefer consistently moist soil. They also require relatively low maintenance, making them a great choice for those who want to improve air quality without having to put in too much effort.

Also Read: 10 Houseplants That Will Thrive in Your Kitchen

3. English Ivy

English Ivy is a popular air-purifying plant known for its fast-growing, lush green leaves. It’s a great option for those looking to add some greenery to their space while also improving air quality.

English Ivy is known to be an effective air purifier, removing harmful pollutants such as formaldehyde and ammonia from the air. 

English Ivy is easy to care for and can be grown in a variety of lighting conditions, making it a great choice for both experienced and novice gardeners.

4. Aloe Vera

Aloe Vera is a succulent plant that is widely known for its medicinal properties, but it is also a great air-purifying plant. Its fleshy leaves and rosette shape make it a stylish addition to any room, while its ability to remove harmful pollutants from the air makes it a practical choice for improving indoor air quality.

Aloe Vera is known to remove harmful pollutants such as benzene and formaldehyde from the air.

Aloe Vera is relatively low maintenance and can be grown in a range of lighting conditions, making it a great choice for both experienced and novice gardeners.

5. Pothos

Pothos, also known as Devil’s Ivy, is a popular air-purifying plant known for its fast-growing vines and heart-shaped leaves. It’s a great option for those looking to add some greenery to their space while also improving air quality.

Pothos is known to be an effective air purifier, removing harmful pollutants such as benzene, formaldehyde, and xylene from the air. It’s especially effective at removing mold spores and allergens, making it a great choice for those with allergies.

Pothos is easy to care for and can be grown in a variety of lighting conditions, making it a great choice for both experienced and novice gardeners. 

Check this out: 15 Healing Houseplants That Can Improve Your Health

6. Rubber Plant

The Rubber Plant is a popular air-purifying plant known for its large, shiny leaves and upright stature. It’s a great option for those looking to add some greenery to their space while also improving air quality.

Rubber Plants are known to be effective air purifiers, removing harmful pollutants such as formaldehyde, benzene, and trichloroethylene from the air.

Rubber Plants are relatively low maintenance and can be grown in a variety of lighting conditions, making them a great choice for both experienced and novice gardeners. They prefer well-drained soil and occasional watering. Water it when the soil is slightly dry.

7. Boston Fern

The Boston Fern is a popular air-purifying plant known for its lush, green fronds and ability to improve indoor air quality.

Boston Ferns are known to be effective air purifiers, removing harmful pollutants such as formaldehyde, xylene, and toluene from the air.

Boston Ferns are relatively low maintenance, but they do require consistent moisture and high humidity to thrive. They are best grown in well-drained soil and bright, indirect light.

8. Dracaena

Dracaena is a large group of air-purifying plants that includes species such as the Dragon Tree and Corn Plant. These plants are known for their distinctive foliage and ability to improve indoor air quality.

Dracaenas are known to be effective air purifiers, removing harmful pollutants such as benzene, formaldehyde, and trichloroethylene from the air.

Dracaenas are relatively low maintenance and can be grown in a variety of lighting conditions, and it’s an ideal choice for everyone. They are also low-maintenance, easy to care for, and only need to be watered infrequently.

9. Lavender

Lavender is a fragrant herb known for its purple blooms and air-purifying abilities.

Lavender is known to be an effective air purifier, removing harmful pollutants from the air.

Lavender is easy to grow and care for, and it thrives in sunny, well-drained locations. It’s a great choice for those who want to add a pop of colour to their space while also improving air quality. Whether you’re looking for a natural way to improve air quality for better sleep or just want to add some greenery to your space, lavender is a great choice.

10. Lady Palm

Lady Palm is a slow-growing air-purifying plant known for its large, fan-like leaves and ability to improve indoor air quality.

Lady Palms are known to be effective air purifiers, removing harmful pollutants from the air. They are also believed to have some health benefits, improving air quality by releasing oxygen and absorbing carbon dioxide, and potentially reducing stress and improving mood.

Lady Palms are relatively low maintenance and can be grown in a variety of lighting conditions, making them a great choice for both experienced and novice gardeners. They are also low-maintenance, easy to care for, and only need to be watered when the top layer of soil reaches dryness.

Conclusion

Air-purifying plants are an easy and effective way to improve indoor air quality and promote better sleep. From Snake Plants and Peace Lilies to English Ivy and Aloe Vera, there is a wide variety of plants to choose from, each with its own unique benefits and features.

Whether you’re looking for a natural way to improve air quality, reduce stress, or simply add some greenery to your space, air-purifying plants are a great option. Consider adding one or more of these plants to your home or office for improved air quality and better sleep.

8 Reasons Why You Should Use Vinegar for Your Houseplants

Vinegar can be used as a natural and cost-effective solution for houseplant care from balancing soil pH levels to killing harmful bacteria, controlling pests, promoting germination, stimulating growth, preventing mold and mildew, and increasing humidity.

Houseplants play a vital role in improving air quality and the overall aesthetic of our homes. To ensure their health and vitality, it is important to provide them with the right care and attention.

While there are many products available in the market to help keep your houseplants healthy, one unlikely but effective ingredient that you may already have in your kitchen is vinegar.

8 Reasons Why You Should Use Vinegar for Your Houseplants

vinegar for houseplants

1. Promotes germination

The use of vinegar can promote germination in seeds by breaking down any natural inhibitors on the seed coat that may prevent germination. This happens because vinegar is acidic and can dissolve these inhibitors, making it easier for the seed to sprout.

To use vinegar for seed germination, simply soak the seeds in a solution of 6-8 drops of white vinegar and water overnight. That will help to improve the chances of successful germination, resulting in stronger, healthier plants.

It’s vital to note that not all seeds respond well to vinegar, so it’s a good idea to research the specific needs of the seeds you plan to plant before using vinegar. Additionally, some seeds may only require a brief soak, while others may need a longer soak for the best results.

2. Prevents mold

Mold and mildew can be a serious problem for houseplants, leading to poor health, discoloration and reduced growth. Luckily, vinegar can help to prevent the growth of these harmful fungi, making it a vital tool in houseplant care.

By using vinegar, you can create an inhospitable environment for mold and mildew, reducing the risk of these fungi developing and spreading.

Mix 2-3 tablespoons of vinegar in 1 gallon of water and spray on plants suffering from fungus. This will help to reduce the amount of moisture on the plant, making it harder for mold and mildew to take hold.

Also Read: How to Treat White Spots on Spinach?

3. Clean houseplant

Dust and debris on the leaves can block light and prevent the plant from photosynthesizing effectively, while pests and diseases can cause serious damage if left unchecked. Vinegar can be used to clean your houseplants and keep them healthy and vibrant.

Mix 1/2 cup white vinegar, 5-8 drops of dish soap, and 8-10 cups water in a big bowl. Fill the mixture into a spray bottle and apply it to the leaves of the plant, wiping off excess moisture for shine.

It’s important to note that some plants may be sensitive to vinegar’s acidic nature, so it’s a good idea to research the specific needs of your houseplants before using vinegar for cleaning.

4. Vinegar removes white lines from the vase(glass)

White lines that form on glass vases and containers can be unsightly and difficult to remove. However, vinegar can effectively remove these white lines, making your vases and containers look new.

To remove white lines from glass vases, simply fill the vase with a mixture of water and white vinegar and let it soak for several hours.

After soaking, use a scrub brush to scrub away the mineral deposits and rinse the vase thoroughly with water. Repeat this process if necessary, until the white lines have been completely removed.

5. Balances pH levels

The pH level of soil determines the availability of essential nutrients that plants need to grow. When the soil pH is too high or too low, it can limit the plant’s ability to absorb nutrients, leading to stunted growth and other problems.

Vinegar is acidic and can be used to lower the pH level of the soil. Mix 1 tbsp white vinegar with 1-litre water and pour over plants for an acid boost, ideal for plants like ferns or African violets. 

Furthermore, vinegar should be used with caution, as over-applying can be harmful to plants. It’s vital to examine the specific necessities of your plants.

6. Clay Pot Cleaning

Clay pots are a popular choice for growing houseplants, but over time they can become dirty and discolored, affecting the appearance of your plants and containers. To clean clay pots, you can use a simple and effective solution of white vinegar and water.

To clean clay pots, fill a bowl with 4 cups of water and 1 cup of white vinegar. Submerge the pots in the solution for several hours, or overnight if necessary. After soaking, use a scrub brush to remove any dirt, mineral buildup, or other residues from the surface of the pots.

Vinegar is a natural cleaning agent that is effective for removing dirt and discoloration from clay pots without harming the surface. Additionally, vinegar is safe for plants and the environment, making it an ideal choice for cleaning your clay pots.

7. Pet Repellent

Pets can be a big problem for gardeners, causing damage to plants, soil, and containers. White vinegar can be used as a natural and effective pet repellent to keep pets away from plants, gardens, and other areas where you don’t want them to go.

To use vinegar as a pet repellent, mix water and white vinegar in a spray bottle.

Spray the solution on plants, soil, containers, and other areas where you don’t want pets to go. The strong odour of vinegar will deter pets from coming into contact with the sprayed areas.

Vinegar is a safe and natural alternative to chemical pests and pet repellents, and it is safe for both pets and plants.

Additionally, vinegar will not harm the soil or the environment, making it an ideal choice for pet owners who are looking for an eco-friendly way to keep pets away from their plants.

8. Extends Indoor Flower Life

Indoor flowers bring a touch of nature into your home, and they can help to brighten up any room.

However, keeping flowers fresh and vibrant for an extended period of time can be a challenge. Fortunately, white vinegar can help you keep your indoor flowers looking fresh for longer.

To help extend the life of your indoor flowers, add 2 tablespoons of white vinegar and 1 teaspoon of sugar to the water. Mix it, and you are ready to use it. 

Additionally, vinegar can help to prevent the growth of bacteria, which can cause the water in the vase to become murky and the flowers to wilt more quickly.

Conclusion

Vinegar has multiple uses in caring for houseplants and improving the overall health of your houseplants. It can act as a soil amendment, promoting healthy plant growth by balancing pH levels.

It is also a natural pet repellent and can help keep pests away from your houseplants. Furthermore, adding vinegar to the water in vases can help extend the life of your indoor flowers.

Its multiple uses and benefits make it a must-have item in any indoor gardener’s toolkit.

By incorporating vinegar into your plant care routine, you can improve the health and longevity of your houseplants, while also enjoying its beauty and benefits.

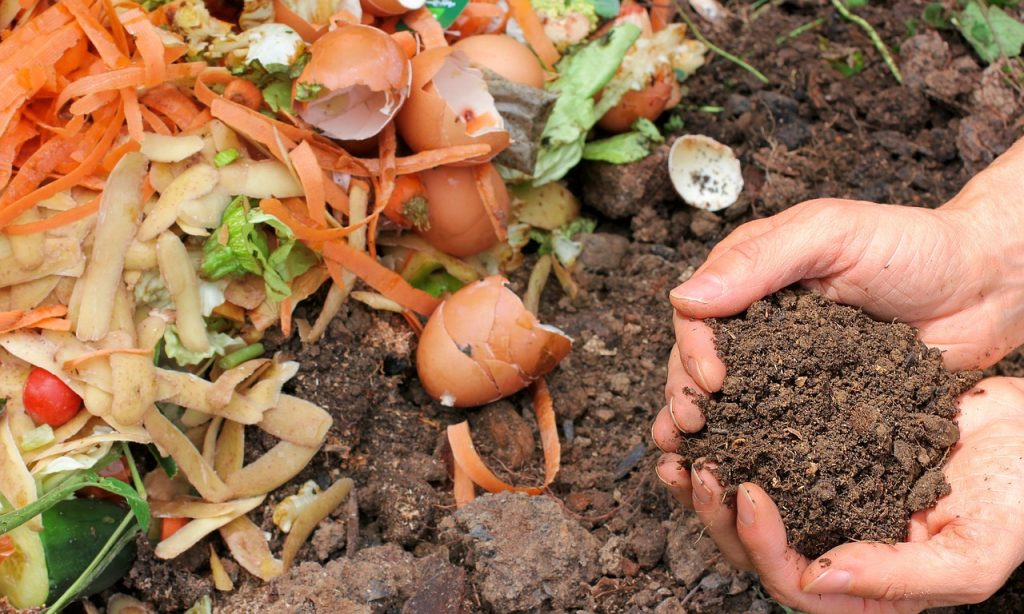
6 Amazing Composting Ways Everyone Should Try, No Matter Where You Live

Composting is a simple and effective way to reduce waste and create nutrient-rich soil for your garden. Not only is it good for the environment, but it also saves you money on fertilizer and helps reduce your carbon footprint.

Composting is a sustainable practice that not only reduces household waste but also enriches soil and benefits the environment. Whether you live in an urban apartment or a rural farm, there’s a composting method that’s perfect for you.

We’ll dive into 6 amazing composting techniques that will take your gardening game to the next level. From vermicomposting to composting in a bin, we’ll cover everything you need to know to get started on your composting journey.

1. Composting with a Tumbler

Composting with a Tumbler is a convenient and efficient method of composting for those who want to speed up the composting process and make it easier to turn the compost.

A compost tumbler is a rotating drum that is mounted on a stand. As the drum rotates, it aerates the compost and helps to mix and distribute moisture evenly, which speeds up the composting process.

One of the key benefits of composting with a tumbler is that it allows for composting in a small space. Tumblers come in a variety of sizes, making them suitable for urban dwellers with limited outdoor space.

They are also easy to use, simply add your compost ingredients to the tumbler and give it a turn every few days to aerate the compost.

2. Vermicomposting

Vermicomposting is a method of composting that uses red wigglers, also known as red earthworms, to break down organic material into nutrient-rich compost. This method of composting is ideal for those who want to compost indoors or who have limited outdoor space.

Vermicomposting starts with a bin that contains bedding material, such as shredded newspaper or coir, and a population of red wigglers.

Kitchen scraps and other organic waste are added to the bin, and the worms feed on the waste, breaking it down into compost. As the worms consume the organic matter, they produce castings, which are nutrient-rich and can be used as a soil amendment.

This method can be performed outdoors, in basements, attached garages or even in a 15-gallon container under the kitchen sink, no matter where you live.

3. Composting in an open Bin

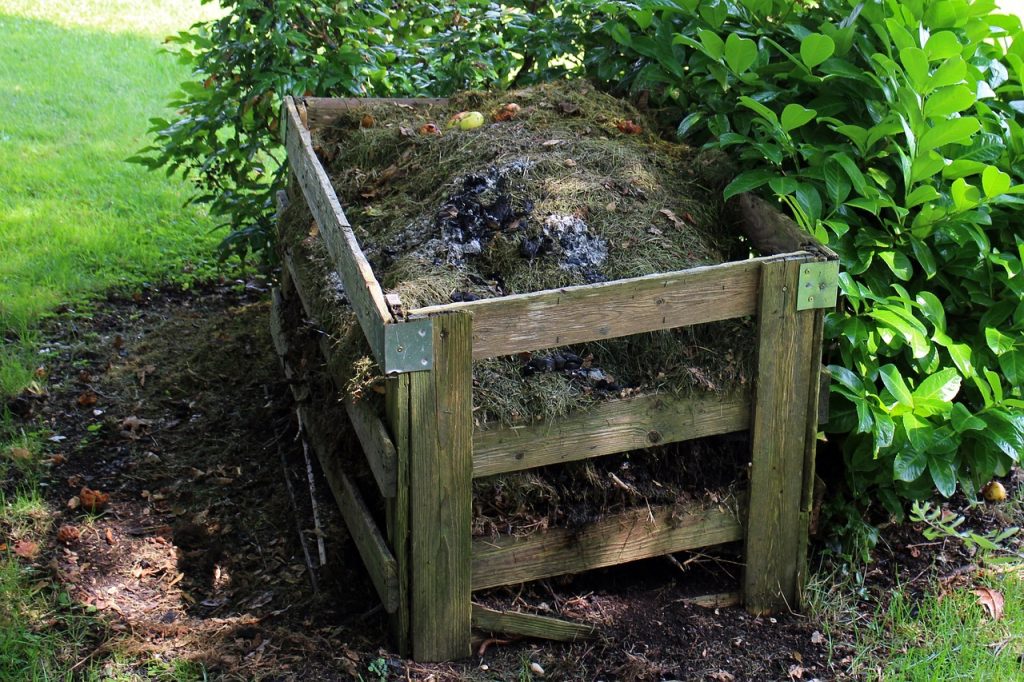
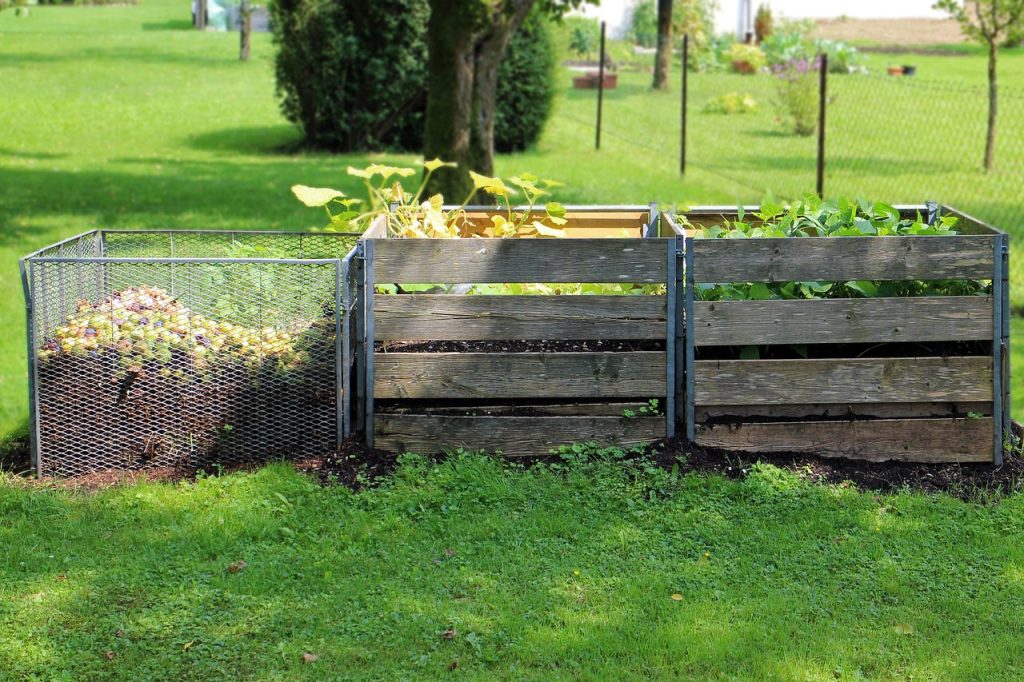
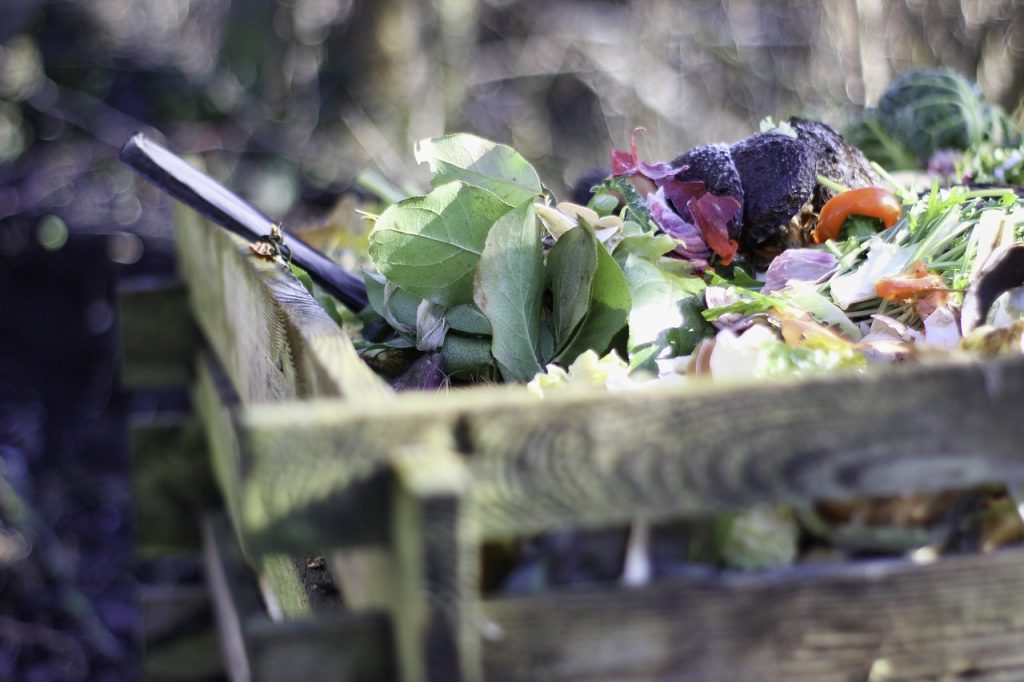
Composting in an open bin is a traditional and simple method of composting that involves creating a compost pile in a designated area of your yard.

Open bins offer versatility for both hot and cold composting, making them a great choice. This method of composting is ideal for those who have ample outdoor space, as the compost pile can be quite large.

To start, you’ll need a compost bin or simply designate a space in your yard for your compost pile. You can build a bin using wooden pallets or purchase a ready-made bin.

Once you have your bin, you can start adding organic waste to the pile. This can include kitchen scraps, leaves, grass clippings, and other yard waste.

One of the advantages of composting in an open bin is that it’s easy to add waste to the pile, and it’s simple to turn the compost. This method is also ideal for those who want to compost a large quantity of waste, as the bin can be as large as needed. 

4. Pit Composting

Pit composting involves digging holes or trenches and burying organic waste within them. This composting method involves minimal effort as you simply need to dig the pit, add the waste, and let it decompose over a period of several months to a year. 

During this time, the organic materials will break down naturally and eventually turn into nutrient-rich compost. Pit composting is a low-maintenance method that’s perfect for those who want a simple and hands-off approach to composting.

5. Bokashi Composting

Bokashi composting is a unique method of composting that uses beneficial microorganisms to ferment organic waste. Unlike traditional composting methods, Bokashi composting doesn’t rely on air, heat, or moisture to break down the organic waste. 

To start Bokashi composting, you’ll need a Bokashi bin and the inoculant. You can add all types of organic waste, including meat, dairy, and cooked food, which are typically not suitable for traditional composting methods. 

Once the bin is full, the organic waste will ferment for approximately two weeks, during which time the beneficial microorganisms will break down the organic waste, producing a nutrient-rich compost.

After the two-week fermentation period, the Bokashi compost can be added directly to your garden or potted plants, where it will continue to break down and provide vital nutrients to the plants. 

Bokashi composting is an ideal method for those who have limited space, as the Bokashi bin can be kept indoors, and it’s also a great solution for those who want to compost all types of organic waste, including meat and dairy.

6. Combination Composting

Combination composting is a method that combines different composting techniques to create a more efficient and effective composting process.

This method is ideal for those who have a large amount of organic waste and want to compost it quickly and efficiently.

Combination composting involves two or more of the following methods: hot composting, cold composting, vermicomposting, or Bokashi composting.

You can Compost all of your kitchen waste, not just a portion of it. This method can be more complex than other methods, but it can also produce compost more quickly, and it’s ideal for those who have a large amount of organic waste and want to compost it efficiently.

Conclusion

Composting is a simple and effective way to reduce waste, improve soil health, and help the environment. With six amazing composting methods to choose from, there is a solution that is perfect for everyone, no matter where they live.

You can compost food waste, yard waste, and other organic materials in a way that is safe, sustainable, and effective.

From vermicomposting to open-bin composting, each method has its own unique benefits, and by choosing the method that is right for you, you can start composting and making a positive impact on the environment today.

How Deep Do Potato Roots Grow?

With shallow roots, potato plant go 6 to 12 inches deep from the surface of the growing soil. However, roots may go deeper in favorable conditions.

According to this report, potato plant has fibrous roots that can’t go deeper than 24 inches. To increase root development you must provide ideal temperature of 59-68F, along with nutrient rich soil and adequate water.

Potato plants are the most efficient, easily grown, and resourceful plants that a house gardener can ever opt to invest in. This is especially true if you have just started growing plants and potatoes are your first try ever.

When growing potatoes in the garden there are always a few key considerations that need to be kept in mind.

One of these is to determine the adequate growth of your plants. Determining the depth of your potato plant roots is one of the most effective methods of doing so.

Other than this, having knowledge about the depth of your potato plant roots also enables you to cater to the growth needs of your plant. So, next time you grow potato plants in your garden, you are well aware of the amount of water, sunlight, and fertilizer that they depend on to get to their optimal growth level.

If you are also one of those plant lovers who want to know the approximate depth to which potato plant roots grow, then keep reading because we have provided a comprehensive answer for the same.

A bonus section is also included that tells you about the growth needs of your potato plants and how to take proper care of them throughout the process. So, without any further ado, let us begin.

How Deep Do Potato Roots Grow?

potatoes

Potato plants are surely not the most popular or glamorous plant options that people have, but they are definitely the most rewarding plants that one can ever grow. That being said, potatoes are basically a root vegetable and grow best when put under soil.

When we say, “grow best”, we are actually referring to a depth of approximately 18 inches or in some cases, even longer than that.

But, in order for your potatoes to grow to such an extent, it is very important that they are comfortably bedded in a soil that has been loosened using all the resources and I perpetually free of stones or any other hard material for that matter.

It allows your potatoes with enough space to grow smoothly without any obstacles and this freedom is one of the best mediums to grow your plant.

Another important noteworthy thing is that potatoes don’t grow in a random zig zag manner. Rather, they prefer going in a straight direction starting right below where the seed is planted.

Also Read: Can You Grow Potatoes in Clay Soil?

How to Promote the Root System of Your Potato Plants?

Everyone wants to have the best environment for their potato plants to grow and prosper in. But, what many people don’t know is that in order to get into an accurate understanding of what kind of environment your plants need, it is equally important to get to a basic understanding of how your plants grow.

This practice begins when you first decide to buy the seed of your potato plants. Naturally, a large potato seed promotes a longer and more vertical growth of the potato plant than a seed that is smaller.

In doing so, the plant pushes its roots outwardly downward from the seed to grow and orient their structure in a progressive manner. In this manner, the farthest that your plants can grow is known to be 18 inches, as mentioned earlier.

This doesn’t mean that you maintain the depth of your bed to be 18 inches. It is considered to cause issues for the proper structure of the plant because if the root doesn’t extend to the desired length, it can severely compromise with the position of the plants.

It is generally advised to prepare your bed approximately 10-12 inches deep for a productive yield. The plant will eventually make space for itself.

Other than what is elaborated above, it is also important to reiterate on the earlier points of keeping the soil free of stones, hard rocks, and loosening them using expert equipments.

Further, remember that your potato plants grow straight downwards from the roots and you’ll have good to go with fulfilling the watering needs, where drip irrigation is preferred.

Also Read: How Many Potatoes Grow from One Seed Potato?

Taking Care of Potato Plants

While it is true that you can see a potato yield of about 11-18 inches below the ground, it is also true that none of this would work if the plants are not taken proper care of. How to know if your potato plants are happy with their service? We are here with a few easy and effective tips to help you take proper care of your potato plants under all conditions.

The soil should not only be loosened and free of harsh materials, but it should also be comparatively dry, light, and extremely well drained. Moisture is something that is not very well taken by potato plants. Imagine subjecting your plant to an environment it doesn’t like for most of its life. It is unlikely to grow.

Your soil bedding should be nutritious and posses the ability to retain moisture for longer times, without disturbing its natural chemical composition.

To do so, you can supplement your bedding with some organically developed compost, manure, or simply adding mulch to enhance its nutrient profile. Another more suitable approach is to purchase a fertilizer that is slightly high on the nitrogen aspect and you’d be good to go.

In order to yield a good potato plant yield, it is relatively important that you purchase good quality seeds. A premium quality potato seed is ideally the size of an egg of hen and has at least three to five potato eyes to support the growth of new plants.

Initially, it is important to space your potato seeds at least 14-15 inches apart. This makes sure that the growth of adjacent plants don’t necessarily interfere the productivity of other plants.

If you feel that it is about time that you harvest your potatoes as they are ready to eat, consider doing it during the mid summer season. Not before it, and certainly not after that. Baby potatoes are the most commonly available harvest during midsummer and you can conveniently harvest them by gently reaching out to the first few inches of soil and pulling them off carefully.

As soon as you see the growth of potato tubers from the plant, start hilling the soil above the plant. You can also make use of mulch to do the same. It is important to also reduce the composition of nitrogen during this time since we effectively require stopping the maturation process of potato tubers.

Also Read: What Size Pot Do I Need to Grow Green Beans?

Conclusion

Potato plants, as we have seen, vary in their length and depth of growing and this is what makes them unique from other plants. By adopting the aforementioned easy care tips, you can ensure that your potato plant grows to its fullest potential and is getting the adequate environment for the same.

If you want to learn more about potato plants and the different problems concerning them, go through more of our articles and seek solutions to your gardening issues. We have covered answers and solutions to a range of your gardening issues for different plants. Till then, happy gardening!

The statistics mentioned above are cited from the report published by the State Extention Service of North Dakota. So, if you want to know more about the depth of your potato plants, you can checkout the report.

Should I Cut Off Yellow Cucumber Leaves?

Having yellow leaves is a sign of concern for most gardeners. However, yellowing of lower leaves is a normal among plants.

But, do you have to cut off the yellow leaves of the cucumber?

Yes, you should prune the yellow leaves of the cucumber as they help your cucumbers to grow.

Every cucumber vine has one main stem that has nodes, or joints along its length. From those nodes, one leaf, fruit, tendril, and a new stem are grown.

When the pruning is done the new stem is removed which is also called growth point, shoot, or lateral runner. The flower and leaf are also pruned in some situations. 

The type of the cucumber plant decides whether to use the clippers or not. Pruning the leaves is based on the cucumber plant you have grown.

Like the bush varieties, they don’t need much pruning or trimming. The only time they need pruning is when they get friendly with other plants in your garden.

The cucumber vines that sprawl on the ground without any vertical support also don’t need pruning or trimming.

Proper pruning of the cucumber plants helps the plant grow higher quality fruits. Pruning of the plants is necessary because it helps the vines grow in the right direction.

If your cucumber vine is only focusing on growing lots of stems and leaves then it is never going to focus on growing fruit. So, by pruning them you are giving the plant a chance to grow fruits that as the cucumbers. 

Cucumber is generally a summer-grown vegetable that is loved in the country. Cold cucumbers with spices are much loved by every age group. They are crispy and crunchy, they also your quench thirst in the hot summers. Cucumbers also give the essential nutrients which are needed in the summer season. 

Also Read: What Size of Container Do I Need to Grow Cucumbers?

does PRUNING GIVE A HIGHER YIELD IN CUCUMBERS?

Pruning the cucumbers helps in their growth and they produce a higher quality of cucumbers which are rich in nutrients and fibers.

The yellow leaves in cucumbers suck all the nutrients of the plant which are necessary for the plant to bear fruits and green leaves. 

The unwanted plants and leaves grow on the main stem they take up all the nutrients which are needed for the plant’s health. These unwanted plants and leaves need to be pruned and trimmed so that they don’t affect the plants. 

Pruning the cucumbers balances the vine growth and fruit production. It is done on the outside branches, leaves, flowers, and fruits as needed throughout the growing season. The trimming of the plants should be started by removing the dead and damaged parts in the plant. 

Removing the old and drying leaves from the plants helps the sunlight to reach the plants directly without any obstruction. When you remove the obstruction from the plants they help in the development of fruits and improve air circulation.

When you remove the lateral runners which are near the base of the plant they don’t restrict the growth of the higher quality fruits. Pruning the cucumber plants helps in the growth and direction of the cucumber plant.

Also Read: How Deep to Plant Eggplant Seedlings?

WHY DO THE LEAVES OF THE CUCUMBER PLANTS TURN YELLOW?

The leaves of the cucumber plants turn yellow which is known as chlorosis. When a plant has chlorosis the chlorophyll content which is very essential for photosynthesis is short in supply. After this, the ability to do photosynthesis in the plant is affected and it struggles to produce sugar which is needed for the plant’s health. 

There are many causes for the yellow leaves in cucumber plants and some of them are:

1. Pests: The pests which are used in the plants sometimes make the leaves yellow. Their harmful chemicals damage the leaves and change the color of the leaves from green to yellow.

2. Improper watering: When plants don’t get proper watering their leaves turn a yellow color. The yellow color of the leaves indicates that there is an insufficient amount of water in the plants. 

3. Insufficient sunlight: Sunlight is very important for the plants to do photosynthesis which is the main process of plants to make food for them. When there is insufficient sunlight the process of photosynthesis is affected and proper food is not made for the plants. In this way, the health of the plants gets affected.

4. Plant diseases: When the health of the plant starts to deteriorate they also have many diseases in them. Plant diseases also change the color of the leaves to yellow.   

5. Poor nutrition: When the plants lack sunlight and water the nutrition of the plants also gets affected. Poor nutrition in plants decreases the health of plant and their growth of it. The yellow color of the leaves indicates their poor nutrition in them. Poor or lack of nutrition stops the plant’s growth and reduces their health.

When you maintain these things with your plants they bear fruits and green leaves. The health of the plants is very important and maintaining their growth and health is very necessary. Like we take care of our health, plants’ health is also very important. 

Also Read: Why Are Sweet Pea Leaves Turning Yellow?

HOW DO WE PRUNE THE YELLOW LEAVES OF CUCUMBER PLANTS?

When you start to prune or trim the yellow leaves of cucumber plants you need to take care of a few things.

The first thing to do is clean the tools by which you have to trim or prune the leaves in the plant. When you clean the tools and instruments the chances of spread of disease are low not only in cucumber plants but also in other plants.

When we cut the growth of the unwanted plants and yellow leaves the lifeline of these plants is decreased and won’t regrow if they are cut at the proper time.

Usually, the pruning is done on the base of the plant. This pruning helps the leader vine grow and the top to fill out the trellis. 

When the nodes are a few inches long they are pruned through clippers so that they don’t damage the main vine. Remove the flowers which are restricting the plant to bloom. 

After all these steps remove any leaves, vines, or fruit that are damaged or show any kind of disease. When they show any disease in the stem, leaves, vines, or fruits immediately remove them before they damage the whole plant. 

If the leaves are bushy in one place then trim them so that they block the air circulation of the plant. If the air circulation is blocked then they will die or show diseases that are not good for the plants. 

When you are finished doing all these activities clean all your tools and instruments so that they don’t get dirty for the next use.

Do timely trim and prune the cucumber plants so that they don’t harm the main stem and take all the nutrients which are needed for the plant. 

Check this out: How Deep Do Potato Roots Grow?

IN THE END, ALL WE GOT TO KNOW IS

Cucumbers are very nutritious and healthy for us. During the summer season, cucumbers provide many nutrients like vitamins, and minerals and provide hydration which is very much needed for our body when the climate is very hot. 

Hydration is very much needed for our body as water is reduced because the temperature is very high during the summertime.

Cucumbers are also used in salads and yogurt for raita. Cucumbers are also used in skincare. It is used in under the eyes to remove puffiness and dark circles. 

The leaves of the cucumber plants turn yellow because of chlorosis which is a lack of chlorophyll that helps in photosynthesis which makes food for the plant and which gives them strength to grow strong and healthy.

When the plant is not able to do photosynthesis it starts to become weak and unhealthy and starts showing diseases.

Leaves turning yellow are also an indication to us that the plant is turning weak and needs trimming or pruning.

When you remove the yellow leaves from the cucumber plant, it yields healthier and high-quality fruits and green leaves.

Yellow leaves on the cucumber plant could happen because of any reason.

There is a lack of sunlight, chemical pesticides that are used to kill the insects and worms that damage the plants; insufficient watering of the plants, and many more can lead to this problem in it. 

The discoloring of leaves can also happen because of soil problems like when the plant doesn’t get enough soil nutrition or doesn’t get enough nitrogen and potassium in their diet.

The organic manure or humus which we give to their soil must have these nutrients so that the leaves don’t leave their color.

As we maintain our health we should maintain the plants as well. Maintaining them will give us the fruits we need and will also make them strong and healthy.

Plants are also living beings and like humans, they also need proper food, water, and medicines when they suffer from any kind of disease. 

The plants need proper hydration and care just like humans so that they don’t die or suffer from any kind of disease.

Pruning or trimming your cucumber plants is a very wise choice and by adopting this technique you can save your plant’s life. 

The unwanted plants and leaves take away all the nutrients from the main stem or vine and reduce the growth of the plant.

The energy is distracted from the main stem and is divided into unwanted plants and yellow leaves. Due to this reason, the plant doesn’t get enough nutrition and dies soon after planting. 

Also Read: Should I Cut Off Yellow Leaves on Tomato Plants?

Maintaining any plant’s health is not easy and providing them with proper nutrition and care is very important. They have their disease and problems which needs to be solved so that they can give us tasty fruits and vegetables.

Plus taking care of a plant makes it greener and healthier which in return gives us oxygen to breathe. There are also horticulture experts who advise on how to take care of specific plants and what are the things that need to be done when we face any kind of problem with the plant. 

Some medicines are natural and organic for plants. They are given to them when suffering from any kind of disease or have any problems which are restricting the plant to grow.

There are many medicines that help them grow into a healthy and strong one that doesn’t die anytime soon because of the disease,

We have to notice and observe the plants for yellow leaves so that they don’t die and all of our energy behind them doesn’t get wasted.

Gardening also is a very good hobby which relaxes your mind and even improves your mental health. Plants have healing powers that calm our mind and makes us feel fresh to start again. 

If you are planning on cutting and pruning the yellow leaves in your cucumber plants do it without any hesitation as it will do wonders to your plant and will make your garden green and full of fruits.

How Many Potatoes Grow from One Seed Potato?

It is really fascinating to see a bunch of potatoes from one seed potatoes. This is why most urban living people are turning towards growing their own veggies.

With container and grow bags you can easily grow potatoes or any other vegetables in your apartment space.

One of the most prominent of them is how many potatoes grow from one seed potato. The answer generally varies according to a number of factors, and we will be looking at all of them in the article here.

A quick answer would be, you can grow 8 to 10 potatoes with one seed potato in your backyard.

Additionally, emphasis would also be placed on how to grow your potato plants from a seed to the fullest, by taking routine and easy care of them.

So without any further ado, let us begin the journey of growing potatoes from seed.

How Many Potatoes from One Seed Potato?

The general rule is that you can see about four pieces of an average sized potato from one seed of potato. Some people can witness more but some people might see less potato growth from the seed. It largely depends on how you take care of it.

If you have a single potato seed and plan to nurture an entire garden out of it, you can actually make this true. All you need is the right technique and little patience and you’ll be good to go.

The good news is that you can reap the benefits of this potato property by either placing your plant in a large container, a frozen ziplock bag, or even directly in the soil of your garden.

If you have limited space, you can still enhance the chances of the number of potato plants that you can grow by choosing the right set of tools and techniques.

To know how you can increase the chances of your plant growth, it is first essential to do a comparative analysis. This expects us to have a general understanding of the average yield that is obtained from one single potato seed without any additional efforts.

If the seed of your potato plant is relatively big, then you can easily see about ten tubers growing out one seed of potato. Five is the lowest that it can get with a large potato seed.

It is important to remember that the values mentioned here are just an estimate and can vary significantly depending upon the growing conditions that you put your plant under.

Also Read: Is Cow Manure Good for Potatoes?

What are the most supporting soil conditions?

growing potato plants

The soil should be kept moist at all parts of the day. Never leave the base of your soil dry and under watered. It can hamper the growth of your potato plant severely.

Always keep your plants at the uphill so that the nutrient supply is directly inclined up to the stems. Hilling the plants in such a way gives them the much needed support they need to grow and further their journey as a full fledged potato plant.

Suitable fertilization should also be provided to the plant with the right proportions of nutrient composition so that the growth is not compromised.

Also Read: How Long Do Sweet Peas Take to Germinate?

How to choose the right kind of seeds for growing potato plants?

One of the most important considerations for growing potato plants from a seed and choosing the right kind of seed is all about whether the chosen seed is whole or is present in pieces.

Instead of the additional 5 to 10 tubers that you can get from each seed, you can also get additional multiple plants out of a single seed.

Take a good look at the number of eyes that your potato seed has. The greater number of eyes that are present on your seeds, greater are the chances that you’ll have more number of plant openings.

Also, pay special attention to where are the eyes placed on your potato seeds. They should be forward looking and not too far away from each other as it can restrict the opportunities of growth for the multiple layers of plant.

If you can, stat away from the potatoes that are available in the grocery stores. They’ve been subjected to artificial environment and present little opportunities for the growth of your plant. They should be the last option on your list.

Diminish sprouting is one of the most harmful conditions that they are subjected to. It can further deteriorate the condition of other plants present in your garden. If you still want to go for grocery brought potato seeds, make sure to select those that are certified as being natural.

If there is a large potato seed available at your disposal, make sure that you use them as a whole.

If the space constraints do no allow you to do so, you can also cut the seed in half, but in a way that there are at least two eyes present on each of the halved seeds. This ensures that adequate number of plants are growing from your seeds even if they split.

A general idea that helps you make an estimate of the potatoes that you can grow from each seed is that for each pound of seed, you can expect the growth of about 25 pounds of a potato plant, or sometimes even more.

While growing your potato seed, make sure that you do not place them too close to each other. A general rule is to space them out at least 12-15 inches apart.

This gives each plant enough space to grow on their own, while interrupting the progress of their counterparts. The optimal yield of the plant should be kept at least 2.5 foot away from the subsequent plants. It will stimulate the growth of multiple potato spuds.

Select the right varieties of potato seeds

Just like no two potato plants are same, no two potato seeds are same and this is an exemplary point that needs to be taken special care of, especially if you want to yield potato plants from the seeds.

Potatoes are known to be of varying varieties ranging from early season, mid season and finally to the main crop varieties. The unique nature of your potato seeds determine how many plants will eventually pop out of the seeds.

As one can already imagine, it is the main crop potato variety that is responsible for giving out the greatest yield.

Check this out: Why Are Eggshells Good for Pepper Plants?

Some of the most popularly known high yielding varieties of potato plants include those listed in the following points:

  • Early season crops like the potato maris bard, and Celine.
  • Mid season crops like the Daisy Gold that easily gives 3 to 5 eyes yields 5 to 8 lbs per potato seed, Kennebec that has similar growth statistic like daisy gold, and almera.
  • Main crop potato seeds like Agria, Car, Hermes, Kondor, and finally the Maris Piper.

Identify the right growing technique

A large part of how your potato plants respond to the potato seeds include the growing techniques that you ascribe to. The yield largely has to do with how you are choosing to grow the plant. Here are some of the most effective potato plant growing techniques that you can follow for a healthy yield:

Make sure that you do not subject your plants to very high temperatures, that is above 75 degrees Fahrenheit. Under such conditions, your plant effectively stops producing new tubers.

If you want little yields but those that are significantly greater in number, then you should probably look for small spaces to grow your potato seeds. These are the most empirically tested and efficient methods to grow your plants from the seeds.

Overall, almost any growing method you choose would produce a healthy yield. To know the average size that each method leads to, refer to our information below:

  • Raised beds lead to an average growth of 2.4 lbs.
  • Wire bin leads to an average growth of 0.7 lbs.
  • Pot leads to an average growth of 0.6 lbs.
  • Grow bag leads to an average growth of 0.58 lbs.

Also Read: What Size of Container Do I Need, to Grow Cucumbers?

How to effectively increase your potato yield?

Even after following the aforementioned tips you are suffering from the situation of a low potato yield, it is about time that you start to apply the following practices into use:

Keep your soil well drained and very light throughout the growing season.

Try growing your potatoes in hills. It helps to support the stems of your potato plants and is highly beneficial for underground growing plants. Do not expose the entire plant to sunlight. Instead, continue to hill them as they grow for seeing maximum productivity.

Since potatoes do not have very deep roots, they demand constant water from the care taker. As mentioned before, keep your soil moist and well drained, but not soggy or it can lead to conditions of root rot.

If you still face issues, try mulching your soil frequently. It is an easy and effective technique to help retain maximum moisture from the soil.

The pests, bacteria, and diseases that affect one plant are soon to be spread to other plants as well as they are highly communicable. To minimize the destruction, spot early signs of disease in your plant and leaves and remove them from your garden immediately.

If only a few parts of your plant are affected, like the leaves, consider removing them from the plant and you’ll be fine. Also, spot signs of root rot in your plant and carefully replant your produce before it makes much destruction to the rest of the plant.

Pay special attention to the fertilization needs of your plant. Your plant needs fertilizers for meeting its macro-nutrient goals and to amplify maximum growth. Most people tend to overestimate this need, but it shouldn’t be overlooked.

Your potato plants generally seek for a fertilizer that presents a balanced composition of nitrogen, potassium, and phosphorus.

The recommended composition ratio usually varies from 5-10-10 to 10-10-5 on the NPK scale. Consider not to use fertilizers that are heavily concentrated on nitrogen. It can be harmful in the long run.

Expose your plant to ample amount of sunlight for the absorption of nutrients and the conduction of photosynthesis.

Sure, the potato plants do not like to be put under high temperatures, but avoiding them of complete sunlight can do more harm that good. If natural sunlight is not available, try arranging for conditions of artificial light.

Conclusion

Instead of rushing to the grocery store every time you run out of potatoes, you can grow potatoes in your house garden and keep the worries forever. Exciting news is one seed of potato can give you multiple potato plants. We have mentioned how to take care of these yields in the article above.

We have also listed a few easy and efficient ways to get the best out of your potato seeds at home. Do not forget to apply these principles as mentioned, or you might fail to see the desired results.

Is Cow Manure Good For Chili Plants?

If you’re planning to use cow manure to fertilize your chilli plant, then this article is for you.

Packed with essential nutrients, cow manure boost healthy growth of any plant.

Chemical fertilizers and pesticides damage the growth of a plant and also don’t provide the plant with the basic nutrition it needs or the growth.

But, can you directly apply fresh cow manure around your chili plant?

No, you can’t directly apply cow manure or poultry manure to your veggies, gardeners must compost it before using it to enrich the growing soil.

Manure is a natural and healthy option for plants as they don’t harm them in any way whereas chemical pesticides and fertilizers harm them and stop their growth.

Cow manure for chili plants is always the best option as manure for the plants. They increase the production of the chilies and also keep the plant healthy and green.

Cow manure has all the essential nutrients and fibers that a plant needs to produce the fruit. Cow manure for chili plants helps them in producing more chilies and also keeps the plant healthy.

Generally, chemical fertilizers and pesticides help in producing more but it damages the health of the plant.

Organic manure like cow manure is way better than any artificial fertilizer and also they are best for the plants whether is in the nutrition or their growth.

Cow manure has the qualities and advantages a chili plant needs starting from the seeding to the last stage which is when it bears fruit. Adding it to the soil is a very essential part of the process of growing chilies.

How Does Cow Manure for Chili Plants?

As we already know that cow manure has many essential nutrients for the plants it is very good for the plants to add it to their soil for their health.

This natural fertilizer won’t hamper the soil like the chemical fertilizers. 

The natural remains in the manure dissolve in the soil without harming the soil’s health and fertility.

By this you can protect both the plant and the soil from artificial and chemical products.

By adding the natural fertilizers they also protect the soil from any kind of soil pollution. When you protect the soil from pollution the plant also stays healthy and even produces more.

When the natural remains of the manure are mixed with the soil, the quality of the soil is increased, and also the nutrients which are present in the soil help the plant in growing.

These nutrients work as food for the plants as they help them to grow and produce more.

Like humans, plants need food to grow into a green and healthy ones. Organic manure like cow manure helps them in growing and also keeps them green.

Any manure whether it is cow or horse whatever it is they have the essential nutrients and the food source which are needed for the plants to grow into a green and healthy ones.

They have an ample amount of nutrients which is needed for the plants to grow.

When plants and especially chilies don’t get enough and the right amount of manure and care then they don’t bear many fruits and also die soon. 

Cow manure for chili plants is a boon as they are filled with the basic nutrients which are needed for the chili plant. The garden is filled with chilies when you add cow manure to the chili plants. 

Also Read: Is Cow Manure Good for Potatoes?

How to Use the Cow Manure for the Chili Plants? 

Chilies are the easiest plant to grow and with the right fertilizer at the right time, they will grow like anything in the garden and will also provide you with so many chilis.

With the proper amount of manure and organic fertilizer, the chili plants can do wonders in your garden. The right and proper amount with the right knowledge of what goes and what not will give you a massive production of chilies in the garden.

The basic NPK, nitrogen, phosphorous, and potassium are the nutrients that are needed for the chili plants.

These nutrients are almost present in every organic and non-organic fertilizer as well as in every soil on this planet. These nutrients work wonders on the plants and keep the plant healthy.

A fertilizer with higher nitrogen content should be used in the first four months of production. Nitrogen is a basic nutrient for every plant as they work miraculously on its growth of it.

The root development is done by the phosphorous and the production of fruits and flowers is the work of potassium.

The blooming starts in the four to six months after the seeds are planted. During this time you can add the fertilizer with higher content of phosphorous and potassium.

Also Read: Is Chicken Manure Good for Tomato Plants?

Is Cow Manure for Chili Plants Work?

Without trying we don’t know whether the cow manure for the chili plants will work or not.

People have tried this and it worked for them but whether it works for everyone or not it depends on the type of chili plant and the type of soil.  

Climate also plays a big part in the production of the chilies as a warm climate and warm soil is the type which is needed for the plant to grow. The cold climate doesn’t suit very much to the plant and dies as soon as it is planted.

The manure is organic and it will harm neither the plant nor the soil. If it doesn’t increase the production and the quality of the chili when added to the soil then it has no harmful effect of it on the plant as it is made from nature only. 

Nature heals nature and doesn’t damage the product. The cow manure is made from nature and is organic which will never hamper the health of the soil or the plant.

Also Read: Why Are My Pumpkin Plant Leaves Turning Yellow?

People assume that everything works on every plant which is not true. There is some organic manure that works on chilies but doesn’t work on other plants. Every plant’s need is different and its growth is different.

Some manure may work wonders on a plant and some cannot do anything to the plant. The type of plant and soil with the right manure can do great things to the plant whereas wrong amount of manure on the wrong plant and soil will do nothing.

Proper research and knowledge are very important when you add something to the plant in your garden. 

There are also different mixtures of manure which makes the plant healthy and green. There are also substitutes and add-on to the manure which is organic and healthy for the plant.

Before adding anything to plant detailed research is very necessary and an important step to follow.

Cow manure is a very safe and good option for chili plants and with the right amount of it you can have enough chilies in your garden. Amount of cow manure you use on chili plants should be limited to avoid over fertilization.

The manure also retains soil fertility and also improves the quality of the soil. Hence, do add the right amount of cow manure to the chili plant for a full and healthy production of the fruit.

How Much Sunlight Does Potatoes Need?

Without enough sunlight, your potato plant may not receive the energy it needs to thrive, resulting in stunted growth or a low yield.

Growth of potatoes is heavily dependent on the amount of sunlight your plant gets.

For potatoes to flourish and yield an abundant tubers, they require at least 6 to 8 hours of full sun every day.

This is because, like every plant potatoes needs sunlight to perform photosynthesis, a crucial process that enables the plant to generate the energy required for tuber growth and development.

When your plant don’t get enough sunlight, they will not be able to thrive and may become vulnerable to disease or pests.

Additionally, too much shade results in small potatoes.

Therefore, it is important to ensure that your potato plants are getting enough sun exposure throughout the day. With which you’ll be gifted with delicious and bigger tubers.

Explain Factors Affecting Sunlight Requirements of Potatoes

How much sunlight potatoes needs depends on temperature, humidity, soil fertility, and season in your region.

Potato plant needs higher temperatures to thrive, ideal temperature ranges between 55-75°F.

Potatoes also require moderate levels of humidity, as well as soil that is both moist and well-drained, and rich in organic matter.

This type of root vegetable thrives during the summer season when there is an abundance of sunlight and the plant can effectively avoid blight or other potato plant diseases.

Understanding how these factors impacts the potato plant’s sunlight requirements will help you in determining the optimal time and location to plant them.

How Much Sunlight Does Potatoes Need?

Exact amount of sunlight potatoes need will vary depending on the conditions mentioned above.

Generally, potatoes should receive at least 6 to 8 hours of full sun each day during the peak growing season.

This is the time when days are longest, and the temperatures are just right for the potatoes to grow.

Explanation of how potatoes use sunlight for photosynthesis and tuber production

As a gardeners we all know importance of sun exposure to grow healthy potato plants. Sunlight helps them make energy so they can produce bigger tubers.

When you fail to give adequate amount of sunlight, your plant won’t be able to make enough energy and will stay small or not produce any tubers.

Amount of sunlight your potato plant needs depends on various factors such as temperature, humidity, soil fertility, and climate.

As already mentioned, potatoes need at least 6-8 hours of full sun each day during the peak growing season when temperature is optimal for growth.

Too much shade can also have an adverse effect on plant growth, so it is important to plant your seed potatoes in a spot with adequate sunlight throughout the day.

Do Potatoes Need Full Sun?

Yes, potatoes need full sun for at least 6-8 hours each day to reach their maximum potential size and yield a good harvest.

This is when the hours of daylight are longest and temperatures are in the optimal range for growth.

Too much shade can stunt their development or cause tubers to fail altogether, so it is important that they get adequate exposure to sunlight throughout the day.

Can You Grow Potatoes in Partial Sunlight?

While potatoes do need full sun for optimal growth, they can still be grown in partial shade. However, the yield will be lower and tubers may be smaller than those grown in full sun.

Additionally, potatoes grown in partial shade are more vulnerable to disease and pests due to decreased photosynthesis.

What is Full Sun and Partial Shade?

Full sun is defined as 6 to 8 hours of direct sunlight each day during the peak growing season.

Partial shade, on the other hand, is defined as 2 to 4 hours of direct sunlight each day or indirect light for up to 6-8 hours.

Understanding what counts as full sun and partial shade can help you determine the best place to plant your potatoes for optimum growth.

What happens if potatoes get too much sun?

Too much sun can be just as damaging to potatoes as too little. Potatoes that get too much direct sunlight can become stressed and dry out quickly, leading to a decrease in yield and poor quality tubers.

It is important to monitor the amount of sunlight your potato plants are receiving and adjust accordingly if needed.

Can potatoes survive without sunlight?

No, potatoes need sunlight in order to survive and grow. They use the light from the sun for photosynthesis and to create energy for growth.

Without this energy, they will be unable to produce tubers or reach their full potential size.

Therefore, it is important that potatoes receive adequate sunlight throughout the growing season in order to maximize yield and quality of the crop.

Conclusion

It is clear that potatoes need a certain amount of sunlight to thrive. They should receive at least 6-8 hours of full sun each day and can tolerate partial shade for up to 6-8 hours.

Too much or too little sun can be detrimental, so it is important to monitor the exposure your potato plants are getting and adjust accordingly if needed.

With the right amount of sunlight, potatoes can reach their maximum potential size and yield a good harvest.

How to: Growing Cucumbers in Grow Bags?

Before you start to grow cucumbers in grow bags, you must first understand how easy or tough is to use grow bags to grow your veggies.

Lack of space forced most urban gardeners to opt for container gardening, now luckily you can use grow bags without plastic containers.

It’s not impossible, there are many gardeners who already tried this and have been successful.

Grow bags are made of a porous fabric that can be filled with growing medium, it is much thicker and more durable compared to a plastic container.

The material allows the plants roots to grow unhindered and air can pass in and out with ease which aids drainage.

By, now you already know that grow bags are not ordinary bags , they are specifically designed to provide your vegetables with a good amount of water and nutrients.

So, lets first learn about them.

What are Grow Bags and Different Types of Grow Bags?

Grow bags are a great way to grow cucumbers in small spaces, such as patios and balconies. Grow bags come in various sizes, shapes, and materials to accommodate different types of cucumber plants.

They also allow for more control over soil temperature, moisture levels, nutrient availability, and other environmental factors.

There are three main types of grow bags: fabric pots, plastic pots, and trays.

Fabric pots offer superior aeration and water absorption compared to plastic or tray systems due to their breathable material.

However, they are not as durable or long-lasting as the other two options.

Plastic pots can be used either indoors or outdoors but do not provide sufficient drainage when exposed to direct sunlight. Lastly, tray systems are ideal for those who need to move their cucumber plants around often. They also provide superior drainage and aeration.

Bio-degradable grow bags are also available and are made from natural materials such as jute, coconut coir, and other plant fibers.

These provide an eco-friendly option for those who want to grow cucumbers without relying on synthetic materials.

No matter which type of grow bag you choose, it is important to ensure that the cucumbers have adequate space, sunlight, and water in order to thrive. Be sure to check the instructions on your particular grow bag before planting your cucumbers.

Also Read: What Does Blight Look Like On Cucumber?

Step-by-step Guide to Grow Cucumber in Grow Bags

Once you have selected the right grow bag for your needs, it is time to start growing cucumbers. Here are a few steps to get started:

Prepare the soil

Before planting cucumbers in your grow bag, mix compost or rotted manure into the soil to provide essential nutrients and improve drainage.

Choose your variety

Consider the features of different cucumber varieties when selecting which type to plant in your grow bag. Some will do better than others depending on light availability, humidity levels, and other factors.

Plant seeds or seedlings

Plant two or three seeds per hole and cover them with 1-2 inches of soil. If using seedlings, plant the entire rootball up to the base of the stem.

Water regularly

Keep soil moist but not waterlogged. Check for adequate moisture each day and adjust your watering schedule accordingly.

Fertilize as needed

Fertilizing is important to maintain healthy cucumber plants in grow bags. Use a liquid fertilizer once or twice a month throughout the growing season.

Harvest when ready

When cucumbers reach their desired size, pick them off with scissors or pruning shears. This will ensure that the plant continues to produce more fruits.

Check this out: How Deep Should a Raised Bed Be for Cucumbers?

Best grow bags for cucumbers?

The best grow bag for cucumbers will depend on your needs and the environment in which they are planted. If you have limited space, then a tray system may be the best option.

For those who need to move the plant around often, fabric pots provide superior aeration and drainage. For an eco-friendly option, bio-degradable grow bags are an excellent choice.

Ultimately, it is important to select a bag that provides adequate space, sunlight, and water for the cucumbers to thrive.

What size grow bag for cucumbers?

The size of the grow bag will depend on the variety of cucumber you are planting. Generally, a 10-gallon or larger is suitable for most varieties.

For vining types, however, you may need to use a larger bag (20-30 gallons).

It is also important to consider how much space the plants need and their root structure when selecting a grow bag size.

It is best to select one that is slightly larger than necessary so the plants have room to spread out and grow.

Also Read: How Much Water Does a Cucumber Plant Need?

How many cucumber seeds in one grow bag?

This will depend on the size of your grow bag and the variety of cucumber you are planting. Generally, it is best to plant two or three seeds per hole in a 10-gallon grow bag.

For larger sized bags (20-30 gallons), you may need to plant four to five seeds per hole. It is important to leave enough space between the seed holes so that the plants have room to spread out and grow.

Additionally, you may need to thin out the seedlings once they sprout, removing any weaker or overcrowded plants. This will help ensure that each cucumber plant gets adequate space and sunlight.

Can I reuse my grow bag for cucumbers?

Yes, you can reuse your grow bag for growing cucumbers. However, it is important to thoroughly clean the bag between uses, as leftover dirt and debris can harbor pests and diseases.

Additionally, adding fresh soil before planting will ensure that the plants get adequate nutrients.

Also Read: Is Chicken Manure Good for Cucumbers?

FAQs

What is the best soil for cucumber plants?

The best soil for cucumber plants is a nutrient-rich soil with good drainage. A combination of compost and rotted manure will provide essential nutrients while helping to improve drainage.

How often should I water my cucumbers in grow bags?

Cucumbers grown in grow bags should be watered regularly, as the soil can dry out quickly.

Aim to keep the soil moist but not soggy, checking for adequate moisture each day and adjusting your watering schedule accordingly.

How do I know when my cucumbers are ready to harvest?

Cucumbers are ready to harvest when they reach their desired size.

Check the fruits regularly and pick off any that have reached their maturity with scissors or pruning shears. This will ensure that the plant continues to produce more cucumbers.

What type of grow bag is best for cucumbers?

The best type of grow bag for cucumbers will depend on your needs and the environment in which they are planted.

If you have limited space, then a tray system may be the best option. For those who need to move the plant around often, fabric pots provide superior aeration and drainage.

For an eco-friendly option, bio-degradable grow bags are an excellent choice. Ultimately, it is important to select a bag that provides adequate space, sunlight, and water for the cucumbers to thrive.

Also Read: Why You Should Not Plant Cucumbers Near Tomatoes?

Conclusion

Growing cucumbers in a grow bag can be an easy and efficient way to add some fresh veggies to your garden.

It is important to choose the right size grow bag, depending on the type of cucumber and how much space they need.

Additionally, it is essential to keep the soil moist but not soggy and harvest when the cucumbers reach their desired size.