Top 5 Benefits of Using Goat Milk in Your Skincare Routine

Goat milk has been used for centuries as a natural skincare ingredient due to its nourishing properties. Packed with essential vitamins, minerals, and fatty acids, it provides a gentle yet effective solution for a range of skin concerns. Here’s a look at the top five benefits of incorporating goat milk into your skincare routine.


1. Rich in Skin-Boosting Nutrients

Why This Matters
Goat milk is loaded with essential nutrients, including vitamins A, D, E, and K, along with minerals like selenium and zinc. These nutrients help maintain skin health, boost cell regeneration, and provide antioxidant protection against environmental stressors.

How It Benefits Your Skin

  • Vitamin A promotes healthy skin cell turnover, which can improve skin texture and reduce the appearance of fine lines and wrinkles.
  • Vitamin D supports the skin barrier, helping it retain moisture and heal from minor irritations.
  • Zinc and Selenium help reduce inflammation and protect against sun damage.

How to Use It
Look for goat milk-based cleansers, creams, or serums to deliver these nutrients directly to your skin. Applying goat milk products daily can help support overall skin health and resilience.


2. Gentle and Naturally Exfoliating

Why This Matters
Goat milk contains lactic acid, a gentle alpha hydroxy acid (AHA) that naturally exfoliates the skin by breaking down dead skin cells on the surface. This mild exfoliation is suitable for all skin types, even sensitive or acne-prone skin.

How It Benefits Your Skin

  • Brightens Skin: By removing dead skin cells, lactic acid brightens the complexion and reveals fresh, radiant skin underneath.
  • Reduces Acne and Clogged Pores: Exfoliating with lactic acid helps unclog pores, reducing the likelihood of acne breakouts and improving overall skin clarity.
  • Smoothens Texture: Regular exfoliation with goat milk leaves the skin soft and smooth, improving the absorption of other skincare products.

How to Use It
Choose a goat milk soap or cleanser that can be used daily, allowing the lactic acid to gently exfoliate without causing irritation. This can be especially beneficial for sensitive skin types looking for a milder exfoliation alternative to stronger AHAs.


3. Deeply Moisturizing Without Clogging Pores

Why This Matters
Goat milk’s creamy texture and rich fat content provide excellent hydration while being non-comedogenic, meaning it won’t clog pores. The natural fat molecules in goat milk penetrate deeply into the skin, providing long-lasting moisture that doesn’t feel greasy.

How It Benefits Your Skin

  • Hydrates and Softens: The natural fats and oils in goat milk nourish and soften the skin, making it ideal for dry and sensitive skin types.
  • Balances Oil Production: Goat milk’s unique fat composition helps balance skin’s natural oil production, making it suitable even for oily and combination skin.
  • Calms Irritation: Its mild formula hydrates without irritation, making it ideal for conditions like eczema, psoriasis, and dermatitis.

How to Use It
Opt for goat milk-based lotions or moisturizers to apply after cleansing. These products help lock in moisture and keep the skin feeling soft and hydrated all day. They’re also excellent as a night cream or soothing balm for dry or inflamed areas.


4. Naturally Soothing for Sensitive Skin

Why This Matters
Goat milk has a pH level close to that of human skin, making it a gentle option for those with sensitive or reactive skin. Unlike some harsh cleansers and moisturizers, goat milk products are less likely to cause irritation or disrupt the skin barrier.

How It Benefits Your Skin

  • Reduces Redness and Irritation: Goat milk’s pH balance helps maintain the skin’s natural protective barrier, minimizing irritation and redness.
  • Soothes Conditions Like Eczema and Psoriasis: Goat milk is rich in soothing fats and proteins that can help relieve the itchiness and dryness associated with these skin conditions.
  • Hypoallergenic Properties: Its gentle formulation makes goat milk a safer option for people prone to allergies or skin sensitivities.

How to Use It
A goat milk soap or lotion is a perfect addition to a sensitive skin routine, as it’s both calming and nourishing. Apply a thin layer of goat milk lotion after cleansing to keep sensitive skin protected and hydrated throughout the day.


5. Anti-Aging Benefits with Natural Collagen Support

Why This Matters
The high level of fatty acids in goat milk works alongside lactic acid and vitamin A to encourage collagen production, which helps maintain skin elasticity and firmness as we age. Collagen support is essential for reducing fine lines and keeping skin youthful.

How It Benefits Your Skin

  • Minimizes Fine Lines and Wrinkles: The vitamin A in goat milk supports collagen production, which can reduce the appearance of fine lines over time.
  • Improves Skin Elasticity: The combination of healthy fats and vitamins in goat milk helps maintain skin elasticity, preventing sagging.
  • Protects Against Free Radicals: Goat milk contains antioxidants that protect against environmental damage, one of the leading causes of premature aging.

How to Use It
Look for anti-aging creams or serums that incorporate goat milk as a primary ingredient. Applying goat milk products in the morning and evening can help keep skin firm and smooth, enhancing your skin’s natural resilience to aging.


Conclusion: Embrace the Benefits of Goat Milk for Healthier Skin

With its nutrient-rich composition, gentle exfoliation, deep moisturization, soothing qualities, and anti-aging benefits, goat milk is a powerhouse ingredient for skincare. By incorporating goat milk products like cleansers, soaps, and moisturizers into your daily routine, you can experience healthier, softer, and more youthful-looking skin. Natural, gentle, and effective, goat milk is a great choice for anyone looking to boost their skincare with a time-tested ingredient.

9 Tips for Speeding Up the Composting Process

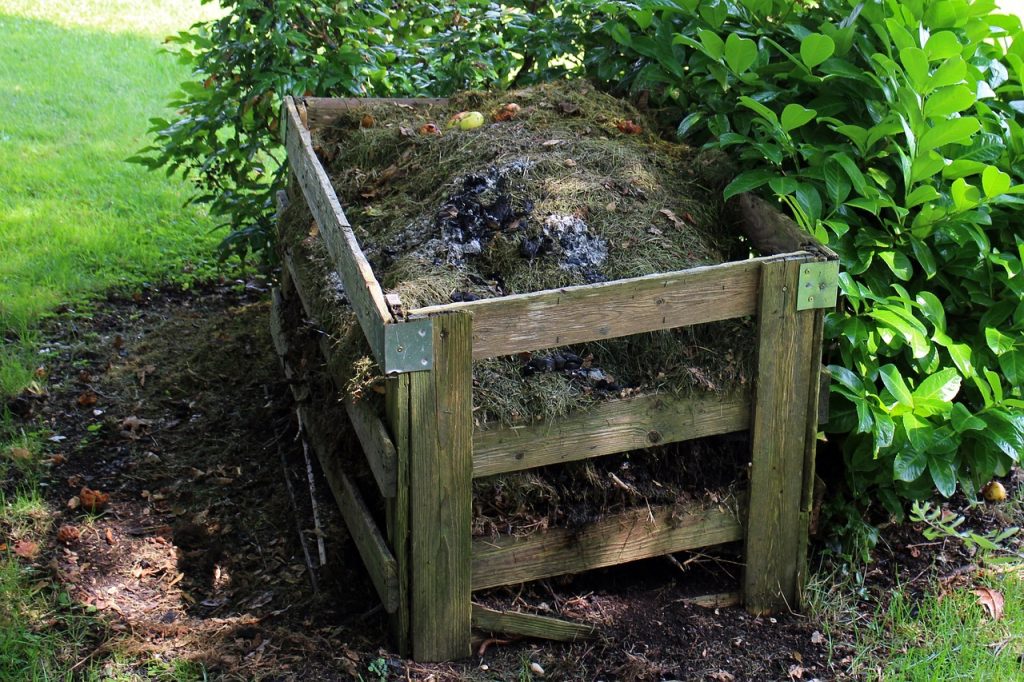
Composting is an excellent way to recycle organic waste, enrich your garden soil, and reduce your carbon footprint. However, sometimes the process can feel slow, especially when you’re eager to use the finished compost in your garden. While composting typically takes a few months, there are several strategies you can use to accelerate the decomposition process and produce nutrient-rich compost more quickly. Here are nine tips to help speed up your composting efforts.


1. Maintain the Right Carbon-to-Nitrogen Ratio

Why It Matters:
A balanced carbon-to-nitrogen (C) ratio is crucial for efficient decomposition. Carbon-rich materials, like leaves and straw, provide energy for microorganisms, while nitrogen-rich materials, like food scraps and grass clippings, fuel microbial growth.

Tip:
Aim for a ratio of about 30:1 (30 parts carbon to 1 part nitrogen). If you notice your compost is not decomposing fast enough, try adding more green (nitrogen) materials. On the other hand, if your pile is too wet or smelly, you likely need to add more brown (carbon) materials.


2. Chop or Shred Materials Before Adding Them

Why It Matters:
Smaller pieces decompose faster because they have more surface area exposed to microbes, speeding up the process. Large chunks of organic matter, like whole branches or large fruit scraps, can slow down the breakdown.

Tip:
Chop, shred, or tear your compost materials into smaller pieces before adding them to your pile or bin. The finer the materials, the faster they will break down.


3. Keep Your Pile Moist

Why It Matters:
Moisture is essential for microbial activity, which is responsible for breaking down organic materials. A dry compost pile will slow down the decomposition process.

Tip:
Your compost should feel like a damp sponge. If it’s too dry, add water or more green materials. If it’s too wet, mix in more brown materials, like dry leaves, to absorb the moisture. Turning the pile regularly also helps distribute moisture evenly.


4. Turn the Pile Frequently

Why It Matters:
Turning your compost pile regularly adds oxygen to the mixture, which is crucial for aerobic decomposition. Without enough oxygen, your pile will become anaerobic, resulting in slow decomposition and unpleasant odors.

Tip:
Turn your compost every 3 to 4 weeks to ensure proper aeration. This will help keep the microbes thriving and speed up the decomposition process.


5. Use a Compost Accelerator

Why It Matters:
Compost accelerators are products that contain added microorganisms to speed up the breakdown of organic materials. They can help jumpstart the process, especially if your pile is struggling to decompose.

Tip:
If you want to speed things up, consider adding a compost accelerator to your pile. You can buy commercial accelerators or make your own by adding compost or soil from an existing compost pile to introduce more microbes.


6. Maintain the Right Size for Your Pile

Why It Matters:
A compost pile that is too small won’t generate enough heat to break down materials quickly, while one that is too large can be difficult to turn and manage. Maintaining the right size ensures that your pile stays hot enough for efficient composting.

Tip:
Aim for a compost pile that is at least 3 feet by 3 feet by 3 feet (1 cubic yard) in size. This size is large enough to generate heat and facilitate the decomposition process but small enough to manage and turn regularly.


7. Add Worms to Your Pile (Vermicomposting)

Why It Matters:
Worms are nature’s decomposers. They break down organic matter quickly and their waste (castings) is rich in nutrients. Adding worms to your compost can speed up the process significantly.

Tip:
To introduce worms, either add a worm bin to your composting system or mix worms directly into your pile. Red wigglers are the best worms for composting, as they thrive in organic matter and are great for aerating the compost.


8. Keep the Temperature High

Why It Matters:
Decomposition is faster at higher temperatures. If your compost pile gets too cold, microbial activity slows down, and the composting process takes longer.

Tip:
To maintain a high temperature (around 130-160°F or 54-71°C), ensure your compost pile is large enough and consistently turn it. If needed, insulate your pile with a compost cover or tarp to keep the heat in.


9. Use a Composting Tumbler

Why It Matters:
Composting tumblers are sealed containers that you can rotate to turn the pile easily. They help keep the pile contained and allow you to mix it with minimal effort, making it easier to maintain the right moisture and aeration.

Tip:
If you’re short on time or want a more hands-off composting process, consider using a composting tumbler. It will speed up the decomposition process by providing regular aeration and promoting faster breakdown of materials.


Conclusion

By following these nine tips, you can significantly speed up the composting process, creating nutrient-rich compost for your garden in less time. A little attention to detail, such as maintaining the right balance of materials, turning your pile regularly, and ensuring proper moisture levels, will go a long way in making your composting efforts more efficient. Whether you’re composting to reduce waste, enrich your soil, or support your sustainability goals, these simple strategies will help you achieve a faster and more successful composting process.

Top 5 Common Mistakes to Avoid in Goat Kid Care

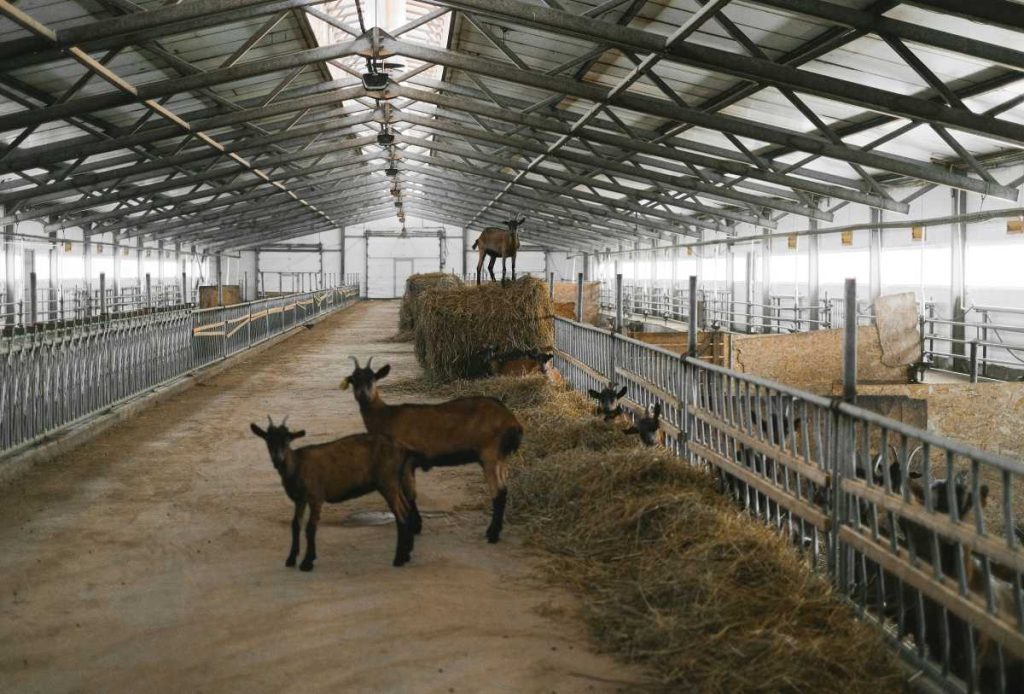
Caring for goat kids is both rewarding and challenging. These little animals require specific care to ensure they grow strong and healthy. However, even experienced farmers sometimes overlook certain aspects of kid care, leading to preventable health issues. This guide covers the top five common mistakes to avoid when raising goat kids, helping you give them the best start in life.


1. Inadequate Colostrum Intake

Why This Matters
Colostrum is the first milk produced by the doe after giving birth, rich in essential antibodies that protect the kid from infections. Failure to receive adequate colostrum within the first 24 hours can lead to serious health problems and even mortality.

How to Avoid This Mistake

  • Timing is Key: Ensure each kid receives colostrum within the first few hours of life. Colostrum absorption declines rapidly after 12 hours, so early feeding is crucial.
  • Monitor for Suckling Problems: If a kid is weak or unable to latch, assist by bottle-feeding with the mother’s colostrum. Always have frozen colostrum on hand as a backup if the mother’s supply is insufficient.
  • Check the Quality of Colostrum: Test for quality if you can, as thicker colostrum generally contains more antibodies. Quality colostrum is crucial, especially if you are raising kids in a farm environment with many pathogens.

2. Improper Temperature Management

Why This Matters
Goat kids are especially vulnerable to cold stress, which can quickly weaken their immune systems, leading to hypothermia and even death. Proper temperature management is essential, particularly in colder climates or during winter births.

How to Avoid This Mistake

  • Use a Clean, Warm Birthing Area: Ensure the birthing area is dry, draft-free, and insulated. Fresh bedding and even heat lamps can help maintain warmth.
  • Warm Up Cold Kids Quickly: If a kid is shivering or appears lethargic, it may be suffering from cold stress. Wrap it in warm towels and, if necessary, use a heat lamp. Monitor closely to prevent overheating.
  • Keep Kids Dry: Wet fur can lead to rapid heat loss. After birth, dry each kid thoroughly, and provide a warm, dry environment to prevent chill.

3. Overfeeding or Underfeeding

Why This Matters
Proper feeding is essential for a goat kid’s growth and immune function. Both overfeeding and underfeeding can lead to health complications such as bloat, diarrhea, or poor development.

How to Avoid This Mistake

  • Follow a Feeding Schedule: Feed goat kids small, frequent meals rather than large ones, especially if bottle-feeding. This helps avoid digestive issues.
  • Monitor Weight and Growth: Weigh kids regularly to ensure they are gaining weight consistently. If a kid is not growing, it may be a sign of inadequate feeding or a health issue.
  • Use the Right Formula: If you’re bottle-feeding, use a milk replacer specifically designed for goat kids. Avoid cow’s milk, which can cause digestive problems in goat kids.

4. Ignoring Parasite Prevention

Why This Matters
Goat kids are highly susceptible to parasites, which can cause anemia, weight loss, and other health issues. Worm infestations, in particular, can be life-threatening if left untreated.

How to Avoid This Mistake

  • Regular Fecal Testing: Have a veterinarian check fecal samples to monitor for parasites. Catching infestations early allows for prompt treatment.
  • Maintain a Clean Living Environment: Remove manure frequently, keep bedding clean, and avoid overcrowding to reduce exposure to parasites.
  • Rotate Pastures if Possible: If you have pasture-raised goats, rotate grazing areas to reduce the risk of parasite buildup in the soil.

5. Delaying Vaccinations and Health Checks

Why This Matters
Vaccinations protect goat kids from various diseases, including enterotoxemia (overeating disease) and tetanus. Delaying or skipping vaccinations increases the risk of these life-threatening illnesses.

How to Avoid This Mistake

  • Start Vaccinations Early: Begin vaccinations according to veterinary recommendations, often starting at a few weeks old. CDT (Clostridium perfringens types C and D and tetanus) is a common initial vaccine.
  • Monitor for Illness: Regularly observe each kid for signs of illness, such as loss of appetite, lethargy, or abnormal behavior. Quick action can prevent minor issues from becoming serious.
  • Keep Records: Document each kid’s vaccination dates, treatments, and health history. This record-keeping helps you stay on track with vaccinations and provides useful information for future care.

Conclusion: Raising Healthy, Happy Goat Kids

Caring for goat kids requires attention to detail, especially in their first few weeks of life. Avoiding these common mistakes—such as ensuring colostrum intake, managing temperature, feeding properly, preventing parasites, and staying on top of vaccinations—will help you raise healthy, resilient goats. By following these best practices, you’ll set your goat kids up for success and enjoy a thriving herd.

7 Important Methods for Compost Maintenance

Composting is an eco-friendly and cost-effective way to recycle organic waste into nutrient-rich soil that can help nourish your garden. However, maintaining your compost pile or bin properly is essential for ensuring that the decomposition process happens efficiently. Without the right attention, your compost can become too wet, too dry, or even smelly and ineffective. Here are seven important methods for compost maintenance that will keep your pile in top condition.


1. Turn Your Pile Regularly

Why it’s important: Turning your compost pile helps to aerate it, ensuring that oxygen reaches all parts of the pile. This encourages the aerobic microorganisms responsible for breaking down organic material. Without regular turning, the compost process can slow down and result in a smelly, anaerobic pile.

How to do it:

  • Use a pitchfork, shovel, or compost aerator to turn your pile every 3-4 weeks. Rotate the materials from the outside to the inside and mix thoroughly to keep the pile aerated and break down materials evenly.

2. Maintain the Right Moisture Levels

Why it’s important: Compost needs to be moist, but not soggy, to encourage microbial activity. Too much moisture can lead to a slimy, smelly pile, while too little moisture can slow down decomposition.

How to do it:

  • The ideal moisture level should be similar to a damp sponge. If the compost is too dry, add water. If it’s too wet, mix in dry, carbon-rich materials like straw, leaves, or shredded cardboard to absorb the excess moisture.

3. Balance Green and Brown Materials

Why it’s important: For compost to break down properly, it needs a balanced ratio of nitrogen-rich “green” materials (like food scraps, grass clippings, and manure) and carbon-rich “brown” materials (like leaves, straw, and wood chips). Too much of one type can slow down decomposition or lead to unpleasant odors.

How to do it:

  • Aim for a 1:3 or 1:4 ratio of green to brown materials. If your compost seems too wet or slimy, add more brown materials. If it’s dry and not decomposing, add more green materials.

4. Chop or Shred Large Materials

Why it’s important: Larger pieces of organic waste take longer to break down, which can slow down the composting process. Smaller materials decompose faster and more evenly.

How to do it:

  • Before adding large items like branches, thick stalks, or large vegetable scraps, chop or shred them into smaller pieces. This will help speed up the decomposition process and prevent clumping.

5. Monitor the Temperature

Why it’s important: A well-maintained compost pile generates heat as organic materials break down. The ideal temperature range for composting is between 130°F and 160°F (55°C – 71°C). A hot compost pile breaks down faster and more effectively, killing weed seeds and pathogens.

How to do it:

  • Use a compost thermometer to check the temperature regularly. If it drops below 130°F, turn the pile to introduce more oxygen. If it’s too hot, add more materials to cool it down, or turn it less frequently to keep the temperature from rising too high.

6. Add a Compost Activator

Why it’s important: Compost activators are rich in microorganisms that help speed up the decomposition process. They can be particularly helpful if your pile seems to be decomposing too slowly or if you’ve added too many “brown” materials.

How to do it:

  • You can purchase commercial compost activators or use natural ones like a handful of garden soil, fresh manure, or even food scraps like coffee grounds. Simply add the activator to your pile to encourage microbial activity.

7. Prevent Odors by Maintaining Aeration

Why it’s important: Odors often occur in compost piles that aren’t properly aerated, usually due to a lack of oxygen or excess moisture. Maintaining proper aeration helps to keep your pile healthy and free from foul smells.

How to do it:

  • Regularly turn the compost to keep it oxygenated. If your compost begins to smell sour or rotten, it may be too wet or lacking in air. Add dry materials to absorb excess moisture and turn the pile to improve airflow.

Conclusion

Proper compost maintenance is key to creating high-quality, nutrient-rich compost that can be used to nourish your plants and garden. By turning your pile regularly, balancing green and brown materials, maintaining moisture, and monitoring temperature, you can ensure your compost pile stays healthy and efficient. Follow these seven methods, and you’ll be well on your way to producing rich, valuable compost that benefits both your garden and the environment.

10 Effective Breeding Plans for Bucks

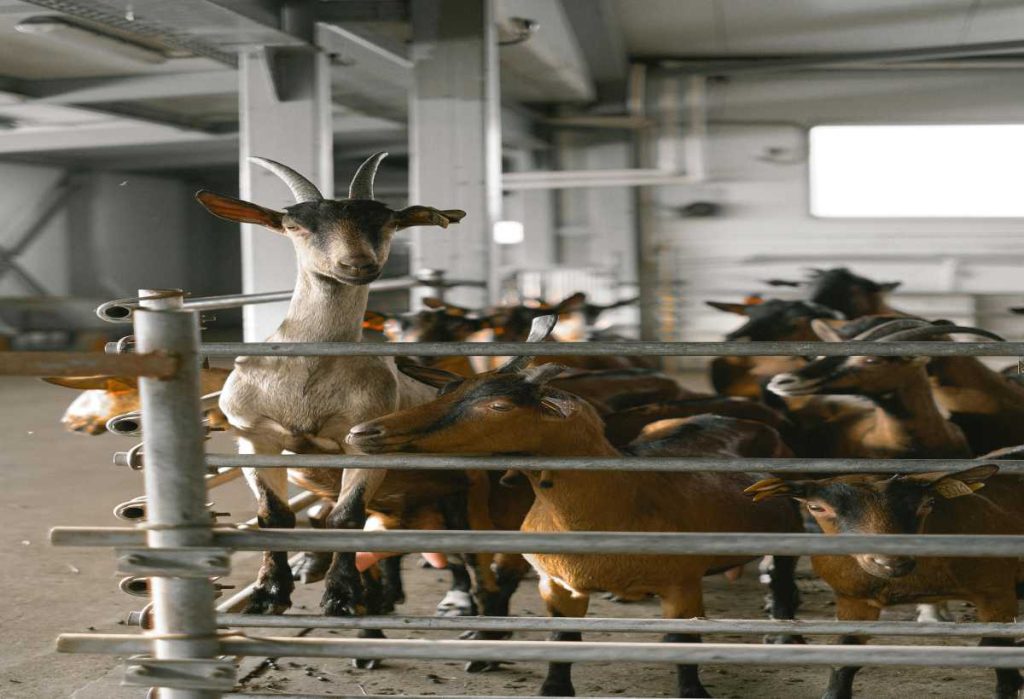
Breeding is a critical component of any goat farming operation, and having a well-thought-out breeding plan for your bucks (male goats) is essential for ensuring a productive and healthy herd. Whether you’re breeding for milk, meat, or fiber, the right breeding strategy can improve your herd’s genetics, increase productivity, and reduce health problems. In this blog, we’ll explore 10 effective breeding plans for bucks that will help you maximize reproductive success and strengthen your goat farming operation.


1. Select Bucks with Superior Genetics

Start with Quality Genetics
One of the most important aspects of a successful breeding plan is selecting bucks with superior genetics. When choosing a buck for breeding, focus on traits such as size, temperament, health, disease resistance, and production traits (e.g., high milk yield for dairy goats or excellent muscle development for meat goats). Bucks contribute half of the genetics to their offspring, so choosing a buck with desirable traits will increase the likelihood of passing those traits to future generations.

Tip: Research the pedigree of the buck you’re considering and choose one with proven offspring records that align with your breeding goals.

2. Ensure Bucks Are Healthy and Fertile

Health is Key to Breeding Success
A healthy buck is critical to a successful breeding plan. Make sure your buck is in good physical condition and free from diseases that could impair fertility or be passed on to offspring. Fertility testing for bucks is also recommended before breeding season to ensure they have a high sperm count and are capable of producing viable offspring.

Tip: Perform regular health check-ups on your buck, including parasite control, vaccinations, and a thorough physical exam before the breeding season begins.

3. Monitor the Bucks’ Age and Experience

Age Matters in Breeding
Age can have a significant impact on a buck’s fertility. Bucks that are too young (under 1 year old) may not have the necessary physical development or experience to breed successfully, while older bucks (over 5 years old) may experience a decline in fertility. It’s important to choose a buck that is in his prime—typically between 2 and 4 years old—for breeding.

Tip: Rotate bucks in your breeding program to prevent overuse of any single buck, which can help maintain genetic diversity and avoid fertility issues.

4. Implement a Rotation Breeding System

Prevent Inbreeding with Rotation
To maintain genetic diversity and reduce the risk of inbreeding, consider implementing a rotation breeding system. This method involves rotating bucks between different does over the course of several breeding seasons. By introducing new genetics regularly, you can improve herd health and productivity, reducing the chances of hereditary diseases or genetic issues.

Tip: Rotate your bucks between different groups of does each year to ensure genetic diversity and avoid inbreeding.

5. Plan for Seasonal Breeding

Time Breeding for Optimal Kids
Goats typically have a seasonal breeding cycle, with the most productive breeding season occurring in the fall. By planning your breeding schedule to coincide with this natural cycle, you can ensure that kids are born in the optimal months (usually spring), when conditions are more favorable for growth and survival.

Tip: Monitor your does’ estrus cycles and time your buck’s breeding sessions to align with the optimal breeding window. Seasonal breeding helps with kid health and survival.

6. Use Artificial Insemination (AI) to Enhance Genetics

Broaden Your Genetic Pool
Artificial insemination (AI) can be an effective tool for improving your herd’s genetic quality without the need to transport bucks. AI allows you to access semen from superior bucks that may not be locally available, broadening your genetic pool and improving traits such as milk production, disease resistance, and growth rates.

Tip: Work with a professional AI technician or veterinarian to ensure that the process is carried out correctly and successfully.

7. Optimize Nutrition for Bucks Pre-Breeding

Proper Nutrition Supports Fertility
The nutritional status of your bucks plays a significant role in their reproductive success. A well-balanced diet with adequate protein, energy, vitamins, and minerals helps ensure optimal sperm production and fertility. Make sure your buck is in excellent body condition before the breeding season starts.

Tip: Provide your bucks with a high-quality diet rich in essential nutrients, such as alfalfa hay, grains, and a mineral supplement formulated for bucks.

8. Use a Controlled Breeding Program

Track Breeding Dates and Genetics
A controlled breeding program allows you to manage mating schedules, track breeding dates, and monitor offspring quality. This helps avoid overbreeding and ensures that each buck is only used for a set number of breedings per season. A controlled program also allows you to monitor the success rates of each breeding and identify any issues early.

Tip: Keep detailed records of all matings, including the breeding date, the buck and doe involved, and any health observations. This will help improve future breeding decisions.

9. Provide Bucks with Adequate Rest Between Breeding Cycles

Prevent Overbreeding and Fatigue
Bucks can experience fatigue if overused during the breeding season, which can lead to reduced fertility and lower-quality offspring. It’s essential to give your bucks adequate rest between breeding cycles. Allow them time to recover and regain their energy before being used for the next breeding season.

Tip: Limit the number of does bred by each buck in a given season. Typically, a buck can breed between 20 and 30 does per breeding season, depending on his health and stamina.

10. Evaluate the Success of Your Breeding Program

Continuous Improvement
After each breeding season, take time to evaluate the success of your breeding program. Assess the health of the offspring, the fertility rates, and the overall condition of your bucks. Keep track of any issues that arise, such as low conception rates or health problems in kids, and make adjustments to your breeding plan for the next cycle.

Tip: Regularly assess your bucks and does to identify potential improvements to your breeding program. Consider adjusting your genetic selection or management practices based on the performance of previous offspring.


Final Thoughts

Effective breeding plans for bucks are crucial for ensuring that your goat farm remains productive and profitable. By selecting high-quality bucks with superior genetics, implementing a rotation system, and focusing on optimal nutrition and health, you can enhance the fertility and health of your herd. Whether you’re using natural breeding methods or AI, careful planning and record-keeping will help you achieve successful breeding outcomes and improve the overall quality of your herd.

With these 10 effective breeding plans, you can create a sustainable and efficient breeding program that supports your farming goals and ensures the long-term health and productivity of your goats.


Related Tips for Goat Breeding:

  • Always ensure your bucks have access to proper veterinary care, including vaccinations and parasite control, before the breeding season.
  • Keep breeding records to track the success rates of each buck and doe and to ensure that you maintain a healthy and genetically diverse herd.
  • Be patient and give your bucks time to rest and recover between breeding seasons to ensure continued fertility and health.

The Ultimate Guide to Goat Nutrition and Feeding Tips

Proper nutrition is essential for the health, productivity, and overall well-being of your goats. Whether you’re raising goats for milk, meat, or fiber, understanding their nutritional needs and providing a balanced diet will ensure they grow strong, stay healthy, and produce high-quality products. This ultimate guide covers everything you need to know about goat nutrition and feeding, from basic feeding principles to specific dietary requirements for different stages of life.


1. Understanding Goat Nutritional Requirements

Goats Are Ruminants
Goats are ruminants, which means they have a specialized digestive system designed to break down fibrous plant material, like grasses and leaves. Their stomach consists of four compartments—rumen, reticulum, omasum, and abomasum—that help process their food in stages. To meet their nutritional needs, goats require a balance of fiber, protein, carbohydrates, vitamins, and minerals.

Tip: Offer goats a variety of roughage, such as hay or pasture, to ensure they receive the fiber needed for proper digestion and overall health.

2. The Role of Roughage in Goat Diets

Fiber is Essential for Digestion
The foundation of any goat’s diet is roughage—high-fiber plant material such as hay, grasses, and browse (shrubs or trees). Roughage helps keep the rumen healthy by promoting fermentation and the production of essential nutrients. Without enough fiber, goats can experience digestive issues, like bloating or impaction.

Tip: Make sure goats have access to fresh, high-quality hay, especially during the winter months when pasture may be sparse. Types of hay like alfalfa, timothy, and clover are all good options.

3. Protein Needs for Goats

Essential for Growth, Milk Production, and Reproduction
Protein is crucial for the growth of kids (baby goats), the production of milk, and maintaining the overall health of adult goats. Protein helps build and repair body tissues and supports vital functions like immunity and reproduction. Different goats have different protein needs depending on their age, breed, and stage of production.

  • Growing Goats: Kids require higher protein levels (16-18%) to support rapid growth.
  • Milking Does: Lactating does need more protein (about 14-16%) to support milk production.
  • Dry Does and Bucks: Non-lactating adult goats typically require less protein (about 10-12%).

Tip: Choose protein-rich feeds or supplements such as alfalfa hay, soybean meal, or legume-based pellets to meet their dietary needs.

4. Carbohydrates and Energy Sources

Fuel for Activity and Growth
Carbohydrates, primarily in the form of fiber and sugars, provide goats with the energy they need for daily activities, growth, and lactation. Forage and hay are excellent sources of complex carbohydrates. If you’re raising goats for milk or meat production, they may need additional energy from grains like oats, corn, or barley to meet their energy demands.

Tip: While goats generally thrive on a forage-based diet, supplementing with grains can help meet energy demands during lactation, pregnancy, or winter months.

5. Vitamins and Minerals for Goat Health

Essential Micronutrients
Goats need a wide range of vitamins and minerals to support immune function, bone health, and reproductive performance. Some essential vitamins include A, D, and E, while key minerals include calcium, phosphorus, magnesium, salt, and trace minerals like copper and selenium. Deficiencies or imbalances in vitamins and minerals can lead to health problems like weak bones, poor milk production, or infertility.

  • Calcium and Phosphorus: An appropriate calcium-to-phosphorus ratio (around 2:1) is essential for bone health and milk production.
  • Salt: Provide a free-choice salt block or loose mineral supplement to ensure adequate intake.
  • Copper: Goats have higher copper requirements than sheep, so make sure your mineral mix contains copper if you have goats.

Tip: Offer goats a good quality mineral mix formulated for goats, and provide free access to clean water at all times to prevent dehydration and mineral imbalances.

6. Water: The Most Important Nutrient

Hydration is Key
Goats need constant access to clean, fresh water, as water is the most important nutrient for their health. Dehydration can lead to serious health problems, including kidney failure and poor digestion. A goat’s water intake can vary depending on age, activity level, and the type of food they’re eating.

Tip: Ensure that goats have access to clean, fresh water at all times, especially in hot weather when their water needs are higher.

7. Feeding Pregnant and Lactating Does

Special Nutritional Needs
Pregnant and lactating does have increased nutritional requirements to support their developing kids and milk production. During pregnancy, it’s important to provide extra calories, protein, and minerals to ensure the health of both the doe and her kids. After birth, lactating does require additional energy and protein to produce milk.

Tip: For pregnant does, increase their intake of protein-rich foods and ensure they get enough calcium and phosphorus to support fetal development. After kidding, switch to high-energy feed to support milk production.

8. Supplementing with Grains and Pellets

Boosting Nutrient Intake During High Demands
During times of stress, pregnancy, lactation, or extreme weather, supplementing with grains or specialized goat pellets can ensure your goats meet their nutritional needs. Grains like corn and oats are high in energy, while specialized goat pellets are balanced to provide a mix of protein, vitamins, and minerals.

Tip: When feeding grains or pellets, it’s important to monitor your goats’ weight and adjust the amount based on their needs to prevent overfeeding or obesity.

9. Managing Overfeeding and Obesity

Maintain a Healthy Weight
While it’s important to ensure goats get enough nutrition, overfeeding can lead to obesity, which can cause health problems like joint issues, poor fertility, and metabolic disorders. Monitor your goats’ body condition regularly to ensure they’re getting the right amount of food.

Tip: Adjust feeding practices to match your goats’ age, size, activity level, and purpose (milking, meat, or fiber production) to avoid overfeeding.


Final Thoughts

Proper goat nutrition is essential for a healthy, productive herd. By understanding the dietary needs of goats at different stages of life and providing a balanced diet of roughage, protein, energy, and essential vitamins and minerals, you can ensure your goats thrive. Whether you’re raising goats for milk, meat, or fiber, this guide will help you optimize your goats’ nutrition for long-term health and productivity.

With careful attention to feeding practices and a focus on quality nutrition, you’ll be well on your way to raising strong, healthy goats that will give you excellent returns for your efforts.


Related Tips for Goat Nutrition:

  • Adjust your goats’ diet based on seasonal changes, such as offering more hay during the winter months.
  • Always ensure that supplemental grain or pellets are introduced gradually to avoid digestive upset.
  • Monitor your goats regularly for signs of nutritional deficiencies, such as poor coat condition, low energy, or reduced milk production.

9 Tips for Speeding Up the Composting Process

Composting is an eco-friendly way to recycle organic waste into rich, fertile soil for your garden. However, sometimes you may want to speed up the process to get compost quicker and use it in your garden sooner. Fortunately, there are several strategies that can help speed up the decomposition process without compromising the quality of your compost. Here are 9 tips to accelerate composting and make the most of your organic waste.


1. Chop or Shred Materials

Why it helps: Smaller pieces of organic material break down faster than large chunks because they have a greater surface area for microbes to work on. Shredding or chopping materials like leaves, branches, and vegetable scraps will help the compost decompose more efficiently.

How to do it:

  • Use a shredder for garden waste or chop large items into smaller pieces with scissors, a machete, or pruning shears. The finer the material, the faster it will decompose.

2. Maintain a Balanced Carbon-to-Nitrogen Ratio

Why it helps: A proper balance of carbon-rich “brown” materials (like leaves, straw, and cardboard) and nitrogen-rich “green” materials (like grass clippings, food scraps, and manure) is crucial for fast composting. Too much of one or the other can slow the process down.

How to do it:

  • Aim for a carbon-to-nitrogen ratio of about 30:1. If the pile is too green (too much nitrogen), add more brown materials like leaves or straw. If it’s too brown (too much carbon), add more nitrogen-rich materials like fresh grass or food scraps.

3. Turn the Pile Regularly

Why it helps: Turning the compost pile every few weeks introduces oxygen, which is essential for aerobic decomposition. Oxygen helps bacteria and fungi break down organic materials faster, speeding up the composting process.

How to do it:

  • Use a pitchfork or compost aerator to turn the pile every 2-3 weeks. Aerating helps prevent the compost from becoming too compacted, and it accelerates decomposition by promoting the growth of oxygen-loving microorganisms.

4. Keep the Pile Moist

Why it helps: Decomposition requires moisture, but the compost pile should not be too wet or too dry. If the pile is too dry, the microorganisms can’t break down materials efficiently. If it’s too wet, the pile can become anaerobic, slowing down the process and creating foul odors.

How to do it:

  • Keep the compost pile as damp as a wrung-out sponge. If it’s too dry, add water while turning the pile. If it’s too wet, add more dry materials (like straw or leaves) to absorb excess moisture.

5. Add Compost Activators

Why it helps: Compost activators are materials that help to jumpstart the composting process. They are often rich in nitrogen, which encourages microbial growth and accelerates decomposition.

How to do it:

  • You can buy commercial compost activators, or use natural sources like manure, fresh grass clippings, or kitchen scraps. These materials will boost microbial activity and speed up the process.

6. Use a Compost Bin or Tumbler

Why it helps: Using a compost bin or tumbler helps to contain the compost and manage temperature and moisture levels more easily. Tumblers allow for better aeration, and because they’re enclosed, they trap heat, which speeds up the breakdown of organic materials.

How to do it:

  • Invest in a compost tumbler, which makes it easy to rotate the pile. A good tumbler can reduce composting time significantly by maintaining an optimal environment for microbial activity.

7. Increase the Pile’s Size

Why it helps: Larger compost piles retain heat more effectively, which speeds up the breakdown of organic materials. A larger pile also creates a better environment for microorganisms to thrive.

How to do it:

  • Aim for a compost pile that’s at least 3 feet by 3 feet. Larger piles generate more heat, which accelerates decomposition. If your pile is too small, the composting process will be slower.

8. Include More Nitrogen-Rich Materials

Why it helps: Nitrogen-rich materials, such as food scraps, grass clippings, and manure, help to heat up the compost pile and support rapid microbial growth. More nitrogen leads to faster decomposition.

How to do it:

  • Add more green materials like vegetable scraps, coffee grounds, and fresh grass clippings. Just make sure to balance them with enough brown materials to maintain the carbon-to-nitrogen ratio.

9. Maintain the Right Temperature

Why it helps: Composting is a heat-driven process. A temperature of 130°F to 160°F (55°C to 71°C) is ideal for quick decomposition. The higher the temperature, the faster the composting process.

How to do it:

  • Use a compost thermometer to monitor the temperature of your pile. If it falls below 130°F, turn the pile to introduce more oxygen. If it’s too hot, add more carbon-rich materials to cool it down.

Conclusion

By implementing these nine tips, you can speed up your composting process and create nutrient-rich compost in a fraction of the time. Properly balancing your materials, maintaining moisture, turning the pile regularly, and monitoring the temperature will ensure a faster, healthier composting process. With a little attention to detail, your compost will break down quickly and be ready to use in your garden sooner, providing your plants with the best possible soil.

10 Creative Uses for Finished Compost: Putting Your Nutrient-Rich Soil to Work

Finished compost is one of the best natural fertilizers available, and it’s a great way to recycle organic waste into valuable nutrients for your plants and garden. But once you’ve created your rich, dark, crumbly compost, you might wonder: How can I put it to best use? The possibilities are endless! Here are 10 creative uses for your finished compost that will enhance your garden, home, and more.


1. Improve Soil Quality in Your Garden

Why it helps: Compost is rich in nutrients that plants need to grow, such as nitrogen, phosphorus, and potassium. It also enhances the soil structure, improves drainage, and supports healthy root development.

How to use it:

  • Spread a layer of compost on your garden beds before planting, or mix it into the soil to improve its texture and fertility. Use it for vegetables, flowers, shrubs, and trees.

2. Create Compost Tea for Plants

Why it helps: Compost tea is a nutrient-rich liquid that you can use to feed plants and enhance soil health. It’s packed with beneficial microorganisms that can boost plant growth and help protect against diseases.

How to use it:

  • Place a small amount of finished compost in a mesh bag or cheesecloth, then steep it in water for a few days. Once the liquid turns brown and fragrant, strain out the solids and use the tea as a natural fertilizer for your plants.

3. Mulch for Your Garden Beds

Why it helps: Compost can act as a natural mulch that retains moisture, prevents weeds, and regulates soil temperature. Plus, as it decomposes, it continues to enrich the soil beneath it.

How to use it:

  • Apply a 2- to 3-inch layer of compost on top of your garden soil as mulch. This will keep your plants hydrated and suppress weed growth throughout the growing season.

4. Boost Lawn Health

Why it helps: Compost improves the texture and structure of your lawn’s soil, helping grass roots penetrate deeper and grow stronger. It also enhances the overall health of the lawn by providing essential nutrients.

How to use it:

  • Spread a thin layer (around ¼ inch) of finished compost over your lawn and rake it in. This will provide your grass with the nutrients it needs to thrive and help combat compaction.

5. Enhance Your Composting Pile

Why it helps: Adding a small amount of finished compost to your new compost pile helps introduce beneficial microorganisms that aid in breaking down organic matter more quickly.

How to use it:

  • When starting a new compost pile, sprinkle a layer of finished compost over the materials. This will help jumpstart the decomposition process by introducing microbes that are already active in the finished compost.

6. Potting Mix for Container Plants

Why it helps: Finished compost is a great addition to potting soil because it helps retain moisture, adds nutrients, and improves drainage in containers.

How to use it:

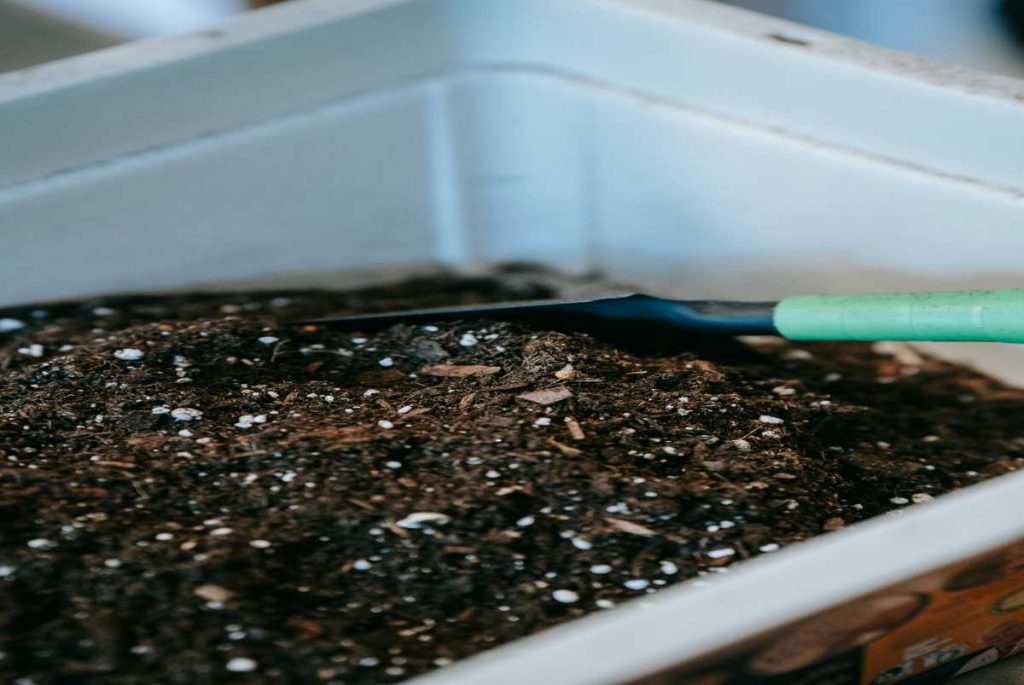
  • Mix finished compost with perlite or vermiculite (to improve aeration) and some garden soil to create a well-draining potting mix. Use this mixture to repot or plant in containers, baskets, or pots.

7. Use in Raised Garden Beds

Why it helps: Raised garden beds often need a soil boost, especially when they are newly established. Finished compost improves the soil’s nutrient profile and supports plant growth in these beds.

How to use it:

  • Add a generous amount of finished compost to the soil mix for your raised garden beds. This will provide immediate nourishment for your plants and create a healthy growing environment.

8. Enhance Your Vegetable Garden

Why it helps: Compost is especially beneficial for vegetable gardens, as it provides essential nutrients while also improving soil structure, which leads to healthier, higher-yielding plants.

How to use it:

  • Mix compost into the soil of your vegetable garden before planting to create rich, fertile ground for your crops. You can also side-dress around the base of growing plants to provide additional nutrients as needed.

9. Top-Dress Fruit Trees

Why it helps: Fruit trees require nutrient-rich soil to produce high-quality fruit. Compost improves soil health by providing the right balance of nutrients and moisture, helping trees grow strong and produce abundant fruit.

How to use it:

  • Spread a layer of compost around the base of fruit trees (but not directly against the trunk) and lightly rake it in. This will provide nutrients and improve the tree’s access to moisture and minerals.

10. Improve Flower Beds and Landscaping

Why it helps: Whether you’re growing flowers, shrubs, or ornamental plants, compost helps to ensure healthy, vibrant blooms. It encourages strong root systems and lush foliage.

How to use it:

  • Work finished compost into the soil of flower beds, or use it as a mulch around plants to keep them nourished throughout the season.

Conclusion

Finished compost is a powerful, all-natural tool for improving the health and vitality of your garden and plants. From enriching your soil to making compost tea or boosting the health of your lawn, the possibilities for using finished compost are endless. By putting your nutrient-rich soil to work, you’ll create a healthier, more productive garden that thrives season after season.

How to Start a Vermicomposting Bin with Red Worms

Vermicomposting is a fantastic way to recycle kitchen scraps and other organic materials into rich, nutrient-dense compost using red worms. It’s simple, eco-friendly, and perfect for small spaces like apartments or urban gardens. Here’s a step-by-step guide to setting up and maintaining your own vermicomposting bin.


What is Vermicomposting?

Vermicomposting uses red worms (typically Eisenia fetida) to break down organic waste into castings, which are nutrient-rich fertilizers. It’s an odor-free, compact system that can be kept indoors or outdoors.


What You’ll Need to Start

1. A Composting Bin

  • Material: Plastic or wood.
  • Size: A bin about 8–12 inches deep works well for most beginners.
  • Lid: Ensure it has a lid to retain moisture and keep pests out.

2. Bedding Material

  • Shredded newspaper, cardboard, coconut coir, or dried leaves.

3. Red Worms

  • Opt for Eisenia fetida (red wigglers), as they thrive in composting environments.

4. Food Scraps

  • Vegetable peels, fruit scraps, coffee grounds, and eggshells (crushed).

5. Optional Tools

  • A moisture meter or spray bottle to manage moisture levels.
  • Gloves or a small garden fork for turning the bin.

Setting Up the Vermicomposting Bin

Step 1: Prepare the Bin

  1. Drill holes in the sides and bottom of the bin for ventilation and drainage.
  2. Place a tray or pan beneath the bin to collect excess liquid (worm tea).

Step 2: Add Bedding

  1. Fill the bin about halfway with shredded paper, coconut coir, or leaves.
  2. Dampen the bedding material with water until it’s moist but not soggy.

Step 3: Introduce the Worms

  • Spread the worms evenly over the bedding. Let them burrow naturally to escape light.

Step 4: Add Food Scraps

  1. Bury small amounts of food scraps in the bedding.
  2. Rotate feeding spots to avoid attracting pests or creating an imbalance.

Step 5: Cover with More Bedding

  • Add a thin layer of damp bedding on top to control odors and maintain moisture.

Feeding Your Worms

What to Feed

  • Fruit and vegetable scraps.
  • Coffee grounds and filters.
  • Crushed eggshells.
  • Tea bags (ensure they are biodegradable).

What to Avoid

  • Meat, fish, or dairy (attracts pests and creates odors).
  • Greasy or oily foods.
  • Citrus fruits and onion/garlic (can harm worms).

Maintaining Your Vermicomposting Bin

1. Moisture

  • Keep bedding moist but not wet. Add water if it dries out, or mix in dry bedding if it’s too wet.

2. Aeration

  • Turn or fluff the bedding every few weeks to prevent compaction and allow airflow.

3. Temperature

  • Keep the bin in a cool, shaded area between 55°F–77°F (13°C–25°C). Avoid extreme heat or freezing temperatures.

4. Harvesting Compost

  1. After 2–3 months, push the contents of the bin to one side.
  2. Add fresh bedding and food to the empty side, encouraging worms to migrate.
  3. Remove the finished compost after 1–2 weeks.

5. Collecting Worm Tea

  • Drain the liquid from the tray below and dilute it with water (10:1 ratio) to use as a fertilizer.

Common Vermicomposting Problems and Solutions

1. Bad Odors

  • Cause: Overfeeding or too much moisture.
  • Solution: Remove excess food and mix in dry bedding.

2. Worms Escaping

  • Cause: Environment too dry, wet, or hot.
  • Solution: Check moisture, temperature, and bedding conditions.

3. Fruit Flies or Pests

  • Cause: Exposed food scraps.
  • Solution: Always bury food under bedding. Add a layer of dry material on top.

4. Slow Decomposition

  • Cause: Overfeeding or imbalance in greens and browns.
  • Solution: Feed less and ensure a good mix of bedding and scraps.

Using the Finished Compost

  • Mix worm castings into potting soil for houseplants.
  • Add directly to garden beds or sprinkle around the base of plants.
  • Use worm tea as a liquid fertilizer for an extra nutrient boost.

Benefits of Vermicomposting

  1. Reduces household waste.
  2. Produces high-quality compost.
  3. Compact and ideal for small spaces.
  4. Easy to maintain with minimal odor or mess.

FAQs

1. How many worms should I start with?

  • Start with 1 pound (about 1,000 worms) for every ½ pound of daily food scraps.

2. Can I keep the bin indoors?

  • Yes! Vermicomposting bins are odor-free and perfect for kitchens or basements.

3. How long does it take to get compost?

  • Typically, 2–3 months, depending on the bin size, worm population, and amount of waste.

Conclusion

Starting a vermicomposting bin is an easy, sustainable way to recycle organic waste and create nutrient-rich compost. With the right setup and a little maintenance, you can enjoy the benefits of vermicomposting year-round. Happy composting!

Tips for Speeding Up the Composting Process

Composting is an excellent way to recycle organic waste, improve soil health, and reduce landfill waste. However, the process can sometimes take months or even years to fully break down materials, especially if conditions aren’t ideal. Fortunately, there are several ways to speed up composting and get nutrient-rich humus for your garden faster. Here are 9 effective tips to accelerate the composting process.


1. Maintain the Right Balance of Green and Brown Materials

Composting works best when there’s a proper balance between nitrogen-rich green materials (such as kitchen scraps, grass clippings, and coffee grounds) and carbon-rich brown materials (such as dry leaves, cardboard, and straw).

  • How it helps: The right balance of greens and browns provides the microorganisms with the nutrients they need to break down organic matter quickly.
  • Tip: Aim for a ratio of about 3:1 (brown to green) for optimal composting speed.

2. Chop or Shred Larger Materials

Larger pieces of organic matter like branches, fruit peels, or vegetable scraps take longer to break down. To speed up the process, chop or shred larger materials into smaller pieces.

  • How it helps: Smaller pieces provide a larger surface area for microorganisms to break down, speeding up the decomposition process.
  • Tip: Use a compost shredder or simply chop materials with a garden shears or knife.

3. Turn the Pile Regularly

Turning the compost pile helps introduce oxygen, which is essential for aerobic bacteria that break down organic matter more quickly.

  • How it helps: Regularly turning the pile promotes aeration, prevents odors, and speeds up the decomposition process by ensuring bacteria can work efficiently.
  • Tip: Turn the pile once a week or more, especially when the temperature starts to drop or if the pile seems to slow down.

4. Maintain the Right Moisture Level

Composting requires moisture to keep the microorganisms active. However, too much moisture can create anaerobic conditions that slow down decomposition, while too little moisture will cause the pile to dry out and halt the process.

  • How it helps: Moisture activates and sustains beneficial microbes that decompose organic material.
  • Tip: Keep the pile as moist as a wrung-out sponge—damp but not soggy. If it’s too dry, add water; if it’s too wet, add more brown materials to absorb excess moisture.

5. Add Compost Accelerator or Activator

Compost accelerators are commercially available products containing beneficial microbes and enzymes that can help jumpstart the composting process.

  • How it helps: Accelerators introduce or stimulate microorganisms that can speed up decomposition.
  • Tip: You can also create your own “compost starter” by adding some already finished compost to the pile to introduce active microbes.

6. Ensure Proper Pile Size and Structure

The size of your compost pile can affect its temperature and speed of decomposition. A pile that’s too small won’t generate enough heat, while a pile that’s too large can become compacted and lack airflow.

  • How it helps: A pile that is about 3 feet by 3 feet in size is optimal for composting, as it can retain heat and maintain aeration while still breaking down material efficiently.
  • Tip: Keep your compost pile in a manageable size to maintain the right temperature and airflow.

7. Increase the Pile’s Temperature

A hot compost pile breaks down organic material much faster than a cool one. The ideal temperature for composting is between 130°F and 160°F (54°C to 71°C), which is hot enough to encourage microbial activity but not so hot that it kills the beneficial organisms.

  • How it helps: Heat speeds up the process by promoting faster microbial breakdown.
  • Tip: If your pile isn’t hot enough, add more green materials like fresh grass clippings or manure to raise the temperature.

8. Use Aerobic Methods

Using aerobic composting methods, which rely on oxygen-loving bacteria, can significantly speed up the breakdown process compared to anaerobic composting (which takes much longer).

  • How it helps: Aerobic bacteria work faster and more efficiently to break down organic materials.
  • Tip: Avoid compacting the pile, and make sure to aerate it regularly by turning or stirring to introduce oxygen.

9. Avoid Adding Certain Materials

Some materials slow down the composting process or create problems in your pile. Avoid adding large quantities of meat, dairy, fats, and oils, as they can attract pests and slow decomposition.

  • How it helps: By excluding slow-decomposing or problematic materials, you ensure a quicker and more efficient composting process.
  • Tip: Stick to plant-based materials, and if you add any animal products, do so sparingly.

Conclusion

By following these 9 tips, you can significantly speed up the composting process and enjoy richer, healthier soil in a shorter amount of time. Remember that composting is an ongoing process that benefits from attention and care, but with the right techniques, you’ll be able to reduce waste and nourish your garden with nutrient-dense compost in no time.