How to Grow Squash – A Step-by-Step Guide

Squash is one of the easy veggies to grow in your garden or backyard. Squash can be grown easily in most of the regions of The United States. 

In this article, you will know everything about how to grow squash, varieties of squash, growing stages, and harvest period.  Before heading towards how to grow squash let us first know about its varieties.

Varieties Of Squash

Squash comes in many varieties which can be grown both in summer as well as winter. Few popular varieties of winter squash are as follows

Winter Squash Variety

Winter squash comes in dozen varieties, it can be kept for months after harvesting as it has tough exterior. 

  1. Butternut Squash

Butternut squash is a popular pick for cold weather dishes like soups and risotto. It comes in a shape of a bulb with tan yellow skin and orange fleshy pulp. Its taste is similar like pumpkin, sweet, and nutty. It grows on a vine and its taste becomes sweeter and richer as it gets ripe. 

  1. Spaghetti Squash

Spaghetti squash is the most trendiest among all the varieties. It has got shredded flesh that is the reason it is called as spaghetti squash. It is one of the healthy substitution of pasta, with low carbs. 

  1. Acorn Squash 

Acorn squash is also known as pepper squash. This squash has green exterior and yellow orange flesh. It can be used for roasting or stuffing and has mild sweet flavor. 

  1. Sweet Dumpling Squash

Sweet dumpling squash comes in much smaller size when compared to other squashes. It resembles a small pumpkin and can be used as a bowl for soups or stuffed with meat and other veggies. Its flesh is sweet and tender and tastes similar to sweet potato. 

  1. Red Kuri Squash

Red kuri squash has a tear top shape with orange skin which can be consumed once cooked. This squash can be best consumed when stuffed with rice, meat or vegetables.

Summer Squash Variety

Well, summer brings sunshine as well as new varieties of squash. These are harvested mush earlier than winter squash. The shelf life of summer squash is one or two weeks only. It is very soft and takes less time to cook. 

  1. Yellow Squash

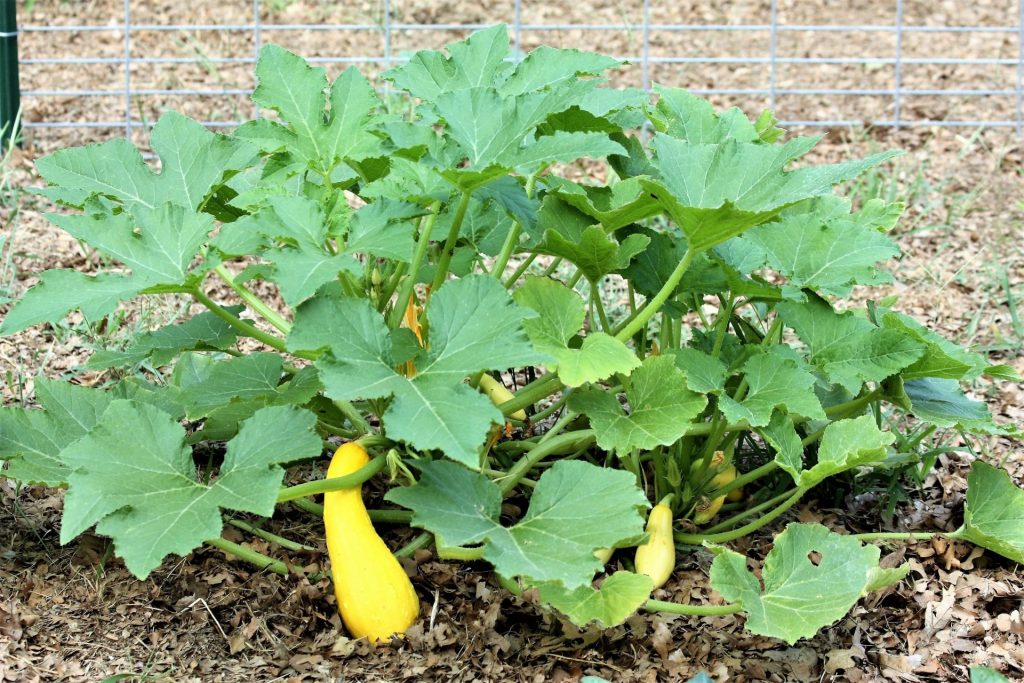
It has a bright yellow exterior and comes in two varieties which can be distinguished by the shape of its neck, straight neck or crooked neck. It has tender and thin skin that can be easily peeled and chopped. 

  1. Zucchini Squash

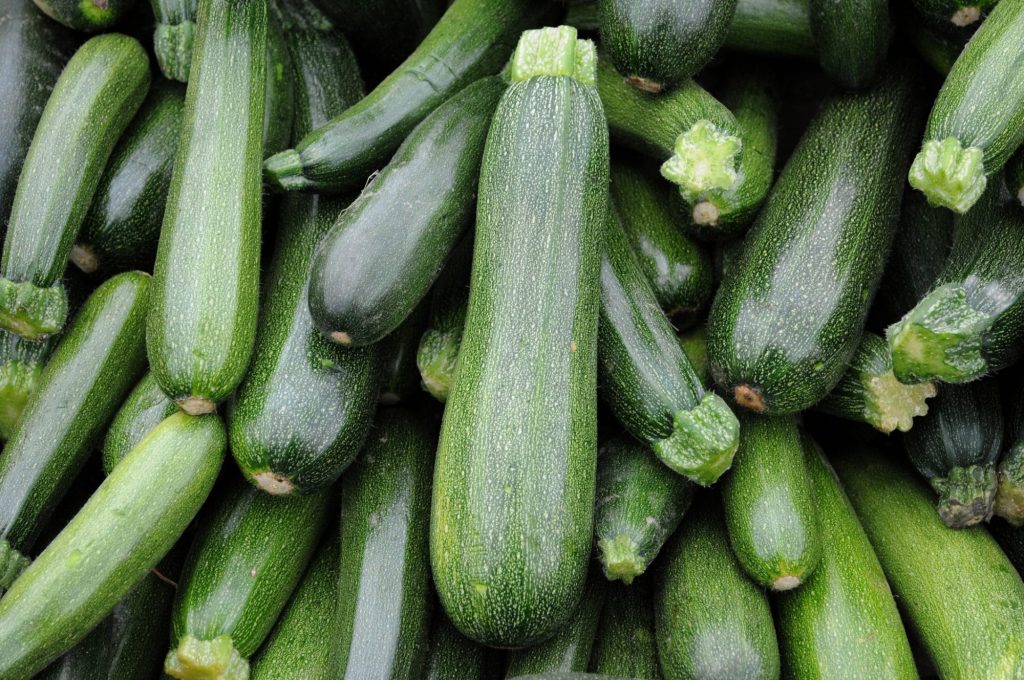
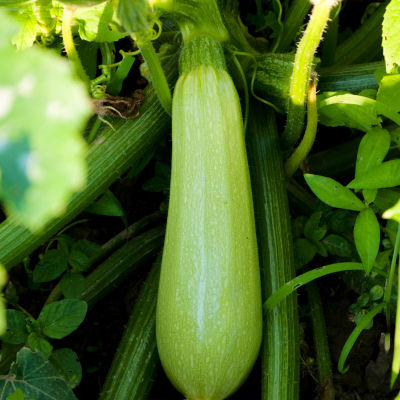
Zucchini is the favorite squash of all the chefs as it is perfect for grilling, baking, sauteing, and much more. It is dark green in color and most loved summer squash. It is the best low-carb substitution for noodles and fries. 

  1. Chayote Squash

This squash is originally from Mexico and resembles a lot like pear. Chayote squash is low in calorie and tastes similar to that of cucumber. It can be made in various ways which makes it versatile. 

Also Read: How to grow cauliflower: All The Information Regarding It

Planting Squash

Let us know about squash growing stages, what month to plant, how long will it take to grow squash, and when to harvest as well. 

If you are planting winter squash then you must know what month to plant. The best time to plant winter squash is after the last frost is over. 

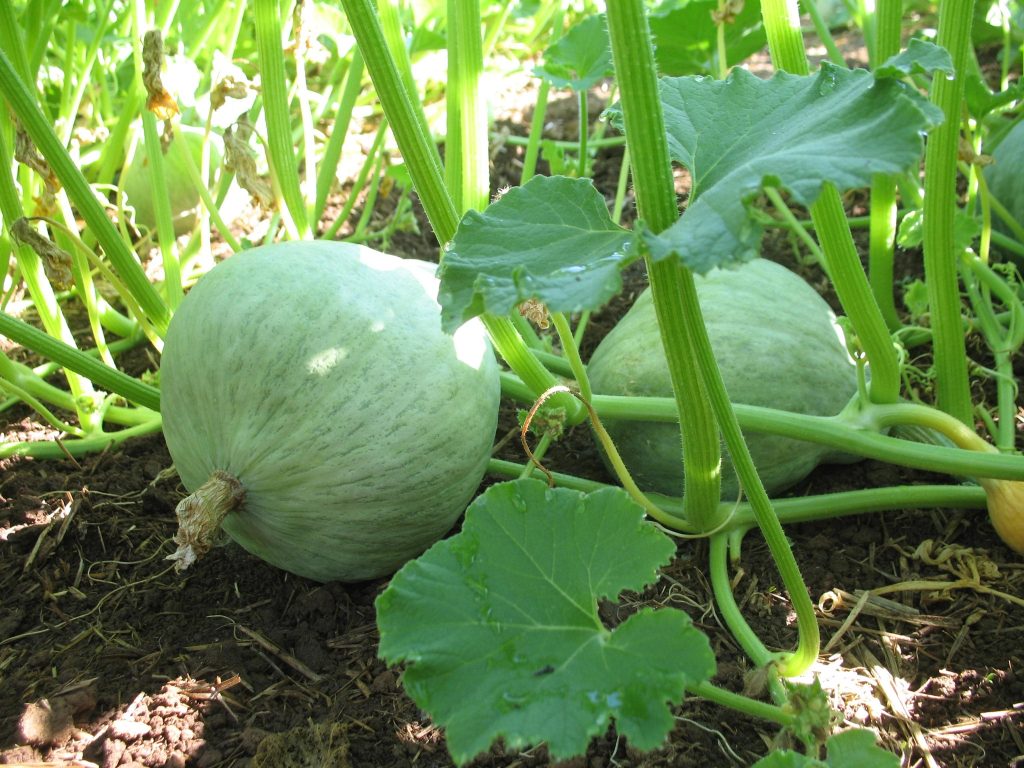
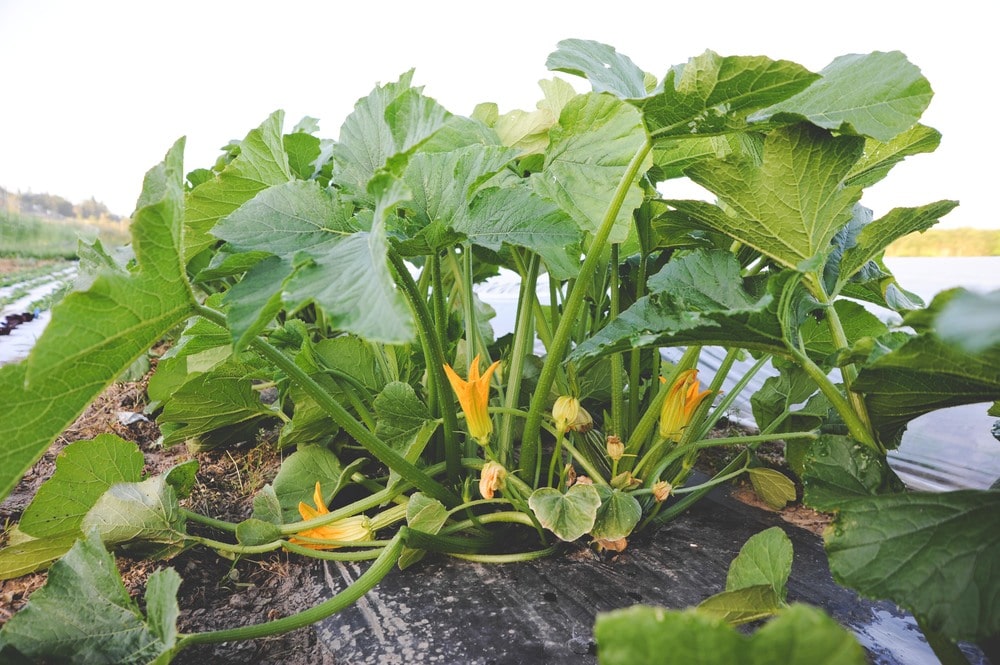
The first thing to be done is to make the soil ready for planting, you need quite open space as it grows in vine and spreads quickly. Spread at least 3 inch of compost and make the land ready. Make sure to provide nutritious fertilizer as well. Squash need full sun and good air circulation so choose the place accordingly. The condition for summer and winter squash are the same, except the harvest time. 

Here is the way on how to grow squash from seeds. Sow the seeds 1-2 inch deep in the soil and give a gap of at least 4-6 feet after every seed. The seedlings will emerge within 3-4 days of planting. 

After this is done now you will be eager to know how long will it take to grow squash. The plant takes 70-100 days to mature, but it depends on the type of plant and the weather as well. 

Harvesting Squash

Harvesting or picking squash is fun, its so good to see different varieties with different shapes and sizes. You can expect about 1-10 fruits from each plant, depending on the variety. Look for the below mentioned points before harvesting winter squash

  • Harvest after at least 50-55 days from the time fruit has set.
  • You should hear a hollow sound when tapped gently.
  • Harvest it before the frost arrive.
  • The rind should change from light green to tan.
  • Cut the rind with a short stub of vine attached. 

After harvesting the squashes need to be kept in a cool and dry place. Winter squash can be kept for as long as 1-2 months, they can even be used for decoration. Where as summer squash cant survive this longer. It needs to be cooked or consumed withing 2-3 weeks. 

Turnip Farming Information Guide

Turnip farming can be performed on commercial or personal scale very easily and with minimal efforts. Gaining much needed knowledge gets you ready to start. Check out this full guide on turnip farming. 

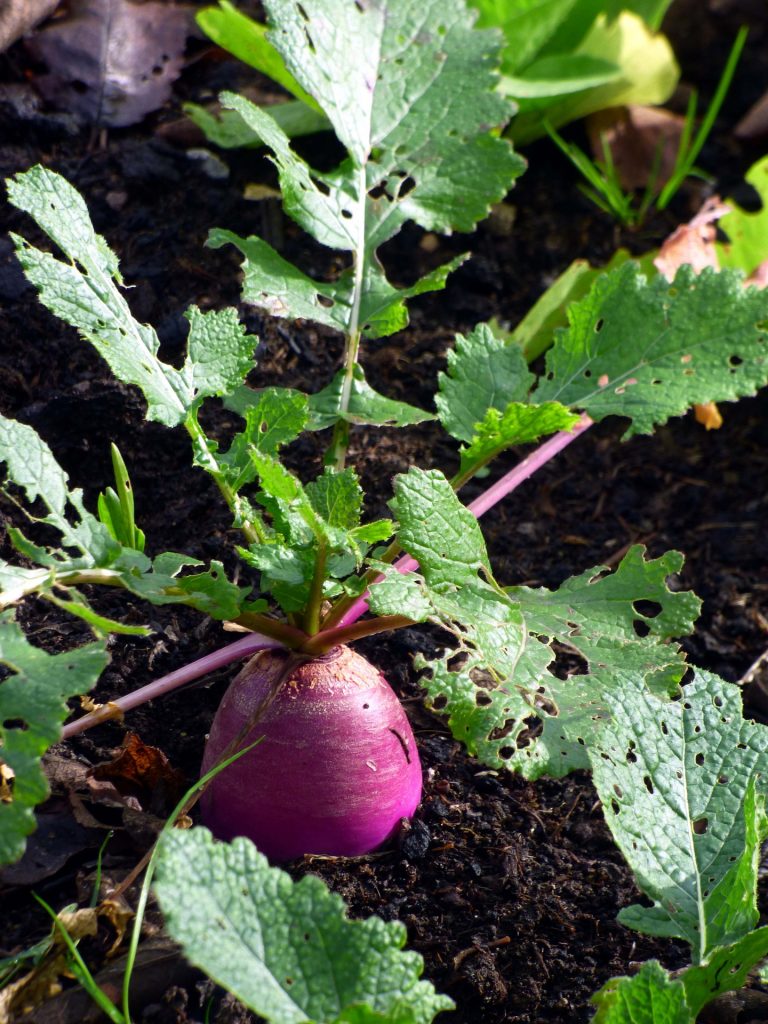
Turnips are cool weather vegetables and its botanical name is Brassica rapa. These are considered as staple food for humans and livestock too. They have a rosette of bright green leaves that grows from tubers or swollen roots. Turnips are consumed for their swollen roots and greens. Also, they are biennial but grown as annual.

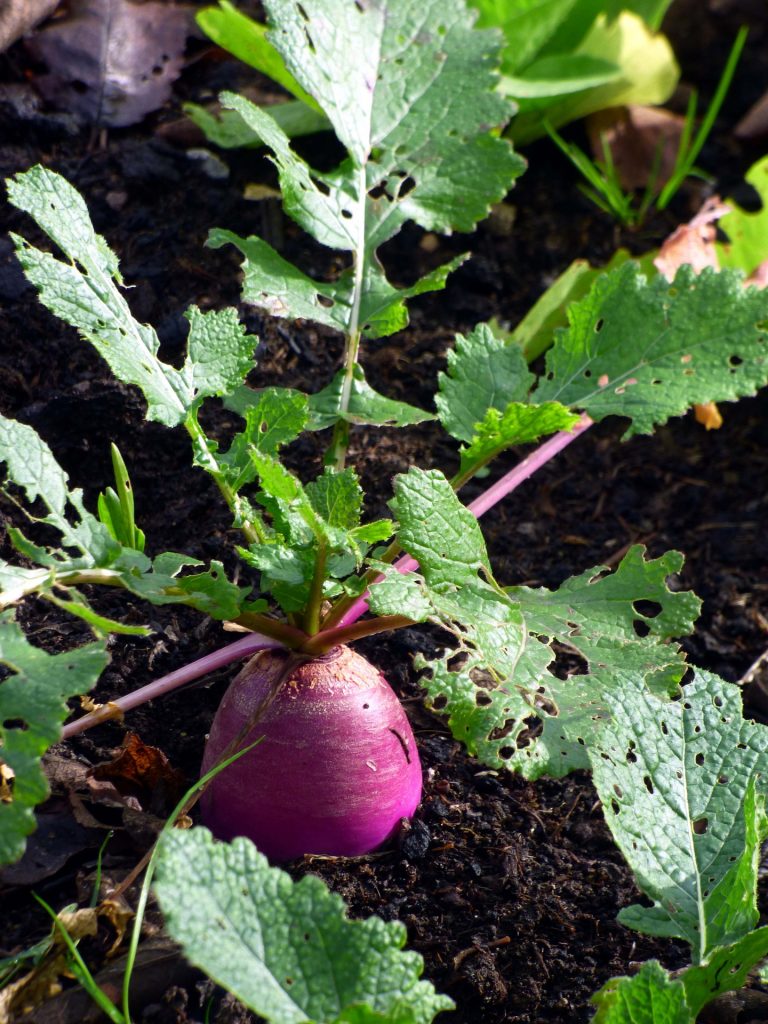
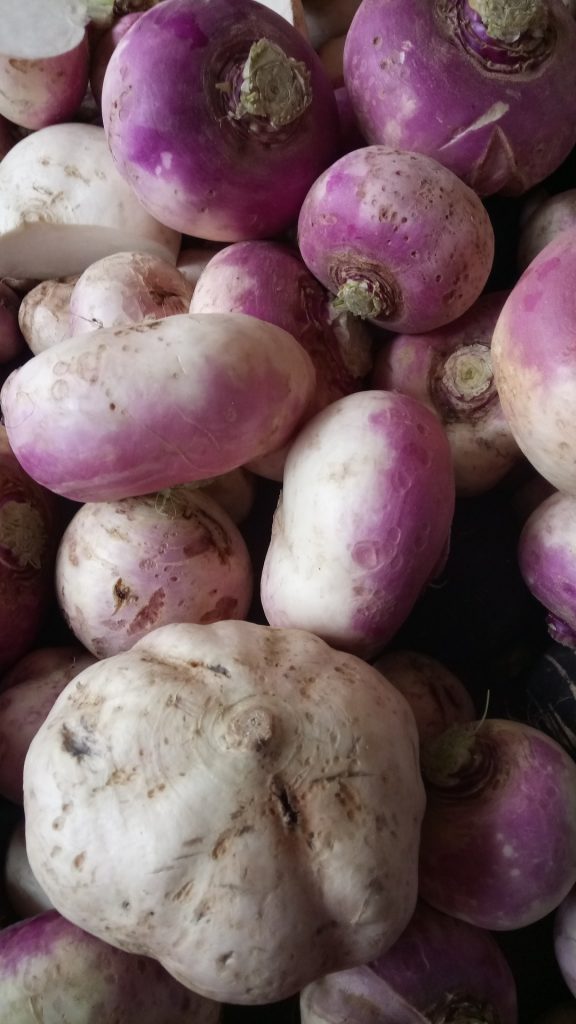
Most commonly found turnips are light purple in colour from top and white from bottom. However, more than 30 varieties of turnip are  found over the globe. All of these vary in shape, sizes, and colours. Some might taste as sweet as carrots and others might taste like a potato. 

Swollen turnip is eaten by people all over the world. It can be either consumed raw or stewed, roasted, boiled, mashed with other root crops to consume. Greens of turnips can be consumed too. People cook and eat them in the same manner as spinach as kale are. 

They generally grow in spring and fall.temperate climates are best suites for turnips. Therefore, they are mostly grown in the USA, UK, Poland, China, France etc. They have been grown and consumed for over 3000 years by our ancestors. 

It is advised to avoid hot summer weather for their growth. Turnips tend to become woody and bitter in hot temperatures. They mature rapidly and are very easy to grow in home gardens.

Turnips are considered biennials hardly. They are mostly grown by people as an autumn crop. 

As mentioned earlier, turnips can be fed to livestock too. Animals can be fed upon turnips after they are harvested. Or browsing animals can consume them in fields too. Few people plant turnips to attract deers to their fields.

Also Read: Sweet Potato Farming Information Guide

Varieties of turnip

There are various varieties of turnips. Most popular varieties of turnip are Purple top, Royal Gloss, Just Right ( 40-60 days), White globe( 57 days), Tokyo Express, Market express, Shogoin, and mild Hakurei. Best varieties in the case of greens are Alltop (50 days greens), Topper, Royal Crown (52 days) and Seven top( 45 days,greens). 

Yellow Globe produces golden turnip roots and is great for roasting. For upper midwest and canada, Green Globe and York Globe are the most suitable varieties. 

Health benefits of turnips

Turnip is full of nutrition and anti-disease properties. Moreover, the health benefits of turnip are immense too. 

  • Nutritional value-

1 medium turnip is laced with following nutrients-

Calories- 34g

Fat- 0.1g

Carbs-7g

Proteins-1g

Fiber- 2g

Sugar- 4g 

Cholesterol- 0g

  • Vitamins and minerals 

Calcium- 3% of daily value (DV)

Folate- 5% of DV

Magnesium

Potassium- 115% of DV

Phosphorus- 3% of DV

Vitamin C- 30% of DV

Turnip greens are also full of nutrition. Vitamin A and C are found in abundance in turnip leaves. One cup of greens contains 6373 IU of vitamin A and 33mg of Vitamin C. 

Health benefits

Vitamin C is helpful in protecting the body from free radical damage. To add to this, it increases iron absorption and regulates blood cholesterol. 

Vitamin K, on the other hand, prevents excessive bleeding. Vitamin A regulates eye, skin and lung health. 

Anti cancer properties Turnip is famous all around the globe for its anti cancer properties. It helps prevent growth and spread of cancerous cells. Also, turnips are rich in glucosinolates. Glucosinolates are a group of bioactive plant compounds. These compounds have antioxidant properties and therefore, reduce risk of various cancers like lung cancer, colon cancer, rectal cancer etc. 

Along with this, they are also enriched with flavonoids. Mainly anthocyanins are found in turnips and they are known to have anti cancer properties too. Plus, they lower the risk of chronic and degenerative disease. 

Control blood sugar Turnip swollen roots and greens are believed to have anti-diabetic effects. They can control metabolic disorders like high blood cholesterol, high triglyceride levels. Further, they increase blood sugar clearage and lower production of glucose from the liver. Also, they reduce the absorption of carbohydrates. 

Anti inflammatory– Many diseases cause inflammation in the body part as symptoms like arthritis, cancer or high blood pressure. Turnip can be helpful in such a condition due to the presence of glucosinolates. It breaks down into indoles and isothiocyanates which have anti-inflammatory properties. 

Protect against Bacteria– Turnip has antibacterial and antimicrobial properties also. Turnip ensures inhibition of bacterial or microbial growth in the human body. 

Weight management– It is a non starch edible, full of fibre, and has very low calorie count. Therefore, consuming this will help you stay full for longer periods and healthy.  

Promote bone healthMaterials present in turnip have the power to maintain good bone health. Vitamin K found in turnip helps in bone metabolism. 

Liver protectionConsuming turnip ensures lesser glucose production and thus less stress on the liver of the human body. 

How to grow turnips

First of all, you must be aware of when to grow turnips. Turnip growth months vary with region. For late spring harvest, you can sow seeds directly in your garden around 2-3 weeks before the average last frost date. For instance, in USA zone 2a, the best time for sowing seeds of turnip is august and September for autumn harvest. You can easily check out the best month of growth of your region. 

For autumn harvest seeds are sown in late summers. These seeds are generally sowed after summer crops of onion,squash, beans or sweetcorn. Seeds can be sowed in early autumn too to get a late autumn harvest.

They grow in temperatures ranging from 40F to 70F ( 7-24C). They must be reaped out before temperature exceeds 24 C. 

Next thing that you need to focus upon is the planting site. The place for growing turnips must receive full sunlight for maximum hours. Soil of the area must be well drained to ensure good growth and sweet and tender vegetables. If soil is heavy or clayey, you can fix it by adding sand in it before seeding. Remove any stones at the site to provide a bigger area for roots to expand. pH of soil must be ranging between 5.5 to 6.8.

Addition of compost and well aged manure is suggested. Manure or organic compost is enriched with nutrients and minerals. Therefore, it is very beneficial in the growth of turnips. 

Soil bed must be weed free. But keep in mind that removal of weeds can disturb roots of young turnip plants. Therefore be careful while removing weeds. Usage of mulch is proven beneficial. It helps in retaining moisture in soil and suppresses weeds too. Addition of peat moss, compost,coconut coir or well aged manure is also favoured.

Although not much care is needed for turnip plants but do provide them with enough moisture at all times of growing period. Watering must be done upto 1 inch per week to avoid bitter and tough roots. It is observed that they demand dry bed but wet heads. Plus, soil must be kept moist at all times. 

Overcrowding must be avoided in case of turnip plants. It results in small roots in turnips. 

How to sow turnip seeds

Turnip seeds are sowed directly into the soil. Just scatter the seeds in your garden. Dig a small hole of ½ inch depth. Place the seed in it and cover it with soil and then patt a little.  Further, they must be placed 2 inch apart wide rows of 12 inches. In later stages,thin them upto 4-6 inches apart for large turnips while 2-4 inches apart for greens. Overcrowding can be an issue for turnip plants. Therefore, work out these beforehand. 

You can also grow turnips in pots or containers. The container taken for turnip growth must be 8inch deep at least. This depth will ensure proper growth of roots. 

Further, for summer harvest, seeds should be sown in early spring, 4-6 weeks before the last expected frost date. And in the case of autumn harvest, sow seeds 6-8 weeks before the first expected frost date. You can expect mature turnips in early spring and after 2 months of first frost date respectively. 

Germination time of turnips

Turnip seeds take around 3 – 10 days approximately to germinate. Soil beds are required to be moist all the time for faster and better germination of turnip seeds. The temperature conditions must be favourable and the best temperature for germination is 71F or 21C. Also, colder temperatures can delay germination. Optimum Temperature for turnip growth is 16C. 

Diseases in Turnip

Pests can affect turnip plants in various ways. Some might cause defects in vegetables or some can affect leaves of the turnip plant. Whatever, it is they ,ust be taken care of to ensure healthy plants. 

Aphids and flea beetles are disastrous for turnips. Aphids can be removed by pinching out the foliage. While on the other hand, flea beetles can be removed or avoided by getting rid of weeds in the area of turnip plantation. 

White rust of fungus is also a disease seen in turnips. It results in small white cottony blisters on the upper surface of the leaves. Yellow discolouration is also observed on the underside in this disease. 

Alternaria leaf spot- In this disease, small black spots appear on leaves which turn into brown or grey. It is caused by fungus and can be treated with a fungicide. 

Anthracnose- Small circular shaped spots appear on leaves. High number of spots can kill the leaves of turnip plants. Lesions turn leaves into yellow and make them wilt. The cause of this disease is fungus. Sanitary practices must be considered to avoid fungus and cruciferous weeds should be gotten rid off. 

Black rot- dark rings appear on the cross section of stem in black rot. Lesions of v shape can also be seen. Leaves can turn into yellow or brown. Cause of disease is a bacteria. Good sanitation must be ensured and avoid sprinkler irrigation. 

Club root- slow and stunted growth is observed.roots become distorted in this disease. It is caused by fungus. Treatment of this disease is economically unfeasible. In future,purchase certified plants from a renowned nursery.  

Downy mildew- irregular yellow patches on the leaves are observed and gray growth is observed on underside of leaves. Apply appropriate fungicide and  remove crop debris. 

Root maggots- This insect leads to root damage and scars on the turnip. 

Growth time for turnips

It takes from 5 weeks to 2 months to grow turnips. Growth time for turnip varies on the basis of a variety of turnip-like greens, tender roots to eat, or larger roots to store. It takes 60 days to grow fully but if you pull them out in 30 days, they will be very small in size. 

Growing for 60 days helps in making them more flavoured and avoid watery or bland taste. 

Along with time, take care of proper water supply too, in order to receive sweeter and tender turnips. 

When to harvest turnips

Small, young and tender turnips can be harvested after 5 weeks of sowing seeds. Main crop can be harvested from 6 weeks to 10 weeks. 

Fall turnips are harvested after light frost and they are known to be sweeter than other harvests. Do harvest them before hard breeze for best results. 

Lift roots when they are 2-3 inch in diameter. Further, you can cut leaves of turnips when they are 12 inch long. Keep in mind to lift them very carefully with a garden fork.  

After harvesting turnips, you can store them for 3 or 4 months in cool,dark and humid places.  Turnips can also be stored in the root cellar, a vegetable drawer for the fridge in a perforated plastic bag. 

Turnips plant  is such a plant that doesn’t require much effort for growing. You just need to take care of the water supply and good soil condition for them to be best. Ensure good fertility in the sowing and growing period to receive sweet and tender turnips. Above mentioned knowledge is enough for you to get started. Then what are you waiting for, just begin. 

How to Grow Beans: Planting, Care, Yield, Harvesting

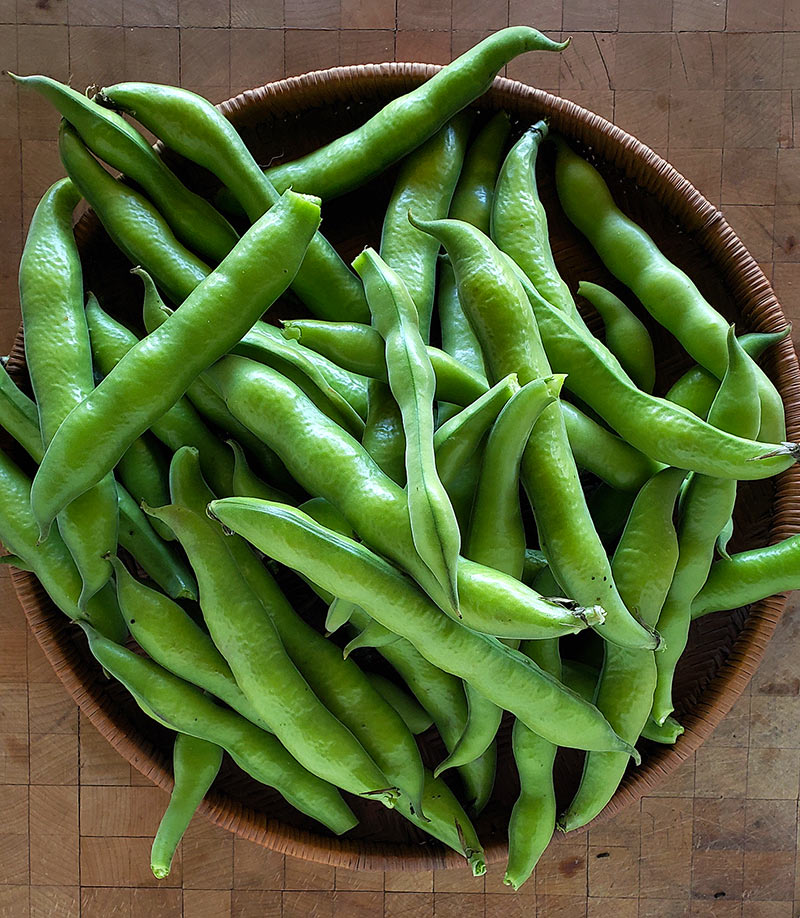
The term beans generally refers to large seeded plants that include soybean, peanut and peas.  Beans are one of the evergreen vegetables that can be grown easily in your backyard, terrace garden and even in your balcony as well. They belong to the legume family and have enormous amounts of health benefits. 

Beans are a good source of protein and fiber and are also rich in iron, potassium and magnesium. 

How to Grow Beans and What Month do you Plant Beans:

Beans need warm weather to grow, so if you are planning to grow green beans then summer is best for growing, start it in summer as cold weather or frost can damage the seeds and make them rotten. Sow the seeds directly in the garden, if you transplant it later,  then the roots may get easily damaged as they are shallow. 

Before planting the beans make sure to know about the type of plant that it grows into, whether it is a bush bean or pole bean.

Bush bean: If it is a bush bean then sow the seeds one or two inches deep and apart. In case you are planting it in garden then the rows should be 2-3 feet apart. 

Pole bean: If you are planting pole bean then they need support of some stick or pole to grow. For every 3-4 seeds one pole is required with a space of 3-4 feet between each pole.

These beans grow when under full sunlight or at least look for a place where there is partial sunlight. The soil should be well drained but moist enough for the seeds to germinate.

Different Types Of Beans:

Beans come in large variety, some can be eaten raw while the other needs to be cooked. The green tender pods can be consumed as it is, where as the dried ones need to be cooked before consuming. 

They are considered nutritious as it contains large amount of protein, carbohydrates and minerals. The various beans cultivated through out the world are

  • French Beans
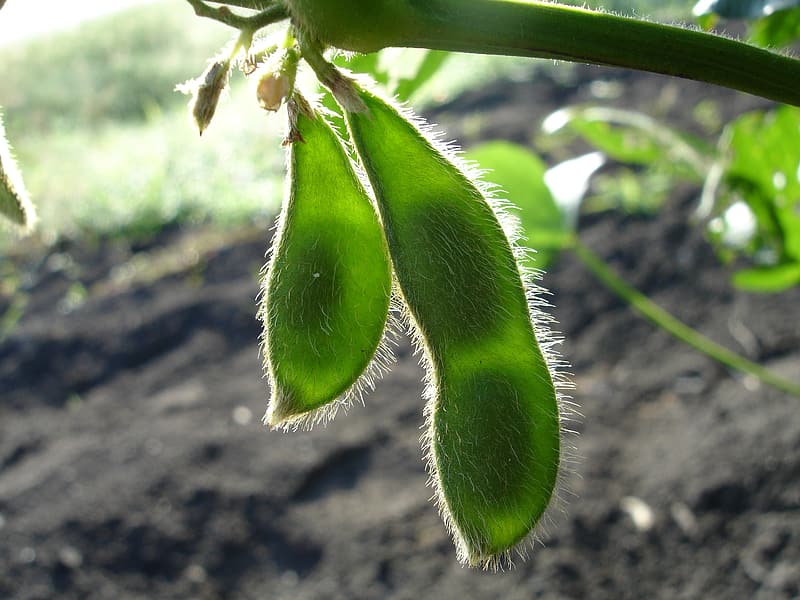
  • Soy Beans
  • Kidney Beans
  • Cluster Beans
  • Lima Beans
  • Broad Beans
  • Sword Beans
  • Garden Beans
  • Dolichos Beans
  • Navy Beans
  • Fava Beans
  • Pinto Beans
  • Cranberry Beans

In this article we are going to study about how to grow kidney beans, when to harvest beans, when to plant broad beans and how long do broad beans take to grow.

How To Grow Kidney Beans

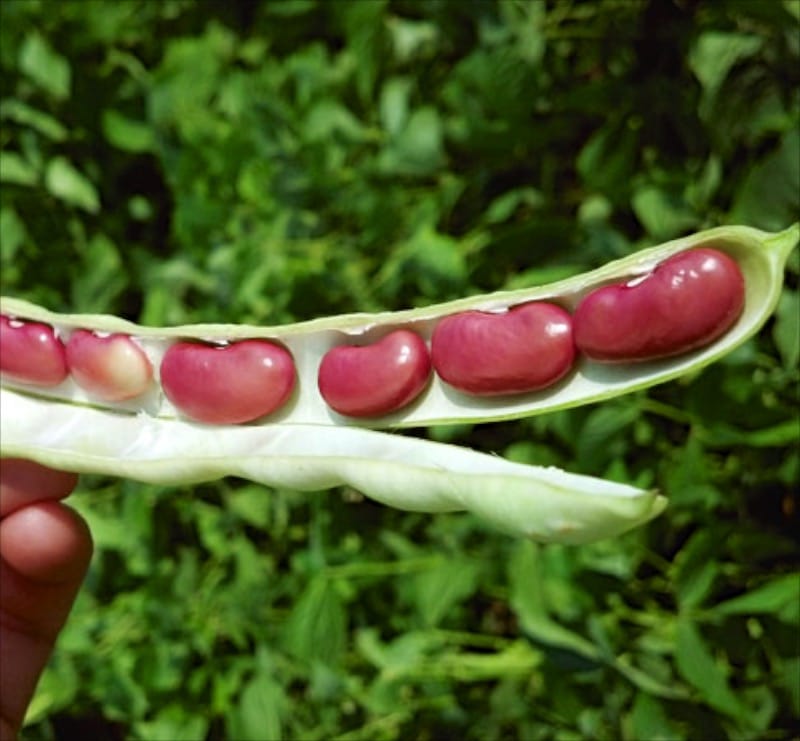
Kidney beans are very healthy as they contain antioxidant properties, vitamin B6, folic acid as well as cholesterol lowering fiber. Kidney beans can be a good choice for vegan’s as well as the one having diabetes. Kidney beans need to be consumed only once they are dried and cooked, the raw once are toxic. 

Kidney beans can be planted when the temperature is about 18-26 degree Celsius. It is best to do the planting in the spring or after the last frost. It give good results when they are directly sowed in the garden instead of doing transplant, as it may damage the plant and it may not yield well. 

Kidney beans comes in two varieties-bush and vine. Make sure you know what type of seed you are using. The vine variety need some sort of support like a pole or trellis to grow.

The planting area should have full sun exposure or at least for about 6 hours daily. Kidney beans require humidity and warmth to thrive. Make sure that the temperature does not go below 16 degree Celsius. Sow the kidney bean seeds 1-2 inches below the soil surface, giving a space of about 4 inches between each seed. Water the plant daily once, when the soil is dried out, do not give over supply of water. The seeds will germinate in about 10-12 days. 

Unexpectedly if there is snow fall after the beans have sprouted , cover the seedlings with a canvas or cloth so that it doesn’t get effected by the freezing temperature. 

Also Read: Soybean Farming: A Complete Guide to Cultivation and Production

Harvest And Storage

If you have planted bush variety then it needs to be harvested only once at the end of the growing season. But if it is pole variety then it has to be harvested several times through out the season. The average harvesting time will be 3-4 months depending on the type of seed you use. 

If there are some unfavorable conditions like dropping temperature that may threaten your harvest then pull out the plants early. Keep the plants for the pods to dry out completely, it may take several days or weeks. As you dry the seeds keep them in a warm indoor location with lots of circulating air. 

How To Grow Broad Beans

 Broad beans produce high yields from the smaller area of garden. These can be grown in modest sized pots as well. This vegetable is easy to grow, especially a good activity for children. 

Lets learn about when and how to grow broad beans.

Before starting with the planting few things need to be kept in mind. Always choose a spot away from strong winds, sheltered spot, fertile land and a place where you can easily get sunlight.

When To Grow Broad Beans

Some variety of broad beans need to ne sown in spring while some are well grown if you plant them in autumn. If you sow it in November, that is autumn then it will germinate within 2-3 weeks. 

The germinated seeds will overwinter and start growing again in spring. In severe winters you need to protect the crops by covering it with fleece or cloches. 

Must Read: Growing Your Favorite Peanuts or Groundnuts

How To Sow Broad Beans

The seeds of broad beans should be sown 2 inch deep into the soil. Each seed should have a gap of at least 9 inches. These can be sown in double row with a gap of 9 inches between each row. After sowing the seeds water them adequately. 

Now you will be concerned about how long does it take for the broad beans to grow. Well the answer is that these beans germinate in approximately 10 days. 

When To Harvest Broad Beans

Broad beans should be harvested and when they are 3 inches long. You can even wait for a little longer and harvest them later. But make sure that when you harvest the seeds should be soft and pots well filled. 

Best time to consume them is when the scar on the edge of the seed is white or green. If it has become black then the bean will become hard and chewy. 

The most important thing to keep in mind while sowing any seed is that don’t be in a hurry to plant the seeds, wait till the weather becomes appropriate as all the seeds may not be suitable for all typed of weather.

Take proper care after the seeds germinate and protect them from insects and mice attack.

How to Grow: Snake Gourd Farming?

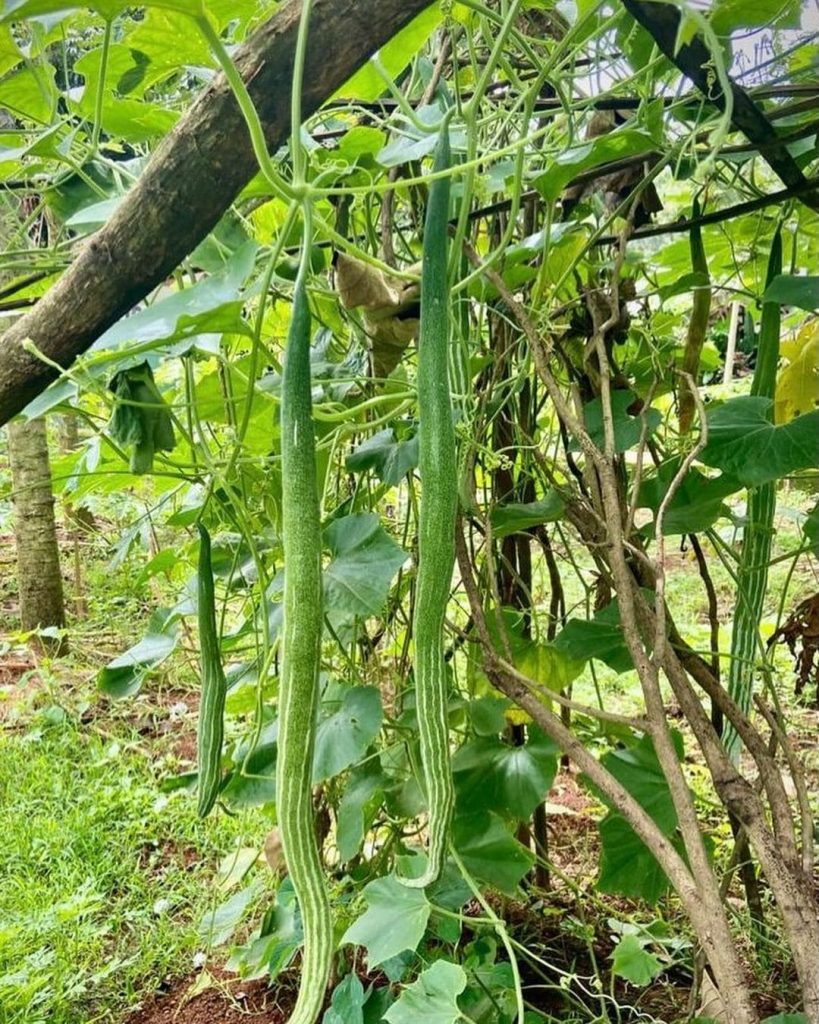
As the name sounds a bit weird, the appearance of Snake Gourd is not. The veggie appears to be elongated and wavy like a snake and tastes like a cucumber. It is a creeper plant. Snake Gourd farming rules the South and Asian market.

India Grows it in abundance and exports it to other corners of the world. In, other words, we can say India is a proprietary market for snake gourd farming.

Though it finds a place in Bangladesh, Pakistan, Indonesia, Sri Lanka, Myanmar, China and, Malaysia. It can be consumed in a multifarious way, whether pickled, sauté with herbs, cooked with typical Indian spices, tastes good.

How to grow snake gourd from seed?

The growing pattern throws light on the type of climate required for snake gourd farming. Being enormously grown in a tropical area, the veggie thrives well in the tropical climate. To grow snake gourd from seeds, you need to follow certain steps, for better results.

As it is a creeper veggie it needs a chain, fence, or kind of support to grow on but it has to be built to last. There are a variety of seeds available. We have chalked down a few for you:

  1. White Glory
  2. Baby
  3. Extra Long Dancer

The seeds are hard as coconut shells which hinders the germination process and can even take a month or more to germinate. To cope up with this issue, you need to crack the seeds with the help of pliers ensuring the safety of the endosperm inside.

If the endosperm is hurt or crushed it won’t allow the seed to sprout. Now, to start with the germination process, you need to soak these seeds extracted from the shells for 12 hours at least.

For growing snake gourd from seeds, it should be allowed to rest in warm water resting on the refrigerator top or any other place that is warm enough to let the water get embedded in the seeds.

Then seeds need to be planted in weed mix soil in large flower pots covered with a cling film or plastic wrap. The vision behind is to hold the moisture to allow sprouting. In about 10 days these seeds start sprouting and now it’s time to uncover them and allow some fresh air to reach them. 

Once the germination process gets a swing, a regular water supply should be maintained to ensure moisture. Now, these young seedlings find their wings in the garden.

snake gourd seed germination

After planting them in the garden, 15 days’ is ideal to water them. Or when you find it necessary like the soil is dry, it needs to be nourished immediately. In about three weeks, these seedlings start’s maturing and demand some additional nutrients in the soil to be added.

This acts as a catalyst to shape these beautiful gourd vines. But always remember a strong back should be there to render a stiffen to the 6 feet (approx.) fruit.

To attract the insects a light or fluorescent cloth needs to be placed next to the blooming flowers to speed up the pollination process.

Growing and harvesting period for snake gourd

Due to the new agro technologies, flushing in the market no vegetable is restricted to a particular point of time. Though it is still advisable to grow snake gourd in January and July.

As it needs a temperature of 25 degrees to 38 degrees. The harvest time of snake gourd depends on the variety of seeds sown. On average it takes 45 to 60 days from the time it is sown.

Getting the soil ready for snake gourd farming

Snake gourd farming is a non-fussy task, as it goes with all types of soil. For getting good results it is recommended to use loam sandy soil with a spice of organic content.

A minimum of 3-4 plowing is needed to be done, to get a PH value equal to 6. Snake gourd cultivation demands a good soil drainage system. On adding good manure to the soil, a higher yield is obtained.

Treatment and sowing of seeds

10 grams of fluorescens and 4 grams of viride should be added to the seeds to accelerate the production cycle. This will surely give better and high yields. And snake gourd farming would be more profitable then.

The cropping season of snake gourd is in July and January. Cropping season is just a medium to enhance productivity.

Production techniques of snake gourd

The production techniques of snake gourd is a bit lengthy. Let’s grab a look at the following:

  1. Sowing and spacing pattern: The sowing pattern should be in multiples of 5, that too in a grid-like structure. After 15 days of germination, pick any 2 healthy seedlings. An alternative method can be used, you can sow the seeds in plastic bags until they germinate. Later can be shifted to pits in 4.
  2. Fertilizer and manure: At the time of soil preparation heaps of compost should be mixed in the soil. Then after 30 days of sowing and the rest just before the plowing time.
  3. Water intake for snake gourd farming should be maintained. One a week of watering is good for the plantation.
  4. Weeding is done twice and not more than that.

Types of Snake Gourd

There are different varieties of snake gourd available in the Indian Market. Let’s take a glimpse:

  1. Padwal or pointed gourd
  2. Serpent gourd
  3. Chinese Gourd
  4. Japanese Gourd
  5. Chichinda

Health benefits of snake gourd:

The significant story of this green thumb relates long back to the ayurvedic culture. With an enormous number of highs, this green veggie finds a place in medicine as well.

Even in today’s time as people are becoming aware of health benefits, the snake gourd has made its root in a portion of day-to-day dietary food. Tendrils, the delicate stem part is also used in some of the medicines.

Let’s have an overview of the benefits that can be extracted from this simple vegetable:

  1. Losing Weight:  Being a possessor of an ample amount of nutrients is a complete food. Keeps the stomach full, free from any sort of unwanted cravings. Thereby, vanishing fat from the body.
  2. Supplement to Heart: Cholesterol free food is always a good choice for the better functioning of the heart. Apart from typically cooked in Indian spices, it can be consumed in boiled form or with negligible oil. And yes, it tastes yum. At the same time a relaxing food for the heart muscles.
  3. A Kidney Detox: A snake gourd sweeps out all the toxic material from the excretory system of your body. It triggers the secretion of fluids responsible for the process of excretion in the kidney. Thereby maintaining the water in the body content ensuring proper hydration.
  4. Speed up the digestion process:  Snake gourd is high in fiber quantity, so helps to keep the stomach light and happy. Chances of acidity and bloating are reduced so the process of digestion becomes fast and easy.
  5. Cleans the respiratory tract: Another amazing perk of consuming this veggie is curbing the mucous secretion and clearing the respiratory tracts. This also controls the infections in the lungs.
  6. Ideal for the keto diet: Being low in carbohydrate and sugar content, it can be easily added to the keto diet as well.

Threats to snake gourd farming

The basic enemies of snake gourd farming are leaf beetles, caterpillar, and flies. To demolish leaf beetles and caterpillars you need to apply pesticides to snake gourd production.

For fruit flies, you have to pluck the infected veggies and throw them away from the rest of the production. These are the best possible ways to save the snake gourds.

Snake gourd diseases

Yes, you heard it right. Even plants get affected by diseases, like humans. The 2 major diseases targeting the veggie are Downy mildew and powdery mildew.

These are controllable, the mere spread of pesticides can make you get rid of these diseases. All you have is healthy snake gourd farming.

Also Read: Planting and Growing Okra Step by Step

Planting snake gourd

Snake Gourd is a tropical veggie, it loves a warm climate to grow. Like warmer days and cool nights. For snake gourd farming sandy loam soil ideal. Which has the benefit of keeping the temperature high for a high yield.

Tresilling snake gourd is adapted to grow erect, this can keep this veggie away from pathogens and flies.

Snake gourd is touchy to excess water and could not bear dry soil as well. There needs to a perfect balance between both.

snake gourd plant

Basic tips to stimulate snake gourd production

With an increasing urge to compete with one another, farmers face a low yield problem with snake gourd farming.

To boost production, we have thrown light on the following tips:

  1. A perfect base fertilizer: To make a perfect fertilizer base cow dung in powdered form or an organic fertilizer should be added to the soil to trigger production rate.
  2. Quality of seeds: To get good results, hybrid or local seeds should be used. Either they can be allowed to soak in water for 6 hours or sowed in cow dung.
  3. Water passage: Choose a place that ensures a continuous and proper water supply. To prevent seeds from drying.
  4. Saplings should be healthy to ensure a good production rate.
  5. As soon as the seeds begin to sprout, the additional underneath growth should be copped off to instigate high yield.

The market for snake gourd farming

With an increase in awareness among the people, the demand for snake gourd has also risen. People tend to switch their eating habits to a healthy delight. This has resulted in huge demand for snake gourd farming.

The farmers are growing this veggie on a large scale as it is low in investment. No extra care is demanded just proper management can work wonders. Being a less perishable item, it can be transported easily.

Conclusion

The ending note on snake gourd farming is a bag full of knowledge. Infused with lots of health and nutritional benefits this simple veggie is a good deal for your family. 

With tips on how to grow snake gourd, types of snake gourd, how to increase production, and the prolonged benefits of the vegetable we have penned down all the relevant and required information regarding snake gourd farming.

 We hope, the article was informative. So, go ahead with your snake gourd farming. Do share your experience of snake gourd farming with us. Stay connected for more updates.

Lavender Farming Guide: How to Grow Lavender with Maximum Productivity?

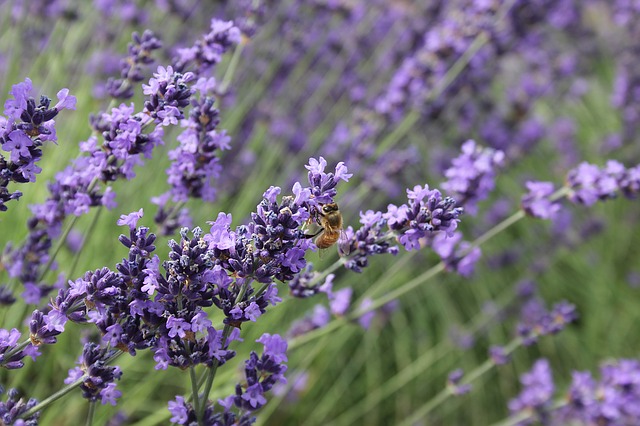
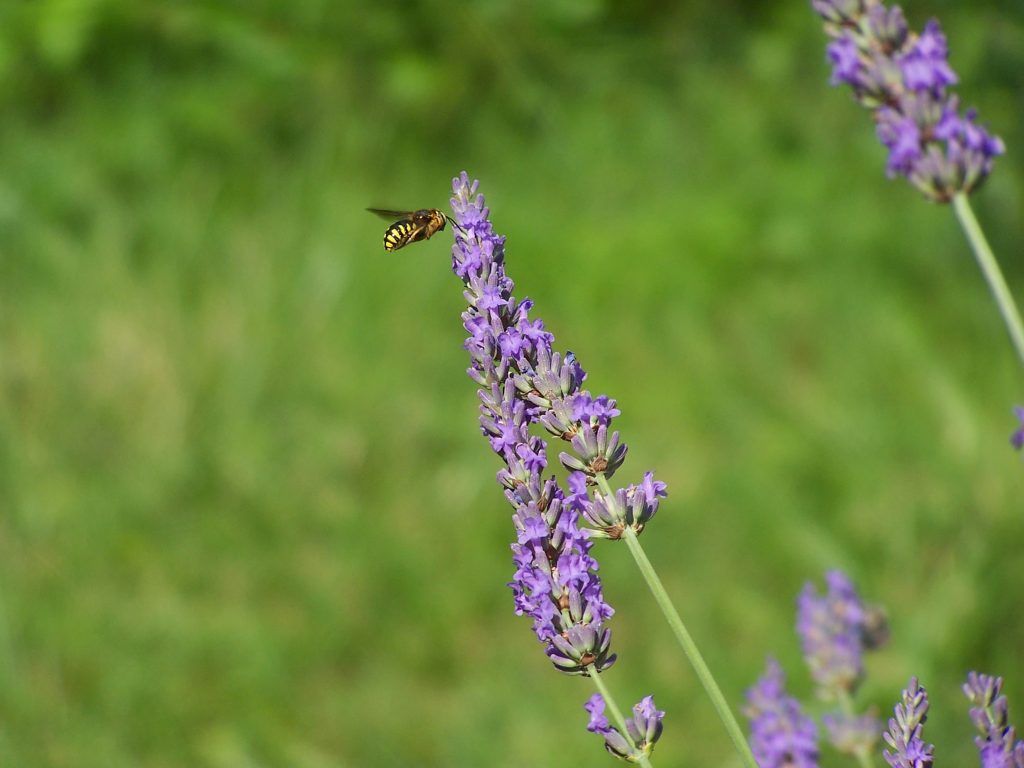
Lavender, also known as Lavandulaspica consists of 30known species of flowering plants in the entire mint family. Lavender is a beautifully aromatic and rustic shrub or herb that originated in the mountainous region of the Mediterranean and North Africa. The height of the herb is from 40-80 cm. The plant has oblong, linear, and opposite leaves consisting of small purple flowers.

Lavender farming is really easy and it only requires ideal growing conditions and extra space. Climate is a critical factor in growing the lavender plant. Lavender can be containers/pots, and backyards. Growing dozens of lavender plants in the backyard of the house can make an individual earn a high profit. If the lavender is cultivated commercially on a huge scale, it can fetch high profits.

Also, there are plenty of ways in which lavender farming can help an individual earn money. For example, lavender can be used in making lotions, soaps, essential oils, fragrant sachet, teas, medicines, and flavorings. Also, fresh or dried lavender can be sold to earn huge profits.

The Indian subcontinent cultivates lavender on the slopes of the hills of Uttar Pradesh and Himachal Pradesh and in regions experiencing scanty rainfall. Successful cultivation of the lavender crop is also seen in Kashmir valley.

Types of Lavender

At a global level, there are five types of lavender varieties known in the market – French lavender, English lavender, Spanish lavender, Spike lavender, and, Lavandin

French lavender

French Lavender

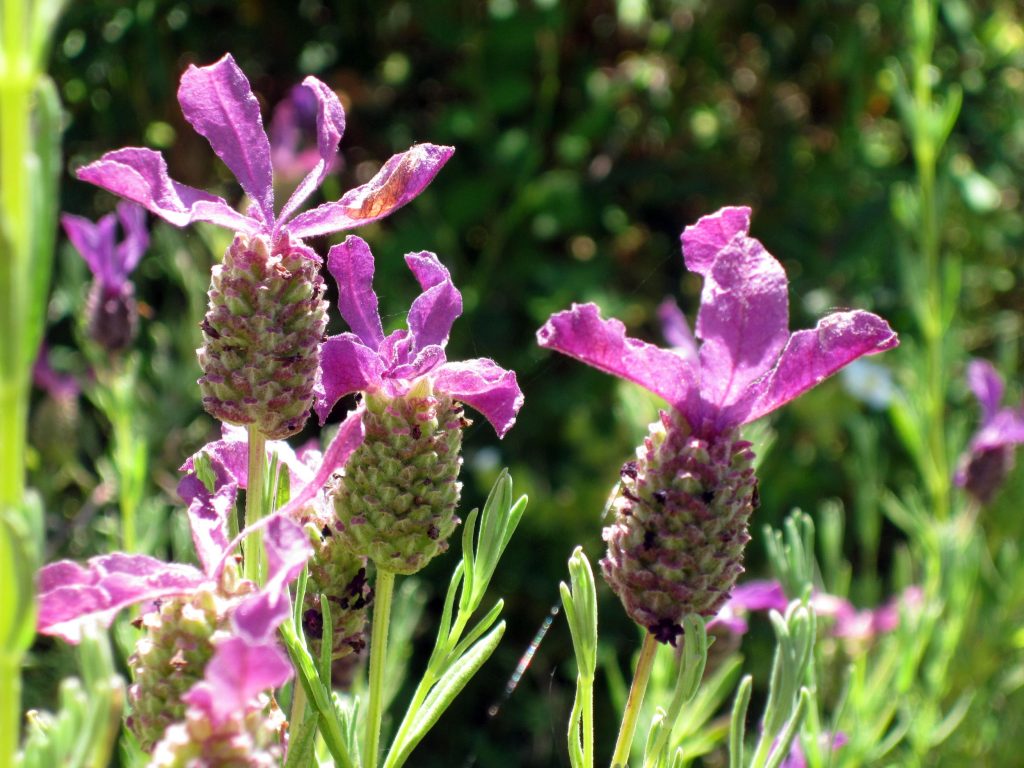
French lavender or Lavanduladentata grows in warm climate and are extremely fragrant. This variety of lavender is grown annually in certain regions of the United States.

English lavender

English Lavender

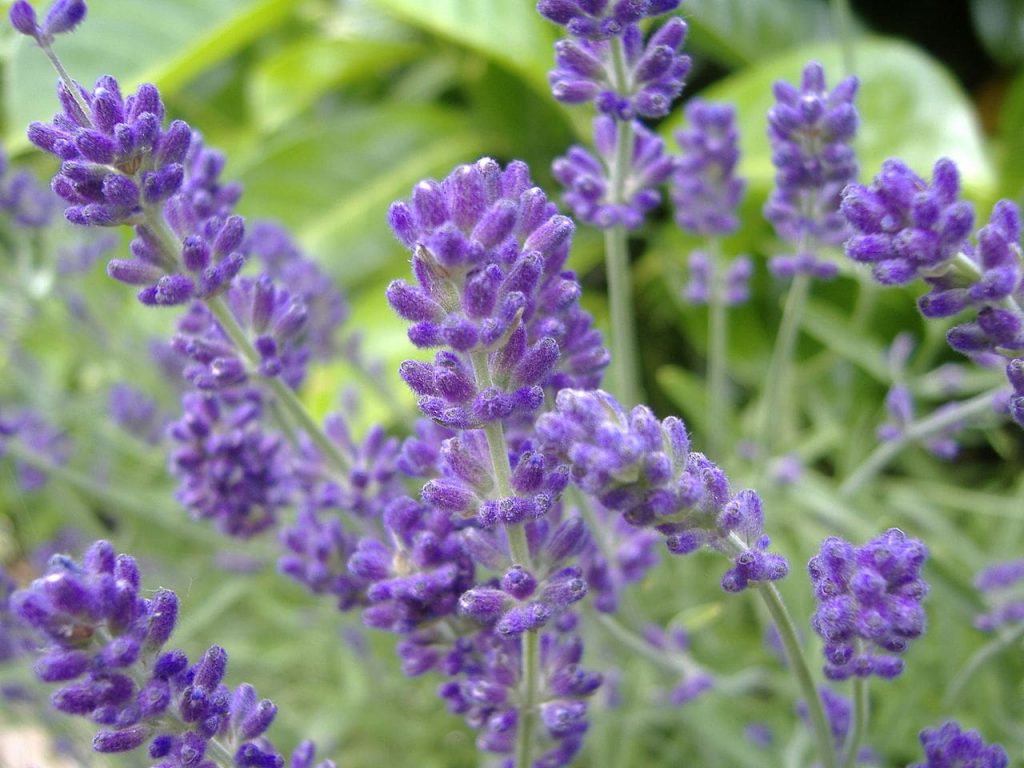
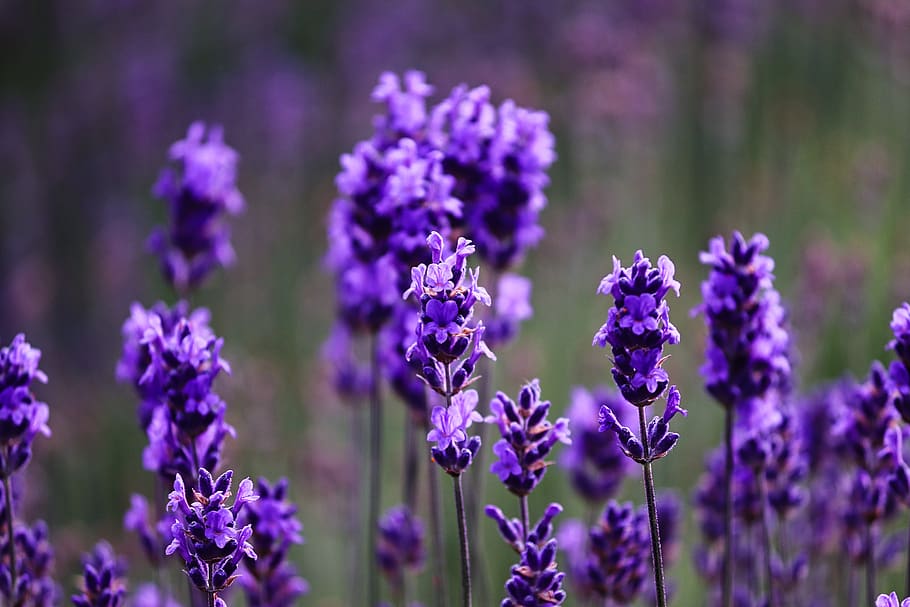
English lavender, also known as Lavandulaaugustifolia is one of the popular species of lavender. This species is used in flavouring, oils, dried flowers, and perfumes. English lavender can be cultivated in warm regions where days are longer.

Spanish lavender

Spanish lavender

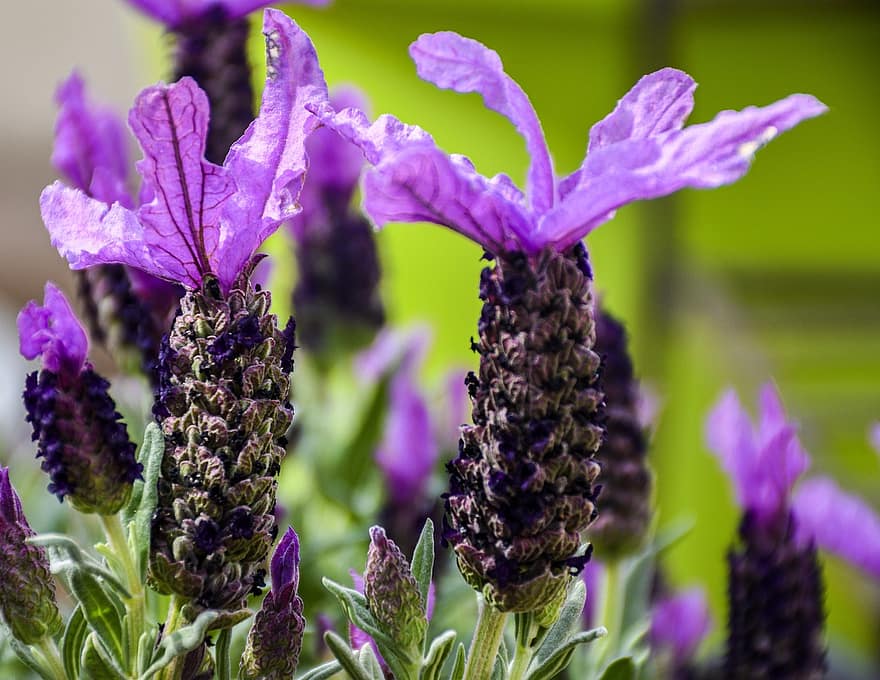
Spanish lavender or scientifically known as Lavandulastoechas blossoms in dark purple colour and are majorly used for dried flowers. Spanish lavender species are grown annually for decoration purposes.

Spike lavender

Spike lavender

Spike lavender, also called as Lavandulalatifolia is grown to extract essential oils which is further used to make soaps. Spike lavender is also referred as Portuguese lavender and requires a Mediterranean climatic conditions.

Lavandin

Lavandin

Lavandin, also referred to as Lavandula x intermedia has a high oil and flower yield, however, the oil quality might not be of supreme quality as compared to the yield. The other name of Lavandin is Dutch lavender and this variety is a hybrid of Spike and English lavender.

In India, Spike lavender, Lavandin, True lavender (English lavender), and Sher-e-Kashmir varieties are grown.

Starting a Lavender Farm

Lavender flower farming should be on the top of a gardener’s list as it is a commercially profitable crop. The flower also adds more beauty to the garden. Although growing lavender on a farm is time-consuming and a risky business because the product may not be of preferred variety.

The transplants of lavender can be planted in small areas such as nurseries. To retain desired characteristics in the plant, growers opt for root divisions or cuttings. It is advisable to do a patch test in a small area to check the appropriate climatic conditions for the plant.

Lavender Propagation Techniques

In order to grow lavender for profit, cutting and planting through seedling is done. The sifted soil can be layered lightly. However, planting seeds need knowledge as well as effort. Beginners can start their journey of lavender cultivation by the cutting method. Tissue culture and layering can also be used for the propagation purpose of the plant.

Seedlings can be sowed directly in the area or in the trays. The germination time of lavender seeds is around 2-6 weeks. To plant the lavender plant by cutting (vegetative technique), it is essential to cut the stems which can be around 10 cm long. The leaves present in the lower region of the plant are removed. Slight humid soil is required in the cutting technique as excess water can cause decomposition. The spacing between each plant should be around 30-90 cm in the cutting method.

Tissue culture is preferred for mass production of the plant and to yield genetically identical and disease-free plants. The mother plants are selected and then cultured for bulk production. However, this technique is costly. On the other hand, layering method uses healthy stem from which a 12-15 cm foliage is removed.

This leaves a 10 cm foliage at the branch tip. The bare section is covered with moist soil. Once the new plants start to grow, they are separated from the mother plant. The new plants are then again planted in the field once the rooting starts. The roots in the plants take around 6-12 weeks to grow.

Spacing and Planting in Cultivation

Spring or Autumn is the best time for the transplantation of the seedling. The plant need plenty of room to grow. The lavender plant is planted 30-40 cm inside rows and are kept at a distance of 4 feet between rows. The highest yield should have plant density of 20,000/ha. For the proper root establishment of the plant, earthing up of soil is extremely essential. 

Lavender can tolerate the drought situations. The water requirement of the plant is minimal and thus needs water every 2-3 weeks till the time the buds are formed. Later on, once or twice in a week is required until the harvesting is done.

Best Farming Conditions for Cultivation

Lavender plant being a Mediterranean plant grows best in the dry climatic conditions. The plant however can tolerate various temperature range. Cold or humid climate is not suitable for the proper plant development. Direct sunlight or sun exposure for approximately 6-8 hours is preferable for growing a healthy lavender plant.

Lavender grows best in a dry and warm environment, and in mild winters. Early years require pruning even during the mature stage as it makes the entire framework of the plant sturdy. Failing to do pruning an initial couple of years can result in woody stems subsequently affecting flowers and stem health.

In order to avoid humidity, a proper drainage system is preferred. As the rise in a humid environments increases the risk of fungal infections. Well-drained soil with pH in the range of 6-8 is used for the cultivation. A calcareous type of soil is ideal for lavender. The optimum temperature for lavender cultivation is in the range of 15-30 °C. The temperature of soil should be higher than 18 °Ctosupport proper growth. The product quality can be affected badly by overheating in summer.

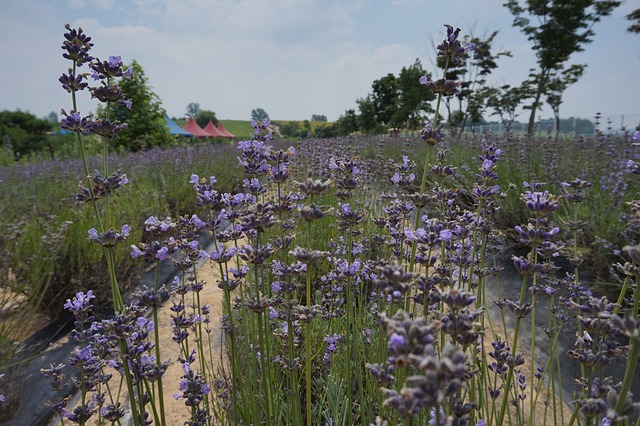
lavender farm-purple beauty plants

In India, the best climatic condition to grow lavender is autumn season. This helps in firm establishment of the plant before the cold winter. Spring season further will help the plant to grow quicker. 

Global Cultivating Regions

Lavender can be easily grown in Canada, Africa, Indonesia, Japan, UK, India, Australia, New Zealand, and USA. Other regions producing the herb are Goodwin Creek, Central Mexico, Bulgaria, and Italy, Spain among others.

Irrigation in Cultivation

The commercial cultivation of lavender requires irrigation for initial 2 years so that the crop can be properly established. The regions experiencing low rainfall and has light soil need irrigation only at vital growth stages. Irrigation is must during the flower initiation stage. It is advised to avoid sprinkler irrigation system as that may elevate disease conditions in the crop. Drip irrigation is the preferred system as it aids in controlling weed and in saving water.

Drip Irrigation for Lavender Fields

As discussed earlier, excessive moisture is not good for lavender crops. It can cause a lot of problems and can disrupt the overall growth, and hence productivity. Aerial irrigation is not suitable too, as it causes leaves to spit in half. Lavender is also at risk of rotting, especially of the soil, remains moist for a long time. Hence, proper planning is required to ensure healthy and productive growth of lavender plants.

Talking to the experienced lavender farmers about “how to do lavender farming” is not a bad idea either. After all, there is no substitute for experience. And they already have learned a lot of lessons, you are now about to learn, and they can give you some valuable feedback!

As said repeatedly, lavender plants don’t require a lot of water, and you should stay at the shorter side while watering. These plants can even withstand droughts well enough. All you need to do is to maintain the moisture in the soil.

Essential Tools for Lavender Cultivation:

Like other crops, lavender cultivation also needs some equipment and tools. These are some essential tools commonly required while planting lavender.

  • Sharp Sickle
  • Steel Shank
  • Kneeling Pad
  • Lavender Sifter
  • Mini Plow
  • A folding hand saw
  • Washable gloves

Fertilizers and Manures for Lavender Cultivation

Once the lavender plant is established properly, there is no need of fertilizer. The new plants do need fertilizers as they can boost the plant growth. It is recommended to use P 40kg/ha, N 100kg/ha, and K 40kg/ha. The basal application needs complete dose of K2O and P2O5 but only 20 kg nitrogen is used. Rest of the nitrogen is used in the later stage.

Diseases and Pests in Lavender

Lavender is resistant to most common pests and insects. However, to be successful in the farming of lavender, it is essential to prevent these insects rather than curing them in the later stage. There are chances that the plant might be affected by Mites, Slugs, Con chinchillas, and Whiteflies.

Preparing the land and making the right soil

Lavender farming profitability depends a lot on the land and soil. A lot of successful lavender farmers do some research before finally starting, and there is no reason why you should not do the same.

Well-drained, gravel-laden, sandy soil with a pH between 6.5 and 7.5 is perfect for growing lavender. Dig the ground at least 18 to 24 inches deep and then add the soil to it. If you can mix the soil with a mixture of 1/3 clay, 1/3 loam, and 1/3 sand, the effectiveness of soil will be even better.

A lot of hybrid lavender species are known for producing sterile seeds. In such a scenario, you should use well-drained, light and moderately fertile soil.

How to Plant Lavender – Start Planting through Soft Cuttings

If you are a beginner, growing lavenders from seeds is not a good idea at all. Instead, start growing from soft cuttings, taking care of the resource links. Herbs grow from these links. Preparing the cuttings can be both frustrating and tedious. So, you should get some from a nearby nursery.

  • Leave a space of four feet between rows and 2½ feet between the two plants.
  • This type of spacing is ideal for growing approximately 4,000 plants per acre.
  • Ensure surrounding every plant with garden cloth, mulch the plats as well as rows to protect from weeds.
  • Add a light-colored hoop at the base of every plant, like gravel, sand, or a piece of marble. This will help the reflection of sunlight on the plants.
  • Prevent excessive moisture to keep your plants healthy.

When to Plant Lavender?

Planting lavender cuttings in the seedbed at the beginning of spring is the best idea. Lavender usually transplants in the autumn or winter. You can obtain a new lavender plant when it is grown a little, and the germination is started. The end of the summer is a suitable time to separate the branches. The flowering time will most probably end at that time.

Taking Care of Lavender Crops for High Yield and Profit

“Good care equals to good yield” suits very well to lavender farming as well. It needs a little bit of rain and a lot of direct sunlight. Furthermore, it can adapt to fall as well.

  • Removing invasive plants is recommended for proper lavender care. Invasive plants may take up the nutrients from the soil.
  • You should also remove the old branches at regular intervals. Because, old branches get woody, and may disrupt the growth of soft, younger plants.
  • You can divide the branches to reproduce new lavender.
  • Having good drainage for lavender is necessary to avoid puddles of water around the plant.
  • Pruning is suitable for lavender so that it can bloom the next year again.

Common Pests, Diseases, and their Management

Although, lavender is known as a repellent to most common insects and pests, controlling them is still a very important aspect of lavender care. The formula of “prevention is better than cure” suits the lavender crops best. Therefore, you should act before any sign of attack from pests or diseases.

Also Read: Why Are Bottom of Tomatoes Turning Black: Blossom End Rot

Lavender is commonly attacked by:

  • Mites
  • Slugs
  • Whiteflies, and
  • Con Chinchillas

You can keep a few lavender plants in pots and use them as a repellent spray to protect other plants. Basil and garlic are very effective to protect the plants from files, insects and some fungi.

Even after proper lavender care, plants may get the victim to different plagues. To avoid that, you would like to eliminate the dead or infected plants as soon as possible.

How to Harvest and store lavender?

It would help if you cut the entire branch with leaves and flowers while harvesting lavender. You can remove the leaves later. Use only sharp flower cutting tools to ensure maximum profit. Flowering begins in the first year itself, but the lavender gets ready for harvesting after one year of planting. So, you can start harvesting after 13 to 14 months of planting the cuttings.

  • Harvesting the lavender crops in the morning hours is ideal, as the oils are most concentrated at that time.
  • It would be best if you cut the stems as long as possible.
  • Gather them in bundles and use rubber bands for securing.
  • Hang them at a sheltered place for proper drying. A cool, dark place with good air circulation is recommended for drying.
  • Flowers will get dried after a few weeks, and you will be able to remove them by shaking the bundles gently. Shake them into lidded jars for a lot of uses!

The flowering process starts late in high slopes while it starts early in low altitude and warm regions. During the harvesting process, flowers are cut with 10 cm stem length. August or September is the ideal time for harvesting lavender in the Kashmir region.

The yield as well as the quality of the oil depends on various aspects such as the agro-climatic conditions, variety, process of distillation, planting, fertilization, and soil. A yield of 15kg/ha with oil content in the range of 1.2%-1.5% can be obtained under optimal herbal cultivation methods.

Now, lavender for marketing is ready. You can opt to trade in local markets or transport them to distant areas. You should get ready to get some decent money!

Lavender for Business

If you are planning for lavender farming, we would suggest you move ahead. But you will have to be a bit patient, at least in the first year, and you can, of course, afford it to become a successful lavender farmer.

Lavender is available in various fragrances and colours depending on the harvest. The family tree of lavender also constitutes widely known sage, Mediterranean herbs, thyme, and rosemary. The historical data suggests the use of lavender as a fragrant, medicinal, and culinary herb. Roman soldiers used the herb as a disinfectant while ancient Roman people scented their bath tubs using the plant.

The average life of productive and healthy lavender plant when used for commercial purpose is around 12 years. However, in certain cases steady produces are obtained for nearly 20 years. Planting lavender for gaining profit can be a perfect mode to transform the love for gardening and herbs into a method to earn money by selling the plants as well as the products. Various products can be made from the plant such as aromatherapy products, dried lavender bundles, herbal pillows, skin care products, lavender buds, tinctures, sachets, and oils. Manufacturing these products require less effort but are high in demand in the market.The herb is also used to increase the taste of honey. The baking process too uses lavender crop to enhance the taste.

Fresh bouquets also provide profit to the grower. A 20’x20’ area produces approximately 300 bunches/year which is of $1,800. The profit margin in large plots is even higher. For instance, a quarter acre area produces around 3,000 bunches which costs $18,000. The flower bunches that remains unsold can be dried and sold to florists, crafters, candle makers, beauty product manufacturers for various purposes.

The easy endeavor is to make soaps using the very simple melt and pour technique. These soaps are the best-selling gift items among the customers. Aromatherapy uses lavender oil as one of the most essential products. The distillation process helps in the extraction of lavender oil. The by-product obtained after the distillation process consists of the water-soluble products together with the oil and thus it is used in room fresheners and spritzers.

At a global level, a certain region of France has been involved in commercial lavender farming for centuries. North America has started to grow the crop on a commercial scale. The growers in these regions have started farming in the backyard as well as multi-acre farms. The knowledge is shared among the novice growers for better yield. Thus, lavender is considered a perfect cash crop for small growers to get substantial income.

Drying the Purple Herb

Once the process of harvesting is complete, the stems of the lavender bunches are tied with a strong rubber bands. The bunches are then transferred to the drying area as early as possible. The delay in transferring results in fading of the natural colour. The drying area should be well-ventilated, dry, and dark. Lavender bunches are hanged in upside-down direction for drying.

Advantages of Growing Lavender

The flowers of the crop are edible and the crop has an approximate life span of 10 years. The plant lavender can be grown without hassle but is a costly herb. The extracted oil has many health benefits such as preventing digestive issues, anti-inflammatory, reduces stress and anxiety, treats sleep issues, among others.

Thank you for reading this piece patiently! Hopefully, we have helped you at the beginning of your journey as a lavender farmer. If you have any questions, feel free to write to us. We will be more than happy to answer! And don’t forget to share with your friends and family members! Good Luck!

How to Increase the Production of Okra?

Okra is a vegetable commonly known as ladyfingers in many countries. These plants are very simple and easy to grow. Okro, gumbo, kopi, Arab, and bhindi are some other common names of okra pods.

This crop can be grown in different varieties of climate and soil. It requires plenty of sunlight. Also the roots should not remain wet for a long time. However, climate plays an important role in okra production. Cold climate is not very suitable for okra. They require proper temperature for germination of seeds. 

To products a big crop yield you must be aware of how to increase production of okra?

Keep in mind the steps mentioned below to increase okra production.

Why are my okra plants not growing?

There can be a number of reasons for improper growth of your plants. Some of the common reasons for this are: 

  • Lack of proper sunlight: sunlight is very important and main factor for growth of okra. It needs sun for 7-8 hours daily. Hence if the crop doesn’t get sufficient sunlight then it will not bloom. 
  • Heat: Heat is very important for okra as cool climate will lead to rotting of the seeds. The temperature of soil should be at least 70° F. Therefore heat is necessary however if the plant doesn’t get sufficient heat then it may end up growing improperly. Hence it is said that areas having plenty of sunlight are most suitable for okra production
  • Not getting enough water: Though okra is a plant that doesn’t need much water and can survive in less amount of that for a good and healthy plant it is important to water the plant from time to time. 
  • Improper nutrition: It is clear that if a plant doesn’t get sufficient amounts of nutrients required then growth will definitely be affected. Hence to avoid this situation, one can add necessary fertilizers to the crop to fulfill the need of nutrients. For example, adding phosphorus is beneficial for flowering. 
  • Right time: Usually the plant matures in 55-65 days but sometimes it may take a bit longer. Nothing can be done in this situation except wait. One should have patience and wait for flowering.

Must Read: Planting and Growing Okra Step by Step

What to do with the wilted seedlings? 

Wilted seeds are a common problem that you may often face. But it is not a big deal if you take necessary action on time. Keeping your crop hydrated can save them from wilting.

If you find that your plant is wilted then water it until the soil becomes moist. Then wait for about an hour and if you feel that the soil is dry then water it again. 

Usually, in hot and dry climates the water gets evaporated very fast hence leads to wilted seeds. To treat this you need to water the plants at regular intervals. But before irrigation, put your finger in the soil 1-2 inches deep and check whether the soil is dry.

If the soil is dry then water it. On the other hand, if the soil has moisture then the reason for wilting is not lack of water. Excess sun or wind or any pest or disease may be responsible for this. So to avoid this change the position of the plant and shift it to an area where the sunlight is not direct or excess. 

Next, if the problem is excess  water then for that one can make some holes on the surfaces of soil, this will allow the water to penetrate to the soil. Also to avoid this one should check the soil before watering. 

Along this remember that you don’t keep your plant in a pool of water as this can lead to yellow leaves. 

Also Read: Why Are My Papaya Leaves Wilting

How to get rid of aphids on okra plants?

Firstly aphids are small-sized insects that feed on the plant and suck the nutrients. These insects cannot be recognized easily. They are very tiny in size and can not be easily seen with naked eyes.

Okra exists in a variety of colors like yellow, brown, light green, pink or black. They have a waxy or wool-like coating on the surface. They have long antennae on their pear-shaped body. There are different methods to control aphids like:

  • Aphids are not very friendly to cold water. Hence one you spray chilled water on the leaves, there is no coming back of aphids on the same plant. 
  • Flour can be another cure to aphids. Flour constipates the aphids hence can be sprinkled on the plant
  •  Neem oil also has properties to destroy aphids. Along this insecticidal soaps or any dish washer solution can also be used. 
  • Diatomaceous earth is an organic material that will vanish the aphids without harming the plant. 
  • Isopropyl alcohol can also be used to control aphids. Ethanol however is also a great option. 

Why is my plant not Blooming?

There can be different reasons for this but insufficient water is one of the main and common reasons for not Blooming. Along with this improper sunlight also delays blooming. Pruning of the plant on time is very important in this cultivation.

Hence if you don’t do this activity on time, then plants may not show flowering. Hence one should take care of all the above-mentioned points so that your plant blooms on time.

Homemade fertilizers of okra plant: 

You can prepare fertilizers for your okra plant at home and increase production of okra plants by multiple folds. Preparing fertilizers at home will surely improve the quality of it as well as will be organic. A list of homemade fertilizers is given below: 

Compost:

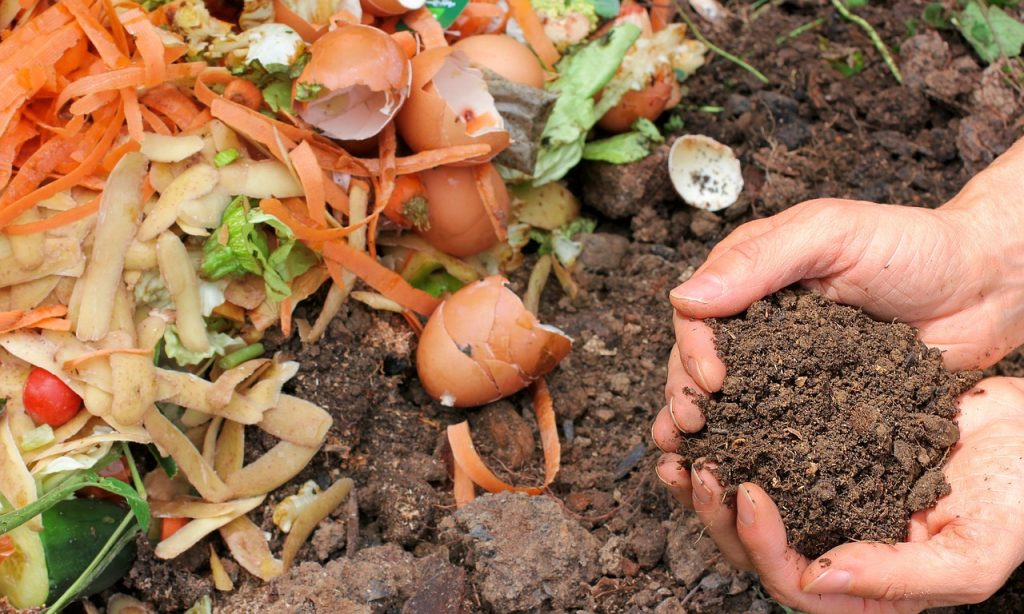
Compost is very common as well as easy to prepare. It is used by many cultivators for all types of crops. To prepare this, dig up a big hole in the ground. Put a layer of soil mixed with dry leaves. Then you can add a lot of things like kitchen waste like vegetable and fruit peels or other kitchen waste, paper, clothing, etc.

After that again cover it with a layer of soil and leaves. You can add such types of waste products afterward also. Now leave this for 45 days and your compost is ready. 

You can also make a very nutritional solution for your crop again using your kitchen products. You can use the left over water or water from the vegetables or water left after washing your cereals. Whether it is pasta or eggs you can use all of them. Collect all the water and let it cool and you can use it. Also you can use hot boiling water on weeds to destroy them

Eggs shells

Eggs shells can also provide some nutrients to the plant. You can use all the leftover eggshells. Dry them properly and then grind them. Hence they are ready to be used. These contain calcium carbonate that improves the fertility of the soil. 

These are some of the homemade fertilizers that can be used for your crop

Bottom line:

okra crop is one of the easiest crops to grow. However similarly as other crops they need proper care. In this article you can learn about some facts and points  that you should know if you are growing okra crops and wish for higher crop yield than usual.

How to: Growing the Avocado in Backyard?

Do you ever realize that what happens to your body after eating an avocado? The fruit is loaded with fiber just like many other vegetables and fruits. Besides, the potassium-rich avocado helps to reduce the blood pressure and, regular use of avocado attenuates weight gain to normal individuals over time.

Meanwhile, it is interesting to know where avocado grow.

This fruit crop is native to tropical America. And, it has been grown in Mexico initially, later it expanded to Central America as well as surrounding areas. Today, it is grown in the USA, Dominican Republic India, Colombia, New Zealand, Indonesia, Brazil, and many other countriesall over the world.

Also Read: Farming Orange for a Perfect Citrus

This fruit is a single seed and is primarily eaten for its outstanding health content. Avocados can be a portion of a superfood diet, loaded with nutrients, many of which are lacking in the contemporary diet.

Initially, the avocado trees were planted to protect the other crops. Today, however, this fruit is mainly cultivated as a cash crop. It can thrive in all climates and environments. Moreover, the capital required for the cultivation of avocado fruit is less and it provides the greatest return on a successful yield in a season.

Today, it is the best decision to start a business venture of avocado farming because the starting cost for growing an avocado tree is relatively less to other fruit plants. 

Moreover, this fruit crop needs little care and maintenance to reach the highest fruit yield.

Growing Avocado Tree

 It is hard to deny the nutritious value of the avocados. But, in case, you are contemplating avocado farming. It requires huge patience. And, once a plant starts to produce fruits, you will not regret your decision.

The price of avocado is relatively high because of its high consumption and nutritious values. The high demand for this healthy fruit is determined by its benefit to the human body.

The growth of a successful avocado farm depends on proper preparation and the right place.

Deciding the site for avocado trees

The atmosphere and weather play the most critical role in the growth of an avocado tree. There is a need for suitable climate conditions for the safe growth of plants and optimal yield in the case of commercial production.

The temperature varying from 15 degrees Celsius to 30 degrees Celsius is the finest for the avocado farming. 

It is recommended throughout cultivation time. This signifies that throughout its whole existence a pleasant environment is expected. 

It is noteworthy that if the temperature falls below freezing or increases above 40 degrees Celsius, avocado trees tend to die. 

In the short period of spring, when the flowers bloom, if the weather gets cooler and rainy, bees won’t come to the air and eventually, fruits won’t flourish.

Just like other crops, avocado cultivation thrives well in highly organic and fertile soil. In the process of determining the quality of soils, it highly recommended getting the soil tested for the exact information for nutrients presence.

This helps in adding the appropriate amount of fertilizer to your field. Thus, at the time of soil preparation, the shortage of micronutrients and macronutrients may be covered.

Avocado trees and plants can grow to red soil, dark brown soil or in almost any kind of soil even the reddish-brown soil. 

However, the safest way to high yield is developing avocado plants or trees on reddish-brown soil or dark brown soil.

As soil is the most crucial criterion when deciding a place. The avocados are highly responsive to poor drainage and sensitive to the Phytophthora which thrives in poorly drained soils. 

Moreover, the soil should be rendered in such a manner that there is no issue with water stagnation. The soil’s strength and efficiency must also be strengthened by well-rotting manure.

It is worth to avoid windy areas. Placing the plant on slopes faced away from the winds and discard planting on western slopes in warm areas as the sun may be very warm and could sunburnt fruits. It is appropriate to sow windbreaks for securing your trees from the heavy winds.

How to Plant Avocado

Choosing the variety for avocado farming 

The avocado has several varieties to choose from but Hass is better than the others because it has the potential to grow year long.

Moreover, it contains more than twenty percent oil with high-fat flesh and buttery texture. While the rough and robust surface makes durable to transport.

Method of Propagation

If you are trying to establish a commercial farm it worth use the grafting method and budding method for plantation of an avocado tree. The plantation with grafting method also assures stable growth and early fruit-bearing in the crop.

While growing an avocado from the seeds require a different level of care and maintenanceYou may have to wait for several years with the seedling before you see the fruits.

How to graft the avocado tree?

The major commercial production of avocados comes from grafted avocado plants. Yet, it is not feasible to say in the avocado cultivation that anyone can graft them.

In this process, one young tree is combined with a separately obtained branch contains single and multiple buds.

As both of them grow together, a reinvented tree is produced. However, when grafting, if the scion is grafted near the base plant’s root, but still on a stem, it has a higher chance of success.

If you want to do it on your own, follow these steps carefully.

  1. Make a vertical cut in the center of the stem
  2. Next, interpolate one or two externally obtained branches with healthy buds in this cut, 
  3. Including two or three buds into stems increase the chances of success

Planting Distance

avocado

The distance between plants is crucial in avocado farming because the avocado is a long term crop. And, it would be wise to make sure that there should be enough plants on the farm, so recovery is possible in case some plants do not succeed in the case of the grafting.

While one can decide the density for the plants and each method have its pros and cons.

1. High Density

In high-density plantings, ensure that two trees have the distance from the 3m to 6m. Such plants give fruits earlier than the others but they require pruning of plants at a certain period. While in warmer areas, it is not suitable to grow avocado too much dense.

2. Low Density 

In low-density plantings, ensure that two trees have a distance ranging between the 8m to 10m. They are easier to manage but might have high maintenance costs because trees have much space between them that allows sunburn or birds to deter the fruit more than the others.

The medium-density spacing, for example, 6m to 8m, works as a solution to the multiple problems for the spacing.

Must Read : How To Do Watermelon Farming

In total, an avocado tree requires about 10 years to be able to produce fruit. 

Nowadays, however, with an improved avocado variety, the planting of commercial avocados will yield fruit in their plant age 4-5 years. 

Irrigation of avocado trees

Systematic irrigation has a strong effect on avocado cultivation. For the successful planting, it is recommended to give water to this seed just after the planting. Then, try to irrigate the seed at a period of three or four weeks. During the hot and dry season, the crop requires to be irrigated more frequently such as two-three weeks.

Besides, in cold weather, it is worth doing the mulching. For this, shade the plants with dry leaves and grass. 

Fertilization

Relevant manure and fertilizers play a significant role in increasing productivity up to several times. This crop reacted quite well to the high nitrogen content of the high manure. Potash, Potassium, and Phosphorus are needed in an equal portion for new plants.

Diseases in Avocado Farming

1. Phytophthora root rot

Root rot, caused by the soil-borne Phytophthora fungus, is very prone to avocado plants. It requires continuous care. Once infected, the tree would disregard an appropriate root structure and would not be able to function without root maintenance.

Chemical root treatment, as well as replanting, could help to cure this disease.

2. Tree Cankers 

 Sores are considerably not so serious; however, they are extremely visible. In some cases, these sores, especially in the trunk, can leak gum. The cankers can cut out the branches.

3. Sun blotch 

 The dangerous incurable illness can affect avocado tree farming. Fruits generally are scarred, twigs can become red or yellow or triangular cracks in the bark. Infected trees are typically smaller, but they do not show any sign than the reduction in the yield.

4. Pests 

Tree borers, caterpillars, or mites can destroy the growth of the plant as well as fruit. Thus, it is recommended to spray a considerable amount of insecticide to prevent any harmful pest or insect.

The avocados should be picked at a mature age in avocado farming California. Once the color of the fruits changed in the case of green to yellow, the fruits get maturity. 

How: Growing Peanuts or Groundnuts

Peanuts are not only good for your appetite but also your wellbeing. These are an outstanding source of protein and are rich in various vitamins, minerals, and herbal compounds.

Peanut butter, produced from the selected pieces from the peanut farm, is an ideal way to incorporate quickly this type of protein in the everyday diet.

People are still surprised to hear that peanuts are certainly not nuts. 

This seed of legume plant belongs to the family of peas and beans.

Growing peanut plants

Peanuts plant

A peanut farm gives a unique posture in terms of appearance as it is full of plants but there is no fruit to grasp. However, the peanut plant has real products deep inside in soil along with the roots.

Also Read: Sweet Potato Farming Information Guide

And, interestingly, the flower of a peanut develops above the ground. Once pollinated, the stems lean down and push the pegs into the soil during the summer and they grow eventually.

As the ovary at the end of each stem is underground, it develops into a pod carrying the peanuts. This is the reason behind it brings the name groundnuts.

In a peanut farm, the peanuts start as a single seed and grow into a plant that can be turned into more than 50 peanuts in a period of four to five months under the soil. 

During the peanut crop, the process of sowing the seeds has its own requirements in terms of soil quality, as fruits mature in the soils themselves.

Selection and preparation of the soil

Sandy loams, crumbly and light-colored are perfect for groundnut cultivation.

 A friable sandy loam or clay loam subsoil provides essential nutrients as well as a suitable climate to the peanut crop as well as a suitable climate.

The heavier soil can be an option to get a higher yield. Such soils nevertheless tend to stick to pods contributing to blot that decreases the quality of the peanut. 

This decision can trigger a loss in the overall yield for a peanut farm. It is wise to avoid farming peanuts in fields with shallow topsoil or inadequately drained areas.

While growing commercially, it is recommended to obtain a soil analysis so that you can have test reports and can apply fertilizers accordingly.

During the planting, the surface temperatures of peanuts should be at least 65 degrees Fahrenheit in April and May after the last freeze.

Sowing the seeds 

Growers generally use the peanut kernels as seeds that were cultivated particularly in the previous year approximately 1 or 2 inches wide in the field. It is worth to have the populations of plants range from sixty thousand to eighty thousand per acre. 

Typically, with improved seed count, there is little growth in production. So it is appropriate to not have a high density of plants for groundnut cultivation.

Generally, it requires 140 to 150 days for a stable crop without any frost.

After the 10 days of harvest, peanut plants grow out of the soil. Generally, they are about 18 inches in length developing into a small, oval-shaped plant.

Yellow flowers occur around 40 days after planting across the lower portion of the plant. The leaves fall off as the peanut ovary starts to grow as soon as the peanut’s flowers pollinate themselves. 

Watering

The irrigation requirements of a peanut farm can vary throughout the growing season.

At the beginning of the season, it is recommended to have a low frequency of watering. As the crop approaches the midseason, it should be at the peak and then declines again as the crop gets to maturity.

Moreover, the need for water for a peanut crop depends on the growth process of the plants. The water supply is essential during vegetative production, as well as flowering and pod formation. 

The adequate rainfall and irrigation can encourage the vegetation as well as the yield of the crop in the season end. 

On the other hand, during an extended drought, the formation of pods to vegetation would be not as adequate as it should be.

Too much watering encourages soil-borne diseases, flows some nutrients required for the proper growth and production of pods. In the late season or during pod ripening, this can trigger some maturing kernels to germinate, reducing the ratio of perfectly formed kernels during harvest.

Once flower petals break apart in the groundnut farming, the peanut ovary grows and penetrates the earth. The fruiting cycle of the peanut plant is roughly two months. 

The ovary, termed as a peg, enlarges and grows down. It is interesting to see that the plant forms a small stem that reaches the soil. 

The peanut embryo resides in this peg. Once, the peg gets into the soil, the embryo bends horizontal to the soil surface and starts to mature into a peanut. 

The peanuts have their nitrogen supply. Thus, it is recommended to avoid fertilizers rich in nitrogen that promote leaves and not fruits. 

Eventually, the plants get their resources from the well-prepared soil.

The peanut plant needs full sunlight to grow on a peanut farm in Virginia. In case you are growing peanuts in the hard soil, it is worth mixing enough organic matter to make the soil fertile and friable so that pegs can easily penetrate the soil surface and can go inside to turn into a peanut. Moreover, ensure that you have good soil drainage. 

At the end of each peg, peanut shapes. It is appropriate to put down thin mulch like straw and grass cuts, such that the surface should not crust and the pegs can easily reach the land.

Once the plants reach six inches height, plow around them to make the soil loose so that pegs can penetrate the surface easily.

Disease in the peanuts

Young seedlings can be under attack by the fungal species. 

Shortly after germinations, plants can get diseased and never get out of the field or can die during the early growing season. Seedling signs differ because of multiple causes for peanut farm Georgia.

Verticillium and Fusarium Wilt

Soil-borne fungi that penetrate plants from the roots are the cause of diseases of verticillium and fusarium. They cause the plant to be sick by growing in the water-conducting xylem tissue. 

Verticillium wilt (Verticillium wilted) is commonly found in cotton and potatoes. While Fusarium Wilt is a vegetable disease.

In the case of a Fusarium or Verticillium, once an area has been contaminated, the bacterial spores survive for several years. 

The crop rotation can help for a bit to reduce the bacterial spores.

But in the case of groundnut farming, however, contaminated regions may not be suitable for producing peanuts. 

Must Read: Growing Mushroom for Your Diet

There are no available fungicides that adequately treat infected plants for any of the diseases or reduce the number of spores present in the soil.

Pod Rots

More than one fungus can be related to rotted conditions when pod rots occur. If a significant infection is observed during the crop, it is worth to apply a fungicide that guards the plant against further infection.

Pod rots do not have any visible symptoms above ground, so it is necessary to uproot plants across the whole field particularly after the pod formation. That is the only way to spot rots of seeds. 

Besides, sound plants do not ensure healthy pods and peanuts under the soil automatically.

Nematodes

The plant parasites reside in the earth and infect plants. The problems are considered to be induced in two types in groundnut cultivation, root, and root-lesion nematodes. Usually, it is seen that only limited field areas are infected, however, if the expansion can destroy a crop.

The leaf spots may be caused by irrigation followed by high humidity during the growing season.

Fungicides should be used to combat leaf diseases as high humidity and moisture exist during the growing season.

Typically, fungicides used for the foliar diseases should be used on leaf surfaces and will start according to the drug labeling until contagious spores settle.

Insects

Insects are usually not a big concern in the processing of peanuts. It is assumed that the regulation of thrips in peanuts allows plants to mature early, but there has been no scientific evidence for such an event. 

In some cases, armyworms may be an occasional concern on a peanut farm. Some of the peanut fields often get harm from grasshoppers. However, labeled insecticides manage both easily.

Once, the plant has grown the grower checks if the field is too moist or too cold to dig. 

If conditions are correct, the peanut is ready to harvest. It is appropriate to uproot the entire plant out of the ground with the pods. You can leave it into the sunlight to dry out for a couple of days until the pods lose around a third of their moisture.

It is noteworthy that not all pods grow equally. Once the highest number of pods matures, you should harvest your crop. 

How to Do Watermelon Farming?

Watermelon is a highly cultivated vine-like flowering plant present in more than thousands of varieties. A fleshy sweet Plantae helps to relax blood vessels with high nutrition and low in calories. 

Watermelon has its fondness among the people by its sauce preferences among the varieties of fruits. The presence of potassium, vitamin A and C make it mealier and provide multiple health benefits i.e., prevent stroke, control blood pressure, obesity, and overweight as well. 

Watermelon farming needs a temperature higher than 25-degree Celcius. They have an extended, delicate, and climbing stem throughout his farming life cycle through germination to growing into a whole fruit. 

In the early stage of farming, watermelon has highly dense fleecy hair which is muddy in color and vanishes in the passing time. 

Also Read: How to Nurture the Dragon Fruit

Watermelon Cultivation 

Watermelon seeds implant in a pot and relocate in the loamy soil for mid-level of nitrogen for enhancing the growth of the fruit. In an excess humid climate, watermelon suffers from pests like root-knot nematodes, fruit flies, and aphids.

Watermelon requires more than 85 days becoming a full-grown fruit than the other melon. Horticulture in Japan grows cubic watermelons for their convenience to store as they use metal and glass boxes for improving grain.

Due to present in the variety of cubic, square, and pyramid shape, they are pricy to purchase rather than the original shaped one. This shaped type of watermelon only belongs to the wealthy class of the consumer or buyers.

Watermelon cultivation can be done in numerous ways according to its harvest time and weight.     

The Carolina cross produced the heaviest watermelon 29to 68 kilograms in about 90 days.

The little golden person takes 70 days from sowing to harvest. 

Orangelo weight 9 to 14 kilogram and take 90 to 100 days till the fruit harvest 

Cream of Saskatchewan grows in cold climate and harvest in 80 to 85 days

Moon and star are weighing 9 to 23 kilograms and harvest in 90 days 

Densuke watermelon is firstly harvest and weighing 11 kgs

Melitopolski is highly cultivated in the region of Russia and take 95 days to harvest

watermelon farming

Watermelon farming in horticulture shows a variety of improvements for the production of watermelon. Its hard crust made it more accessible to transport it from one place to another due to its oblong shape as well. Improvement in geographical conditions also provides to get an elastic environment for the cultivation of watermelons.

Watermelon is the garden-variety fruit that every grocery sells more often. China is the largest producer, and more than 40 states of the United States are cultivating watermelons. It is a smaller shaped variety of melons known as icebox melons as they have red and yellow color flesh. 

Some of the groups are also seen in the variety of watermelon, which shows the variation in taste and texture of its flesh.

·        Citroides group is a fleecy melon cultivated in the world for fodder with sweet yellow flesh.

·        The Lanatus group is food for the traveler in the Kalahari Desert. Seeds are edible in this group and having juicy white meat. 

·         Vulgaris group is widely cultivated for the consumption of human and cattle feed as well.

Watermelon is mainly consumed in summer; it contains water more than 85%, and the rest is sugar with low-fat properties. It mixes with other fruit juices, wine, or pickles. Watermelon seeds are also consumed by a human after the roast and dried up.

In China, people consume seeds of watermelon on the eve of china new year, and in Vietnamese, people consume seeds as a snack on the Vietnamese New Year holiday.

Watermelon zest has vile flavors, which is used in making pickles, and people were making vegetables by stewing and stir-frying. Watermelon zest produces Amino acid citrulline.

Only vitamin c present in a significant amount and a low amount of nutrients with 30 calories per 100 grams of serving. It is also known as state vegetable or fruit in Oklahoma State due to its versatility of consumption. 

Watermelon Farming Through Seeds

Watermelons grow from seed. You might be tempted to use seed from a melon you purchased, but it would just be time wasted. There are chances of it being a hybrid one. Hybrid is somewhat different from crosses not true to nature. Then, you would probably end up cultivating what is generally termed as pig-melons, which is nice to feed pigs only and not human beings. 

What Kind Of Seeds To Buy For Watermelon Farming?

If possible, pick the open-pollinated heirloom variety of seed, if necessary. You will find far better and fascinating types in the heirlooms than in the regular collections at the local gardening center. 

Start your watermelon seeds in the field, where they will spread. To germinate, the soil should be at least 18 ° C.

 What Is The Right Approach To Watermelon Farming?

Do NOT plant your watermelon seed in a container or big bowl, unless you have an incredibly short growing season. Neither buys watermelon seedlings from a nursery. Watermelon seeds germinate within a few days, simply and rapidly. 

Watermelon plants quite quickly outgrow the seedling stage and do not like transplantation. You don’t save a great deal of time, and you end up with a poorer vine.

Avoid all this needless hard work and stick your seeds in the dirt, about 2 cm or an inch deep.

Watermelon Vines Need A Lot Of Care

The watermelons need soils that are dark, warm, and permeable. It allows the land to develop melons. There are some benefits of growing the soil: A slab or hill is free draining. If you have thick clay dirt, bring the bed certainly up.

Mounds are beautiful even when the soil is somewhat unfortunate. To raise watermelons, make a mound of healthy soil with plenty of compost in it. Often, after using much of the compost, farmers plant them in what’s remaining over from a compost pile.

When you want to grow stuff in tidy circles, or if you’re going to plant a broad field, raise watermelons on ridges, much as the growers do.

 The Benefit Of Mulching

Watermelon cultivation needs to be very diligently done. A few things like mulching that one needs to keep in mind. Melons have deep roots and require plenty of water. Therefore, you need to ensure that the field is never dry out, in case it dries, so mulch helps. 

Mulch holds weeds down. Weeding may disrupt the strong roots, so it’s best not to let them rise. Watermelons are starving animals. 

If your mulch is like compost or old animal manures, it’s excellent. Watermelons can tolerate relatively fresh manure and fertilizers. 

Otherwise, periodically feed the watermelons with anything like pelleted manure or other sustainable fertilizer.

Once the vines are two meters thick, pinch the ends. Encourage branching. When your watermelon vines get bigger, they seek to take up more space. Unless they start smothering specific stuff, you should warn them to keep to their region by smoothing the ends of the vines, so they develop in the right direction.

Watermelon Harvesting 

watermelon harvest

Watermelon is a summer delight fruit loved by all ages. In addition to its great taste, it provides lycopene refreshment in the hot summer. It requires relocation after the germination of seeds more than 75-degree F and for growth more than 65 degrees F. 

Throughout the watermelon cultivation, watermelon requires a warm season to grow as their sizes, shape and texture of zest vary from climate, so their best production came from the south and southwest regions of the United States.

Must Read: How to plant, grow, and harvest pumpkins correctly 

For cultivating watermelon, it requires a heavier feeder than the other fruits. Before planting, the soil has to be compost and manure was rotted in it to provide the warmness to the sown seeds. 

Sown seeds start growing in the form of fruit; then fertilizers were mainly starting dressing up side by side. It requires a ph scale of 6 to 6.5 and more than 80 days of the warm summer season to grow up.

It is a fragile fruit to time in sandy, muddy soil. The soil will be moist, and water needed in the field will be 1 to 2 inches per week. Watermelon farming soil contains a high amount of nitrogen, phosphorus, and potassium, but after illuminating it into flowers, it needs less nitrogen for further growth. 

Watermelon elevates in a row sun-dried atmosphere, as they are not much sweeter as they are ripe, so the harvesting part plays a vital role in the life span of watermelon. The texture and color of a watermelon show whether the fruit is ripe or not.

Pests of Watermelon: 

The leading watermelon killer is leaf-eating beetles (also destroying the flowers), including painted and dotted flea beetles, pumpkin beetles with or without markings, whatever you call them.

They all look alike, all doing the very same: nibble away on your watermelon plants. However, if they are a significant concern, it’s just an indication that your watermelon is stressed.

In a safe climate and decent soil, stable watermelon does not draw so many beetles. A watermelon should also grow quickly enough to manage any beetles.

The other primary concern with rising watermelons is mildew, a disease that makes the leaves appear like white dust. Fungus thrives in wet environments.

In the tropics, you may not be able to avoid beetles or mildew until the rainy season build-up starts. And it’s not worth it anyway… 

The unbearable heat and humidity aren’t healthy produced watermelon conditions. Develop anything that needs rain, waiting for another dry season to produce watermelons.

Conclusion

In this guide on how to do watermelon farming, we have tried to explain all those steps and techniques that are required to produce a quality crop. However, you are solely responsible for crop failure for any reason. Don’t worry, this is not a kind of alarming signal. It’s just a precautionary statement. In the end, we would like to advise you to take any watermelon farming-related decisions at your discretion.  

Growing Cucumber – How to Plant, Grow & Harvest?

Cucumbers are worthy of each salad courtesy it’s health benefits. Cucumbers have a mild, refreshing flavor and a high amount of water. You will also feel dehydrate and enjoy eating them in hot weather. Generally, most of the diet conscious people use cucumber in their diets.

Moreover, it has a variety of applications in several beauty products due to its richness of vitamins and minerals.

Growing Fresh and Crunchy Cucumbers

Cucumbers farming

The fresh cucumbers have a special crunch with every bite. Cucumber farming would be a different experience.

Whatever the space you have, you can grow cucumbers. They can be cultivated in pots, bags or directly on the field successfully.

Also Read: Sweet Potato Farming Information Guide

Two main types of cucumber are outdoor and greenhouse. Plants of greenhouse cucumber make long, smooth fruit similar to those sold in the supermarket. 

On the other hand, others are called ridge cucumbers. It’s usually shorter and covered with red skin. 

Crunchy cucumbers, fresh from the garden are in a league of their own, so if you’re wondering whether to grow them or not, the answer should be a resounding yes.

Some of the cucumber varieties are more suitable for cucumber farming in the UK, either outdoors or in the greenhouse. 

Generally, the outdoor cucumbers also called ‘ridge cucumbers’ have resistance to the cooler climates and are often spiked or rough to the touch. Greenhouse cucumbers are a bit smoother fruits but do need that extra warmth to grow to the full capacity.

Some varieties prefer sheltered environments just like a greenhouse and others mature better out, in a sunny environment.

How to Sow Cucumbers

The mid-spring is the ideal time to sow the cucumber seeds into small pots with a general-purpose potting mix. Sowing depth of cucumber seeds is about an inch 3 cm deep.

Cucumbers germinate at least 20 degrees. This usually takes 7-10 days. Thus, you have to wait for a launch at the end of the spring.

 After germination, you should transfer seedlings to the place which has good sunlight and put them there until these are sufficiently large to transplant it. 

Once the seedlings start to appear, for better growth of a healthy plant remove the weakest from the pot and leave one per pot.

The liquid fertilizer is better for cucumber farming. Thus, a liquid fertilizer high in potassium is the initial diet plant within every two weeks that keep these hungry plants moist most of the time.

Must Read: How to harvest onions?

Growing Greenhouse Cucumbers

Greenhouse cucumbers can be transplanted into beds, large containers of potting soil. The other way to set the plant to grow is by setting two cucumbers per bag into bottomless pots set on top of the growing bag.

These will help to trap moisture and ensure cucumber plant care every time you water, instead of it running off over the surface.

Put in place supports such as bamboo canes, vertical wires, strong netting or trellis. Train vines up their supports then pinch out the growing tips when they reach the top to encourage side shoots. Take out the tips of side shoots to leave two leaves beyond each fruit.

Feed plants every two weeks with a liquid fertilizer that’s high in potassium and keeps these thirsty plants moist at all times.

You can exclude all male flowers from greenhouse cucumbers. This prevents bitter-tasting fruits. It’s effortless to identify female flowers by the slight swelling of the embryonic fruit behind each bloom.

Growing Outdoor Cucumbers

When the soil warms in late spring or early summer, outdoor cucumbers should be planted. For the perfect plantation, accustom the plant to a newer climate for a week or two preparations slowly for a week or two.

On the other hand, you could sow seeds directly to their actual rising places in warmer climates.

Cucumber farming considers the healthy, fertile soil just like other plants. Thus before planting, you can collect plenty of well-rotted organic matter such as manure. 

It is ideal to set the plants at about 18 inches apart when you raise your cucumbers upward using supports like a trellis. Alternatively, position them about three feet from each other if you let them scatter over the soil surface.

The outdoor cucumber needs insect pollination. Therefore, the plant needs the involvement of male and female flowers. Thus, you should not remove the male flowers.  There is no need to remove male flowers as greenhouse cucumbers. It is important to have this marriage for better and high yields.

Feeding to the cucumber

Cucumbers are typically grown at the same location as other vegetables in the case of a greenhouse. And, in this case, farmers usually use the same feed for all vegetables. 

In the case of the cucumbers are provided the more effective and balanced fertilizer. The yield is higher.

High nitrogen requirement in cucumber feed

A small cucumber plant has a larger leaf that is even greater than the leaves of other plants. 

As nitrogen is the fuel for flower growth. Cucumbers need more nitrogen than other major nutrients such as magnesium, calcium, iron, and manganese. 

 In the case of organic, the high liquid nitrogen feed would benefit cucumber farming to the full capacity.

Cucumber Plant Diseases

1. Powdery Mildew

The fungus emerges first as several white spots on the cucumber leaves and grows quickly as very small, threadlike powdery areas. It seems like a cotton-dumpling demon that absorbs plant nutrients, so if you don’t handle it, it can contribute to a serious infestation. The yield will be greatly affected, even if they mature.

When you just begin to see the mold on the leaves of the cucumber or if you had previous problems and want the chance of powdery mildew to be reduced, milk is an all-natural effective barrier to funguses. Dilute and spray the milk on the plants in the ratio of 10 parts water to 1 part milk.

Baking soda has solid household applications and can be applied to this list as “treating powdery mildew.” A 1 tablespoon soda solution in a gallon of water is adequate to be successful, but a soap or dish soap would need as an additive. Some growers often add oil, neem or standard cooking oil.

Sprinkle the mixture again early in the day, and then rinse in the evening. The persuasive mildew requires a very favorable pH to survive and baking soda is enough essential to render the leaves desolate. 

2. Bacterial Wilt

Bacterial wilt affects the fruits in cucumber farming more intensely. Infection is recognized with often witty and dried branches, often even overnight. 

One simple way to prevent bacterial wilt is by cutting off a wilted stem at the base and rubbing the cut with your fingertip.

 If you take off your finger gradually, the plants have bacterial wilting threads out of the cut. There is no remedy for this cucumber decay.

3. Fusarium wilt 

Fusarium wilt is another issue with the cucumber plant which is a difficulty to treat and overcome. In dry climates, the pathogen is much more widespread and can damage, in addition to cucumber, a wide variety of vegetables.

The dropping leaves is the beginning of this disease. This can be identified by the slicing the main trunk of an infected fusarium wilt vine. If it’s the base is spotted with dark stripes. The fungicidal soil drenches the remedy of this infection while treating the soils before plantation can prevent the unfortunate loss. 

4. Cucumber Mosaic

At any stage, this disease will invade cucumber plants and the virus spreads systemically in the plant once the plant is infected.

Symptoms appear 7 to 14 days after infection and develop most quickly at low temperatures.

 A pale or dark green mosaic or mottling develops first on the youngest leaves. The outer borders curl inward. New leaves are stunted and twisted.

Flowers can exhibit strange properties like green petals. The fruit of contaminated plants is often smaller and somewhat skewed, and display light and dark green mosaic patterns on the surface.

In this case, it is important to buy the treated seeds for cucumber farming that often highlighted at the label.

Harvesting the right cucumber

The cucumbers are best plucked before their seeds become hard as they are preferred eating as immature.

While a yellow and mature cucumber is of the highest quality when it is uniformly green, firm, and crisp. 

Cucumbers that are left on the vine for a longer period would get tough skins and eventually lower plant productivity.

You should collect fruits during the cucumber cultivation every few days at full harvest time as they grow rapidly once at the peak.

Storage of Mature Cucumber

Although a fresh cucumber has the highest level of water content and crunchiness.

Cucumbers are over 90 percent water. This is ideal to store them wrapped tightly in plastic wrap to retain moisture. if there is a need to store them for a longer time, you will keep them for a week to 10 days when stored properly in the refrigerator.

Also Read: Growing the Avocado