Composting Mistakes and must Avoid Them

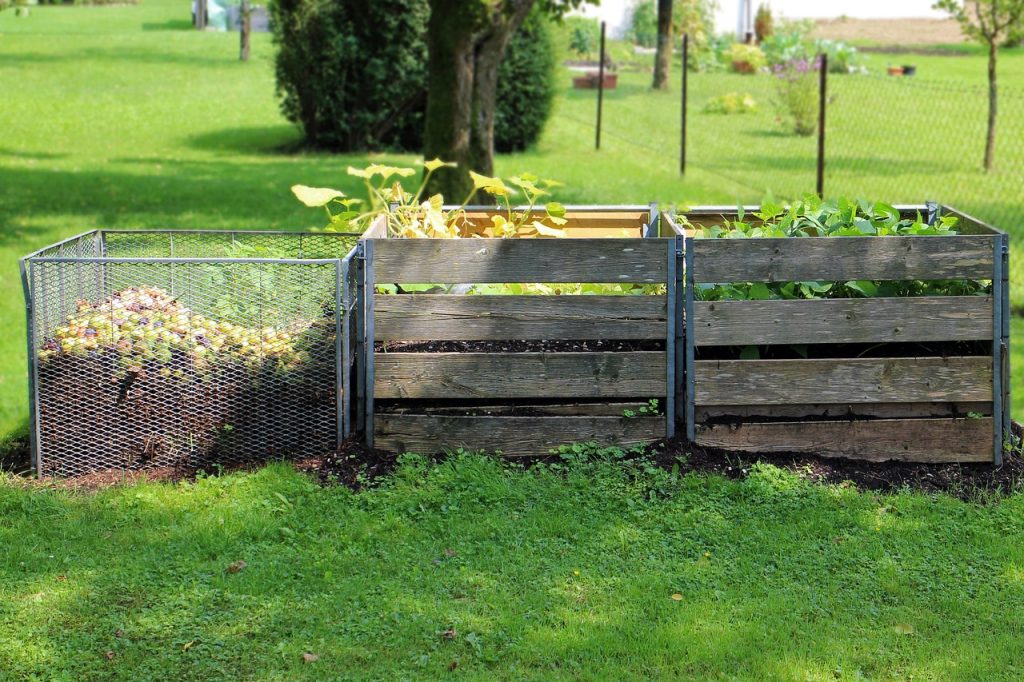
Composting is an eco-friendly way to recycle organic waste and create nutrient-rich soil for your garden. However, like anything, there are common pitfalls that can slow down the process or even ruin your compost altogether. By understanding these mistakes and knowing how to avoid them, you can ensure that your composting efforts yield the best results. Here are five of the most common composting mistakes and how to avoid them.


1. Too Much of One Material

Why It’s a Mistake:
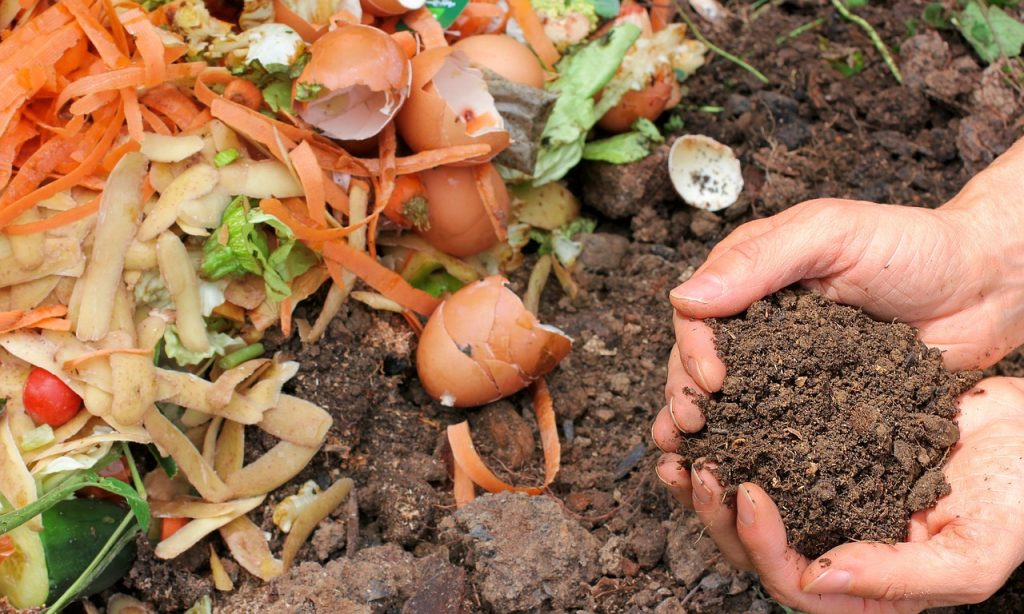
One of the most common composting errors is an imbalance of materials, often due to adding too much of one type, such as too many kitchen scraps (greens) or too much dry material (browns). This imbalance can slow down the decomposition process or even cause odors.

How to Avoid It:
Aim for a balanced ratio of carbon (brown materials) and nitrogen (green materials). A good rule of thumb is to maintain a carbon-to-nitrogen ratio of 30:1. The ideal compost should contain a mixture of fruits, vegetables, grass clippings, leaves, straw, and cardboard. If you add too much of one material, the pile can become too wet, too dry, or not decompose properly.


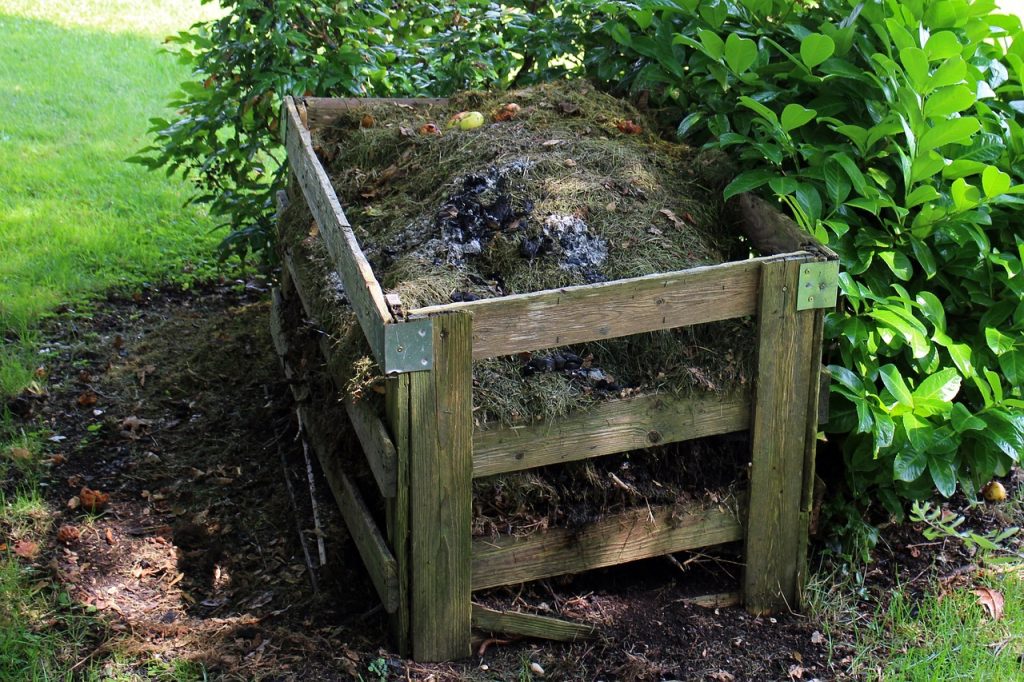
2. Not Turning the Pile Enough

Why It’s a Mistake:
Composting relies on aerobic (oxygen-loving) bacteria to break down materials. If your compost pile isn’t turned or aerated regularly, it can become compacted, leading to slower decomposition or even unpleasant, anaerobic conditions that produce foul odors.

How to Avoid It:
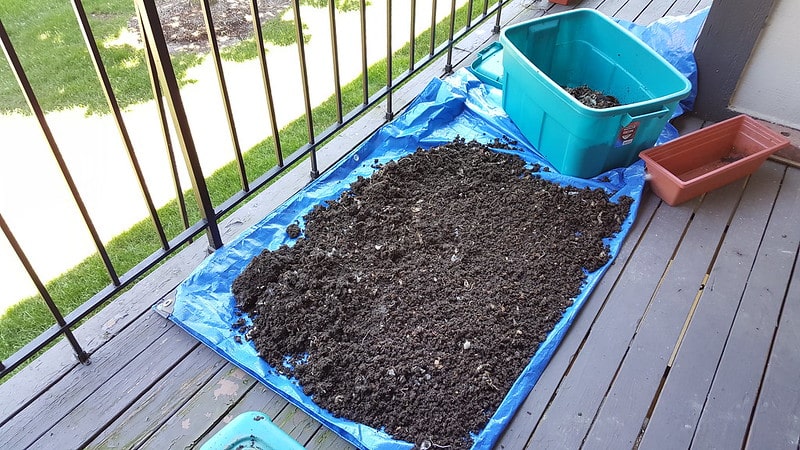
Turn your compost regularly—every 1-2 weeks for small piles or more frequently for larger heaps. Turning the compost ensures that the pile gets enough oxygen and helps mix the materials for faster decomposition. Use a compost fork, shovel, or a compost aerator to fluff the pile and introduce air.


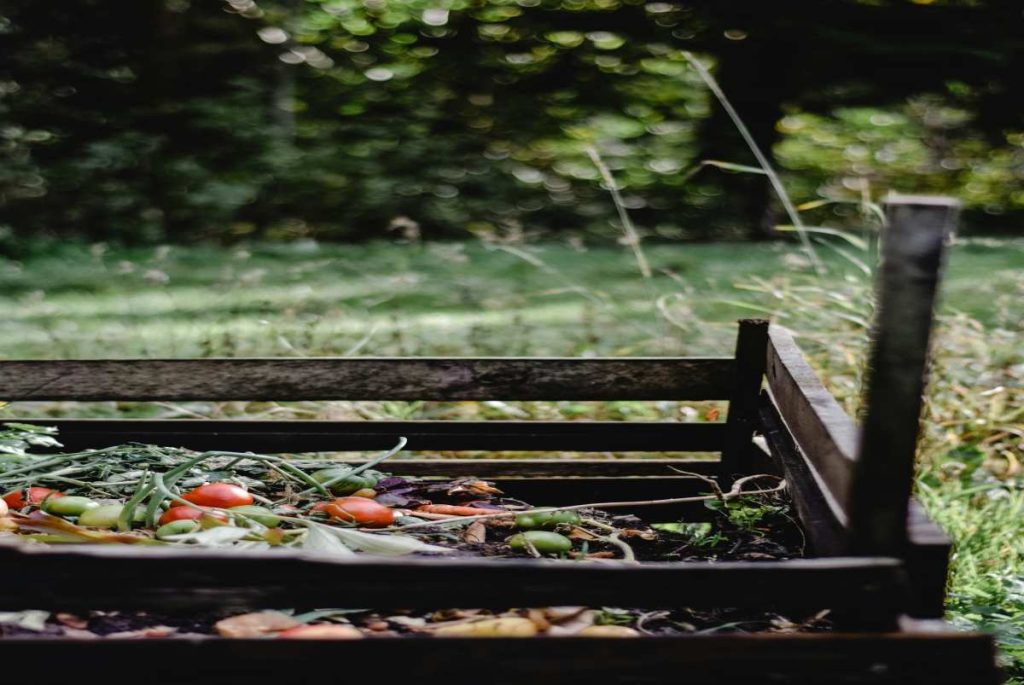
3. Adding Non-Compostable Items

worm castings for tomato plants

Why It’s a Mistake:
While composting seems like a free-for-all for organic waste, not everything belongs in the compost bin. Adding meat, dairy, oily foods, diseased plants, or pet waste can attract pests, create strong odors, and even contaminate the compost with harmful pathogens.

How to Avoid It:
Stick to composting fruit and vegetable scraps, grass clippings, leaves, coffee grounds, eggshells, and other plant-based materials. Be cautious about adding things like dairy products, meat, and bones, as they can lead to trouble. Always research items you’re unsure about before tossing them into the bin.


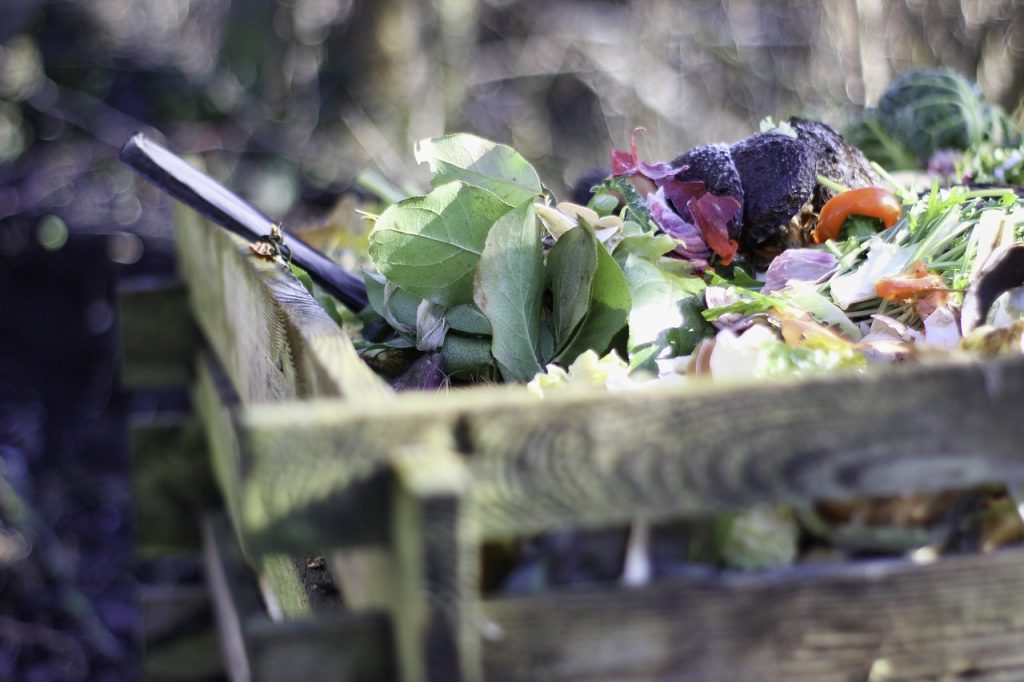
4. Not Monitoring Moisture Levels

Why It’s a Mistake:
Moisture is crucial for the composting process. Without enough water, the bacteria and fungi that break down organic material can’t do their job. On the flip side, too much moisture can cause your compost pile to become too soggy, creating a smelly, anaerobic environment.

How to Avoid It:
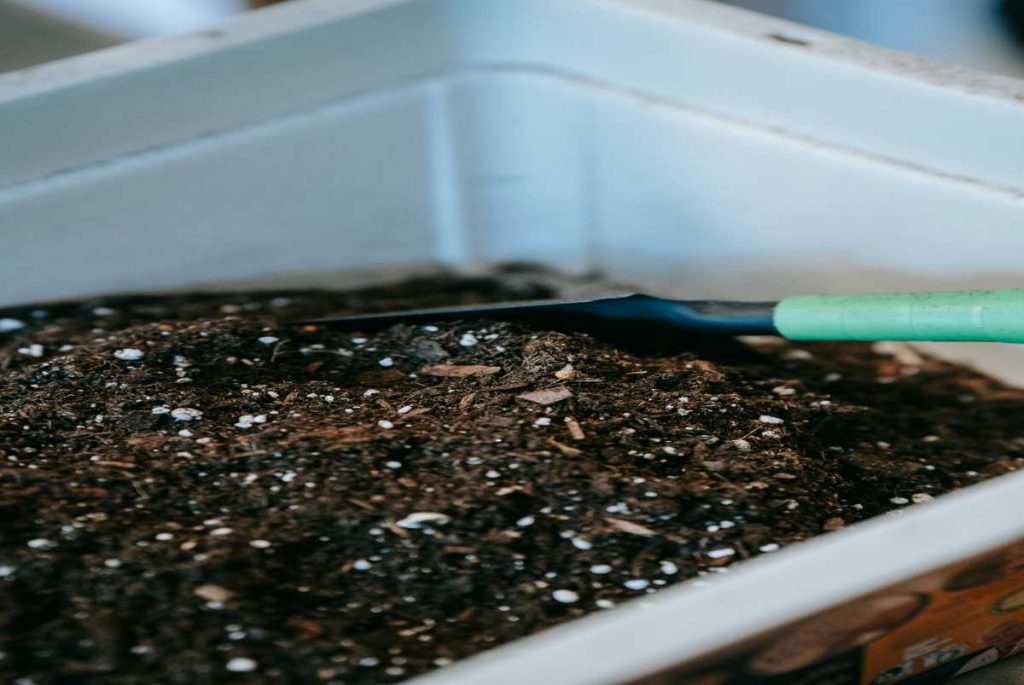
The ideal moisture level is about 40-60%. Your compost should be as moist as a wrung-out sponge—moist but not dripping wet. If the pile is too dry, add water or wetter materials like fruit scraps. If it’s too wet, add more dry, carbon-rich materials such as straw, leaves, or cardboard to absorb the moisture.


5. Ignoring the Temperature

Why It’s a Mistake:
Composting is most efficient when the pile is kept at the right temperature, typically between 130°F and 160°F (54°C–71°C). If the pile is too cold, decomposition will slow down, and if it’s too hot, it could kill off beneficial microorganisms.

How to Avoid It:
Monitor the temperature of your compost regularly using a compost thermometer. If the pile is too hot, add more browns to help cool it down. If it’s too cold, turn the pile more frequently and ensure it’s properly aerated. You can also add more nitrogen-rich materials like grass clippings or kitchen scraps to raise the temperature.


Conclusion

Composting is a fantastic way to reduce waste and enrich your soil, but it’s important to avoid common mistakes that can slow down the process or ruin the compost altogether. By maintaining a proper balance of materials, turning the pile regularly, monitoring moisture and temperature, and avoiding non-compostable items, you can create nutrient-rich compost that benefits your garden and the environment. Keep these tips in mind and enjoy the benefits of composting without the common headaches.

7 Important Methods for Compost Maintenance

Composting is an eco-friendly and rewarding way to recycle organic waste, but it requires consistent care to ensure a smooth process. Proper compost maintenance promotes fast decomposition, prevents unpleasant odors, and results in nutrient-rich, dark, crumbly compost. Here are 7 essential methods for maintaining your compost and ensuring that your composting system remains healthy and effective.


1. Turn Your Pile Regularly

Why It Works:
Turning your compost pile ensures that air circulates through the materials, which speeds up the decomposition process. It also prevents the pile from becoming compacted, which can slow or even halt the breakdown of organic matter.

How to Do It:
Use a compost fork or shovel to turn your compost every 1-2 weeks. Aim for turning the pile every 2-3 days if you want to speed up the decomposition process. This encourages aeration and helps mix the wetter, denser materials with the drier, lighter ones.


2. Maintain the Proper Moisture Level

Why It Works:
Moisture is essential for microbial activity in your compost. Without enough water, the microbes that break down the organic matter will become dormant. On the other hand, too much water can create a soggy, smelly mess.

How to Do It:
Your compost should be as moist as a wrung-out sponge. Check your pile regularly and add water when it feels too dry. If it’s too wet, add more dry carbon materials like straw, leaves, or shredded newspaper to balance the moisture level.


3. Balance Green and Brown Materials

Why It Works:
A proper balance of “greens” (nitrogen-rich materials like food scraps, grass clippings, and coffee grounds) and “browns” (carbon-rich materials like leaves, wood chips, and paper) is key to a successful compost pile. Greens provide the nutrients needed for microbial growth, while browns offer structure and aeration.

How to Do It:
Aim for a carbon-to-nitrogen ratio of about 30:1. If your pile smells or is too slimy, it may have too much nitrogen (greens). In this case, add more carbon-rich materials to balance it out. On the flip side, if the compost is slow to break down, it might need more nitrogen.


4. Keep the Pile Aerated

Why It Works:
Aeration promotes aerobic (oxygen-loving) microbes that break down compost more efficiently and reduce the risk of foul-smelling anaerobic decomposition, which occurs in the absence of oxygen.

How to Do It:
When turning the pile, mix in air by fluffing up the materials. If you’re using a compost tumbler, rotate it every few days to ensure that air circulates throughout. For larger compost heaps, consider using a compost aerator tool to punch holes into the pile to enhance oxygen flow.


5. Monitor Temperature

Why It Works:
Composting works best when the temperature of the pile rises to between 130°F and 160°F (54°C–71°C). At this temperature, microorganisms break down organic matter at an optimal rate, and pathogens and weed seeds are killed off.

How to Do It:
Use a compost thermometer to monitor the temperature of your pile. If the temperature drops below the ideal range, turn the pile to allow air to circulate and reinvigorate microbial activity. Conversely, if it gets too hot, add more moisture or brown materials to cool it down.


6. Avoid Adding Non-Compostable Materials

Why It Works:
Some items in your compost can slow down the process or introduce harmful substances. Items like meat, dairy, pet waste, and diseased plants should be avoided as they can create odors, attract pests, and disrupt the decomposition process.

How to Do It:
Stick to composting vegetable scraps, fruit peels, yard waste, and other biodegradable materials. If you’re unsure about a specific material, do a little research before adding it to your compost pile.


7. Harvest Your Compost at the Right Time

Why It Works:
Knowing when your compost is ready is crucial for using it effectively. Finished compost is dark, crumbly, and has an earthy smell. It should look like rich, loamy soil and have a texture that’s easy to sift through.

How to Do It:
Typically, compost takes anywhere from 2-6 months to mature, depending on the size of your pile and how often it’s turned. Once the compost is ready, sift out large, uncomposted materials (which can be returned to the pile) and spread your finished compost in your garden or on your lawn.


Conclusion

Regular compost maintenance is the key to achieving a healthy, productive compost pile that yields nutrient-rich material for your garden. By turning your pile, balancing moisture, maintaining the right green-to-brown ratio, and ensuring good aeration, you’ll speed up the decomposition process and reduce unwanted odors. Monitoring temperature, avoiding non-compostable items, and knowing when to harvest are all part of the process that helps make your composting efforts successful. With these tips, your composting system will thrive and help you create high-quality, organic matter to enrich your soil and support plant growth.

9 Tips for Speeding Up the Composting Process

Composting is an excellent way to recycle organic waste, enrich your garden soil, and reduce your carbon footprint. However, sometimes the process can feel slow, especially when you’re eager to use the finished compost in your garden. While composting typically takes a few months, there are several strategies you can use to accelerate the decomposition process and produce nutrient-rich compost more quickly. Here are nine tips to help speed up your composting efforts.


1. Maintain the Right Carbon-to-Nitrogen Ratio

Why It Matters:
A balanced carbon-to-nitrogen (C) ratio is crucial for efficient decomposition. Carbon-rich materials, like leaves and straw, provide energy for microorganisms, while nitrogen-rich materials, like food scraps and grass clippings, fuel microbial growth.

Tip:
Aim for a ratio of about 30:1 (30 parts carbon to 1 part nitrogen). If you notice your compost is not decomposing fast enough, try adding more green (nitrogen) materials. On the other hand, if your pile is too wet or smelly, you likely need to add more brown (carbon) materials.


2. Chop or Shred Materials Before Adding Them

Why It Matters:
Smaller pieces decompose faster because they have more surface area exposed to microbes, speeding up the process. Large chunks of organic matter, like whole branches or large fruit scraps, can slow down the breakdown.

Tip:
Chop, shred, or tear your compost materials into smaller pieces before adding them to your pile or bin. The finer the materials, the faster they will break down.


3. Keep Your Pile Moist

Why It Matters:
Moisture is essential for microbial activity, which is responsible for breaking down organic materials. A dry compost pile will slow down the decomposition process.

Tip:
Your compost should feel like a damp sponge. If it’s too dry, add water or more green materials. If it’s too wet, mix in more brown materials, like dry leaves, to absorb the moisture. Turning the pile regularly also helps distribute moisture evenly.


4. Turn the Pile Frequently

Why It Matters:
Turning your compost pile regularly adds oxygen to the mixture, which is crucial for aerobic decomposition. Without enough oxygen, your pile will become anaerobic, resulting in slow decomposition and unpleasant odors.

Tip:
Turn your compost every 3 to 4 weeks to ensure proper aeration. This will help keep the microbes thriving and speed up the decomposition process.


5. Use a Compost Accelerator

Why It Matters:
Compost accelerators are products that contain added microorganisms to speed up the breakdown of organic materials. They can help jumpstart the process, especially if your pile is struggling to decompose.

Tip:
If you want to speed things up, consider adding a compost accelerator to your pile. You can buy commercial accelerators or make your own by adding compost or soil from an existing compost pile to introduce more microbes.


6. Maintain the Right Size for Your Pile

Why It Matters:
A compost pile that is too small won’t generate enough heat to break down materials quickly, while one that is too large can be difficult to turn and manage. Maintaining the right size ensures that your pile stays hot enough for efficient composting.

Tip:
Aim for a compost pile that is at least 3 feet by 3 feet by 3 feet (1 cubic yard) in size. This size is large enough to generate heat and facilitate the decomposition process but small enough to manage and turn regularly.


7. Add Worms to Your Pile (Vermicomposting)

Why It Matters:
Worms are nature’s decomposers. They break down organic matter quickly and their waste (castings) is rich in nutrients. Adding worms to your compost can speed up the process significantly.

Tip:
To introduce worms, either add a worm bin to your composting system or mix worms directly into your pile. Red wigglers are the best worms for composting, as they thrive in organic matter and are great for aerating the compost.


8. Keep the Temperature High

Why It Matters:
Decomposition is faster at higher temperatures. If your compost pile gets too cold, microbial activity slows down, and the composting process takes longer.

Tip:
To maintain a high temperature (around 130-160°F or 54-71°C), ensure your compost pile is large enough and consistently turn it. If needed, insulate your pile with a compost cover or tarp to keep the heat in.


9. Use a Composting Tumbler

Why It Matters:
Composting tumblers are sealed containers that you can rotate to turn the pile easily. They help keep the pile contained and allow you to mix it with minimal effort, making it easier to maintain the right moisture and aeration.

Tip:
If you’re short on time or want a more hands-off composting process, consider using a composting tumbler. It will speed up the decomposition process by providing regular aeration and promoting faster breakdown of materials.


Conclusion

By following these nine tips, you can significantly speed up the composting process, creating nutrient-rich compost for your garden in less time. A little attention to detail, such as maintaining the right balance of materials, turning your pile regularly, and ensuring proper moisture levels, will go a long way in making your composting efforts more efficient. Whether you’re composting to reduce waste, enrich your soil, or support your sustainability goals, these simple strategies will help you achieve a faster and more successful composting process.

9 Tips for Speeding Up the Composting Process

Composting is an eco-friendly way to recycle organic waste into rich, fertile soil for your garden. However, sometimes you may want to speed up the process to get compost quicker and use it in your garden sooner. Fortunately, there are several strategies that can help speed up the decomposition process without compromising the quality of your compost. Here are 9 tips to accelerate composting and make the most of your organic waste.


1. Chop or Shred Materials

Why it helps: Smaller pieces of organic material break down faster than large chunks because they have a greater surface area for microbes to work on. Shredding or chopping materials like leaves, branches, and vegetable scraps will help the compost decompose more efficiently.

How to do it:

  • Use a shredder for garden waste or chop large items into smaller pieces with scissors, a machete, or pruning shears. The finer the material, the faster it will decompose.

2. Maintain a Balanced Carbon-to-Nitrogen Ratio

Why it helps: A proper balance of carbon-rich “brown” materials (like leaves, straw, and cardboard) and nitrogen-rich “green” materials (like grass clippings, food scraps, and manure) is crucial for fast composting. Too much of one or the other can slow the process down.

How to do it:

  • Aim for a carbon-to-nitrogen ratio of about 30:1. If the pile is too green (too much nitrogen), add more brown materials like leaves or straw. If it’s too brown (too much carbon), add more nitrogen-rich materials like fresh grass or food scraps.

3. Turn the Pile Regularly

Why it helps: Turning the compost pile every few weeks introduces oxygen, which is essential for aerobic decomposition. Oxygen helps bacteria and fungi break down organic materials faster, speeding up the composting process.

How to do it:

  • Use a pitchfork or compost aerator to turn the pile every 2-3 weeks. Aerating helps prevent the compost from becoming too compacted, and it accelerates decomposition by promoting the growth of oxygen-loving microorganisms.

4. Keep the Pile Moist

Why it helps: Decomposition requires moisture, but the compost pile should not be too wet or too dry. If the pile is too dry, the microorganisms can’t break down materials efficiently. If it’s too wet, the pile can become anaerobic, slowing down the process and creating foul odors.

How to do it:

  • Keep the compost pile as damp as a wrung-out sponge. If it’s too dry, add water while turning the pile. If it’s too wet, add more dry materials (like straw or leaves) to absorb excess moisture.

5. Add Compost Activators

Why it helps: Compost activators are materials that help to jumpstart the composting process. They are often rich in nitrogen, which encourages microbial growth and accelerates decomposition.

How to do it:

  • You can buy commercial compost activators, or use natural sources like manure, fresh grass clippings, or kitchen scraps. These materials will boost microbial activity and speed up the process.

6. Use a Compost Bin or Tumbler

Why it helps: Using a compost bin or tumbler helps to contain the compost and manage temperature and moisture levels more easily. Tumblers allow for better aeration, and because they’re enclosed, they trap heat, which speeds up the breakdown of organic materials.

How to do it:

  • Invest in a compost tumbler, which makes it easy to rotate the pile. A good tumbler can reduce composting time significantly by maintaining an optimal environment for microbial activity.

7. Increase the Pile’s Size

Why it helps: Larger compost piles retain heat more effectively, which speeds up the breakdown of organic materials. A larger pile also creates a better environment for microorganisms to thrive.

How to do it:

  • Aim for a compost pile that’s at least 3 feet by 3 feet. Larger piles generate more heat, which accelerates decomposition. If your pile is too small, the composting process will be slower.

8. Include More Nitrogen-Rich Materials

Why it helps: Nitrogen-rich materials, such as food scraps, grass clippings, and manure, help to heat up the compost pile and support rapid microbial growth. More nitrogen leads to faster decomposition.

How to do it:

  • Add more green materials like vegetable scraps, coffee grounds, and fresh grass clippings. Just make sure to balance them with enough brown materials to maintain the carbon-to-nitrogen ratio.

9. Maintain the Right Temperature

Why it helps: Composting is a heat-driven process. A temperature of 130°F to 160°F (55°C to 71°C) is ideal for quick decomposition. The higher the temperature, the faster the composting process.

How to do it:

  • Use a compost thermometer to monitor the temperature of your pile. If it falls below 130°F, turn the pile to introduce more oxygen. If it’s too hot, add more carbon-rich materials to cool it down.

Conclusion

By implementing these nine tips, you can speed up your composting process and create nutrient-rich compost in a fraction of the time. Properly balancing your materials, maintaining moisture, turning the pile regularly, and monitoring the temperature will ensure a faster, healthier composting process. With a little attention to detail, your compost will break down quickly and be ready to use in your garden sooner, providing your plants with the best possible soil.

10 Creative Uses for Finished Compost: Putting Your Nutrient-Rich Soil to Work

Finished compost is one of the best natural fertilizers available, and it’s a great way to recycle organic waste into valuable nutrients for your plants and garden. But once you’ve created your rich, dark, crumbly compost, you might wonder: How can I put it to best use? The possibilities are endless! Here are 10 creative uses for your finished compost that will enhance your garden, home, and more.


1. Improve Soil Quality in Your Garden

Why it helps: Compost is rich in nutrients that plants need to grow, such as nitrogen, phosphorus, and potassium. It also enhances the soil structure, improves drainage, and supports healthy root development.

How to use it:

  • Spread a layer of compost on your garden beds before planting, or mix it into the soil to improve its texture and fertility. Use it for vegetables, flowers, shrubs, and trees.

2. Create Compost Tea for Plants

Why it helps: Compost tea is a nutrient-rich liquid that you can use to feed plants and enhance soil health. It’s packed with beneficial microorganisms that can boost plant growth and help protect against diseases.

How to use it:

  • Place a small amount of finished compost in a mesh bag or cheesecloth, then steep it in water for a few days. Once the liquid turns brown and fragrant, strain out the solids and use the tea as a natural fertilizer for your plants.

3. Mulch for Your Garden Beds

Why it helps: Compost can act as a natural mulch that retains moisture, prevents weeds, and regulates soil temperature. Plus, as it decomposes, it continues to enrich the soil beneath it.

How to use it:

  • Apply a 2- to 3-inch layer of compost on top of your garden soil as mulch. This will keep your plants hydrated and suppress weed growth throughout the growing season.

4. Boost Lawn Health

Why it helps: Compost improves the texture and structure of your lawn’s soil, helping grass roots penetrate deeper and grow stronger. It also enhances the overall health of the lawn by providing essential nutrients.

How to use it:

  • Spread a thin layer (around ¼ inch) of finished compost over your lawn and rake it in. This will provide your grass with the nutrients it needs to thrive and help combat compaction.

5. Enhance Your Composting Pile

Why it helps: Adding a small amount of finished compost to your new compost pile helps introduce beneficial microorganisms that aid in breaking down organic matter more quickly.

How to use it:

  • When starting a new compost pile, sprinkle a layer of finished compost over the materials. This will help jumpstart the decomposition process by introducing microbes that are already active in the finished compost.

6. Potting Mix for Container Plants

Why it helps: Finished compost is a great addition to potting soil because it helps retain moisture, adds nutrients, and improves drainage in containers.

How to use it:

  • Mix finished compost with perlite or vermiculite (to improve aeration) and some garden soil to create a well-draining potting mix. Use this mixture to repot or plant in containers, baskets, or pots.

7. Use in Raised Garden Beds

Why it helps: Raised garden beds often need a soil boost, especially when they are newly established. Finished compost improves the soil’s nutrient profile and supports plant growth in these beds.

How to use it:

  • Add a generous amount of finished compost to the soil mix for your raised garden beds. This will provide immediate nourishment for your plants and create a healthy growing environment.

8. Enhance Your Vegetable Garden

Why it helps: Compost is especially beneficial for vegetable gardens, as it provides essential nutrients while also improving soil structure, which leads to healthier, higher-yielding plants.

How to use it:

  • Mix compost into the soil of your vegetable garden before planting to create rich, fertile ground for your crops. You can also side-dress around the base of growing plants to provide additional nutrients as needed.

9. Top-Dress Fruit Trees

Why it helps: Fruit trees require nutrient-rich soil to produce high-quality fruit. Compost improves soil health by providing the right balance of nutrients and moisture, helping trees grow strong and produce abundant fruit.

How to use it:

  • Spread a layer of compost around the base of fruit trees (but not directly against the trunk) and lightly rake it in. This will provide nutrients and improve the tree’s access to moisture and minerals.

10. Improve Flower Beds and Landscaping

Why it helps: Whether you’re growing flowers, shrubs, or ornamental plants, compost helps to ensure healthy, vibrant blooms. It encourages strong root systems and lush foliage.

How to use it:

  • Work finished compost into the soil of flower beds, or use it as a mulch around plants to keep them nourished throughout the season.

Conclusion

Finished compost is a powerful, all-natural tool for improving the health and vitality of your garden and plants. From enriching your soil to making compost tea or boosting the health of your lawn, the possibilities for using finished compost are endless. By putting your nutrient-rich soil to work, you’ll create a healthier, more productive garden that thrives season after season.

How to Start a Vermicomposting Bin with Red Worms

Vermicomposting is a fantastic way to recycle kitchen scraps and other organic materials into rich, nutrient-dense compost using red worms. It’s simple, eco-friendly, and perfect for small spaces like apartments or urban gardens. Here’s a step-by-step guide to setting up and maintaining your own vermicomposting bin.


What is Vermicomposting?

Vermicomposting uses red worms (typically Eisenia fetida) to break down organic waste into castings, which are nutrient-rich fertilizers. It’s an odor-free, compact system that can be kept indoors or outdoors.


What You’ll Need to Start

1. A Composting Bin

  • Material: Plastic or wood.
  • Size: A bin about 8–12 inches deep works well for most beginners.
  • Lid: Ensure it has a lid to retain moisture and keep pests out.

2. Bedding Material

  • Shredded newspaper, cardboard, coconut coir, or dried leaves.

3. Red Worms

  • Opt for Eisenia fetida (red wigglers), as they thrive in composting environments.

4. Food Scraps

  • Vegetable peels, fruit scraps, coffee grounds, and eggshells (crushed).

5. Optional Tools

  • A moisture meter or spray bottle to manage moisture levels.
  • Gloves or a small garden fork for turning the bin.

Setting Up the Vermicomposting Bin

Step 1: Prepare the Bin

  1. Drill holes in the sides and bottom of the bin for ventilation and drainage.
  2. Place a tray or pan beneath the bin to collect excess liquid (worm tea).

Step 2: Add Bedding

  1. Fill the bin about halfway with shredded paper, coconut coir, or leaves.
  2. Dampen the bedding material with water until it’s moist but not soggy.

Step 3: Introduce the Worms

  • Spread the worms evenly over the bedding. Let them burrow naturally to escape light.

Step 4: Add Food Scraps

  1. Bury small amounts of food scraps in the bedding.
  2. Rotate feeding spots to avoid attracting pests or creating an imbalance.

Step 5: Cover with More Bedding

  • Add a thin layer of damp bedding on top to control odors and maintain moisture.

Feeding Your Worms

What to Feed

  • Fruit and vegetable scraps.
  • Coffee grounds and filters.
  • Crushed eggshells.
  • Tea bags (ensure they are biodegradable).

What to Avoid

  • Meat, fish, or dairy (attracts pests and creates odors).
  • Greasy or oily foods.
  • Citrus fruits and onion/garlic (can harm worms).

Maintaining Your Vermicomposting Bin

1. Moisture

  • Keep bedding moist but not wet. Add water if it dries out, or mix in dry bedding if it’s too wet.

2. Aeration

  • Turn or fluff the bedding every few weeks to prevent compaction and allow airflow.

3. Temperature

  • Keep the bin in a cool, shaded area between 55°F–77°F (13°C–25°C). Avoid extreme heat or freezing temperatures.

4. Harvesting Compost

  1. After 2–3 months, push the contents of the bin to one side.
  2. Add fresh bedding and food to the empty side, encouraging worms to migrate.
  3. Remove the finished compost after 1–2 weeks.

5. Collecting Worm Tea

  • Drain the liquid from the tray below and dilute it with water (10:1 ratio) to use as a fertilizer.

Common Vermicomposting Problems and Solutions

1. Bad Odors

  • Cause: Overfeeding or too much moisture.
  • Solution: Remove excess food and mix in dry bedding.

2. Worms Escaping

  • Cause: Environment too dry, wet, or hot.
  • Solution: Check moisture, temperature, and bedding conditions.

3. Fruit Flies or Pests

  • Cause: Exposed food scraps.
  • Solution: Always bury food under bedding. Add a layer of dry material on top.

4. Slow Decomposition

  • Cause: Overfeeding or imbalance in greens and browns.
  • Solution: Feed less and ensure a good mix of bedding and scraps.

Using the Finished Compost

  • Mix worm castings into potting soil for houseplants.
  • Add directly to garden beds or sprinkle around the base of plants.
  • Use worm tea as a liquid fertilizer for an extra nutrient boost.

Benefits of Vermicomposting

  1. Reduces household waste.
  2. Produces high-quality compost.
  3. Compact and ideal for small spaces.
  4. Easy to maintain with minimal odor or mess.

FAQs

1. How many worms should I start with?

  • Start with 1 pound (about 1,000 worms) for every ½ pound of daily food scraps.

2. Can I keep the bin indoors?

  • Yes! Vermicomposting bins are odor-free and perfect for kitchens or basements.

3. How long does it take to get compost?

  • Typically, 2–3 months, depending on the bin size, worm population, and amount of waste.

Conclusion

Starting a vermicomposting bin is an easy, sustainable way to recycle organic waste and create nutrient-rich compost. With the right setup and a little maintenance, you can enjoy the benefits of vermicomposting year-round. Happy composting!

Tips for Speeding Up the Composting Process

Composting is an excellent way to recycle organic waste, improve soil health, and reduce landfill waste. However, the process can sometimes take months or even years to fully break down materials, especially if conditions aren’t ideal. Fortunately, there are several ways to speed up composting and get nutrient-rich humus for your garden faster. Here are 9 effective tips to accelerate the composting process.


1. Maintain the Right Balance of Green and Brown Materials

Composting works best when there’s a proper balance between nitrogen-rich green materials (such as kitchen scraps, grass clippings, and coffee grounds) and carbon-rich brown materials (such as dry leaves, cardboard, and straw).

  • How it helps: The right balance of greens and browns provides the microorganisms with the nutrients they need to break down organic matter quickly.
  • Tip: Aim for a ratio of about 3:1 (brown to green) for optimal composting speed.

2. Chop or Shred Larger Materials

Larger pieces of organic matter like branches, fruit peels, or vegetable scraps take longer to break down. To speed up the process, chop or shred larger materials into smaller pieces.

  • How it helps: Smaller pieces provide a larger surface area for microorganisms to break down, speeding up the decomposition process.
  • Tip: Use a compost shredder or simply chop materials with a garden shears or knife.

3. Turn the Pile Regularly

Turning the compost pile helps introduce oxygen, which is essential for aerobic bacteria that break down organic matter more quickly.

  • How it helps: Regularly turning the pile promotes aeration, prevents odors, and speeds up the decomposition process by ensuring bacteria can work efficiently.
  • Tip: Turn the pile once a week or more, especially when the temperature starts to drop or if the pile seems to slow down.

4. Maintain the Right Moisture Level

Composting requires moisture to keep the microorganisms active. However, too much moisture can create anaerobic conditions that slow down decomposition, while too little moisture will cause the pile to dry out and halt the process.

  • How it helps: Moisture activates and sustains beneficial microbes that decompose organic material.
  • Tip: Keep the pile as moist as a wrung-out sponge—damp but not soggy. If it’s too dry, add water; if it’s too wet, add more brown materials to absorb excess moisture.

5. Add Compost Accelerator or Activator

Compost accelerators are commercially available products containing beneficial microbes and enzymes that can help jumpstart the composting process.

  • How it helps: Accelerators introduce or stimulate microorganisms that can speed up decomposition.
  • Tip: You can also create your own “compost starter” by adding some already finished compost to the pile to introduce active microbes.

6. Ensure Proper Pile Size and Structure

The size of your compost pile can affect its temperature and speed of decomposition. A pile that’s too small won’t generate enough heat, while a pile that’s too large can become compacted and lack airflow.

  • How it helps: A pile that is about 3 feet by 3 feet in size is optimal for composting, as it can retain heat and maintain aeration while still breaking down material efficiently.
  • Tip: Keep your compost pile in a manageable size to maintain the right temperature and airflow.

7. Increase the Pile’s Temperature

A hot compost pile breaks down organic material much faster than a cool one. The ideal temperature for composting is between 130°F and 160°F (54°C to 71°C), which is hot enough to encourage microbial activity but not so hot that it kills the beneficial organisms.

  • How it helps: Heat speeds up the process by promoting faster microbial breakdown.
  • Tip: If your pile isn’t hot enough, add more green materials like fresh grass clippings or manure to raise the temperature.

8. Use Aerobic Methods

Using aerobic composting methods, which rely on oxygen-loving bacteria, can significantly speed up the breakdown process compared to anaerobic composting (which takes much longer).

  • How it helps: Aerobic bacteria work faster and more efficiently to break down organic materials.
  • Tip: Avoid compacting the pile, and make sure to aerate it regularly by turning or stirring to introduce oxygen.

9. Avoid Adding Certain Materials

Some materials slow down the composting process or create problems in your pile. Avoid adding large quantities of meat, dairy, fats, and oils, as they can attract pests and slow decomposition.

  • How it helps: By excluding slow-decomposing or problematic materials, you ensure a quicker and more efficient composting process.
  • Tip: Stick to plant-based materials, and if you add any animal products, do so sparingly.

Conclusion

By following these 9 tips, you can significantly speed up the composting process and enjoy richer, healthier soil in a shorter amount of time. Remember that composting is an ongoing process that benefits from attention and care, but with the right techniques, you’ll be able to reduce waste and nourish your garden with nutrient-dense compost in no time.

Natural Additives ways to charge Your Compost

Boosting your compost with natural additives can enhance its decomposition process, nutrient content, and overall quality. These additions can speed up the breakdown of organic matter, improve the balance of nutrients, and provide beneficial microbes that enrich the soil. Here are six natural ingredients to take your compost to the next level.


1. Coffee Grounds

Why They Work:
Coffee grounds are rich in nitrogen, a key component for healthy compost. They also improve the texture of the compost, making it easier to mix.

How to Use Them:

  • Add used coffee grounds in moderation to avoid creating an acidic compost pile.
  • Mix with “brown” materials like dry leaves to maintain a balanced carbon-to-nitrogen ratio.

Pro Tip: Include paper coffee filters—they decompose easily and add more carbon.


2. Crushed Eggshells

Why They Work:
Eggshells provide calcium, an essential nutrient for plant growth. Over time, they also help balance the pH of your compost.

How to Use Them:

  • Rinse and crush the shells to speed up their decomposition.
  • Spread evenly throughout the pile to prevent clumping.

Pro Tip: Don’t worry about the smell—cleaned eggshells won’t attract pests.


3. Wood Ash

Why They Work:
Wood ash is rich in potassium and calcium carbonate, making it a fantastic addition for nutrient enrichment. It also helps neutralize overly acidic compost piles.

How to Use Them:

  • Sprinkle a thin layer of ash occasionally; too much can make your compost too alkaline.
  • Avoid ashes from treated or painted wood, which can introduce harmful chemicals.

Pro Tip: Use wood ash from a natural fireplace or wood-burning stove for the best results.


4. Seaweed and Kelp

Why They Work:
Seaweed and kelp are loaded with micronutrients like magnesium, potassium, and iodine. They also contain alginates, which improve soil structure by helping it retain water.

How to Use Them:

  • Rinse seaweed to remove excess salt before adding it to your compost.
  • Chop or shred it into smaller pieces to speed up decomposition.

Pro Tip: Collect seaweed responsibly and ensure it’s allowed in your area.


5. Banana Peels

Why They Work:
Banana peels are rich in potassium, phosphorus, and other trace minerals essential for plant growth. They break down quickly and release nutrients into the compost.

How to Use Them:

  • Chop banana peels into smaller pieces to accelerate their breakdown.
  • Mix them evenly with other materials to prevent clumping.

Pro Tip: Avoid adding too many peels at once, as they can attract pests if not properly buried in the pile.


6. Manure from Herbivores

Why It Works:
Manure from animals like cows, horses, rabbits, and chickens is a powerhouse of nitrogen and beneficial microbes that jumpstart decomposition.

How to Use It:

  • Add well-aged manure to avoid introducing harmful pathogens. Fresh manure can be too “hot” and damage plants.
  • Mix thoroughly with “browns” to balance the pile and reduce odors.

Pro Tip: Avoid using manure from meat-eating animals like cats or dogs, as it may contain harmful bacteria.


Conclusion

Incorporating these six natural additives into your compost can dramatically improve its quality, nutrient content, and effectiveness. By using coffee grounds, crushed eggshells, wood ash, seaweed, banana peels, and herbivore manure, you’ll enrich your compost and create a valuable resource for your garden. Experiment with these ingredients to find the perfect combination for your composting goals, and watch your plants thrive with the nutrient-packed results!

Indigenous Composting Techniques for Sustainable Farming

Indigenous composting techniques have been practiced for centuries, offering a sustainable way to enrich the soil and promote long-term agricultural health. Rooted in tradition, these methods are environmentally friendly and use locally available resources, making them both effective and accessible. This guide explores various indigenous composting methods and how they contribute to sustainable farming practices.


1. Pit Composting: An Ancient Soil-Enrichment Technique

Pit composting involves burying organic waste in pits dug into the ground, allowing natural decomposition to occur underground.

How It Works:

  • A pit is dug, typically 2–3 feet deep, and organic materials like crop residues, food scraps, and animal manure are added.
  • Layers of soil are added between organic layers to promote microbial activity.
  • After filling, the pit is covered with soil and left to decompose for several months.

Advantages:

  • Retains moisture and nutrients, preventing loss through evaporation or leaching.
  • Keeps pests and odors at bay.

Regions of Practice: Common in semi-arid areas where water conservation is crucial.


2. Vermiculture: Harnessing Worms for Soil Health

Vermiculture, or worm composting, has been a traditional practice in regions of Asia and Africa, where earthworms are used to decompose organic matter.

How It Works:

  • Organic waste is layered with soil in a shallow pit or container.
  • Earthworms like Eisenia fetida (red wigglers) break down the waste, converting it into nutrient-rich worm castings.

Benefits:

  • Produces high-quality compost packed with beneficial microbes.
  • Enhances soil aeration and water retention.

Cultural Use: Widely used in India for small-scale organic farming.


3. Trench Composting: Integrating Waste Directly into Fields

Trench composting involves burying organic waste directly in trenches dug between crop rows, a method favored by indigenous farmers for its simplicity.

How It Works:

  • Trenches are dug in between crop rows, and organic waste is placed directly into them.
  • The trenches are covered with soil, and crops are planted nearby.
  • Over time, the waste decomposes, releasing nutrients directly into the root zone.

Benefits:

  • Reduces labor and transportation of compost.
  • Enriches the soil without additional applications.

Traditional Use: Practiced in regions of Africa and Latin America to maximize crop yield with minimal input.


4. Heap Composting: A Communal Approach

Heap composting, often done in open spaces, is a traditional technique in rural communities where waste from households and farms is composted collectively.

How It Works:

  • Organic waste is piled into heaps and covered with straw, banana leaves, or soil to retain moisture.
  • The heap is occasionally turned to aerate and speed up decomposition.

Advantages:

  • Easy to set up and manage without equipment.
  • Encourages community participation in sustainable waste management.

Cultural Insight: In African villages, heap composting often doubles as a community activity, fostering collective responsibility for soil health.


5. Fukuoka Method: Emulating Natural Decomposition

Inspired by traditional Japanese farming, the Fukuoka method emphasizes no-till farming and natural composting on the field itself.

How It Works:

  • Crop residues, weeds, and organic waste are left on the soil surface as mulch.
  • Over time, this organic layer decomposes, enriching the soil with nutrients.

Advantages:

  • Prevents soil erosion and conserves moisture.
  • Mimics natural ecosystems, reducing human intervention.

Indigenous Practice: Closely aligns with the Chisan Chisui philosophy of Japanese sustainable farming.


6. Indigenous Biochar Composting

Biochar composting, practiced in the Amazon basin as Terra Preta (black earth), combines charcoal with organic waste to create highly fertile soil.

How It Works:

  • Organic waste is mixed with biochar (charcoal produced by burning biomass in a low-oxygen environment).
  • This mixture is composted to form a carbon-rich soil amendment.

Benefits:

  • Improves soil fertility and carbon sequestration.
  • Enhances microbial activity and nutrient retention.

Historical Roots: Terra Preta soils have been used by indigenous Amazonian farmers for thousands of years.


7. Fermented Organic Matter (Indigenous EM)

In many Asian cultures, effective microorganisms (EM) are used to ferment organic matter, creating a fast-acting compost solution.

How It Works:

  • Organic waste is mixed with EM solution and allowed to ferment in an airtight container or pit.
  • The fermented product is added to the soil or diluted with water for use as a liquid fertilizer.

Advantages:

  • Quick composting process (2–4 weeks).
  • Promotes soil microbial diversity.

Regions of Practice: Popular in countries like Japan and the Philippines for rice farming.


8. Livestock Manure Composting: A Traditional Staple

Animal manure composting is a centuries-old practice in indigenous farming systems, particularly in regions reliant on livestock.

How It Works:

  • Manure from cattle, goats, or poultry is mixed with bedding materials like straw or leaves.
  • The pile is turned regularly to ensure even decomposition and reduce pathogens.

Benefits:

  • Rich in nitrogen, phosphorus, and potassium.
  • Reduces waste accumulation on farms.

Traditional Practice: Found in Indian and African farming systems where livestock are integral to the community.


Why Indigenous Composting Techniques are Sustainable

Indigenous composting methods are sustainable because they:

  • Utilize Local Resources: Minimize reliance on synthetic inputs.
  • Support Soil Health: Improve fertility without degrading the land.
  • Reduce Environmental Impact: Recycle organic waste, reducing landfill use.
  • Promote Community Practices: Encourage collaborative efforts and cultural preservation.

How to Incorporate Indigenous Composting into Modern Farming

  1. Learn Local Practices: Understand the traditional methods used in your area.
  2. Adapt Techniques: Modify indigenous methods to suit your farming scale and needs.
  3. Combine Approaches: Integrate indigenous techniques with modern composting tools for enhanced results.
  4. Educate Communities: Share the benefits of these practices with fellow farmers.

Conclusion

Indigenous composting techniques are a treasure trove of sustainable farming wisdom. By adopting these age-old methods, farmers can nurture their soil, reduce waste, and cultivate crops in harmony with nature. Whether you’re a small-scale gardener or a large-scale farmer, these techniques offer valuable insights into eco-friendly agriculture that stands the test of time.

9 Tips for Speeding Up the Composting Process

Composting is a fantastic way to reduce waste and create rich, fertile soil for your garden. However, the process can sometimes take longer than expected, especially if conditions aren’t ideal. Fortunately, there are several tips and techniques you can use to speed up decomposition and get nutrient-rich compost in less time. If you’re looking to speed up your composting process, here are nine effective tips to help you out.


1. Maintain the Right Carbon-to-Nitrogen Ratio

Why It’s Important:
Composting requires a balance of “greens” (nitrogen-rich materials) and “browns” (carbon-rich materials). Too much carbon slows down decomposition, while too much nitrogen can cause your pile to become too wet and smelly. The ideal carbon-to-nitrogen (C) ratio is 30:1, meaning 30 parts carbon to 1 part nitrogen.

How to Speed Up Composting:

  • Add More Greens: If your compost pile is too slow, increase the nitrogen by adding kitchen scraps, grass clippings, or coffee grounds.
  • Add More Browns: If your pile is too wet and doesn’t break down, balance it with dry materials like leaves, cardboard, or straw.

2. Turn the Pile Frequently

Why It’s Important:
Turning your compost pile introduces oxygen, which is necessary for the microbes that break down organic matter. Without oxygen, your compost can become compacted and anaerobic, leading to slower decomposition.

How to Speed Up Composting:

  • Turn Regularly: Aim to turn your compost pile every 2-3 weeks to keep the decomposition process active.
  • Use a Pitchfork or Compost Aerator: These tools make it easier to aerate the pile and ensure that the materials decompose evenly.

3. Shred or Chop Larger Materials

Why It’s Important:
Larger pieces of organic material, like whole leaves or branches, take much longer to break down. Shredding or chopping materials into smaller pieces increases the surface area, allowing microorganisms to break them down faster.

How to Speed Up Composting:

  • Shred Leaves: Use a lawnmower, garden shredder, or hand tools to chop up leaves and larger plant material before adding them to the compost pile.
  • Chop Up Kitchen Scraps: Cutting vegetable scraps, eggshells, and other kitchen waste into smaller pieces helps them decompose faster.

4. Maintain the Right Moisture Level

Why It’s Important:
Moisture is crucial for composting, as it helps keep the microorganisms hydrated and active. Too much moisture can make your compost pile soggy and anaerobic, while too little moisture can slow down microbial activity.

How to Speed Up Composting:

  • Moisture Level: Aim for the compost to be as damp as a wrung-out sponge — not too dry, not too wet.
  • Water as Needed: If the pile is too dry, add water to it, especially in dry climates. If it’s too wet, add more carbon-rich materials (like dry leaves or straw) to help absorb excess moisture.

5. Use a Composting Accelerator or Activator

Why It’s Important:
Composting accelerators are products that contain beneficial bacteria, fungi, and enzymes that help break down organic material more quickly. They can speed up the decomposition process, especially if your pile is sluggish.

How to Speed Up Composting:

  • Add a Compost Accelerator: These are available in both liquid and granular form and can be found at most garden centers.
  • Look for Natural Activators: Many gardeners use natural ingredients like comfrey, alfalfa, or seaweed as compost accelerators. These materials provide extra nutrients to the microbes in your pile.

6. Keep the Pile Warm

Why It’s Important:
Microbial activity speeds up in warmer temperatures, so keeping your compost pile warm can drastically speed up the decomposition process. A well-maintained compost pile can reach temperatures of 130-160°F (54-71°C), where decomposition happens most efficiently.

How to Speed Up Composting:

  • Insulate the Pile: In colder climates, consider insulating your compost pile with straw bales or placing it in a compost bin to retain heat.
  • Monitor Temperature: Use a compost thermometer to ensure the pile stays within the ideal temperature range for composting.

7. Use a Compost Tumbler

Why It’s Important:
Compost tumblers are enclosed bins that make it easy to turn your compost. The mechanical turning helps oxygenate the pile, promotes even decomposition, and speeds up the process.

How to Speed Up Composting:

  • Turn Regularly: With a compost tumbler, you can turn your pile every 2-3 days, which helps aerate it and prevent compaction.
  • Aerate the Pile: Tumblers also allow for better oxygen circulation, which helps accelerate microbial activity.

8. Add Manure to the Pile

Why It’s Important:
Animal manure, especially from herbivores like cows, chickens, and horses, is rich in nitrogen and beneficial microorganisms that can jump-start the composting process. Manure acts as a natural accelerator and helps balance the carbon-to-nitrogen ratio.

How to Speed Up Composting:

  • Add Fresh Manure: Mix fresh manure into your compost pile, but be sure to use it in moderation, as too much can make your pile too hot or smelly.
  • Compost with Caution: Ensure that manure is well-composted before using it in your garden, as fresh manure can burn plants.

9. Keep the Pile Aerated

Why It’s Important:
Aeration is key to speeding up decomposition. Without enough oxygen, the compost pile can become anaerobic, leading to unpleasant odors and slow breakdown. Proper aeration helps create the ideal environment for beneficial microbes to thrive.

How to Speed Up Composting:

  • Use a Compost Aerator: This tool allows you to poke holes in the pile, helping air reach the center.
  • Add More Air: If your compost pile is dense or compact, manually fluff it up by turning it or mixing it with a pitchfork to improve airflow.

Conclusion

Speeding up the composting process requires a combination of the right ingredients, the proper conditions, and regular maintenance. By following these nine tips — balancing your carbon-to-nitrogen ratio, turning your pile frequently, chopping up materials, and maintaining the right moisture and temperature — you can create nutrient-rich compost more quickly. With these strategies in place, you’ll have healthier soil and a thriving garden in no time!