Vermicomposting is a fantastic way to recycle kitchen scraps and other organic materials into rich, nutrient-dense compost using red worms. It’s simple, eco-friendly, and perfect for small spaces like apartments or urban gardens. Here’s a step-by-step guide to setting up and maintaining your own vermicomposting bin.
What is Vermicomposting?
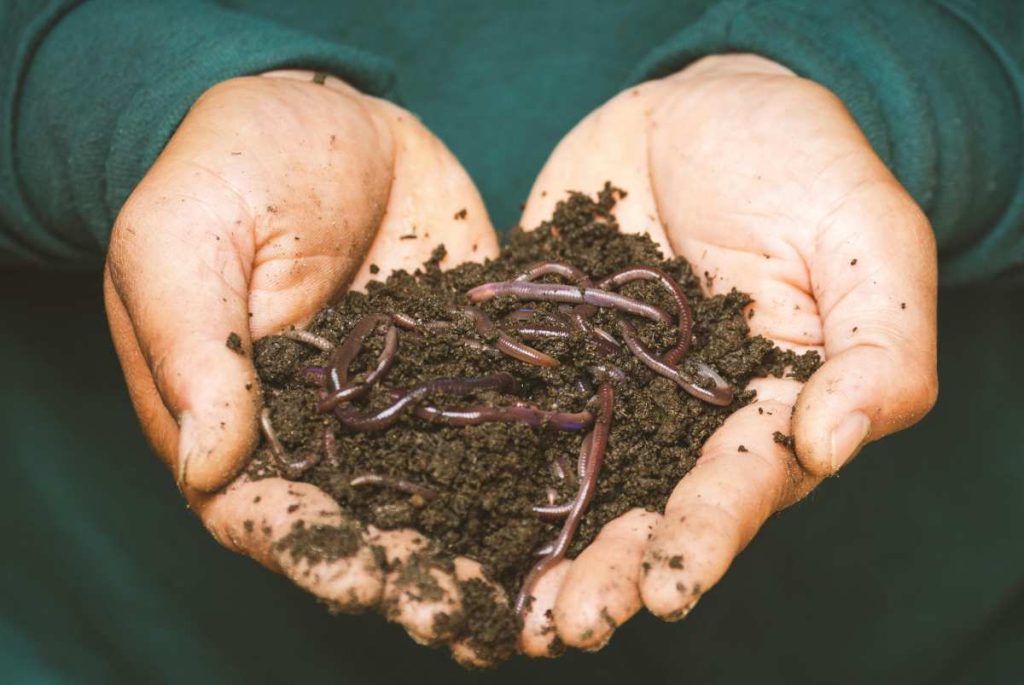
Vermicomposting uses red worms (typically Eisenia fetida) to break down organic waste into castings, which are nutrient-rich fertilizers. It’s an odor-free, compact system that can be kept indoors or outdoors.
What You’ll Need to Start
1. A Composting Bin
- Material: Plastic or wood.
- Size: A bin about 8–12 inches deep works well for most beginners.
- Lid: Ensure it has a lid to retain moisture and keep pests out.
2. Bedding Material
- Shredded newspaper, cardboard, coconut coir, or dried leaves.
3. Red Worms
- Opt for Eisenia fetida (red wigglers), as they thrive in composting environments.
4. Food Scraps
- Vegetable peels, fruit scraps, coffee grounds, and eggshells (crushed).
5. Optional Tools
- A moisture meter or spray bottle to manage moisture levels.
- Gloves or a small garden fork for turning the bin.
Setting Up the Vermicomposting Bin
Step 1: Prepare the Bin
- Drill holes in the sides and bottom of the bin for ventilation and drainage.
- Place a tray or pan beneath the bin to collect excess liquid (worm tea).
Step 2: Add Bedding
- Fill the bin about halfway with shredded paper, coconut coir, or leaves.
- Dampen the bedding material with water until it’s moist but not soggy.
Step 3: Introduce the Worms
- Spread the worms evenly over the bedding. Let them burrow naturally to escape light.
Step 4: Add Food Scraps
- Bury small amounts of food scraps in the bedding.
- Rotate feeding spots to avoid attracting pests or creating an imbalance.
Step 5: Cover with More Bedding
- Add a thin layer of damp bedding on top to control odors and maintain moisture.
Feeding Your Worms
What to Feed
- Fruit and vegetable scraps.
- Coffee grounds and filters.
- Crushed eggshells.
- Tea bags (ensure they are biodegradable).
What to Avoid
- Meat, fish, or dairy (attracts pests and creates odors).
- Greasy or oily foods.
- Citrus fruits and onion/garlic (can harm worms).
Maintaining Your Vermicomposting Bin
1. Moisture
- Keep bedding moist but not wet. Add water if it dries out, or mix in dry bedding if it’s too wet.
2. Aeration
- Turn or fluff the bedding every few weeks to prevent compaction and allow airflow.
3. Temperature
- Keep the bin in a cool, shaded area between 55°F–77°F (13°C–25°C). Avoid extreme heat or freezing temperatures.
4. Harvesting Compost
- After 2–3 months, push the contents of the bin to one side.
- Add fresh bedding and food to the empty side, encouraging worms to migrate.
- Remove the finished compost after 1–2 weeks.
5. Collecting Worm Tea
- Drain the liquid from the tray below and dilute it with water (10:1 ratio) to use as a fertilizer.
Common Vermicomposting Problems and Solutions

1. Bad Odors
- Cause: Overfeeding or too much moisture.
- Solution: Remove excess food and mix in dry bedding.
2. Worms Escaping
- Cause: Environment too dry, wet, or hot.
- Solution: Check moisture, temperature, and bedding conditions.
3. Fruit Flies or Pests
- Cause: Exposed food scraps.
- Solution: Always bury food under bedding. Add a layer of dry material on top.
4. Slow Decomposition
- Cause: Overfeeding or imbalance in greens and browns.
- Solution: Feed less and ensure a good mix of bedding and scraps.
Using the Finished Compost
- Mix worm castings into potting soil for houseplants.
- Add directly to garden beds or sprinkle around the base of plants.
- Use worm tea as a liquid fertilizer for an extra nutrient boost.
Benefits of Vermicomposting
- Reduces household waste.
- Produces high-quality compost.
- Compact and ideal for small spaces.
- Easy to maintain with minimal odor or mess.
FAQs
1. How many worms should I start with?
- Start with 1 pound (about 1,000 worms) for every ½ pound of daily food scraps.
2. Can I keep the bin indoors?
- Yes! Vermicomposting bins are odor-free and perfect for kitchens or basements.
3. How long does it take to get compost?
- Typically, 2–3 months, depending on the bin size, worm population, and amount of waste.
Conclusion
Starting a vermicomposting bin is an easy, sustainable way to recycle organic waste and create nutrient-rich compost. With the right setup and a little maintenance, you can enjoy the benefits of vermicomposting year-round. Happy composting!


