How to Create a Backup Plan for Chicken Emergencies

Keeping chickens is not only a rewarding hobby but also a commitment that comes with various responsibilities, especially when it comes to their health and safety. Emergencies can arise unexpectedly, ranging from health issues and natural disasters to accidents and supply chain disruptions.

To ensure the well-being of your flock, creating a comprehensive backup plan is essential. Here’s an in-depth guide to help you prepare for chicken emergencies effectively, ensuring that your chickens remain safe and healthy.

1. Assess Potential Risks

The first step in creating a backup plan is to conduct a thorough assessment of the potential risks that could impact your chickens. Understanding these risks allows you to tailor your emergency strategies accordingly. Here are some common emergencies to consider:

  • Health Issues: Chickens can be susceptible to various diseases, parasites, and injuries. Common ailments include respiratory infections, coccidiosis, and mites. Outbreaks can happen unexpectedly, leading to significant health problems within your flock.
  • Environmental Hazards: Extreme weather conditions, such as heatwaves, heavy rain, snow, or cold spells, can threaten your chickens’ safety. Additionally, predators like raccoons, hawks, or stray dogs can pose a risk, especially during nighttime or in vulnerable conditions.
  • Natural Disasters: Floods, fires, earthquakes, or severe storms can disrupt your chicken’s habitat, leading to the loss of shelter and food sources. Knowing the natural disaster risks in your area can help you prepare accordingly.
  • Food Supply Disruptions: Shortages of feed or clean water can occur due to supply chain issues, market fluctuations, or increased demand. In a pinch, having alternative sources of nutrition or emergency feed stored can be a lifesaver.

By understanding these risks, you can develop a more tailored and effective emergency plan for your chickens.


2. Establish an Emergency Contact List

An emergency contact list is crucial for a swift response during a crisis. Compile a list of important contacts that may need to be reached during an emergency, including:

  • Veterinarian: Identify a veterinarian who specializes in poultry or has experience with chickens. Having their contact information readily available can save precious time during health emergencies, ensuring your chickens receive prompt care.
  • Local Animal Control: For issues related to predators or stray animals, knowing who to call can help protect your flock. Many local animal control agencies can assist in managing wildlife threats.
  • Neighbors or Friends: Identify nearby neighbors or friends who can assist in an emergency, especially if you’re unavailable. Having a trusted friend or neighbor who understands chicken care can make a significant difference.
  • Local Feed Suppliers: Keep a list of local feed suppliers to ensure you can quickly access food and supplies when needed. Establishing a good relationship with suppliers can also provide insights into future supply chain issues.

Make sure this contact list is easily accessible, perhaps on your phone or posted in a prominent place in your coop, and share it with anyone involved in your chickens’ care.

3. Create a Health Care Plan

Developing a comprehensive health care plan is crucial for managing potential health emergencies. This plan should include:

  • Routine Check-Ups: Schedule regular veterinary visits to keep your flock healthy and catch any potential issues early. Regular check-ups can help identify problems before they become serious.
  • Vaccination Schedule: Stay updated on vaccinations necessary for your chickens, such as those for Marek’s disease, avian influenza, or Newcastle disease. Consult with your veterinarian to establish a vaccination schedule based on your flock’s needs.
  • First Aid Kit: Assemble a chicken first aid kit that includes essential items like antiseptic, bandages, and medications for common issues (e.g., electrolytes for dehydration, antibiotics for infections). Familiarize yourself with how to use these supplies effectively.
  • Signs of Illness: Educate yourself on the common signs of illness in chickens, such as lethargy, changes in appetite, respiratory issues, or abnormal droppings. Early detection can lead to more effective treatment and recovery.

By having a proactive health care plan, you can minimize the impact of health emergencies on your flock and ensure that they receive timely care when needed.


4. Prepare for Environmental Hazards

Environmental hazards can pose a significant risk to your chickens, so it’s important to prepare accordingly:

  • Shelter: Ensure that your chicken coop is sturdy and weather-resistant. Inspect it regularly for any potential vulnerabilities, such as leaks or weak points that could allow predators to enter. Reinforce the coop and run as needed.
  • Ventilation: Proper ventilation is crucial to prevent overheating during hot weather. Ensure that your coop has adequate airflow while still providing protection from predators. Consider installing adjustable vents that can be opened or closed based on the weather conditions.
  • Predator Prevention: Install sturdy fencing around your chicken coop and run. Use buried fencing to prevent digging and consider adding motion-activated lights or sound devices to deter predators. Regularly inspect the area around your coop for signs of predator activity and make necessary adjustments.
  • Emergency Shelter: Consider having a temporary shelter or portable coop on hand that can be quickly set up in case of extreme weather or a predator threat. This shelter can be made from easy-to-assemble materials and should be lightweight for easy transport.

Taking these proactive steps will help safeguard your chickens from environmental dangers and ensure they have a secure living space.


5. Plan for Food and Water Supply

A reliable food and water supply is essential for your chickens’ well-being, especially during emergencies. Consider the following:

  • Stock Up on Supplies: Keep an emergency stockpile of chicken feed and clean water. A general rule of thumb is to have at least a week’s worth of feed stored, as well as several gallons of fresh water. This can be especially important during natural disasters when access to supplies may be limited.
  • Water Sources: Ensure you have backup water sources, such as large containers, buckets, or rain barrels, to provide water in case of supply interruptions. Regularly check and clean water sources to prevent contamination and ensure they are filled during emergencies.
  • Feeding Schedule: Maintain a consistent feeding schedule to ensure your chickens are well-nourished. Familiarize yourself with the amount of feed your flock requires daily, taking into account factors like age, breed, and production needs (e.g., layers vs. broilers).
  • Alternative Nutrition Sources: Consider keeping alternative sources of nutrition, such as grains, kitchen scraps (vegetable peels, grains), or even sprouted seeds, to supplement their diet in case of feed shortages.

By planning for food and water supplies, you will keep your flock healthy and well-nourished during emergencies.


6. Create an Evacuation Plan

In the event of a natural disaster or other emergencies, having an evacuation plan is crucial. Consider the following steps:

  • Identify Safe Locations: Determine where you could relocate your chickens in case of an emergency. This could be a friend’s farm, a neighbor’s property, or an emergency shelter designated for livestock.
  • Transportation: Have a means of transport ready, such as carriers or crates, to safely transport your chickens if needed. Make sure these are easily accessible and familiar to your birds to reduce stress during transport. Practice loading your chickens into these carriers to make the process smoother in an emergency.
  • Practice Evacuation Drills: Conduct practice drills to ensure that you and anyone helping you can quickly and efficiently evacuate the chickens. This will help reduce panic and confusion during a real emergency.
  • Emergency Supplies: Prepare an emergency kit that includes food, water, and necessary health supplies for your chickens during evacuation. Having these essentials on hand will make the transition easier.

An effective evacuation plan will ensure the safety of your flock during emergencies and provide peace of mind knowing you’re prepared.


7. Document Important Information

Keeping a record of important information related to your chickens can assist in emergencies. This documentation can include:

  • Health Records: Maintain records of vaccinations, health check-ups, and any medications administered. This information will be useful for your veterinarian if issues arise and can help streamline treatment.
  • Contact Information: Keep a list of all emergency contacts and their roles in your backup plan. This will streamline communication during a crisis, ensuring everyone knows their responsibilities.
  • Feeding and Care Instructions: Document feeding schedules, dietary needs, and care instructions to share with anyone who may need to care for your chickens in your absence. This can be especially helpful for neighbors or friends stepping in during emergencies.
  • Emergency Procedures: Write down detailed emergency procedures, including steps to take for various situations (e.g., disease outbreaks, natural disasters). Share these procedures with your emergency contacts.

Having organized documentation will facilitate quick decision-making during emergencies and help maintain the care standards for your chickens.

8. Stay Informed and Educated

Continuously educate yourself about chicken care and emergency preparedness. This ongoing education can help you feel more equipped to handle any situation. Consider the following approaches:

  • Researching Best Practices: Read articles, books, and join online forums or local groups focused on chicken care and emergency management. Understanding the latest research and best practices can enhance your preparedness.
  • Attending Workshops: Participate in workshops or webinars related to poultry health, emergency preparedness, and sustainable farming practices. Learning from experts in the field can provide valuable insights and practical strategies.
  • Networking: Connect with other chicken owners to share experiences and strategies for managing emergencies effectively. Joining local poultry clubs or online communities can foster a sense of support and resource sharing.
  • Emergency Training: Consider training courses in basic animal care, first aid, and emergency response. This knowledge can significantly enhance your ability to handle emergencies with confidence.

Staying informed will empower you to respond to emergencies confidently and efficiently, ensuring the health and safety of your chickens.


Conclusion

Creating a backup plan for chicken emergencies is essential for the health and safety of your flock. By assessing potential risks, establishing an emergency contact list, developing a health care plan, preparing for environmental hazards, and documenting important information, you can mitigate the impact of unforeseen circumstances. Staying informed and educated about chicken care will further strengthen your ability to respond to emergencies. With a solid backup plan in place, you can ensure that your chickens thrive, no matter what challenges arise.

Shrimp Farming 101 – The Art of Shrimp Cultivation, Culture & Harvesting

Curious to know about Shrimp Farming?

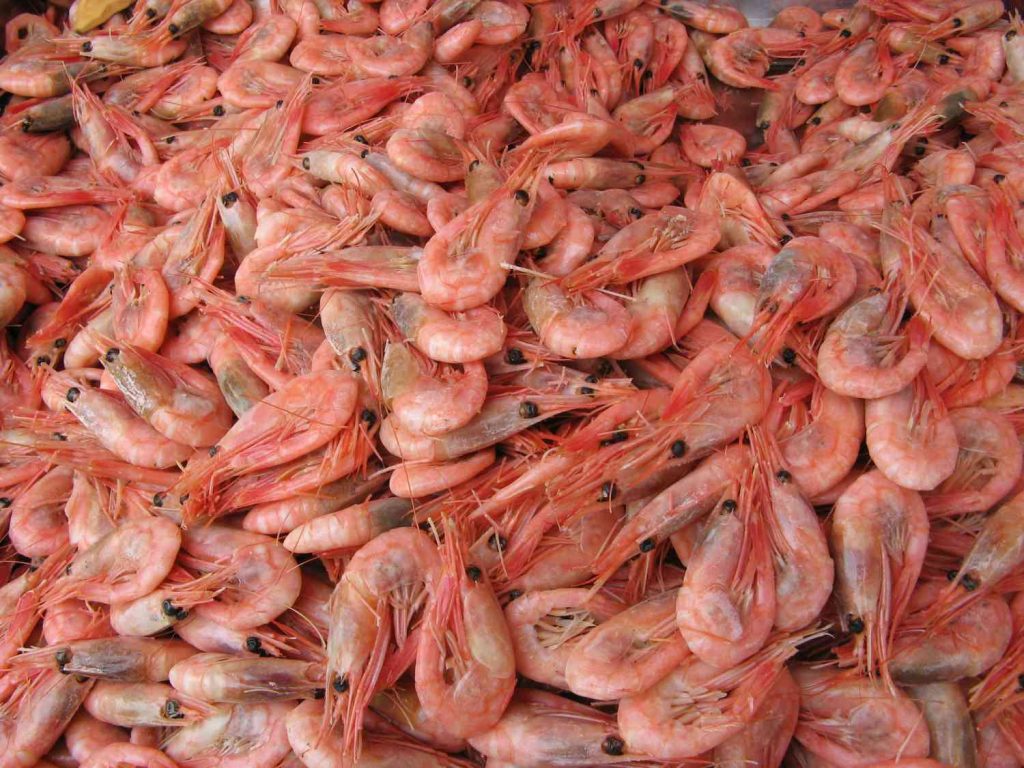
First of all, let’s understand the term. Shrimp means Prawns. So, shrimp farming is a marine farming culture where prawns are produced for public utilization.

The evolution of shrimp farming began in the early 70’s, gradually made its roots to meet the rapidly increasing demand of Japan, Europe, and the United Nations. Then spread its wing all over the world.

Now emerged as a flourishing opportunity to grow heaps and bound. But at the same time, a lot of norms have been set due to concurrent pressure from NGO’s. Altogether it is a profitable business option.

How to start shrimp farming?

Here we will provide a complete shrimp farming guide to you. With, the trending requirement for shrimp, in today’s era shrimp farming is on the boom. It allures the new business entrants to get into this because of its high profitability.

 With gaining fame in the food industry shrimp rearing is at it’s peak these days. Apart, from fish and duck culture, shrimp culture is crazily rising because of the market demand. 

To start with you should possess a pond. If you don’t have one no need to get disheartened. It can be acquired on lease. The pond should be of at least 1500 square feet area having a depth of 5 feet. Now let’s go through shrimp farming guide, to get a clear picture of it.

Brief about pond culture

As we know the shrimp farming culture is very old, but still, after so much development, the traditional and old practices are having a stronghold in shrimp rearing. Apart from low monetary investment, they are splendid money catching source.

To increase the production a few practices, need to be incorporated like fixing the pond size, expanding stock quantity, elation, etc. These simple tricks can act as a cherry on the cake.

Essentials for the site:

The basic element for a perfect startup is an adequate size place for raising shrimps. So, the location has to be a perfect one with an abundant water supply. Always keep in mind, commutation from your farm to the market area should be lesser. 

This helps to save on transportation costs, plus the stock reaches the market in no time. One more thing also check if the place has a good road network as it is the economical way to reach out.

Selection of Breed

To compete, you need to be among the smartest of the smarter. While selecting a breed for shrimp farming, you just need to keep it simple. A rapidly growing fry is easy to maintain with fewer effort. Grow faster and ready to sell. This will surely, yield more profits.

Methods of Shrimp Farming

Traditional Method:

In this style of farming, the pond is erratic and uneven. Size is generally, 10-20 m in width, and depth is 30-60 cm. It is the eldest and simple practice adopted for shrimp rearing culture. Mainly it has a dependency on the season. Shrimps in these ponds find their way through water exchange or fry collected by the farmers.

Improved Traditional Method:

The contour of the pond is fixed to a rectangular shape. There are separate inlets and outlets for the water, pond exchange and to facilitate harvesting. There is a provision of a diagonal pitch to allow easy water drainage and shrimp collection. Surely this method is better than the typical traditional method and results in high yield also.

The Intensive Culture Method:

Among all this is the most trending and better technique to be adopted, resulting in huge monetary and technical gains. Concrete tanks are used, totally rely on the bred fry. The drainage system is more sophisticated with high water management. This is a modern applied technique for greater and consistent yield.

Preparing the pond for shrimp farming

For raising shrimp, the soil beneath the pond is a deciding factor. Like higher the organic content in the soil, the higher would be the production. Yield is directly proportional to the soil content which serves as food for the organisms. So, it is the base step for a better productivity rate. The following steps is a part of this process:

Sampling:

Before starting an analysis of the soil is to be made. For this small soil samples are collected from the pond and their PH value is evaluated. The acidic soil needs to be corrected to promote shrimp farming.

It is not a valid process for finely built ponds. Wet soil samples are collected for a better analysis. Or it can be simply done by the use of a PH meter detector by the farming himself.

Leaching:

It is the cleaning of the pond bottom by wiping out the acidic water to remove all the unwanted elements including metallic elements present in the acidic water, highly injurious for shrimps. 

Drying the pond:

The process of drying is adopted to get rid of the water minerals if left after leaching. This promotes organic life. After a few corrective measures should be adopted like pond leveling, repairing the gates, bottom trench, installing proper substrates.

Tilling:

Ploughing facilitates the unveiling of soil components lying deep inside. The soil gets a chance to breathe and a new layer of soil gets formed ensuring better productivity in the future

Keeping a check on unfriendly species:

A lot of competition lies in marine life as well. Crabs, snakes, finfishes and other marine creatures can cause a threat to shrimp farming. It is highly recommended to curb them through various corrective measures

Must Read: Tilapia Fish Farming Information And A Complete A to Z Guide

Liming:

To nullify the acidic effect of the soil, Calcium and, Magnesium compounds are induced in the soil during the drying phase.

Fertilization:

This is a basic procedure to increase shrimp productivity by adding some sort of fertilizers to the soil, both organic and inorganic.

Supply of shrimp:

The main source of shrimp is from the wild. Though can be transported through hatcheries too. Either they are obtained through trapping from the ponds or by fry grounds. 

For collection through wild: fry lure, scissor nets, fry traps are used. The hatchery is a bigger and major source to extract shrimps. As they are available at any point of time throughout the year.

To translocate shrimps, plastic bags, fiber glass or canvas tanks are used. The only thing to be kept in mind while relocating is the water temperature should be low by placing some ice in these containers.  

Types of shrimp farming

Bio floc Shrimp Farming:

It is aimed at restricting the outbreak of bacterial infection during rearing. It is eco-friendly as it aims at maintaining a balance between carbon and nitrogen in the water throughout the process.

Freshwater Shrimp Farming:

To hold freshwater shrimps we need solid tanks, earthen ponds, or cages. They are extracted from nurseries or freshwater and made to rest in open water. It is a lengthy and time-consuming process.

Output

The profitability of the shrimp rearing is reflected through the high production, less investment of money, high profits earned, and the market price. This in turn is proportional to some factors narrated below:

Fry nursing:

The core cause behind shrimp fatality is mal handling. During translocating them you should be a bit careful. To avoid such a situation the baby fry is initially stocked in nurseries for about a month and then shifted to respective ponds. Let’s understand this.

The nursing of fry can be executed in concrete tanks. These tanks are repleted with fresh and clean seawater, induced with certain minerals to keep up the water quality. It is generally, beneficial to use plastic netting to widen the area a bit as the tiny larvae are in a habit to cling to the corner and bottom tank area.

When nursing through ponds, a fine transparent sheet or screen has to be placed to curb the entry of other organisms fatal for the larva. A net cage can also be used to stock fry, which keeps on floating in the water because of the wooden frame as a base.

Also Read: Biofloc Fish Farming – A Complete Guide

What do shrimp eat?

The market is flooded with a lot of nutritious food for shrimps, a bit expensive. This is the reason the small farmers could not afford them. But this is no more a reason to worry.

A protein-rich diet can be prepared at home by using cow dung with some almonds and corn added to it. This can be given thrice a day to the shrimps. Therefore, what do shrimps eat is not a big issue anymore.

Disease and Cure

Some of the diseases that are a threat to shrimps are White Spot Syndrome Virus, Yellowhead Disease Virus, Taura Syndrome Virus, Infectious Hypodermal and Haematopoietic Necrosis Virus, and Vibrio Harveyi. Perfect water quality should be maintained to avoid these types of diseases.

Harvesting

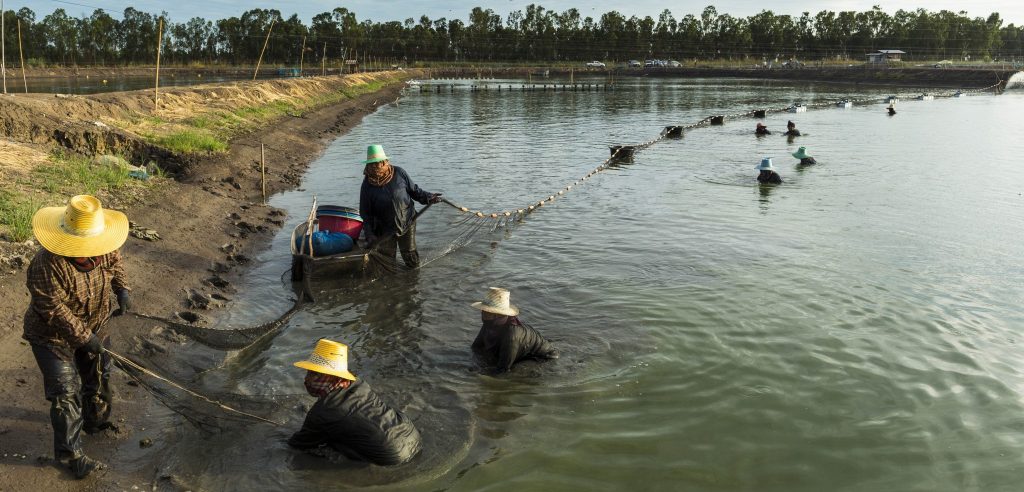
Market demand and price are also deciding factors for harvesting apart from shrimp condition. A cast net is used to trap fry according to their weight, shape, and size. This is a must to note that at the time of harvest, the shell size should be around 5% in water.

The harvesting should be done after a week if the shrimp has gained 30 grams of weight. Those shrimps collected should be stored in cold storage or sent for processing within 10 hours of harvesting time. It is advisable not to harvest shrimp at the time of molting as they have soft shells which fetch a low price.

Tips to increase the rate of shrimp farming

With the evolution of time, shrimp farming has gained popularity. More farmers are attracted to it. But it is a challenge to increase productivity, and still, people are looking for ways to increase productivity.

Below are some ways to increase shrimp farming:

  1. Ensuring a high protein diet: Actually, it is very essential to give a highly nutritious and protein-rich diet to the shrimps. The resultant is a healthy and fast grown-up shrimp. Qualitative care is a must to get higher yields.
  2. Expert management: High-level expertise is needed to monitor shrimp growth. To expand the production rate, rigorous efforts have to be put in.
  3. Water management: Fix water level needs to be maintained, with quality on priority. If the water quality is compromised, shrimps won’t grow well. Continuous cleaning and flushing of contaminated water should be done to ensure healthy shrimps.
  4. Adding good supplements to diet: There is an ample number of supplements flooded in the market. If you can’t afford them, you can prepare one for yourself. Rice mill sweeps, corn, wheat, and animal protein can be added to the diet.
  5. Proper air supply should be there. Fresh and atmospheric air is important for shrimps.

Is shrimp farming profitable?

After going through the facts and figures narrated above, you must have got a complete analysis of how to proceed in this direction. Now, the main thing of concern is, whether to get yourself engaged in this field or not? You must be glad to know, in today’s era this is a hot trendy business.

 Apart from non-vegetarian food, even sea-food has gained importance in these past years. People are more attracted to this. This is why shrimp farming is a flourishing market. To rule the market, you just need to careful regarding certain points mentioned above. You can be the king here. This will surely earn you high profits as it has huge market demand. 

Go ahead with your own shrimp farming business and make more riches.

Tilapia Fish Farming Information And A Complete A to Z Guide

These days, tilapia is among the most popular fish for cultivation. People are doing tilapia farming even on their farms for thousands of years now. It is considered a very successful, profitable small-scale business, and you can of course make it a large-scale one with time.

If you are patient and at the same time, dedicated, this business can completely change your life for good. Flexibility is one of the biggest highlights of the tilapia farming business, as there are various cultivation methods you can opt for. Here we are discussing one of the most productive cultivation processes.

How to set-up a tilapia fish farm

Having various sizes and shapes of tanks and ponds can be immensely helpful, especially in the beginning. It will help you to manage water properly. Your tilapia fish farm must be equipped with different types of fish containers and a proper drainage system. And providing fish with high-quality, fresh food will also ensure proper and timely growth of fishes.

Is tilapia farming profitable?

The answer is “yes”. As we have discussed earlier, it is one of the most profitable farming businesses. Intensive and hyperactive intensive are the two most common types of breeding that are preferred for business purposes.

Different types of tilapia species

You can discover tilapia in estuaries, ponds, watercourses, lakes, marine habitats, and other seafaring conditions. They love tropic conditions with 25-30 degrees Celsius as optimum temperature for growth. A few varieties can even tolerate as low temperatures as 8 or 9 degrees Celsius.

NAMEDESCRIPTIONREASON/WEATHER
Nile TilapiaOne of the oldest species from Egypt. Gain approximately 1 to 2 pounds in five to seven months.Can be found anywhere in fresh lake water
Blue TilapiaGain 2 to 4 pounds in 12 monthsPart of Asia, USA, Middle East, and Northern Africa. Grow even in cold temperatures. Fresh and saltwater are suitable for their growth
Mozambique TilapiaAn average weight of 2 pounds in 1 yearCan’t survive cold or salty water
Mono-sex TilapiaHybrid, one of the most suitable species for tilapia farming, capable of growing at very good speed for a couple of years.Found in India, USA, Bangladesh, and South Africa  
RendalliUsually herbivorousOne of the most preferred species for aquaponics industry
‘Abbassa’ and ‘Akosomb’Very unique hybrids of Nile TilapiaCan grow 30% faster
AndersoniiA small-headed Species with the best taste among all tilapiasGrow decently in cold-water culture

Let’s start our guide to properly grow tilapia

Here are all the basic as well as advanced things related to tilapia farming for beginners. If you can understand all these points in a quick time, you can become a very successful tilapia farmer within a couple of years. We have tried to cover “everything” from the beginning to the end, let’s learn the basics first.

Where you can grow tilapia fish

As already discussed, tilapia fish can survive and grow in almost every condition including cages, raceways, fish ponds, and tanks, etc. Residential producers are even using trash cans for raising tilapia!

But if you want to maximize your productivity, you should arrange a set of few ponds or tanks. Depending on your budget, you can start with 8 to 12 tanks, and can of course increase the number with time.

How long tilapia takes to grow

Most of the tilapia species grow in 32 to 34 weeks i.e. about eight months, and the average weight of fully-grown tilapia is 450 to 600 grams. Though, farming of tilapia and hence, growth of tilapia depends on a lot of factors including care, atmospheric conditions, and food, etc.

How to maximize your profit

Securing the profit should be the priority in the beginning. And you also have to identify the challenges related to raising tilapia. Here are some of the most common causes of failures in commercial tilapia farming.

Lack of nutrition: Usually, people either ignore the importance of proper, healthy, and timely feeding or they are unaware of nutrition according to age. We will discuss the proper nutrition for tilapia later.

Too many fingerlings: Female tilapia is known for reproducing a lot of eggs. It is capable of spawning about 200 to 1000 eggs every 4 to 6 weeks, and that can create an unwanted situation for you! Can you afford them to feed or to grow? As a solution, you can opt to raise only male tilapias which are known as the Mono-sex tilapia farming method.

Problems related to marketing – Most of the farmers get affected by this problem. As the growth rate of tilapia is very good, you may suffer from incomplete selling. So, you need to identify the species of tilapias with rather slow growth stages.

Let’s assume that, you are doing tilapia farming backyard. Now, they need enough food and spices. You are feeding them continuously, and they are not growing as they are supposed to. The food you are wasting is obviously being wasted. So, what can you do differently? Here are the answers

Don’t compromise with the quality of nutrients and water – Never!

For any species of fish, water is almost everything. They simply can’t survive without water! And for healthy survival, unlike most of the other species, tilapia can also survive in dirty water. But, as a farmer, you won’t want to grow poisonous fishes in your firm. Dirty water is usually full of bacteria, pathogens, viruses, and other infectious organisms. These organisms can make fishes harmful, even poisonous for humans. So, always try to fill your ponds and tanks with fresh water to ensure proper and healthy growth of tilapia fishes.

Nutrition is another very important aspect of tilapia fish farming at any scale. Here is a general diet chart for tilapia. You can divide the amount of food required with serving time. It will also help you to avoid wasting food.

Assumed fish sizeAmount of food per fish/per dayApproximate time after stokingTimes a day
5-40 g1g1-2 month3-4
40-100g2-3g2-3 months3-4
100g-400 g3-4 g/fish3-5 months3
400+4-5 g/fish5 months+3

Designing a pond for tilapia farming (Circular container)

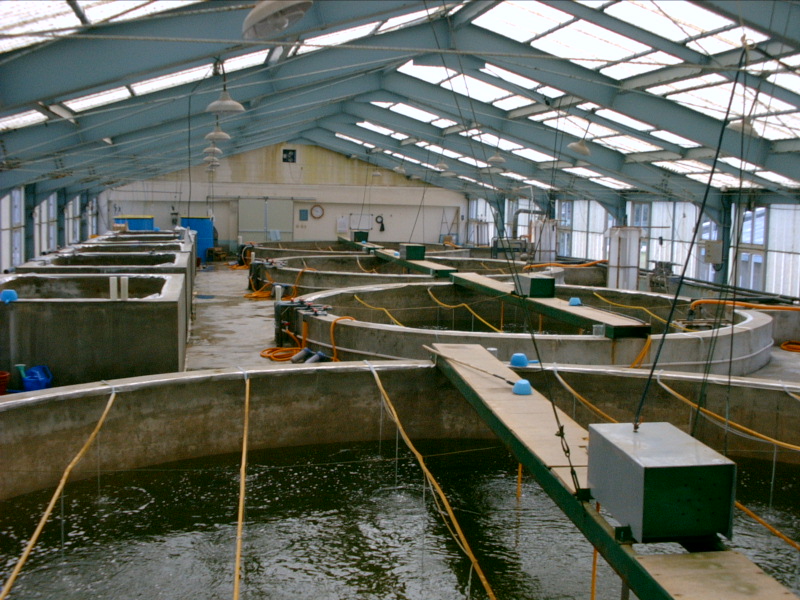
Ideally, you will need eight ponds/circular tanks to start farming of tilapia. There are two different types of aeration generally in the cultivation system – horizontal and vertical. The initial vertical aeration should be from the bottom to the surface. The aeration is usually provided by an apparatus.

You will start seeing the fishes properly once they weight 45 grams. So, at the beginning of tilapia farming in tanks, you can easily store 170 to 200 tilapia fishes in each cubic meter of water. It means, around 15 thousand fishes per pound! In the second stage, you will be able to keep 85 to 100 fishes per cubic meter. And that’s when the horizontal aeration is preferred.

Tilapia Fish Harvest

Divide the container properly for better production

If you want to increase the growth of tilapia for commercial cultivation, dividing the container is a good idea. Suppose, you have eight containers for tilapia farming, you can have an uninterrupted production in four of them. So, it won’t be a huge challenge to steer profit almost every month. Start using half of the tanks then add another half in the next month, and so on. If you are aiming to increase the number of tanks/ponds, you should still proceed according to the multiples of four.

In the case of farming of tilapia, feeding is the most important aspect of growth, and ultimately, benefits. Commercial farming of tilapia doesn’t need external aeration systems. It will be enough if you can manage efficient water exchange whenever needed. To avoid uncontrolled reproduction, you should go for monosexual tilapia instead of mixing males and females.

Standard size for ponds and tanks

Whether you are doing tilapia farming in tanks or ponds, you should take care of the standard size. A standard pond for tilapia is 20×40 meters with 1.20 meters of depth. It can easily store 960 cubic meters of water.

But,

If you raise 10 tilapias in each cubic meter of water, the pond will store 9600 fishes at a time. And you need to maintain the balance while feeding! According to an estimation, 1.7 kilograms of food will convert into a harvest of one kilogram of meat. And the average weight of a commercial tilapia is 500 to 600 grams! And a standard pond will produce 4800 kilograms of meat. It means, 9600 tilapia fishes can give you 4800-5500 kilograms of selling product!

NOTE: The average weight of an adult tilapia is 1 kg to 4 kg. And it requires 2 to 3 years to achieve adulthood!

Raising tilapia in bio floc

Tilapia fish farming in bio floc is also a wonderful idea, as they can easily adapt to bio floc systems. In this system, you will have to use minimum water, and add a lot of dense microbial populations to ponds. Adjusting the carbon-nitrogen ratio (C: N) is the key to this system.

Also Read: Biofloc Fish Farming – A Complete Guide

The bacteria forming bio flocs can assimilate the total ammonia nitrogen (TAN), and can produce microbial proteins for tilapia fishes.

Tilapia can adapt to bio floc systems very quickly, and you can have an amazing production! Using bio flocs for raising tilapia, you will get very high biomass, as the biomass of tilapia can reach to the surprising pace of 200-300 mt/ha! You get higher fish density, but the system also generates a lot of waste! So, this is not the ideal way to start your tilapia fish business.

Primary Cost to start a small-scale business

The production system is the most important aspect of the tilapia farming business on any scale. Floating fish cultivation needs lower investment. “One hectare” is the base of calculation in case if floating cultivation. A 5,000 USD per annum gives you the production capacity of 20 tons of tilapia!

Look, you should opt for a floating cage in case If there are continental water conditions in your area. A floating cage with 20 meters of diameter is should be suitable. And three in-depth floating cages will cost you approx. 4,000 USD, and you can earn 60 tons of biomass per year. You can distribute the whole cost as:

55% for a balanced, nutritious diet, 37% for administrative and

production costs, and 8% for fingerlings.

Homemade organic feed for tilapia

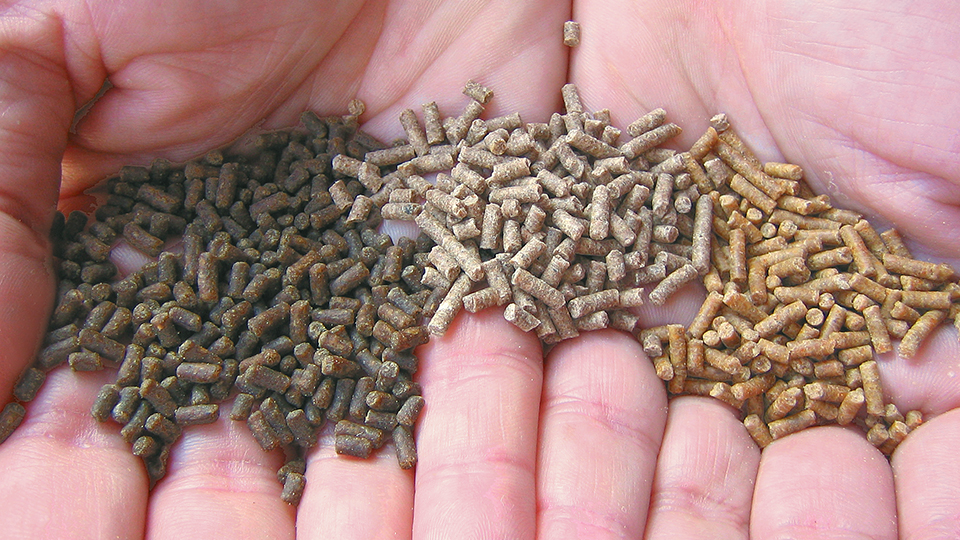
You can buy feeds from the market, as well as can prepare them at home. Tilapia can eat almost everything, and homemade pellets are like a treat for them! These pellets are made with corn, rice barn, oat groats, alfalfa meal, linseed meal, or canola meal, as well as different vegetables.

If you are doing tilapia farming in tanks, homemade feeds are not good for, as they can start damaging them in a quick time. So, for tanks, buying feeds from the market is a better option. You can give homemade pellets to the fishes raising in the ponds.

The best feeding methods for small-scale tilapia fish farming

The average survival rate of most of the tilapia species is 99%! And the average growth per organism is 960 grams. You can achieve this result by modifying the feeding methods. The amount of food required is usually decided by the percentage of biomass. And as already discussed, providing your fishes with a balanced diet is very crucial.

Here is how you can manage feeding throughout the growth period:

With the increase in size, the requirement of protein decreases. If a small-sized tilapia fish requires 38% of protein, the protein required by a large-sized fish is 24%. To achieve maximum success in the tilapia farming business, Lent and Holy Week are the best seasons for harvesting.

Making appropriate food ratio is very important

You have a wide range of options when it comes to balanced foods. Feeding at the initial stage of farming is a bit expensive, 0.93 USD per kg. And the cost was reduced to half with the growth of tilapia. So, prepare balanced food for tilapia by referring to the second table mentioned above.

How to cultivate tilapia

Intensive cultivation

At least four ponds of 20 by 40 meters each should be there for proper intensive cultivation. And the recommended shape of ponds is rectangular. Also, each pond should have a proper slope, with separate entrance and exit. These types of ponds can handle 10 to 15 fishes per cubic meter.

Intensive hyperactive cultivation

It is the second method full of profits. In this method, circular ponds with conical bottoms are recommended. There should be a drainage system in the center of each pond. There are four different sizes of ponds, and the ideal one is 9.40 meters in diameter. It can store about 80 cubic meters of water. And the average cost for each pond is 1250 USD

Proper monitoring is also necessary

The best thing about both intensive and intensive hyperactive systems is, only one person is enough to manage them. And monitoring oxygen levels, and temperature of the water is enough.

Whether you are opting for tilapia farming in tanks or ponds, keeping a check on concentration levels of ammonia is also necessary, and you can easily get basic equipment in the market for this purpose. Executing a hydroponic culture is also a great idea to recover the contained nutrients.

Farming method for Monosex Tilapia fish

Females can give birth to 200-1000 fingerlings in every 4 to 5 weeks, and they take around six months to attain the maturity! And if you even have 90-100 female tilapias, you will get 2000 to 10,000 fingerlings! How are you going to manage them? Feed them? You will start feeling helpless!

Relax! There is a solution! As discussed earlier, monosex tilapia fish farming is the way to raise only male tilapia fishes. You can cultivate these fishes in two stages i.e. nursery stage and reservoir stage. All you need to do is to keep small-sized and large-sized fishes separately. The feeding and caring method are the same as mentioned above.

When and how of catching

  • When the fishes attain the weight of 180 to 200 grams, separate them in two different ponds, as they need more space for comfortable movement.
  • Divide them again in two different ponds/tanks when they weigh about 300 grams.
  • In short, if you start tilapia farming in tanks with four nos. you will need eight of them in the end.
  • When the average weight of each fish touches the 400g mark, separate them, again.
  • You will also have to adjust the diet properly to ensure maximum productivity.
Catching them for sale!

Right then, you are going to earn some great returns for your investment. As the amazing growth rate couples with a very low mortality rate, there are great chances of profit.

Start catching them when they attain the average weight of 400g.

But if you can wait a bit more and harvest them at 500g, you will find it even more profitable.

In this post, we’ve tried our very best to cover every aspect of tilapia fish farming. Hopefully, we’ve guided you correctly to start a new business full of fun, profits, and productivity. Please write back to us, if this guide was helpful for you. Happy fishing!

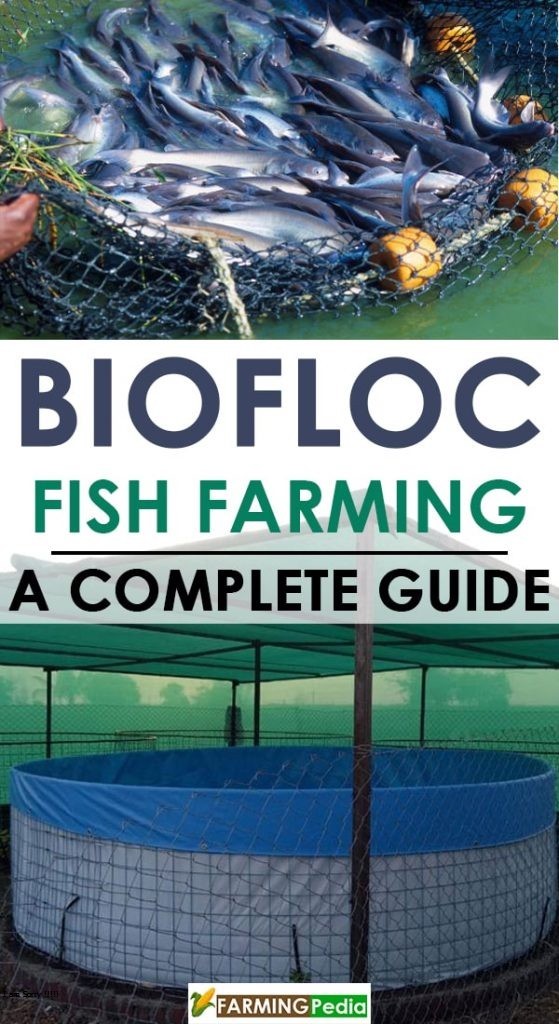
Biofloc Fish Farming – A Complete Guide

Biofloc technology (BFT) is a new organism that is particularly productive in aquaculture and is a potentially innovative way to fish farming. This fish farming method is cost-effective in which hazardous or toxic materials for fish and shellfish are transformed into useful products, i.e., protein feed.

The toxic substances that are converted to produce protein feed are nitrate and ammonia. Biofloc fish farming is the cultivation of Biofloc and it is most productive in the tanks exposed to the sun now, you know, “what is biofloc fish farming?”.

Some must-know benefits of biofloc farming

Among all the benefits of this latest aquafarming method, below are the few to be primarily considered.

•  Not only this farming technique is safe; it is also environment-friendly.

•  Biofloc technology regulates water quality and harmful pathogens

•  Value-added production of microbial protein feed is possible for aquatic farm structure.

•  Bioflocfish farming in USA is one of the best techniques to enhance environmental control overproduction.

•  This technology ensures zero water exchange.

•  The list of benefits also includessurvival rate, the performance of growth, etc.

•  It is a cost-effective and efficient technique for aquaculture.

•  Plus, the pressure on captured fisheries is also significantly reduced.

Since high-density fish rearing typically requires a particular system for waste management. Primarily, Biofloc is a system that treats waste. Biofloc fish farming material was designed to stop incoming water disease from entering a farm.

In order to do cost-effective production, the use of more intensive types of aquaculture is always beneficial. Especially in the water-scarce areas or where land is costly.

Must Read: Tilapia Fish Farming Information And A Complete A to Z Guide

The flip side of Biofloc technique

•  First up, it needs more energy as far as mixing and aeration are concerned.

•  Due to the elevation of water respiration rates, the response time is reduced remarkably.

•  It also required Alkalinity supplementation

•  In the case of sunlight-exposed systems, it gives seasonal as well as inconsistent performance.

•  The pollution potential is more if nitrate accumulates in the large amount.

What Is The Need For Biofloc Fish Farming?

The biofloc fish farming materials system was developed to improve environmental control over the development of aquatic animals. The most influential factors in aquaculture are feed costs, and the most limiting factor is water/land supply.

High stocking rates and aquatic animal rearing need wastewater treatment. The biofloc method is a wastewater solution that has acquired significance in aquaculture.

The Theory BehindBiofloc Fish Farming

This technique is based on the assumption that nitrogen cycles are created by maintaining a higher C/N ratio through stimulation and assimilation of nitrogen waste as food for the cultivated species. Not only does biofloc fish farming tank preparation technology treats waste effectively, but it also gives aquatic animals the nutrition that it needs.

Let us tell you that higher C: N is sustained by the introduction of carbohydrate source, also known as molasses, in addition to the improvement of water quality with the high degree microbial protein obtained from single cells.

How Is Biofloc Technology Implemented?

Because of its low dwelling habit and resistance to environmental changes, biofloc technology is widely used in shrimp farming. Studies were conducted to assess shrimp and Nile tilapia larval growth and reproductive efficiency.

In the biofloc system, increased breeding efficiency was observed in shrimps compared to standard crop practices. The improvement in larval growth was also witnessed.

Know The Nutritional Value Of Biofloc Fish Farming

Biofloc is a diverse mixture of suspended particles and a range of extracellular polymer-related microorganisms. Biofloc is made up of bacteria, plants, fungi, invertebrates, and detritus, respectively.

The food that is prepared through the conversion of available feed and excreta into natural food becomes richer in protein when exposed to sunlight—floc is kept together in a mucous matrix which is bacteria-isolated and is attached by filamentous microorganisms. The naked eye can see big flocs, but most are microscopic.

The floc is 50-200 microns in thickness. Biofloc possesses excellent nutritional value. It consists of dry weight protein somewhere between 25 to 50 %, whereas fat is between 0.5-15%. This makes the biofloc a good medium of vitamins and minerals  not to mention phosphorus.

Also Read: Goat Farming Guide

Set Up Your Biofloc Fish Farming

The first thing you need to start a biofloc fish farming venture is, of course, some basic knowledge of the same. As the more experienced you are, the higher are the chances of your success. Before you go to buy biofloc fish farming material, first, arrange some space in the backyard to dig a fish pond.

It can be a space in your basement or anywhere—to gather fish in containers. Fish can be grown in tanks and tubs along with the barrels. Once you are done choosing the tub or container, you have to avail of water from a reliable source now. Your local water supply may be a good option. Now get your juvenile fish to the pond or container, and you are good to go.

The above steps are for backyard or indoor fish farming. If you are looking to set up an outdoor fish farm, it is better to take a quick look at the below-listed equipment.

•          Fish tanks

•          Pumps

•          Devices for aeration

•          Seine reels or net

•          Equipment to test the water

Let’s make biofloc fish farming tank preparation a bit more straightforward.

1. Preparing the water for biofloc farming

Biofloc’s water preparation is most important to start fishing using this method. Anyone who begins a biofloc process or culture must first set up a tank.

Those who are a novice to biofloc, it’s a better idea, to begin with,cement ponds or enclosed tanks where the soil doesn’t influence water conditions or biofloc systems.

Indoor processes have a significant advantage in most tropical countries. Owing to the fact that heavy rainfall affects alkalinity and pH in outdoor structures indoor tank set-up always looks a good idea.

2. Aeration

Once you are done selecting the right pond or tank set-up, it’s time to focus on a set-up for aeration. To maintain high oxygen levels and prevent solids from lodging, all systems need constant movements.

Areas without activity can eventually lose oxygen, becoming anaerobic areas that emit large amounts of ammonia and methane. Each reservoir, tank, or raceway system needs a well-planned aerator configuration to avoid this. Wetlands use paddlewheel aerators.

3.Pre-Seeding Microbes

Pre-seeding is often beneficial if you want the biofloc to improve the growth of bioflocorder and maintain your pond quicker, pre-seeding the farm water is always advisable. Itcan be done by adding several commercial or homemade ingredients to cultural water.

4.Select The Species And Check The Stock Density

Most species will profit from enhanced water quality of biofloc systems while feeding and digesting the biofloc themselves, you want to choose species that better benefit from extra proteins produced. These species are all or partially filter feeders.

That is tilapia and shrimp, these two are perfect candidates for engulfing biofloc, which significantly improves the feeding performance.

Growing Biofloc Farming Trend

A wide range of aquaculture programs and new aquaculture initiatives are being practiced worldwide. Alongside this,it is true about fish farming in USA as well where many companies are operating in aquaculture with particular emphasis on biofloc farming.

With growing fishing technology, aquaculture in the USA is also evolving; hence fish farming is becoming a profitable business. This was not the same earlier when fish were caught only by trial and error method.

A company planning to expand its aquaculture share in the market may get strong economic encouragement for them to be more motivated for producing inputs, notably the most costly (feed) and the most restrictive (water or land).