How to Grow Lettuce – An Ultimate Guide

Lettuce farming is gaining popularity day by day. It is among the highest consumed salad vegetable throughout the world. Becoming trendy in India too. 

Although the roots of lettuce farming lie in Asia. Though, it was wholehearted adopted by the rest of the countries.

Being a store of healthy nutrients, how to grow lettuce, became an important part of farming.

The Romaine species of lettuce is the most famous among all. Lettuce finds a place in healthy food items like wraps, salads, sandwiches. Etc.

China lead in the production of lettuce. It is a spiral leafy vegetable with a package of health.

This crop has acquired commercial importance in the passage of time. If you are planning a business strategy by growing lettuce, surely will land towards wealth in your bag.

How grab a look!!!!! 

Different types of lettuce 

These nutrition ruched salad leaves have different species. Check them out:

  1. Leaf Lettuce: 

They are like a branch splashing out from the stalk. Red, green, and Oak in color. Leaf lettuce is the most delicate and short-lived. The red one has a mild flavor than the green one. While the oak one is the crunchiest and spiciest.

  1. Romaine Lettuce:

Sweet in center and bitterly towards the tip, long and firm in appearance.

  1. Iceberg lettuce:

It is crispy in taste and resembles cabbage. Unlike lettuce, it is not juicy. Can be refrigerated for 15 days in plastic bags.

  1. Arugula Lettuce:

This is generally used in pizza toppings. Blends with pesto sauce so go well in sandwiches too.

  1. Frisse:

It belongs to the radicchio family. Available in grocery stores are used as toppings.

Requirements for how to grow lettuce

For growing lettuce on your farm, these things should not be overlooked. Note the following:

Climate

Being a cool-headed crop thrives amazingly well at temperatures ranging between 15 to 18 degrees. 

They are reluctant towards extremely hot temperatures. It can be cultivated throughout the year using shady or greenhouse effect in warmer climates.

They have a speedy growth. And performs well in the spring season. Ideally, the  lettuce growing season is spring time before the onset of scorching heat.

Soil Required

Good organically rich soil is a perfect combo for Lettuce cultivation. The soil should excel in two things, water retention and good drainage. 

This is a boon in disguise for farming. Highly allergic to acidic soil, better to choose a neutral one.

Prepare Land

The land needs good plowing till tilth. Plowing has to be carried out for successive 3-4 times.

Also, get the soil tested for productivity and if needed add some good organic manure to boost up the productivity.

Make necessary arrangements to flush out excessive water at frequent intervals.

Irrigation

Water supply should be maintained regularly. For this, you can water the plantation, once every 4 days. Extra water must be flushed out during excessive rains.

Fertilization

60 TO 65 KG of potash and phosphorus is needed by the lettuce crop. With good quantity of manure around 15 to 20 tonnes. It ensures healthy growth.

Pest and Disease Control

The pests are the disturbance-causing agent. They hamper the yield and have an adverse effect on lettuce cultivation.

Cutworms, bollworms, aphids are some of the enemies of the lettuce plantation. Soft rot, downy mildew are the diseases caused by these agents.

To curb their spread, you need to approach the horticulture department for some remedy.

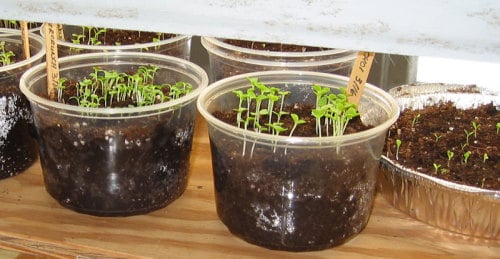
Germination in lettuce seeds

Lettuce seed germination is an easy process. But you don’t have to be antsy. Pick the best quality seeds from the market or any other reliable source.

Now plant these seeds in the soil. The temperature of the place is the deciding factor to initiate lettuce seed germination.

Make sure the temperature is 20 degrees at least. Else, the seeds will enter a deep sleep mode.

During the entire sprouting time, these standards should be maintained. Ideal temperature, exposure to sunlight, and moisture laden soil is an explicit combo to trigger sprouting in seeds.

This has to be maintained for 7 to 10 days until the germination starts. You can see tiny tots emerging from the seeds.

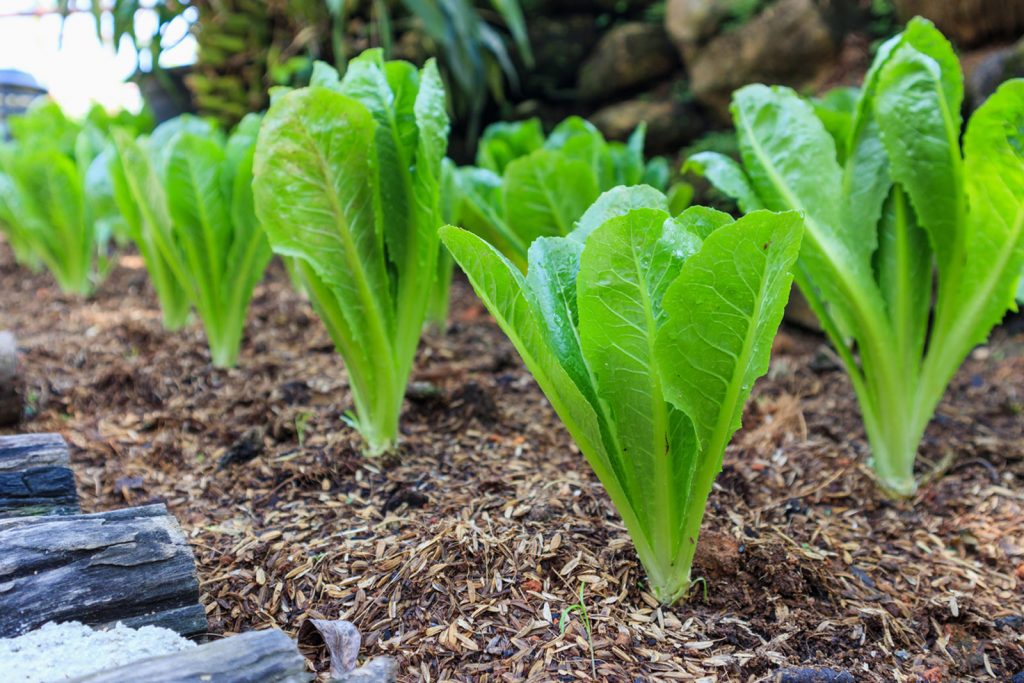
How to grow lettuce from seeds

Propagation through seeds is easy. You can sow them directly into the soil. As an alternative, they can be planted in a nursery till germination.

After that, it can be translocated to the fields.

Mostly leafy varieties are cultivated by this method. Raised beds are prepared in the field. This ensures proper water drainage and air to the soil.

The seeds should be at least 12 to 15 mm deep. This is ideal, depth for a lettuce plantation. 

A lettuce plant spacing should be done in rows 15 to 25 cms far from each other.

Also Read: How To Plant Spinach? Here Is Everything You Need To Know

How to grow leaf lettuce from seed

Leaf lettuce demands sunlight, although too much heat can be injurious. Causing bolting of leaves. As an introductory step, sow the seeds inside for about 4 weeks before the arrival of frost.

Amid springs, shift them outside in the fields. The purpose is to allow a shady and light sun area till the germination process pops up.

Do make a note sun is an essential element to instigate germination. So, don’t sow them very deeply. And cover with a thin layer of soil to allow the sunlight to reach them.

The soil quality of those freshly prepared beds should be highly productive and the PH between 6.2 to 6.8. Acid or lime soil burns the seeds. The soil must be moisture-laden to keep nurturing the seeds.

Spacing style is like one-inch gap between the seeds and a 12 to 18 inches gap between the soil beds or rows. 

Before shifting the sprouting seeds allow the seeds to get harder by reducing the water content. Maintain the temperature of 20 degrees.

Then translocate them to their soil beds in fields. Water them and protect them from injuries by moths and bugs.

After some time they start growing, keeping mulching the soil to retain the fertility. Once lettuce farming starts flourishing, it’s time to remove them before the frost arrives.

Harvesting lettuce

Such a delightful sight it is, to have those butter surfaced, big green crunch in the field waiting for you. Firstly, when to harvest lettuce is not restricted to the maturity stage.

Lettuce can be removed at any point in time. As it is consumable at every stage of growth. Even small leaves are demanded in the market for sandwiches, wraps, etc. 

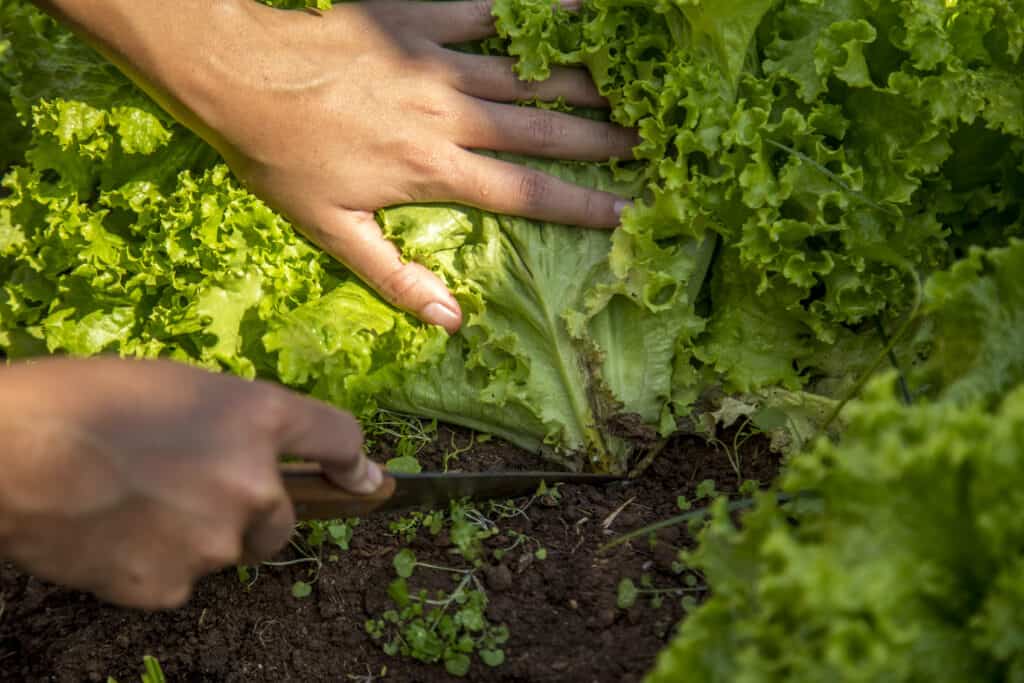
Always pluck lettuce in the early hours of the day before sunlight falling on them. To enjoy the lettuce thickens, pluck the early tiny leaves and allow the plant to grow densely.

Allow the plant to attain a bigger size. When to feel the firmness of leaves, then it’s perfect time to get the juicy leaves out. When and how to harvest lettuce is all about the firmness of the plant.

As it can be plucked anytime.

Benefits of the lettuce plant

Consumption of lettuce can be beneficial in multiple ways. Having a calorie content of 12, it is highly recommended for weight loss.

Fibrous and cellulose riches make it desirable. It assists in the breakdown of cholesterol.

Makes you hail and hearty. Strengthens the functioning of the heart.

Storehouse for omega-rich fatty acids.

Work on the protein deficiency in the body.

Conclusion

This was a brief insight into how to grow lettuce. Once you start your lettuce farming, you will get to know the profitability of this venture.

Starting the business and setting your goal towards a decent profit earning, depends on the number of efforts invested in it.

Apart from this, you have a clear picture of how much trendy lettuce has become these days.

In comparison to older times where it was considered as a fancy or lavishly consumed vegetable. Now it finds a way to the routine diet of people.

With the above information, you are already a step ahead towards lettuce farming.

Start growing your lettuce for a profitable venture.

How to: Growing the Avocado in Backyard?

Do you ever realize that what happens to your body after eating an avocado? The fruit is loaded with fiber just like many other vegetables and fruits. Besides, the potassium-rich avocado helps to reduce the blood pressure and, regular use of avocado attenuates weight gain to normal individuals over time.

Meanwhile, it is interesting to know where avocado grow.

This fruit crop is native to tropical America. And, it has been grown in Mexico initially, later it expanded to Central America as well as surrounding areas. Today, it is grown in the USA, Dominican Republic India, Colombia, New Zealand, Indonesia, Brazil, and many other countriesall over the world.

Also Read: Farming Orange for a Perfect Citrus

This fruit is a single seed and is primarily eaten for its outstanding health content. Avocados can be a portion of a superfood diet, loaded with nutrients, many of which are lacking in the contemporary diet.

Initially, the avocado trees were planted to protect the other crops. Today, however, this fruit is mainly cultivated as a cash crop. It can thrive in all climates and environments. Moreover, the capital required for the cultivation of avocado fruit is less and it provides the greatest return on a successful yield in a season.

Today, it is the best decision to start a business venture of avocado farming because the starting cost for growing an avocado tree is relatively less to other fruit plants. 

Moreover, this fruit crop needs little care and maintenance to reach the highest fruit yield.

Growing Avocado Tree

 It is hard to deny the nutritious value of the avocados. But, in case, you are contemplating avocado farming. It requires huge patience. And, once a plant starts to produce fruits, you will not regret your decision.

The price of avocado is relatively high because of its high consumption and nutritious values. The high demand for this healthy fruit is determined by its benefit to the human body.

The growth of a successful avocado farm depends on proper preparation and the right place.

Deciding the site for avocado trees

The atmosphere and weather play the most critical role in the growth of an avocado tree. There is a need for suitable climate conditions for the safe growth of plants and optimal yield in the case of commercial production.

The temperature varying from 15 degrees Celsius to 30 degrees Celsius is the finest for the avocado farming. 

It is recommended throughout cultivation time. This signifies that throughout its whole existence a pleasant environment is expected. 

It is noteworthy that if the temperature falls below freezing or increases above 40 degrees Celsius, avocado trees tend to die. 

In the short period of spring, when the flowers bloom, if the weather gets cooler and rainy, bees won’t come to the air and eventually, fruits won’t flourish.

Just like other crops, avocado cultivation thrives well in highly organic and fertile soil. In the process of determining the quality of soils, it highly recommended getting the soil tested for the exact information for nutrients presence.

This helps in adding the appropriate amount of fertilizer to your field. Thus, at the time of soil preparation, the shortage of micronutrients and macronutrients may be covered.

Avocado trees and plants can grow to red soil, dark brown soil or in almost any kind of soil even the reddish-brown soil. 

However, the safest way to high yield is developing avocado plants or trees on reddish-brown soil or dark brown soil.

As soil is the most crucial criterion when deciding a place. The avocados are highly responsive to poor drainage and sensitive to the Phytophthora which thrives in poorly drained soils. 

Moreover, the soil should be rendered in such a manner that there is no issue with water stagnation. The soil’s strength and efficiency must also be strengthened by well-rotting manure.

It is worth to avoid windy areas. Placing the plant on slopes faced away from the winds and discard planting on western slopes in warm areas as the sun may be very warm and could sunburnt fruits. It is appropriate to sow windbreaks for securing your trees from the heavy winds.

How to Plant Avocado

Choosing the variety for avocado farming 

The avocado has several varieties to choose from but Hass is better than the others because it has the potential to grow year long.

Moreover, it contains more than twenty percent oil with high-fat flesh and buttery texture. While the rough and robust surface makes durable to transport.

Method of Propagation

If you are trying to establish a commercial farm it worth use the grafting method and budding method for plantation of an avocado tree. The plantation with grafting method also assures stable growth and early fruit-bearing in the crop.

While growing an avocado from the seeds require a different level of care and maintenanceYou may have to wait for several years with the seedling before you see the fruits.

How to graft the avocado tree?

The major commercial production of avocados comes from grafted avocado plants. Yet, it is not feasible to say in the avocado cultivation that anyone can graft them.

In this process, one young tree is combined with a separately obtained branch contains single and multiple buds.

As both of them grow together, a reinvented tree is produced. However, when grafting, if the scion is grafted near the base plant’s root, but still on a stem, it has a higher chance of success.

If you want to do it on your own, follow these steps carefully.

  1. Make a vertical cut in the center of the stem
  2. Next, interpolate one or two externally obtained branches with healthy buds in this cut, 
  3. Including two or three buds into stems increase the chances of success

Planting Distance

avocado

The distance between plants is crucial in avocado farming because the avocado is a long term crop. And, it would be wise to make sure that there should be enough plants on the farm, so recovery is possible in case some plants do not succeed in the case of the grafting.

While one can decide the density for the plants and each method have its pros and cons.

1. High Density

In high-density plantings, ensure that two trees have the distance from the 3m to 6m. Such plants give fruits earlier than the others but they require pruning of plants at a certain period. While in warmer areas, it is not suitable to grow avocado too much dense.

2. Low Density 

In low-density plantings, ensure that two trees have a distance ranging between the 8m to 10m. They are easier to manage but might have high maintenance costs because trees have much space between them that allows sunburn or birds to deter the fruit more than the others.

The medium-density spacing, for example, 6m to 8m, works as a solution to the multiple problems for the spacing.

Must Read : How To Do Watermelon Farming

In total, an avocado tree requires about 10 years to be able to produce fruit. 

Nowadays, however, with an improved avocado variety, the planting of commercial avocados will yield fruit in their plant age 4-5 years. 

Irrigation of avocado trees

Systematic irrigation has a strong effect on avocado cultivation. For the successful planting, it is recommended to give water to this seed just after the planting. Then, try to irrigate the seed at a period of three or four weeks. During the hot and dry season, the crop requires to be irrigated more frequently such as two-three weeks.

Besides, in cold weather, it is worth doing the mulching. For this, shade the plants with dry leaves and grass. 

Fertilization

Relevant manure and fertilizers play a significant role in increasing productivity up to several times. This crop reacted quite well to the high nitrogen content of the high manure. Potash, Potassium, and Phosphorus are needed in an equal portion for new plants.

Diseases in Avocado Farming

1. Phytophthora root rot

Root rot, caused by the soil-borne Phytophthora fungus, is very prone to avocado plants. It requires continuous care. Once infected, the tree would disregard an appropriate root structure and would not be able to function without root maintenance.

Chemical root treatment, as well as replanting, could help to cure this disease.

2. Tree Cankers 

 Sores are considerably not so serious; however, they are extremely visible. In some cases, these sores, especially in the trunk, can leak gum. The cankers can cut out the branches.

3. Sun blotch 

 The dangerous incurable illness can affect avocado tree farming. Fruits generally are scarred, twigs can become red or yellow or triangular cracks in the bark. Infected trees are typically smaller, but they do not show any sign than the reduction in the yield.

4. Pests 

Tree borers, caterpillars, or mites can destroy the growth of the plant as well as fruit. Thus, it is recommended to spray a considerable amount of insecticide to prevent any harmful pest or insect.

The avocados should be picked at a mature age in avocado farming California. Once the color of the fruits changed in the case of green to yellow, the fruits get maturity. 

How to: Onion Farming – An Ultimate Guide

Onion is one of the popular vegetables for most people worldwide. Growing onions is productive and straightforward. Investment needed for commercially producing onions is very limited, and onion plant treatment is also shallow.

So, we’re studying top onion growing methods, tricks, and ideas today. Usually, onions are cultivated early in the summer and harvested after their tops start to die off. Few onion varieties can be planted in fall in the southern US. At the end of this guide, you would be able to know about “How to plant onion?”, “How onion grow?”, the ways to onion cultivation, and so on.

Onion varieties origin:

Onions

For centuries, insects such as bees and flies have developed onion (Allium cepa L.) seed by random crossing between plants. This open pollination (OP) results in every onion plant being genetically isolated from many other crops in the environment.

This high degree of genetic variability results in non-uniformity for essential characteristics like maturities, disease tolerance, bulb shapes, etc. Throughout the mid-20th century, breeders began self-pollinating onions to create more scientifically uniform inbred rows.

These inbred onions were less intense and yielded less than their initial OP populations. Fortunately, the natural crossing of two inbred lines for hybrid onion will restore vigor.

Onion hybrids are much more uniform for desirable characteristics, produce consistently higher yields than OP varieties, and comprise 90-95% of US production. Also, classical plant breeding enhanced both hybrid and OP onions.

Also Read: Sweet Potato Farming Information Guide

How Onions Grow– seed or sets!

We suggest using onion sets that can be planted without thinking about frost damage and are more effective than growing from onion seeds or transplantation. Onion sets are tiny bulbs marketed exclusively for planting.

After around 3-1⁄2 months, they mature into a full-size bulb. Onion plants grow well in elevated beds or rows at least 4 inches wide. If you’d instead start growing onions from seeds, check our tips on increasing indoor onions.

How Onion Grow: Plantation of onions

You might have several questions on your mind. For example, when to plant the onion?How to prepare the plantation site? Etc. So, let’s begin with the answer to the first question. 

How to plant onions and when?

Typically, when the weather is pleasant, plant onion sets outdoors — not cold. Ideally, after planting outdoor temperatures shouldn’t drop to 28 ° F (-2 ° C). Grow onions in regions with a frigid winter as soon as the field can be worked in spring — probably late March or April. In milder climates, late fall or winter will help in onion plantation.

They’ll remain dormant throughout the cold season, but they’ll be able to develop as soon as the longer, milder spring days start.

Continue planting them indoors around six weeks before you intend to move them to the ground. Onion seeds require at least 50 ° F (10 ° C) to sprout correctly. So, you must have now got the idea about how to plant onions and when.

How to prepare for the plantation site?

It’s not a tough job to prepare for the plantation site. You just need to consider a few things before starting right away. Look at those factors below. 

  • Find a full-sun location so that individual plants won’t cover your onions.
  • The soil must be well-drained, soft, and nitrogen-rich; compacted, rough, or clay-heavy soil influences bulb growth.
  • Add in any nitrogen fertilizer while planting.
  • Conduct onion seed rotation. In other words, don’t grow them at the same place year after year because this will promote disease distribution that affects the seed.
  • Attach aged manure or compost in early spring, until planting. Onion plants are fast feeders, needing continuous nourishment to grow big bulbs.

More on how to plant onions

As they develop much quicker (and less total work), we consider increasing onions through onion sets (i.e., tiny onion bulbs) rather than seeds.

However, seeds are also an alternative in moderate, long growing season regions. If seed planting, note that onions plants live for a short period, so start increasing the year with fresh seeds.

Start seeds within around six weeks until transplanting into the field. If planting onion sets, place them 2 to 6 inches apart and don’t hide them farther than 1 inch under the dirt. When transplanting into the field, place plants 4-5 inches apart in rows 12-18 inches apart.

How onion grows – Should you plant a sprouted onion?

Yeah, you can grow a germinated onion, but you will get fewer onions. You’ll get plenty of yellow sprouts, too! 

Steps:

  • Fill a bowl with potting soil and create a middle hole around the onion’s depth and distance.
  • Next, you can place the onion in the hole, and then you need to cover it. 
  • You now need to water the onion and keep it on the sunny spot.
  • Your green sprouts are now ready for cooking, wait. You need to harvest it first!

Note: If you have a flower sprout, wait before the crop dies. Keep seeds for spring planting.

Caring for the onion plants:

Firstly, you need to consider onions a leaf flower, not a root flower. And then, you need to fertilize nitrogen every few weeks for large bulbs.

But you should stop feeding when the onions drive away from the soil and start the bulbing cycle. In addition to that, don’t bring the ground around the onions; the bulb will rise above the land.

And one more thing, generally, by utilizing mulch, onion plants don’t require regular irrigation. About one-inch water every week (including rainwater) is plenty. For sweeter onions, add more.

Getting rid of pests/diseases – Onion cultivation

Before you learn to do away with onion plant pests/diseases, you first need to know about a few pests/conditions that are its foe. 

Thrips

Take in the garden a dark piece of paper to monitor thrips — tiny insects about as thick as the sewing needle — and knock on it with their onion tops; if thrips are present, you can see their tangy bodies on the paper.

Any insecticide soap treatments destroy them. Follow packaging rules. Sprinkle the plants twice, and the thrips will vanish.

Onion maggots

Cover with a fine mesh your growing onion crop. Seal it around the edges by shifting dirt. The onion maggot likes to place its eggs on the plant’s base, which is stopped by the netting.

You should also keep mulch off because insects like organic matter to rot and make sure that you collect your onions thoroughly as the season progresses. In stormy times onion maggots are usually a concern, so such measures may be unnecessary when you have a dry season.

From Onion harvest to the storage of onion plants

Now is the time to explore the details about how to harvest and store onion plants. This step is pretty much crucial since it’s the time to reap whatever you have sown with your hard work. So, let’s first begin with the onion harvesting part.

Irrigation needs for onion farming

Irrigation is needed at the time of clove transplantation / dibbling, and moderate watering must be performed on the third day after plantation and subsequent irrigation at 7-10 days intervals depending on soil condition and season. Immediately after planting, water transplants.

Due to the shallow root system, onions need regular furrow irrigation. Stop overhead irrigation causing plant diseases. If the foliage is harmful, yellowish, the plants are over-irrigated. The soil would be too dry around an under-watered crop and broken.

Onions typically need 30′′ irrigation during a growing season, and the closer to onion harvest, the higher the need for water. If the onion doesn’t get enough sunlight, it won’t make a large bulb. When the necks begin to fall, and the onions mature, watering should be stopped, allowing the soil to dry.

Must Read: Pumpkin farming: how to plant, grow, and harvest pumpkins correctly and properly

Micro-irrigation of onion crop

Through drip and sprinklers, irrigation will happen once every three days. A drip machine operating pressure should be 1.5kg / cm2 and 2.5kg / cm2 for the rotary micro-sprinkler. Using nitrogen fertilizers should be achieved by a trickle. Apply 50 percent N as a primal dose and the remaining 50 percent N for seven splits (10 days period up to 70 days after transplantation) via the drip irrigation system.

How to plant Onion: Crop rotation

Practical and optimum use of all the applied soil mineral nutrients is impossible. Available nutrients leach and settle in the sub-soil.

Over the next planting season, planting leguminous crops will ensure utilizing these nutrients. Thus, the cultivation sequence of onions and legumes is recommended to preserve soil quality, optimum nutrient usage, and higher yield.

How to harvest onions?

  • Pull some onions sending flower stalks; if you see the flower stalk, it means that the onions have stopped growing. Such onions are not well processed but can be used in a few days.
  • When onions start maturing, the heads (foliage) turn yellow and start falling over. Bend the tops at that stage or even stump them to speed up the final maturation process.
  • You need to loosen the soil around the bulbs to encourage drying.
  • Are you observing the brown tops? Great.It’s an excellent time to pull the onions.
  • And lastly, ensure that you harvest only in late summer before the weather gets cold. Since mature onions may get spoiled in fall weather.

Harvest onions: Pre and post-harvesting

In addition to the doses of fertilizers as recommended, the crop is watered in rolls of 6-12 days, based on local conditions. Be vigilant about watering turns, such that the plant may not suffer from water tension. When the onion bulb matures below level, the long upper leaves become yellowish and begin to fall off, meaning the crop is now ready for harvest.

When the roots at the bulb’s bottom are dry, they lose their grip on the earth. The stage’s called “neck-breaking.” When 75% of the crop has reached this point, harvesting begins. The pulled-out bulbs are permitted to stay in the field for 4-5 days, which in turn dries up and thickens outer layers, increasing storage life.

Storing the onions

  • Clip the roots and cut the tops up to 1 inch (but if you intend to braid the onions, leave the heads on).
  • Let the onions recover for a few days, depending on the weather. Often treat them very carefully — the slightest bruise can promote spoilage.
  • Enable onions to dry for a few weeks before stocking in a root cellar or any other storage area. You also need to spread them out on a full screen, which should be off the ground to dry.
  • You need to store it at 40 to 50°F while removing its stems in a mesh bag.
  • You should not store apple or pear onions together, as the fruit-producing ethylene gas can disrupt the germination of the onions. On the other hand, onions can also ruin these fruits’ flavor.

Marketing of onion

Onions can be classified into three marketable categories: spring (“green”), summer-fresh market onions, and fall/winter onions (“dry bulb”). Fresh or green onions are pulled while the tops are still green, usually before a large bulb has grown. Small, light-colored skin may recognize fresh market onions and have edible green tops.

While the new onion market was accounting for the most significant proportion of onion use, other markets also account for substantial production. Most canning and freezing onions come from new market varieties, while dehydrated products use separate types with a higher solids content

Conclusion

So, it was all about the onion farming. We have tried to answer all your questions related to this topic. Whether it be plantation to harvesting and everything in between, we hope you can now kickstart farming practices.

How: Growing Peanuts or Groundnuts

Peanuts are not only good for your appetite but also your wellbeing. These are an outstanding source of protein and are rich in various vitamins, minerals, and herbal compounds.

Peanut butter, produced from the selected pieces from the peanut farm, is an ideal way to incorporate quickly this type of protein in the everyday diet.

People are still surprised to hear that peanuts are certainly not nuts. 

This seed of legume plant belongs to the family of peas and beans.

Growing peanut plants

Peanuts plant

A peanut farm gives a unique posture in terms of appearance as it is full of plants but there is no fruit to grasp. However, the peanut plant has real products deep inside in soil along with the roots.

Also Read: Sweet Potato Farming Information Guide

And, interestingly, the flower of a peanut develops above the ground. Once pollinated, the stems lean down and push the pegs into the soil during the summer and they grow eventually.

As the ovary at the end of each stem is underground, it develops into a pod carrying the peanuts. This is the reason behind it brings the name groundnuts.

In a peanut farm, the peanuts start as a single seed and grow into a plant that can be turned into more than 50 peanuts in a period of four to five months under the soil. 

During the peanut crop, the process of sowing the seeds has its own requirements in terms of soil quality, as fruits mature in the soils themselves.

Selection and preparation of the soil

Sandy loams, crumbly and light-colored are perfect for groundnut cultivation.

 A friable sandy loam or clay loam subsoil provides essential nutrients as well as a suitable climate to the peanut crop as well as a suitable climate.

The heavier soil can be an option to get a higher yield. Such soils nevertheless tend to stick to pods contributing to blot that decreases the quality of the peanut. 

This decision can trigger a loss in the overall yield for a peanut farm. It is wise to avoid farming peanuts in fields with shallow topsoil or inadequately drained areas.

While growing commercially, it is recommended to obtain a soil analysis so that you can have test reports and can apply fertilizers accordingly.

During the planting, the surface temperatures of peanuts should be at least 65 degrees Fahrenheit in April and May after the last freeze.

Sowing the seeds 

Growers generally use the peanut kernels as seeds that were cultivated particularly in the previous year approximately 1 or 2 inches wide in the field. It is worth to have the populations of plants range from sixty thousand to eighty thousand per acre. 

Typically, with improved seed count, there is little growth in production. So it is appropriate to not have a high density of plants for groundnut cultivation.

Generally, it requires 140 to 150 days for a stable crop without any frost.

After the 10 days of harvest, peanut plants grow out of the soil. Generally, they are about 18 inches in length developing into a small, oval-shaped plant.

Yellow flowers occur around 40 days after planting across the lower portion of the plant. The leaves fall off as the peanut ovary starts to grow as soon as the peanut’s flowers pollinate themselves. 

Watering

The irrigation requirements of a peanut farm can vary throughout the growing season.

At the beginning of the season, it is recommended to have a low frequency of watering. As the crop approaches the midseason, it should be at the peak and then declines again as the crop gets to maturity.

Moreover, the need for water for a peanut crop depends on the growth process of the plants. The water supply is essential during vegetative production, as well as flowering and pod formation. 

The adequate rainfall and irrigation can encourage the vegetation as well as the yield of the crop in the season end. 

On the other hand, during an extended drought, the formation of pods to vegetation would be not as adequate as it should be.

Too much watering encourages soil-borne diseases, flows some nutrients required for the proper growth and production of pods. In the late season or during pod ripening, this can trigger some maturing kernels to germinate, reducing the ratio of perfectly formed kernels during harvest.

Once flower petals break apart in the groundnut farming, the peanut ovary grows and penetrates the earth. The fruiting cycle of the peanut plant is roughly two months. 

The ovary, termed as a peg, enlarges and grows down. It is interesting to see that the plant forms a small stem that reaches the soil. 

The peanut embryo resides in this peg. Once, the peg gets into the soil, the embryo bends horizontal to the soil surface and starts to mature into a peanut. 

The peanuts have their nitrogen supply. Thus, it is recommended to avoid fertilizers rich in nitrogen that promote leaves and not fruits. 

Eventually, the plants get their resources from the well-prepared soil.

The peanut plant needs full sunlight to grow on a peanut farm in Virginia. In case you are growing peanuts in the hard soil, it is worth mixing enough organic matter to make the soil fertile and friable so that pegs can easily penetrate the soil surface and can go inside to turn into a peanut. Moreover, ensure that you have good soil drainage. 

At the end of each peg, peanut shapes. It is appropriate to put down thin mulch like straw and grass cuts, such that the surface should not crust and the pegs can easily reach the land.

Once the plants reach six inches height, plow around them to make the soil loose so that pegs can penetrate the surface easily.

Disease in the peanuts

Young seedlings can be under attack by the fungal species. 

Shortly after germinations, plants can get diseased and never get out of the field or can die during the early growing season. Seedling signs differ because of multiple causes for peanut farm Georgia.

Verticillium and Fusarium Wilt

Soil-borne fungi that penetrate plants from the roots are the cause of diseases of verticillium and fusarium. They cause the plant to be sick by growing in the water-conducting xylem tissue. 

Verticillium wilt (Verticillium wilted) is commonly found in cotton and potatoes. While Fusarium Wilt is a vegetable disease.

In the case of a Fusarium or Verticillium, once an area has been contaminated, the bacterial spores survive for several years. 

The crop rotation can help for a bit to reduce the bacterial spores.

But in the case of groundnut farming, however, contaminated regions may not be suitable for producing peanuts. 

Must Read: Growing Mushroom for Your Diet

There are no available fungicides that adequately treat infected plants for any of the diseases or reduce the number of spores present in the soil.

Pod Rots

More than one fungus can be related to rotted conditions when pod rots occur. If a significant infection is observed during the crop, it is worth to apply a fungicide that guards the plant against further infection.

Pod rots do not have any visible symptoms above ground, so it is necessary to uproot plants across the whole field particularly after the pod formation. That is the only way to spot rots of seeds. 

Besides, sound plants do not ensure healthy pods and peanuts under the soil automatically.

Nematodes

The plant parasites reside in the earth and infect plants. The problems are considered to be induced in two types in groundnut cultivation, root, and root-lesion nematodes. Usually, it is seen that only limited field areas are infected, however, if the expansion can destroy a crop.

The leaf spots may be caused by irrigation followed by high humidity during the growing season.

Fungicides should be used to combat leaf diseases as high humidity and moisture exist during the growing season.

Typically, fungicides used for the foliar diseases should be used on leaf surfaces and will start according to the drug labeling until contagious spores settle.

Insects

Insects are usually not a big concern in the processing of peanuts. It is assumed that the regulation of thrips in peanuts allows plants to mature early, but there has been no scientific evidence for such an event. 

In some cases, armyworms may be an occasional concern on a peanut farm. Some of the peanut fields often get harm from grasshoppers. However, labeled insecticides manage both easily.

Once, the plant has grown the grower checks if the field is too moist or too cold to dig. 

If conditions are correct, the peanut is ready to harvest. It is appropriate to uproot the entire plant out of the ground with the pods. You can leave it into the sunlight to dry out for a couple of days until the pods lose around a third of their moisture.

It is noteworthy that not all pods grow equally. Once the highest number of pods matures, you should harvest your crop. 

How to: Growing Tomatoes in Containers, Raised Beds & Backyard?

When it comes to tomato flavor the list of delicious cuisines is fairly long. Besides, take a look at your favorite fast food, whether it is a hamburger, or delightful wrapped pizza, without a slice of tomato you can’t imagine the taste that can touch your palates. 

Tomato’ Journey from Concern To Preference

Tomato farming has a tradition. While it’s usage in popular culture is ironic. In the late 1700s, a large percentage of Europeans were frightened by the tomato.

The fruit was termed as poison apple then because it was thought that some of the aristocrats fall sick and eventually died after consuming them. Although, the real reason behind the tragedy was the utensils of wealthy Europeans. These pewter plates have high lead content.

Also Read: Farming Orange for a Perfect Citrus

Since tomatoes are so rich in acidity, the fruit can leach lead from the plate when put on this specific tableware, resulting in numerous deaths from lead poisoning. At that moment, no one related this to plate and poison, and eventually the tomato bore all the blame.

Moreover, the tomato was not only criticized for lead poisoning. Before the fruit found its way to the table in North America, tomato is misunderstood as a lethal nightshade-a family of Solanaceae plants containing toxins called tropane alkaloids.

While as far as the use of tomato concerned, Italian started the use of tomatoes in their cuisines. And, mass migration from Italy to America in the 1800s made tomatoes famous in North American and since then tomato has been in the focus of flavors. It has come so far to be an essential vegetable from the fruit in our everyday cuisines.

Growing The Tomatoes

Tomatoes are subtropical plants and therefore need a maximum sun position. For the tomato cultivation, this is particularly important for growing areas to have sunshine at a premium. 

Besides, the tomato plants need six to eight hours of daily sunlight to flourish. During the growing season, it needs to be sure to give sufficient room for the growth of each plant.  

Apart from this requirement, the selection of the seed is the utmost variety as the market has thousands of varieties to choose from and some of them can suit your requirements better than others.

Determining the seeds

When it comes to picking a variety, hundreds of varieties are available. You can determine the right one based on some aspects.

According to the growth model. 

You can discover the tomato seed based on the height of a plant. There are two types of plants at maturity.

1. Indeterminate or vining types – a tall plant 

2. Determinate – a short bushy plant

It is better to choose based on your selection of area.

Based on fruit characteristics

These are taste, smell, color, texture, shape, etc. While yield is one of the most important aspects of a variety that is the priority that we need to focus

Growing area 

Is your space outdoor or in a protected setting?

When the seed variety is concluded, it is high time the soil is prepared according to the correct seeding guidelines.

Preparation of Seedlings

Tomato seeding requires a slightly hot environment, especially in indoor conditions. The proper time for tomato seedling is in late February to early March. And, seeding in tomato farming needs the well-mixed compost that can be warm up to the 22 degree celsius. It’s rational that a young seedling will keep warm until the start of the summer with a bit of warm compost.

You can seed at a very short distance often known as sort seeding and will require at least two cubic feet of soil.

Tomato seeds are quite small so you won’t see them again if you grow them too deeply. The tomato seed planting depth should about a quarter-inch, partially filled with a moistened potting mix.

Besides, you can sprinkle 2-3 seeds into the trench and cover them with a mix of potting. Strengthen the blend gently so that the seeds go enough deep into the soil. If it doesn’t sound wet enough, you should spray the surface with water.

Nurturing the Tomato Seedling

You will wait for the plant until a seedling has real leaves. Now it needs better treatment for the young plant. It’s the best moment to continue feeding. At this time, the sunlight is critical and always requires putting the seedlings under sufficient light exposure.

When they are about 6-8 inches high, the seedlings get the first truss flowers. Now, it is time to prepare compost or rusty manure.

Preparing The Soil

Tomato farming is seasonal, especially for warm weather and better suited on well-drained, fertile soils. 

A sloping surface approx two percent is desired for early production with sufficient sunlight in place.

In some cases, it is feasible to also grow tomatoes on pots or containers, whereas in personal usage or a hobby it is favored.

This method needs more intense feeding due to the restricted root area. 

These plants must be drained better, besides plants like tomatoes need to have enough area. If you choose to grow into pots, selecting a well-drained big pot, at least 30 cm tall with a regular potting mix is ideal.

It’s best to change the soil before growing them again. It has been noticed the or soil pests and root diseases can be a serious problem.

Soil Requirements

Before you grow in the field, make sure that during winter, just before you plant, you put in plenty of compost or manure as an overall fertilizer.  

In the case of tomatoes, fertile land is the base for every good harvest. Prepare the soil with a ton of rotting waste and a complete wheelbarrow on 3 square meters.

In case of sowing into pots. The number of seedlings should be two and keep in mind they need to be irrigated and cared more as compared to others.

Transforming and Planting a seedling

The tomato planting distance should be about 18 inches apart, leaving 30 inches between the rows. 

A good plant up to 2 meters high can produce hundreds of fruits while consuming a relatively small size.

As a young tomato plant has been sown in well fertile and nutritious soil. Now it is time to look after these plants.

Nurturing the Plant for Tomato Cultivation

A complete nutrient solution with trace elements (especially in case of use of artificial mixtures) should be provided to transplants at weekly intervals.

They can also be fed with water using a diluting nutrient solution

The latter approach has the benefit that the fertilizer is supplied more according to the needs of the plant: more in hot, warm days; fewer in cool cloudy days.

In each case, following the instructions for feed quantities on the fertilizer label. A fertilizer where the bulk of nitrogen is nitrate instead of ammonium and urea is better than the others.

The issue with the Tomatoes

1. Blighting

Tomato blight spreads fast, leaving a visible brown patch all over the surface, especially with outdoor plants. This is a common problem caused by wet weather. It not only ruins plants, but they also eat the crop.

The moist environment offers perfect environments for early fungal diseases, which first develop dark spots on the bottoms. Make sure any bad or ill leaves are collected during the season.

 The substantial fungal disorder is more destructive and destroys plants fast.

It needs spraying the plants with a fungicide, such as chlorothalonil or copper, to shield them from fungal disorders.

2. Fruit Splitting

Tomatoes with certain strains that are more likely than others to have issues commonly caused by irregular watering. This problem in tomato farming should be fixed by more frequent watering.

3. Pest and insecticides

Search for green and whitefly, as both will spread. As soon as you notice pests, spray your plants with a recommended insecticide. 

Tomato has a significant effect of such incidence while it directly hampers the yielding

Finally a Fruit full Cultivation

Tomatoes continue to develop their color changes, with a subtle pink or yellow blushing, from bright medium-green to light shade. The exact ripeness indications differ with variety, but usually fully mature tomatoes have a dark color.

Can okra and tomatoes grow together?

Finally, tomatoes and other vegetables are a great food source for stink bugs. Planting okra near the tomatoes draws these pests away from your other crops.

Must Read: Planting and Growing Okra Step by Step

Companion planting strives to boost harvests by situating plants that have symbiotic relationships. Used for centuries, selecting the right companions for tomato cannot only reduce pests but also provide a haven for beneficial insects, boost pollination, enrich the soil and in general diversify the plantation – all of which will produce healthier plants that can fend off disease and produce bountiful crops.

Conclusion

Once done with the plucking the proper ripe tomatoes. Last but not least for tomatoes farming is storage. The cooler temperatures will minimize flavor and induce sluggishness in a refrigerator is not to be advised. Although lower temperatures will allow the fruit to stay

Goat Farming – Must-haves Before Embarking

The global population of goats continues to expand, now approaching one billion. The number of goats raised mainly for milk production is also increasing as demand grows. Much of the world’s dairy goat output and use are in Asia.

Still, a global perspective of the dairy goat industry provides valuable lessons to develop productive modern dairy goat industries. Europe, particularly France, considers the most regulated market for goat milk. 

The Extent Of Goat Farming Worldwide

goat farming

The European goat sector specializes in milk processing, mainly for commercial cheesemaking, though maintaining conventional on-farm growth. State participation is essential in governing, investigating, developing, funding local supplier associations and markets, and maintaining health and efficiency. Nonetheless, manufacturers often face demand volatility.

Also read: Sheep Farming – A Step to Step Guide

Modern dairy goat industries prove goat farming profitable

Advanced dairy goat industries are emerging in countries with no long goat milk tradition like China, the U.S., and New Zealand due to increasing market demand, high prices, and climate change. The strategy, management, and consumer mix vary greatly.

Still, irrespective of region, the dairy goat sector thrives when farmers have exposure to markets and tools and expertise to manage their livestock and natural resources sustainably.

Those are accomplished more readily by robust, equitable producer associations, access to professional support, and policies that allow vulnerable and disadvantaged communities to profit from through demand.

Evidence of why goat farming is profitable!

The global dairy-goat industry is increasingly growing. Besides safe and nutritious milk-based products provide sustainable livelihoods, particularly in resource-limited areas, and help smallholders to accumulate assets.

Well-managed goats may also support the ecosystem by weed management, fire protection, habitat conservation, and climate change mitigation. It is mainly attributed to their collection and feeding behaviors. In addition to milk, dairy goats have other incentives for owners, including leather hides, meat animals, and fertilizer manure. They can create income sources while grazing under trees on oil palm plantations.

Goat farming for meat

Goats that are farmed for meat processing comprise the bulk of the world population. In developed parts of the world, goats are generally considered as a specialty or exotic livestock. In contrast, in developing countries, particularly in South-East Asia and Africa, goats are the primary source of meat production (Dhanda et al. 2003).

South Africa’s Boer Goat is the only recognized breed chosen for meat processing. Other types include Anglo-Nubian (dual-purpose animals), Kiko of New Zealand, Damascus, and Spanish. There are various crosses between Boer bucks and dairy goats. Many local breeds have meat characteristics in different areas of the world.

Why would people buy goat meat and milk?

The answer to this question will be the answer to your question about why to do goat farming?  People will buy goat’s milk as it is a good source of nutrition and has several health benefits. It is due to these health benefits goat farming for milk is a lucrative business.

It was provided that it was eaten in adequate quantities. It has comparable protein, lower fat, higher calcium, magnesium, potassium, identical iron, and lower B12 and folate content. On the other side, goat meat produces weak saturated fatty acids and cholesterol and is a safer option to other red meat forms. Therefore, goat farming for meat is a good idea.

Leather production from goat

Goatskin leather is used for soft hide pockets, hats, gloves, and other items. Traditionally, leather bookbinding was favored. Untanned goat skins are used as containers for beer, kefir, food, etc. High-quality goat skins from Bangladesh Black Bengal breed.

Advantages of goat farming for milk and meat
  • The initial investment in goat farming is significantly less than dairy farming.
  • You can even start goat farming with one goat and then gradually increase to a herd.
  • Goats will, in no small degree, bear bitter tastes compared to other species. They also eat nearly all kinds of plants that other species do not consume.
  • Mutton and goat meat are much in demand, and there is also no religious, social taboo about it. It produces lean beef and has less cholesterol.
  • The small fat globules in the goat’s milk make it easily digestible. 
  • It’s dropping a vast amount of nitrogen, potassium, and phosphorus.
  • You start to get milk’s goat as soon as they grow 15 to 17 months older.

Goat Breeds

If you are still searching for the answer to your question, “Is goat farming profitable?”  read this and get the right answer.

1. Fainting Goat

The Fainting Goat is a domestic goat breed. It also has other names, including Myotonic Cup, Tennessee Fainting, Tennessee Meat, Anxious, Rigid, Texas Wooden Leg, Rigid Beet, and Scare Cups. A race trait known as myotonia congenita is referred to under the term “Fainting,” a condition in which the muscle cells are prolonged when the goat is shocked. The exact origin of this breed of goats is unknown.  

Characteristics of fainting goat

Fainting goat is smaller than the standard breeds of goat. The most common colors are black and white in this breed, but most potential colors are also present in this species. The Fainting goats have wide, distinctive eyes on high bases. The hair can be either short or thick, with some people grow a lot of cashmere in colder months. 

2. The British Alpine

The British Alpine Goat is a domestic goat breed mainly used for milking. It was produced by other breeds of Toggenburg goat in the early 1900s. The goat of Toggenburg has the same Swiss marks. The British alpine goat, native British goats, and Nubian goats were produced from the Toggenburg.

The breed is known for producing high-quality milk as well as prolonged lactations. The race was brought to Australia in 1958 and is spread throughout the world. Although maybe not as much as other milking goats like the Saanen horse.

Characteristics of British Alpine Goat

British Alpine Goat is a beautiful animal and looks pretty good. They typically have white Swiss markings in black paint. But at times, a black goat will appear, and the breed is sometimes referred to as ‘all black’ or ‘black Saanen goat.’

Although their slim black coat lights up because of the absence of copper in the diet (copper is one of the essential minerals for all goats, and its color may indicate its consumption of copper). The breed has a traditional ‘clover’ shape, typical in some other dairy goat breeds.

Like many other milk-based goats, British Alpine goats are often distributed. You have hair, ears upright, and a straight muzzle line. The perfect bucks height is 95 cm and 83 cm.

3. Arapawa Goat Characteristics & Breed Information

The Arapawa goat is a dual-purpose domestic goat raised for the production of meat and milk. Arapawa goat is simply a wild race of a local goat and one of the rare species of goat in the nation. The breed was found isolated in the Marlborough Sounds of New Zealand on the Island of Arapawa.  

Characteristics of Arapawa Goat

Arapawa goat is a comparatively small breed of goat. It is smaller than modern dairy breeds. The goats of Arapawa come in different colors and patterns. Brown, black, fawn and white are typical colors and patterns.

Must Read: Dairy Farming

The race typically has distinct faces and several goats and bowl stripes. They have bright labels and black and brown patchwork.

4. Aspromonte Goat 

The Aspromonte goat is a domestic goat raised for the production of meat and milk. It is also called Aspromonte or Capra dell’Aspromonte. The species is named after the Aspromonte mountain range in the province of Reggio Calabria, in southern Italy.

Aspromonte goat is only grown in Reggio Calabria, mostly in Aspromonte, on the plateau of Zomaro (Altipiano Dello Zomaro) in the north-east and on the province’s ionic coastlines, and in the Germanic areas in particular.

Characteristics of Aspromonte Goat

The goat Aspromonte is a medium-sized dual-purpose goat breed. Their head is tiny and their face is straight. They have horizontal or upright ears. Their abdomen is relatively broad, with a straight back and a sloping rump, for the size of the animal. The udders with medium size teats have been firmly attached.

Both bucks and bucks are barbed and have horns typically. The head and bucks’ antlers are more significant than the deer. The bucks have more muscular extremities and more robust fur. The Aspromonte goat’s coat is long with a ruddy cassava-like undercoat.

Their color varies. Red and white, black and white, blue, orange, orange, and gold are the most common colors. Aspromonte’s average height is about 69 cm and the bucks about 73 cm.  

5. Appenzell Goat

The Appenzell Goat is a dairy goat breed raised primarily for the production of milk. The race comes from Switzerland’s Appenzell region. It was named after its place of origin. Some other names like French are given to Appenzell Goat. It is a relatively old breed of goats and has been recorded for more than 100 years. The Appenzell was founded in Innerrhoden in February 1902.  

Characteristics of Appenzell Goat

The goats of Appenzell are medium-sized creatures. It is pure white with medium-length hair and a healthy, harmoniously formed body. Appenzell goats have connections with the Saanen goat, but their body is a little broader than those of Saanen goat and, therefore, significantly smaller.

What to consider making goat farming profitable

  • Location: The best places for a goat farm are far from cities because urban congestion is bad for animal safety. As goats eat a lot of grass every day. You must also ensure that your food supply is very convenient and not too far from the breeding area.
  • Land: Goats can be intensively grown on small acres with additional feed. If you use a comprehensive scheme, 2 to 8 goats per acre would be a rough guide for grass and brush supplies.
  •  Veterinarian: Simple access to a veterinarian is a significant factor. If you start a goat farm, your goats are likely to contract diseases. A veterinarian can, therefore, help reduce losses in disease control and management. They help you diagnose diseases or advise on supplements to keep your pets safe, particularly in stressful situations such as weaning.
  • Transportation: A market close to the farmland is best, as it allows you to sell your commodities and buy the goods required simply.
  • Care: Always try to care for your goats properly. Do not feed them with tainted food or water. Keep your home as tidy and safe as you can. You must frequently clean your room. Take extra care of the children and the pregnant. Keep the kids some weeks after their birth with their mother.

Conclusion

That’s all about goat farming. So, whether you do goat farming for milk or meat, you can make it a profitable business.


How Many Months Does it Take Turkey to Grow?

Rising animals for different purposes is not a very new idea. People have been raising various kinds of animals and birds for multiple purposes. It is ultimately a magic of science that has given us different techniques to raise and use different organisms for mankind.

Turkey is commercially very profitable and excellent to raise birds. These birds are very easy to raise and don’t require a lot of specific care. Even the numbers can be very good at a time and same as broiler chicken people do love to have turkey for an excellent evening.

They are famous for basically two reasons, eggs and the meat they produce. If you talk of poultry business and if you are a newcomer, Turkey can be the best one to start with.

How to start Turkey Farming?

If you think that Turkey will need a specific environment or some tough handling, then you completely have got wrong. These birds are very friendly and like to interact with humans. They are very similar to chickens and ducks, and hence one can find it very easy to maintain them. Tukey likes to be social, and the interaction often is great.

One should keep in mind that Turkey needs easy care, and hence we have some basic steps you should follow before raising them.

  • Choosing the best breed, you need to raise-

Turkey is a very diverse genus, and hence you need to select properly the breed you want to go for. Many breeds of Turkey are hard to raise, and they don’t have that much profit commercially. The time is taken to raise, and the amount of care and feeding one has to provide the bird really does matter. You should keep in mind that in Turkey Farming you will have to be selective and will have to go with the one that can bring profit to your Business.

There are many breeds that are not that efficient in meat to price ratio. Many of these birds don’t have a lot of edible meat, and hence the profit margin comes down. Even the gestation period or the period in which these birds lay eggs is an important fact to have a note upon.

Some of the breeds lay a good amount of eggs at a time while the others don’t. You need to study all the Tukey’s well for a good selection. Even the amount of the feed you are going to provide you becomes important as it can be an economic factor for the businessman.

  • Economic stability-

Another very important point to take care of is the Economic stability of the farmer. It completely depends on you and your financial status of how big and complicated your farm can be.

Everything which the Tukey’s do need can vary a lot depending on how you are approaching. It is a fact that the more you invest in a business, the bigger it is, but we will suggest going with a simple approach at first. Try doing it and managing it on a small scale and hence get an experience of how to approach Turkey farming.

Also Read: A Complete Business Guide to start Emu Farming

  • You will have to house them well- this means that the fencing and area where you will be keeping and growing birds should have good facilities. The fencing even matters a lot of Turkeys as these are very strong and big birds. They will require constant care to raise and hence the birds to require good housing facilities.

Even to get your Business on the road of commercialization, you will need to provide the birds with good facilities. You can have some points in your mind before going with anything to house them. New technologies such as electric fencing for poultry and wooden houses with good facilities are important in raising the bird. You must have good predator resistance as they are very prone with their strong smell to them.

On the other side, the birds are larger than the usual chickens and commercial birds so you will need even better protection and arrangements. Space and ventilation are very important to promote fast growth. Keeping the number of birds in your mind, you will have to pre-plan everything.

Cleaning the area of raising these birds is very necessary for a hygienic environment. Try keeping the fence as strong as possible and high above the ground, because once they are grown up they are strong birds and you don’t want to lose them because of such reasons.

  • Feeding and watering

Another aspect of poultry farming is feeding your bird. Turkey is a very big bird, and it needs a good amount of diet. Even the protein content is to be taken care of in the feed you will be providing. The least amount of protein which these birds need is 28 % of their daily intake, which gives you a lot to take care of. Even the quantity does increase with turkey.

The water needs to be good and pure. These birds easily catch diseases with water as an agent. You will have to provide them with gallons of water to make them stay hydrated and then also make sure there is no presence of any harmful pathogen in the water. Good food and water can make them grow faster and give you better results both with meats and eggs.

  • A good caring environment

It really does not matter if you’re opting for such a farming technique just for Business. The bird does need very good care. It will have to be in the good management of you and your team. You will have to take care of any type of contamination, space and other such factors. Even you will have to maintain hygiene with your veterinary doctor. All you need is to love them and raise them.

If we are talking about Business, we can’t forget the profit. So the next question up here will be-

How much turkey farmers make?

On average, a farmer with Turkey farming deals with more than $30,000. It completely depends on your way, and the meat you get that will make your profit. Mostly Turkey gives you 7-12 kg of meat. Eggs are also an important commercial factor. In India, Turkey is not a very common bird so the prices are high whereas in many countries, Turkey is very common and hence the consumption rate will give immense profit. Moreover, $15 in an hour is the most common price people get with this farming. It is a very good earning rate for a common farmer, and hence it’s great to have such a business.

Turkey Farming Facts

So in this section, we will take you into some of the most amazing facts about Turkey Farming. This will help you in raising a successful business.

  • They are not all vegetarian animals- there are not pure veg eating birds. It’s really great to notice that they are omnivores. They like to eat worms and other meats too. Isn’t it great as the bird can be fed on a good amount of protein in no time and even at very reasonable prices? It has both merits and demerits with this point, and hence you can have the edge over other types of birds.
  • Turkey is a very sensitive animal. Though these birds don’t need lots of demands, you will have to take care of them every day. You just can’t skip vacation for a few days from your farm as this might lead you in big trouble. Your birds can even die if left alone. A good survey and regular reports should be there to keep the check. The farmer needs to be very specific with these conditions before going for such a farm. Even the maintenance is sometimes high, so be ready to face the conditions.
  • Turkey is very different with hormones- if you contact a doctor for your flock of Turkey, you will get to know how different these birds are. One cannot store antibiotics and other tablets for future use with Turkey. They need new prescriptions every time. The animal is sensitive, and these birds easily get influence from others.
  • The young turkey can look sick- don’t worry and panic up if you see that the young turkeys in your farm have spots on their body that lack features. They’re very normal and can be due to the changes these birds go through. These birds do lose all their features during the development, and eventually, new features come up on the grown bird. It is just like humans losing the first set of deciduous teeth and further getting the permanent one.
  • They are best friends- Unlike any other bird, Turkey is very beautiful in colonizing. They really love each other a lot and hence are often seen in groups. They like to share their food, keep care of other mates and their babies and a lot more. They do like to be in a group just like a group of best friends do hang out.
How long will it take to raise a Turkey?

Talking on the point that what will be the time in which a Turkey can grow up fully so that one can use it commercially then this really depends on the selection and care. A Turkey on average does have a life span of 10 years and hence needs time to gain maturity enough to be profitable.

On the other side, a Turkey just needs 4-5 months to grow up and acquire the maximum size, so don’t be in the wrong thought that you will have to wait for years. Above 16 weeks it will get fully grown up, and hence a farmer can use it for his own commercial purpose. Six months can be enough to sell these birds in the market with meat aspects.

Turkey weight gain chart

This is a very important chart to maintain as you can get a very accurate data of how your birds are doing. The chart contains important data as the food intake, the medication that the bird ate and other such details. Everything gets a good measure of how the management is going which helps you to keep track of all your Turkeys. Isn’t it great to have such a chart? It really can help you to go swiftly with your farming.

Turkey Growth stages

Like any other bird, a turkey needs different nutritional requirements at different stages of their life cycles. In the beginning, when Turkey is just a small bird, it needs the most care. Even the heat which one has to provide in such a stage is very much specific. You can not provide more or less in this case. In the beginning, it does look the same as a small chick. Soon the features will start coming on the main body. This leads to ease in your work. The bird in this age starts taking care of itself and is well mature enough to be left in a more open environment.

The main point which makes a turkey different from all the other in the growth stages is the amazing size change the bird goes through. Just in 6-7 weeks, it grows up to a big strong bird, and this is not seen in any other such poultry animal.

Turkey farming profit

Sometimes the profit depends on the area of raising. In many countries, people don’t consume this bird a lot, and hence the sales get down. Also, it’s seen that the market gets boosts in different seasons or occasions. American do consume the normal amount of turkey during Thanksgiving thrice. The meat of turkey is very rich in lots of vitamins and is a portion of complete party food. The bird on an average expenditure of Rs200-300 gives a profit of more than Rs500. It might differ on size and the sex of the bird.

Conclusion

Turkey Farming doesn’t need a lot of complication. It is very swift and makes a good profit. The article was our effort to help people with Turkey Farming, and we hope it helps you out. Just keep stick up to the basics, and things are done.

Refrences:

https://vikaspedia.in/agriculture/poultry/turkey-farming#:~:text=A%20market%20study%20shows%20that,give%20a%20profit%20of%20Rs.

Turkey Farming: Profitable Business Starting Plan For Beginners

https://study.com/academy/lesson/life-cycle-of-a-turkey-lesson-for-kids.html

https://www.researchgate.net/figure/Turkey-Feed-Consumption-per-1kg-of-Body-Weight-Gain_tbl1_228667995

Is Custard Apple Farming Profitable?

The custard apple, Annonareticulata L., is commonly ranked among the influential representatives of this family, both in the tree and in the berries. Its descriptive English name has been widely misapplied to particular species and the hybrid ATEMOYA, and it is often incorrectly referred to as “sugar apple,” “sweetsop” and, by Spanish-speaking men, “anon” or “onion,” in India as “Ramphal.”

It also received very few appropriate geographic titles. Most widely used as an alternative term in English-speaking regions is bullock’s heart or bull’s heart.

The custard apple tree isn’t pretty. It’s upright with a rounded or spreading crown and 10-14 in (25-35 cm) thick base. Height from 15-35 ft (4.5-10 m). The poorly smelling leaves are evergreen, alternating, oblong or narrow-lanceolate, 10-20 cm long, 2-5 cm thick, with visible veins. The flowers are fragrant, small, with three outer fleshy, thin petals up to 2-3 cm long, light green outside and pale-yellow with a dark-red or purple patch within in the middle. Never completely open bulbs.

Origin of the Custard Apple

The custard apple is thought to be native to the West Indies but was brought to southern Mexico in early times from Central America. Fostered and naturalized as far south as Peru and Brazil. It is usually grown in the Bahamas, often in Bermuda and southern Florida. It was planted in South Africa in the early 17th century and is cultivated as a fruit tree in South Africa.

The tree grows in India, particularly around Calcutta, and runs wild in other places. It has become relatively popular on Malaya’s east coast, and across Southeast Asia and the Philippines, though especially esteemed nowhere. This was stated extensively naturalized in Guam eighty years ago. It’s unclear in Hawaii.

Custard Apple Quality

No named cultivars are registered, but the fruit quality from various trees differs considerably. The yellow-skinned forms are preferable to the brownish and have smoother, juicier meat when well packed. Seeds of a purple-skinned, purple-fleshed type were planted in Florida, and the tree developed unremarkable quality fruit. Keep the quality factor in mind when planning about custard apple farming.

Must Read: How To Do Watermelon Farming?

Propagation techniques

Custard apples can be propagated in three ways: gene, budding, and grafting processes. Seed: seeds usually produce custard Apple. Budding: Chip-and-shield budding will even spread it. Budding happens in spring as the sap begins flowering. Grafting: Whip grafting succeeded in increasing yield and efficiency. Plants usually propagate custard apples.

For rain-fed conditions, when they attain a height of around 20-25 cm, seedlings can be grown in polythene bags packed with garden soil and planted in the field when the monsoon begins.  

Custard Apple farming zone

The custard apple prefers low-lying, dark, fertile soil with enough moisture and durable drainage. It develops to full size on oolitic calcareous in south Florida and grows wild in light sand, and numerous other soil types in the New and Old-World tropics but is undoubtedly less competitive in less suitable locations.

Custard Apple Farming: Planting Custard Apple

Here we are going to discuss various steps associated with custard apple farming, and in other words, agriculture begins with the planting. So, let’s explore it step by step.

 1. Getting seeds

You can get sugar apple seeds from your nearest garden center or, if you have a friend, you can get seeds from the flesh with the help of your friend. You can also order seeds from the online retailer. If you get seeds from the flesh of a custard apple, you will have to wait a week before planting the seeds from the fruit. They don’t germinate well if you immediately place them in the dirt.

Cut the custard apple fruit and extract the big, black seeds. Put them in a seed envelope, wait a week before planting. If you bought seeds from a garden center, you need not wait until planting.

2. Soak the seeds

While germination can take thirty days, soaking your seeds will speed the process. Wrap the seeds in a paper towel. Soak seeds with some water. Place the paper towel seeds in a bag. Let your seeds soak three days before planting.

3. Finding a sunny spot

Because custard apple is a tropical tree, you want a bright spot to start seedlings. You’ll want to place your seedling tray in front of a window facing south, so the seed gets more than enough warmth and light. If you don’t have a window facing south, you will grow lights. So, all in all, you need a sunny spot for custard apple farming.

4. Putting potting soil in a seedling tray

You’ll need at least two to three inches deep seeding tray with drainage holes that you can find at a garden store. Fill the seed tray with new compost from the garden shop, as opposed to garden soil. You would like to moisten the soil until planting the seeds.

5. Put the seeds in the soil

Plant two or three centimeters deep in your seedling tray. They will be one-and-a-half cm apart. The plants will germinate within 30 days. 

Moving to the next step

Now it’s time to move outside. And transplant the seed out there.

Also Read, Papaya Farming Ultimate Guide

1. Choose warm climates

In hot or near-tropical weather, plant your custard apple tree. Since sugar apples can survive drought, you can plant it in a dryer environment. Cooler temperatures are not anticipated, so stop planting it outdoors in winter or night cold areas.

2. Transplant in the spring

In spring, you can transplant your custard apple tree or whenever the climate reaches between 23-24 Celsius. You will consider a place with a wind cover, plenty of suns, and not prone to waterlogging.

3. Choose the sunny area

Custard apple is a tropical plant growing well in South America, Asia, and Africa, so enjoy the sun! You will plant it in a warm, wind-protected spot.

4. Soil should get good drainage

Use fertile, well-draining apple-tree soil. You can grow it in sandy, calcareous or hard loam soil because it tolerates a variety of soil types. However, avoid waterlogged soil and ensure proper drainage.

5. Dig a hole

As custard apple trees have deep root systems, the planting hole should be twice as full as the seedling root ball. The hole depth will suit the root ball size. Place the root ball in the hole, cover and cover the seedling

6. Watering the plant

Water your tree rarely but extensively. Custard apples have mild watering requirements and withstand drought, although they drop leaves if the drought is severe.

7. Using organic fertilizer

To get the tree started, you’ll want a full fertilizer. Using organic fertilizer to boost root system growth.Using 3-10-10 fertilizer to increase yield in later years.

8. Giving shape

To shape your custard apple tree, you’ll want to trim it in spring. You’ll find it grows in several parts, which can get very unwieldy. You’ll want to trim back to shape the tree and extract any old berries.      

custard apples
Irrigation of Custard Apple

Custard apple cultivation does not require watering to grow relatively good crops if successful water storage is impaired by micro catchment in the rainy season. Irrigation during flowering and fruit production is essential.

However, in the absence of water harvesting in the post-monsoon season, two or three irrigations aid in fruit quality and higher growth. Fruit collection yield per field and consistency are superior in pulp/segment irrigated plantations.

With each carrying, plants receiving daily water thrive. Pruning, fertilization, and irrigation are essential for optimum production. For regions with water-limiting schemes, pool, trickle or drip irrigation help in the judicious usage of water. Fruits are grown in low rainfall zones.

Land forming may be used to drain rainwater around the plantation. Contour terraces, contourite, and micro-catchments often help effectively using water. Plowing and mulching during rainy season allows retaining moisture further

Custard Apple Varieties

Some custard apple fruits are tiny and produce plenty of seeds and nothing to consume. On the other side, certain custard apple varieties grow broad fruits with just 5-7 seeds and all substance to enjoy. Custard apples are two major types, both short, juicy and flavored. Break them in two, pinch the meat with a tablespoon and enjoy.

  • Pink Mammoth: Good quality fruits are enormous. It may weigh up to 3 kg and have very few seeds, nearly seedless. This is custard apple’s most popular commercial form.
  • African Pride: The fruits are smaller up to 500-800 gm. But this type of variety of custard Apple has more seeds than the Pink Mammoth. This fruit starts growing sooner. Skin blackening and other fruit issues are susceptible.
Custard Apple Cultivation: Seed benefits and business opportunities

We know that the benefits of the seed of custard apple have nothing a lot to do with its cultivation. But when you plan for custard apple cultivation, you must be aware of the benefits of its seeds. The reason is straightforward, its seeds are in massive demand in the market.

So, more needs will create more opportunities for you in terms of business. For say, through custard apple farming, you will not only be able to sell the product but also its seeds can give you some good company. So, without wasting any time, let’s quickly get to know about the same.

1. Eradication of head lice

Are you sick to scratch your head because of the insects and nit? Has everything failed, such as the dandruff shampoos? Seek the seeds of the custard apple. Only take some, grind in powdered shape and blend into a paste with a little water. Apply on the head and give 10 minutes to rest.

Wash with sparkling, clear water. This process will yield great results twice a week for a month and leave your head entirely safe.

2. Works as a pesticide

The same blend can also be used for your home garden as a pesticide. Regularly spray a few of the riddled plants for 10 to 15 days, to avoid leaf-eating insects.

3. Use in pharmaceuticals

Its seeds are commonly used by drug makers because of their emergency contraceptive properties that have been scientifically confirmed. It’s used to manufacture drugs to cause abortion.

4. Use in Biogas

Countries like Germany and several other European countries use these few wonders to generate biogas for commercial purposes. The grains of this fruit contains methyl-ester-rich trapped fatty acids that cause gas production.

5. Commercial pesticides farming

The custard apple seeds are also combined with neem seeds to create a new powerful bacterial pesticide used in industrial agriculture. The pesticide produced from such seeds is natural and ecologically harmless. The use of custard apple seed pesticide is perfect for human health.

We have not mentioned these benefits for the sake of mentioning. Instead, we have tried to broaden your idea about the business opportunities you can develop out of these benefits. You can transform any of the benefits into a profit-making business when it comes to custard apple cultivation.

Caution!

The custard fruit is excellent, but the seeds are very poisonous, and unintentional ingestion can lead to abortion, as it is slightly hazardous. The insecticides developed from the grains should be kept from the eyes because they are capable of even temporarily blinding a person. So although you enjoy a dish packed with this healthful fruit, first take care to take off all the seeds.

Reference

https://www.farmers.co.ke/article/2001339100/a-step-by-step-guide-to-custard-apple-farming

How to start Emu Farming (Complete Business Guide)

Emu farming in USA is a very popular and productive business model. Emus are among the large-sized poultry birds having connections from the ratite group and play a very important role in economies around the world. They produce productive meat, eggs, oil, feathers, as well as skin. And the best part is, they adopt in almost all types of climates and agricultural conditions.

Farmers can raise these large-sized birds in both semi-intensive as well as extensive systems. Countries like the USA, Australia, and China are the leaders in emu farming.

And the climate in countries like India, Pakistan, Sri Lanka, and Bangladesh, etc. is also very favourable for emu farming. If you are planning for a profitable emu farming business, you are going in the right direction.

Starting an emu farming business in the US is very easy, and you can start it anytime, especially if you own some land. But before starting, you need to know the right emu farming information. Factors like housing, breeding, caring, feeding, disease management, and atmosphere can make a lot of difference in a successful, profitable, and wayward, fruitless farming.

Also Read: Quail Farming – A profitable business for farmers having small lands

Some interesting facts about emus

  • Emu comes from the species “DromaiusNovaehollandiae.”
  • They belong to the group of ratite families with other birds like Kiwi and Ostrich etc.
  • Birds from ratite are known for “not flying.”
  • These birds can adapt to almost all kinds of weather and conditions, from excessive cold to extreme heat. And hence, emu farming in the US is not a challenge from a weather point of view.
  • They survive for as many as 30 years.
  • These birds are known for their friendly nature and be raised easily on the dry open farm and grassy plains.
  • An adult eum’s average weight is 45 to 60 kgs, while the average height is 5 to 6 feet.
  • Female emus can reproduce for at least 25 years.

Advantages of Emu Farming

There are various advantages associated with emu farming. Some of the main highlights of commercial emu farming are:

  • Emu meat is always in demand because of its amazing taste and nutrition. It is high in energy and protein, and low in cholesterol and fat.
  • Almost all products, including emu eggs, meat, oil, and skin, are of great value in different industries.
  • Emus don’t require a lot of food. They can easily survive in different types of affordable foods. And can give you a lot in return.
  • It is very easy to raise them even with other poultry birds and pet animals.
  • Diseases are less common in emus, and they survive healthily in almost all types of climates and conditions.
  • Emu farming is full of profits and can be an excellent source of income and employment.
  • You don’t need vast management and technical knowledge to raise emus. Only basic knowledge about how to start emu farming is enough.

How to start farming with high chances of productivity

If you own spacious land with enough nature in the surroundings, setting up an emu business won’t take many efforts. Here is a step-by-step guide on everything you need to know about emu farming – yes, A to Z of emu farming!

Location for farming

Selecting a suitable location/land is important to start emu farming correctly. And if you have your own plot of land, then you are in a win-win situation. It would help if you can keep a few important factors in mind while selecting a location for emu farming. And one of them is to ensure proper availability of clean and fresh water, cheap labor, good sources of food and nutrition, proper transportation chain, medical system, and a market near the location.

Manging emu chicks

If you want to get decent emu farming profit, managing emu chicks becomes very important. The average weight of a newly born chick is around 370 to 450 grams i.e., about 67% of the total weight of emu egg. But the exact chick weight also depends on the size of the emu egg.

Manging emu chicks

Keeping the chick inside an incubator for 2 to 3 days is important. It will ensure proper absorption of egg yolk as well as drying of the chick. Then, place them in a house with a deep litter floor. You can easily prepare litter with paddy husk. Setting up a brooder for a batch of around 25 to 40 chicks. Each chick requires 4 square feet of space in the first three weeks of its life.

Set the brooding temperature at 900F for the first ten days, reduce it to 850F, and don’t change the temperature until they are 3-4 weeks old. If you want to raise them properly, taking care of temperature is massively important.

Place enough number of feeders and water pots inside the brooder. Build a chick guard of at least 2.5 feet to ensure the chicks don’t jump and stray outside the brooder. Hang a bulb inside the brooder, and keep it on all the time. A 100 square feet area needs a 40-watt bulb for proper lighting and temperature.

Once the chicks are of 3 weeks, increase the brooder area as well as the height of the chick guard. Keep them feeding with chick starter mash for 12 to 14 weeks or until their body weight touches the 10-kg mark.

Emu chicks need a lot of playing and running space for proper and healthy growth. So, provide them with as much floor space as possible. You can easily raise around 40 chicks in a floor space measuring 30×40 square foot. Space should be drained easily and is free from any dampness.

Grower management

This is the most important part of emu farming information. Unlike most of the poultry birds, emus are big. And naturally, they need large flooring space, large feeders, and big-sized water pots. Keeping male and female emus together is not a good idea, so keep them separately after identifying their sexes. Feed them with birds’ grower mash and 10% of green for 34 weeks of age or weight 25 kg. Never raise chicks with grown adult emus to ensure maximum safety.

Breeder management
  • Usually, emu birds attain maturity at 18th to 24th month of age.
  • Ensure male and female ratio as 1:1 for proper breeding.
  • Each pair requires 2500 square feet area for comfortable mating.
  • You can grow multiple shrubs and trees to induce mating with complete privacy.
  • Plan your breeding campaign properly, and increase the number of minerals and vitamins in their food to better breed. This will ensure healthy fertility.
  • An adult emu needs one kg of food per day, but the requirement reduces dramatically during mating.
  • You will get about 15 emu eggs in the first year. And unlike most of the other poultry birds, the number of eggs increases with every passing year.
  • A female emu usually lays its first egg at the age of one and a half years.
  • The average weight of a healthy egg is 470 grams to 650 grams. Eggs are slightly greenish and are fairly tough in appearance.
  • Usually, a healthy egg takes as many as 52 days of incubation to produce a healthy chick!
  • To ensure proper hatching of eggs, you must have to maintain proper temperature as well as moisture.
  • Proper care and management are very critical for producing healthy chicks. So, you will have to be extra careful throughout the breeding process.

Feeding emus

A balanced diet and nutrition are very important for emu birds, like all other poultry birds. Fresh, high-quality foods play a very important role in keeping them healthy and disease-free. So, for profitable emu farming in the USA, never compromise with the quality of food you provide to the emus. And don’t forget to give a sufficient amount of fresh and clean water at regular intervals!

  • Care and management

Emus are among the strongest birds, and they have a very long life. Issues related to health and mortality rate are also not common. Juveniles and chicks often suffer from a few health problems like clostridial infections, coli infections, leg abnormalities, malnutrition, intestinal obstruction, and starvation, etc.

Genetic disorders, improper brooding, caring, handling, and poor diet and nutrition, etc. are responsible for these diseases. Conditions like ascarid infestations, candidiasis, lice, salmonella infection, coccidiosis, aspergilla, etc. are less common but are noticed in emus.

Vaccinating them on time is a great idea to protect them from possible diseases. Veterinary experts recommend vaccines like Lasota, Lasota booster, and mukteswar strain for good immunity.

Marketing emus and their products

You can earn a lot of emu farming profit as you can sell almost everything! Start selling emu products when they attain the marketing age. Along with emu eggs, meat, skin, feather, and oil are in great demand. You can even sell them as day-old chicks or gown birds! Selling a chick for $50 to $60 won’t be a huge challenge. And you can sell growing emu at $300 to $400. First, explore your local market so that you don’t need to be worried about transport expenses. On a larger scale, you have the whole international market in front of you!

Emu farming is definitely an astoundingly profitable business. The USA’s weather is also not a big challenge, as they can grow in almost every condition. So, follow this detailed emu farming information, visit a few emu farms around your city/town, and start your own business today!

Reference Link:

https://www.roysfarm.com/emu-farming-in-india/

How to Plant, Grow Sweet Potato – Farming Guide

Sweet Potato popularly known as Yams in some parts of North America and is one of the most favorite foods enjoyed by all. It is native to lands of tropical America and generally comes under the family of ‘Convolvulaceae’.

Sweet potatoes are rich in carbohydrates and hence, give a good amount of calories when consumed. Due to its high carbohydrate content, it is used as livestock feed. Sweet potatoes have sweet root tubers. Thus, it is the main source of starch, industrial alcohol, sugar syrup, and glucose.  

How to Plant, Grow Sweet Potato?

sweet potato

Climatic Conditions

Sweet Potato cultivation has a wide color range of tuber skin. This mainly consists of purple, brown, white color tuber skin. Farming is done mainly in tropical and subtropical climatic regions. It is generally cultivated in totally frost-free areas.

Soil specifications

Sweet potato cultivation requires soil that has a pH of 5.8 to 6.7. It can be cultivated in sandy as well as loamy soils. However, the best soil recommended for sweet potato cultivation is sandy loam soil with high fertility and good drainage system. It is advised not to cultivate in areas having light sandy and heavy clayey soil.

It is so because the tuber development in such soil does not occur well. Many varieties of sweet potato are cultivated. Among them, the most common variety is Punjab Sweet Potato- 21. This type gives an average yield of 75 QTL per acre and contains deep red color tubers having white flesh.

Also Read: Growing Mushroom for Your Diet

Other varieties from different states include:

  • Varsha, which is grown in Maharashtra and gives an average yield of 62.5 QTL per acre.
  • SreeArun, which is grown near Sreekariyam gives an average yield of 83 to 116 QTL per acre.
  • KonkanAshwini, which is grown in Maharashtra gives an average yield of 70 QTL per acre.
  • H – 41, Co 3, H – 42, and SreeRetna are some of the improved varieties of sweet potatoes cultivated in the US.  

Land Preparation

Now, a question arises on how to grow sweet potato. Farming requires proper land preparation. It is essential to bring the soil to a fine tilt. Before sowing the seeds, it is essential to plowing the land around three to four times. This should be followed by the planking process. Ensure that the land is free from weed.

This is followed by the sowing process. The best time for sowing tubers in nursery beds in January or February. For planting vines, the best time is between April and July. To sow tubers, keep the depth to 20 to 25 cm. For spacing, it is advised to use the row to row spacing of sixty centimeters and plant to plant spacing of thirty centimeters.

Commonly, sweet potato farming uses vine cutting methods for sowing purposes. In this, the tubers are taken from the old vines and are then planted and prepared on nursery beds. Ridges and flatbeds are used for vine plantation. It is advised to use terminal cutting as it gives a better result. Also, the host plant should have at least four to five nodes.

You can sow around thirty-five to forty kilograms of tubers in half a Kanal land, which is then followed by the planting of vines in one-acre land. You can also treat the tubers by placing them in a plastic bag and soaking them in concentrated sulfuric acid for around ten to forty minutes.

Planting sweet potatoes 

Sweet potatoes have unique properties and hence can be cultivated even in poor soil. There are chances of development of deformed roots if the soil is very clayey or is rich in the excessive sandy dirt. For creating a perfect environment, it is necessary for creating long, wide ridges spacing at least 10 inches. The potatoes are placed at a distance of 3 and a half feet from one another. 

The plantations require plenty of compost. Avoid the use of fertilizers that are rich in nitrogen components. These produce lush vines and stunted tubers. If you are performing sweet potato cultivation in cold areas, remember to cover the soil with a plain plastic. This will help in keeping the soil warm, thereby promoting strong growth to the sweet potatoes.

Sweet potatoes cultivation and crop rotation 

Sweet potato farming can be done along with rice crop rotation. This can be done for maximum usage of land. In such a case, sweet potatoes can be planted in December and January after the second harvest of rice. After sowing, apply a full dose of K2O and P2O5 which acts as fertilizers.

Also, apply nitrogen dose at the time of planting and after five weeks of planting. This fertilizes the soil and helps in providing better results.

After planting the vines, perform irrigation once in 2 days for ten days. After that, perform irrigation once in seven to ten days. Thereafter, before three weeks of harvesting, stop the process of irrigation.

However, irrigate the land before two days of harvesting. This provides better results. This process should be followed to grow sweet potatoes.

Weed Control

Weed control is another essential step undertaken during cultivation. Sweet potato cultivation requires the application of several treatments to prevent the growth of weed around the crops. Treatment solutions such as Metribuzine 70WP with a dosage of 200gram per acre or Alachlor at 2ltr per acre is applied to the field. This needs to be done before the sweet potatoes start sprouting.

Weed infests the plants even after sprouting. When around 5 to 10% sprouts have emerged, the sweet potatoes’ field gets infested with several varieties of weed. At this stageParaquat at 500 to 750 ml per acre is applied

Protecting the plants against pest

Sweet potato weevils are long insects with a length of ¼ inches. These are dark blue heads, orange-red bodies, and wings. They lay their eggs into the stems and tubers. They lay their eggs on the tubers and stems. The fleshy roots contain sufficient nutrients for the larvae to grow, while the vines and leaves are a great source of nutrients for the adults.

Potato foot rot, a common disease in these plants are caused due to these pests. The plants infected with the disease have brown or black stems near the soil and at the ends, that does on enlarging.  

These weevils multiply themselves quickly and can affect the whole field within a few days. Hence, they are hard to eliminate. But, with better-certified disease-resistant chemicals along with crop rotation after every four years.

It is advised to destroy all the plants from their roots that have been infected. Alternatively, you can pick these plants along with their roots, place them in a sealed container, and discard them with other household wastes. 

Irrigating the field

Another important technique that is involved in all types of crop cultivation. Some crops require less water while others require more. Moreover, the amount of irrigation required for different crops is different at every stage.  

Sweet potatoes are irrigated once in every 2 days after the stems are planted. This continues for about 10 days. Thereafter, irrigation is given once in a week or 10 days. The plants stop receiving irrigation before 21 days of harvesting. However, irrigation is just a couple of days before sweet potato harvesting. 

Protecting the plant from different diseases

Apart from the above-mentioned points, it is very important to perform weed control in the initial days. Earthing up should be followed after one month of planting. This removes weeds and results in good yield. Weeds are automatically suppressed once the vines start to grow.

Also, it is important to protect your sweet potato cultivation from various diseases. Various diseases such as black scurf, early blight may destroy your plantation and may cause a great loss to the investment.

A black scarf is observed on tubers which in turn causes the plant to dry up. In this, black color appears on the tuber’s eyes. To avoid this disease, treat the tubers with mercury.

In early blight, some necrotic spots appear on lower leaves of the plant. It happens in areas having high moisture content and low temperature. To avoid this, prevent mono-cropping and follow crop rotation. Check for other diseases like common scab also. It is advised to perform pest control by using appropriate pesticides.

Besides, sweet potatoes are affected immensely due to fungal diseases. One such is the black rot, causing dark and circular depressions on the tubers. Infected sweet potatoes must be discarded properly, followed by curing the healthy roots of the same crop. 

Stem rot is another fungal disease commonly found in these plants. The fungus affects the part of the stems that insects have injured due to careless sweet potato farming. Although plants will not die due to the disease but will result in poor quality yields. It is best to plant healthy slips for farming. This will minimize the chances of the plants from being infected by insects and fungus. 

Are you afraid of mummification of sweet potatoes? Are you wondering how to save them and reduce dry rot? It is easy. Store the healthy and fleshy roots at 55 to 60 degrees. This simple step will help you a lot in saving your sweet potatoes as well as give you high yields. 

 Harvesting sweet potatoes

Lastly, harvesting needs to be done. These crops get mature after around 120 to 125 days of planting. Sweet potato harvesting is done at the time when tubers get mature and the crop’s leaves turn to yellow. But, the longer you keep the crop in the ground, the better yield it will be. How? If the potatoes are left for longer, they will be more nutritious as they will have high vitamin content.

Must Read: Onion Farming Skills? Here’s What To Do

But be careful and keep a track of the climatic conditions. On the arrival of frost, the vines will start to turn dark, and finally black. Beware, the tubers will start rotting and the yield will be wasted. 

What are the best ways of harvesting sweet potatoes? Many often inquire about this, as they are not aware of the best measures. It is better to use a spading fork for digging tubers during sweet potato harvesting.

Harvest them on a bright sunny day. This needs to be done when the soil is completely dry. Store them in a well-ventilated area at 85 to 90 degrees Fahrenheit for a couple of weeks. 

There is a sharp trend in the cultivation of sweet potatoes. Farmers are shifting the areas for cultivation of other cash crops that have a high yield and more demand in the market.