Are you thinking about the things what not to compost in your backyard? You can compost most of things but you have to avoid 13 things you can’t compost. Find below!
Composting is a best way to prepare your own organic fertilizer which allows you to decompose the wastage of your garden and food wastage of your home, otherwise it will be thrown into the trash. Almost you can compost everything that is organic but there are few things that which you cant compost in large extend to avoid hassle. So find out what not to compost?
What not to compost?
1. Weeds
After cleaning the garden it might be tempted to damp the weeds and other unwanted in the bin in the spring. But keeping weeds in the pile, now that will be popping back up in the finished compost later once spread it in your garden.
In case of your pile gets consistently hot- reaches a minimum of 140 degree Fahrenheit at least 2 weeks. Weed seeds can survive to sprout another day.
And for few invasive plants like as Japanese knotweed, requires only an inch of stem to regret.
It is good to leave them out, especially those weeds that are begun to flower.
2. Diseased Plants
Plant pathogens such as powdery mildew, black spot, rust, verticillium wilt and mosaic virus can survive the composting process and infect new plants in the next season.
Like weeds, diseased plants in compost need high temperatures to kill bacteria like Fungi, viruses and parasites completely. Even so, not all pathogens can be completely eradicated.
Make better use of its safety and keep it away from the packaging.
All parts of Juglans nigra, including branches, leaves, roots, bark, nuts, and shell, contain an organic compound called jugalone.
Jugalone production is an evolutionary characteristic of black walnut, giving it a significant advantage over other nearby plants. Root system inhibits metabolic enzymes and destroys photosynthesis.
Apples, tomatoes, peppers, berries, asparagus and potatoes are few plants that are particularly sensitive to jugalone.
After being removed from the landscape, the jugalone will remain underground for several years.
Prevent any part of the black walnut from entering the compost pile to avoid contamination by walnut chemicals.
Excellent supplements to heap that provide nitrogen (cold) or carbon (dry).
Never put grass clippings that have been treated with insecticides, herbicides or other chemicals in the compost.
Treated grass destroys the composting process of harmful microorganisms.
To make matters worse, using finished compost for edible plants increases the toxins in the food stream.
5. Glossy paper products
Magazines, catalogs, spam, newsprint, brochures, food packaging, and glossy business cards should be included keep away from compost.
These materials are treated with a special coating to form a smooth and shiny surface. The coating is usually composed of clay minerals, but can also contain synthetic additives such as polyethylene.
The shiny products added to the pile will not degrade properly and will immerse the plastic chemicals in the finished compost.
If in doubt, please recycle any shiny materials and choose plain paper to add to the stack.
6. Cat and Dog Poop
The manure from herbivores is the best source of nitrogen and perfectly good addition of heap. Carnivores’ animals and pets poop can be strictly kept away. Omnivores can contain harmful pathogens and parasites which are not eliminate while composting. If the finished compost applied around the food plants, it will contaminate the crop which causes health hazards. Dog and cat wastage keep away from the general compost heap.
Without using landfills eager to dispose this free renewable resource, pet waste can be composted when it placed in a pile away from the vegetable patch. Once it will be cheapen, used for non-edible trees, shrubs and plants.
7. Cooking Oils
In heap don’t add cooking oil, grease and fat
Waste oil can attract rodents into open compost piles and can also disrupt the composting process itself.
A large amount of oil leakage forms a watertight barrier around the carbon and nitrogen materials in the stack, preventing water absorption and reducing airflow.
The microorganisms that destroy it need water and oxygen, so soaking a pile with edible oil will only slow down or stop the activity of microorganisms.
However, you can compost very small amounts of vegetable oil. Spilled or leftover vegetable oil should be moistened with a paper towel or newspaper before discarding.
8. Meat
Meat and fish, whether cooked or raw, will attract scavengers when they start to deteriorate. Meat can also be very uncomfortable.
Although the meat is organic and adds valuable nutrients to this pile of meat, budding composers are not allowed to throw it away.
If you tend to add a small amount of leftover meat, bury it deep in the pile and cover it with more carbon material to avoid odours in the empty pile.
You can also prevent scavenger leakage by using a compost bin with a sealed lid or using a fully insulated system such as bokashi.
Adding a small amount of milk, yogurt, ice cream and cheese is not a big problem, but adding sour or expired dairy products to the entire container will completely change the look, feel and taste of the composting environment.
10. Latex Products
Opinions seem to be divided on whether latex products such as condoms and balloons can be added.
In theory, natural latex is completely biodegradable. Latex is obtained from flowering plants. It is a milky liquid composed of starch, sugars, resins and gums. It will coagulate when it comes in contact with air.
Balloons and condoms are a problem with composting because they are not 100% rubber. Latex and contains synthetic additives to give the final product tear resistance. Condoms may also contain other additives, such as lubricants and spermicides.
Experiments have shown that backyard balloons can last for several years. Even if you grind the latex product before adding it to the compost, you may inadvertently introduce unnatural elements into the organic compost.
11. Paraffin Wax
Animal and vegetable waxes such as beeswax and soybean wax can be added to homemade compost. Cut them into small pieces, as they may take a long time to fall apart.
Anything made of paraffin—candles, wax paper, cheese wax, etc.—should not be composted.
Because paraffin is a by-product of fossil fuels. When petroleum, coal or shale oil is refined, a waxy substance is produced. It is separated from the oil with a solvent and distilled.
You really don’t want to pile petrochemical products on your pile, so always throw paraffin-containing products in the trash.
12. Treated and Engineered Wood
The use of sawdust, shavings and chips for processing wood products is prohibited. Treated wood contains chemical preservatives or synthetic binders, which can contaminate soil and food when composted in the garden.
This includes pressurized wood and construction wood such as plywood, fiber board, particleboard and medium density fiber board. Varnished, stained, or painted wood should not be added to compost.
13. Bio-plastics
As an alternative to typical petrochemical plastics, bio-plastics made from plant materials and other renewable biomass materials are processed.
In the past decade, bio-plastics have become more common and can take many forms, from thin and flexible bio bags, envelopes, food packaging, etc., to rigid applications such as tableware, straws, water bottles and containers Packaging materials.
Bio-plastics must be compostable on paper, because they are processed from plants.
Large-scale systems can generate high temperatures for a long time, and at the same time have a perfectly balanced moisture and oxygen environment: for example, compared with traditional plastics, bio-plastics thrown into the sea take decades to decompose!
Unless bio-plastics are specifically designed and labelled for home composting, don’t pile them in a pile.
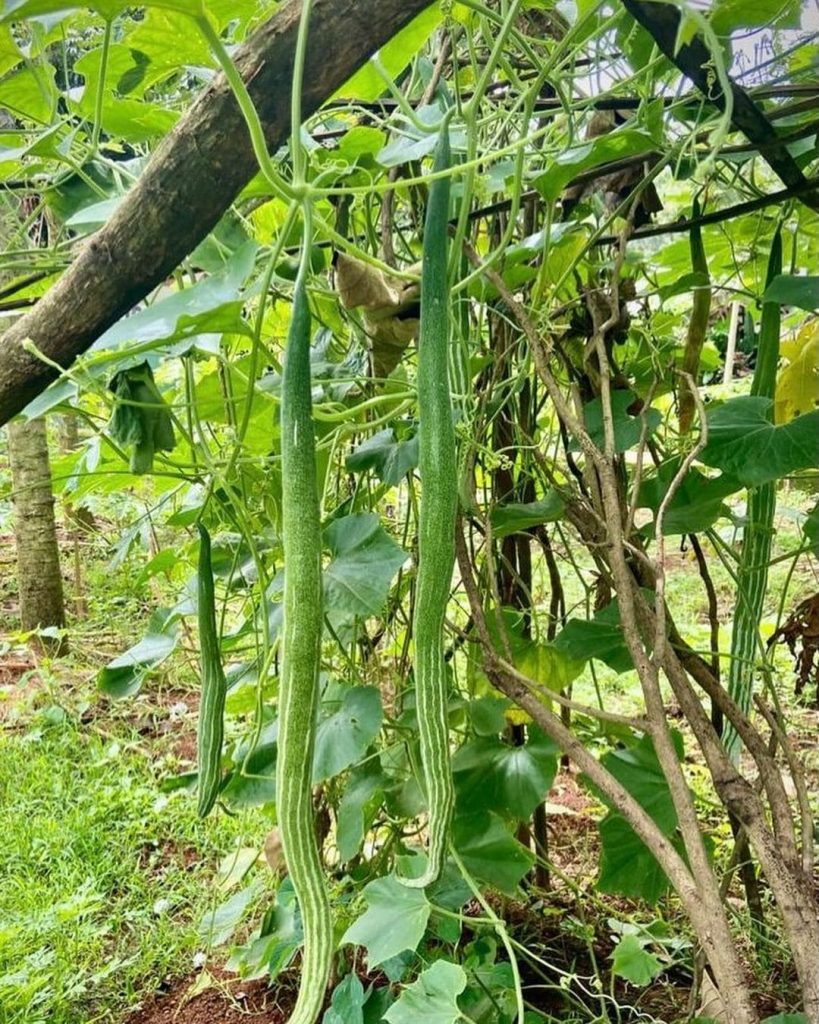
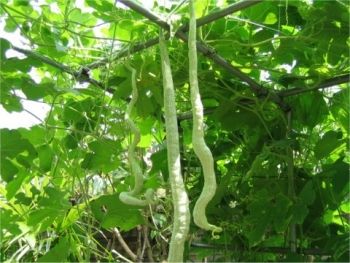
As the name sounds a bit weird, the appearance of Snake Gourd is not. The veggie appears to be elongated and wavy like a snake and tastes like a cucumber. It is a creeper plant. Snake Gourd farming rules the South and Asian market.
India Grows it in abundance and exports it to other corners of the world. In, other words, we can say India is a proprietary market for snake gourd farming.
Though it finds a place in Bangladesh, Pakistan, Indonesia, Sri Lanka, Myanmar, China and, Malaysia. It can be consumed in a multifarious way, whether pickled, sauté with herbs, cooked with typical Indian spices, tastes good.
How to grow snake gourd from seed?
The growing pattern throws light on the type of climate required for snake gourd farming. Being enormously grown in a tropical area, the veggie thrives well in the tropical climate. To grow snake gourd from seeds, you need to follow certain steps, for better results.
As it is a creeper veggie it needs a chain, fence, or kind of support to grow on but it has to be built to last. There are a variety of seeds available. We have chalked down a few for you:
White Glory
Baby
Extra Long Dancer
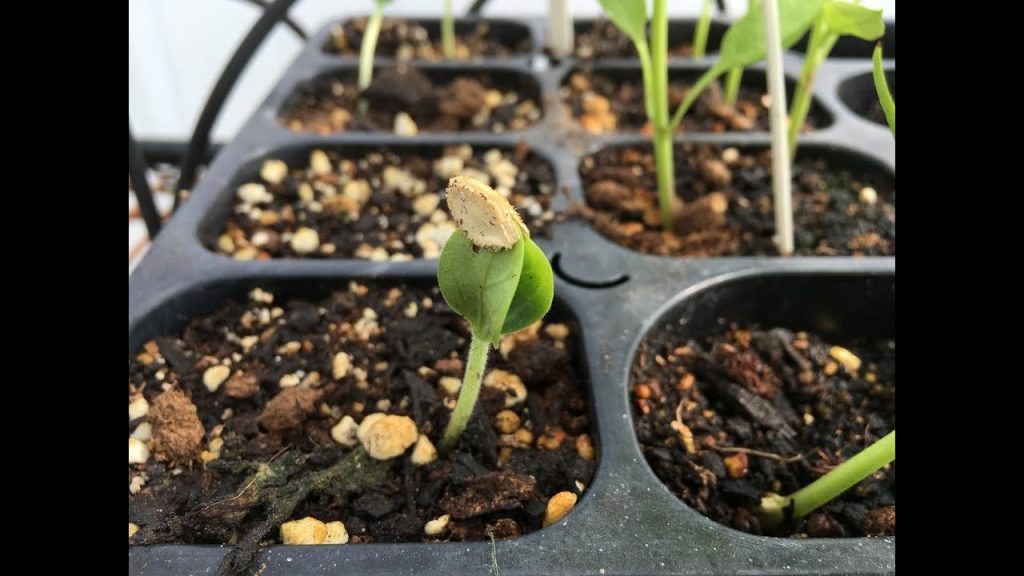
The seeds are hard as coconut shells which hinders the germination process and can even take a month or more to germinate. To cope up with this issue, you need to crack the seeds with the help of pliers ensuring the safety of the endosperm inside.
If the endosperm is hurt or crushed it won’t allow the seed to sprout. Now, to start with the germination process, you need to soak these seeds extracted from the shells for 12 hours at least.
For growing snake gourd from seeds, it should be allowed to rest in warm water resting on the refrigerator top or any other place that is warm enough to let the water get embedded in the seeds.
Then seeds need to be planted in weed mix soil in large flower pots covered with a cling film or plastic wrap. The vision behind is to hold the moisture to allow sprouting. In about 10 days these seeds start sprouting and now it’s time to uncover them and allow some fresh air to reach them.
Once the germination process gets a swing, a regular water supply should be maintained to ensure moisture. Now, these young seedlings find their wings in the garden.
After planting them in the garden, 15 days’ is ideal to water them. Or when you find it necessary like the soil is dry, it needs to be nourished immediately. In about three weeks, these seedlings start’s maturing and demand some additional nutrients in the soil to be added.
This acts as a catalyst to shape these beautiful gourd vines. But always remember a strong back should be there to render a stiffen to the 6 feet (approx.) fruit.
To attract the insects a light or fluorescent cloth needs to be placed next to the blooming flowers to speed up the pollination process.
Growing and harvesting period for snake gourd
Due to the new agro technologies, flushing in the market no vegetable is restricted to a particular point of time. Though it is still advisable to grow snake gourd in January and July.
As it needs a temperature of 25 degrees to 38 degrees. The harvest time of snake gourd depends on the variety of seeds sown. On average it takes 45 to 60 days from the time it is sown.
Getting the soil ready for snake gourd farming
Snake gourd farming is a non-fussy task, as it goes with all types of soil. For getting good results it is recommended to use loam sandy soil with a spice of organic content.
A minimum of 3-4 plowing is needed to be done, to get a PH value equal to 6. Snake gourd cultivation demands a good soil drainage system. On adding good manure to the soil, a higher yield is obtained.
10 grams of fluorescens and 4 grams of viride should be added to the seeds to accelerate the production cycle. This will surely give better and high yields. And snake gourd farming would be more profitable then.
The cropping season of snake gourd is in July and January. Cropping season is just a medium to enhance productivity.
Production techniques of snake gourd
The production techniques of snake gourd is a bit lengthy. Let’s grab a look at the following:
Sowing and spacing pattern: The sowing pattern should be in multiples of 5, that too in a grid-like structure. After 15 days of germination, pick any 2 healthy seedlings. An alternative method can be used, you can sow the seeds in plastic bags until they germinate. Later can be shifted to pits in 4.
Fertilizer and manure: At the time of soil preparation heaps of compost should be mixed in the soil. Then after 30 days of sowing and the rest just before the plowing time.
Water intake for snake gourd farming should be maintained. One a week of watering is good for the plantation.
Weeding is done twice and not more than that.
Types of Snake Gourd
There are different varieties of snake gourd available in the Indian Market. Let’s take a glimpse:
The significant story of this green thumb relates long back to the ayurvedic culture. With an enormous number of highs, this green veggie finds a place in medicine as well.
Even in today’s time as people are becoming aware of health benefits, the snake gourd has made its root in a portion of day-to-day dietary food. Tendrils, the delicate stem part is also used in some of the medicines.
Let’s have an overview of the benefits that can be extracted from this simple vegetable:
Losing Weight: Being a possessor of an ample amount of nutrients is a complete food. Keeps the stomach full, free from any sort of unwanted cravings. Thereby, vanishing fat from the body.
Supplement to Heart: Cholesterol free food is always a good choice for the better functioning of the heart. Apart from typically cooked in Indian spices, it can be consumed in boiled form or with negligible oil. And yes, it tastes yum. At the same time a relaxing food for the heart muscles.
A Kidney Detox: A snake gourd sweeps out all the toxic material from the excretory system of your body. It triggers the secretion of fluids responsible for the process of excretion in the kidney. Thereby maintaining the water in the body content ensuring proper hydration.
Speed up the digestion process: Snake gourd is high in fiber quantity, so helps to keep the stomach light and happy. Chances of acidity and bloating are reduced so the process of digestion becomes fast and easy.
Cleans the respiratory tract: Another amazing perk of consuming this veggie is curbing the mucous secretion and clearing the respiratory tracts. This also controls the infections in the lungs.
Ideal for the keto diet: Being low in carbohydrate and sugar content, it can be easily added to the keto diet as well.
Threats to snake gourd farming
The basic enemies of snake gourd farming are leaf beetles, caterpillar, and flies. To demolish leaf beetles and caterpillars you need to apply pesticides to snake gourd production.
For fruit flies, you have to pluck the infected veggies and throw them away from the rest of the production. These are the best possible ways to save the snake gourds.
Snake gourd diseases
Yes, you heard it right. Even plants get affected by diseases, like humans. The 2 major diseases targeting the veggie are Downy mildew and powdery mildew.
These are controllable, the mere spread of pesticides can make you get rid of these diseases. All you have is healthy snake gourd farming.
Snake Gourd is a tropical veggie, it loves a warm climate to grow. Like warmer days and cool nights. For snake gourd farming sandy loam soil ideal. Which has the benefit of keeping the temperature high for a high yield.
Tresilling snake gourd is adapted to grow erect, this can keep this veggie away from pathogens and flies.
Snake gourd is touchy to excess water and could not bear dry soil as well. There needs to a perfect balance between both.
Basic tips to stimulate snake gourd production
With an increasing urge to compete with one another, farmers face a low yield problem with snake gourd farming.
To boost production, we have thrown light on the following tips:
A perfect base fertilizer: To make a perfect fertilizer base cow dung in powdered form or an organic fertilizer should be added to the soil to trigger production rate.
Quality of seeds: To get good results, hybrid or local seeds should be used. Either they can be allowed to soak in water for 6 hours or sowed in cow dung.
Water passage: Choose a place that ensures a continuous and proper water supply. To prevent seeds from drying.
Saplings should be healthy to ensure a good production rate.
As soon as the seeds begin to sprout, the additional underneath growth should be copped off to instigate high yield.
The market for snake gourd farming
With an increase in awareness among the people, the demand for snake gourd has also risen. People tend to switch their eating habits to a healthy delight. This has resulted in huge demand for snake gourd farming.
The farmers are growing this veggie on a large scale as it is low in investment. No extra care is demanded just proper management can work wonders. Being a less perishable item, it can be transported easily.
Conclusion
The ending note on snake gourd farming is a bag full of knowledge. Infused with lots of health and nutritional benefits this simple veggie is a good deal for your family.
With tips on how to grow snake gourd, types of snake gourd, how to increase production, and the prolonged benefits of the vegetable we have penned down all the relevant and required information regarding snake gourd farming.
We hope, the article was informative. So, go ahead with your snake gourd farming. Do share your experience of snake gourd farming with us. Stay connected for more updates.
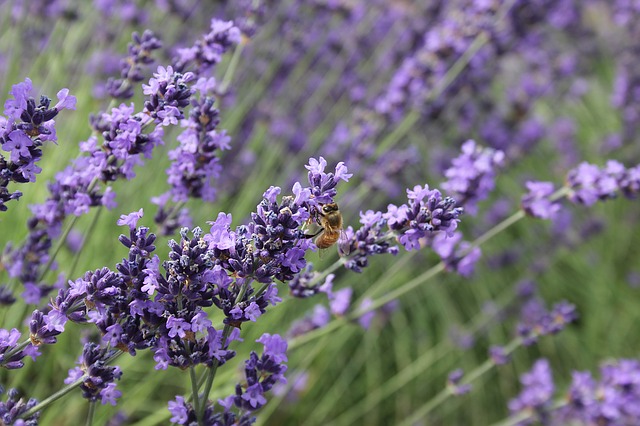
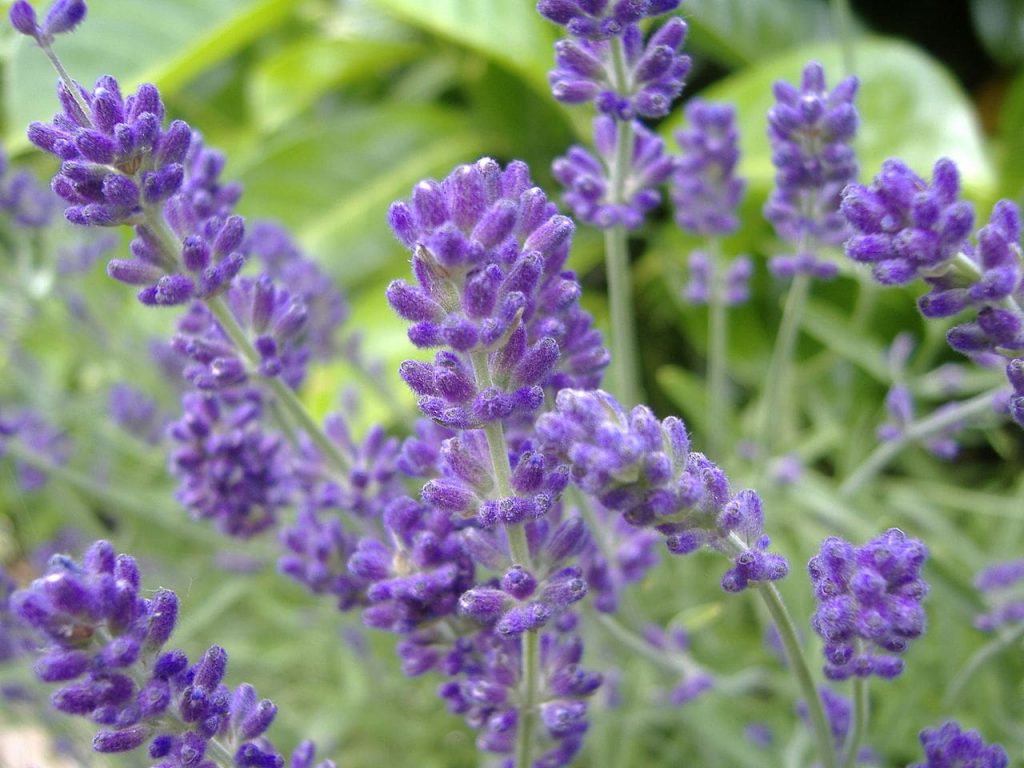
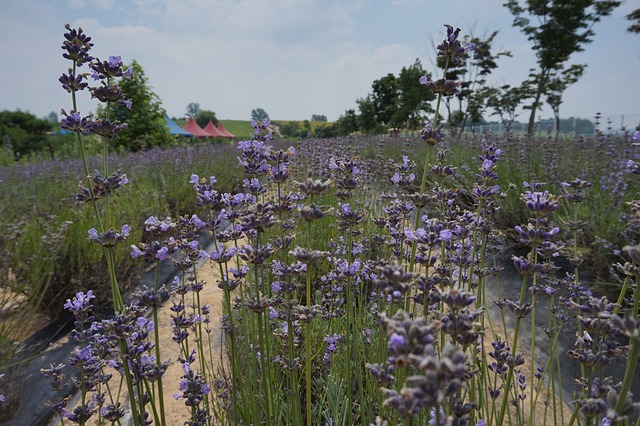
Lavender, also known as Lavandulaspica consists of 30known species of flowering plants in the entire mint family. Lavender is a beautifully aromatic and rustic shrub or herb that originated in the mountainous region of the Mediterranean and North Africa. The height of the herb is from 40-80 cm. The plant has oblong, linear, and opposite leaves consisting of small purple flowers.
Lavender farming is really easy and it only requires ideal growing conditions and extra space. Climate is a critical factor in growing the lavender plant. Lavender can be containers/pots, and backyards. Growing dozens of lavender plants in the backyard of the house can make an individual earn a high profit. If the lavender is cultivated commercially on a huge scale, it can fetch high profits.
Also, there are plenty of ways in which lavender farming can help an individual earn money. For example, lavender can be used in making lotions, soaps, essential oils, fragrant sachet, teas, medicines, and flavorings. Also, fresh or dried lavender can be sold to earn huge profits.
The Indian subcontinent cultivates lavender on the slopes of the hills of Uttar Pradesh and Himachal Pradesh and in regions experiencing scanty rainfall. Successful cultivation of the lavender crop is also seen in Kashmir valley.
Types of Lavender
At a global level, there are five types of lavender varieties known in the market – French lavender, English lavender, Spanish lavender, Spike lavender, and, Lavandin
French lavender
French lavender or Lavanduladentata grows in warm climate and are extremely fragrant. This variety of lavender is grown annually in certain regions of the United States.
English lavender
English lavender, also known as Lavandulaaugustifolia is one of the popular species of lavender. This species is used in flavouring, oils, dried flowers, and perfumes. English lavender can be cultivated in warm regions where days are longer.
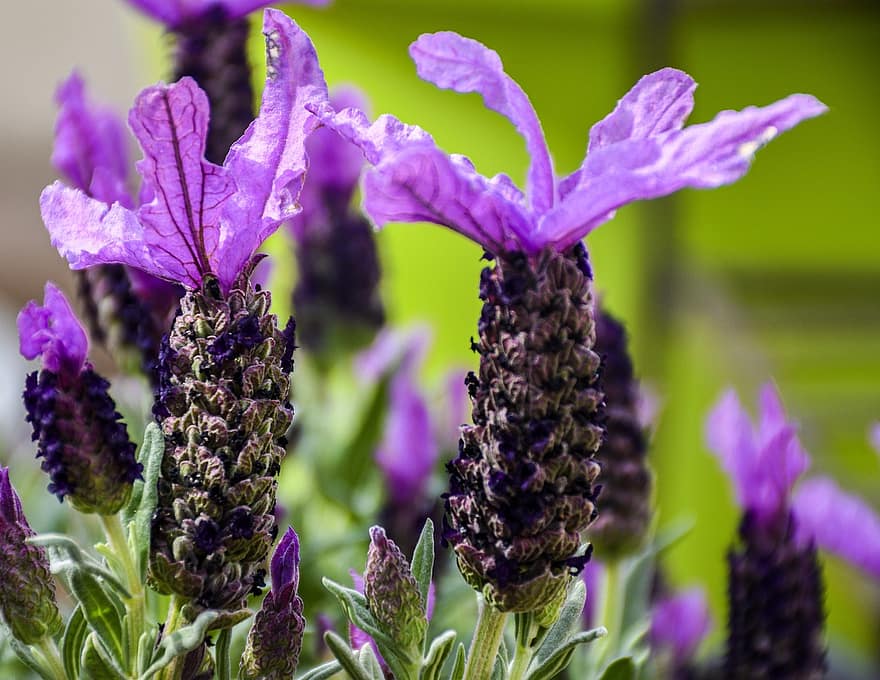
Spanish lavender
Spanish lavender or scientifically known as Lavandulastoechas blossoms in dark purple colour and are majorly used for dried flowers. Spanish lavender species are grown annually for decoration purposes.
Spike lavender
Spike lavender, also called as Lavandulalatifolia is grown to extract essential oils which is further used to make soaps. Spike lavender is also referred as Portuguese lavender and requires a Mediterranean climatic conditions.
Lavandin
Lavandin, also referred to as Lavandula x intermedia has a high oil and flower yield, however, the oil quality might not be of supreme quality as compared to the yield. The other name of Lavandin is Dutch lavender and this variety is a hybrid of Spike and English lavender.
In India, Spike lavender, Lavandin, True lavender (English lavender), and Sher-e-Kashmir varieties are grown.
Starting a Lavender Farm
Lavender flower farming should be on the top of a gardener’s list as it is a commercially profitable crop. The flower also adds more beauty to the garden. Although growing lavender on a farm is time-consuming and a risky business because the product may not be of preferred variety.
The transplants of lavender can be planted in small areas such as nurseries. To retain desired characteristics in the plant, growers opt for root divisions or cuttings. It is advisable to do a patch test in a small area to check the appropriate climatic conditions for the plant.
Lavender Propagation Techniques
In order to grow lavender for profit, cutting and planting through seedling is done. The sifted soil can be layered lightly. However, planting seeds need knowledge as well as effort. Beginners can start their journey of lavender cultivation by the cutting method. Tissue culture and layering can also be used for the propagation purpose of the plant.
Seedlings can be sowed directly in the area or in the trays. The germination time of lavender seeds is around 2-6 weeks. To plant the lavender plant by cutting (vegetative technique), it is essential to cut the stems which can be around 10 cm long. The leaves present in the lower region of the plant are removed. Slight humid soil is required in the cutting technique as excess water can cause decomposition. The spacing between each plant should be around 30-90 cm in the cutting method.
Tissue culture is preferred for mass production of the plant and to yield genetically identical and disease-free plants. The mother plants are selected and then cultured for bulk production. However, this technique is costly. On the other hand, layering method uses healthy stem from which a 12-15 cm foliage is removed.
This leaves a 10 cm foliage at the branch tip. The bare section is covered with moist soil. Once the new plants start to grow, they are separated from the mother plant. The new plants are then again planted in the field once the rooting starts. The roots in the plants take around 6-12 weeks to grow.
Spacing and Planting in Cultivation
Spring or Autumn is the best time for the transplantation of the seedling. The plant need plenty of room to grow. The lavender plant is planted 30-40 cm inside rows and are kept at a distance of 4 feet between rows. The highest yield should have plant density of 20,000/ha. For the proper root establishment of the plant, earthing up of soil is extremely essential.
Lavender can tolerate the drought situations. The water requirement of the plant is minimal and thus needs water every 2-3 weeks till the time the buds are formed. Later on, once or twice in a week is required until the harvesting is done.
Best Farming Conditions for Cultivation
Lavender plant being a Mediterranean plant grows best in the dry climatic conditions. The plant however can tolerate various temperature range. Cold or humid climate is not suitable for the proper plant development. Direct sunlight or sun exposure for approximately 6-8 hours is preferable for growing a healthy lavender plant.
Lavender grows best in a dry and warm environment, and in mild winters. Early years require pruning even during the mature stage as it makes the entire framework of the plant sturdy. Failing to do pruning an initial couple of years can result in woody stems subsequently affecting flowers and stem health.
In order to avoid humidity, a proper drainage system is preferred. As the rise in a humid environments increases the risk of fungal infections. Well-drained soil with pH in the range of 6-8 is used for the cultivation. A calcareous type of soil is ideal for lavender. The optimum temperature for lavender cultivation is in the range of 15-30 °C. The temperature of soil should be higher than 18 °Ctosupport proper growth. The product quality can be affected badly by overheating in summer.
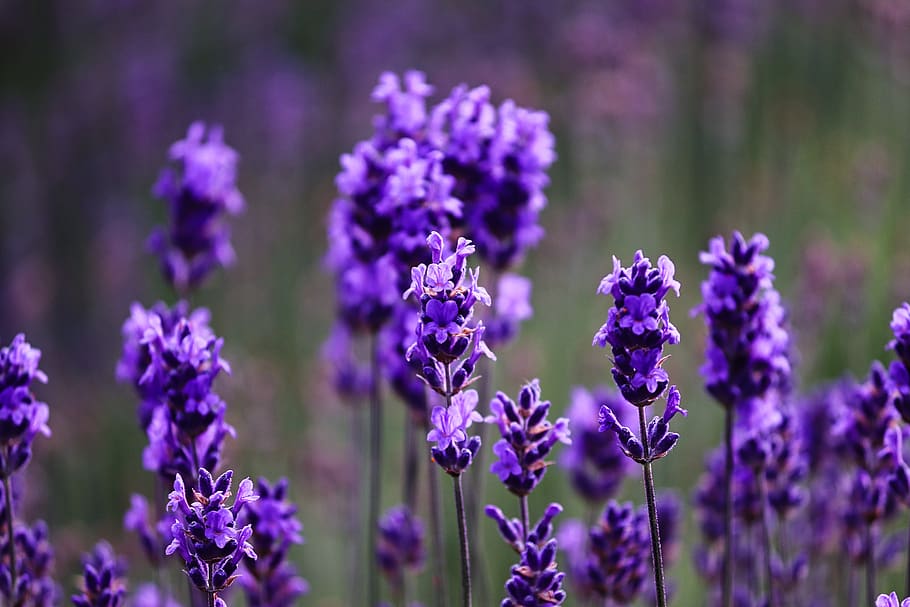
lavender farm-purple beauty plants
In India, the best climatic condition to grow lavender is autumn season. This helps in firm establishment of the plant before the cold winter. Spring season further will help the plant to grow quicker.
Global Cultivating Regions
Lavender can be easily grown in Canada, Africa, Indonesia, Japan, UK, India, Australia, New Zealand, and USA. Other regions producing the herb are Goodwin Creek, Central Mexico, Bulgaria, and Italy, Spain among others.
Irrigation in Cultivation
The commercial cultivation of lavender requires irrigation for initial 2 years so that the crop can be properly established. The regions experiencing low rainfall and has light soil need irrigation only at vital growth stages. Irrigation is must during the flower initiation stage. It is advised to avoid sprinkler irrigation system as that may elevate disease conditions in the crop. Drip irrigation is the preferred system as it aids in controlling weed and in saving water.
Drip Irrigation for Lavender Fields
As discussed earlier, excessive moisture is not good for lavender crops. It can cause a lot of problems and can disrupt the overall growth, and hence productivity. Aerial irrigation is not suitable too, as it causes leaves to spit in half. Lavender is also at risk of rotting, especially of the soil, remains moist for a long time. Hence, proper planning is required to ensure healthy and productive growth of lavender plants.
Talking to the experienced lavender farmers about “how to do lavender farming” is not a bad idea either. After all, there is no substitute for experience. And they already have learned a lot of lessons, you are now about to learn, and they can give you some valuable feedback!
As said repeatedly, lavender plants don’t require a lot of water, and you should stay at the shorter side while watering. These plants can even withstand droughts well enough. All you need to do is to maintain the moisture in the soil.
Essential Tools for Lavender Cultivation:
Like other crops, lavender cultivation also needs some equipment and tools. These are some essential tools commonly required while planting lavender.
Sharp Sickle
Steel Shank
Kneeling Pad
Lavender Sifter
Mini Plow
A folding hand saw
Washable gloves
Fertilizers and Manures for Lavender Cultivation
Once the lavender plant is established properly, there is no need of fertilizer. The new plants do need fertilizers as they can boost the plant growth. It is recommended to use P 40kg/ha, N 100kg/ha, and K 40kg/ha. The basal application needs complete dose of K2O and P2O5 but only 20 kg nitrogen is used. Rest of the nitrogen is used in the later stage.
Diseases and Pests in Lavender
Lavender is resistant to most common pests and insects. However, to be successful in the farming of lavender, it is essential to prevent these insects rather than curing them in the later stage. There are chances that the plant might be affected by Mites, Slugs, Con chinchillas, and Whiteflies.
Preparing the land and making the right soil
Lavender farming profitability depends a lot on the land and soil. A lot of successful lavender farmers do some research before finally starting, and there is no reason why you should not do the same.
Well-drained, gravel-laden, sandy soil with a pH between 6.5 and 7.5 is perfect for growing lavender. Dig the ground at least 18 to 24 inches deep and then add the soil to it. If you can mix the soil with a mixture of 1/3 clay, 1/3 loam, and 1/3 sand, the effectiveness of soil will be even better.
A lot of hybrid lavender species are known for producing sterile seeds. In such a scenario, you should use well-drained, light and moderately fertile soil.
How to Plant Lavender – Start Planting through Soft Cuttings
If you are a beginner, growing lavenders from seeds is not a good idea at all. Instead, start growing from soft cuttings, taking care of the resource links. Herbs grow from these links. Preparing the cuttings can be both frustrating and tedious. So, you should get some from a nearby nursery.
Leave a space of four feet between rows and 2½ feet between the two plants.
This type of spacing is ideal for growing approximately 4,000 plants per acre.
Ensure surrounding every plant with garden cloth, mulch the plats as well as rows to protect from weeds.
Add a light-colored hoop at the base of every plant, like gravel, sand, or a piece of marble. This will help the reflection of sunlight on the plants.
Prevent excessive moisture to keep your plants healthy.
When to Plant Lavender?
Planting lavender cuttings in the seedbed at the beginning of spring is the best idea. Lavender usually transplants in the autumn or winter. You can obtain a new lavender plant when it is grown a little, and the germination is started. The end of the summer is a suitable time to separate the branches. The flowering time will most probably end at that time.
Taking Care of Lavender Crops for High Yield and Profit
“Good care equals to good yield” suits very well to lavender farming as well. It needs a little bit of rain and a lot of direct sunlight. Furthermore, it can adapt to fall as well.
Removing invasive plants is recommended for proper lavender care. Invasive plants may take up the nutrients from the soil.
You should also remove the old branches at regular intervals. Because, old branches get woody, and may disrupt the growth of soft, younger plants.
You can divide the branches to reproduce new lavender.
Having good drainage for lavender is necessary to avoid puddles of water around the plant.
Pruning is suitable for lavender so that it can bloom the next year again.
Common Pests, Diseases, and their Management
Although, lavender is known as a repellent to most common insects and pests, controlling them is still a very important aspect of lavender care. The formula of “prevention is better than cure” suits the lavender crops best. Therefore, you should act before any sign of attack from pests or diseases.
You can keep a few lavender plants in pots and use them as a repellent spray to protect other plants. Basil and garlic are very effective to protect the plants from files, insects and some fungi.
Even after proper lavender care, plants may get the victim to different plagues. To avoid that, you would like to eliminate the dead or infected plants as soon as possible.
How to Harvest and store lavender?
It would help if you cut the entire branch with leaves and flowers while harvesting lavender. You can remove the leaves later. Use only sharp flower cutting tools to ensure maximum profit. Flowering begins in the first year itself, but the lavender gets ready for harvesting after one year of planting. So, you can start harvesting after 13 to 14 months of planting the cuttings.
Harvesting the lavender crops in the morning hours is ideal, as the oils are most concentrated at that time.
It would be best if you cut the stems as long as possible.
Gather them in bundles and use rubber bands for securing.
Hang them at a sheltered place for proper drying. A cool, dark place with good air circulation is recommended for drying.
Flowers will get dried after a few weeks, and you will be able to remove them by shaking the bundles gently. Shake them into lidded jars for a lot of uses!
The flowering process starts late in high slopes while it starts early in low altitude and warm regions. During the harvesting process, flowers are cut with 10 cm stem length. August or September is the ideal time for harvesting lavender in the Kashmir region.
The yield as well as the quality of the oil depends on various aspects such as the agro-climatic conditions, variety, process of distillation, planting, fertilization, and soil. A yield of 15kg/ha with oil content in the range of 1.2%-1.5% can be obtained under optimal herbal cultivation methods.
Now, lavender for marketing is ready. You can opt to trade in local markets or transport them to distant areas. You should get ready to get some decent money!
Lavender for Business
If you are planning for lavender farming, we would suggest you move ahead. But you will have to be a bit patient, at least in the first year, and you can, of course, afford it to become a successful lavender farmer.
Lavender is available in various fragrances and colours depending on the harvest. The family tree of lavender also constitutes widely known sage, Mediterranean herbs, thyme, and rosemary. The historical data suggests the use of lavender as a fragrant, medicinal, and culinary herb. Roman soldiers used the herb as a disinfectant while ancient Roman people scented their bath tubs using the plant.
The average life of productive and healthy lavender plant when used for commercial purpose is around 12 years. However, in certain cases steady produces are obtained for nearly 20 years. Planting lavender for gaining profit can be a perfect mode to transform the love for gardening and herbs into a method to earn money by selling the plants as well as the products. Various products can be made from the plant such as aromatherapy products, dried lavender bundles, herbal pillows, skin care products, lavender buds, tinctures, sachets, and oils. Manufacturing these products require less effort but are high in demand in the market.The herb is also used to increase the taste of honey. The baking process too uses lavender crop to enhance the taste.
Fresh bouquets also provide profit to the grower. A 20’x20’ area produces approximately 300 bunches/year which is of $1,800. The profit margin in large plots is even higher. For instance, a quarter acre area produces around 3,000 bunches which costs $18,000. The flower bunches that remains unsold can be dried and sold to florists, crafters, candle makers, beauty product manufacturers for various purposes.
The easy endeavor is to make soaps using the very simple melt and pour technique. These soaps are the best-selling gift items among the customers. Aromatherapy uses lavender oil as one of the most essential products. The distillation process helps in the extraction of lavender oil. The by-product obtained after the distillation process consists of the water-soluble products together with the oil and thus it is used in room fresheners and spritzers.
At a global level, a certain region of France has been involved in commercial lavender farming for centuries. North America has started to grow the crop on a commercial scale. The growers in these regions have started farming in the backyard as well as multi-acre farms. The knowledge is shared among the novice growers for better yield. Thus, lavender is considered a perfect cash crop for small growers to get substantial income.
Drying the Purple Herb
Once the process of harvesting is complete, the stems of the lavender bunches are tied with a strong rubber bands. The bunches are then transferred to the drying area as early as possible. The delay in transferring results in fading of the natural colour. The drying area should be well-ventilated, dry, and dark. Lavender bunches are hanged in upside-down direction for drying.
Advantages of Growing Lavender
The flowers of the crop are edible and the crop has an approximate life span of 10 years. The plant lavender can be grown without hassle but is a costly herb. The extracted oil has many health benefits such as preventing digestive issues, anti-inflammatory, reduces stress and anxiety, treats sleep issues, among others.
Thank you for reading this piece patiently! Hopefully, we have helped you at the beginning of your journey as a lavender farmer. If you have any questions, feel free to write to us. We will be more than happy to answer! And don’t forget to share with your friends and family members! Good Luck!
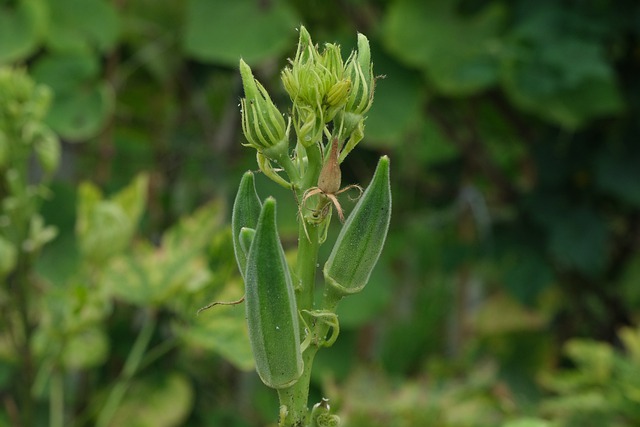
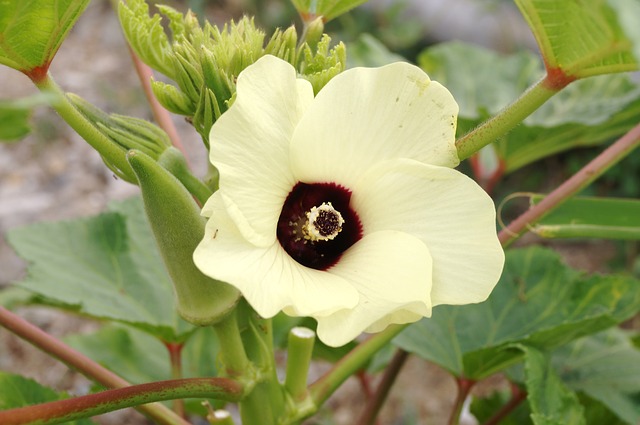
Okra is a vegetable commonly known as ladyfingers in many countries. These plants are very simple and easy to grow. Okro, gumbo, kopi, Arab, and bhindi are some other common names of okra pods.
This crop can be grown in different varieties of climate and soil. It requires plenty of sunlight. Also the roots should not remain wet for a long time. However, climate plays an important role in okra production. Cold climate is not very suitable for okra. They require proper temperature for germination of seeds.
To products a big crop yield you must be aware of how to increase production of okra?
Keep in mind the steps mentioned below to increase okra production.
Why are my okra plants not growing?
There can be a number of reasons for improper growth of your plants. Some of the common reasons for this are:
Lack of proper sunlight: sunlight is very important and main factor for growth of okra. It needs sun for 7-8 hours daily. Hence if the crop doesn’t get sufficient sunlight then it will not bloom.
Heat: Heat is very important for okra as cool climate will lead to rotting of the seeds. The temperature of soil should be at least 70° F. Therefore heat is necessary however if the plant doesn’t get sufficient heat then it may end up growing improperly. Hence it is said that areas having plenty of sunlight are most suitable for okra production.
Not getting enough water: Though okra is a plant that doesn’t need much water and can survive in less amount of that for a good and healthy plant it is important to water the plant from time to time.
Improper nutrition: It is clear that if a plant doesn’t get sufficient amounts of nutrients required then growth will definitely be affected. Hence to avoid this situation, one can add necessary fertilizers to the crop to fulfill the need of nutrients. For example, adding phosphorus is beneficial for flowering.
Right time: Usually the plant matures in 55-65 days but sometimes it may take a bit longer. Nothing can be done in this situation except wait. One should have patience and wait for flowering.
Wilted seeds are a common problem that you may often face. But it is not a big deal if you take necessary action on time. Keeping your crop hydrated can save them from wilting.
If you find that your plant is wilted then water it until the soil becomes moist. Then wait for about an hour and if you feel that the soil is dry then water it again.
Usually, in hot and dry climates the water gets evaporated very fast hence leads to wilted seeds. To treat this you need to water the plants at regular intervals. But before irrigation, put your finger in the soil 1-2 inches deep and check whether the soil is dry.
If the soil is dry then water it. On the other hand, if the soil has moisture then the reason for wilting is not lack of water. Excess sun or wind or any pest or disease may be responsible for this. So to avoid this change the position of the plant and shift it to an area where the sunlight is not direct or excess.
Next, if the problem is excess water then for that one can make some holes on the surfaces of soil, this will allow the water to penetrate to the soil. Also to avoid this one should check the soil before watering.
Along this remember that you don’t keep your plant in a pool of water as this can lead to yellow leaves.
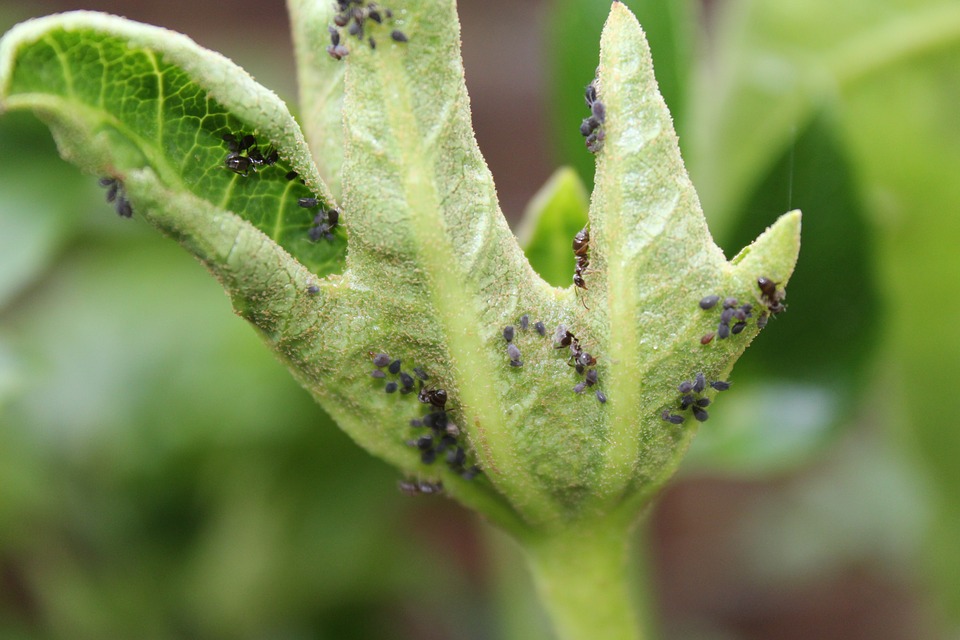
Firstly aphids are small-sized insects that feed on the plant and suck the nutrients. These insects cannot be recognized easily. They are very tiny in size and can not be easily seen with naked eyes.
Okra exists in a variety of colors like yellow, brown, light green, pink or black. They have a waxy or wool-like coating on the surface. They have long antennae on their pear-shaped body. There are different methods to control aphids like:
Aphids are not very friendly to cold water. Hence one you spray chilled water on the leaves, there is no coming back of aphids on the same plant.
Flour can be another cure to aphids. Flour constipates the aphids hence can be sprinkled on the plant
Neem oil also has properties to destroy aphids. Along this insecticidal soaps or any dish washer solution can also be used.
Diatomaceous earth is an organic material that will vanish the aphids without harming the plant.
Isopropyl alcohol can also be used to control aphids. Ethanol however is also a great option.
Why is my plant not Blooming?
There can be different reasons for this but insufficient water is one of the main and common reasons for not Blooming. Along with this improper sunlight also delays blooming. Pruning of the plant on time is very important in this cultivation.
Hence if you don’t do this activity on time, then plants may not show flowering. Hence one should take care of all the above-mentioned points so that your plant blooms on time.
Homemade fertilizers of okra plant:
You can prepare fertilizers for your okra plant at home and increase production of okra plants by multiple folds. Preparing fertilizers at home will surely improve the quality of it as well as will be organic. A list of homemade fertilizers is given below:
Compost:
Compost is very common as well as easy to prepare. It is used by many cultivators for all types of crops. To prepare this, dig up a big hole in the ground. Put a layer of soil mixed with dry leaves. Then you can add a lot of things like kitchen waste like vegetable and fruit peels or other kitchen waste, paper, clothing, etc.
After that again cover it with a layer of soil and leaves. You can add such types of waste products afterward also. Now leave this for 45 days and your compost is ready.
You can also make a very nutritional solution for your crop again using your kitchen products. You can use the left over water or water from the vegetables or water left after washing your cereals. Whether it is pasta or eggs you can use all of them. Collect all the water and let it cool and you can use it. Also you can use hot boiling water on weeds to destroy them
Eggs shells
Eggs shells can also provide some nutrients to the plant. You can use all the leftover eggshells. Dry them properly and then grind them. Hence they are ready to be used. These contain calcium carbonate that improves the fertility of the soil.
These are some of the homemade fertilizers that can be used for your crop
Bottom line:
okra crop is one of the easiest crops to grow. However similarly as other crops they need proper care. In this article you can learn about some facts and points that you should know if you are growing okra crops and wish for higher crop yield than usual.
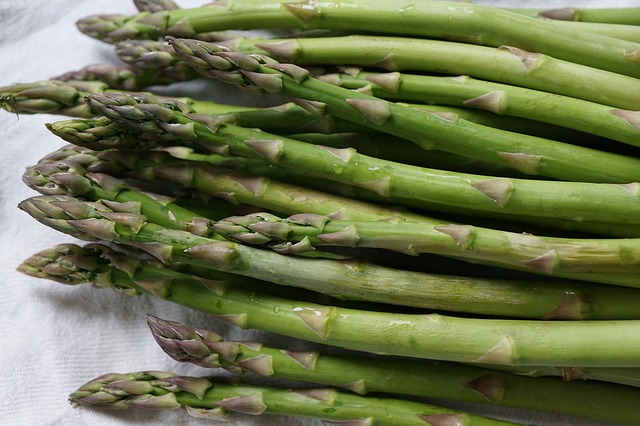
If you are looking around for a guide on “how to grow asparagus?”, here we are to help you! In this guide, we are going to talk about everything related to farming of asparagus from planting, caring, harvesting and storage. Let’s move on to find more.
Asparagus is among the first few plants that greet farmers in springtime. It is a perennial plant, which means, once you successfully start asparagus farming, you will earn decent benefits year after year. Also, to be healthy, low-calorie food, asparagus’s ferny foliage is used to make beautiful ornamental as well.
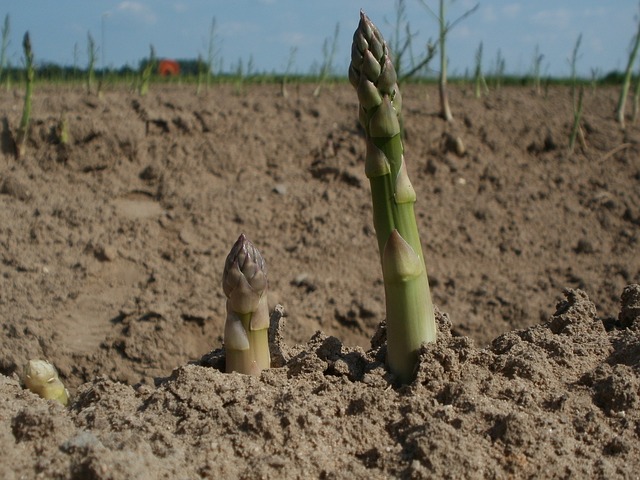
The whole of the USA is almost suitable for growing asparagus, but cooler regions with long winter season are perfect conditions for robust growth. Young stem shoot is the edible portion of the plant and starts emerging once the temperature of the soil increases more than 50°F in springs.
The most important factor you must have to know that, asparagus is “not harvested in the first couple of seasons”. The plants need a lot of time to get matured and you will have to be patient before you can finally harvest them. And you will surely get the rewards of your patience, as the asparagus field remains productive for 15 to 30 years!
In this asparagus planting guide, we will focus on all the important aspects of growing asparagus from choosing a planting site for harvesting and transporting. Let’s start our guide by knowing “when to start planting”.
When to start planting asparagus?
Early spring is the best time for planting. You can grow asparagus from one-year-old plants or “crowns”, both of which are easily available at garden centers and nurseries.
Growing asparagus from seeds is also popular in some parts of the country, but we recommend starting with crowns, as you can eliminate the long-year headache of weeding which is usually associated with seeds.
A few varieties like hybrid “sweet purple”, and open-pollinated “purple passion” are grown from the seeds. But you should try these varieties after gaining some experience of asparagus crops.
Choosing the right site for plantation
Given that asparagus takes at least a couple of years for proper growth, and comes back year after year for so long, you must have to decide, where is the best place to plant asparagus.
Choosing a site with at least partial sunlight is recommended.
If you are planning to grow some other crops, choose one side of the garden/field for placing the asparagus bed, so that it won’t be disturbed due to constant activities of planting or re-planting other crops.
Ensure the proper drainage of the asparagus bed without any pooling of water. Asparagus doesn’t like “wet feet”. If you are unable to find a site with decent enough drainage, you should consider raised beds for growing asparagus instead.
Neutral to slightly acidic soil with a pH of about 6.5 is suitable for asparagus growth.
Get rid of all weeds from the planting area by digging it placing a 2 to 4-inch layer of soil mix, aged manure, or compost.
Ensure that the soil is loosened enough to 12 to 15 inches in depth for proper rooting of asparagus crowns, and the roots are not disturbed by rocks and other obstacles.
How to plant asparagus roots?
The aim of planting crowns should be to protect them from various external obstacles, so plant them to ensure enough depth.
Dig a trench of 6 to 8 inches deep and about 12 to 18 inches wide. Keep a distance of at least 3 feet, if you are digging multiple trenches.
Don’t forget to soak asparagus crowns in water before planting.
Use soil to make a 2-inch high ridge right at the center of the trench. Place the crowns on top, ensuring roots are evenly spread.
Place the crowns 12-18 inches apart from each other inside the trench. Do the measurement from the tip of the root of one crown to the second and so on.
What after placing the crowns?
Placement of crowns keeping in mind the proper depth as well as distance is a very important part of asparagus cultivation. Here are the steps to follow once you are done with this important part.
You can either follow the “all-at-once” method or “little-by-little” method
Some farmers fill the trench directly with a mixture of soil and compost. Although other traditional “little-by-little” is considered as the best method, farmers found no problem whatsoever with this “all at once” method either. As long as the soil is free enough, you will get the desired crop even with this fairly easy method.
Little-by-little method
Burry the crowns two inches deep with the mixture of compost and soil, ensuring proper watering.
With the progress of the season, when the spears are 2 to 3 inches tall, add another 2-inch layer of soil, ensuring spears are not buried completely.
Once you notice further growth of spears again through the soil, add one more layer of soil. Keep doing this until the levels of the trench and the ground are the same. You can also add soil a couple of more times throughout the growing season.
After filling the trench, ensure molding the soil to avoid pooling around the trenches.
How to care for asparagus?
Once the trenches are full of soil, add a 5 to 6-inch layer of mulch.
Fighting with weeds, especially in the first couple of years is the biggest challenge while growing asparagus. You will have to keep the crop free from weeds, and that too, without disturbing their roots! So, pulling the weeds gently with hands is the only option. The problem of weeds will go away slowly with the growth of plants. So, mulch the surrounding of roots with compost or grass clippings to maintain moisture and to control the growth of weeds.
Asparagus plants require a couple of inches of water, especially in the first two years. So, if there is not enough rain, you will have to water them properly and regularly. And, the drip irrigation method is the best option for asparagus.
A proper supply of plant food is necessary for healthy and constant growth. So, prefer using the drip irrigation method for adequate and balanced watering of plants.
Some important points to remember before harvesting
Yes, it is important to know, when and how to harvest asparagus. But, before that, let’s discuss a few important pre-harvesting points.
Avoid harvesting the crop in the first season. But, for caring purposes, ensure side-dressing with compost, as well as cutting down the dead foliage, especially in late fall.
During the second season, start harvesting, but not more than 3 to 4 weeks. Ensure side-dressing with compost, especially in spring cutting down the dead ferns regularly, preferably in late fall. And of course, maintain the thickness of the bed with mulch.
You will notice the full production of asparagus bed in the third year, and you will then be able to harvest asparagus continuously in every season.
Transplanting Asparagus
Transplanting is also an important factor in asparagus farming. You should transplant the crowns early in the spring season when they remain dormant, or in the later stage of fall, after cutting down the foliage.
Use a garden fork to dig and lift the crowns, without disturbing the roots! Divide the clump into more than two pieces, and water the transplants properly. Avoid harvesting heavily in the following year to ensure good asparagus crops in the future.
Pests and diseases commonly affecting asparagus
As already mentioned, weeds are the most common problems related to asparagus crops. And regular hand pulling in early summer and spring is the best way to get rid of them. Prefer light cultivation to avoid damages to asparagus crop.
Here are some common diseases you may encounter during asparagus farming, and how you can control/prevent them.
Disease/Pest
Type
Symptoms
Control/Prevention
Asparagus Beetles
Insects
Spears start appearing brown and they convert into hook shape. Beetles can also cause damage and defoliation to the fruits
You can hand-pick the beetles and throw them away from the field. Disposing the plant matter, especially in the fall season.
Constant inspection and hand-removal is the best way to protect crops from cutworms.
Fusarium Crown Rot
Fungus
Wilted, stunted, yellow fruits, brownish or reddish spots on the stems, roots, or crowns, spears start rotting
This is quite a big challenge in asparagus farming. Destroying the infected plants is the only option. In addition, you will have to avoid planting asparagus around the infected areas for at least five years. Otherwise, using resistant varieties, disinfected tools, and avoid overharvesting are a few options.
Asparagus Rust
Fungus
Emerging spears are full of pale green spots, that become orange or yellow. If not cured in time, they will convert into reddish-brown blisters. There is defoliation, as well as reduced vigour.
Excessive moisture is responsible for spreading rust. So, avoid excessive watering, especially on the ferns or spears. Choose other resistant varieties, destroy infected plant matter, improve air circulation, and avoid growing plants around the infected area.
How to grow asparagus from seed?
Growing asparagus from seed is super easy and fun, but again, you will have to be very patient, as you can’t harvest asparagus for a couple of years, even if you are using seeds. Here are the steps on how to grow asparagus from seed:
Soak seeds for a couple of hours.
Use sterile soil, and plant each seed 1 cm deep in separate 5 cm pots.
You will notice sprouts coming out after a couple of weeks.
Seedlings take 10-12 weeks to grow properly.
Now, you can place the transplants just like we have discussed placing the asparagus crowns in the field. All the steps afterward are the same.
How to harvest asparagus
We have discussed it repeatedly that you should not harvest the asparagus for a couple of years in the beginning.
With young plants, the production period is usually 2 to 3 weeks. But established plants take up to 8 weeks for production.
Check your plants every second or third day to see if there are harvest-ready spears. The growth of spears is too quick, and they can convert into wooden structures in no time. And they’ll be too hard for eating, and hence, for marketing.
Spears are ready to harvest when they are 8 to 10 inches in height and ½ and ¾ inch thick. (Thinner and younger spears are usually more tender. So, keep in mind for your marketing purposes.
Cut the spears at ground level using a sharp knife or scissor.
When the diameter of spears is less than the size of a pencil, stop the harvest.
Harvesting is also an important part of asparagus farming, so keep all important points in mind.
Make sure, you don’t cut the asparagus ferns. Otherwise, your asparagus bed will be ruined completely. Give them enough time to get matured. They will replenish important nutrients in the asparagus bed for next season’s spear production.
Storage of asparagus
You can’t store asparagus for very long after harvesting. So, start marketing right from day one.
Remove any visible dirt, or wash them gently with cold water before storing. Don’t forget to dry them completely after washing, because any moisture will pave the way for molds.
Bundle the spears properly, use a moist paper towel to wrap the stem ends, and keep the bundles in a plastic bag. Place the bags in a refrigerator to maximize the freshness.
So, that’s all about our asparagus growing guide. Asparagus is full of nutrition and tastes very delicious too. It is an amazing source of fiber, minerals, vitamins, calories, and sodium, etc. When it comes to economic value, it can be a great source of income too.
You can increase your income by combining it with other crops, especially in a couple of non-harvesting seasons in the beginning. So, if you are thinking about growing asparagus for commercial purposes, you can surely be affirmative about it. All you need to do is to be very active and caring.
You will have to wait for a couple of seasons, but you will be amazed at the returns after that. After all, every good thing worth to wait.
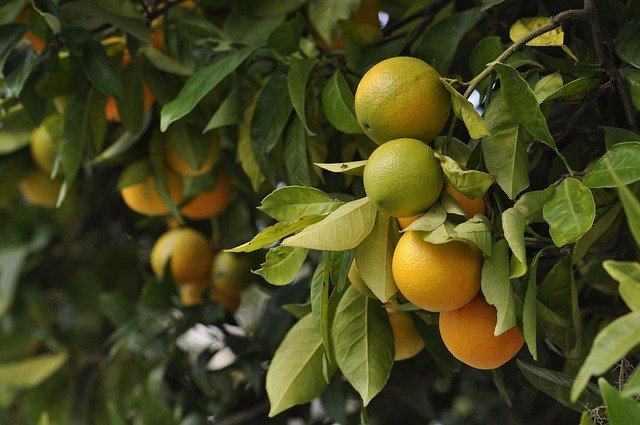
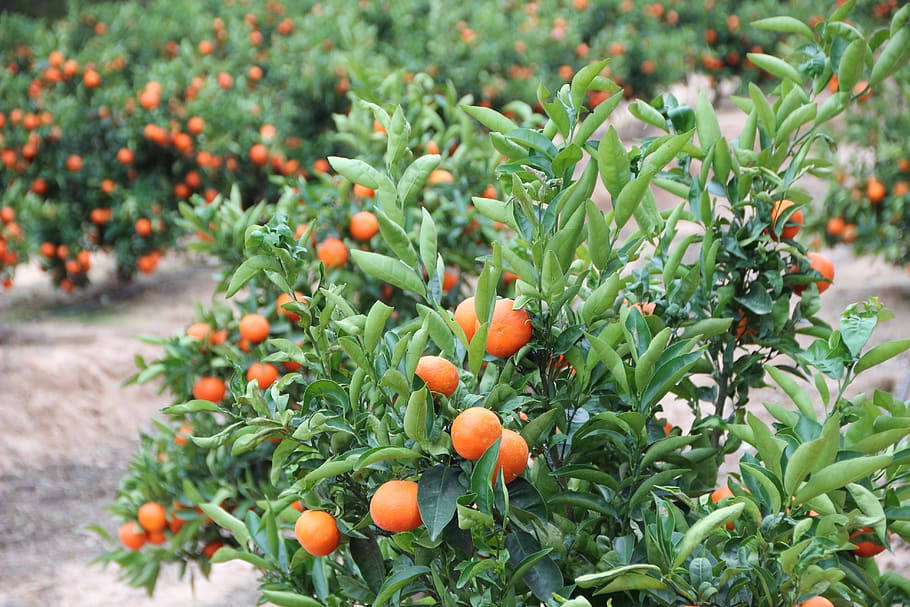
Do you have your breakfast without orange juice? Isn’t it like a day without sunshine?
Orange is not just a favorite fruit of many individuals but it
provides many essential nutrients. A pulpy orange has a great source of fiber
that keeps a check on the human digestive system.
The high content of vitamin C helps in lowering the blood
pressure, consequently improves the heart’s health. Moreover, it is full of
antioxidants that eventually boost your immune system.
There is also some mystery on how citrus fruit is bloomed by juicy skin. Simply, how to do orange farming?
The tropical region as well as in sub-tropical regions are
perfect for the orange cultivation.
However, the dry environment is ideal for productive orange
growing for the higher orange yield.
A temperature of the surface in a range of 25 degrees Celsius is
ideal for both the plants as well as roots. Nevertheless, oranges are known to
grow at their best and in a dry climate. The warm summer and reasonable rains
between 100 and 200 cm suits more to orange plants. These conditions prove to
the better climatic conditions for the excellent growth of orange plants.
Keeping into the mind that orange plants are particularly responsive to high humidity and frosts, orange farming can be prone to a significant number of diseases and dangerous insects and pests.
Besides, it is also a smart strategy to maintain the farm’s
temperature to a desirable limit throughout the growth cycle to achieve a high
yield of oranges. Because the summer hot winds cause orange flowers and budding
fruits to collapse.
Deciding the Right Soil
The soil preparation before planting directly enhances the
overall yield. It significantly boosts the health of your plant as well as keeps
many diseases away, especially those that are sourced from the hidden pests in
the soil.
Moreover, this is recommended to check your land for important
minerals and nutrients to determine these important additives.
A large variety of soils such as clay and silt soils of loam or sandy soil, oranges can be planted. But the soil with strong drainage capacity, limestone-free with strong salt absorption ability is ideal for the orange farming.
Generally, the soil ph is roughly 6.0 to 7.0. And oranges are
indeed a citrus crop, the growth of these plants on soil with a pH of about 5
is a better idea for higher yields.
Yet, it is a smart practice, at least once before planting, to
go for the soil check and see if the soil is adequate or not?
In the winter and monsoon seasons, the growing farm should not
be too cold as it makes your farm a variety of plagues and diseases.
In this case, providing the windshields by planting the trees
across the farm not only prevents the fruits and flowers in case of a storm or
heavy winds but can give additional revenue once they get mature.
Growing an orange plant
You can reproduce an orange tree just by seed or the shield
budding often known as T-budding. In case, there is already a plant that has
attained the age of its maturity. Vegetative propagation is a better choice.
In case, you choose to grow an orange plant from a seed. You have a few things to learn in orange farming.
Planting By Seeds
In case, you are trying sowing the seeds to the soil directly.
You can add a good mix of additives to the proper fermentation. Moreover, you
can add manure to the soil before sowing the seeds. Let’s have a look at how to
grow a plant using seeds,
Sprinkle your orange seed into the soil and mix them properly so they can mix around 1.5 inches into the soil.
You should take care of these seeds so that they can enough sunlight as well as properly make the soil enough moist whenever it becomes dry.
It is worthy of notice
that seed-based trees are mostly short-lived because they are vulnerable to
root and foot decay.
However, oranges plants are more productive and fast-growing if
planting is done through the budding.
Besides, the oranges should be planted early in the rainy season in the case of orange farming in Florida. A comparatively small rainy season leads to less chance of plant mortality. And, a plant can be better sustained by rainwater.
Planting By Budding
In the case of planting
the budding, you need a young orange tree which can be obtained from the local
nursery or can be grown of its own with seeds.
Furthermore, this process requires a branch with multiple stems.
And, in this process, you need to keep in mind while selecting the branches or
stems. They tend to bend at the time of snapping.
It is worthy to note that trees grown after T-budding in orange farming are more productive than others that are seed-based.
T-budding is required certain steps to follow. Let’s have a look:
Split the bottom of the bud stem at the 45-degree angle
Create a hole at in the trunk of a young orange tree
Slide in the slit in the trunk alongside the cut
Wrap both parts and tie them together with a tiny amount of tape
Wait for some time as the graft starts to expand, once grown, remove the grafting tape to prevent the development
The slatted bud stem is known as the scion. The fruit is spruced
and grows quickly on grafted trees than on seeds based orange plants.
Once, a tree grows enough from the initial stage. It requires special care to be the best to yield for the full capacity while orange farming in California.
Generally, a plant needs some important aspects of growth that
are fertilizing, watering and pruning.
1. Water
The water needed for orange trees is based on the local
environment, however, it is required to low irrigation in fall, while
frequently water in spring. The watering of a plant also varies according to
the rainfall in a year.
It is worthy to note that excess watering reduces the pulp
quality of the fruit. The planting depth often influences the amount of water
that you provide in orange trees.
2. Fertilization
Fertilization in orange farming directly influences the quality of mature fruits as well as the breeding of orange plants. In case you provide some extra nitrogen in fertilizers to the growing plants. It contributes the oil to the peel. While fertilizer excess in potassium reduces peel grease.
Usually, one or two pounds of nitrogen should be added to the
growing tree for the high production of good oranges.
And, indeed potassium, phosphorus, and several
micro-nutrients will also be part of the fertilizer.
If you are not getting enough yield from an orange-tree. It is
recommended to have a soil check to see the actual amount of nutrient ratio at
present.
Besides, it is not appropriate to cut the orange tree just for
shape.
Any shorter trees will be eliminated from the ground. Often, it
is good to trim the weak or rotted leaves from the orange tree.
This is a highly deadly bacterial infection for citrus trees that can be identified by the scabs on the fruit, leaves, and branches of the orange trees.
2. Root rot
The soil-inhabiting fungus from the Phytophthora species
causes the wilting of leaves as well as a thin canopy of the fungus. Look
at the roots for signs of rot and disease.
3. Citrus greening
In case leaves of the orange plant are getting yellowish. A nutrient shortage might be behind such occurrence in orange farming.
Though, they can also be induced by the harmful disease of the
citrus plant. Such infection can cause the leaves of the plant to wither. While
fruits would be a bit sour as well as tiny and rough.
4. Sooty mold
This disease can lead to a branch to die. To identify this
infection, you can bark peels away, for a dark sooty fungus disclosure.
5. Greasy Spot
If the leaves of orange plants have the mark of
yellowish-brownish sore spots, especially under the leaf. This is a sign of
another fungus disease known as a greasy spot.
As the disease evolves, the spots enlarge into oily-looking
spots. These greasy spots cam hamper the growth of leaves even can make
them shrink or wilt. In a plan to prevent the greasy spots, collect the fallen
leaves that might counter the further spreading to healthy leaves.
However, it is good to spray the tree with liquid copper
fungicide in June or July.
And, you can apply as the second spray of the same fungicide in august or September to preserve the summer growth of your orange farming.
Apart from this, many insects such as citrus whitefly,
caterpillars and aphids may damage your orange flowers, leaves, and fruits
significantly.
It is best to ensure that you are informed of diseases in your area. While offering the orange trees the best conditions so that a strong and healthy tree has a better immune system to the diseases.
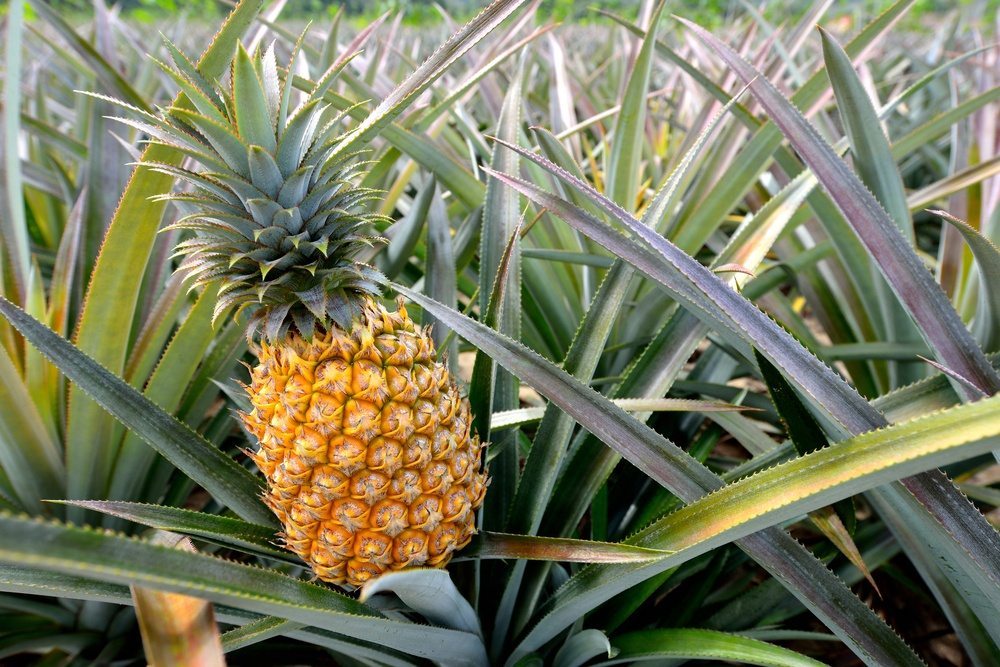
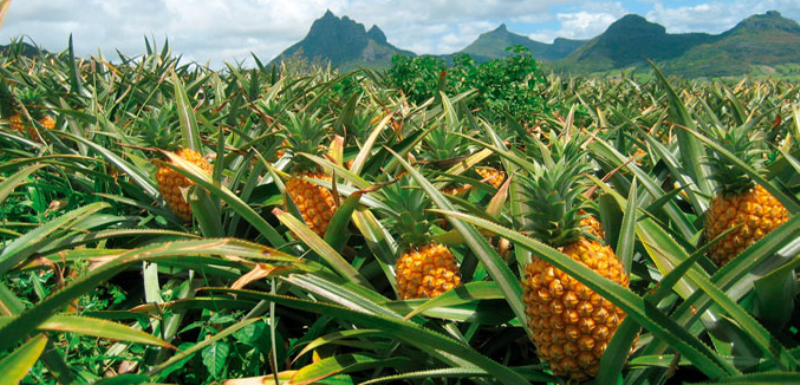
The tasty nutritious pineapple fruit has its popularity matched to mango fruit. Its yummy tangy flavor and appearance make it familiar with people.
How do pineapples grow? Is it profitable to grow a pineapple? How to plant a pineapple? These are some common queries that come to your mind when planning for pineapple farming.
This fruit is high in Vitamin A and Vitamin B. Also, has traces of Vitamin C and minerals, iron too. Caribbean, South, and Central America are the largest producers of pineapples, India holds the fifth position. Here is an overview of pineapple cultivation.
In India, it is popularly known as ANANAS. Here, Karnataka, Kerala, Goa, Bihar, and North-eastern states cultivate pineapple abundantly.
Plowing, digging, and leveling are done step by step to get the land ready for pineapple farming. In the case of trenches, a space of 165 cm from center to center is required.
Treatment for suckers
The suckers need to be sorted, healthy or unhealthy. Then the healthy ones should be eliminated from unhealthy ones.
The healthy ones are dried in the shelter and then dipped in Bordeaux mix before plantation.
The Necessity for pineapple farming
To ensure the best yield for pineapple farming always remember, a coastal and humid climate is necessary.
Season favorable for pineapple farming
The flowering season for pineapple farming is between December and March. It is advisable to maintain a gap of 12-15 months from the flowering season.
A heavy rainfall period is avoided for plantation, so it is done before the onset of monsoon rains. Too much rain in the early stage will ruin the pineapple plantation.
Soil requirement
For pineapple cultivation, sandy loam soil is a perfect choice to be made. Though alluvial and laterite soil is also ideal for pineapple cultivation.
The basic theory behind this is it should be free from waterlogging. Also, the acidic content should be between 5.5-6.0.
How often do we need to water a pineapple plant?
Normally, pineapple cultivation is done in tropical places enriched with a humid climate. So, the water intake of the fruit is sufficient.
No artificial irrigation is required. But when planting on a commercial basis there might be a need for additional water to get a healthy grown delicious fruit.
Artificial irrigation helps retain water during the offseason to nourish the plant. Thereby, facilitating water supply in deficit regions as well.
In such cases, you need to water a pineapple plant twice a week.
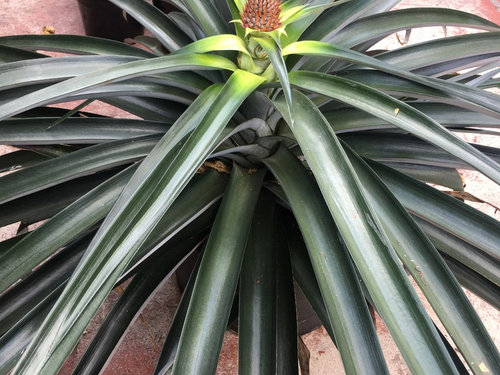
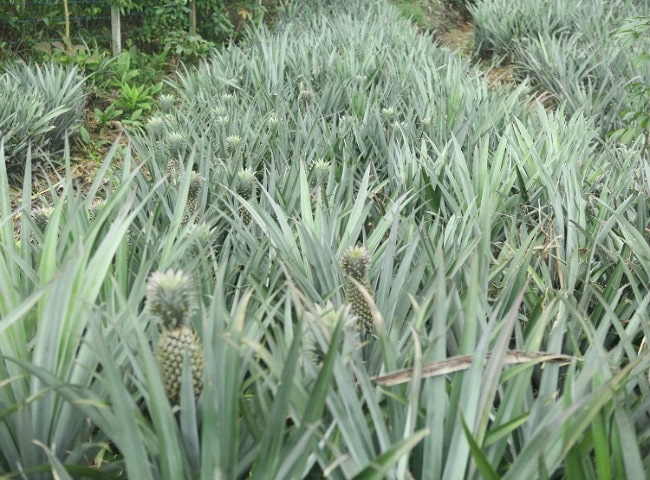
Let us know how do pineapples grow? To grow pineapples a set of 4 techniques is applied like flat-bed, furrow, contour, and trench.
This is entirely dependent on the land and rainfall pattern of the area of cultivation. A contour planting is generally practiced to curb soil erosion.
To give good support, the plant -soil is moved towards the trench area. The flat-bed planting pattern is adopted as the pineapple roots are very hollow. This is how pineapples grow.
Diseases of the pineapple plant
It is a pest-free crop, though in some severe cases scale insects and bugs are its worst enemy.
Fertilizers for pineapple crop
Pineapples are high in potassium and nitrogen requirement. For good pineapple farming, they are harmful to the soil, so they are applied in minimum quantity as per the requirement.
Nitrogen is generally divided into 6 doses. The first is applied after 2 months of cultivation and the last one before 12 months of harvest.
Similarly, potassium is given in 2 doses. Half can be applied after planting and the remaining after 6 months from the plantation.
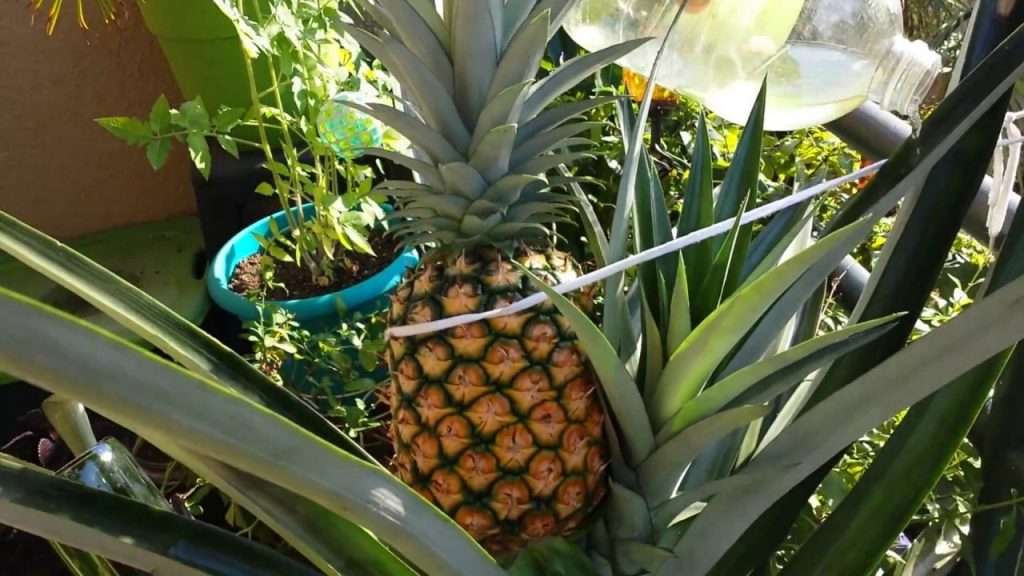
Pineapple harvesting
After 12-15 months of planting, the pineapple crop bear flowers. It takes a complete 15-18 months to get a fully grown pineapple fruit.
The growth of pineapple depends upon the climate, temperature, variety of pineapple, size, and type of plant material.
The month of May-August is the time for pineapple harvesting. After 5 months of flowering, the plant bears fruit.
For canning purposes, the fruits are extracted from the plant when the fruit is not fully grown. For table use, you have to wait till it has attained a golden yellow color.
Steps involved pineapple plantation
Pineapple farming involves a series of to be followed to ensure a good fruit.
Earthing: Pineapple is a hollow root plant. If they don’t get sturdy support, they tend to bend. To render support to the fruit the soil is moved towards the trench.
Weeding: The most common weeds in pineapple farming are nutgrass and hariyali. It is done to make sure the good growth of the pineapple fruit.
Mulching: When grown as a rain-fed crop means, dependent on rainwater. It is an important step. The idea behind this is to store water for an adequate water supply.
Ratoon crop: Rotation crop farming is generally practiced in India. The cropped part of the fruit is used as a base for the next farming cycle.
Unusual behavior in pineapples
This is a big reason to worry, as to remain in demand pineapples must have to be perfect in taste and appearance. Else they get neglected.
Though pineapple farming is free from any sort of infection and all still there are few challenges.
More than one crown: In some cases, the fruit might develop more than one crown. In this, it gets de-shaped. Broad from the upper portion and pointed from below. Making them non-eligible for canning.
Slips collar: This happens when a large number of slips appears from the base. It leads to small-sized fruit with too many slips overlapping.
This lovely crown shaped fruit is adored not only for its taste and appearance but also has some benefits as well.
Rich in Vitamin C: It is enriched with Vitamin C which indicates a capacity to curb heart and joint diseases.
Rich in fiber content: This helps in keeping the intestines healthy.
Helps in removing excess mucus.
Helps in weight loss.
Conclusion
You need not worry about the profitability of pineapple farming. It has already made deep roots in the market. They have a loud market domestically or internationally.
Sold on huge margins, still have the monopoly in the market. Can be consumed in multifarious ways. Jams, fruit, jelly, spread, canned, and candies loveable in all forms.
Pineapple waste serves as fodder for the animals. Enjoys fame all over the world. The production cost is low as compared to other farming’s.
Pineapple needs no introduction. No separate marketing strategy is required.
What else you need!!! Just go ahead with your pineapple farming. Surely, you can create magic with your pineapple farming.
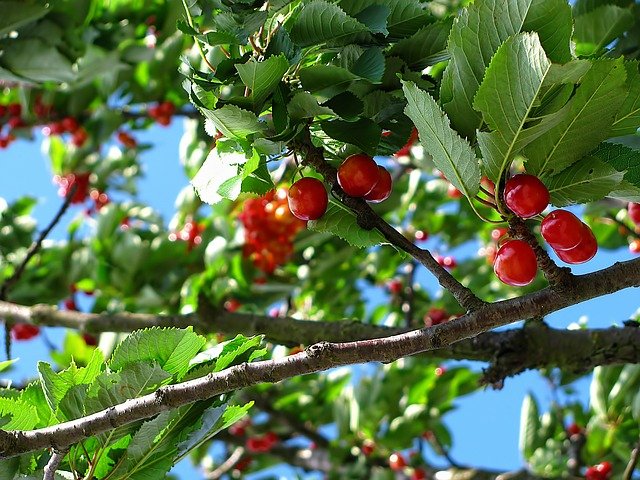
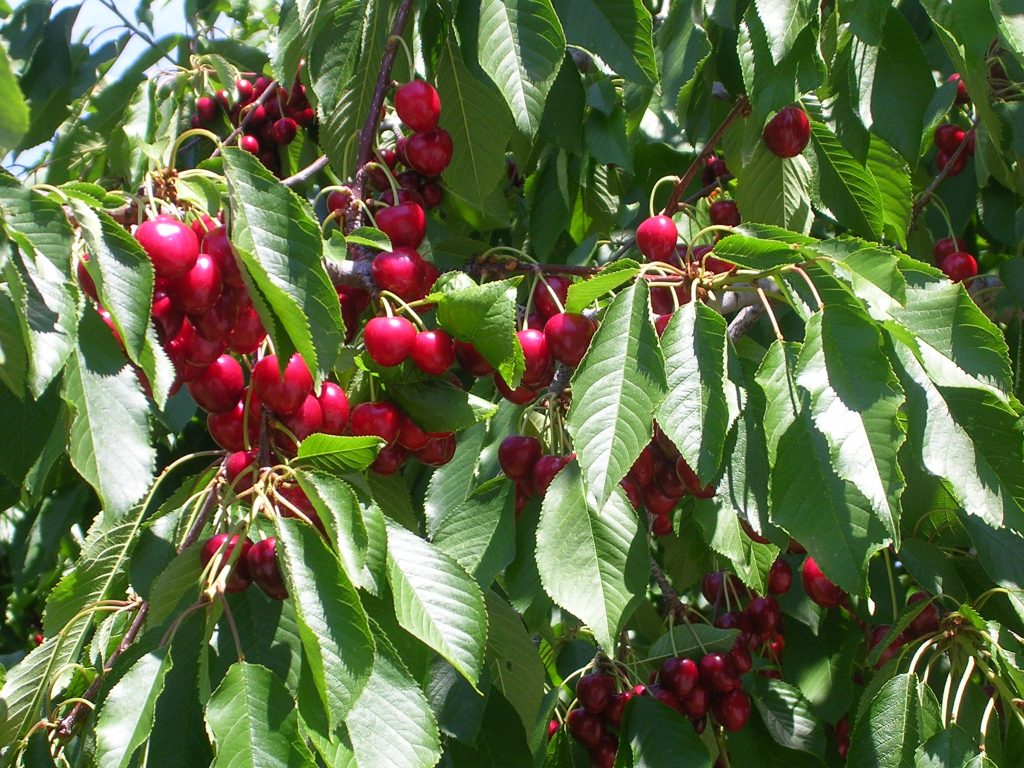
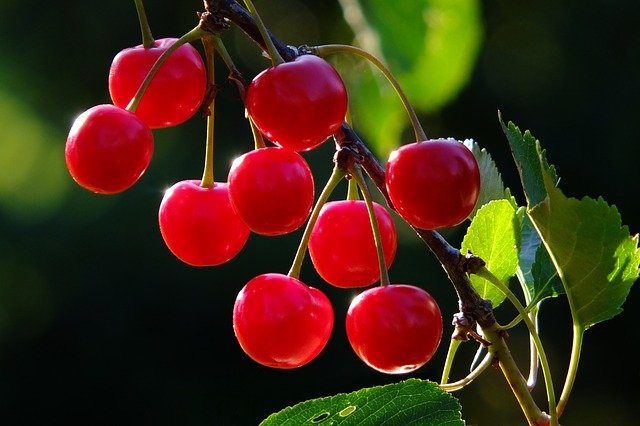
Cherries are those eye-catching red stony fruit which is loved for their sweet taste. People love the mesmerizing view of the spring blooming cherry trees with white and pinkish flowers.
We just have to find out how to grow cherry trees. Growing cherries is trending these days. As they can be preserved and are much in demand.
Apart from a common thought that cherries can grow on big grounds, you can add a look and grace to your home gardens as well.
Even, they improve your health status also. Like curing arthritis and gout. Improves blood circulation and is good for the heart also.
Let us have some insights into the entire process of cherry cultivation.
Where do cherry grow?
Where do cherry grow? Cherries thrive happily in the zones receiving enough sunlight, with a cold climate and perfect wet soil. However, this icy cold climate varies among different species of cherry.
Soil should also have a PH value between 6, which means a bit acidic. The sun rays should be on the plant for 6-8 hours.
Because excessive cold climate can make cherry plants dormant. These conditions make for a perfect cherry plantation.
Selection of seeds
You need to choose between the varieties of cherry and then analyze your climatic conditions for how to grow cherry trees.
Selecting cherry seeds entirely depends on the climatic conditions prevailing in your area. And for the soil, you have to make it fit for growing your cherry plants.
Can you grow a cherry tree from a pit?
Well, you must be thinking can you grow a cherry tree from a pit? In your backyard or home garden. The answer is yes.
This is an amazing idea to grow a cherry tree from a pit. You ought to have patience, as it is a time taking activity.
The trees can produce flowers very late and not sure all those turns into sweet tasty cherry fruit.
Cross-pollination adds life to the reproduction process. With enormous and dedicated management and hard work, you can have cherries from the pit. Seeds are prepared for it first. Let’s check out how.
When those pulpy balls find their way to your stomach, save those leftover seeds. Instead of throwing them, just dip them in warm water and clean them.
Allow them to dry on a paper or towel for 5 days. After that place them in a plastic container covered with a lid tightly. Now, carefully this container is allowed to rest in a refrigerator for 10 weeks.
This is a preparatory step as to how to grow cherry trees.
Planting cherries
Remove those dormant cherry pods and allow them to rest at room temperature for 3 hours.
You need to place these tiny pods in soil pots, each with 2-3 pods in number. Place the pots in sunlight with keeping the soil moist.
You can observe seedlings sprouting from those cherry pods. On gaining some height they tend to be kept inside on colder nights.
The moment your cherry plant starts flourishing, plant the seedlings out at a distance of 20 meters from each other.
At this point, they are 10-12 inches tall. And this is how to grow cherry trees.
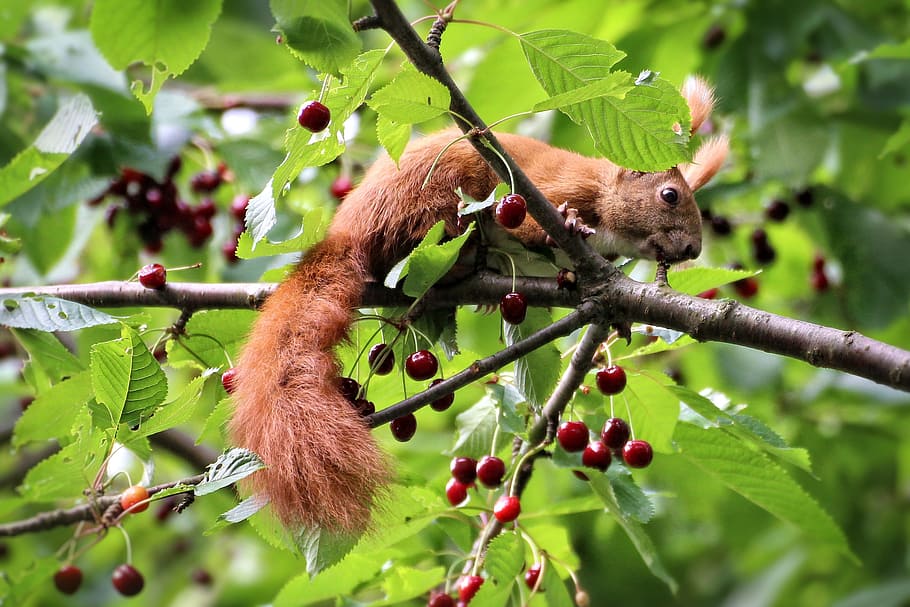
The worst enemy of cherry trees is wildlife. These rabbits, reindeer, and other animals hunting for fodder end up eating these tasty plants.
You can tie burlap around the plantation. Yes, they are effective but unwrap them when the spring approaches to ensure proper sunlight to the tiny tots.
Once they attain maturity, they become out of reach and they are safe anyways then.
Apart from how to grow cherry trees, you should also be aware of how to save them.
Do cherry trees need full sun?
You must be wondering, do cherry trees need full sun? Yes, they do.
These cute little red bulbs need full sunlight. Let’s define FULL SUN. Full sun means sunlight of 8 hours.
Yes, you heard it well, a complete 8 hours of sunlight will work wonders. It is mandatory, otherwise, they will end up having a straggly stem, discolored fruit, and that is not done.
When to plant cherry blossom trees
The amazing, tasty, and world-famous cherry blossom is the home production of Japan. These cherry blossom plants were given to the USA as a token of gift in the early of 19 century. Later the USA also started with the production of cherry blossom.
A cherry blossom plant needs explicitly nutritious and productive soil. Soil should not be waterlogged and a minimum of 6 hours of sunlight is a necessity.
Proper spacing of 20 feet should be maintained between the plants. Fertilization is the key to how and where to grow cherry.
Now, for when to plant cherry blossom trees you should wait for the frost period to get over, this supports a speedy and good growth of the plant.
Growing dwarf cherry trees
Dwarf cherry trees look cute with their smaller size. The size of the tree does not affect the size of the fruit.
If your backyard can’t accommodate tall cherry trees, growing dwarf cherry trees is an option. With these trees, you can still have that alluring sight of light bounty flowers in the spring.
These dwarf trees are obtained by grafting. They are 6-8 feet in height so, they find a perfect place in your backyard. Initially, they can be planted in pots or containers.
Their upkeep is also easy like pruning. Sandy soils are apt for these trees. The condition remains the same. It should be a well-drained one.
How long does it take for a dwarf cherry tree to grow?
These are cultivated for their explicit capacity to withstand extremely cold temperatures. Dwarf structure and too much pulp is the outstanding feature of these dwarf cherries.
Growing dwarf cherry trees follows the same process nothing different, they are planted and taken care of, in the same manner.
With dwarf cherries, you need not wait for how long does it take for a dwarf cherry tree to grow? As in comparison to normal cherry trees bearing fruit in 10 years, you have them in 3-5 years in your backyard.
Pruning in cherry trees
In the case of cherry plantation too pruning is required. Trimming ensures the removal of dead and unwanted parts from the plant.
It promotes good health and growth of the plant. The plant is disease-free and also free from abnormalities.
Fertilization of cherry plants
Cherry cultivation needs a handful of good organic fertilizers. In 10 years, the plantation needs a combo of Calcium ammoniate, potash, and superphosphate to thrive well.
Good manure promotes rapid growth and productivity of the plant.
Growing cherry trees in Australia
Cherries do cause a bit of hassle as they are typically cold climate lovers. Don’t lose hope. Even Australia can have their cherries. Growing cherry trees in Australia is not MISSION IMPOSSIBLE.
There are species of cherries that love Australian weather too. Some variety of dwarf cherries do well in mild cold and don’t grow too tall.
They can be grown all year-round. Those juicy, pulpy cherries can be grown at much ease.
To grow cherry trees in Australia all you need is well-drained humus soil, with a PH scale of 6.5- 7. Proper mulching should be done to ensure the soil temperature.
As cherries can’t stand too much water though need water every day in summers. The soil should be moist.
Pruning should be taken care of. And all this trouble is worth taking. When you have your cherries to eat.
Well, the above-stated information is enough. So how to grow cherry trees is no more a query.
You have to tighten your shoes and get into how to grow cherry trees.
Sow the seeds in this winter and you have them ready by the summer for those yummy shake toppings.
Cherries look good for Christmas gifting and are delicious too. Now with all the complete knowledge about growing cherries, you can accomplish your goals for having home cherries.
They are easy to grow, don’t require a gross procedure. Especially those dwarf cherries beautify your backyard with the bunch of red pulpy cherry fruits hanging on them.
Apart from satisfying your taste buds they are contributing towards health as well. Anti-oxidants help in curbing cancer growth. Good for the heart as well.
So, you have enough on how to grow cherry trees just execute it and enjoy the yummy cherries from your backyard.
The olive is an evergreen tree basically found in Mediterranean regions, Asia and Africa. OliveFarming has been done throughout the world for centuries hence olive is one of the oldest fruits cultivated ever. Olive, the evergreen tree has been cultivated in the Mediterranean regions since about 3000 BC for edible purpose as well as was also a symbol of joy happiness and peace in Europe. Olives are one of the oldest known cultivated trees.
Olive is entirely cultivated for oils. These oils are very beneficial as along with its edible properties, it also has medicinal benefits. Olive oil has many health benefits like control cholesterol levels, regulate blood pressure and also prevent blood clots and cancer. Olive also helps in strengthening immunity.
Olive Trees: Olive (botanical name Olea) is a species of family Oleaceae found naturally in Mediterranean basin.
Basic requirements for olive farming:
Soil Requirement
Olive is cultivated in a wide range of soils although it needs deep, rich as well as well-drained loamy or clay loam soils for best yield. Pit size also depends on the soil type. For example for fertile loamy soil, the pit size should be 60cm×60cm however for poor soil the pit size required is 90cm×90cm.
The depth of oil should be at least 5 feet to assure of aeration of roots. The deeper layer of soil has more importance in comparison with upper layer for good growth. The suitable pH range for good quality and higher yeild of olive is 6-7.5. Other point to be kept in mind is that water stagnation can cause root in a prolonged period of waterlogging.
Climate Requirements:
Cultivation of olives need warm climactic conditions. The factor that has major impact on cultivation is ‘temperature’. So the best temperature range for its cultivation is 15°C -20°C. About 100cm of well distributed rainfall during its growth period is necessary. Frost conditions are not favorable for this crop.
Irrigation of olive farming:
Olive plants should be irrigated in hot and prolonged dry conditions. Irrigation has to be done 1 month before the flowering season. Next, the olive trees should be irrigated after about 2 weeks of blooming period. Irrigation has to be carried out the month after the fruit is set to stimulate the development of fruits.
However without rain irrigation of olive crop becomes a very stressful condition as the crop starts shrinking and dropping fruit’s although the irrigation done by own without rain gives us the power to control stress of water, amount of water.
Olive trees even react in very short span of time if adequate amount of water is supplied. Property waters olive plants have a very good growth and produce large sized fruits. But it is also to be kept in mind that how much water should be supplied.
In the initial years the tree needs water at least once a week but with time the irrigation period becomes once on month
Constant weeding and mulching activates are very important as this operation increase fruit yield and improve quality. Weedicides can also be used to control weeds effectively.
Some examples of the weedicides are glyphosate that should be sprayed at the rate of 0.18-0.36kg per hectare crop. It can be used 2-4 times during entire growth. And for perennial weed gramoxone can be used (2-3 liters per hectare crop ).
Pruning in Olive Farming:
Pruning is necessary to have even and balanced canopy. Because if a olive tree is left unpruned it grows very large which make it very difficult to harvest. Timings also hold importance in this activity. The perfect timing for hard pruning is when the olive tree has finished fruiting, which marks the end of autumn or start of winter season.
However the non-bearing olive tree can be pruned any time throughout the year. To keep a check on canopy it is better to give the tree a light prune each year. It is important to prune off the suckers as they steal the nutrients and water of the canopy.
It also removes dead damages or crossing branches. Olive trees need to be tied to a stake. This had to be done in such a way that it stands tightly. A soft gunny thread can be used to tie up for the first couple of years.
Pests and diseases in olive farming:
There are some diseases found in olive farming which are root rot, leave spot, peacock spot, olive knot , diplodia cancer ,phytophthora crown and more. Some insects and pests like Locusts can cause harm to olive trees. Preventive measures should be taken to avoid these problems.
How long does it take olives to ripen:
The naturally black ripe olives ripen fully on the tree? They reach the dark red to black stage of color in about 3-4 months after the initial or green stage.
Harvesting in olive farming :
Harvesting is a very important phase of olive farming hence it should be done very carefully and at the right time due to the reason that the immature olives can decrease in both quality as well as quantity.
Even if the harvesting is delayed, it will produce the fruits with the oils of higher acidity. So the correct time for harvesting in olive farming begins in mid winters. Olive trees grow throughout the summer and autumn and ripe during mid winters harvesting depends upon desired ripeness, region and variety.
As olives serves couple of purpose like eating and processing the oil out of it so the state if ripeness matters. In the initial state the olives are green and with the time it becomes rosy and at the end finally black. Mostly the olives are ready to harvest at the green ripe, when the juice turns cloudy that is the stage in late September. Then they start ripening into uneven reddish brown olives through mid December, ending up darkening naturally black ripe stage towards end of, winters the stage in which it has high oil contents.
There are different ways to harvest olives. At first one need to place the traps under the trees and then with the help of a rake, gently dislodge the olives and then collect the olives from the trap. And if the olives are to be used for oil purpose, then follow the same steps of harvesting as above, and then gather up any strays on the ground.
Either traditionally or commercially, handpicking is method applicable in both. Though handpicking is the most desirable method, on the other hand, it is also expensive and slow process that definitely affects the quality of olives.
But in today’s modernized world new technologies and machinery are use to harvest olives. In this, a long-handled vibrating tong is used that shake the olives from the branches that shed on the nets laid under the trees. Beside this the other modern method used for harvesting olives is tractor drawing shakers or the grape harvesting machinery used in high density orchards.
Since it’s not possible for everyone to own such machinery, harvesting olives at home still has to be done in old fashioned method. But before harvesting one must now that what flavor they want, like if you harvest it in earlier stages the olives will taste bitter, but as the olives mature , the flavor mellows. After harvesting the olives have to be used within 3 days otherwise the olives will oxidize as taste sour.
There are different maturity stages of olives and it is important to harvest at correct time for better yield and good quality.
Maturation stages of the fruit depends on different factors like the variety of olive , temperature, irrigation , sunlight etc. High temperature can make the fruit ripen quickly however low temperature can assure the green olive hanging on the tree well into winter. Coming on the other factor variety, some. Variety will ripen faster and other may take long time and these factors make the decision more complicated. One must also keep in mind that these Olives are not as sensitive as grapes hence you need not to get up at mid night and harvest them and put on the ice. All we need to do is proper planning for start to end.
Advantages of olives and olive oils : Olives and olive oil has very large list of advantages:
This oil is considered very good for skin and hair, it helps to improve the texture of skin , make skin glowing , prevents wrinkles and even helpful in some other skin problems. It is very helpful in increasing or improving the fertility. Olives may prevent cancer too. Beside these olives are great source of anti oxidants, vitamin C as well as a good source of dietry fiber. It helps to control as well as maintain cholesterol levels and blood pressure levels.
Yield of olives: Yield of olives depends on many different factors
These factors are crop management, method of planting, climatic conditions, cultivar etc.
Crop management further includes many different things like time to Time check on weeds as weeds can suck the nutrients making the quality bad. Irrigation has to be done time to time every factor has to be kept in mind during the whole cultivation period. Method of planting is also very important factor as If the olives Are not planted properly , the whole crop can suffer and we may not get good yield. Choosing the correct soil, staking the crop correctly, good climatic conditions and more and more these factors really affect the growth quality and yield of the crop.
Is olive farming profitable:
So the answer to this is definitely yes. Olive farming is of great profits as olives and olive oils have an excellent demand in international market. If the soil region and climatic conditions are suitable, the profits can be unremarkable.
Olives and olive oils has a number of health benefits Like olives controls and regulates blood pressure, olives Are a very good source of dietary fiber and also of vitamin E . Olive are very good antioxidants. Olives also prevent many diseases like cancer, blood clots and it helps in keeping the immunity strong and in this era health is a priority of almost everyone and hence olives having such great benefits of health is of great demand in the market and hence is very Profitable.
Talking about how much money can one make through this, if a person has 2.2 acres of space that is around 5m×8m one can grow 250 trees on that which would give 10,000 Kg ( ten tones ) of olives a year and at the rate 1$ per kg makes an annual income of 10000$.
But it also depends on the variety of olives that you choose for cultivation and the land that you have for its cultivation as the soil type is one of the major factor that affects the yield of the crop. Next if you take proper care of tour crop and keep each and every small factor in mind the crop quality can be really good and hence the only thing is that one needs to invest time and do a bit hard work for this profit
Conclusion:
Olives along with its other benefits is also one of the favorite thing to eat in one’s own way. One of the most loved ways to eat olives is put the olives into the jar with orange zest, crushed garlic cloves, crushed bay leaves with olive oil. Leave it for few hours after mixing well and its ready to searve. This can also be refrigerated for 2 weeks.
Hence in whatever way one eat olives, it’s one of the most healthy and delicious fruit to eat.
Strawberries farming is one of the best alternatives to traditional crop farming in the USA. A large number of farmers around the country are growing strawberries for commercial purposes, and are making decent money. But, unfortunately, a lot of them are also struggling to earn a livelihood, because they are doing it the wrong way.
If you also want to secure your finances through growing strawberries, you should follow this detailed guide at every step. This guide is an overview of all the aspects related to commercial strawberry farming.
The guide focuses on starting a strawberry farm in almost every region in the USA. All the points are collected from a publication in CIS 93, written by B. B. Davis, D. L. Barney, and J. K. Fellman, and published by the Agricultural Experiment Station and Cooperative Extension Service of the University of Idaho.
Here are the most important points we’ve taken from the publication to make your strawberries growing efforts as fruitful as possible.
The economic importance of strawberries
As many as 76 countries produce strawberries for commercial purposes. China, the USA, Mexico, Turkey, and Spain are the top five producers, but the production is only increasing in various other parts of the world including Asia, Central, and North America, and North Africa. And the demand is getting larger and larger with every passing year too!
The development and of California’s strawberry industry is itself a story, and the rapid expansion of the industry at local levels in other parts including Central and South America, Australia, China, and the Mediterranean region is clearly visible to the global economy.
In short, if you are planning to start strawberries farming (you are most probably doing so, and that’s why you are here), your economic future is amazing! You’re going to make loads of money, of course, if you are determined enough to do the hard yards, especially in the beginning. So, let’s start with our guide.
Most of the producers start preparing land for commercial strawberry farming in late August. Strawberry plants are actually perennial, but most of the farmers consider them as annual. The land is properly fertilized before farming and harvesting strawberries.
After fertilization, farmers focus on mounding soil into plateau-like rows, and then they cover the soil with black plastics.
Usually, the drip tape irrigation is also placed in the ground while covering with plastics. Experienced farmers use a specialized tractor-machine to accomplish all the tasks related to growing strawberries from scraps. The drip tape is very useful for watering and fertilizing strawberries throughout the growth period.
Perfect climate and soil for planting strawberries
The temperate climate is the best option for growing strawberries. It is considered as “short-day and long-evening” plant and needs 10 days of sun-exposure of not more than eight hours to initiate flowering.
Strawberry plants remain dormant throughout the winter. The plants continuously grow and flower during the spring season, when the days are longer than those of winter. Some varieties also grow in a subtropical climate and grow very slowly even in winter.
Based on their response to the light, strawberries are divided into two groups i.e.
The overbearing varieties that give buds during both short and long periods of light.
The varieties that are common for commercial purposes and develop buds in the presence of short-light periods only.
When we talk about soil, strawberries farming needs properly-drained soil with medium loam. The soil should contain a decent amount of organic matter and should be slightly acidic (with a pH from 5.7 to 6.5).
If the soil is highly acidic, there won’t be proper root formation in strawberry plants. And soil rich in calcium makes strawberry leaves yellow, which is not a good sign at all. And, runner formation is also very good in light soil which is rich in organic matter.
You should prefer manured green land for proper growth and timely budding of plants. Don’t even think about alkaline soils or soils that are infected from nematodes.
Different varieties of strawberries
There is a wide range of strawberries available around the USA. Some of the varieties introduced from California like Solana, Tioga, and Torrey, etc. are very good for farming. For hilly areas, Dilpasand, Srinagar, and Sovereign varieties from India and neighboring countries are perfect.
For strawberries farming in warmer areas of the USA, you should choose from Blackmore, Premier Florida-90, Klonmore, Missionary and Klondike, etc.
Propagation of Strawberry plants
Runners that are prepared after the blooming season are used for propagation. Multiple runners are used for successful propagation. The target should be to use every plant with a good root system to successfully set the plantation. If properly nurtured and cared for, a single plant can give up to 18 runners.
Best season for planting strawberries
In the hills, September to October is the best time to plant crowns and runners. And for plain areas, January to February is the perfect window for planting. If planting happens too early, the overall quality and quantity of fruits are expected to be affected.
And if it is too late, runners start developing in March, and the crops are usually not very good. So, depending on the atmospheric temperature and other climate factors, August to October is the perfect strawberry growing time.
You should give priority to uprooting runners from the nurseries. Keep them into bundles before planting in the field. Keeping them in cold storage before transplanting is also a great option. You should irrigate the soil regularly to reduce the stress of water in the leaves.
Planting
Before planting, the land should be properly prepared by harrowing after deep plowing. There should be enough amount of organic manure in the soil before planting. Flatbeds, hill rows, and matted rows, all are suitable for planting strawberries. But in irrigated areas, you should plant on ridges.
The distance between the two plants varies according to the variety of plants as well as the type and area of the land. Usually, strawberry farmers follow a standard spacing of 30 cm. X 60 cm. In an ideal “strawberries growing condition”, a population of 22,000 plants per acre with the spacing if 30 cm. x 30 cm. is followed.
The plants should be planted in the soil with roots in a straight position. There should be enough air in the soil for healthy growth. The growing point is usually just above the surface of the soil. Plants should be decently irrigated at the beginning with no dry spots on the surface.
How to ensure proper care of plants
The straight roots of the strawberry plants spread closer to the surface. Therefore, you will have to maintain decent moisture in and around the soil. Young plants should be free from weeds, and there should be light and regular hoeing.
Horticultural practices related to the strawberry crops
Farmers prefer covering the soil with mulch throughout the winter to protect roots from cold injury. The mulch protects fruits from the soil, conserves moisture of the soil, and controls the decaying of fruits. And for strawberries farming, straw mulch is the most preferred one. Black alkathine mulch is also used, especially before and after the winter.
Requirement of irrigation
Strawberry is a shallow-rooted plant, and less amount, but more frequent watering in each irrigation. Excessive irrigation usually converts into increased incidents of Botrytis rot, and growth of excessive stolons and leaves at the expense of flowers and fruits. Strawberry plants are also very susceptible to drought, so insufficient watering can also damage the plants completely.
In the case of newly planted runners, you should irrigate frequently after planting. Otherwise, plants will start dying, even before their proper growth. During September and October, especially if there is no rain, you should irrigate the plants
A couple of times in a week. In December and January, irrigation once in a couple of weeks is ideal. The frequency of irrigation is usually increased once the fruits appear on the plant to ensure larger fruits in a decent number.
How many strawberries per plant?
Well, it depends entirely on a lot of factors including conditions, rain, soil, variety of strawberry plants, care, irrigation, etc. On average, a healthy plant yields 150 to 400 grams of strawberries.
Using fertilizers and manures for strawberry plants
A fertilizer dose of 25 to 50 tonnes manure, 75-100 kg. N, 40-120 kg. P205, 40-80 kg. K20/ha. maybe needed depending on the variety of plant(s) and soil type.
Intercultural operations
Harrowing and plowing are the two methods through which strawberry crop is kept free from weeds during the first season. Applying plastic sheets and herbicides are also preferred in some regions.
How to protect strawberry crops from different pests and diseases?
Cutworms and red spider mites are the most common pests related to strawberry plants. You can control spider by using 0.25 percent water-soluble sulfur with 0.05 percent monocrotophos. And a dusting the soil before plantation with 5 percent chlordane or heptachlor can control cutworms.
Blackroot rot and red stale are the two major diseases affecting strawberries farming. Fungus Phytophthora fragariae is responsible for both of them.
Black root rot can be controlled by increasing the resistant variants like stelemaster, and red stale can be managed by maintaining the vigor of the plants and rotating the strawberry crops with other crops like beans, legumes, and peas, etc.
Virus diseases like crinkle, dwarf, and yellow edges also affect strawberries crops. And raising the crop in hilly areas is the best way to avoid these diseases. Strawberries are known for throwing various chlorotic plants, which usually results from genetic segregation – and should not be confused with virus infections.
Harvesting
When the half to three-fourth of each strawberry fruit starts changing its color, you should get the indication that the harvesting time has arrived. Depending on the growth and weather conditions, you can do the picking every second or third day – prefer morning hours for picking. Small baskets and trays are preferred for harvesting at the end of strawberries growing season. To avoid damage due to excessive heat, keep those baskets or trays in a shady place.
February to April is the best time for the ripening of strawberries grown in plains. And May and June are suitable for harvesting in places with higher elevations. If you want to transport them in distant markets, try to harvest when fruits are still light in color. For transporting them in local markets, harvest them when they are fully ripe.
Post-harvesting care
Strawberries are perishable fruits. Therefore, they are packed in shallow, flat containers of different types including bamboo, cardboard, trays, and papers, etc. with not more than two to three layers of fruits. Avoid washing them, as it causes bruises and makes them lustreless – and of course, can completely derail your marketing strategies.
Yielding also depends on various factors including varieties, conditions, care, and rain, etc. If you yield 20 to 25 tons of fruits per hectare, you’ve grabbed the jackpot! But if the conditions are ideal, even 50 tons of fruits per hectare have been reported.
Grading: Grading is also an important aspect of a successful strawberries farming strategy. Factors like size, color, weight, etc. are considered before proper grading.
Storage: You can store strawberry fruits in cold storage at 32 degrees Celsius up to 10 days. If you are planning to transport them to distant markets, don’t forget to pre-cool them at 4 degrees Celsius within the first two hours of harvesting. After pre-cooling, you can ship them in refrigerated vans.
Packing: Packing is done based on grading and transportation distance. Perforated cardboard cartons with paper cutting as cushioning material are preferred for first-grade fruits. And low-grade fruits are packed in trays or baskets.
Transportation: Road transport by lorries or trucks is the easiest mode of transport because you will find it easy to travel from orchards to the market.
Marketing: Most of the farmers, especially the new ones prefer contacting trade agents at local levels to get a decent price. We recommend this to you as well!
To be honest, strawberries growing is not the easiest of options to start your business. But if you are determined enough to do the hard work in the beginning, there is a lot to take.
Strawberry farming is considered as one of the most profitable farming in the world. It does demand a lot of hard work, care, grit, and determination.
But, once you successfully go through the first season of farming, you will find it considerably easy in the subsequent seasons. It is full of fun, taste, tang, and a lot of profit. So, keep delivering the delicacy, keep growing strawberries, keep growing fruits! Happy farming!