If you’re looking to produce your own fresh milk, dairy goats are a fantastic choice. Not only are they more manageable than cows, but they can also yield high-quality milk with unique flavors. However, not all goat breeds are the same when it comes to milk production. Choosing a breed known for its milk output, butterfat content, and overall ease of milking can make a huge difference. Here, we’ll introduce you to the top five high-yielding dairy goat breeds for producing plenty of fresh, nutritious milk.
1. Saanen: The Queen of Dairy Goats
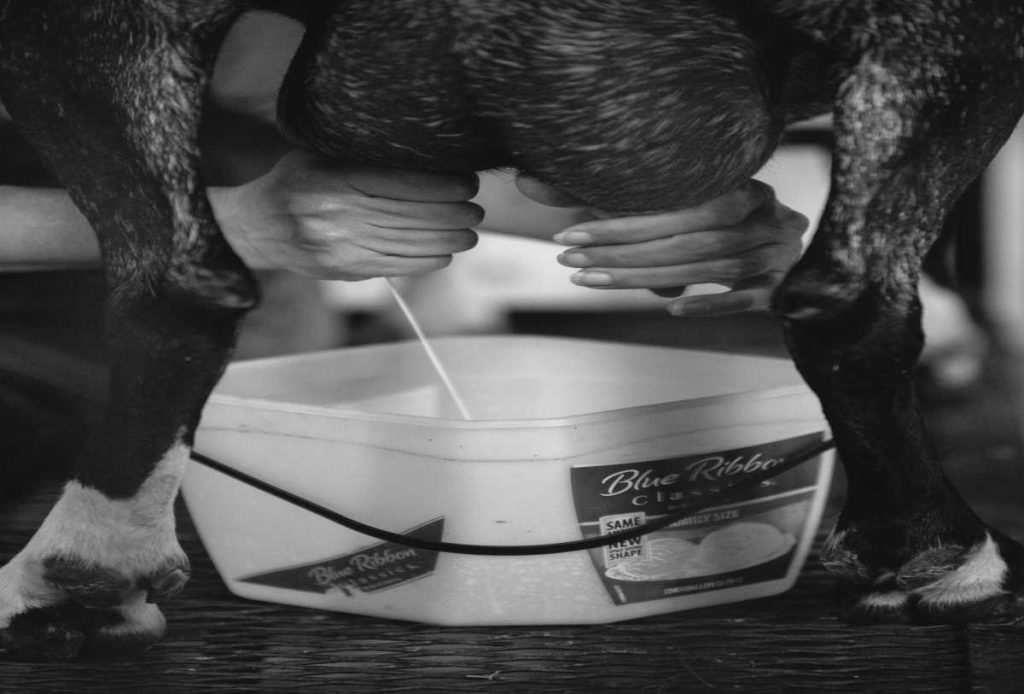
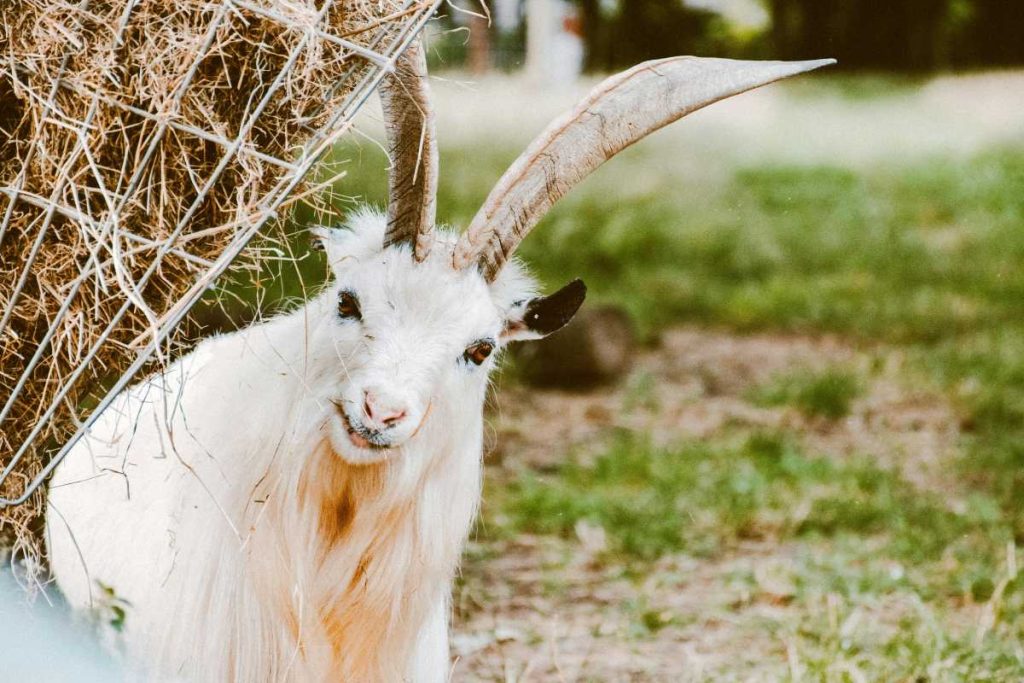
Saanens are one of the most popular and productive dairy goat breeds in the world, often called the “queen” of milk production. Originating from Switzerland, Saanens are known for their calm temperament and gentle nature, making them a great choice for beginners.
Milk Yield: Up to 1.5 to 3 gallons per day
Butterfat Content: 2%–3%
Flavor Profile: Mild and clean-tasting, ideal for those new to goat’s milk
Additional Traits: Saanens are large, white, or cream-colored goats with a robust build, and they thrive in cool climates. They also tend to have long lactation periods, meaning they produce milk for longer periods between kidding.
Best For: High milk yield with a mild flavor, suitable for making milk-based products like cheese and yogurt.
2. Alpine: Versatile and Productive
Alpine goats are another highly productive dairy breed, well-suited for those who want both quantity and quality in milk production. Originally from the French Alps, these goats are hardy and adaptable, thriving in various climates.
Milk Yield: Approximately 1 to 1.5 gallons per day
Butterfat Content: 3%–4%
Flavor Profile: Rich yet mild, with a creamier texture than Saanen milk
Additional Traits: Alpines come in a variety of colors and patterns, and their sturdy build makes them resilient. They are known for their energetic, curious personalities.
Best For: Those seeking versatile milk with a balance of mild flavor and creamy texture, making it excellent for drinking, cooking, and crafting dairy products.
3. Nubian: High Butterfat Content for Creamy Milk
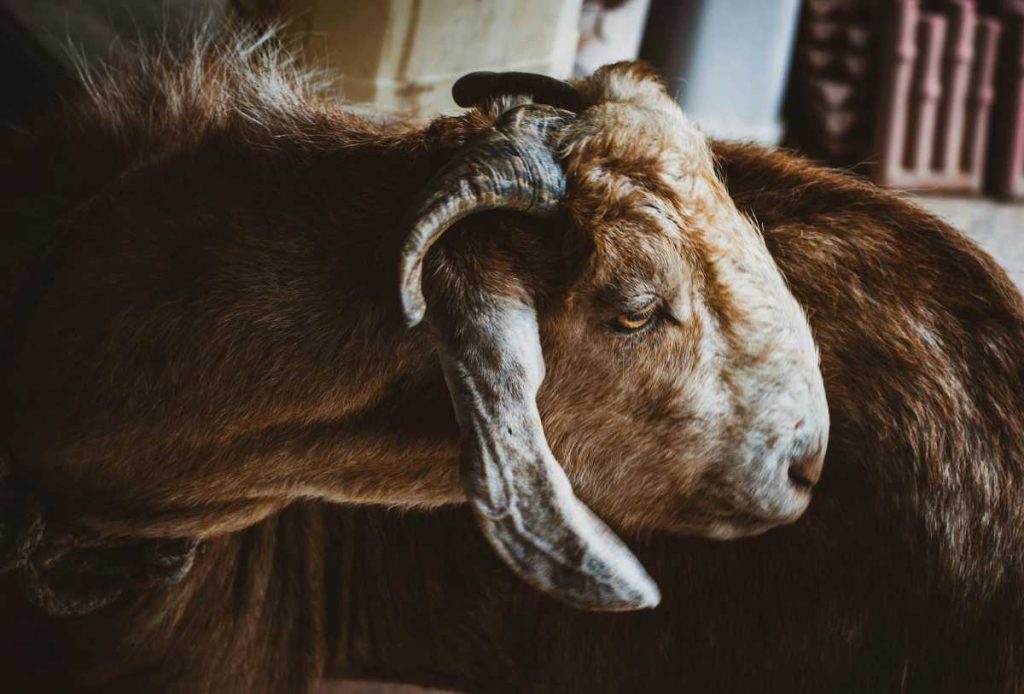
Nubians are easily recognizable due to their long, floppy ears and Roman noses. Known for their friendly and sociable personalities, Nubians are loved by families and homesteaders alike. This breed is ideal if you’re looking for rich, creamy milk thanks to its high butterfat content.
Milk Yield: Around 0.5 to 1 gallon per day
Butterfat Content: 4%–5%
Flavor Profile: Creamy, slightly sweet, and rich, great for cheese-making and butter
Additional Traits: Nubians are heat-tolerant, making them an excellent choice for warmer climates. However, they can be vocal and opinionated, adding personality to your farm.
Best For: Milk with high butterfat content that’s perfect for making rich cheeses, butter, and ice cream.
4. LaMancha: Small Ears, Big Production
LaMancha goats, famous for their tiny “gopher” ears, are a uniquely American breed with origins in Oregon. They are known for their sweet personalities and adaptability, and their milk has a pleasant, slightly tangy flavor.
Milk Yield: Around 1 to 1.5 gallons per day
Butterfat Content: 3%–4%
Flavor Profile: Mild with a tangy undertone, ideal for diverse dairy uses
Additional Traits: LaManchas are social and friendly, making them a joy to raise. They also adapt well to various climates and have a generally hardy constitution.
Best For: Those looking for a versatile breed with unique looks and a gentle, adaptable personality.
5. Toggenburg: Consistent Production with a Rich Flavor
The Toggenburg goat, one of the oldest known dairy breeds, hails from Switzerland. They have a unique brown-and-white appearance and produce milk that is known for its distinct flavor, making it a favorite for cheese enthusiasts.
Milk Yield: About 0.75 to 1 gallon per day
Butterfat Content: 3%–4%
Flavor Profile: Rich and slightly tangy, popular for cheese and other dairy-based recipes
Additional Traits: Toggenburgs are hardy and do well in cooler climates. They have a calm, friendly temperament, though they can be a bit reserved.
Best For: Cheese makers and those who enjoy the nuanced flavors of goat’s milk.
Conclusion
Selecting the right breed for milk production depends on your taste preferences, climate, and farm setup. Saanens and Alpines are excellent for high yield and mild flavor, while Nubians provide creamy, rich milk ideal for dairy products. LaManchas and Toggenburgs add diversity with their unique flavors and consistent production. Whatever your needs, one of these top dairy breeds is sure to provide delicious, fresh milk for your family.
Goats are generally hardy animals, but like all livestock, they can occasionally fall ill. Early detection of illness is critical in preventing the spread of disease and ensuring that minor health issues don’t turn into serious problems. Knowing what to look for can make all the difference in maintaining a healthy, happy herd. In this guide, we’ll cover five key indicators of illness in goats to help you catch health concerns early and take action.
1. Changes in Appetite and Drinking Habits
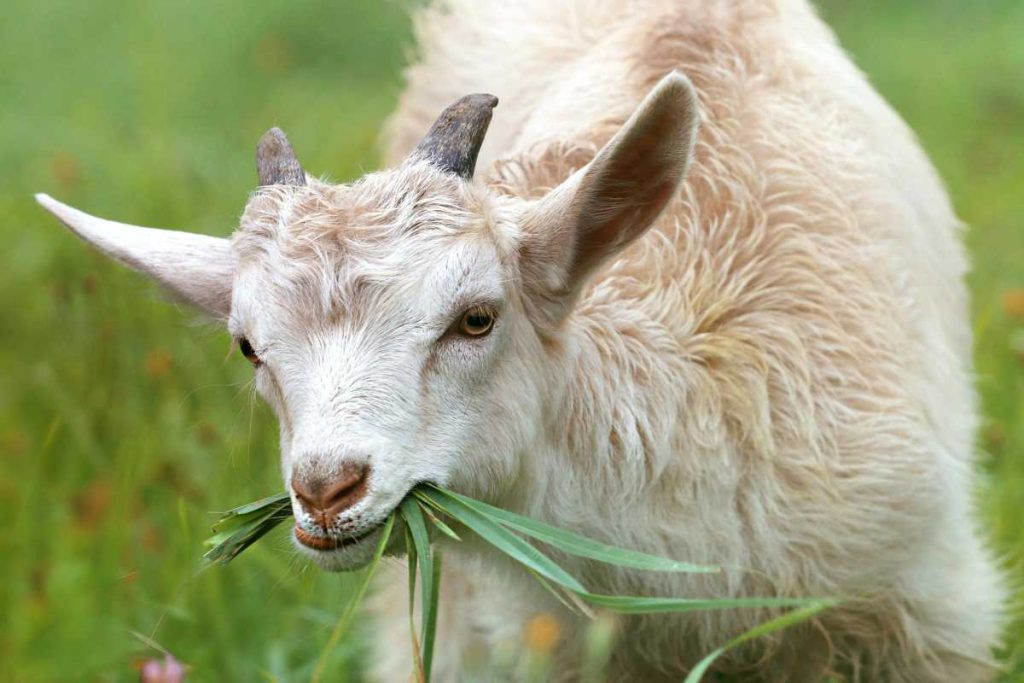
One of the first signs that something might be wrong with your goat is a change in their eating or drinking patterns. Healthy goats have a good appetite, so if your goat is eating significantly less or not drinking enough water, it could be a red flag.
What to Look For:
Refusal to eat or decreased appetite
Excessive thirst or a lack of interest in water
Unusual eating behaviors, such as dropping food or eating very slowly
Possible Causes: Changes in appetite can indicate digestive issues, infections, or other illnesses. Lack of water intake can quickly lead to dehydration, which can be dangerous for goats.
Action Steps: Monitor the goat’s food and water intake, and if the changes persist, consult a veterinarian.
2. Isolation from the Herd
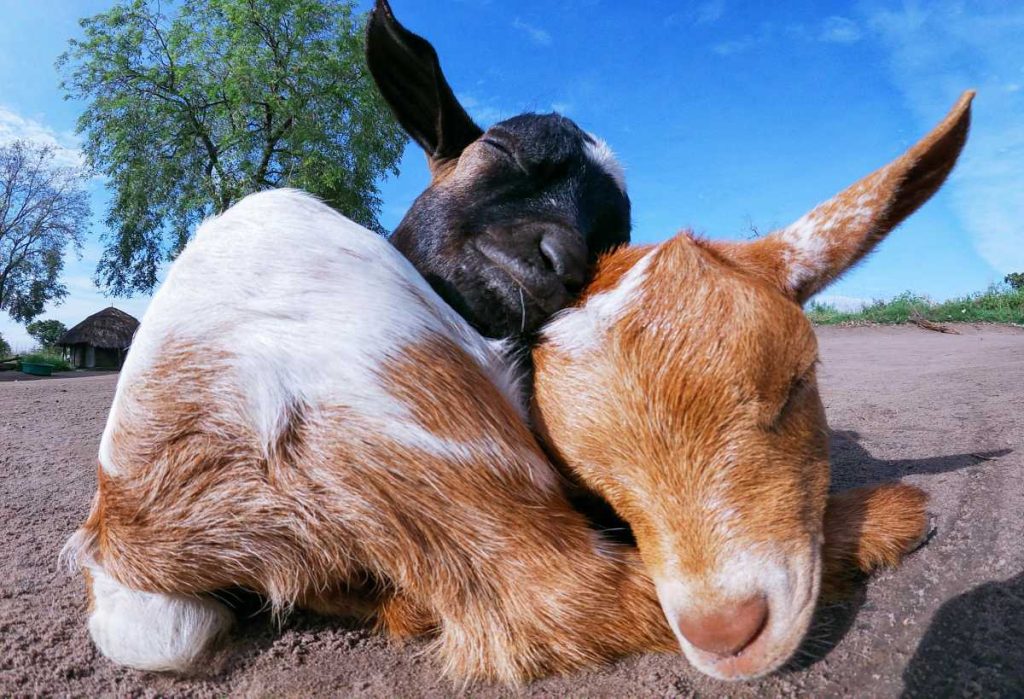
Goats are social animals and tend to stay close to their herd. If you notice a goat isolating itself or being unusually quiet and withdrawn, it could be a sign of illness or discomfort.
What to Look For:
Staying away from the rest of the herd
Lethargic or unwilling to move much
Appearing disinterested in usual activities, such as grazing or playing
Possible Causes: Isolation can indicate pain, fever, or a general feeling of weakness, which may stem from infections, injuries, or other health conditions.
Action Steps: Observe the goat’s behavior closely for any additional symptoms, and consider a veterinary examination if the behavior continues.
3. Unusual Coat Condition
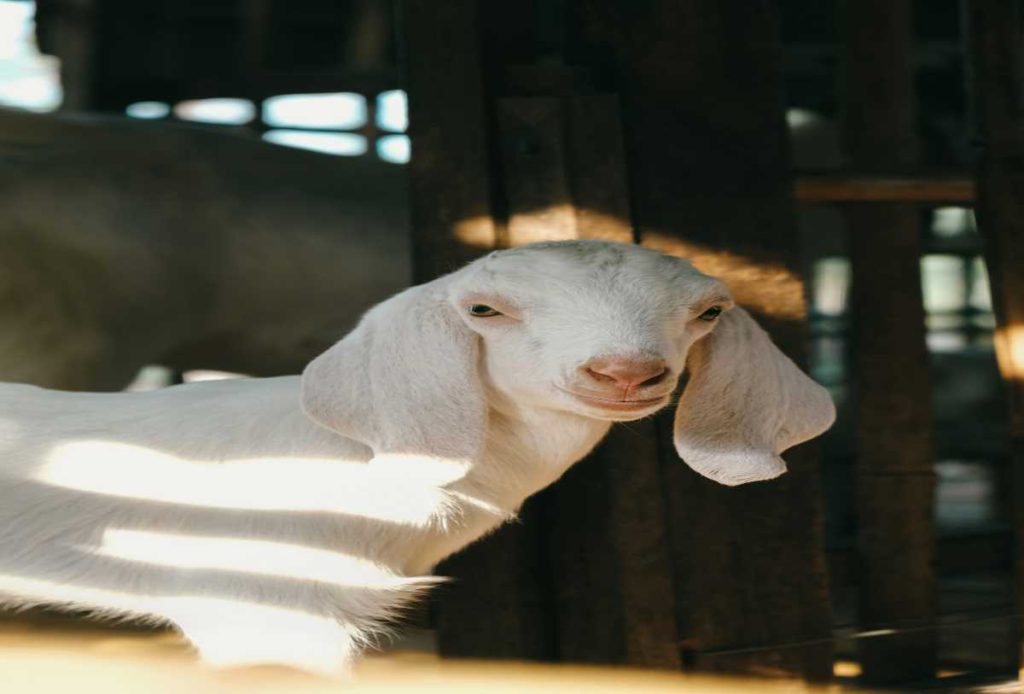
A healthy goat’s coat should look smooth, clean, and shiny. If your goat’s coat appears dull, rough, or has bald patches, it might be an indicator of nutritional deficiencies, parasites, or underlying health issues.
What to Look For:
Dull, rough, or brittle coat
Excessive scratching or rubbing, which can cause bald patches
Hair loss, often around the head, neck, or back
Possible Causes: A poor coat can be due to internal parasites, external parasites (such as mites or lice), or nutritional deficiencies. Goats with mineral imbalances may also show changes in coat quality.
Action Steps: Provide a balanced diet with necessary minerals, and conduct a parasite check. If the coat doesn’t improve, consult a veterinarian.
4. Changes in Body Condition and Posture
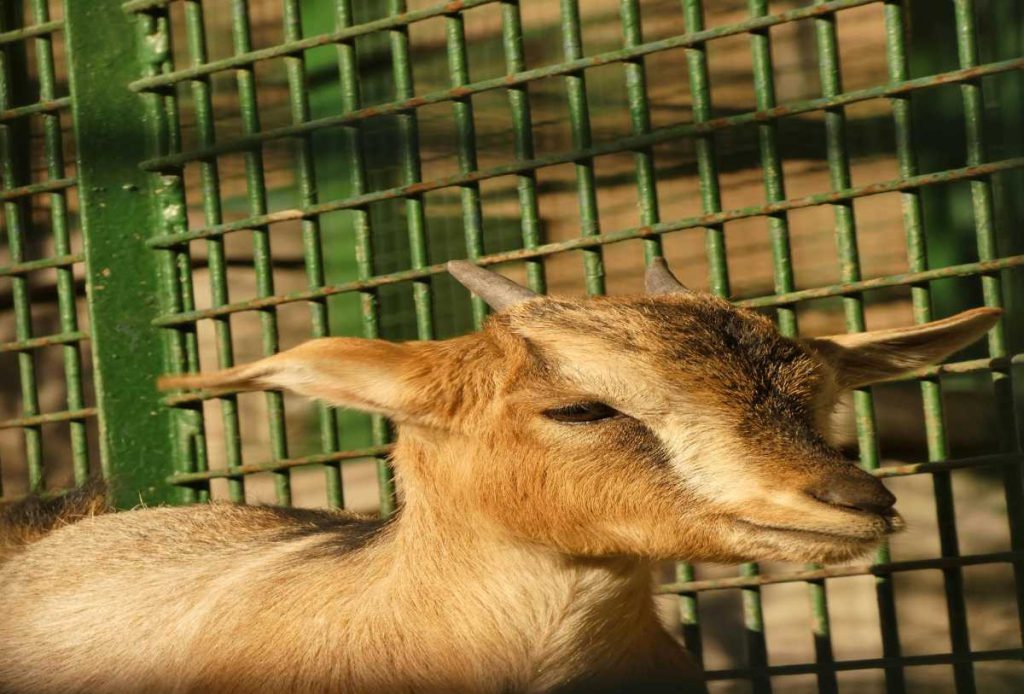
A sudden change in body condition, such as weight loss or bloating, is often a sign of health issues. Additionally, how a goat carries itself can tell you a lot about how it feels—goats in pain or discomfort may adopt unusual postures to relieve pressure on sore areas.
What to Look For:
Rapid weight loss or emaciation
Bloated or swollen abdomen
Limping, favoring one leg, or hunched posture
Reluctance to lie down or difficulty getting up
Possible Causes: Weight loss or bloating can result from digestive problems, worms, or other internal issues, while abnormal posture may indicate pain or discomfort in specific areas.
Action Steps: Keep track of your goat’s weight and body condition. If bloating occurs, try gently massaging the stomach area and consult a vet if it doesn’t improve quickly. For posture issues, investigate for injuries or signs of pain.
5. Abnormal Eyes, Nose, and Mouth Discharge
Healthy goats have clear eyes, clean noses, and dry mouths. Abnormal discharges—whether from the eyes, nose, or mouth—can be signs of infections, respiratory illnesses, or other health concerns.
What to Look For:
Runny eyes or cloudiness in the eyes
Mucus or discharge from the nose
Excessive drooling or frothing at the mouth
Possible Causes: Discharge from the eyes or nose often indicates respiratory issues, which could stem from bacterial or viral infections. Drooling or frothing can be due to oral health issues, poisoning, or other digestive concerns.
Action Steps: Observe the consistency and color of any discharge (e.g., thick, yellowish, or greenish discharge may indicate infection). If symptoms persist, consult a vet to identify and treat the underlying cause.
Conclusion
Maintaining the health of your goats involves regular observation and quick action when something seems off. By keeping an eye out for these five indicators of illness—changes in appetite, isolation, coat condition, body posture, and unusual discharge—you’ll be better equipped to detect potential health issues early. Early intervention can lead to quicker recovery and a happier, healthier herd, so remember to always prioritize your goats’ well-being!
In recent years, goats have become an essential tool in sustainable land management and habitat restoration. Known for their voracious appetites and adaptability, goats are used to control invasive plants, reduce fire risk, and restore ecosystems in a natural, eco-friendly way. More than just adorable grazers, goats bring unique qualities that make them invaluable in efforts to restore native habitats and improve land health.
This guide will explore why goats are ideal for habitat restoration, the benefits they bring, and how to implement a goat-based restoration plan for your land. Whether you’re managing a small property or overseeing a large conservation project, using goats can be a sustainable solution that aligns with nature’s own processes.
1. Why Goats Are Ideal for Habitat Restoration
Goats are naturally inclined to browse on a variety of plants, including many invasive species that threaten local ecosystems. Unlike other grazers, goats can eat a wide range of vegetation, including shrubs, grasses, and woody plants, making them perfect for tackling dense, overgrown landscapes. Their agility and hardy nature also allow them to thrive in difficult terrains, such as rocky hills and steep slopes.
Key Benefits of Using Goats for Restoration:
Adaptability: Goats can graze in diverse environments, from arid landscapes to woodlands, making them suitable for various restoration projects.
Diet Flexibility: Goats prefer browsing shrubs and weeds, which means they target invasive species while often leaving native plants intact.
Low Environmental Impact: Unlike machinery, goats cause minimal disturbance to the soil, reducing erosion and preserving natural soil structure.
Why It Matters:
Using goats allows land managers to restore habitats in a natural way, without the need for chemicals or heavy machinery, which can disrupt soil and harm surrounding ecosystems.
2. The Environmental Benefits of Using Goats for Land Clearing
Goats provide a sustainable alternative to chemical herbicides and mechanical clearing methods, which can harm the environment. When goats graze on invasive plants, they help reduce competition for native flora, giving these species a chance to recover and flourish. Goats are also effective in controlling underbrush, which can reduce fire risk in fire-prone areas.
Specific Benefits:
Reduction of Invasive Species: Goats selectively target invasive plants like thistle, kudzu, poison ivy, and blackberry bushes, which can overpower native plants.
Fire Prevention: By reducing dense undergrowth, goats lower the amount of dry vegetation that fuels wildfires, creating safer, more resilient landscapes.
Soil Health Improvement: Goat droppings act as a natural fertilizer, enriching the soil with organic matter and enhancing microbial activity.
Why It Matters:
Chemical-free land clearing not only protects surrounding wildlife and plants but also promotes a healthier ecosystem where native species can thrive.
3. How to Plan a Goat Grazing Program for Habitat Restoration
Implementing a goat grazing program involves careful planning to maximize its benefits for habitat restoration. Key factors include choosing the right goats, determining the best time for grazing, and managing their movement across the land.
Steps to Implementing a Successful Program:
Assess Your Land and Restoration Goals: Understand which plants need controlling and what restoration outcomes you’re aiming for. Identify the invasive species and native plants to establish targeted goals.
Select the Right Goats: Goats vary in grazing habits; for instance, some breeds are better suited to browsing shrubs than grass. Boer and Kiko goats, for example, are often used for restoration projects due to their hardiness and efficiency in rough terrain.
Plan Rotational Grazing: Use rotational grazing to ensure even vegetation coverage and avoid overgrazing, which can lead to soil degradation.
Determine Grazing Duration: The amount of time goats need to spend in an area depends on the density of vegetation and the size of the herd. Start with shorter durations, monitor the impact, and adjust as needed.
Why It Helps:
Planning allows for controlled, effective restoration, ensuring that goats contribute positively to the ecosystem without overgrazing or damaging sensitive areas.
4. Case Studies: Successful Habitat Restoration Using Goats
Many organizations and local governments have turned to goat grazing for land restoration projects. These case studies illustrate the positive impact goats can have when used thoughtfully and strategically.
Case Study Examples:
California Wildfire Prevention: In California, goats are deployed annually to reduce underbrush in fire-prone areas. By keeping dry vegetation low, goats help reduce the risk of wildfires, saving ecosystems and protecting nearby communities.
Public Parks and Conservation Areas: Parks in urban areas like Seattle and Portland have used goats to clear invasive plants like blackberry and ivy. This approach has improved biodiversity in these green spaces by giving native plants a chance to grow.
Restoring Prairie Ecosystems: In the Midwest, goats have been used to control invasive species on prairies, allowing native grasses and flowers to regenerate and providing better habitat for pollinators and other wildlife.
Why It Works:
These examples showcase how goat grazing, when managed effectively, provides a low-cost, eco-friendly solution that benefits both the land and the surrounding ecosystem.
5. Addressing Common Challenges in Goat Grazing for Restoration
While goats are an excellent tool for habitat restoration, there are challenges to consider, such as ensuring they don’t overgraze or target desirable plants. Effective management and understanding goats’ behavior can help you avoid these common pitfalls.
Challenges and Solutions:
Preventing Overgrazing: Use rotational grazing to limit the amount of time goats spend in each area, ensuring they don’t deplete vegetation or disturb the soil excessively.
Protecting Native Plants: Fencing off native plant areas or using temporary barriers can prevent goats from damaging desirable vegetation.
Ensuring Goats’ Health: Provide adequate water, shelter, and supplemental feed if vegetation is scarce, as this ensures goats stay healthy and effective for the project.
Why It Helps:
Addressing these challenges allows for a more sustainable, effective approach to goat grazing, ensuring long-term success in habitat restoration.
6. Selecting the Right Goat Breeds for Different Restoration Needs
Different goat breeds offer varying grazing habits and physical resilience, making breed selection important for specific restoration goals. For example, Boer goats are known for their strength and ability to handle dense brush, while Pygmy goats are agile and better suited for light vegetation.
Top Breeds for Habitat Restoration:
Boer Goats: Hardy, muscular goats ideal for dense, woody vegetation and rough terrain.
Kiko Goats: Known for their resilience, Kiko goats perform well in harsh environments and require minimal maintenance.
Nubian Goats: Friendly and adaptable, Nubians are great for lighter brush and less demanding terrains.
Spanish Goats: These goats are tough and thrive in challenging conditions, making them excellent for clearing invasive species in diverse environments.
Why Breed Matters:
Choosing the right breed optimizes the efficiency of your goat grazing program and ensures you’re meeting specific habitat restoration goals.
7. Monitoring and Measuring the Impact of Goat Grazing on Restoration
Tracking the progress of goat grazing allows you to measure the program’s success and make adjustments as needed. Monitoring vegetation regrowth, soil quality, and biodiversity changes will help you assess the long-term effects of using goats for habitat restoration.
Key Metrics to Track:
Vegetation Coverage: Regularly check the density and types of plants regrowing to ensure that invasive species are under control and native plants are returning.
Soil Health: Monitor soil stability and composition to ensure that grazing is not leading to erosion or nutrient depletion.
Wildlife Activity: Observe changes in wildlife presence, as healthy ecosystems should support a diverse array of species.
Why It Helps:
Monitoring ensures that your habitat restoration project is progressing as planned and that goats are benefiting, rather than harming, the ecosystem.
Conclusion
Using goats for habitat restoration is more than just an eco-friendly trend; it’s a practical, sustainable way to manage land and restore native ecosystems. Goats provide a low-impact, chemical-free method to control invasive plants, reduce fire risk, and enrich soil. With proper planning and management, they can become invaluable allies in efforts to protect and restore natural landscapes.
By choosing the right goats, planning their grazing patterns, and monitoring their impact, you can harness the power of these remarkable animals to create healthier, more resilient ecosystems. Whether you’re a land manager, conservationist, or small property owner, goats can play a vital role in restoring biodiversity and promoting environmental health. Embracing these natural grazers is a step toward a greener, more sustainable future.
Yoga has long been a popular practice for promoting mindfulness, flexibility, and relaxation. But in 2024, a delightful twist on traditional yoga—goat yoga—has become one of the year’s hottest wellness trends. Combining the peaceful practice of yoga with the unexpected charm of goats, this unique experience is winning over wellness enthusiasts and curious beginners alike. You might wonder, “Why goats?” Surprisingly, these social, friendly animals are the perfect yoga companions, adding fun and joy to the practice in ways you might not expect.
In this blog, we’ll dive into why goat yoga is capturing attention as the wellness trend of 2024, the benefits it offers, and what you can expect from a session. Whether you’re a yoga pro or a total beginner, goat yoga is a chance to de-stress, laugh, and experience the therapeutic benefits of animal interaction.
1. A Unique Combination of Yoga and Animal Therapy
One of the main reasons goat yoga has taken off is that it combines the mental benefits of yoga with the therapeutic effects of animal-assisted therapy. Studies show that interacting with animals can reduce anxiety, lower blood pressure, and boost mood. Goats, in particular, are known for their social and playful nature, which makes them a perfect fit for this type of therapy.
Why It Works:
Stress Reduction: Animal interactions can lower cortisol levels, which helps reduce stress.
Mindfulness: Practicing yoga with goats encourages you to stay in the moment and focus on the experience, increasing mindfulness.
Natural Laughter Therapy: Goats’ playful antics, like hopping on backs or nudging for attention, create moments of laughter that are both joyful and therapeutic.
The Impact:
Goat yoga merges these two healing practices, making it a unique and enjoyable way to relax and recharge.
2. Physical Benefits Enhanced by Playful Distraction
Yoga is known for enhancing flexibility, strength, and balance, and practicing with goats adds a playful element that makes the experience even more engaging. While performing yoga poses, participants might find a friendly goat hopping onto their back or brushing past, creating a lighthearted distraction that can make the practice feel less strenuous.
Physical Benefits of Goat Yoga:
Improved Flexibility and Balance: Yoga poses improve flexibility and balance, which is crucial for physical health and injury prevention.
Core Strength: Holding poses while interacting with goats requires additional balance and core engagement, which strengthens your abdominal muscles.
Enhanced Mobility: The stretches and movements involved in yoga improve joint mobility, a benefit that’s essential for all ages.
Why It’s Different:
Unlike traditional yoga, goat yoga adds elements of surprise and laughter, making the workout enjoyable and helping people stick with it long-term.
3. A Mental Health Boost Like No Other
Goat yoga offers more than just physical benefits—it’s a powerful mental health booster. The combination of outdoor activity, animal companionship, and mindful practice works wonders for reducing anxiety, lifting mood, and improving overall mental well-being. For those looking to try something that feels both refreshing and therapeutic, goat yoga can be an excellent choice.
Mental Health Benefits:
Reduces Anxiety and Depression: Physical touch and interaction with animals release oxytocin, a hormone that promotes bonding and reduces symptoms of anxiety and depression.
Increases Happiness: Goats are naturally playful, and their antics during yoga sessions often make participants laugh, releasing endorphins and improving mood.
Mindfulness and Stress Relief: Practicing yoga outdoors with goats encourages mindfulness, helping participants let go of worries and focus on the present.
Why It’s Needed in 2024:
With increasing stress levels in today’s world, people are seeking alternative ways to improve mental health. Goat yoga provides a novel approach to finding inner peace and relaxation in a setting that feels unique and accessible.
4. Accessible for All Fitness Levels
One of the reasons goat yoga has become so popular is that it’s accessible to everyone, regardless of fitness level or yoga experience. Goat yoga sessions are typically beginner-friendly and focus on basic poses, allowing participants of all ages and abilities to join in and enjoy. For those who might find traditional yoga intimidating, the presence of goats offers a comforting and less serious atmosphere.
What to Expect in a Session:
Simple, Beginner-Friendly Poses: Goat yoga focuses on simple poses like child’s pose, downward dog, and cat-cow, making it easy for beginners to join in.
Friendly Instructors: Instructors keep the mood light and focus on making the experience enjoyable and stress-free.
Goats Roaming Freely: Goats are often encouraged to interact naturally, so participants can focus on their practice or take breaks to pet or play with the goats.
Why Accessibility Matters:
Goat yoga removes barriers by creating a welcoming environment where everyone feels comfortable, regardless of their fitness background.
5. Perfect for Social Media and Creating Memories
In the age of social media, goat yoga is the perfect opportunity to capture unique, fun, and memorable moments. Many people are drawn to goat yoga because of its “Instagrammable” quality. Photos of goats mingling with yogis or resting atop backs during poses create unforgettable images and videos that can be shared with friends and followers.
Social Benefits:
Great for Group Activities: Goat yoga is a popular choice for group outings, including bachelorette parties, birthdays, and team-building events.
Memorable Experiences: Sessions create lasting memories, as each interaction with the goats is unique and often unpredictable.
Shareable Moments: Participants often leave with fun photos and videos, making the experience one they’ll want to share and look back on.
Why Social Aspects Matter:
People increasingly value experiences they can share with others. Goat yoga offers an opportunity for connection, both with animals and with other participants, and adds a unique memory to their wellness journey.
6. Supporting Local Farms and Small Businesses
Goat yoga classes are often hosted by local farms, allowing people to support small businesses and gain a closer connection to their food sources. By participating in goat yoga, attendees contribute to the local economy, help sustain small farms, and learn more about sustainable practices.
Community Benefits:
Boosting Farm Income: Goat yoga provides an additional revenue stream for farms, helping them maintain sustainable practices.
Educational Opportunities: Participants learn more about farm life, sustainability, and animal care, gaining insight into agriculture and farming practices.
Promoting Eco-Friendly Practices: Many goat yoga farms focus on sustainable farming, so attendees can feel good about supporting environmentally conscious businesses.
Why It’s Popular in 2024:
As people become more aware of environmental issues, supporting local, sustainable businesses aligns with values that many consumers hold dear. Goat yoga provides an enjoyable way to contribute to those values while also enjoying a wellness activity.
7. An Activity That Combines Exercise and Joy
The essence of goat yoga is in the joy and lightheartedness it brings to participants. Goats are curious, affectionate creatures, and their presence adds a layer of joy that many find uplifting and energizing. Goat yoga invites participants to let go of perfection, laugh at the unexpected, and find happiness in the simplicity of the moment.
Why People Love It:
It’s Fun and Lighthearted: Goat yoga lets participants experience the practice of yoga without taking it too seriously.
Joyful Connection: Animals can bring a sense of warmth and connection that brightens the experience for everyone.
Lasting Impact: People often leave goat yoga sessions feeling not only physically refreshed but also mentally rejuvenated.
Why Joy Matters:
In a fast-paced world, goat yoga offers a unique opportunity to reconnect with joy and simplicity. This focus on happiness and laughter has made it a wellness favorite for 2024.
Conclusion
In 2024, goat yoga has cemented itself as a wellness trend that’s here to stay. By merging the benefits of yoga, animal therapy, and outdoor exercise, it provides a unique blend of physical, mental, and emotional wellness. Whether you’re seeking a fun new workout, a way to connect with animals, or a stress-free introduction to yoga, goat yoga offers something for everyone.
From reducing stress and boosting happiness to creating unforgettable memories, goat yoga is more than just a passing fad. It’s a joyful, healing practice that captures the playful spirit of goats and the peace of yoga, making it one of the most sought-after wellness experiences this year. If you’re ready to try something new, goat yoga might be the perfect way to add fun, relaxation, and health benefits to your routine!
For goat breeders, the right breeding strategies can make all the difference in developing a productive, healthy, and high-performing herd. Whether you’re breeding for milk production, meat, fiber, or simply to improve genetic health, understanding how to maximize your herd’s genetics is essential. Breeding strategies are about more than just pairing two animals—they’re about selectively enhancing the traits that best fit your goals while keeping genetic diversity and herd health in mind.
In this blog, we’ll dive into some effective breeding strategies that can help you maximize the genetic potential of your goats. From selection methods to herd management, these tips will guide you in building a herd that meets your goals while staying strong and resilient.
1. Set Clear Breeding Goals
Before you start planning your breeding strategy, it’s crucial to define what you hope to achieve. Are you looking to increase milk yield, improve meat quality, enhance fiber characteristics, or develop disease-resistant goats? Setting clear goals will inform which traits to prioritize in your breeding program and help you make more focused, consistent decisions.
Key Goals to Consider:
Milk Production: Selecting goats with higher milk yield and butterfat content for dairy herds.
Meat Quality: Breeding for rapid growth rates, muscle quality, and weight gain.
Fiber: Focusing on fiber fineness, density, and quality in fiber-producing goats like Angoras.
Disease Resistance: Selecting goats with natural immunity to common diseases and parasites, which can reduce healthcare costs and improve longevity.
Why It Helps:
Setting clear goals keeps your breeding focused and purposeful, which will yield better results over time compared to random or unfocused breeding.
2. Select for Desired Traits
Once you have clear goals, selecting the right goats to breed is the next step. This process requires close attention to genetic traits, health history, and performance records. Look for goats that exhibit the traits you want, whether it’s high milk production, rapid growth, or parasite resistance.
Important Factors in Selection:
Pedigree Records: Study the lineage of each goat to assess its genetic potential and the consistency of desired traits in its family line.
Performance Data: Keep records on milk yield, growth rates, and other metrics relevant to your breeding goals.
Physical Conformation: Select goats with strong structural conformation, as healthy physical traits often contribute to a longer, more productive life.
Health and Temperament: Choose goats with good health records and manageable temperaments, as these factors contribute to easier handling and management.
Why It Helps:
By focusing on specific traits, you’ll see a gradual improvement in your herd’s performance, helping you achieve the ideal qualities you’re breeding for.
3. Use Linebreeding to Strengthen Desired Traits
Linebreeding, or breeding closely related animals such as half-siblings or cousins, can help consolidate desirable traits within your herd. It’s a controlled form of inbreeding that enhances consistency and predictability in your herd. However, linebreeding requires careful management to avoid inbreeding depression, which can lead to health issues and reduced genetic diversity.
Guidelines for Successful Linebreeding:
Monitor Health Carefully: Regularly check for signs of inbreeding depression, such as lower fertility rates or weakened immune systems.
Start with High-Quality Stock: Only use strong, healthy, and high-performing animals for linebreeding, as weaknesses can become amplified.
Limit the Practice: Avoid overusing linebreeding; instead, alternate with outcrossing (breeding with less-related animals) to maintain genetic diversity.
Why It Helps:
Linebreeding can solidify desirable traits within your herd, making it more consistent in appearance, production, and performance.
4. Implement Crossbreeding for Hybrid Vigor
Crossbreeding involves breeding animals from different lines or breeds to introduce new genes and improve genetic diversity. This practice often results in hybrid vigor (or heterosis), where the offspring exhibit better growth, health, and reproductive performance than their parents.
Advantages of Crossbreeding:
Improved Health and Immunity: Crossbred goats tend to have stronger immune systems and are often more resistant to diseases and parasites.
Increased Productivity: Many crossbred goats show higher growth rates, better milk yields, and more resilience compared to purebred animals.
Better Adaptability: Crossbreeding can help produce goats that are better suited to local climate and environmental conditions.
Why It Helps:
Crossbreeding introduces beneficial traits that strengthen your herd, leading to better performance and adaptability without compromising health.
5. Use Artificial Insemination (AI) to Access Superior Genetics
Artificial insemination (AI) is a powerful tool that gives breeders access to high-quality genetics from top-performing goats worldwide. AI allows you to breed your goats with award-winning sires, even if they’re located far away, increasing your options for enhancing your herd’s genetic potential.
Steps to Successful AI Implementation:
Choose Proven Sires: Look for sires with strong genetic profiles, proven performance, and traits that align with your goals.
Work with Experienced Technicians: AI requires skill and precision, so using trained professionals increases the success rate.
Maintain Accurate Records: Track which sires have been used and monitor the offspring’s performance to evaluate the impact of each AI cycle.
Why It Helps:
AI allows you to bring in top genetics without having to purchase or transport animals, giving you a broader selection of traits to incorporate into your herd.
6. Monitor and Track Herd Genetics and Performance
Keeping detailed records of each goat’s genetic history, health status, and performance is essential for a successful breeding program. Tracking this data over time allows you to make informed breeding decisions and quickly spot any issues that may arise.
Important Data Points to Track:
Birth and Growth Records: Tracking birth weights, growth rates, and mature weights helps you assess each goat’s genetic potential for size and productivity.
Milk and Fiber Production: Keep data on milk yield, butterfat content, or fiber quality to measure improvements over generations.
Health Records: Record health issues, parasite resistance, and recovery rates to identify resilient lines within your herd.
Breeding Success: Note conception rates and the quality of offspring to assess the effectiveness of your breeding strategies.
Why It Helps:
Detailed records provide insights into your herd’s progress, enabling you to adjust your breeding approach as needed to achieve better results.
7. Plan for Genetic Diversity and Long-Term Sustainability
Maintaining genetic diversity is critical to ensuring the long-term health and productivity of your herd. Overly focused breeding can lead to inbreeding depression, where lack of genetic variation results in lower fertility, weakened immunity, and other health issues.
Strategies for Preserving Genetic Diversity:
Rotate Sires: Avoid using the same sire for too many generations to reduce the risk of inbreeding.
Introduce New Genetics Periodically: Incorporate outside genetics by bringing in a new buck or using AI to avoid genetic stagnation.
Focus on Multiple Traits: Instead of breeding solely for one trait, consider a balanced approach that improves overall productivity, health, and resilience.
Why It Helps:
A genetically diverse herd is more adaptable to changes, less susceptible to disease outbreaks, and more resilient overall.
8. Regular Health Checks and Veterinary Care
A strong breeding program goes hand in hand with excellent health management. Regular veterinary checks, vaccinations, and parasite control will ensure that your breeding goats stay healthy, which is essential for a successful breeding strategy.
Health Practices for Optimal Breeding:
Routine Vet Visits: Regular check-ups help catch potential health issues early.
Vaccinations: Ensure your goats are up-to-date on essential vaccinations to prevent common diseases.
Parasite Management: Use a combination of rotational grazing, deworming, and natural treatments to keep parasites under control.
Why It Helps:
Healthy goats are more likely to produce strong offspring, and preventive care helps maintain a productive and thriving herd.
Conclusion
Maximizing the genetic potential of your goat herd requires thoughtful planning, careful selection, and consistent management. By setting clear breeding goals, selecting for desired traits, balancing linebreeding with crossbreeding, and maintaining accurate records, you can build a herd that meets your needs while preserving genetic diversity. Remember that a successful breeding program is a long-term commitment, but with the right strategies in place, you’ll see lasting improvements in herd health, productivity, and performance.
Whether you’re breeding for milk, meat, fiber, or overall hardiness, these strategies will help you make the most of your herd’s genetic potential, creating a legacy of strong, resilient, and high-performing goats.
For farmers and breeders, developing a herd of goats with superior genetics is key to achieving higher productivity, better health, and overall resilience. Through careful breeding strategies, you can create goats that produce more milk, exhibit stronger immunity, and yield better meat or fiber. In this guide, we’ll cover various breeding techniques to maximize goat genetics, from traditional selective breeding to modern approaches like artificial insemination and genetic testing. By following these strategies, breeders can work toward healthier herds and sustainable, profitable operations.
1. The Importance of Genetic Quality in Goat Breeding
High-quality genetics play a crucial role in the success of any livestock operation. A strong genetic foundation can lead to goats that are more resistant to diseases, require less maintenance, and consistently perform well. In goat breeding, the focus may vary based on goals—whether for milk, meat, or fiber. By establishing clear breeding goals, farmers can identify which genetic traits to prioritize, such as milk yield, growth rate, disease resistance, and specific body characteristics that suit their breed type.
2. Setting Breeding Goals: Defining What You Want to Achieve
Before diving into breeding techniques, it’s essential to set well-defined goals for your herd. Do you want goats with higher milk production? Faster growth for meat purposes? Superior fiber quality for cashmere or mohair production? Once you’ve outlined your goals, you can tailor your breeding program to focus on specific traits. For example, milk production may prioritize breeds like Saanen or Alpine goats, whereas Boer goats are renowned for meat production. Establishing these goals will inform your decisions on sire and dam selection and allow you to track genetic progress over generations.
3. Selective Breeding: The Foundation of a Strong Genetic Program
Selective breeding is the most traditional and widely used approach to improving goat genetics. In this method, farmers choose the best animals from their herd to mate based on desirable traits. This involves:
Evaluating individual goats for specific traits like size, fertility, milk yield, and resilience.
Pairing animals strategically to reinforce or introduce desirable characteristics while minimizing undesirable ones.
Tracking heritability of desired traits over time, as some genetic qualities are more likely to be passed down than others.
Consistent selective breeding, when combined with thorough record-keeping, can significantly improve the genetic quality of a herd over time.
4. Inbreeding, Linebreeding, and Crossbreeding: Exploring Different Strategies
Inbreeding: This involves breeding closely related animals to strengthen specific traits. While it can fix desirable traits, inbreeding carries risks, such as increased susceptibility to genetic defects. It should be done cautiously and only when there is a clear understanding of the genetic risks involved.
Linebreeding: A more conservative form of inbreeding, linebreeding maintains a close genetic relationship but avoids the high risks of inbreeding. Linebreeding focuses on one or two superior ancestors, allowing for a concentration of their traits without severe genetic drawbacks.
Crossbreeding: By mating goats from different breeds, farmers can combine desirable traits from each, enhancing hybrid vigor (heterosis). Crossbreeding is especially popular for commercial herds focused on meat or milk production, as hybrid animals often show increased growth rates, fertility, and disease resistance.
Each of these methods has its benefits and challenges. Choosing the right approach depends on the genetic goals and the risks a breeder is willing to take to achieve those goals.
Artificial insemination is a breeding technique that allows breeders to introduce high-quality genetics without physically housing a buck. AI offers several advantages:
Access to superior genetics from sires around the world, which might otherwise be inaccessible.
Reduced disease transmission risk, as there is no direct contact between animals.
Flexibility in timing and control over mating.
Although AI requires training and can be costly, it opens up a world of genetic diversity for breeders looking to improve their herds.
6. Embryo Transfer: Advanced Genetics for Elite Breeding
Embryo transfer is another modern technique where embryos from genetically superior does are implanted into surrogate does. This allows a breeder to produce multiple offspring from one high-quality doe in a single breeding season. Embryo transfer is particularly beneficial for expanding elite genetics and rapidly improving herd quality. However, it’s a complex process that typically requires veterinary assistance and is best suited for breeders with advanced goals and resources.
7. Genetic Testing: Understanding DNA and Heritable Traits
Genetic testing is a powerful tool in modern breeding programs. By analyzing DNA, breeders can identify goats with specific genes linked to desirable traits or disease resistance. Commonly tested traits include:
Disease resistance: Genetic markers can indicate susceptibility to conditions such as Caprine Arthritis Encephalitis (CAE) or Caseous Lymphadenitis (CL).
Milk production genes: Testing for genes related to milk yield and quality can help dairy goat breeders select the best animals.
Growth rate and body conformation genes: For meat production, testing can reveal goats with better growth rates, lean muscle distribution, and overall body conformation.
Genetic testing helps breeders make informed decisions and predict outcomes more accurately, accelerating the improvement of herd genetics over time.
8. Maintaining Genetic Diversity: Balancing Progress with Sustainability
While focusing on specific traits is valuable, maintaining genetic diversity within a herd is crucial. A narrow genetic base increases the risk of inbreeding depression, where offspring suffer from reduced vigor, fertility, and overall health. To prevent this, breeders should:
Rotate sires and introduce new bloodlines periodically.
Monitor inbreeding coefficients to ensure genetic diversity is maintained.
Consider crossbreeding selectively to inject genetic diversity while still focusing on target traits.
Maintaining diversity not only keeps herds resilient but also provides flexibility as market demands and environmental conditions change.
9. Record-Keeping: Tracking Progress and Identifying Trends
Accurate record-keeping is essential for any breeding program. Records allow breeders to track performance metrics, such as milk yield, weight gain, and reproductive success. Keeping detailed logs on the lineage, health, and productivity of each animal enables breeders to:
Make informed breeding decisions based on objective data.
Identify trends over generations, allowing them to assess the success of their breeding program.
Predict genetic outcomes with greater accuracy.
Many breeders now use digital tools to simplify record-keeping, making it easier to analyze data and make decisions that align with their genetic goals.
10. Using Genetic Evaluation and Estimated Breeding Values (EBVs)
Estimated Breeding Values (EBVs) are predictions of an animal’s genetic potential based on data from its own performance and the performance of related animals. EBVs help breeders:
Evaluate potential sires and dams for specific traits, allowing for more selective breeding.
Make comparisons across herds, especially useful in large operations or collaborations with other breeders.
Reduce the guesswork in breeding decisions, enabling more reliable genetic improvement.
EBVs can be especially useful for breeders looking to make scientifically informed choices that contribute to long-term genetic gains.
11. Monitoring Health and Disease Resistance in Genetic Programs
Health is a major component of genetic quality. While improving productivity, it’s essential to keep disease resistance in mind. Breeders should prioritize goats with strong immune systems and low susceptibility to common diseases. In addition to selective breeding, breeders can:
Vaccinate regularly to minimize health risks.
Implement biosecurity measures to prevent the spread of diseases.
Cull animals that show signs of hereditary diseases, reducing the risk of passing these traits to offspring.
By prioritizing health in their breeding programs, farmers create herds that are not only productive but also resilient.
12. Evaluating Results and Adapting Strategies
Breeding is an ongoing process that requires flexibility and adaptation. Breeders should evaluate the results of their programs periodically, assessing whether their goals are being met and making adjustments as needed. Factors like changing market demands, environmental conditions, or unexpected genetic challenges may prompt breeders to refine their approaches.
Conclusion
Maximizing goat genetics through strategic breeding is a rewarding yet complex endeavor that requires planning, knowledge, and dedication. By implementing a combination of selective breeding, advanced techniques like AI and embryo transfer, genetic testing, and rigorous record-keeping, breeders can significantly improve the quality and productivity of their herds. Embracing these strategies empowers farmers and breeders to build resilient, profitable herds tailored to meet their unique goals while contributing to the sustainability and growth of the goat industry.
Goat farming has long been a part of agricultural heritage, with goats providing milk, meat, wool, and leather for generations. Among the various breeds, heritage goats stand out due to their adaptability, resilience, and deep historical roots. These breeds are often less commercialized, but they offer a unique glimpse into the agricultural practices of the past and serve as a reminder of the biodiversity that sustains modern farming systems. Exploring the genetic diversity of heritage goat breeds not only helps in preserving these breeds but also provides valuable insights into how they have evolved to thrive in diverse environments.
In this article, we’ll dive into the importance of genetic diversity in heritage goat breeds, the benefits of maintaining these breeds, and how conservation efforts can help safeguard their future.
What Are Heritage Goat Breeds?
Heritage goat breeds are those that have been selectively bred over long periods for specific characteristics like milk production, meat quality, and resilience to local environmental conditions. Unlike commercial goat breeds, which are often crossbred for maximum yield, heritage breeds have maintained genetic traits that make them valuable both for their practical uses and for their conservation. These breeds are often highly adaptable to their environments and may require fewer resources, making them sustainable options for small-scale farming.
The Importance of Genetic Diversity
Genetic diversity refers to the variation in genes within a population, and it plays a crucial role in the survival and adaptability of any species. For goats, genetic diversity ensures they have a broad range of traits to help them adapt to changing environments, diseases, and farming conditions. A genetically diverse herd can be more resilient to disease outbreaks, harsh climates, and other environmental challenges. Without diversity, a breed may become more susceptible to genetic defects and health issues, which can lead to the extinction of that breed.
In the case of heritage goat breeds, preserving genetic diversity is especially important. Many of these breeds are threatened by the pressures of modern agricultural practices, such as the preference for high-yield, commercial breeds. By focusing on conserving genetic diversity, we can ensure the future health and sustainability of these breeds.
Benefits of Heritage Goat Breeds
Resilience and Adaptability: Heritage goats have evolved to thrive in specific environments, whether it’s in the harsh conditions of high-altitude areas or the dry regions where food and water may be scarce. These goats have developed unique traits that make them more resilient to diseases, extreme weather, and limited resources. Their genetic diversity allows them to survive and even flourish in conditions that might challenge other breeds.
Unique Characteristics: Heritage goat breeds often have distinct physical and behavioral traits. For example, the Nubian goat, known for its long, drooping ears and high milk production, is an excellent example of how genetic diversity leads to a breed that is both productive and unique. Other breeds, like the Boer goat, are prized for their meat production and rapid growth, while the Angora goat is renowned for its fine wool.
Sustainability and Efficiency: Many heritage goat breeds are well-suited to small-scale, sustainable farming practices. They typically require less intensive care and are more adaptable to organic farming systems. By supporting heritage breeds, farmers can maintain a sustainable operation that reduces their reliance on external inputs such as medications and commercial feed.
Cultural Significance: Many heritage goat breeds are deeply tied to local cultures and traditions. They play a vital role in local economies, diets, and customs, often being central to artisanal products like cheese, yogurt, and specialty meats. By conserving these breeds, we help preserve local agricultural traditions and food systems, ensuring the continuation of cultural heritage.
Genetic Challenges Facing Heritage Goat Breeds
While genetic diversity is crucial, heritage goat breeds face significant challenges. As mentioned earlier, many of these breeds are threatened by the rise of commercial breeds that are selectively bred for high yields and uniformity. This has led to a decline in the population of many heritage breeds, resulting in inbreeding and a loss of genetic diversity.
Additionally, some heritage goat breeds may be confined to small populations, which makes it harder for them to maintain healthy genetic variation. The small number of animals available for breeding can lead to a limited gene pool, increasing the risk of genetic defects or diseases spreading quickly through the herd.
Conservation Efforts to Preserve Genetic Diversity
Efforts to conserve the genetic diversity of heritage goat breeds are essential for their survival. Several organizations and institutions are working to protect and promote these breeds, both through active breeding programs and by raising awareness about their importance. Here are a few key strategies being used:
Genetic Preservation: By maintaining genetic records and using advanced techniques like cryopreservation (freezing sperm and embryos), conservationists can help ensure the genetic material of heritage goats is preserved for future generations. This also helps to reintroduce genetic diversity into endangered populations.
Selective Breeding: By carefully selecting breeding pairs, farmers and breeders can avoid inbreeding and improve the genetic health of heritage goat populations. This involves ensuring that animals with distinct genetic backgrounds are paired to introduce variety into the gene pool.
Creating Awareness: Promoting the importance of heritage goat breeds through educational programs and direct marketing of their products (such as artisan cheeses and specialty meats) helps farmers gain economic support for their conservation. This creates an incentive to continue raising these breeds rather than switching to commercial breeds.
Establishing Breeding Networks: Collaboration among breeders and farms can help exchange genetic material and prevent the loss of diversity within small populations. These networks play a vital role in preserving the health and viability of heritage breeds.
Challenges and the Future of Heritage Goat Breeds
Despite these conservation efforts, heritage goat breeds continue to face many challenges. Changing agricultural policies, economic pressures, and the increasing dominance of commercial farming practices can make it difficult for small-scale farmers to support these breeds. However, as consumer awareness of the benefits of local, sustainable, and heritage foods continues to grow, there is hope that demand for these unique breeds will increase.
Additionally, ongoing genetic research will likely continue to improve the understanding of these breeds’ unique traits and their potential for adaptation to future environmental challenges. In the coming years, a focus on genetic diversity will be essential for ensuring that these heritage breeds not only survive but thrive in an ever-changing world.
Conclusion
The genetic diversity of heritage goat breeds plays a crucial role in preserving not only the health and resilience of these animals but also the sustainability of farming systems and cultural traditions. By focusing on conservation efforts and understanding the unique traits of these breeds, we can ensure they continue to thrive for generations to come. Whether for their adaptability, their distinct characteristics, or their cultural significance, heritage goat breeds are a treasure worth preserving, contributing to the broader goals of agricultural sustainability and biodiversity.
Goats are hardy animals, but they can struggle in extremely hot weather, which can lead to stress, dehydration, and even heat-related illnesses. As a goat owner, it’s essential to understand how heat can affect your animals and what measures you can take to keep them comfortable and healthy during hot climates. In this blog, we’ll explore the top five heat prevention tips for goat care to ensure your herd thrives, even in the hottest conditions.
1. Provide Ample Shade and Shelter
One of the most effective ways to protect goats from extreme heat is by providing adequate shade and shelter. Goats are naturally curious creatures that enjoy exploring the outdoors, but without shelter, they can be exposed to harmful sun exposure. A shaded area helps regulate their body temperature by offering a cool refuge from the sun.
Ensure your goats have access to well-ventilated shelters that provide shade from both the direct sun and heat radiating from the ground. You can use trees, tarps, or purpose-built shelters to create shaded spaces. Ideally, the shelter should allow air to circulate freely to avoid the buildup of hot air inside.
It’s also important to avoid overcrowding in shaded areas. Ensure that there is enough space for each goat to comfortably move around and find a cool spot to rest.
2. Ensure Access to Fresh Water at All Times
Water is essential for keeping goats hydrated, especially during the hot months. Goats are particularly prone to dehydration, which can lead to serious health issues like kidney failure, heatstroke, or even death. During the summer, goats will drink more water to stay hydrated, so ensure that they have access to fresh, cool water at all times.
You should regularly check the water supply to ensure that it is clean and free from contaminants. If possible, provide multiple water sources in different areas of your property to prevent competition among goats. Adding ice cubes or chilled water can also help cool them down on extremely hot days.
In addition to drinking water, consider adding electrolytes to their water supply to replenish minerals lost through sweat and to support their hydration levels.
3. Groom Your Goats Regularly
Regular grooming can help goats manage the heat better by keeping their coats clean and preventing overheating. Goats, especially those with thick coats, can retain heat if their fur is matted or too long. Regular brushing removes dirt, debris, and excess hair, promoting better air circulation around the body and allowing goats to cool off more easily.
Shearing goats in the summer months can also be a good practice, especially for breeds with thick wool coats. This will help them stay cooler during the hottest part of the year. Be sure to do this carefully and avoid shearing too closely to prevent sunburn.
4. Adjust Their Feeding Schedule
Feeding goats during the hottest part of the day can contribute to heat stress, as digestion generates internal heat. To reduce this risk, adjust their feeding schedule by offering them their main meals either early in the morning or late in the evening when temperatures are cooler.
Additionally, avoid feeding goats heavy meals, especially high-grain or high-protein diets during the heat. These can increase metabolic heat production. Instead, offer them lighter, easily digestible foods like hay, and ensure they have access to fresh, leafy greens.
5. Monitor for Signs of Heat Stress
It’s essential to keep an eye on your goats during the hottest months to catch signs of heat stress early. Goats suffering from heat stress may exhibit behaviors such as panting, excessive salivation, reduced activity, and a reluctance to eat or drink. In severe cases, heat stress can lead to heatstroke, which is a medical emergency.
If you notice any signs of heat stress, move the affected goat to a cooler area with ample shade and water. You can also use a hose to spray cool water on them, but avoid cold water, as it can cause shock. In extreme cases, seek veterinary attention immediately.
Conclusion
Caring for goats in hot climates requires extra effort and attention to ensure they stay comfortable and healthy. By providing ample shade, ensuring access to fresh water, grooming regularly, adjusting feeding schedules, and monitoring for signs of heat stress, you can help your goats thrive even during the hottest months. With the right care and preparation, your goats will be able to manage the heat and continue to live happy, healthy lives.
Goat grazing is an environmentally friendly and sustainable practice that can be used to transform and manage your land. Whether you’re trying to improve soil health, control invasive plants, or simply maintain a beautiful landscape, goats are natural and efficient land managers. With their hardy nature and diverse diet, goats are excellent at grazing on a variety of terrains, making them a valuable tool for landowners. In this blog, we’ll explore eight ways goat grazing can help you transform your land while promoting sustainability.
1. Control Invasive Plants and Weeds
One of the most effective ways goats can help transform your land is by controlling invasive plants and weeds. Goats are known for their ability to eat a wide variety of vegetation, including many types of plants that other animals avoid. By grazing on these unwanted species, goats help prevent them from overtaking your land and allow native plants to thrive.
How It Works:
Goats will graze on invasive species like kudzu, poison ivy, and honeysuckle, preventing them from spreading and taking over.
Their constant grazing keeps these plants from reseeding and growing back, reducing the need for chemical herbicides.
Pro Tip: Consider rotating your goats across different areas of your land to give plants a chance to recover while still benefiting from the grazing.
2. Improve Soil Health and Fertility
Goat manure is rich in nutrients that can enrich the soil, making it more fertile and conducive to healthy plant growth. When goats graze, they naturally deposit manure across the land, which acts as a natural fertilizer.
How It Works:
Goat manure contains essential nutrients like nitrogen, phosphorus, and potassium, which are key to improving soil fertility.
Over time, the manure breaks down, enriching the soil, increasing microbial activity, and improving its structure.
Pro Tip: To avoid over-fertilizing certain areas, rotate grazing locations regularly. This gives time for the soil to absorb the nutrients and prevents nutrient overload in one spot.
3. Promote Natural Fire Prevention
Goats are excellent at reducing fire risks by eating the dry grass and brush that can fuel wildfires. Their grazing helps reduce the build-up of combustible vegetation, which can be especially useful in fire-prone areas.
How It Works:
Goats graze on dry grasses, brush, and other vegetation that can easily catch fire, preventing a dangerous accumulation of fuel.
By keeping the vegetation short and sparse, goats help create fire breaks and reduce the likelihood of wildfires spreading.
Pro Tip: If you’re in a fire-prone area, consider using goats for seasonal grazing to keep brush and dry grass under control during high-risk months.
4. Enhance Biodiversity and Ecosystem Health
Goat grazing can increase biodiversity by encouraging a more varied plant population. As goats graze, they help maintain open spaces that allow for the growth of a wide range of plant species. This creates a healthier ecosystem by supporting different types of wildlife and promoting balanced plant life.
How It Works:
Goats tend to graze on less desirable plants, which allows for a greater variety of more desirable and native species to thrive.
The grazing cycle helps maintain the ecological balance, encouraging both native plants and wildlife to flourish.
Pro Tip: Use controlled grazing to ensure goats don’t overgraze and leave too little vegetation behind, which could harm the overall ecosystem.
5. Manage Pastures and Create Sustainable Grazing Systems
Goats are excellent grazers when managed properly, and they can help create well-maintained pastures. By rotating goats between different grazing areas, you allow your land to recover and ensure the sustainability of the pasture.
How It Works:
Rotational grazing involves moving goats between different sections of pasture to prevent overgrazing in any one area.
This system helps maintain healthy grasslands, allowing grasses to regrow and ensuring that the soil isn’t overworked.
Pro Tip: Divide your land into several paddocks to rotate the goats through. This allows your land to rest and recover while still benefiting from regular grazing.
6. Reduce Mowing and Maintenance Costs
Instead of using expensive machinery to mow your land, goats can provide a low-cost alternative. Their natural grazing behavior allows them to efficiently keep grass and weeds under control, saving you time, energy, and money.
How It Works:
Goats naturally graze down vegetation, including grass, weeds, and brush, eliminating the need for lawnmowers or other equipment.
They can access areas that are difficult to reach with machinery, such as steep hills, uneven terrain, or areas near fences.
Pro Tip: Use goats for areas where it’s difficult to mow, such as uneven land or areas with dense brush, to save on maintenance costs.
7. Create Aesthetic Landscapes and Improve Visual Appeal
Goat grazing can also help improve the aesthetic appeal of your land. By keeping the vegetation at an optimal level, you can maintain a tidy, well-managed landscape that looks great and is easier to manage.
How It Works:
Goats help maintain a clean, well-grazed landscape by keeping grass and weeds under control, enhancing the overall appearance of your property.
Grazing goats can create a natural, rustic aesthetic that complements rural or farm settings.
Pro Tip: Use goats in specific areas of your property, like near walking paths, garden borders, or scenic overlooks, to keep the landscape neat and beautiful.
8. Enhance Carbon Sequestration and Reduce Erosion
Properly managed goat grazing can help prevent soil erosion and improve carbon sequestration. When goats graze on your land, they help maintain healthy ground cover and root systems that prevent soil from washing away during rainstorms.
How It Works:
Goats’ grazing encourages plant regrowth, helping maintain a dense root system that holds the soil in place.
Their grazing also promotes plant diversity, which can help enhance carbon storage in the soil.
Pro Tip: Focus on areas that are prone to erosion, like hillsides or areas near waterways, and use goats to keep the ground stable and reduce runoff.
In Summary:
Goat grazing can be a transformative tool for landowners looking to improve soil health, control weeds, enhance biodiversity, and reduce maintenance costs. Whether you’re looking to create a sustainable pasture, prevent wildfires, or simply keep your property looking neat, goats offer an environmentally friendly solution.
Here’s how goats can help transform your land:
Control invasive plants and weeds naturally
Improve soil fertility with their nutrient-rich manure
Reduce fire risk by eating dry grasses and brush
Enhance biodiversity and support ecosystem health
Manage pastures with sustainable grazing systems
Save money on mowing and land maintenance
Improve the aesthetic appeal of your land
Prevent erosion and support carbon sequestration
By incorporating goats into your land management strategy, you can reap the benefits of their natural grazing habits while supporting a more sustainable and eco-friendly environment.
Goat herding is an essential skill for anyone involved in goat farming or keeping goats, whether for milk, meat, or simply as pets. Herding goats can be a challenging yet rewarding task, requiring patience, understanding of goat behavior, and proper technique. Effective herding ensures your goats stay safe, healthy, and productive. In this step-by-step guide, we’ll walk you through the key strategies for herding goats efficiently, whether you’re managing a small flock or a larger herd.
1. Understand Goat Behavior
Before diving into herding techniques, it’s important to understand goats and their natural instincts. Goats are curious, intelligent, and often independent creatures. They tend to roam and explore, which can make herding them a bit tricky. Goats are social animals, and they prefer to stay with their herd. However, they can be stubborn, so it’s essential to recognize their behavior patterns to herd them effectively.
Key Points to Remember:
Curiosity: Goats like to explore new areas, so be prepared for them to wander off.
Social Animals: They feel safer when they’re in a group, so they’re likely to follow the herd.
Stubbornness: Goats can sometimes ignore commands or resist being moved, especially if they’re not motivated.
2. Choose the Right Tools for Herding
While some goats can be herded with just your voice and gestures, there are tools that can make the process more efficient. Depending on your terrain and the size of your herd, consider using:
A herding dog: A well-trained dog is a fantastic tool for guiding goats, especially over larger distances.
A shepherd’s crook: Useful for guiding goats and gently nudging them if they’re reluctant to move.
A goad or flag: A long, flexible stick or a flag can be used to direct goats from a distance.
Pro Tip: If you’re using a dog, make sure it is trained in herding and understands the commands needed to keep the goats moving in the right direction.
3. Establish a Routine and Consistent Commands
Goats thrive on routine, so having a consistent schedule for feeding, milking, and herding can make the process smoother. Goats are creatures of habit, and they will learn what to expect if you herd them at the same time each day.
Tips for Effective Herding:
Use consistent verbal cues: Goats respond to familiar sounds or phrases. Use a specific word or whistle to signal that it’s time to move.
Establish boundaries: Whether you’re working within a pasture or directing goats to a new area, make sure they know where they’re allowed to go.
Avoid sudden movements: Goats are easily startled, so avoid sudden or aggressive gestures. This will help maintain a calm environment.
4. Use the Flock Mentality to Your Advantage
Goats are social animals, and they are likely to follow the rest of the herd if you can get the lead goat moving. When herding, it’s essential to encourage the entire herd to follow one another. Here’s how:
Lead with the lead goat: Most of the time, if the lead goat starts moving, the rest of the herd will follow. Encourage the lead goat to move first and set the pace.
Stay behind: Position yourself behind the herd, but don’t get too close. Goats are more likely to follow when they feel they have space to move forward.
Create a pathway: If you’re directing them through a gate or to a new area, make sure there’s a clear path for them to follow.
5. Herd in Small Groups When Necessary
While it’s tempting to herd the entire flock at once, managing smaller groups can be much more effective, especially if the herd is large or if you’re navigating a challenging landscape.
Benefits of Herding in Smaller Groups:
Less chaos: Smaller groups are easier to manage, and you’ll have more control over the movement of individual goats.
Easier to handle: Goats can be more manageable when they’re in smaller clusters, reducing the risk of injury or confusion.
Less stress: Larger herds can be overwhelming for both the goats and the herder. Smaller groups tend to be calmer.
Pro Tip: If you have a particularly large herd, consider using multiple people or dogs to help manage the flock.
6. Be Mindful of Terrain and Weather Conditions
The terrain and weather conditions can significantly affect how you herd goats. Goats are agile and sure-footed, but they can have difficulty navigating steep slopes, mud, or icy ground.
Tips for Adjusting to Terrain and Weather:
Avoid overly rough terrain: If possible, guide your goats on smoother, flat ground to avoid injuries.
Consider the weather: If it’s too hot or cold, it may be necessary to herd more slowly or seek shelter. Goats are generally more active in cooler temperatures and may resist moving during the heat of the day.
Take breaks when necessary: If you’re herding for long periods, give both the goats and yourself time to rest and rehydrate.
7. Keep Goats Safe During Herding
The safety of your goats should be your top priority when herding. It’s easy for goats to get injured, especially if they’re startled or pushed too hard.
Safety Tips:
Avoid overworking the goats: Herding is physically demanding, and too much stress can cause injuries or exhaustion.
Check for potential hazards: Before starting, make sure there are no obstacles like barbed wire, sharp objects, or unstable footing that could cause injury.
Monitor for signs of distress: Watch for signs of stress or injury, such as limping, heavy panting, or vocal distress. Take action immediately if something seems wrong.
8. Reinforce Positive Behavior
Positive reinforcement is an effective way to make herding easier and more pleasant for both you and your goats. Reward your goats for following commands or moving in the right direction.
Ways to Reinforce Good Behavior:
Use treats: Occasionally reward goats with a treat (like grain or fruits) when they follow instructions well.
Praise calm behavior: Speak in a soothing tone when they remain calm and cooperative. This will help them associate herding with positive outcomes.
9. Train Your Goats for Basic Commands
Training your goats to follow basic commands can make the herding process much easier. Start with simple commands like “come,” “stop,” or “move” and use treats or positive reinforcement to encourage them. Over time, they’ll learn to associate certain sounds with specific actions, making the herding process smoother.
10. Practice Patience and Flexibility
Finally, remember that herding goats requires patience. They won’t always move as quickly or in the direction you want, but with persistence and consistency, they will learn to follow your cues. Be prepared for setbacks, and don’t get frustrated. Flexibility and a calm demeanor go a long way when managing a herd of goats.
In Summary:
Effective goat herding requires a mix of understanding goat behavior, using the right tools, establishing routines, and maintaining safety. With these steps in mind, you can manage your herd efficiently and ensure a smoother experience for both you and your goats.
Understand goat behavior: Know that goats are curious, social, and independent animals.
Use the right tools: Consider herding dogs, crooks, and flags for greater control.
Establish a routine and consistency: Regular feeding times and consistent cues make herding easier.
Work with the herd mentality: Lead the herd and let the goats follow.
Practice in smaller groups: This will reduce stress and allow for better management.
Adapt to terrain and weather: Keep safety and comfort in mind while herding.
Reinforce good behavior: Reward your goats for cooperation, making future herding easier.
With time and practice, herding goats will become second nature, ensuring both you and your herd stay safe and happy.