How to Create a Backup Plan for Chicken Emergencies

Keeping chickens is not only a rewarding hobby but also a commitment that comes with various responsibilities, especially when it comes to their health and safety. Emergencies can arise unexpectedly, ranging from health issues and natural disasters to accidents and supply chain disruptions.

To ensure the well-being of your flock, creating a comprehensive backup plan is essential. Here’s an in-depth guide to help you prepare for chicken emergencies effectively, ensuring that your chickens remain safe and healthy.

1. Assess Potential Risks

The first step in creating a backup plan is to conduct a thorough assessment of the potential risks that could impact your chickens. Understanding these risks allows you to tailor your emergency strategies accordingly. Here are some common emergencies to consider:

  • Health Issues: Chickens can be susceptible to various diseases, parasites, and injuries. Common ailments include respiratory infections, coccidiosis, and mites. Outbreaks can happen unexpectedly, leading to significant health problems within your flock.
  • Environmental Hazards: Extreme weather conditions, such as heatwaves, heavy rain, snow, or cold spells, can threaten your chickens’ safety. Additionally, predators like raccoons, hawks, or stray dogs can pose a risk, especially during nighttime or in vulnerable conditions.
  • Natural Disasters: Floods, fires, earthquakes, or severe storms can disrupt your chicken’s habitat, leading to the loss of shelter and food sources. Knowing the natural disaster risks in your area can help you prepare accordingly.
  • Food Supply Disruptions: Shortages of feed or clean water can occur due to supply chain issues, market fluctuations, or increased demand. In a pinch, having alternative sources of nutrition or emergency feed stored can be a lifesaver.

By understanding these risks, you can develop a more tailored and effective emergency plan for your chickens.


2. Establish an Emergency Contact List

An emergency contact list is crucial for a swift response during a crisis. Compile a list of important contacts that may need to be reached during an emergency, including:

  • Veterinarian: Identify a veterinarian who specializes in poultry or has experience with chickens. Having their contact information readily available can save precious time during health emergencies, ensuring your chickens receive prompt care.
  • Local Animal Control: For issues related to predators or stray animals, knowing who to call can help protect your flock. Many local animal control agencies can assist in managing wildlife threats.
  • Neighbors or Friends: Identify nearby neighbors or friends who can assist in an emergency, especially if you’re unavailable. Having a trusted friend or neighbor who understands chicken care can make a significant difference.
  • Local Feed Suppliers: Keep a list of local feed suppliers to ensure you can quickly access food and supplies when needed. Establishing a good relationship with suppliers can also provide insights into future supply chain issues.

Make sure this contact list is easily accessible, perhaps on your phone or posted in a prominent place in your coop, and share it with anyone involved in your chickens’ care.

3. Create a Health Care Plan

Developing a comprehensive health care plan is crucial for managing potential health emergencies. This plan should include:

  • Routine Check-Ups: Schedule regular veterinary visits to keep your flock healthy and catch any potential issues early. Regular check-ups can help identify problems before they become serious.
  • Vaccination Schedule: Stay updated on vaccinations necessary for your chickens, such as those for Marek’s disease, avian influenza, or Newcastle disease. Consult with your veterinarian to establish a vaccination schedule based on your flock’s needs.
  • First Aid Kit: Assemble a chicken first aid kit that includes essential items like antiseptic, bandages, and medications for common issues (e.g., electrolytes for dehydration, antibiotics for infections). Familiarize yourself with how to use these supplies effectively.
  • Signs of Illness: Educate yourself on the common signs of illness in chickens, such as lethargy, changes in appetite, respiratory issues, or abnormal droppings. Early detection can lead to more effective treatment and recovery.

By having a proactive health care plan, you can minimize the impact of health emergencies on your flock and ensure that they receive timely care when needed.


4. Prepare for Environmental Hazards

Environmental hazards can pose a significant risk to your chickens, so it’s important to prepare accordingly:

  • Shelter: Ensure that your chicken coop is sturdy and weather-resistant. Inspect it regularly for any potential vulnerabilities, such as leaks or weak points that could allow predators to enter. Reinforce the coop and run as needed.
  • Ventilation: Proper ventilation is crucial to prevent overheating during hot weather. Ensure that your coop has adequate airflow while still providing protection from predators. Consider installing adjustable vents that can be opened or closed based on the weather conditions.
  • Predator Prevention: Install sturdy fencing around your chicken coop and run. Use buried fencing to prevent digging and consider adding motion-activated lights or sound devices to deter predators. Regularly inspect the area around your coop for signs of predator activity and make necessary adjustments.
  • Emergency Shelter: Consider having a temporary shelter or portable coop on hand that can be quickly set up in case of extreme weather or a predator threat. This shelter can be made from easy-to-assemble materials and should be lightweight for easy transport.

Taking these proactive steps will help safeguard your chickens from environmental dangers and ensure they have a secure living space.


5. Plan for Food and Water Supply

A reliable food and water supply is essential for your chickens’ well-being, especially during emergencies. Consider the following:

  • Stock Up on Supplies: Keep an emergency stockpile of chicken feed and clean water. A general rule of thumb is to have at least a week’s worth of feed stored, as well as several gallons of fresh water. This can be especially important during natural disasters when access to supplies may be limited.
  • Water Sources: Ensure you have backup water sources, such as large containers, buckets, or rain barrels, to provide water in case of supply interruptions. Regularly check and clean water sources to prevent contamination and ensure they are filled during emergencies.
  • Feeding Schedule: Maintain a consistent feeding schedule to ensure your chickens are well-nourished. Familiarize yourself with the amount of feed your flock requires daily, taking into account factors like age, breed, and production needs (e.g., layers vs. broilers).
  • Alternative Nutrition Sources: Consider keeping alternative sources of nutrition, such as grains, kitchen scraps (vegetable peels, grains), or even sprouted seeds, to supplement their diet in case of feed shortages.

By planning for food and water supplies, you will keep your flock healthy and well-nourished during emergencies.


6. Create an Evacuation Plan

In the event of a natural disaster or other emergencies, having an evacuation plan is crucial. Consider the following steps:

  • Identify Safe Locations: Determine where you could relocate your chickens in case of an emergency. This could be a friend’s farm, a neighbor’s property, or an emergency shelter designated for livestock.
  • Transportation: Have a means of transport ready, such as carriers or crates, to safely transport your chickens if needed. Make sure these are easily accessible and familiar to your birds to reduce stress during transport. Practice loading your chickens into these carriers to make the process smoother in an emergency.
  • Practice Evacuation Drills: Conduct practice drills to ensure that you and anyone helping you can quickly and efficiently evacuate the chickens. This will help reduce panic and confusion during a real emergency.
  • Emergency Supplies: Prepare an emergency kit that includes food, water, and necessary health supplies for your chickens during evacuation. Having these essentials on hand will make the transition easier.

An effective evacuation plan will ensure the safety of your flock during emergencies and provide peace of mind knowing you’re prepared.


7. Document Important Information

Keeping a record of important information related to your chickens can assist in emergencies. This documentation can include:

  • Health Records: Maintain records of vaccinations, health check-ups, and any medications administered. This information will be useful for your veterinarian if issues arise and can help streamline treatment.
  • Contact Information: Keep a list of all emergency contacts and their roles in your backup plan. This will streamline communication during a crisis, ensuring everyone knows their responsibilities.
  • Feeding and Care Instructions: Document feeding schedules, dietary needs, and care instructions to share with anyone who may need to care for your chickens in your absence. This can be especially helpful for neighbors or friends stepping in during emergencies.
  • Emergency Procedures: Write down detailed emergency procedures, including steps to take for various situations (e.g., disease outbreaks, natural disasters). Share these procedures with your emergency contacts.

Having organized documentation will facilitate quick decision-making during emergencies and help maintain the care standards for your chickens.

8. Stay Informed and Educated

Continuously educate yourself about chicken care and emergency preparedness. This ongoing education can help you feel more equipped to handle any situation. Consider the following approaches:

  • Researching Best Practices: Read articles, books, and join online forums or local groups focused on chicken care and emergency management. Understanding the latest research and best practices can enhance your preparedness.
  • Attending Workshops: Participate in workshops or webinars related to poultry health, emergency preparedness, and sustainable farming practices. Learning from experts in the field can provide valuable insights and practical strategies.
  • Networking: Connect with other chicken owners to share experiences and strategies for managing emergencies effectively. Joining local poultry clubs or online communities can foster a sense of support and resource sharing.
  • Emergency Training: Consider training courses in basic animal care, first aid, and emergency response. This knowledge can significantly enhance your ability to handle emergencies with confidence.

Staying informed will empower you to respond to emergencies confidently and efficiently, ensuring the health and safety of your chickens.


Conclusion

Creating a backup plan for chicken emergencies is essential for the health and safety of your flock. By assessing potential risks, establishing an emergency contact list, developing a health care plan, preparing for environmental hazards, and documenting important information, you can mitigate the impact of unforeseen circumstances. Staying informed and educated about chicken care will further strengthen your ability to respond to emergencies. With a solid backup plan in place, you can ensure that your chickens thrive, no matter what challenges arise.

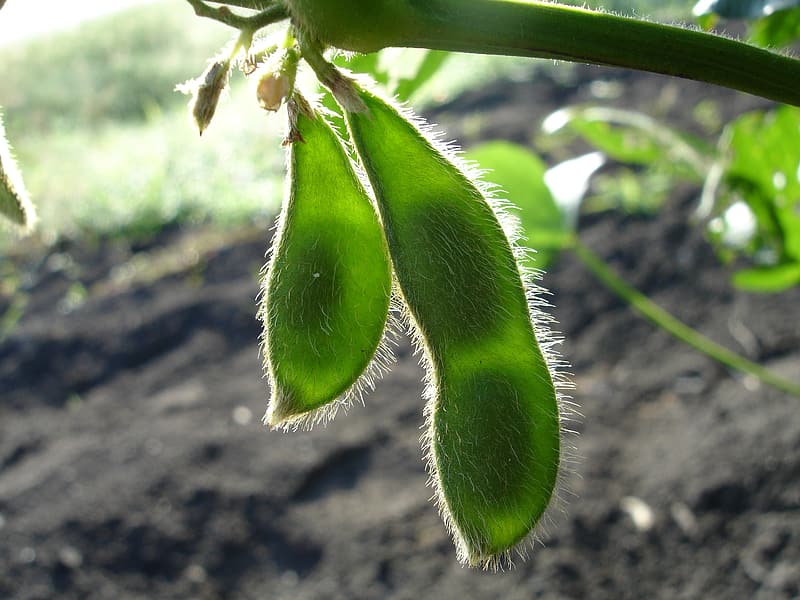
How to Grow Beans: Planting, Care, Yield, Harvesting?

The term beans generally refers to large seeded plants that include soybean, peanut and peas.  Beans are one of the evergreen vegetables that can be grown easily in your backyard, terrace garden and even in your balcony as well. They belong to the legume family and have enormous amounts of health benefits. 

Beans are a good source of protein and fiber and are also rich in iron, potassium and magnesium. 

How to Grow Beans and What Month do you Plant Beans:

Beans need warm weather to grow, so if you are planning to grow green beans then summer is best for growing, start it in summer as cold weather or frost can damage the seeds and make them rotten. Sow the seeds directly in the garden, if you transplant it later,  then the roots may get easily damaged as they are shallow. 

Before planting the beans make sure to know about the type of plant that it grows into, whether it is a bush bean or pole bean.

Bush bean: If it is a bush bean then sow the seeds one or two inches deep and apart. In case you are planting it in garden then the rows should be 2-3 feet apart. 

Pole bean: If you are planting pole bean then they need support of some stick or pole to grow. For every 3-4 seeds one pole is required with a space of 3-4 feet between each pole.

These beans grow when under full sunlight or at least look for a place where there is partial sunlight. The soil should be well drained but moist enough for the seeds to germinate.

Different Types Of Beans:

Beans come in large variety, some can be eaten raw while the other needs to be cooked. The green tender pods can be consumed as it is, where as the dried ones need to be cooked before consuming. 

They are considered nutritious as it contains large amount of protein, carbohydrates and minerals. The various beans cultivated through out the world are

  • French Beans
  • Soy Beans
  • Kidney Beans
  • Cluster Beans
  • Lima Beans
  • Broad Beans
  • Sword Beans
  • Garden Beans
  • Dolichos Beans
  • Navy Beans
  • Fava Beans
  • Pinto Beans
  • Cranberry Beans

In this article we are going to study about how to grow kidney beans, when to harvest beans, when to plant broad beans and how long do broad beans take to grow.

How To Grow Kidney Beans

Kidney beans are very healthy as they contain antioxidant properties, vitamin B6, folic acid as well as cholesterol lowering fiber. Kidney beans can be a good choice for vegan’s as well as the one having diabetes. Kidney beans need to be consumed only once they are dried and cooked, the raw once are toxic. 

Kidney beans can be planted when the temperature is about 18-26 degree Celsius. It is best to do the planting in the spring or after the last frost. It give good results when they are directly sowed in the garden instead of doing transplant, as it may damage the plant and it may not yield well. 

Kidney beans comes in two varieties-bush and vine. Make sure you know what type of seed you are using. The vine variety need some sort of support like a pole or trellis to grow.

The planting area should have full sun exposure or at least for about 6 hours daily. Kidney beans require humidity and warmth to thrive. Make sure that the temperature does not go below 16 degree Celsius. Sow the kidney bean seeds 1-2 inches below the soil surface, giving a space of about 4 inches between each seed. Water the plant daily once, when the soil is dried out, do not give over supply of water. The seeds will germinate in about 10-12 days. 

Unexpectedly if there is snow fall after the beans have sprouted , cover the seedlings with a canvas or cloth so that it doesn’t get effected by the freezing temperature. 

Harvest And Storage

If you have planted bush variety then it needs to be harvested only once at the end of the growing season. But if it is pole variety then it has to be harvested several times through out the season. The average harvesting time will be 3-4 months depending on the type of seed you use. 

If there are some unfavorable conditions like dropping temperature that may threaten your harvest then pull out the plants early. Keep the plants for the pods to dry out completely, it may take several days or weeks. As you dry the seeds keep them in a warm indoor location with lots of circulating air. 

How To Grow Broad Beans

 Broad beans produce high yields from the smaller area of garden. These can be grown in modest sized pots as well. This vegetable is easy to grow, especially a good activity for children. 

Lets learn about when and how to grow broad beans.

Before starting with the planting few things need to be kept in mind. Always choose a spot away from strong winds, sheltered spot, fertile land and a place where you can easily get sunlight.

When To Grow Broad Beans

Some variety of broad beans need to ne sown in spring while some are well grown if you plant them in autumn. If you sow it in November, that is autumn then it will germinate within 2-3 weeks. 

The germinated seeds will overwinter and start growing again in spring. In severe winters you need to protect the crops by covering it with fleece or cloches. 

How To Sow Broad Beans

The seeds of broad beans should be sown 2 inch deep into the soil. Each seed should have a gap of at least 9 inches. These can be sown in double row with a gap of 9 inches between each row. After sowing the seeds water them adequately. 

Now you will be concerned about how long does it take for the broad beans to grow. Well the answer is that these beans germinate in approximately 10 days. 

When To Harvest Broad Beans

Broad beans should be harvested and when they are 3 inches long. You can even wait for a little longer and harvest them later. But make sure that when you harvest the seeds should be soft and pots well filled. 

Best time to consume them is when the scar on the edge of the seed is white or green. If it has become black then the bean will become hard and chewy. 

The most important thing to keep in mind while sowing any seed is that don’t be in a hurry to plant the seeds, wait till the weather becomes appropriate as all the seeds may not be suitable for all typed of weather.

Take proper care after the seeds germinate and protect them from insects and mice attack.

Cabbage Farming Guide

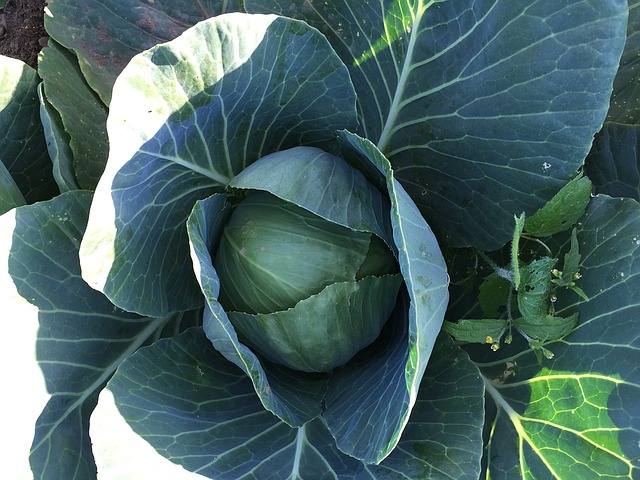
Cabbage also is known as Brassica oleracea var. capitata is a popular temperate and small green-leafy or purple vegetable. The leafy vegetable is also called a biennial plant or as a rabi crop but in certain areas, it is grown as a Kharif crop too.

Cabbages are rich in vitamins C and A and are also filled with minerals such as sodium, calcium, phosphorus, iron, and potassium. Cabbage can be consumed in cooked or raw form depending on the individual. The external appearance of the crop displays a compact mass of smooth leaves wrapped around each other and the structure is referred to as the head of the vegetable.

The leaves on the exterior are large in size than the inner ones. The stem of the plant is stout and short and the flowers of the plant appear in the winter season. Thus, cabbage is a cool-weather crop.

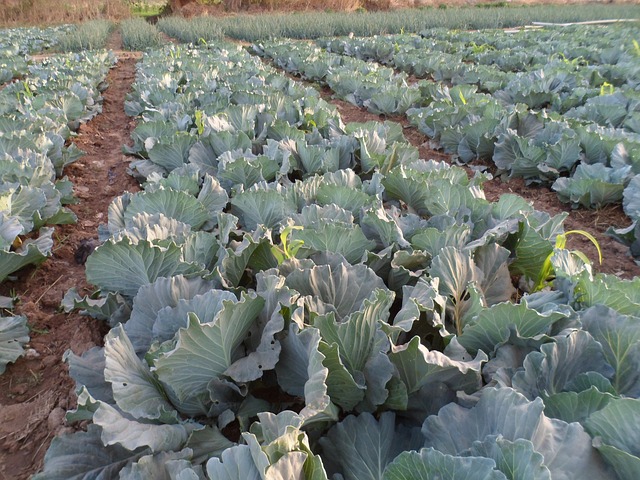
Before initiating cabbage farming, it is essential to understand the basics of cabbage cultivation and the environment necessary for the entire process. Starting to grow cabbage in the late or mid-summer so that it can be harvested in the winter, early spring, or in the autumn season.

The seeds of the crop should be planted indoors approximately 4-6 weeks before the last spring frost and the crop should be ¼ inch deep during the sowing process. The transplants of the crop can be transferred to the outdoor garden once they are around 7-10 cm (3-4 inches) tall and the seedlings are hardened.

The sowing process of the plant can be started as soon as the soil is easy to work on in the spring season. The regions with mild winters can start the seeding process during the late summer so that the crop can be harvested in spring or winter.

Also Read: Are You Embarrassed By Your Onion Farming Skills?

Perfect Environment to Grow Cabbage

How long does cabbage take to grow

Weather and soil are the dominating factors in the proper outcomes of the cabbage. Cabbages are regarded as adaptive in nature when it comes to soils as well as climate. Cabbage quickly depletes the nutrients present in the soil and thus the plant is considered as the heavy feeder.

Organic constituent rich and well-drained soil is ideal for growing cabbage. Heavy to sandy soils rich in nutrients is preferred for cabbage cultivation. The planting bed/soil should be prepared well in advance by combining the aged manure or compost. The well-drained soil aids in inhibiting the rotting of the head that stands in the water.

Light soil is used for early crops whereas late crops require heavy soils to store moisture. Growing the plant on the heavy soil helps in growing the plant slowly thus maintaining the quality. The soil used for cabbage farming should have a pH level in the range of 5.5-6.5. The pH of the soil shouldn’t cross 6.5 and it shouldn’t fall below 4.5 as it can damage the petals of the cabbage plant.

The cabbage plant is prone to various diseases when grown in saline soils. Thus, it is crucial to determine the pH to get the best results in the cabbage planting. Furthermore, crop rotation is practiced to avoid soil-borne diseases and infections to the plant.

The cabbage plant in the Indian subcontinent is grown in moist and cool climatic conditions. The optimum temperature ranges from 15°-21°C for the perfect growth of the head of the cabbage. The flowering intensity of the plant is influenced by the duration of its exposure to low temperatures and the age of the plant.

Popular Varieties of Cabbage

There are different types of cabbages with varied sizes, colours, and shapes. The varieties in green cabbages are Golden Acre, Round-Up, Blue Boy, Green Boy, Badger Ban Head, Market Prize, Blue Ribbon, Flat Dutch, Jersey Wakefield, and Stonehead. Red cabbage varieties are Ruby Perfection, Red ball, Red Acre, and Red Ribbon. Savoy cabbage varieties available are Savoy King and Savoy Ace.

The other varieties available are PusaMukta, Hariana, Bajrang, September Early, Pusa Drum Head, Pride of India, K-1, Pusa Synthetic, Late Large Drum Head, ShriganeshGol, Copenhagen Market, Early Drum Head, Kaveri, and Midseason Market.

Stages of Cabbage Growth

The complete growth of cabbage is divided into 9 stages – Cotyledon (first leaf), Seedling, 6-8 true leaf, 9-12 true leaf, Precupping, Cupping, Early head formation, Head fill, and Mature stage. The seedling goes through these stages to turn into a mature plant.

Cabbage Watering Requirement

Watering the cabbage plant too is an important ingredient necessary in the developmental stage of the plant. The cabbage plant need a continuous moisture supply. Drip system can be installed for better water retaining. Plant bolting occurs in the dry environment and thus prevents from drying. A cabbage plant requires 11/2-inch rain/week and if the environmental condition is not favourable, external watering should be done to keep the plant hydrated.

Around 10 litre water is required for meter square of the land and thus hose and jugs are used. It is essential to be careful while watering the root levels and upper levels. Roots help in retaining the soil moisture and upper levels aids in keeping diseases and pests at bay.

The leaves that have turned yellow should be removed as they can cause a further infestation in the plants. Mushy soil is not a suitable environment for cabbage like other vegetables. If for any unknown reason the soil is dry, the soil has to be dug 3 inches down and then water it. If the moisture level transfers from the upper layer, the plant can be harvested in better shape.

Spacing and Planting Cabbage

Cabbage farming is easy but to understand the correct planting procedure helps in good yield. The distance of planting relies on soil conditions, variety, and planting season. The seedlings are planted in 4-5 levels. The seedlings of cabbage are sowed 0.5-inch-deep and spaced 2.5 cm (1 inch) apart.

Thin plants on the other hand are 45-61 cm (18-24 inches) apart from each other. When there are 4-5 true leaves and are 4-6 weeks old, cabbage can be transplanted to the garden. Cooked stem plants should be planted deep. Seedlings are spaced 45-61 cm (18-24 inches) away from each other and are placed in rows which are apart at 61-91 cm (24-36 inches).

The plants can also be placed near to each other but the size of the mature heads would be smaller. Based on the maturity levels, the following distances are recommended:

Early maturity: 60×30 cm or 45×45 cm

Mid-level maturity: 60×45 cm

Late maturity: 60×60 cm or 75x60cm

A garden fabric set or black plastic can be used to plant cabbage in the early spring season. An x is cut in the fabric or plastic to set the cabbage transplant. Cabbage crop can be planted in succession with the time interval of every 2 weeks so the plant can be harvested at varied times of the season.

Planting Method

Morning or late evening is preferred time for transplanting process. The roots of the seedlings are dipped in Bavistin solution (2 gram/litre of solution) before transplantation. After the process of transplantation, irrigation is immediately carried out. Some countries irrigate the beds first and then the seedlings are transplanted to the bed.

Irrigation Mechanism

The cabbage is a versatile vegetable yet at the same time, it can’t suffer drying out. In the colder time of year season the interim irrigation methodology is used which takes 8-10 days. In any case, in the dry season the method must be constant.

A restricted water quantity ought to be present in furrows in order to re-hydrate the crops during dry climatic conditions. During the rainy season, a remarkable drainage technique needs to be made to deal with the situation. Areas with less rainfall should implement drizzle irrigation to cope up with the water scarcity in the plantation method.

Fertilizers and Manures

The dose of fertilizer depends on the quantity of organic manure used in the crop and the soil fertility. Approximately 4 weeks before transplanting, 15-20 tonnes of FYM is integrated into the soil for better yield. In general, for optimum yield 60-100 kg P2O5, 60-120 kg K2O, and 80-120 kg N is recommended. At the time of transplantation, entire quantity of K and P is given and half dose of N is applied. The remaining N is applied after 6 weeks from transplantation.

Apart from these fertilizers, decomposed cow dung 40 tonnes/ acre, Muriate of Potash 40kg/acre, Single Superphosphate 155kg/acre, and Urea 110kg/acre is applied. Also, look for magnesium or boron deficiency in the plant and accordingly perform soil testing.

Companions of Cabbage

Cabbage can be grown together with onions, fragrant herbs, beet roots, potatoes, sage, thyme, cucumber, dill, spinach, kale, artichoke, lettuce, and celery provide additional benefits to the cabbage plant. Try to avoid growing tomatoes, pole beans, cauliflower,and strawberries as they require the same nutrients and thus can’t be grown together.

Harvesting and Yielding

when do you harvest cabbage / cabbage harvest time?

It takes 90-120 days for the plant to get harvested. The ideal time for harvesting the cabbage is when the head portion is mature and hard and stable. The delay in harvest even for few days after it is matured can cause incidences of disease and split heads of the plant.

The harvesting of heads that are immature results in reduced yield as the heads are not yet mature and are easily prone to damage due to the delicate nature. The life of immature heads is shorter than the mature heads.

The harvesting of head is done by tilting the head on one side and then gradually cutting it with a sharp knife. The stalk of the plant has to be cut in flat form and incision should be done close to the head but stalk has to be long to preserve 2-4 wrapper leaves. The wrapper leaves or extra leaves behave as cushions that helps in protecting cabbages while handling. Certain markets desire the extra leaves for consumption or decoration purposes.

The head of the plant has to be handled carefully and should not be twisted or snapped while removing as it can cause head damage and the length of the stalk becomes inconsistent. The breakage in the stalks causes faster decay.

Depending on the maturity of the heads, the harvest is carried out as different heads require different time for maturity and thus differs in harvest time. Before packing, the harvested produce should be stored in shade conditions. The sorting and grading process is followed after harvesting and it depends on the head size.

The yielding process depends on various factors such as cultivation season, variety, and maturity group. The early varieties have an average yield of 25-30 t/ha and the late level varieties yield is 40-60 t/ha.

Common Diseases and Pests

The growth of the plant attracts various types of pests and diseases. These pests and diseases impact the plant externally as well as internally. The entire system of the plant from roots to leaf is damaged by the catastrophic elements. For instance, it can damage the essence, weight, growth rate, color, and many other things.

The pests infecting the crops are Cutworms, American Bollworms, Flea Beetles, Aphids, Cabbage worms, Nematodes, Cabbage rot maggots, Bagrada Bug, Diamond Back Moth (DBM), and Cabbage loopers.

The diseases that infect the produce are Wire Stem, White Blister, Downy Mildew, Club-root, Target spot/Leaf spot/ Ringspot, White Mould, Blackleg (Dry Rot Canker), Powdery Mildew, White leaf spot, and Dumping off. Most of the diseases are caused by Botrytis and Sclerotinia.

To control these diseases and pests, chemicals like insecticidal soaps, Spinosad, Carbaryl, Permethrin, and Neem oil extracts is used. However, not all the pests and diseases can be controlled and thus a proper consultation with agricultural institute might provide solutions.

Preserving and Storing Cabbage

Cabbage can stay for 1-2 weeks or may be longer in a refrigerator. The seeds of cabbage can be sprouted. Cabbage can also be dried and frozen. It can also be cured in brine to make processed cabbage known as Sauerkraut.

Conclusion

Cabbage farming can yield profits if best practices are implemented at every stage of the process and proper hydration is provided to the plant.

How to grow cauliflower: All The Information Regarding It

Everyone should maintain their healthy fitness. People like to have many vegetables in their diet and soups. After this, they also tend to make all of the special variety. But because of the increase in chemical usage, people cannot afford to eat vegetables.

One can make observance of many harmful effects. Hence, to avoid such circumstanced with their family, many people grow it on their own. Are you among those who like to eat cauliflower but do not know how to grow cauliflower? You can some interesting steps for how to grow cauliflowers in this article. 

What are the different types of cauliflower? 

Cauliflower needs much of the care to grow. People can find many of the difficulties while growing it. Therefore people need to satisfy all of their requirements in a succulent manner. Cauliflower needs the perfect Temperature to get fully flourished. One can enumerate a bit of TLC in it. After this, cauliflowers can easily grow on your lawn. You can assemble your cauliflower into diversification if you inaugurate from seeds. 

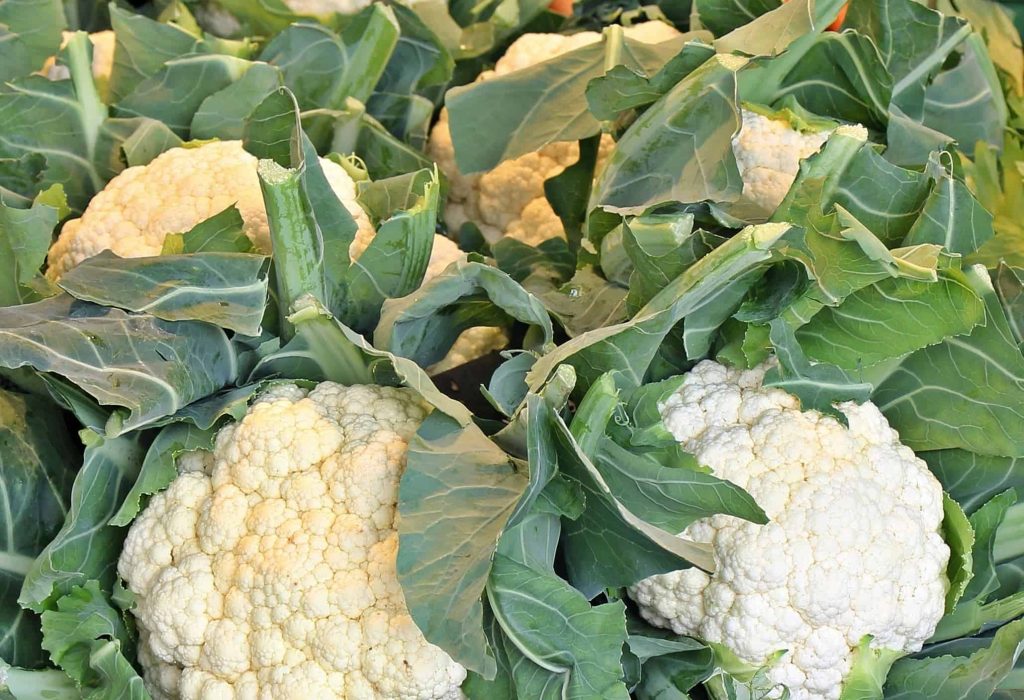
There seem different types of cauliflower. Firstly to grow the common white type of cauliflower, you can make a leaf shade over it. You can enumerate a specific kind of colouring growth hormone called anthocyanin. It can give your cauliflower a purple colour. Scientists have discovered the orange-coloured cauliflower accidentally. They can maintain it with the help of a better amount of Beta-carotene. You can grow these types of cauliflower accessibly on your lawn. 

An overall view for cauliflower plant 

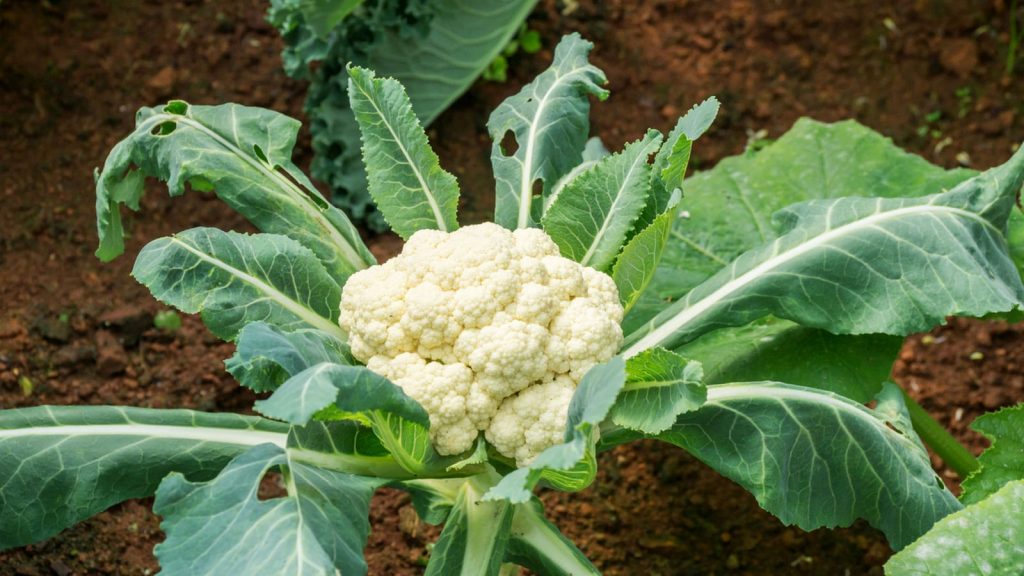
You have added cauliflower to your diet. But do you know its edible parts? Cauliflower possesses its leaves and stems as eatable parts. It has oval leaves with parallel venation. Cauliflower seems to belong to the cruciferous family.

Do you know the scientific designation of cauliflower? It seems like Brassica Oleracea. It possesses a large number of curds on its head. Cauliflower growing season seems like spring. There possess many people who like to grow it throughout the year. Therefore one has to take special care for cauliflower growing stages. 

Cauliflower spacing in cm as 12 to 30 after growing fully in soli. People can tend to grow any type of cauliflower in their garden. Please grow them to enhance your lawn area. But all the colours of cauliflower fade away after cooking it. This might occur because of the limited tolerance level of chemicals for temperatures.  

How to plant the cauliflower? 

There seem many specific steps to plant the cauliflower. You can follow each of them in this article. 

  • It would help if you took a pot for growing a healthier cauliflower plant. 
  • You might admire the first question that how deep to plant cauliflower seeds? 
  • One has to lead it 0.5 inches deeper from the soil surface. 
  • You have to keep the temperature of the surrounding cauliflower pot much warmer. 
  • One should make sure that seeds should particularly get hard. This might seem like an influential consideration. It possesses because seeds cannot bear much of the moisture in them. 
  • You should keep the particular space of around 18 inches in between every plant. 
  • This can help them to get a good place for growing the leaves of the cauliflower. 
  • Within two or three months, you can make observance of the sprout of cauliflower. 

How to grow cauliflower from seeds? 

There possess many people who admire this question. You can make accessibility with two types of seeds. Firstly that seems readily provided in the market. After this, you have to follow the steps mentioned above. Secondly, you can expect your seeds from one planted already. It would help if you had the patience to pass the winter season. 

After this, cauliflowers get to emit the seeds out of it. Therefore successfully, without any investment, one can enjoy the cauliflower. Many people also prefer to do organic farming at home. You can get the best quality and taste of cauliflower after following such methods. 

What should one consider to avoid problems with growing cauliflower? 

You have to consider the following points to grow cauliflower accessibly. You can tend to implement all such steps as follow: 

Sunlight 

Cauliflower plants need ambient Temperature to flourish. It can grow efficiently in sharp sunlight. But following sources, one should place it under partial sunlight. Direct sunlight might harm the growing neophyte of cauliflower. 

Sand 

Cauliflower essentially requires sand of organic type. It doesn’t flourish well with the loading of fertilizer. Also, one should have a look at the PH of sand. It should be maintained to the six to seven. Cauliflower needs slightly damp, containing soils. This can help them to maintain diversified curds of cauliflower. In case if humid retain from sand, then you will lead with single huge curd. Therefore to avoid such problems, one should maintain the need for cauliflower with sand. 

Also Read: Growing the Microgreen Broccoli

Ambient Temperature and moisture 

 One should try to maintain the ambient temperature under 70 degrees. Cauliflower nourishes well under colder surroundings. But this cold doesn’t mean having the frost. You can accessibly obtain a better quality of cauliflower in the spring season. This season satisfies all results out of it. One should try to retain moisture in soils for growing flowers. 

Amount of fertilizer 

One should well notify that cauliflower takes a longer time to nourish up well. Also, you can make a note of the essential points of hormones need for cauliflower. According to it, you can enumerate the fertilizers. One should try to make results out of it. People can maintain all their areas with better consistency of fertilizers. You can inspect the soil that you seem to enumerate in it. 

One should never try to over-dose the fertilizers in it. If so, then the plant might rise as toxic. Also, one should try to focus on the quality of the fertilizer that it seems to use. One should pour the fertilizer every two to three weeks. Also, it would help if you enumerated only organic types of fertilizers. 

Conclusion: 

If you follow all steps to grow cauliflower, you can get many benefits out of it. Many people like to maintain their fields on a commercial basis for cauliflower. Therefore you can maintain sufficient cauliflower yield per acre.