How to: Growing Tomatoes in Containers, Raised Beds & Backyard?

When it comes to tomato flavor the list of delicious cuisines is fairly long. Besides, take a look at your favorite fast food, whether it is a hamburger, or delightful wrapped pizza, without a slice of tomato you can’t imagine the taste that can touch your palates. 

Tomato’ Journey from Concern To Preference

Tomato farming has a tradition. While it’s usage in popular culture is ironic. In the late 1700s, a large percentage of Europeans were frightened by the tomato.

The fruit was termed as poison apple then because it was thought that some of the aristocrats fall sick and eventually died after consuming them. Although, the real reason behind the tragedy was the utensils of wealthy Europeans. These pewter plates have high lead content.

Also Read: Farming Orange for a Perfect Citrus

Since tomatoes are so rich in acidity, the fruit can leach lead from the plate when put on this specific tableware, resulting in numerous deaths from lead poisoning. At that moment, no one related this to plate and poison, and eventually the tomato bore all the blame.

Moreover, the tomato was not only criticized for lead poisoning. Before the fruit found its way to the table in North America, tomato is misunderstood as a lethal nightshade-a family of Solanaceae plants containing toxins called tropane alkaloids.

While as far as the use of tomato concerned, Italian started the use of tomatoes in their cuisines. And, mass migration from Italy to America in the 1800s made tomatoes famous in North American and since then tomato has been in the focus of flavors. It has come so far to be an essential vegetable from the fruit in our everyday cuisines.

Growing The Tomatoes

Tomatoes are subtropical plants and therefore need a maximum sun position. For the tomato cultivation, this is particularly important for growing areas to have sunshine at a premium. 

Besides, the tomato plants need six to eight hours of daily sunlight to flourish. During the growing season, it needs to be sure to give sufficient room for the growth of each plant.  

Apart from this requirement, the selection of the seed is the utmost variety as the market has thousands of varieties to choose from and some of them can suit your requirements better than others.

Determining the seeds

When it comes to picking a variety, hundreds of varieties are available. You can determine the right one based on some aspects.

According to the growth model. 

You can discover the tomato seed based on the height of a plant. There are two types of plants at maturity.

1. Indeterminate or vining types – a tall plant 

2. Determinate – a short bushy plant

It is better to choose based on your selection of area.

Based on fruit characteristics

These are taste, smell, color, texture, shape, etc. While yield is one of the most important aspects of a variety that is the priority that we need to focus

Growing area 

Is your space outdoor or in a protected setting?

When the seed variety is concluded, it is high time the soil is prepared according to the correct seeding guidelines.

Preparation of Seedlings

Tomato seeding requires a slightly hot environment, especially in indoor conditions. The proper time for tomato seedling is in late February to early March. And, seeding in tomato farming needs the well-mixed compost that can be warm up to the 22 degree celsius. It’s rational that a young seedling will keep warm until the start of the summer with a bit of warm compost.

You can seed at a very short distance often known as sort seeding and will require at least two cubic feet of soil.

Tomato seeds are quite small so you won’t see them again if you grow them too deeply. The tomato seed planting depth should about a quarter-inch, partially filled with a moistened potting mix.

Besides, you can sprinkle 2-3 seeds into the trench and cover them with a mix of potting. Strengthen the blend gently so that the seeds go enough deep into the soil. If it doesn’t sound wet enough, you should spray the surface with water.

Nurturing the Tomato Seedling

You will wait for the plant until a seedling has real leaves. Now it needs better treatment for the young plant. It’s the best moment to continue feeding. At this time, the sunlight is critical and always requires putting the seedlings under sufficient light exposure.

When they are about 6-8 inches high, the seedlings get the first truss flowers. Now, it is time to prepare compost or rusty manure.

Preparing The Soil

Tomato farming is seasonal, especially for warm weather and better suited on well-drained, fertile soils. 

A sloping surface approx two percent is desired for early production with sufficient sunlight in place.

In some cases, it is feasible to also grow tomatoes on pots or containers, whereas in personal usage or a hobby it is favored.

This method needs more intense feeding due to the restricted root area. 

These plants must be drained better, besides plants like tomatoes need to have enough area. If you choose to grow into pots, selecting a well-drained big pot, at least 30 cm tall with a regular potting mix is ideal.

It’s best to change the soil before growing them again. It has been noticed the or soil pests and root diseases can be a serious problem.

Soil Requirements

Before you grow in the field, make sure that during winter, just before you plant, you put in plenty of compost or manure as an overall fertilizer.  

In the case of tomatoes, fertile land is the base for every good harvest. Prepare the soil with a ton of rotting waste and a complete wheelbarrow on 3 square meters.

In case of sowing into pots. The number of seedlings should be two and keep in mind they need to be irrigated and cared more as compared to others.

Transforming and Planting a seedling

The tomato planting distance should be about 18 inches apart, leaving 30 inches between the rows. 

A good plant up to 2 meters high can produce hundreds of fruits while consuming a relatively small size.

As a young tomato plant has been sown in well fertile and nutritious soil. Now it is time to look after these plants.

Nurturing the Plant for Tomato Cultivation

A complete nutrient solution with trace elements (especially in case of use of artificial mixtures) should be provided to transplants at weekly intervals.

They can also be fed with water using a diluting nutrient solution

The latter approach has the benefit that the fertilizer is supplied more according to the needs of the plant: more in hot, warm days; fewer in cool cloudy days.

In each case, following the instructions for feed quantities on the fertilizer label. A fertilizer where the bulk of nitrogen is nitrate instead of ammonium and urea is better than the others.

The issue with the Tomatoes
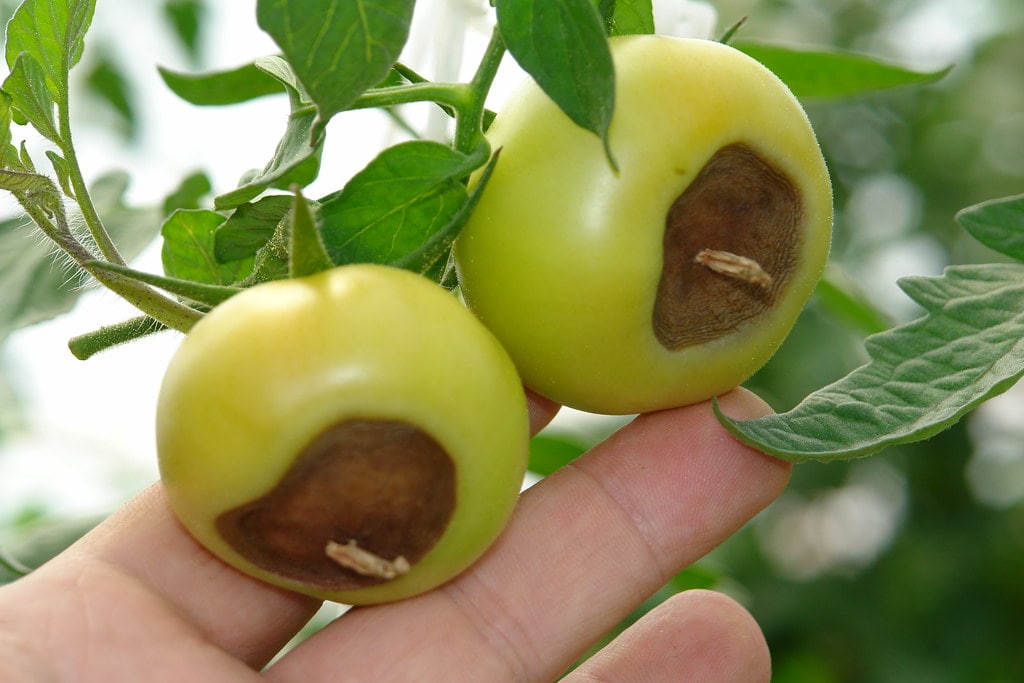
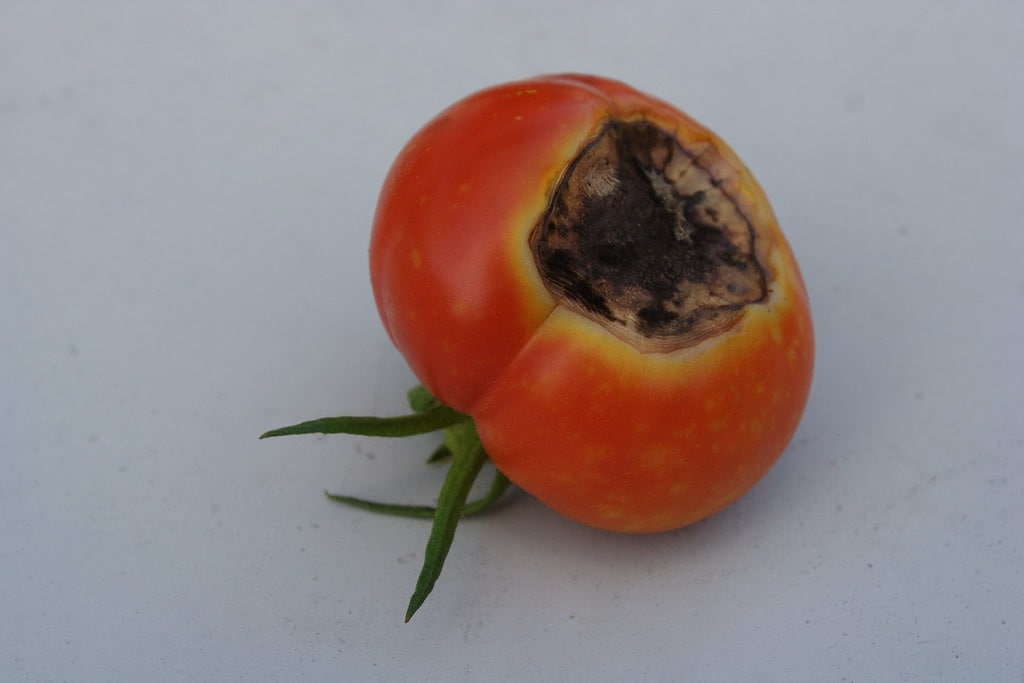
1. Blighting

Tomato blight spreads fast, leaving a visible brown patch all over the surface, especially with outdoor plants. This is a common problem caused by wet weather. It not only ruins plants, but they also eat the crop.

The moist environment offers perfect environments for early fungal diseases, which first develop dark spots on the bottoms. Make sure any bad or ill leaves are collected during the season.

 The substantial fungal disorder is more destructive and destroys plants fast.

It needs spraying the plants with a fungicide, such as chlorothalonil or copper, to shield them from fungal disorders.

2. Fruit Splitting

Tomatoes with certain strains that are more likely than others to have issues commonly caused by irregular watering. This problem in tomato farming should be fixed by more frequent watering.

3. Pest and insecticides

Search for green and whitefly, as both will spread. As soon as you notice pests, spray your plants with a recommended insecticide. 

Tomato has a significant effect of such incidence while it directly hampers the yielding

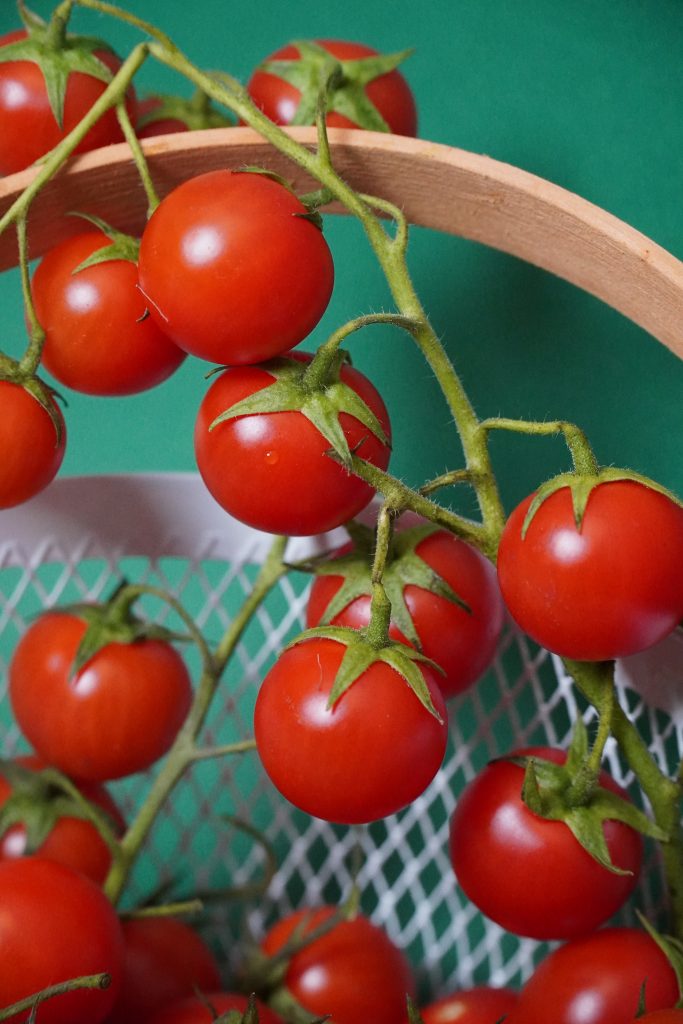
Finally a Fruit full Cultivation

Tomatoes continue to develop their color changes, with a subtle pink or yellow blushing, from bright medium-green to light shade. The exact ripeness indications differ with variety, but usually fully mature tomatoes have a dark color.

Can okra and tomatoes grow together?

Finally, tomatoes and other vegetables are a great food source for stink bugs. Planting okra near the tomatoes draws these pests away from your other crops.

Must Read: Planting and Growing Okra Step by Step

Companion planting strives to boost harvests by situating plants that have symbiotic relationships. Used for centuries, selecting the right companions for tomato cannot only reduce pests but also provide a haven for beneficial insects, boost pollination, enrich the soil and in general diversify the plantation – all of which will produce healthier plants that can fend off disease and produce bountiful crops.

Conclusion

Once done with the plucking the proper ripe tomatoes. Last but not least for tomatoes farming is storage. The cooler temperatures will minimize flavor and induce sluggishness in a refrigerator is not to be advised. Although lower temperatures will allow the fruit to stay

Why Are Bottom of Tomatoes Turning Black: Blossom End Rot

If you are worried about why your tomatoes are rotting on the bottom then you have come to the right place. Let us discuss this issue of tomatoes turning black that many people are facing nowadays, and let us provide you the best solution to this problem.

The classic symptom of blossom-end rot is a water-soaked spot at the tomato fruit blossom ends. This relatively common issue with the garden is not a disease but rather a physiological condition induced within the plant by a calcium imbalance. It can occur in fruits such as pepper, squash, cucumber, and melon, and tomatoes.

When the growing season starts wet and then becomes dry and the fruit is set, then the ‘blossom-end’ rot is most common. Damage occurs first when fruits are around half their full size. The water-soaked areas enlarge and turn dark brown and leathery. Eventually, these areas may start to rot, so the fruit should be picked and discarded.

My tomatoes have black bottoms but why?

Several factors can restrict a plant’s ability to absorb enough calcium for correct development. These include soil moisture variations (too wet, dry), soil nitrogen abundance, cultivational damage to the root, soil pH too high, soil pH too thin, salt cold, and high soil.

How to prevent and control this problem?
  • Keep constant soil humidity levels throughout the growing season. Water once or twice a week, when the weather is dry, to damp the field to a depth of 6 inches or less.
  • Prevent Tomato Rot Avoid calcium deficiency.
  • Enable soil to warm before seeding in cold climates; cold soils restrict the intake of nutrients.
  • Keep soil pH at or close to 6.5.
  • We are using nitrogen-free and phosphorous-high fertilisers like our GSC Organic Tomato Fertilizer.
  • To get water down to the root field, use watering cones (Aqua Cones).
  • To mitigate evaporation and to maintain consistent soil moisture, add mulch, such as Red Tomato Mulch.
  • Keep your garden records: Some crop varieties are more receptive than others to blossom-end red.

Whether it’s just minute black spots in the field or if it’s even worse, it makes your tomatoes look like rotting, the name of this disease is ‘blossomed tomatoes and red’.

It’s a disease that is not caused by some kind of pathogen, despite its pretty scary name; It is caused by a lack of calcium primarily because the nutrient does not enter the fruit even though the plant has enough calcium. Only by applying calcium fertilizer to the soil, this issue can be fixed in serious cases. Preventing blossom end rot on tomatoes can give you a tough fight. 

We’re going to take a look at the root cause (no pun intended) of the problem in this post, in reality, there are three potential causes, each of which is very easy to address. Therefore, within minutes of reading this post, you can stop any additional blossom end rot in your tomatoes.

If you know for a fact that one of the following three conditions affects your tomato plant, you can skip to the related section to learn more about it:

Get to identify the cause of the issue

We’re going to take a look at the root cause (no pun intended) of the problem in this post, in reality, the three potential causes, each of which is very easy to address. Therefore, within minutes of reading this post, you will stop any additional blossom end rot.

If you know for a fact that one of the following three conditions affects your tomato plant, you can skip to the related section to learn more about it:

What is the main causes of blossom end rot in tomatoes?

This condition is induced during its growth and development by a lack of calcium that enters the fruit. For the nightshade family, calcium is an essential micronutrient that includes, among others, tomatoes, eggplants, peppers, and okra. You might also face blossom end rot on tomatoes in containers. 

Must Read: Planting and Growing Okra Step by Step

It plays an essential part in the epidermis, that is, the fruit’s surface. There is no protective covering that can be formed when the fruit does not receive its due number, and the fruit grows without this cover and thus becomes black and hard. This occurs at the bottom of the plant, as the plant develops outward from the tip in this family.

Moisture

Moisture plays a vital role in creating this problem, excess or less of moisture can affect the plant and thereby cause blossom end roots.

Soil too Cold at Planting –

Cold soil will interfere with nutrient absorption to the plant, which is more of a concern for northern gardeners.

Root damage from cultivation –

The roots can be harmed by vigorous digging around your plants (for weed control, for example). It will also conflict with the taking up of nutrients.

Soil pH too high or too low –

Any extreme pH will make your tomatoes difficult to thrive

Susceptible varieties –

Some tomatoes varieties are more resistant to blossom end rot than others.

Too much Nitrogen –

Dump a load of fresh manure onto your tomatoes, and you can be rewarded with loads of green growth and black bottomed berries. The nitrogen salts can make the tomatoes less accessible to the calcium in the soil.

Also, you can try water cones or soaker hoses to offer slow, steady water supply. If caught in heavy rain, drain the trench away from the tomatoes (if possible). Fresh roots above the sodden ground may also be promoted by heaping compost around the tomato plant’s foundation. (When the soil is too saturated, roots will drown.)

Pot grown plants in particular, due to difficulty keeping the soil moist enough, may be more vulnerable to end rot in bloom. Try the self-watering containers in your jar or water the spikes.

Temperature

Tomato plants love the sun and prefer temperatures above 65 ° C (18 ° C). If you plant your crop late in the season, the soil will probably drop below this temperature during the fruiting time of your plants. They are not performing at their best at lower temperatures, and their roots do not absorb nutrients very well from the soil.

For plants in a greenhouse, painting with straw or leaves will reduce the temperature, thus putting black plastic sheets around your plants will help to warm the area and preserve the heat compared to the exposed soil. This is beneficial if your plant is late and the temperature has dropped.

If you have black container plants, you can paint them white to absorb less heat or instead cover them in aluminium to reflect the sun’s rays. As in a greenhouse, you’ll want to use a mulch to hold moisture and not lose it because of the sun.

The way of watering

Watering abnormalities is the most common cause of the blue end of your tomatoes. Perfect water conditions in containers are extremely difficult. The field needs to be moist enough and not damp until a few centimeters below the soil. This helps the plant to retain water when transpiring and thereby retain nutrients in the soil so that they are able to grow and spread around the plant.

If the roots become too dry, calcium, in this situation, will not absorb nutrients. The roots do not work as they cannot respire while the soil is soaking. The roots can also start to rot in prolonged cases.

Stress from other sources

The other reason the plant should be stressed is the chemical composition of the soil, other than temperature. Overfertilization or calcium deficiency in tomato plants causes a lot of stress on the plant and roots may totally stop the lockout of absorbing nutrients so that concentrated nutrients which could destroy a plant are not absorbed.

A lack of nutrients is not the cause of blossom end rot even though it is a concern unless it is due to a very rare situation of lack of calcium in the soil. You’ll have to have your soil tested, to know for sure. Using any calcium fertiliser in small amounts does not cause any damage.

A lack of enough calcium results in weaker cell walls that can cause the fruit to crack until it is completely ripened. You can try adding calcium to tomato plants for a better blossom. 

If you are considering the addition of fertilisers, other than the above points, it is helpful to know at this stage of growth, what kind your plant should use. You should read my manual on fertilising tomatoes to learn more about this.

High nitrogen consisting fertilizers are the reasons

behind your tomatoes suffering from blossom end rot. It will take some time before you can fix this problem because calcium takes time to climb up to the entire plant system.

Does adding calcium to tomato plants help?

There are two separate tissues in plants, the xylem, and the phloem. The first is for the transport of water and nutrients, while the second is for the transport of molecules of food or energy produced during photosynthesis.

Also Read: Growing Tomato for Your favorite Cuisines

Leaves do not have xylem tissue, and calcium is an essential resource that is picked from the soil and passes through the xylem tissue and not through the phloem. This calcium would not move to the fruit if sprayed on the leaves.

Unlike the leaves, the fruit has no stomata (used during transpiration to exchange water and air) and thus has no real openings for something sprayed to get into the plant and pass through it.

More about blossom end

As Blossom end rot (BER) occurs, you can notice some dark spots on the bottom of the tomato as it grows. Gradually it starts becoming leathery and black and may even cover the entire bottom of the fruit. 

Blossom end rot is often attributed to a lack of calcium in tomatoes, either due to exhausted, poorly drained soil or simply of displacement due to transpiration, especially when plants are under stress. Technically this lack of calcium causes brown spots on blossom end rot tomatoes. For this reason, it is always recommended that you add calcium to the soil or substitute, the calcium in the plant with a foliar application will help to fix the issue. But it’s rare for calcium to be absent from soil. Instead, there may be a variety of other environmental causes of end rotting of the tomato bloom, from uneven watering due to drought, heavy rainfall, or overcare of a gardener.

It is also crucial to provide sufficient and even quantities of water for tomato plants. While keeping the soil and plant roots insulated, the addition of mulch will help maintain moisture. Although it may or may not be effective, and is a widely debated topic, it may not necessarily hurt to add crushed eggshells, limestone, or calcium carbonate to the soil, but it may not help much either.

Quick tips for a great blossom

  • Try to apply calcium to the soil before planting the plants in the field or containers, using lime or gypsum. When Blossom End Rot occurs on the fruit, Calcium nitrate, water-soluble lime, hydrated lime, and very fine lime can be applied (top-dress and light raking) to help correct potential fruit from being affected. 
  • Increase timely irrigation to establish healthy soil moisture. Apply mulch to tomatoes which will help to preserve soil moisture.
  • Do not overfeed the plants, particularly with a fertiliser high in nitrogen.
  • Use all-purpose garden foods that are lower in N and higher in potassium and phosphorus, and other nutrients, including calcium, that are required.
  • Verify the levels of its pH. –
  • The movement of calcium/water into the plant and fruit would also be influenced by cold temperatures (soil and air). Another good excuse for not planting tomatoes in the season too early! When temperatures get colder, plant them.

Conclusion

At some point of time in the entire life-span of the tomato plant, it does go through blossom end rot, no matter which variety of plant it is. Although when the weather condition starts changing, this disease in the plant will clear up on its own. And yet if you find a plant deteriorating due to blossom end roots disease, then simply pluck and discard it. 

Reference Links

https://commonsensehome.com/blossom-end-rot/

https://www.gardeningknowhow.com/edible/vegetables/tomato/tomato-blossom-rot.htm

https://dengarden.com/gardening/Blossom-End-Rot-Tomatoes-Turning-Black-on-the-Bottom

https://www.gardeners.com/how-to/blossom-end-rot/5354.html#:~:text=A%20water%2Dsoaked%20spot%20at,calcium%20imbalance%20within%20the%20plant.&text=The%20water%2Dsoaked%20areas%20enlarge%20and%20turn%20dark%20brown%20and%20leathery.