How to Grow Organic Asparagus From Seed?

If you are looking around for a guide on “how to grow asparagus?”, here we are to help you! In this guide, we are going to talk about everything related to farming of asparagus from planting, caring, harvesting and storage. Let’s move on to find more.

Asparagus is among the first few plants that greet farmers in springtime. It is a perennial plant, which means, once you successfully start asparagus farming, you will earn decent benefits year after year. Also, to be healthy, low-calorie food, asparagus’s ferny foliage is used to make beautiful ornamental as well.

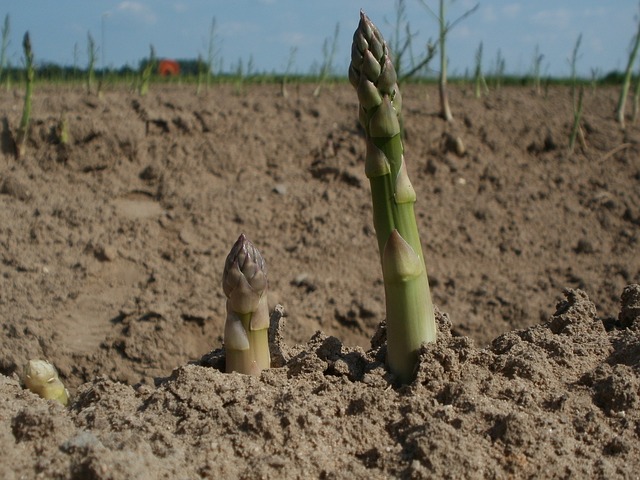
The whole of the USA is almost suitable for growing asparagus, but cooler regions with long winter season are perfect conditions for robust growth. Young stem shoot is the edible portion of the plant and starts emerging once the temperature of the soil increases more than 50°F in springs.

The most important factor you must have to know that, asparagus is “not harvested in the first couple of seasons”. The plants need a lot of time to get matured and you will have to be patient before you can finally harvest them. And you will surely get the rewards of your patience, as the asparagus field remains productive for 15 to 30 years!

In this asparagus planting guide, we will focus on all the important aspects of growing asparagus from choosing a planting site for harvesting and transporting. Let’s start our guide by knowing “when to start planting”.

When to start planting asparagus?

Early spring is the best time for planting. You can grow asparagus from one-year-old plants or “crowns”, both of which are easily available at garden centers and nurseries.

Growing asparagus from seeds is also popular in some parts of the country, but we recommend starting with crowns, as you can eliminate the long-year headache of weeding which is usually associated with seeds.

Also Read: Spinach Plant Spacing And Growing

A few varieties like hybrid “sweet purple”, and open-pollinated “purple passion” are grown from the seeds. But you should try these varieties after gaining some experience of asparagus crops.

Choosing the right site for plantation

Given that asparagus takes at least a couple of years for proper growth, and comes back year after year for so long, you must have to decide, where is the best place to plant asparagus.

  • Choosing a site with at least partial sunlight is recommended.
  • If you are planning to grow some other crops, choose one side of the garden/field for placing the asparagus bed, so that it won’t be disturbed due to constant activities of planting or re-planting other crops.
  • Ensure the proper drainage of the asparagus bed without any pooling of water. Asparagus doesn’t like “wet feet”. If you are unable to find a site with decent enough drainage, you should consider raised beds for growing asparagus instead.
  • Neutral to slightly acidic soil with a pH of about 6.5 is suitable for asparagus growth.
  • Get rid of all weeds from the planting area by digging it placing a 2 to 4-inch layer of soil mix, aged manure, or compost.
  • Ensure that the soil is loosened enough to 12 to 15 inches in depth for proper rooting of asparagus crowns, and the roots are not disturbed by rocks and other obstacles.

How to plant asparagus roots?

  • The aim of planting crowns should be to protect them from various external obstacles, so plant them to ensure enough depth.
  • Dig a trench of 6 to 8 inches deep and about 12 to 18 inches wide. Keep a distance of at least 3 feet, if you are digging multiple trenches.
  • Don’t forget to soak asparagus crowns in water before planting.
  • Use soil to make a 2-inch high ridge right at the center of the trench. Place the crowns on top, ensuring roots are evenly spread.
  • Place the crowns 12-18 inches apart from each other inside the trench. Do the measurement from the tip of the root of one crown to the second and so on.

What after placing the crowns?

Placement of crowns keeping in mind the proper depth as well as distance is a very important part of asparagus cultivation. Here are the steps to follow once you are done with this important part.

You can either follow the “all-at-once” method or “little-by-little” method

Some farmers fill the trench directly with a mixture of soil and compost. Although other traditional “little-by-little” is considered as the best method, farmers found no problem whatsoever with this “all at once” method either. As long as the soil is free enough, you will get the desired crop even with this fairly easy method.

Little-by-little method

  • Burry the crowns two inches deep with the mixture of compost and soil, ensuring proper watering.
  • With the progress of the season, when the spears are 2 to 3 inches tall, add another 2-inch layer of soil, ensuring spears are not buried completely.
  • Once you notice further growth of spears again through the soil, add one more layer of soil. Keep doing this until the levels of the trench and the ground are the same. You can also add soil a couple of more times throughout the growing season.
  • After filling the trench, ensure molding the soil to avoid pooling around the trenches.

How to care for asparagus?

  • Once the trenches are full of soil, add a 5 to 6-inch layer of mulch.
  • Fighting with weeds, especially in the first couple of years is the biggest challenge while growing asparagus. You will have to keep the crop free from weeds, and that too, without disturbing their roots! So, pulling the weeds gently with hands is the only option. The problem of weeds will go away slowly with the growth of plants. So, mulch the surrounding of roots with compost or grass clippings to maintain moisture and to control the growth of weeds.
  • Asparagus plants require a couple of inches of water, especially in the first two years. So, if there is not enough rain, you will have to water them properly and regularly. And, the drip irrigation method is the best option for asparagus.
  • A proper supply of plant food is necessary for healthy and constant growth. So, prefer using the drip irrigation method for adequate and balanced watering of plants.

Some important points to remember before harvesting

Yes, it is important to know, when and how to harvest asparagus. But, before that, let’s discuss a few important pre-harvesting points.

  • Avoid harvesting the crop in the first season. But, for caring purposes, ensure side-dressing with compost, as well as cutting down the dead foliage, especially in late fall.
  • During the second season, start harvesting, but not more than 3 to 4 weeks. Ensure side-dressing with compost, especially in spring cutting down the dead ferns regularly, preferably in late fall. And of course, maintain the thickness of the bed with mulch.
  • You will notice the full production of asparagus bed in the third year, and you will then be able to harvest asparagus continuously in every season.

Transplanting Asparagus

Transplanting is also an important factor in asparagus farming. You should transplant the crowns early in the spring season when they remain dormant, or in the later stage of fall, after cutting down the foliage.

Use a garden fork to dig and lift the crowns, without disturbing the roots! Divide the clump into more than two pieces, and water the transplants properly. Avoid harvesting heavily in the following year to ensure good asparagus crops in the future.

Pests and diseases commonly affecting asparagus

As already mentioned, weeds are the most common problems related to asparagus crops. And regular hand pulling in early summer and spring is the best way to get rid of them. Prefer light cultivation to avoid damages to asparagus crop.

Here are some common diseases you may encounter during asparagus farming, and how you can control/prevent them.

Disease/PestTypeSymptomsControl/Prevention
Asparagus BeetlesInsectsSpears start appearing brown and they convert into hook shape. Beetles can also cause damage and defoliation to the fruitsYou can hand-pick the beetles and throw them away from the field. Disposing the plant matter, especially in the fall season.
CutwormsInsectWitling, younger stems start cutting automaticallyConstant inspection and hand-removal is the best way to protect crops from cutworms.
Fusarium Crown RotFungusWilted, stunted, yellow fruits, brownish or reddish spots on the stems, roots, or crowns, spears start rottingThis is quite a big challenge in asparagus farming. Destroying the infected plants is the only option. In addition, you will have to avoid planting asparagus around the infected areas for at least five years. Otherwise, using resistant varieties, disinfected tools, and avoid overharvesting are a few options.
Asparagus RustFungusEmerging spears are full of pale green spots, that become orange or yellow. If not cured in time, they will convert into reddish-brown blisters. There is defoliation, as well as reduced vigour.Excessive moisture is responsible for spreading rust. So, avoid excessive watering, especially on the ferns or spears. Choose other resistant varieties, destroy infected plant matter, improve air circulation, and avoid growing plants around the infected area.

How to grow asparagus from seed?

Growing asparagus from seed is super easy and fun, but again, you will have to be very patient, as you can’t harvest asparagus for a couple of years, even if you are using seeds. Here are the steps on how to grow asparagus from seed:

  • Soak seeds for a couple of hours.
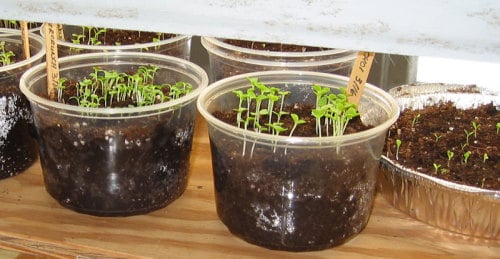
  • Use sterile soil, and plant each seed 1 cm deep in separate 5 cm pots.
  • You will notice sprouts coming out after a couple of weeks.
  • Seedlings take 10-12 weeks to grow properly.
  • Now, you can place the transplants just like we have discussed placing the asparagus crowns in the field. All the steps afterward are the same.

How to harvest asparagus

We have discussed it repeatedly that you should not harvest the asparagus for a couple of years in the beginning.

  • With young plants, the production period is usually 2 to 3 weeks. But established plants take up to 8 weeks for production.
  • Check your plants every second or third day to see if there are harvest-ready spears. The growth of spears is too quick, and they can convert into wooden structures in no time. And they’ll be too hard for eating, and hence, for marketing.
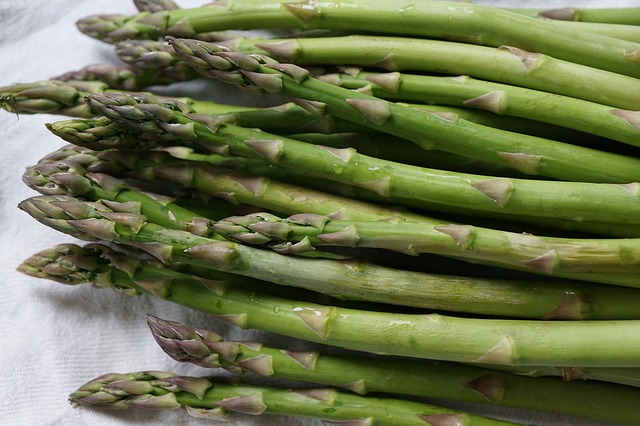
  • Spears are ready to harvest when they are 8 to 10 inches in height and ½ and ¾ inch thick. (Thinner and younger spears are usually more tender. So, keep in mind for your marketing purposes.
  • Cut the spears at ground level using a sharp knife or scissor.
  • When the diameter of spears is less than the size of a pencil, stop the harvest.
  • Harvesting is also an important part of asparagus farming, so keep all important points in mind.
  • Make sure, you don’t cut the asparagus ferns. Otherwise, your asparagus bed will be ruined completely. Give them enough time to get matured. They will replenish important nutrients in the asparagus bed for next season’s spear production.

Storage of asparagus

  • You can’t store asparagus for very long after harvesting. So, start marketing right from day one.
  • Remove any visible dirt, or wash them gently with cold water before storing. Don’t forget to dry them completely after washing, because any moisture will pave the way for molds.
  • Bundle the spears properly, use a moist paper towel to wrap the stem ends, and keep the bundles in a plastic bag. Place the bags in a refrigerator to maximize the freshness.

So, that’s all about our asparagus growing guide. Asparagus is full of nutrition and tastes very delicious too. It is an amazing source of fiber, minerals, vitamins, calories, and sodium, etc. When it comes to economic value, it can be a great source of income too.

You can increase your income by combining it with other crops, especially in a couple of non-harvesting seasons in the beginning. So, if you are thinking about growing asparagus for commercial purposes, you can surely be affirmative about it. All you need to do is to be very active and caring.

You will have to wait for a couple of seasons, but you will be amazed at the returns after that. After all, every good thing worth to wait.

How to Grow Lettuce – An Ultimate Guide

Lettuce farming is gaining popularity day by day. It is among the highest consumed salad vegetable throughout the world. Becoming trendy in India too. 

Although the roots of lettuce farming lie in Asia. Though, it was wholehearted adopted by the rest of the countries.

Being a store of healthy nutrients, how to grow lettuce, became an important part of farming.

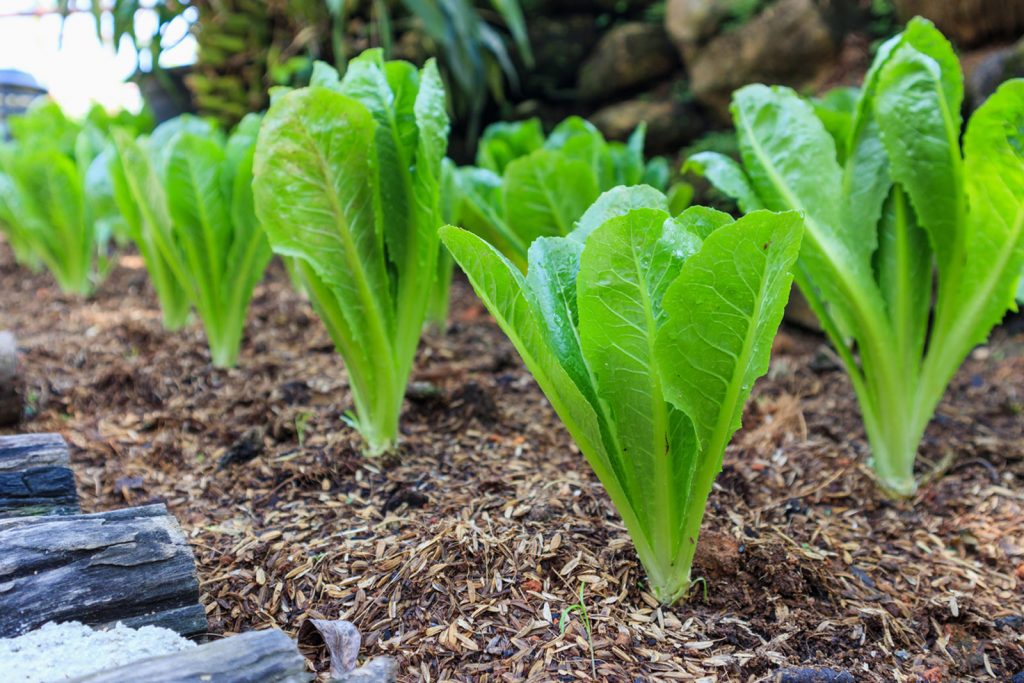
The Romaine species of lettuce is the most famous among all. Lettuce finds a place in healthy food items like wraps, salads, sandwiches. Etc.

China lead in the production of lettuce. It is a spiral leafy vegetable with a package of health.

This crop has acquired commercial importance in the passage of time. If you are planning a business strategy by growing lettuce, surely will land towards wealth in your bag.

How grab a look!!!!! 

Different types of lettuce 

These nutrition ruched salad leaves have different species. Check them out:

  1. Leaf Lettuce: 

They are like a branch splashing out from the stalk. Red, green, and Oak in color. Leaf lettuce is the most delicate and short-lived. The red one has a mild flavor than the green one. While the oak one is the crunchiest and spiciest.

  1. Romaine Lettuce:

Sweet in center and bitterly towards the tip, long and firm in appearance.

  1. Iceberg lettuce:

It is crispy in taste and resembles cabbage. Unlike lettuce, it is not juicy. Can be refrigerated for 15 days in plastic bags.

  1. Arugula Lettuce:

This is generally used in pizza toppings. Blends with pesto sauce so go well in sandwiches too.

  1. Frisse:

It belongs to the radicchio family. Available in grocery stores are used as toppings.

Requirements for how to grow lettuce

For growing lettuce on your farm, these things should not be overlooked. Note the following:

Climate

Being a cool-headed crop thrives amazingly well at temperatures ranging between 15 to 18 degrees. 

They are reluctant towards extremely hot temperatures. It can be cultivated throughout the year using shady or greenhouse effect in warmer climates.

They have a speedy growth. And performs well in the spring season. Ideally, the  lettuce growing season is spring time before the onset of scorching heat.

Soil Required

Good organically rich soil is a perfect combo for Lettuce cultivation. The soil should excel in two things, water retention and good drainage. 

This is a boon in disguise for farming. Highly allergic to acidic soil, better to choose a neutral one.

Prepare Land

The land needs good plowing till tilth. Plowing has to be carried out for successive 3-4 times.

Also, get the soil tested for productivity and if needed add some good organic manure to boost up the productivity.

Make necessary arrangements to flush out excessive water at frequent intervals.

Irrigation

Water supply should be maintained regularly. For this, you can water the plantation, once every 4 days. Extra water must be flushed out during excessive rains.

Fertilization

60 TO 65 KG of potash and phosphorus is needed by the lettuce crop. With good quantity of manure around 15 to 20 tonnes. It ensures healthy growth.

Pest and Disease Control

The pests are the disturbance-causing agent. They hamper the yield and have an adverse effect on lettuce cultivation.

Cutworms, bollworms, aphids are some of the enemies of the lettuce plantation. Soft rot, downy mildew are the diseases caused by these agents.

To curb their spread, you need to approach the horticulture department for some remedy.

Germination in lettuce seeds

Lettuce seed germination is an easy process. But you don’t have to be antsy. Pick the best quality seeds from the market or any other reliable source.

Now plant these seeds in the soil. The temperature of the place is the deciding factor to initiate lettuce seed germination.

Make sure the temperature is 20 degrees at least. Else, the seeds will enter a deep sleep mode.

During the entire sprouting time, these standards should be maintained. Ideal temperature, exposure to sunlight, and moisture laden soil is an explicit combo to trigger sprouting in seeds.

This has to be maintained for 7 to 10 days until the germination starts. You can see tiny tots emerging from the seeds.

How to grow lettuce from seeds

Propagation through seeds is easy. You can sow them directly into the soil. As an alternative, they can be planted in a nursery till germination.

After that, it can be translocated to the fields.

Mostly leafy varieties are cultivated by this method. Raised beds are prepared in the field. This ensures proper water drainage and air to the soil.

The seeds should be at least 12 to 15 mm deep. This is ideal, depth for a lettuce plantation. 

A lettuce plant spacing should be done in rows 15 to 25 cms far from each other.

Also Read: How To Plant Spinach? Here Is Everything You Need To Know

How to grow leaf lettuce from seed

Leaf lettuce demands sunlight, although too much heat can be injurious. Causing bolting of leaves. As an introductory step, sow the seeds inside for about 4 weeks before the arrival of frost.

Amid springs, shift them outside in the fields. The purpose is to allow a shady and light sun area till the germination process pops up.

Do make a note sun is an essential element to instigate germination. So, don’t sow them very deeply. And cover with a thin layer of soil to allow the sunlight to reach them.

The soil quality of those freshly prepared beds should be highly productive and the PH between 6.2 to 6.8. Acid or lime soil burns the seeds. The soil must be moisture-laden to keep nurturing the seeds.

Spacing style is like one-inch gap between the seeds and a 12 to 18 inches gap between the soil beds or rows. 

Before shifting the sprouting seeds allow the seeds to get harder by reducing the water content. Maintain the temperature of 20 degrees.

Then translocate them to their soil beds in fields. Water them and protect them from injuries by moths and bugs.

After some time they start growing, keeping mulching the soil to retain the fertility. Once lettuce farming starts flourishing, it’s time to remove them before the frost arrives.

Harvesting lettuce

Such a delightful sight it is, to have those butter surfaced, big green crunch in the field waiting for you. Firstly, when to harvest lettuce is not restricted to the maturity stage.

Lettuce can be removed at any point in time. As it is consumable at every stage of growth. Even small leaves are demanded in the market for sandwiches, wraps, etc. 

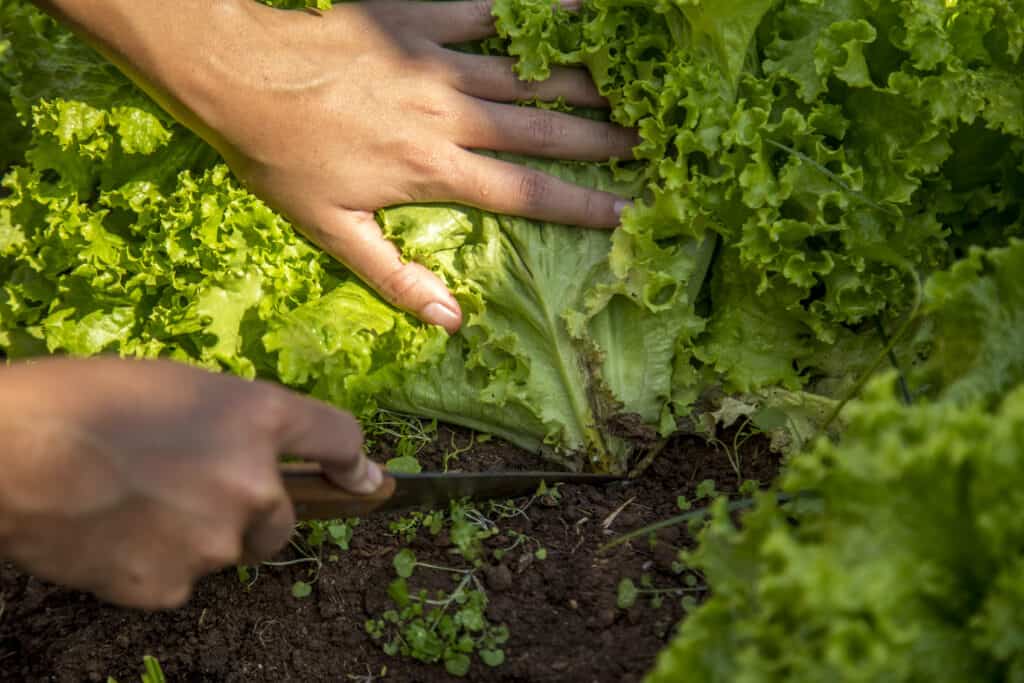
Always pluck lettuce in the early hours of the day before sunlight falling on them. To enjoy the lettuce thickens, pluck the early tiny leaves and allow the plant to grow densely.

Allow the plant to attain a bigger size. When to feel the firmness of leaves, then it’s perfect time to get the juicy leaves out. When and how to harvest lettuce is all about the firmness of the plant.

As it can be plucked anytime.

Benefits of the lettuce plant

Consumption of lettuce can be beneficial in multiple ways. Having a calorie content of 12, it is highly recommended for weight loss.

Fibrous and cellulose riches make it desirable. It assists in the breakdown of cholesterol.

Makes you hail and hearty. Strengthens the functioning of the heart.

Storehouse for omega-rich fatty acids.

Work on the protein deficiency in the body.

Conclusion

This was a brief insight into how to grow lettuce. Once you start your lettuce farming, you will get to know the profitability of this venture.

Starting the business and setting your goal towards a decent profit earning, depends on the number of efforts invested in it.

Apart from this, you have a clear picture of how much trendy lettuce has become these days.

In comparison to older times where it was considered as a fancy or lavishly consumed vegetable. Now it finds a way to the routine diet of people.

With the above information, you are already a step ahead towards lettuce farming.

Start growing your lettuce for a profitable venture.

Bell Pepper Farming: Planting, Growing, Pruning, & Harvesting

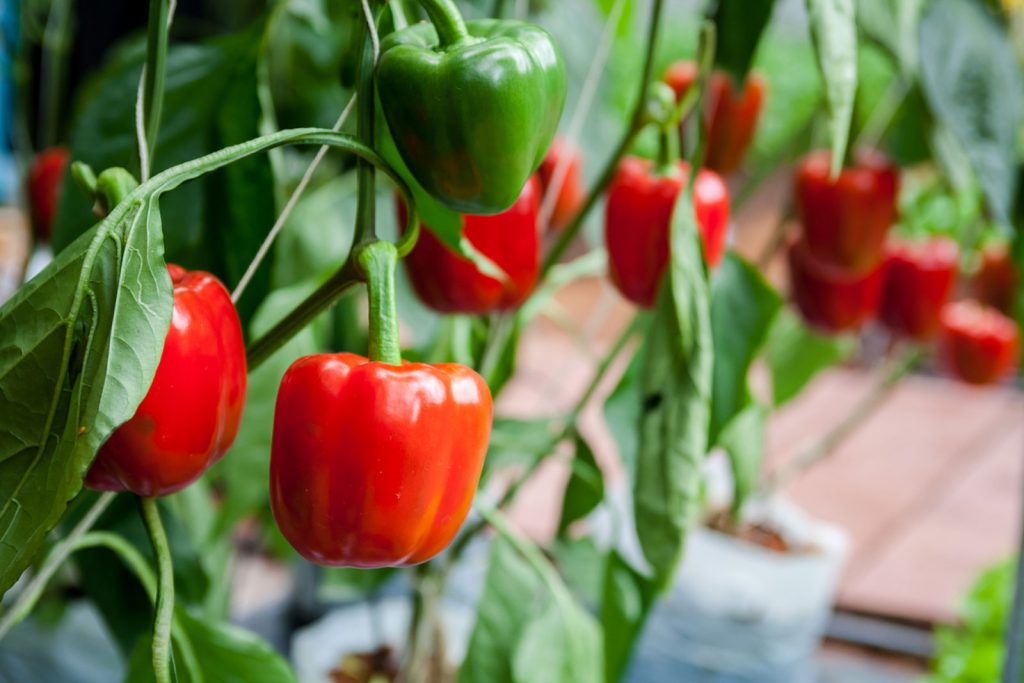
Bell Pepper crop is mainly grown when the weather is warm. These crunchy Bell peppers have some sweetness in them however they lack a component called capsaicin that gives it the heat. The external skin of the bell peppers is very smooth and provides a shield to crunchy flesh present inside.

Bell Peppers are hollow from inside and have so many seeds in the middle, attached to the white-colored membrane that lies along the wall. These are also known as the colored capsicum that is mainly red, yellow, and green. These have vitamin C and vitamin A in them.

Organic capsicum farming needs a temperature of 15 to 25° celsius and these grow very well at a height of about 2000 meters above the sea level. Bell Peppers can be grown in greenHouses and in greenHouse cultivation one can get up to 120 tonnes of yield to each hectare. 

Climatic conditions for growing bell pepper:

Bell Peppers can be cultivated in cool as well as warm conditions however extreme weather conditions are intolerable. So in summers to avoid too much heat, shading can be done. 20 to 25° C is the best temperature for germination as well as fruit set. 

Selecting the planting stuff for bell pepper plantation:

First of all, all the materials that you select for planting should be healthy. All the stuff should be diseases and pest resistant. Coming to the seedlings, for bell pepper plantation, the age of seedlings should be about 40 days. The seeding should be up to 20 cm long.

The crop should have a fine rooting system. The stem of the seedlings should possess a few leaves on it during the plantation. Selecting a good variety of all the planting material is very important for good quality fruit and high yield as well as good production. 

Must Read: How to Germinate Chilli Seeds

Soil preparation for bell pepper: 

The soil has to be properly loosened and make a nice tilth. After this beds are prepared to have heights of 45cm and 75cm wide. But before this step either vermicompost or properly decomposed organic matter along with sand and sawdust should be added to the soil.

Afterward, the beds are soaked with 4 Percent of formaldehyde and then are protected with polythene for about 4 to 5 days. Later on, these polythene covers are removed. Then the beds are to be raked regularly every day to remove the fumes of formaldehyde that are stuck in the soil. Sandy and loamy soil are best for these capsicums. For bell pepper, the pH of the soil should be 6.0- 6.8. Along with all these, this plant also requires a lot of care. 

Planting and Pruning of bell pepper:

When the seedlings are completely ready, then these are planted in the rows that maintain a distance of 60cm between them and the distance between the plants has to be 30cm. Imidacloprid is sprayed on the seedlings to prevent any pest infestation.

Pruning of bell pepper

During plantation, the bed should be watered, as the bed has to be completely wet during this process. After this, the seeds have been sown in two lines on the beds. Plastic mulches can also be used for this purpose as it also helps in controlling weeds and saving water.

Irrigation of the bed has to be done daily until the seeds are set up well. Later on, the drip irrigation method is used to irrigate the field with 2 to 3 liters of water to each square meter every day.

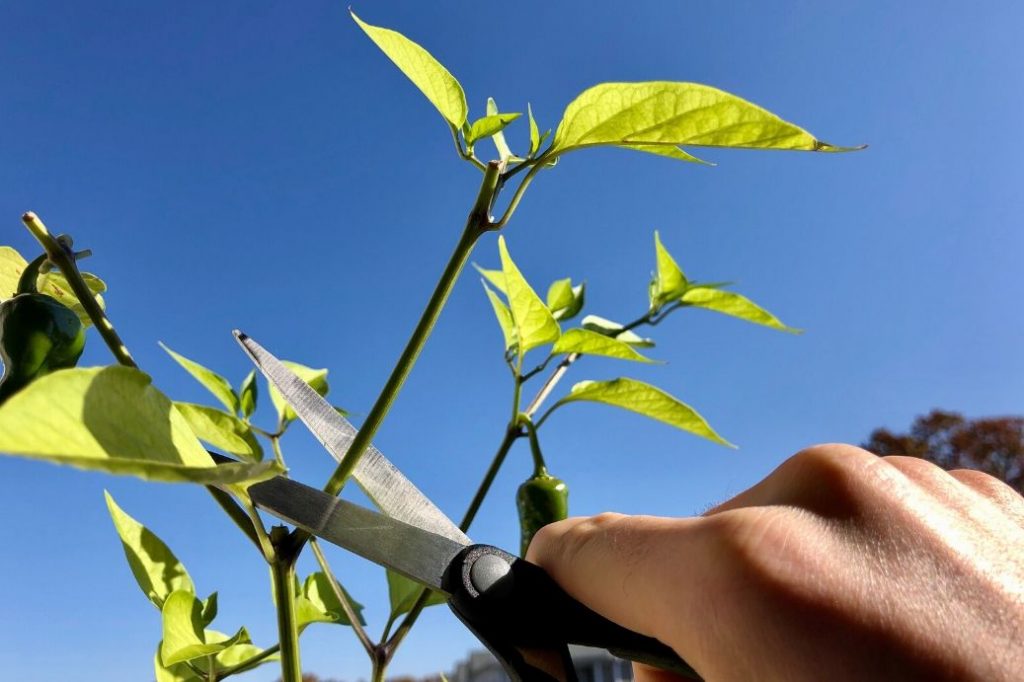
Pruning is started after about 20 days of plantation and this has to be done after every 7 days.

After the completion of 4 months, this activity has to be done once in 10 days. The seedlings of bell pepper are planted in a zig-zag pattern on the beds. 

Diseases of bell pepper: 

Mainly the disease is fungal diseases that include damping off, grey mold, pythium, powdery mildew, fruit rot, etc. 

Damping-off:

This is a disease of seeds that occurs when the plant has just started to grow. Pythium and Rhizoctonia solani are carriers of this fungal disease. In this disease, fungi destroy the root system of the plant. Some plants having this disease may have the potential to grow mature however these fungi will cause root rot and gradually kill the plant.

Growing the seedlings in an inert medium can help avoid this fungal disease however the reason for this disease can be poor sanitation in a greenhouse or improper soil, or climate or not irrigating on time can also be responsible for this.

When this crop is grown at a commercial level, the seedlings are transplanted from the greenhouse to Rockwool where the best conditions are provided and chances of any disease are also very less. Selecting fresh and healthy seeds and growing the plant under ideal conditions can help control the disease. 

Root rot or pythium crown disease:

This disease is not very common and usually occurs after the dumping of the disease. The main reason for this disease is stressful conditions in the greenhouse. This disease can be under control by growing the plant in ideal conditions and maintaining the temperature in the root zone and irrigating them from time to time. 

Fusarium stem or fruit rot:

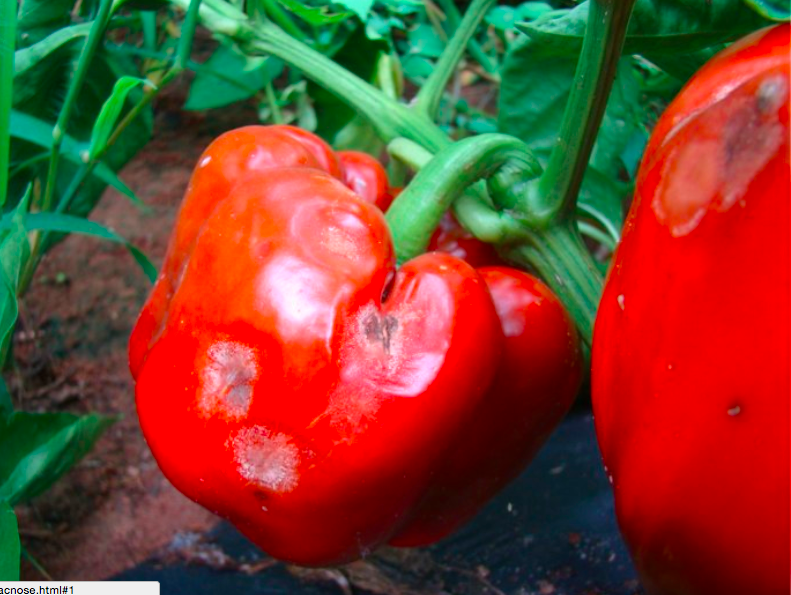
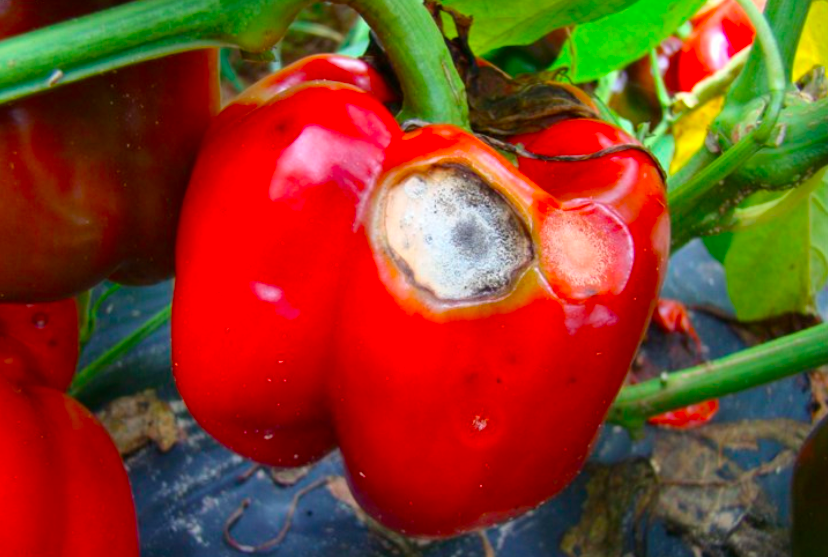
In this dark brown soft, and black lesions appear on the stems. This fungal disease is mainly caused by Fusarium solani. These black lesions may also be seen around the calyx and this degrades the quality of food.

Fusarium stem or fruit rot of bell pepper

To avoid this fungal disease, the greenhouse should be neat and clean and some sanitation should be exercised to prevent fruit rot. The plants that are infected should be immediately and carefully removed from the greenhouse to avoid the spread of disease to every plant.

The greenhouse should be properly ventilated so that it has good air circulation and talking about the humidity, it should not rise more than 85 percent otherwise it will be harmful. 

Also Read: Why Are Bottom of Tomatoes Turning Black: Blossom End Rot

Gray mold fungal disease:

The fungus Botrytis cinerea is responsible for gray mold disease. It is a very common disease. High humidity and bad air circulation favor this disease. In this disease, the fungi get into the crop from the wounded area where greenish colored lesions develop.

gray mold fungal disease in bell-pepper

These lesions griddle the stem and the plant dies at the end. The gray mold infection is usually found in the wounded area or calyx in the beginning. To avoid this fungal infection, proper air circulation has to be maintained and the relative humidity should not be more than 85 percent. 

Powdery mildew:

This is the next disease of bell pepper. This disease is mainly caused by Leveilluta Taura. This disease was first reported in Canada. In this disease, the overall crop yield decreases by 10 to 15 percent. In this disease, the white powdery layer can be seen on the surface of the leaf. 

These were some of the fungal diseases and their symptoms and control. Next comes the diseases caused by viruses. 

  • PMMV:

Pepper mild mottle virus: In this disease, any part of the plant can get infected. This disease is very difficult to detect until the plants start fruiting. In this disease further, the growth of a plant can be infected. Symptoms of this fruit occur well before the stunting symptoms and include the development of obvious bumps on the fruit as well as color streaking and green spotting when the fruit matures to color. The fruit is very sharp from the corners and may also develop sunken brown areas on the external skin.

Daily use of skim milk as a dip while handling the plants helps to prevent the spread of the virus in the crop. Skim milk has the protein that helps to bind to the virus and disables it. The virus is secure in the sap of the plant. This virus easily expands from plant to plant.

Once the plants start fruiting, PMMV (pepper mild mottle virus) can be easily detected in the plant through its symptoms on the vegetative parts of the plant. Infected plants should be pulled out very carefully and crushed because the virus can survive in a dry plant also. If all plants bear normal fruit, then it means that the plant is known disease-free and the use of skim milk can be stopped.

  • Tobacco mosaic virus (TMV)

Tobacco mosaic virus disease can be found in greenhouse pepper throughout the world. Initially, the symptoms of this virus can be noticed on the surface of the leaf-like an injury with the main veins. Along with this wilting and leaf drop can also be observed. Also when the new plants start growing, then also these symptoms and this disease can be found in the plant and even it degrades the growth of a new plant.

To avoid this virus disease-free seeds should be used. The utility of skim milk dip can be helpful. The fully grown plant may carry the disease without showing any symptoms of the disease plants. 

  • Tomato spotted wilt virus (TSWV)

Tomato spotted wilt virus TSWV has a long list of hosts that upsets almost 300 different species of plants. Thrips are the main reason for the spread of this virus, these thrips are the main problem in the greenhouse plants.

There are blackish-brown round shaped spots or tan spots that are surrounded by a black margin. 

 When the fruit ripens, the color of the fruit changes with orange to yellow spots having a green margin. Green spots can also be noticed at the backside of the ripened fruit that is red, yellow, or orange. 

Control of this virus:

This virus can be controlled by checking on the thrips and controlling them. In the starting, knowledge about thrips control and the other reasons for the spread of this disease should be gathered. One should take care of all the symptoms to avoid the disease.

Check on weed is also very important as if you don’t cut off the weeds it will suck all the necessary nutrients and the plant quality will degrade. Ornamental plants should be kept away from the greenhouse as they can also be a source of the virus.

Harvesting of bell pepper: 

The activity of harvesting can be initiated after completion of 2 months after plantation. However red and yellow capsicums take 3 months to become mature. Harvesting is done at the interval of 10 days and is carried out for almost 200 days.

Harvesting of bell pepper

After harvesting these can be stored in a cool place. These fruits are wrapped properly and then stored at a temperature of about 8° C and can be stored maximum for two months. After wrapping the capsicums, these can be packed in cartons of different sizes according to the need.  

Tips for growing bell peppers: 

  1. Mulching should be done from time to time and properly for good quality and high production. 
  2. Irrigation also has to be done properly as bell pepper needs deep watering. Especially in dry conditions watering should be done on time otherwise the fruit will taste bitter.
  3. Bell Peppers are warm climate crops and need proper sunlight for good growth.
  4. Using the correct fertilizer is very important as this greatly affect the crop yield
  5. Staking is not compulsory in bell pepper however it can help the crop to keep it off the floor. 
  6. Keeping a check on the pests is very important to avoid the diseases and hence suitable insecticides or pesticides should be used

Conclusion:

Bell pepper farming is a very fun activity as well as a profitable business. One should take care of all the necessary activities and take proper care of the crop.

Growing Spring Onions From Seeds

Spring onions also referred to as Allium fistulosum is a perennial plant. It is very delicious and versatile. They can be grown in minimal space and require little effort. 

The bulbs of spring onions can be consumed along with the greens. The whole plant holds importance and can be consumed either raw or cooked.  

Names and varieties of spring onions vary a lot. A few varieties of spring onions are- shallots (Australia), shallots, salad onions, Japanese welchbunching onions, scallions in the US, green onions (China), and Egyptian or tree onions. Some varieties have very small bulbs and some don’t have bulbs at all. 

Bulbs of spring onions can be consumed raw because they do not have much intense flavor. It can be grown from seed or bulb and can be stored easily for later use. 

The main variety of spring onion (Allium fistulosum) has no bulb in it. Allium refers to garlic and fistuosum means hollow stemmed in Latin. 

Spring onions are plants with a bulb and hollow stem covered with edible mild flavoured leaves. 

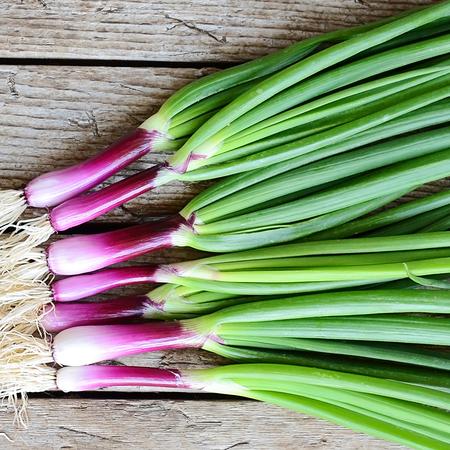
One variety of spring onions called red-stemmed spring onion is ornamental and eatable. 

Flavour-  these plants are mild flavoured. The bulb can be consumed along with leaves. Flavours of spring onions vary with variety from strong to sweet and mild. 

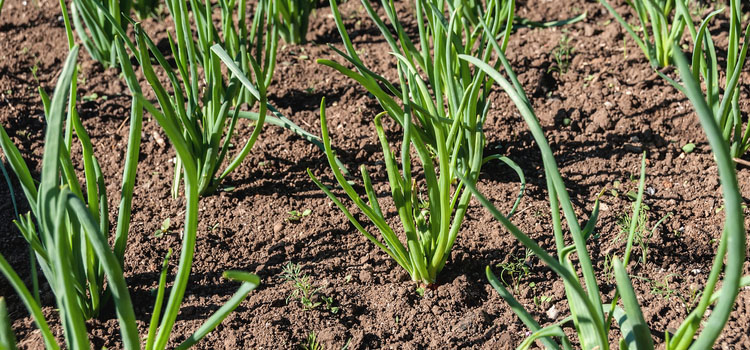
These perennial vegetables can be grown easily with very little effort and in minimal space. They are generally grown in subtropical regions. However, in cooler areas, such vegetables can be grown in nurseries. They can easily grow well in containers and even in the water on the kitchen bench. 

Height- The height of these plants ranges between 35-50 cm (12-20inch) singly or in clusters. The height of plants generally depends upon their variety. The root system of spring onions is very shallow. Therefore they can be easily grown in small pots. 

Growth of spring onions

Safe organic certified seeds can be used to grow healthy spring onions. 

Plants can also be grown from seeds saved from previous crops. 

Here is the way to collect seeds from spring onion plants- 

First, wait till the flower head of the spring onion matures fully. They chop that flower off and store it in place to dry it off. Place it to dry for around 2 weeks. Shake the seeds and scoop them out after they are completely dried. Store them in cool and dry places and seal them completely so that they do not get in contact with moisture and germinate. 

Spring onions can be stored for at least 2 years in dry places. As the age of seeds increases so does the time for germination of seeds. Germination of seeds is fastest when they are fresh. 

To grow healthy plants, you need to provide them with proper nutrition too. Homemade seed raising mix can save loads of money and is organic at the same time. 

While growing spring onions keep them moist and do not let them dry. if seeds dry out, this can lead to death. Plus, you can cover them to maintain humidity. 

You can also transplant them when they reach a height of around 15 cm. Buy 15 cm seedlings and plant them in your home garden. 

Choose varieties that suit the climate of your region. If you belong to colder regions then use the hardiest spring onion that is red welsh. Benizone variety also grows well in cold areas and has violet coloured stalks. 

Commonly preferred varieties of spring onions are mentioned below-

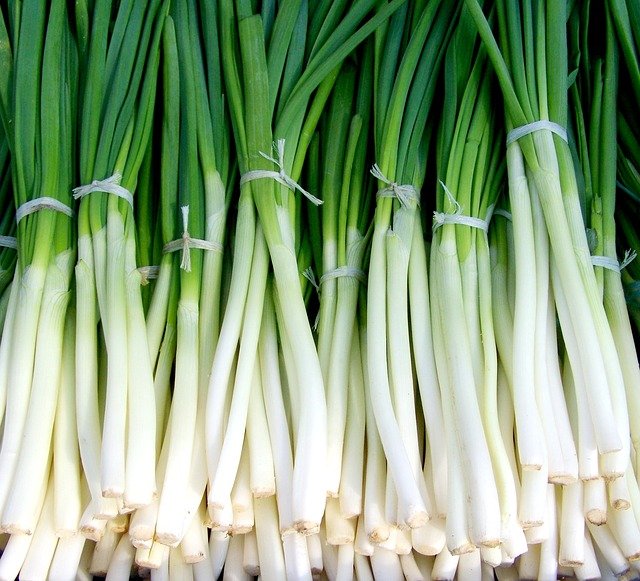
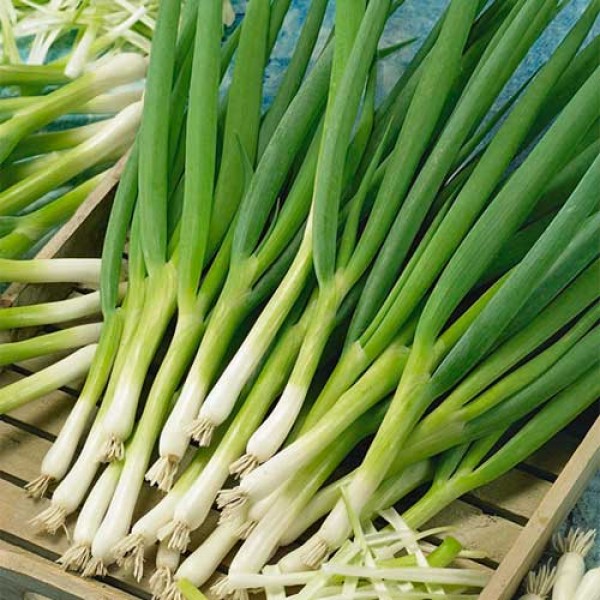
Spring onion ‘white Lisbon’

Spring onion white Lisbon

They have a short cropping time and are great for overwintering. Due to their easy growth, they are a perfect choice for new and inexperienced gardeners. 

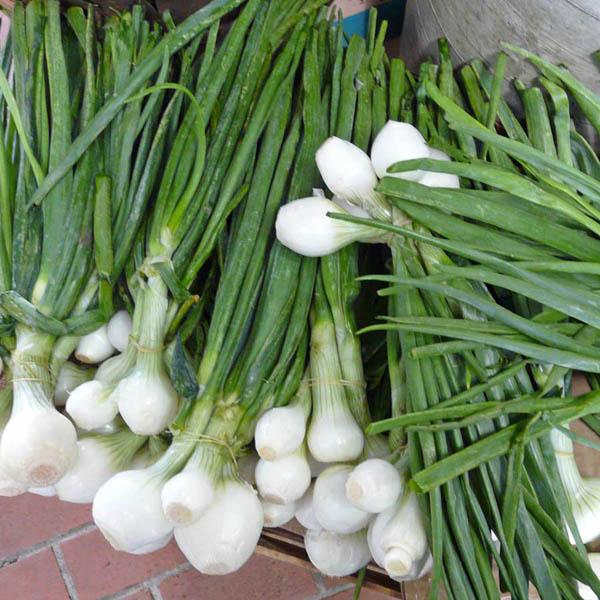
Spring onion ‘Pompeii’-

Spring onion Pompeii

The bulbs of this variety are rounder in shape and silver-skinned. They are best for picking ad serving on cocktail sticks

Spring onion ‘apache’-

This red variety has a very good flavor as compared to others. It has a crisp flavor and adds color to salads. 

Spring onion apache

Spring onions feast F1 hybrid- this one is outstanding and all-rounder. Successive sowings to harvest all summer long. 

Spring onions should be planted every 3-4 weeks to ensure a regular supply of spring onions. 

Must Read: Onion Farming, Planting, Care, Harvesting

Sowing seeds

Soil for sowing seeds must be fertile and well-drained. Prepare the soil beforehand of sowing seeds in it. Use fertilizers or manure to make it fully nutritious. 

Sow seeds of spring onions in 5mm ( ⅕ inch) deep holes. Place them at least 5mm apart and in 15 cm apart rows. They need around 8-12 weeks to mature. They do not require to be thinned because you will pull them when they mature and use them straight. 

Soil is used for planting spring onions must be well-drained. Spring onions hate loamy or too wet soil. They can rot or even die with excess amounts of water. Therefore, choose well-drained soil and it should be loose and friable. 

You can also add compost or manure to make it nutritious for plants. Worm castings and liquid fertilizers are also preferred by people.

the pH of the soil must be around 6-7. If it is too acidic then add sulfur to make it normal and if the soil is too basic then add lime to make it usable.

Placement of plants for proper growth should be in well-lit areas. The sunny position ensures good and fast growth in spring onions. Ensure regular watering for proper growth. 

For greener leaves of spring onions, you can use liquid seaweed, a weak worm juice, or compost tea. 

Due to the shallow root system, spring onions can be easily grown in small pots or containers. 

Avoid planting spring onions near peas or beans. Also, drying out or stress is completely disliked by these flavored perennials. Competition from weeds can lead to weak plants because of a lack of nutrition. Further, keep them full at all times. Hungry plants will become weak and non-delicious. 

Tip-  you do not seed for growing spring onions. You can grow spring onions from bought spring too. Here is how- 

Cut them from around 1 inch above the bulb. Now you can use the above portion of leaves in cooking. The leftover should be placed in a container filled with water. Dip the bulb in water and place it in sunlight or near your window. Do change the water every day. After 2 days you will observe stem growing. You can cut the tops again and leave it growing more. 

How long does it take for spring onion seeds to germinate?

So further you might be wondering, once you sow the seeds; when will the seeds germinate?

It takes around 2 weeks for seeds of spring onions to germinate. Germination slows at lower temperatures like 6-7C. However, if the temperature is raised then germination speeds up. The optimum temperature for germination is 10-35C. Therefore, it is evident that this crop germinates fast in warmer conditions. They can even germinate in as little as 4 days if temperature conditions are favourable. 

spring onion seeds germinating

Artificial practices like the usage of bottom heat can help raise temperatures and speed up the germination process. 

Once they grow up to a height of 8-10 inches you can transplant them into your home garden in case you sowed them in a container.  

When to harvest spring onions?

Spring onions are ready to harvest when they reach a height of 12-20 inches. They mature in around 8-12 weeks. If you wish to harvest strongly flavored spring onions, then let them mature over 8 weeks. Mildly flavoured spring onions can be harvested early. 

Spring onions can be used as a filler crop too. Grow them in between other slower growing vegetables to keep your soil healthy and working. 

Harvesting Spring Onion

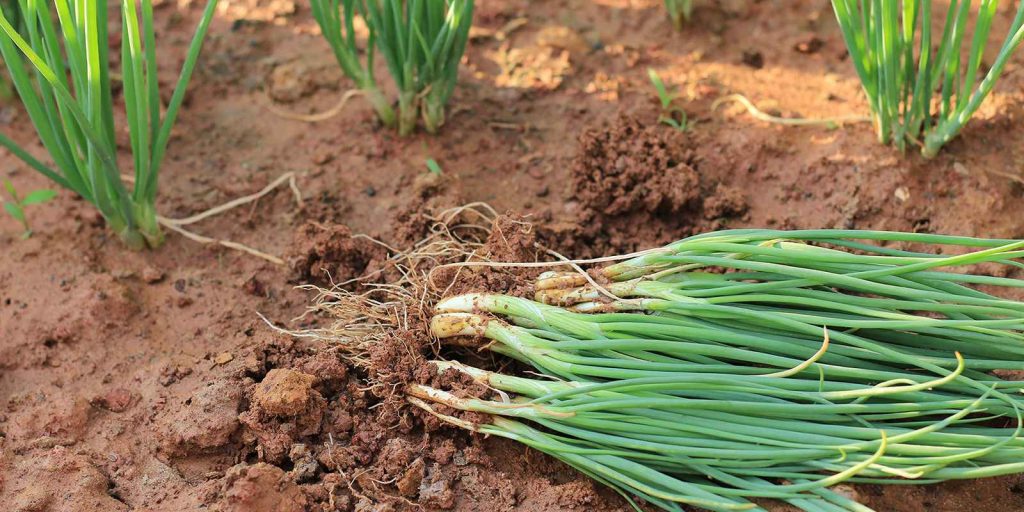
Once they are tall, green, and healthy-looking, they are ready to harvest. You can even cut greens with a scissor at least 3 cm above ground level. Then leave bulbs in the soil to grow more. you can water the plant with seaweed for faster regrowth. Snipping of outer leaves encourages more growth in plants. Depending on varieties, some spring onions are white while some develop brown bulbs. 

In colder temperatures, you can grow spring onions in water inside your house to maintain temperatures. 

Storage 

Use flowers on spring onions to obtain seeds and save them for further use. 

After harvesting spring onions, wrap them in plastic. Edible flowers of some varieties can be harvested for use in salads, stir-fries, or for garnishing purposes. 

Health benefits of spring onions

Spring onions are full of health benefits. The presence of various nutrients makes them very healthy. Along with nutrients, the taste of this vegetable is also very good. 

They help in lowering cholesterol. They also have antibacterial and antifungal properties. Spring onions also benefit people by relieving sinus and chest ailments. 

Asthma and bronchitis ailments can also be treated by the consumption of spring onions regularly. Further, spring onions also contain anticoagulants. This helps in the thinning of blood and lowers the risk of a heart attack. 

The presence of high sulfur content in spring onions purifies blood, makes skin clearer, cleanses the liver, and improves immunity. 

Few recipes of spring onions 

As already known spring onions are loaded with deliciousness and their versatile nature makes them readily useful. They can be used to make stir-fries, used in salads, making dips, chutneys, salsa, omelets, and even used as garnishing. 

Spring onions taste so delicious when raw and even when cooked. 

Mature bulbs are strong flavoured and young slender leaves are mildly flavoured and can be enjoyed in various recipes. They are most nutritious when raw. 

You can even put them in rice, noodles, soups, pasta, eggs, or casserole to enhance the flavour and make your dishes even more delicious. 

Pest and diseases

Onion thrips 

Thrips are the main organisms that affect spring onions. They are small sucking insects and are active in warmer months. Dry and warm conditions are favorable for the growth of such insects. 

To avoid problems, keep a check on the center of plants regularly. Keeping them moist will keep most of the problems away. Tiny thrips usually attach themselves to new leaves. They cause the appearance of white, silver, and grey blotches on leaves. 

Downy mildew

This disease results in white to purple furry growth on the surface of older leaves. Leaf tissue becomes pale then yellow and collapses eventually. This disease is spread by wind. It is the main disease that occurs in spring onions and shallot production. 

Alternate fungicides can be used to cure the disease. 

Grey mould

Cool, moist springs result in the spread of this disease. Symptoms in this disease are rotting of the bulb and sunken lesions on the side or base of the bulb. Fungicides can be used to treat this disease. 

White rot (Sclerotium cepivorum)

Yellowing, wilting, and death of leaves are observed in infected plants. Decaying of leaves begins at the base and older leaves are affected at first. Fluffy mycelial growth is observed on the bulb. 

The severity of this disease varies with regions. Regions like SA and VIC are majorly hit by this disease. 

Fungicides are not being used yet to treat this disease. However, soil can be gotten rid of the fungus. Plus, Trichoderma can be used as a biological treatment. 

Further, carrot flies are also harmful to spring onions. You can keep carrot flies away by growing them between carrot plants.

Use horticultural fleece to protect them from birds. 

Conclusion 

Spring onions or shallots are so easy to grow and maintain. They do not require much space or effort of yours. Growing these perennial plants is interesting and fruitful. 

Whole spring onions can be consumed except roots. The white bulb is strongly flavoured and tender in texture while the green part is crispier and has a mild flavour. 

With amazing health benefits and delicious taste, these vegetables are a must-have for your garden.