Growing Mint – Ultimate Guide

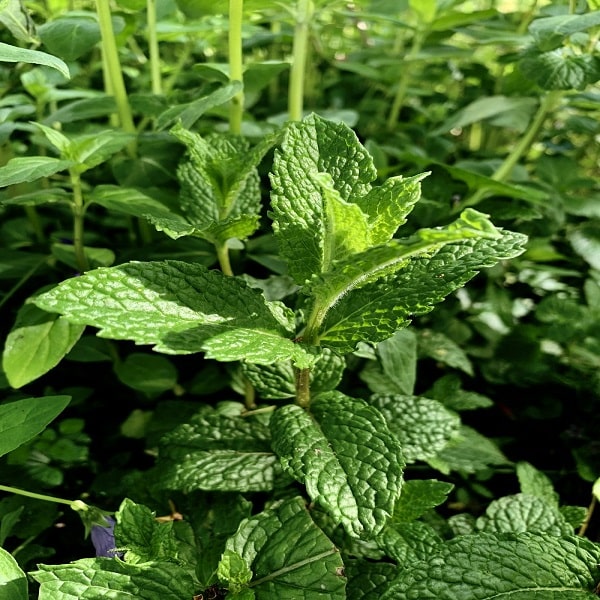
Mint is a tasty, versatile herb used to flavor a fruit salad, lamb or fish dish, or even an iced tea or cocktail and you should know how to grow mint. Mint comes in various flavors, each of which is simple to care for and can last for several years if properly cared for.

However, if left to grow unchecked, the plant may become invasive and compete for nearby plants’ resources. To grow mint, you’ll need to either plant it in containers or find a way to keep its roots from extending too far below ground. Know about how to grow mint and make your garden greener.

List of things you should take care of for mint plant

Light Mint grows best in part shade, but it can be grown in full sun if watered regularly. Planning to know about how to grow Mint at home should include the following steps.

Know about the things you should consider before growing Mint. 

  1. The soil

Mint grows best in a thick, slightly acidic soil with a pH of 6.5 to 7.0.

If the soil is deficient, top-dress with the organic matter once a year and add an organic fertilizer after shearing in the middle of the season. You can also grow Mint from cuttings.

  1. Source of water

Mint needs consistently moist soil with good drainage. Mint plants love water, but they can’t tolerate wet feet or soggy dirt.

It’s probably best to water the plants first thing in the morning so that they have plenty of moisture by the time the afternoon sun arrives.

  1. Humidity and Temperature

The hardiness of your mints can vary depending on the species, but they are very adaptable. Peppermint is a hardy plant that can withstand the cold in USDA hardiness zone 3.

Spearmint is the best heat-tolerant plant and can be grown in zones 11 and 12. Increase humidity by m if you’re raising Mint indoors. You should know how to care for the mint plant.

  1. Type of fertilizer

As new growth emerges in the early spring, feed container mint a healthy, all-purpose liquid fertilizer. After that, fertilize every four to six weeks for the rest of the growing season. Potted plants that are constantly watered lose nutrients more quickly.

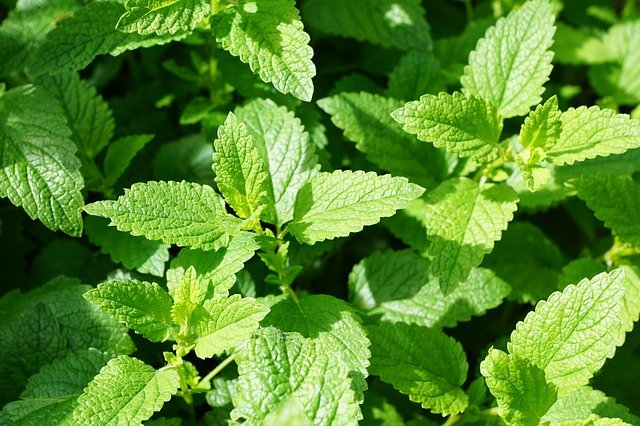
How can you grow Mint?

Mint is a fast-growing plant that prefers an organically rich, well-draining soil with a pH of 6.0 to 7.0. USDA Hardiness Zones 3–8 are suitable for the plants. Plants prefer full to partial sun, and variegated varieties can need shade from the hot afternoon sun.

Feed with a portion of all-purpose, water-soluble plant food, such as 10-10-10, until new growth emerges in the spring (NPK). If required, fertilize again in the middle of the growing season. Harvest leaves regularly after the plants have formed themselves.

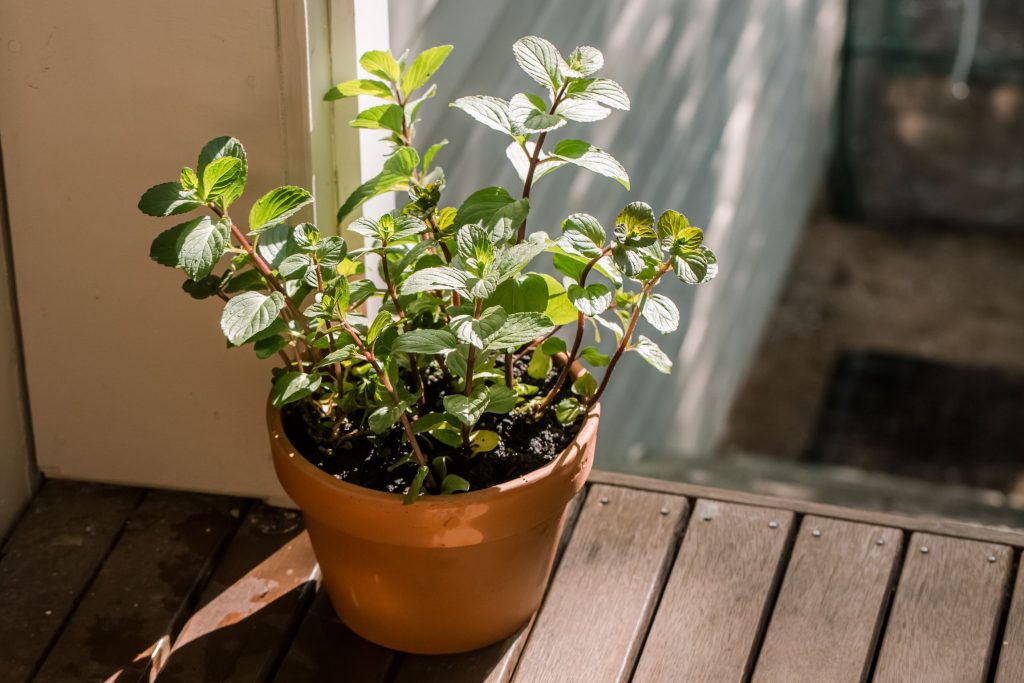
How can you grow plants in containers?

Mint plants in containers should be spaced 12 to 24 inches apart in the garden to keep growth under control. You can use wide containers with a diameter of 8 to 24 inches and a similar width.

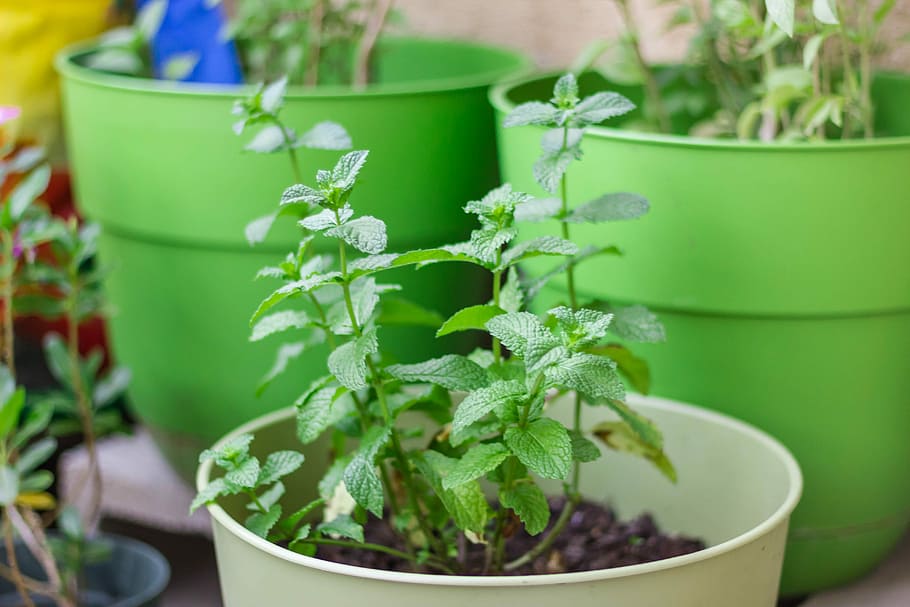
The boxes should be sunk into the garden beds, with the top two inches of the rim remaining above ground. This prevents runners from escaping and establishing new plants in fertile soil. To boost drainage, amend the soil with 1/3 aged compost or other rich organic matter and 1/3 landscape sand.

To avoid the roots from resting in water, make sure there is plenty of material covering the drainage holes in the pots, such as coir, pebbles, or broken pottery. To prevent the roots from spreading through the drainage holes, turn the banks in the ground every 14 to 28 days. 

Must Read: How To Grow Cilantro

How can you take care of your mint plant?

To keep the plant from taking over, bury some metal flashing or landscape edging 8 inches deep around it. Mulch potted and in-ground plants with a 2-inch layer of straw to keep weeds at bay and maintain moisture.

Mint plants can survive a light freeze, but their top growth may die back in the winter. If your winters are rough, cut back stems to the ground in the fall and cover with a 2-inch layer of mulch. You should also be aware of how to grow Mint at home.

Can we grow the mint indoors?

If necessary, add 1/3 of landscape sand to help with drainage. You should know that how to grow Mint indoors. Ensure that the bottom of the pots has plenty of drainage material, such as broken pottery, gravel, or pebbles, and that the soil is moist but not wet.

Fertilize in the spring and again in the middle of the growing season with an all-purpose liquid plant food like 10-10-10 (NPK). Give your containers some afternoon shade to avoid heat stress and ensure a consistent harvest. Plants in containers should be divided every 3 to 4 years to keep them healthy.

How can you take care of your mint plant?

Keep the following tips in mind for fast growth and a plentiful harvest.

  • Enable the soil to remain moist; these plants need a lot of moisture.
  • In places where the sun is hot in the afternoon, have some light shade.
  • Plants can be kept from spreading by growing them in containers or using landscape barriers. The mint growing season is autumn.
  • To attract pollinators, encourage some plants to flower in the garden.
  • To help plants conserve moisture, cover them with a 2-inch layer of mulch.

Harvesting of mint plant

If you’re starting from seed, this should take about two months, but if you’re buying nursery plants, it should take less time. To avoid weakening the plants and bringing them into decline, never harvest more than one-third of the plant at a time. You should be aware of when you can start harvesting Mint.

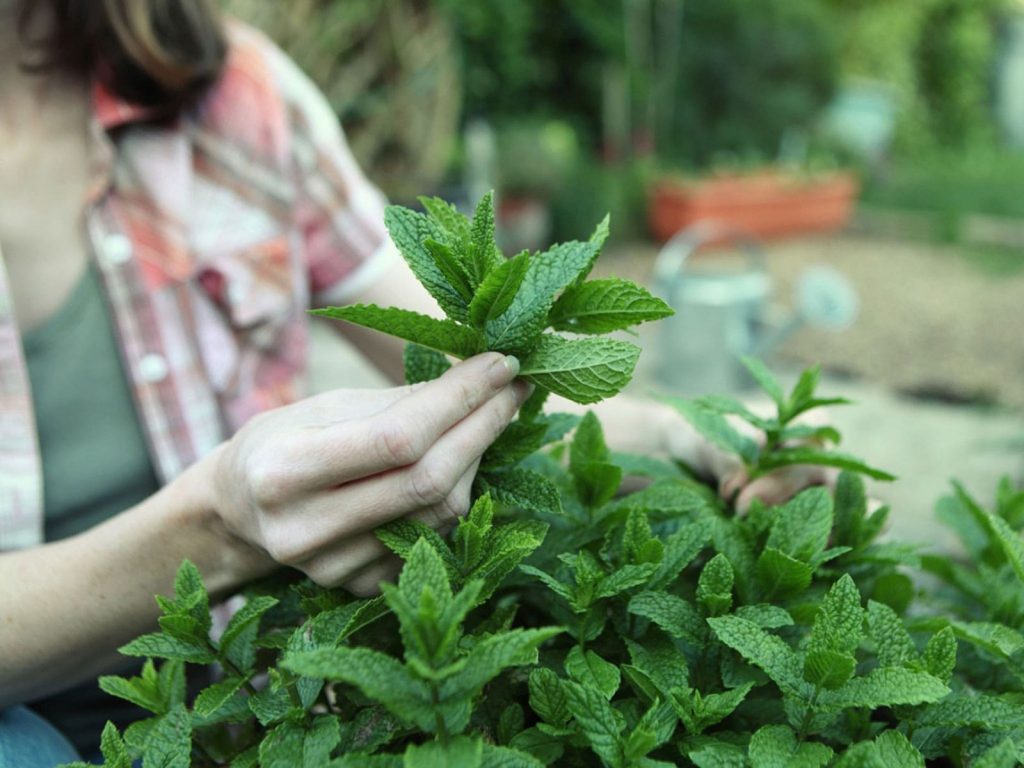
As required, snip sprigs and leaves. If you don’t harvest your Mint regularly, shearing it in the middle of the season would greatly help it. You’ll probably see the stems getting longer and the leaves getting shorter at some point. Now is the time to cut the plants back by one-third to one-half of their original size. This will motivate them to send out new messages.

Conclusion 

Mint doesn’t need anything other than moisture and fertile soil. It’s difficult to destroy a mint plant. If you let it, it will take over your backyard. To keep the plants lush with leaves, harvest or shear them.

Sow seeds outdoors in late spring or indoors eight to ten weeks before the last frost. Maintain a moist atmosphere before the seed germinates. Mint seed takes 10 to 15 days to germinate. Within two months, seed-grown plants should be ready to harvest. 

How to Increase the Production of Okra?

Okra is a vegetable commonly known as ladyfingers in many countries. These plants are very simple and easy to grow. Okro, gumbo, kopi, Arab, and bhindi are some other common names of okra pods.

This crop can be grown in different varieties of climate and soil. It requires plenty of sunlight. Also the roots should not remain wet for a long time. However, climate plays an important role in okra production. Cold climate is not very suitable for okra. They require proper temperature for germination of seeds. 

To products a big crop yield you must be aware of how to increase production of okra?

Keep in mind the steps mentioned below to increase okra production.

Why are my okra plants not growing?

There can be a number of reasons for improper growth of your plants. Some of the common reasons for this are: 

  • Lack of proper sunlight: sunlight is very important and main factor for growth of okra. It needs sun for 7-8 hours daily. Hence if the crop doesn’t get sufficient sunlight then it will not bloom. 
  • Heat: Heat is very important for okra as cool climate will lead to rotting of the seeds. The temperature of soil should be at least 70° F. Therefore heat is necessary however if the plant doesn’t get sufficient heat then it may end up growing improperly. Hence it is said that areas having plenty of sunlight are most suitable for okra production
  • Not getting enough water: Though okra is a plant that doesn’t need much water and can survive in less amount of that for a good and healthy plant it is important to water the plant from time to time. 
  • Improper nutrition: It is clear that if a plant doesn’t get sufficient amounts of nutrients required then growth will definitely be affected. Hence to avoid this situation, one can add necessary fertilizers to the crop to fulfill the need of nutrients. For example, adding phosphorus is beneficial for flowering. 
  • Right time: Usually the plant matures in 55-65 days but sometimes it may take a bit longer. Nothing can be done in this situation except wait. One should have patience and wait for flowering.

Must Read: Planting and Growing Okra Step by Step

What to do with the wilted seedlings? 

Wilted seeds are a common problem that you may often face. But it is not a big deal if you take necessary action on time. Keeping your crop hydrated can save them from wilting.

If you find that your plant is wilted then water it until the soil becomes moist. Then wait for about an hour and if you feel that the soil is dry then water it again. 

Usually, in hot and dry climates the water gets evaporated very fast hence leads to wilted seeds. To treat this you need to water the plants at regular intervals. But before irrigation, put your finger in the soil 1-2 inches deep and check whether the soil is dry.

If the soil is dry then water it. On the other hand, if the soil has moisture then the reason for wilting is not lack of water. Excess sun or wind or any pest or disease may be responsible for this. So to avoid this change the position of the plant and shift it to an area where the sunlight is not direct or excess. 

Next, if the problem is excess  water then for that one can make some holes on the surfaces of soil, this will allow the water to penetrate to the soil. Also to avoid this one should check the soil before watering. 

Along this remember that you don’t keep your plant in a pool of water as this can lead to yellow leaves. 

Also Read: Why Are My Papaya Leaves Wilting

How to get rid of aphids on okra plants?

Firstly aphids are small-sized insects that feed on the plant and suck the nutrients. These insects cannot be recognized easily. They are very tiny in size and can not be easily seen with naked eyes.

Okra exists in a variety of colors like yellow, brown, light green, pink or black. They have a waxy or wool-like coating on the surface. They have long antennae on their pear-shaped body. There are different methods to control aphids like:

  • Aphids are not very friendly to cold water. Hence one you spray chilled water on the leaves, there is no coming back of aphids on the same plant. 
  • Flour can be another cure to aphids. Flour constipates the aphids hence can be sprinkled on the plant
  •  Neem oil also has properties to destroy aphids. Along this insecticidal soaps or any dish washer solution can also be used. 
  • Diatomaceous earth is an organic material that will vanish the aphids without harming the plant. 
  • Isopropyl alcohol can also be used to control aphids. Ethanol however is also a great option. 

Why is my plant not Blooming?

There can be different reasons for this but insufficient water is one of the main and common reasons for not Blooming. Along with this improper sunlight also delays blooming. Pruning of the plant on time is very important in this cultivation.

Hence if you don’t do this activity on time, then plants may not show flowering. Hence one should take care of all the above-mentioned points so that your plant blooms on time.

Homemade fertilizers of okra plant: 

You can prepare fertilizers for your okra plant at home and increase production of okra plants by multiple folds. Preparing fertilizers at home will surely improve the quality of it as well as will be organic. A list of homemade fertilizers is given below: 

Compost:

Compost is very common as well as easy to prepare. It is used by many cultivators for all types of crops. To prepare this, dig up a big hole in the ground. Put a layer of soil mixed with dry leaves. Then you can add a lot of things like kitchen waste like vegetable and fruit peels or other kitchen waste, paper, clothing, etc.

After that again cover it with a layer of soil and leaves. You can add such types of waste products afterward also. Now leave this for 45 days and your compost is ready. 

You can also make a very nutritional solution for your crop again using your kitchen products. You can use the left over water or water from the vegetables or water left after washing your cereals. Whether it is pasta or eggs you can use all of them. Collect all the water and let it cool and you can use it. Also you can use hot boiling water on weeds to destroy them

Eggs shells

Eggs shells can also provide some nutrients to the plant. You can use all the leftover eggshells. Dry them properly and then grind them. Hence they are ready to be used. These contain calcium carbonate that improves the fertility of the soil. 

These are some of the homemade fertilizers that can be used for your crop

Bottom line:

okra crop is one of the easiest crops to grow. However similarly as other crops they need proper care. In this article you can learn about some facts and points  that you should know if you are growing okra crops and wish for higher crop yield than usual.

How to Grow Cherry Trees- A Complete Guide

Cherries are those eye-catching red stony fruit which is loved for their sweet taste. People love the mesmerizing view of the spring blooming cherry trees with white and pinkish flowers.

We just have to find out how to grow cherry trees. Growing cherries is trending these days. As they can be preserved and are much in demand. 

Apart from a common thought that cherries can grow on big grounds, you can add a look and grace to your home gardens as well.

Even, they improve your health status also. Like curing arthritis and gout. Improves blood circulation and is good for the heart also.

Let us have some insights into the entire process of cherry cultivation.

Where do cherry grow?

Where do cherry grow? Cherries thrive happily in the zones receiving enough sunlight, with a cold climate and perfect wet soil. However, this icy cold climate varies among different species of cherry.

Soil should also have a PH value between 6, which means a bit acidic. The sun rays should be on the plant for 6-8 hours.

Because excessive cold climate can make cherry plants dormant. These conditions make for a perfect cherry plantation.

Selection of seeds

You need to choose between the varieties of cherry and then analyze your climatic conditions for how to grow cherry trees. 

Selecting cherry seeds entirely depends on the climatic conditions prevailing in your area. And for the soil, you have to make it fit for growing your cherry plants.

Can you grow a cherry tree from a pit?

Well, you must be thinking can you grow a cherry tree from a pit?  In your backyard or home garden. The answer is yes.

This is an amazing idea to grow a cherry tree from a pit. You ought to have patience, as it is a time taking activity.

The trees can produce flowers very late and not sure all those turns into sweet tasty cherry fruit.

Cross-pollination adds life to the reproduction process. With enormous and dedicated management and hard work, you can have cherries from the pit. Seeds are prepared for it first. Let’s check out how.

When those pulpy balls find their way to your stomach, save those leftover seeds. Instead of throwing them, just dip them in warm water and clean them.

Allow them to dry on a paper or towel for 5 days. After that place them in a plastic container covered with a lid tightly. Now, carefully this container is allowed to rest in a refrigerator for 10 weeks.

This is a preparatory step as to how to grow cherry trees. 

Planting cherries

Remove those dormant cherry pods and allow them to rest at room temperature for 3 hours.

You need to place these tiny pods in soil pots, each with 2-3 pods in number. Place the pots in sunlight with keeping the soil moist.

You can observe seedlings sprouting from those cherry pods. On gaining some height they tend to be kept inside on colder nights. 

The moment your cherry plant starts flourishing, plant the seedlings out at a distance of 20 meters from each other.

At this point, they are 10-12 inches tall. And this is how to grow cherry trees.

Also Read: How do pineapples grow? – A complete guide

Protecting cherry trees from wildlife

The worst enemy of cherry trees is wildlife. These rabbits, reindeer, and other animals hunting for fodder end up eating these tasty plants. 

You can tie burlap around the plantation. Yes, they are effective but unwrap them when the spring approaches to ensure proper sunlight to the tiny tots.

Once they attain maturity, they become out of reach and they are safe anyways then.

Apart from how to grow cherry trees, you should also be aware of how to save them.

Do cherry trees need full sun?

You must be wondering, do cherry trees need full sun? Yes, they do.

These cute little red bulbs need full sunlight. Let’s define FULL SUN. Full sun means sunlight of 8 hours.

Yes, you heard it well, a complete 8 hours of sunlight will work wonders. It is mandatory, otherwise, they will end up having a straggly stem, discolored fruit, and that is not done.

When to plant cherry blossom trees

The amazing, tasty, and world-famous cherry blossom is the home production of Japan. These cherry blossom plants were given to the USA as a token of gift in the early of 19 century. Later the USA also started with the production of cherry blossom.

A cherry blossom plant needs explicitly nutritious and productive soil. Soil should not be waterlogged and a minimum of 6 hours of sunlight is a necessity.

Proper spacing of 20 feet should be maintained between the plants. Fertilization is the key to how and where to grow cherry.

Now, for when to plant cherry blossom trees you should wait for the frost period to get over, this supports a speedy and good growth of the plant.

Growing dwarf cherry trees

Dwarf cherry trees look cute with their smaller size. The size of the tree does not affect the size of the fruit.

If your backyard can’t accommodate tall cherry trees, growing dwarf cherry trees is an option. With these trees, you can still have that alluring sight of light bounty flowers in the spring. 

These dwarf trees are obtained by grafting. They are 6-8 feet in height so, they find a perfect place in your backyard. Initially, they can be planted in pots or containers.

Their upkeep is also easy like pruning. Sandy soils are apt for these trees. The condition remains the same. It should be a well-drained one.

How long does it take for a dwarf cherry tree to grow?

These are cultivated for their explicit capacity to withstand extremely cold temperatures. Dwarf structure and too much pulp is the outstanding feature of these dwarf cherries.

Growing dwarf cherry trees follows the same process nothing different, they are planted and taken care of, in the same manner.

With dwarf cherries, you need not wait for how long does it take for a dwarf cherry tree to grow? As in comparison to normal cherry trees bearing fruit in 10 years, you have them in 3-5 years in your backyard.

Pruning in cherry trees

In the case of cherry plantation too pruning is required. Trimming ensures the removal of dead and unwanted parts from the plant.

It promotes good health and growth of the plant. The plant is disease-free and also free from abnormalities.

Fertilization of cherry plants

Cherry cultivation needs a handful of good organic fertilizers. In 10 years, the plantation needs a combo of Calcium ammoniate, potash, and superphosphate to thrive well.

Good manure promotes rapid growth and productivity of the plant.

Growing cherry trees in Australia

Cherries do cause a bit of hassle as they are typically cold climate lovers. Don’t lose hope. Even Australia can have their cherries. Growing cherry trees in Australia is not MISSION IMPOSSIBLE. 

There are species of cherries that love Australian weather too. Some variety of dwarf cherries do well in mild cold and don’t grow too tall.

They can be grown all year-round. Those juicy, pulpy cherries can be grown at much ease.

To grow cherry trees in Australia all you need is well-drained humus soil, with a PH scale of 6.5- 7. Proper mulching should be done to ensure the soil temperature.

As cherries can’t stand too much water though need water every day in summers. The soil should be moist.

Pruning should be taken care of. And all this trouble is worth taking. When you have your cherries to eat.

Must Read: Strawberry Farming – A business that promises a “delicious” future

Wrap up

Well, the above-stated information is enough. So how to grow cherry trees is no more a query.

You have to tighten your shoes and get into how to grow cherry trees. 

Sow the seeds in this winter and you have them ready by the summer for those yummy shake toppings.

Cherries look good for Christmas gifting and are delicious too. Now with all the complete knowledge about growing cherries, you can accomplish your goals for having home cherries.

They are easy to grow, don’t require a gross procedure. Especially those dwarf cherries beautify your backyard with the bunch of red pulpy cherry fruits hanging on them.

Apart from satisfying your taste buds they are contributing towards health as well. Anti-oxidants help in curbing cancer growth. Good for the heart as well.

So, you have enough on how to grow cherry trees just execute it and enjoy the yummy cherries from your backyard.