How to Practice Mindful Cooking

Mindful cooking is the art of preparing food with full attention and presence, turning a routine task into a meditative and enriching experience. By focusing on the process rather than rushing to the outcome, mindful cooking helps foster a stronger connection to the food we eat, cultivates gratitude, and enhances mental and physical well-being. Here’s a guide to help you integrate mindfulness into your cooking routine.


What is Mindful Cooking?

Mindful cooking involves being fully present during every step of food preparation, from selecting ingredients to serving the final dish. It emphasizes the sensory experience—how ingredients look, feel, smell, and taste—and encourages an appreciation for the effort and resources involved in bringing food to the table.

Unlike multitasking in the kitchen, mindful cooking is about slowing down and savoring the process, making it a practice of self-care and mindfulness.


Benefits of Mindful Cooking

1. Reduces Stress

Focusing on the present moment while cooking helps quiet a busy mind and relieves stress. The repetitive motions of chopping, stirring, or kneading can feel meditative.

2. Enhances Creativity

Cooking mindfully allows you to experiment with flavors and techniques, fostering creativity and joy in the kitchen.

3. Builds a Better Relationship with Food

By paying attention to ingredients and the process, you gain a deeper appreciation for the nourishment food provides, encouraging healthier choices.

4. Encourages Gratitude

Mindful cooking helps you recognize the journey of food—from farm to table—promoting a sense of gratitude for the people and processes involved.

5. Improves Mental Clarity

The focus required during mindful cooking can help clear your mind of distractions and enhance your overall concentration.


How to Practice Mindful Cooking

1. Prepare Your Space

Start by creating a calm and organized cooking environment. Declutter your workspace and gather all necessary tools and ingredients. A clean and tidy kitchen sets the stage for focus and relaxation.

  • Tip: Play soothing music or light a candle to create a peaceful atmosphere.
  • Focus: Let the act of organizing your space become part of the mindful experience.

2. Choose Ingredients with Care

Mindful cooking begins with selecting quality ingredients. Pay attention to their freshness, color, texture, and aroma. Consider the source of your food and its impact on your health and the environment.

  • Tip: Visit a local farmers’ market or grocery store and consciously select your ingredients.
  • Practice: As you pick up an ingredient, take a moment to appreciate its journey and purpose.

3. Focus on Your Senses

Engage all five senses during the cooking process. Notice the vibrant colors of vegetables, the earthy aroma of herbs, the sizzling sound of food on a pan, and the tactile sensation of kneading dough.

  • Smell: Inhale deeply as you chop herbs or spices.
  • Touch: Feel the textures of ingredients—smooth tomatoes, grainy salt, or fluffy flour.
  • Listen: Tune into the sounds of slicing, sizzling, and simmering.
  • Taste: Sample as you cook, appreciating how flavors develop.

4. Take Your Time

Avoid rushing through the process. Cooking mindfully means working at a pace that allows you to pay attention to each step. If you’re chopping vegetables, focus entirely on the motion of the knife and the sound of the blade.

  • Tip: Set aside enough time to cook without feeling hurried.
  • Practice: Treat each task—washing, peeling, slicing—as an individual act of mindfulness.

5. Be Present in the Moment

Resist the urge to multitask while cooking. Avoid distractions such as checking your phone or watching TV. Let your attention rest solely on the act of preparing food.

  • Tip: If your mind starts to wander, bring your focus back to the task at hand.
  • Practice: Repeat a mantra like “I am nourishing myself” to stay grounded.

6. Cultivate Gratitude

Take a moment to reflect on the journey of your food—from the farmers who grew it to the hands that transported it. Appreciate the effort, resources, and time that went into making the meal possible.

  • Activity: Before starting, say a silent “thank you” for the food and its nourishment.

7. Embrace the Process

Instead of focusing solely on the final dish, enjoy every step along the way. Cooking is not just a means to an end; it’s an opportunity to immerse yourself in a creative, nourishing ritual.

  • Focus: Celebrate small victories, like the perfect slice of onion or the ideal simmer of a sauce.
  • Mindset: Treat mistakes as learning experiences rather than sources of frustration.

8. Practice Deep Breathing

Incorporate deep, calming breaths into your cooking routine to enhance relaxation and presence. Breathing mindfully can help you stay focused and reduce stress during challenging moments in the kitchen.

  • Tip: Pause between steps to take a deep breath and reset your focus.
  • Practice: Sync your breathing with repetitive actions like stirring or chopping.

9. Taste With Intention

Savor the flavors of your dish as it comes together. Pay attention to how the combination of ingredients creates layers of taste and texture. Tasting mindfully allows you to make thoughtful adjustments to seasoning or preparation.

  • Tip: Take a small bite and let it linger, noting its complexity and balance.
  • Practice: Reflect on how the flavors make you feel—energized, comforted, or satisfied.

10. Enjoy the Meal

Mindful cooking naturally leads to mindful eating. Sit down to enjoy your creation without distractions. Take the time to savor every bite, appreciating the effort you put into the meal.

  • Focus: Eat slowly and observe how the flavors unfold.
  • Gratitude: Reflect on how the meal nourishes both your body and soul.

Mindful Cooking as a Lifestyle

Incorporating mindful cooking into your routine can transform your relationship with food and the kitchen. It’s not just about what you cook but how you cook it. Over time, this practice can enhance your physical health, mental well-being, and overall quality of life.

By approaching cooking with intention, curiosity, and gratitude, you create a space where nourishment extends beyond the plate—enriching both your body and mind.

4o

You said:

5 Common Composting Mistakes and How to Avoid Them

ChatGPT said:

ChatGPT

5 Common Composting Mistakes and How to Avoid Them

Composting is a simple yet highly effective way to reduce waste, enrich soil, and support sustainability. However, even seasoned composters can make mistakes that hinder the process. Understanding these pitfalls and how to sidestep them ensures that your compost pile thrives and produces rich, nutrient-dense compost.


1. Adding the Wrong Materials

The Mistake:
Not everything can go into your compost pile. Items like meat, dairy, oily foods, and synthetic materials can attract pests, produce unpleasant odors, and slow down decomposition.

How to Avoid It:
Stick to a balance of “greens” (nitrogen-rich materials like vegetable scraps and grass clippings) and “browns” (carbon-rich materials like dry leaves and cardboard). Avoid adding:

  • Meat and dairy products.
  • Fats, oils, and greasy foods.
  • Plastics, metals, or glass.
  • Diseased plants or weeds that have gone to seed.

Pro Tip: If you’re unsure, remember this rule: “If it grows, it goes.” Most plant-based materials are compost-friendly.


2. Incorrect Green-to-Brown Ratio

The Mistake:
A common error is having too much “green” material (like fruit peels and grass clippings), leading to a soggy, smelly pile, or too much “brown” material, which slows decomposition.

How to Avoid It:
Aim for the ideal carbon-to-nitrogen (C

) ratio of 30:1. This translates to about three parts “browns” to one part “greens.”

Examples:

  • For every bucket of kitchen scraps (greens), add three buckets of shredded leaves or cardboard (browns).
  • Layer greens and browns for better decomposition.

Pro Tip: If your pile smells bad, add more browns. If it’s dry and not breaking down, add more greens and water.


3. Neglecting to Turn the Pile

The Mistake:
Leaving the compost pile untouched can lead to poor aeration, uneven decomposition, and foul odors caused by anaerobic conditions.

How to Avoid It:
Regularly turning the pile introduces oxygen, which supports aerobic decomposition and speeds up the process.

How Often:

  • Turn your pile every 1–2 weeks.
  • Use a pitchfork or compost aerator to mix the layers.

Pro Tip: If turning is physically challenging, consider a compost tumbler for easy aeration.


4. Letting the Pile Get Too Dry or Too Wet

The Mistake:
An overly wet pile can become waterlogged and smelly, while a dry pile halts decomposition.

How to Avoid It:
Maintain a moisture level similar to that of a wrung-out sponge: damp but not dripping.

Steps to Fix:

  • Too wet: Add more browns (like shredded cardboard or straw) and mix well.
  • Too dry: Sprinkle water evenly or add moisture-rich greens (like fruit scraps).

Pro Tip: Cover your pile with a tarp during heavy rains to prevent waterlogging.


5. Ignoring the Size of Your Compost Pile

The Mistake:
A compost pile that’s too small may not generate enough heat for efficient decomposition, while a massive pile can become unmanageable.

How to Avoid It:

  • Optimal Size: Aim for a pile at least 3 feet wide, 3 feet long, and 3 feet tall. This size retains heat while remaining easy to manage.
  • For larger setups, consider dividing your pile into sections or using multiple bins.

Pro Tip: Use a compost thermometer to monitor internal temperatures (ideally 135°F to 160°F for hot composting).


Conclusion

Avoiding these common composting mistakes ensures a thriving pile that quickly turns waste into rich, garden-ready compost. By sticking to the right materials, maintaining a balanced green-to-brown ratio, turning the pile regularly, managing moisture levels, and maintaining the proper size, you’ll create a successful composting system. Embrace these tips, and you’ll be on your way to producing “black gold” for your plants while reducing waste sustainably.

6 Natural Additives to Supercharge Your Compost

Boosting your compost with natural additives can enhance its decomposition process, nutrient content, and overall quality. These additions can speed up the breakdown of organic matter, improve the balance of nutrients, and provide beneficial microbes that enrich the soil. Here are six natural ingredients to take your compost to the next level.


1. Coffee Grounds

Why They Work:
Coffee grounds are rich in nitrogen, a key component for healthy compost. They also improve the texture of the compost, making it easier to mix.

How to Use Them:

  • Add used coffee grounds in moderation to avoid creating an acidic compost pile.
  • Mix with “brown” materials like dry leaves to maintain a balanced carbon-to-nitrogen ratio.

Pro Tip: Include paper coffee filters—they decompose easily and add more carbon.


2. Crushed Eggshells

Why They Work:
Eggshells provide calcium, an essential nutrient for plant growth. Over time, they also help balance the pH of your compost.

How to Use Them:

  • Rinse and crush the shells to speed up their decomposition.
  • Spread evenly throughout the pile to prevent clumping.

Pro Tip: Don’t worry about the smell—cleaned eggshells won’t attract pests.


3. Wood Ash

Why They Work:
Wood ash is rich in potassium and calcium carbonate, making it a fantastic addition for nutrient enrichment. It also helps neutralize overly acidic compost piles.

How to Use Them:

  • Sprinkle a thin layer of ash occasionally; too much can make your compost too alkaline.
  • Avoid ashes from treated or painted wood, which can introduce harmful chemicals.

Pro Tip: Use wood ash from a natural fireplace or wood-burning stove for the best results.


4. Seaweed and Kelp

Why They Work:
Seaweed and kelp are loaded with micronutrients like magnesium, potassium, and iodine. They also contain alginates, which improve soil structure by helping it retain water.

How to Use Them:

  • Rinse seaweed to remove excess salt before adding it to your compost.
  • Chop or shred it into smaller pieces to speed up decomposition.

Pro Tip: Collect seaweed responsibly and ensure it’s allowed in your area.


5. Banana Peels

Why They Work:
Banana peels are rich in potassium, phosphorus, and other trace minerals essential for plant growth. They break down quickly and release nutrients into the compost.

How to Use Them:

  • Chop banana peels into smaller pieces to accelerate their breakdown.
  • Mix them evenly with other materials to prevent clumping.

Pro Tip: Avoid adding too many peels at once, as they can attract pests if not properly buried in the pile.


6. Manure from Herbivores

Why It Works:
Manure from animals like cows, horses, rabbits, and chickens is a powerhouse of nitrogen and beneficial microbes that jumpstart decomposition.

How to Use It:

  • Add well-aged manure to avoid introducing harmful pathogens. Fresh manure can be too “hot” and damage plants.
  • Mix thoroughly with “browns” to balance the pile and reduce odors.

Pro Tip: Avoid using manure from meat-eating animals like cats or dogs, as it may contain harmful bacteria.


Conclusion

Incorporating these six natural additives into your compost can dramatically improve its quality, nutrient content, and effectiveness. By using coffee grounds, crushed eggshells, wood ash, seaweed, banana peels, and herbivore manure, you’ll enrich your compost and create a valuable resource for your garden. Experiment with these ingredients to find the perfect combination for your composting goals, and watch your plants thrive with the nutrient-packed results!

Indigenous Composting Techniques for Sustainable Farming

Indigenous composting techniques have been practiced for centuries, offering a sustainable way to enrich the soil and promote long-term agricultural health. Rooted in tradition, these methods are environmentally friendly and use locally available resources, making them both effective and accessible. This guide explores various indigenous composting methods and how they contribute to sustainable farming practices.


1. Pit Composting: An Ancient Soil-Enrichment Technique

Pit composting involves burying organic waste in pits dug into the ground, allowing natural decomposition to occur underground.

How It Works:

  • A pit is dug, typically 2–3 feet deep, and organic materials like crop residues, food scraps, and animal manure are added.
  • Layers of soil are added between organic layers to promote microbial activity.
  • After filling, the pit is covered with soil and left to decompose for several months.

Advantages:

  • Retains moisture and nutrients, preventing loss through evaporation or leaching.
  • Keeps pests and odors at bay.

Regions of Practice: Common in semi-arid areas where water conservation is crucial.


2. Vermiculture: Harnessing Worms for Soil Health

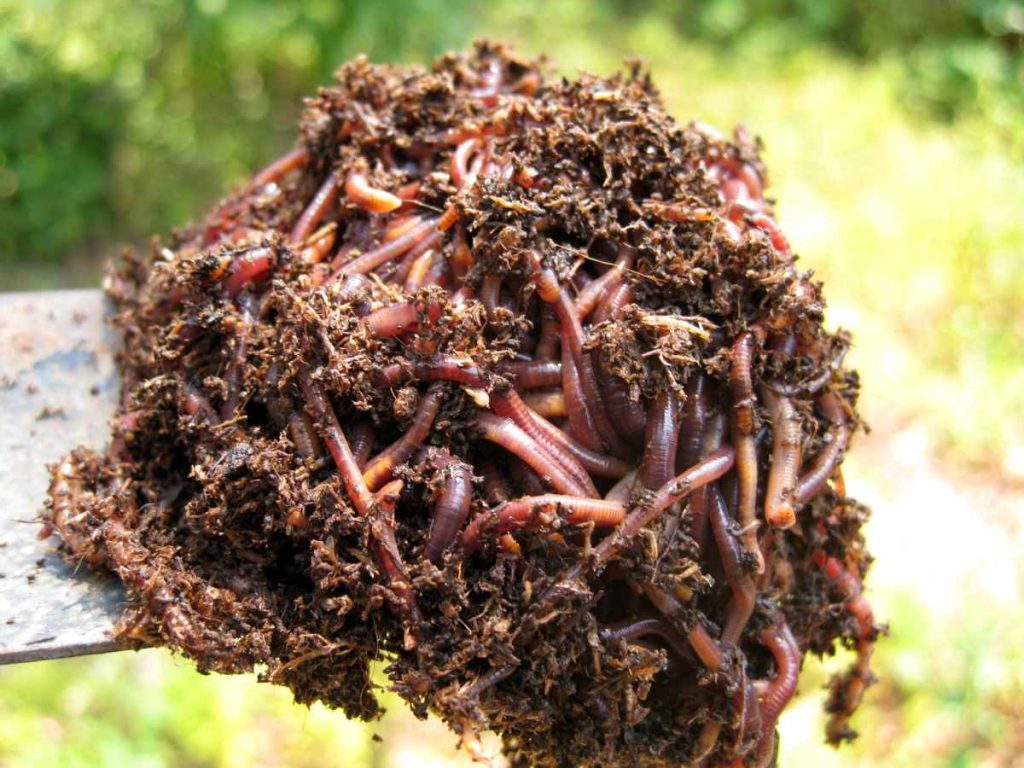
Vermiculture, or worm composting, has been a traditional practice in regions of Asia and Africa, where earthworms are used to decompose organic matter.

How It Works:

  • Organic waste is layered with soil in a shallow pit or container.
  • Earthworms like Eisenia fetida (red wigglers) break down the waste, converting it into nutrient-rich worm castings.

Benefits:

  • Produces high-quality compost packed with beneficial microbes.
  • Enhances soil aeration and water retention.

Cultural Use: Widely used in India for small-scale organic farming.


3. Trench Composting: Integrating Waste Directly into Fields

Trench composting involves burying organic waste directly in trenches dug between crop rows, a method favored by indigenous farmers for its simplicity.

How It Works:

  • Trenches are dug in between crop rows, and organic waste is placed directly into them.
  • The trenches are covered with soil, and crops are planted nearby.
  • Over time, the waste decomposes, releasing nutrients directly into the root zone.

Benefits:

  • Reduces labor and transportation of compost.
  • Enriches the soil without additional applications.

Traditional Use: Practiced in regions of Africa and Latin America to maximize crop yield with minimal input.


4. Heap Composting: A Communal Approach

Heap composting, often done in open spaces, is a traditional technique in rural communities where waste from households and farms is composted collectively.

How It Works:

  • Organic waste is piled into heaps and covered with straw, banana leaves, or soil to retain moisture.
  • The heap is occasionally turned to aerate and speed up decomposition.

Advantages:

  • Easy to set up and manage without equipment.
  • Encourages community participation in sustainable waste management.

Cultural Insight: In African villages, heap composting often doubles as a community activity, fostering collective responsibility for soil health.


5. Fukuoka Method: Emulating Natural Decomposition

Inspired by traditional Japanese farming, the Fukuoka method emphasizes no-till farming and natural composting on the field itself.

How It Works:

  • Crop residues, weeds, and organic waste are left on the soil surface as mulch.
  • Over time, this organic layer decomposes, enriching the soil with nutrients.

Advantages:

  • Prevents soil erosion and conserves moisture.
  • Mimics natural ecosystems, reducing human intervention.

Indigenous Practice: Closely aligns with the Chisan Chisui philosophy of Japanese sustainable farming.


6. Indigenous Biochar Composting

Biochar composting, practiced in the Amazon basin as Terra Preta (black earth), combines charcoal with organic waste to create highly fertile soil.

How It Works:

  • Organic waste is mixed with biochar (charcoal produced by burning biomass in a low-oxygen environment).
  • This mixture is composted to form a carbon-rich soil amendment.

Benefits:

  • Improves soil fertility and carbon sequestration.
  • Enhances microbial activity and nutrient retention.

Historical Roots: Terra Preta soils have been used by indigenous Amazonian farmers for thousands of years.


7. Fermented Organic Matter (Indigenous EM)

In many Asian cultures, effective microorganisms (EM) are used to ferment organic matter, creating a fast-acting compost solution.

How It Works:

  • Organic waste is mixed with EM solution and allowed to ferment in an airtight container or pit.
  • The fermented product is added to the soil or diluted with water for use as a liquid fertilizer.

Advantages:

  • Quick composting process (2–4 weeks).
  • Promotes soil microbial diversity.

Regions of Practice: Popular in countries like Japan and the Philippines for rice farming.


8. Livestock Manure Composting: A Traditional Staple

Animal manure composting is a centuries-old practice in indigenous farming systems, particularly in regions reliant on livestock.

How It Works:

  • Manure from cattle, goats, or poultry is mixed with bedding materials like straw or leaves.
  • The pile is turned regularly to ensure even decomposition and reduce pathogens.

Benefits:

  • Rich in nitrogen, phosphorus, and potassium.
  • Reduces waste accumulation on farms.

Traditional Practice: Found in Indian and African farming systems where livestock are integral to the community.


Why Indigenous Composting Techniques are Sustainable

Indigenous composting methods are sustainable because they:

  • Utilize Local Resources: Minimize reliance on synthetic inputs.
  • Support Soil Health: Improve fertility without degrading the land.
  • Reduce Environmental Impact: Recycle organic waste, reducing landfill use.
  • Promote Community Practices: Encourage collaborative efforts and cultural preservation.

How to Incorporate Indigenous Composting into Modern Farming

  1. Learn Local Practices: Understand the traditional methods used in your area.
  2. Adapt Techniques: Modify indigenous methods to suit your farming scale and needs.
  3. Combine Approaches: Integrate indigenous techniques with modern composting tools for enhanced results.
  4. Educate Communities: Share the benefits of these practices with fellow farmers.

Conclusion

Indigenous composting techniques are a treasure trove of sustainable farming wisdom. By adopting these age-old methods, farmers can nurture their soil, reduce waste, and cultivate crops in harmony with nature. Whether you’re a small-scale gardener or a large-scale farmer, these techniques offer valuable insights into eco-friendly agriculture that stands the test of time.

9 Tips for Speeding Up the Composting Process

Composting is a fantastic way to reduce waste and create rich, fertile soil for your garden. However, the process can sometimes take longer than expected, especially if conditions aren’t ideal. Fortunately, there are several tips and techniques you can use to speed up decomposition and get nutrient-rich compost in less time. If you’re looking to speed up your composting process, here are nine effective tips to help you out.


1. Maintain the Right Carbon-to-Nitrogen Ratio

Why It’s Important:
Composting requires a balance of “greens” (nitrogen-rich materials) and “browns” (carbon-rich materials). Too much carbon slows down decomposition, while too much nitrogen can cause your pile to become too wet and smelly. The ideal carbon-to-nitrogen (C) ratio is 30:1, meaning 30 parts carbon to 1 part nitrogen.

How to Speed Up Composting:

  • Add More Greens: If your compost pile is too slow, increase the nitrogen by adding kitchen scraps, grass clippings, or coffee grounds.
  • Add More Browns: If your pile is too wet and doesn’t break down, balance it with dry materials like leaves, cardboard, or straw.

2. Turn the Pile Frequently

Why It’s Important:
Turning your compost pile introduces oxygen, which is necessary for the microbes that break down organic matter. Without oxygen, your compost can become compacted and anaerobic, leading to slower decomposition.

How to Speed Up Composting:

  • Turn Regularly: Aim to turn your compost pile every 2-3 weeks to keep the decomposition process active.
  • Use a Pitchfork or Compost Aerator: These tools make it easier to aerate the pile and ensure that the materials decompose evenly.

3. Shred or Chop Larger Materials

Why It’s Important:
Larger pieces of organic material, like whole leaves or branches, take much longer to break down. Shredding or chopping materials into smaller pieces increases the surface area, allowing microorganisms to break them down faster.

How to Speed Up Composting:

  • Shred Leaves: Use a lawnmower, garden shredder, or hand tools to chop up leaves and larger plant material before adding them to the compost pile.
  • Chop Up Kitchen Scraps: Cutting vegetable scraps, eggshells, and other kitchen waste into smaller pieces helps them decompose faster.

4. Maintain the Right Moisture Level

Why It’s Important:
Moisture is crucial for composting, as it helps keep the microorganisms hydrated and active. Too much moisture can make your compost pile soggy and anaerobic, while too little moisture can slow down microbial activity.

How to Speed Up Composting:

  • Moisture Level: Aim for the compost to be as damp as a wrung-out sponge — not too dry, not too wet.
  • Water as Needed: If the pile is too dry, add water to it, especially in dry climates. If it’s too wet, add more carbon-rich materials (like dry leaves or straw) to help absorb excess moisture.

5. Use a Composting Accelerator or Activator

Why It’s Important:
Composting accelerators are products that contain beneficial bacteria, fungi, and enzymes that help break down organic material more quickly. They can speed up the decomposition process, especially if your pile is sluggish.

How to Speed Up Composting:

  • Add a Compost Accelerator: These are available in both liquid and granular form and can be found at most garden centers.
  • Look for Natural Activators: Many gardeners use natural ingredients like comfrey, alfalfa, or seaweed as compost accelerators. These materials provide extra nutrients to the microbes in your pile.

6. Keep the Pile Warm

Why It’s Important:
Microbial activity speeds up in warmer temperatures, so keeping your compost pile warm can drastically speed up the decomposition process. A well-maintained compost pile can reach temperatures of 130-160°F (54-71°C), where decomposition happens most efficiently.

How to Speed Up Composting:

  • Insulate the Pile: In colder climates, consider insulating your compost pile with straw bales or placing it in a compost bin to retain heat.
  • Monitor Temperature: Use a compost thermometer to ensure the pile stays within the ideal temperature range for composting.

7. Use a Compost Tumbler

Why It’s Important:
Compost tumblers are enclosed bins that make it easy to turn your compost. The mechanical turning helps oxygenate the pile, promotes even decomposition, and speeds up the process.

How to Speed Up Composting:

  • Turn Regularly: With a compost tumbler, you can turn your pile every 2-3 days, which helps aerate it and prevent compaction.
  • Aerate the Pile: Tumblers also allow for better oxygen circulation, which helps accelerate microbial activity.

8. Add Manure to the Pile

Why It’s Important:
Animal manure, especially from herbivores like cows, chickens, and horses, is rich in nitrogen and beneficial microorganisms that can jump-start the composting process. Manure acts as a natural accelerator and helps balance the carbon-to-nitrogen ratio.

How to Speed Up Composting:

  • Add Fresh Manure: Mix fresh manure into your compost pile, but be sure to use it in moderation, as too much can make your pile too hot or smelly.
  • Compost with Caution: Ensure that manure is well-composted before using it in your garden, as fresh manure can burn plants.

9. Keep the Pile Aerated

Why It’s Important:
Aeration is key to speeding up decomposition. Without enough oxygen, the compost pile can become anaerobic, leading to unpleasant odors and slow breakdown. Proper aeration helps create the ideal environment for beneficial microbes to thrive.

How to Speed Up Composting:

  • Use a Compost Aerator: This tool allows you to poke holes in the pile, helping air reach the center.
  • Add More Air: If your compost pile is dense or compact, manually fluff it up by turning it or mixing it with a pitchfork to improve airflow.

Conclusion

Speeding up the composting process requires a combination of the right ingredients, the proper conditions, and regular maintenance. By following these nine tips — balancing your carbon-to-nitrogen ratio, turning your pile frequently, chopping up materials, and maintaining the right moisture and temperature — you can create nutrient-rich compost more quickly. With these strategies in place, you’ll have healthier soil and a thriving garden in no time!

6 Natural Additives to Supercharge Your Compost

Composting is an excellent way to recycle organic waste and enrich your garden soil, but did you know that certain natural additives can supercharge your compost and speed up the decomposition process? By incorporating specific materials into your compost, you can balance the carbon-to-nitrogen ratio, enhance microbial activity, and accelerate the breakdown of organic matter. If you’re looking to take your composting game to the next level, here are six natural additives that can work wonders for your compost pile.


1. Bone Meal: A Boost of Phosphorus

Why It’s Beneficial:
Bone meal is made from finely ground bones and is an excellent source of phosphorus, a vital nutrient for healthy root development in plants. Adding bone meal to your compost pile ensures that your final compost is rich in phosphorus, which is essential for plant growth, especially for promoting root systems.

How to Use It:

  • Add to Compost: Sprinkle bone meal throughout your compost pile, mixing it in to evenly distribute the phosphorus.
  • Amount: Use it in moderation—about 1 to 2 cups of bone meal per compost bin is sufficient.
  • Timing: Bone meal breaks down slowly, so adding it early in the composting process is ideal.

Pro Tip: Bone meal also helps balance the pH of your compost, especially if it’s too acidic.


2. Wood Ash: Boosts Potassium and Raises pH

Why It’s Beneficial:
Wood ash is a rich source of potassium and calcium, which are essential for healthy plant growth. Potassium helps plants resist diseases and promotes strong stems and roots. Wood ash can also help raise the pH of acidic compost, making it more neutral and plant-friendly.

How to Use It:

  • Add to Compost: Sprinkle wood ash on top of your compost pile, mixing it in gently. Be cautious not to add too much, as excessive wood ash can make your compost too alkaline.
  • Amount: A handful of wood ash every week should be enough.
  • Timing: Wood ash works well throughout the composting process.

Pro Tip: Wood ash should be used sparingly, especially if you live in an area with naturally alkaline soil, as it could make the compost too basic.


3. Coffee Grounds: A Nitrogen Boost

Why It’s Beneficial:
Coffee grounds are rich in nitrogen, making them an excellent addition to your compost pile to help balance the carbon-to-nitrogen ratio. They also contain micronutrients like magnesium, calcium, and potassium, which enhance soil fertility. Coffee grounds provide the necessary nitrogen to speed up decomposition and enrich the final compost.

How to Use It:

  • Add to Compost: Add coffee grounds directly to the compost pile or spread them on the surface and turn them in.
  • Amount: You can add coffee grounds freely, but it’s best to mix them with carbon-rich materials like leaves to prevent them from compacting and forming clumps.
  • Timing: Coffee grounds break down quickly, so they can be added at any time during the composting process.

Pro Tip: Used coffee filters can be composted too, making them a great addition to your pile along with the grounds.


4. Eggshells: Source of Calcium and Trace Minerals

Why It’s Beneficial:
Eggshells are an excellent source of calcium, which is essential for strong plant cell walls and overall plant health. Calcium also helps neutralize acidic soil, improving the pH balance in your compost. In addition, eggshells provide trace minerals that help plants thrive.

How to Use It:

  • Add to Compost: Crush eggshells before adding them to your compost pile to help them break down faster.
  • Amount: You can add several dozen crushed eggshells over time, depending on your compost needs.
  • Timing: Eggshells decompose slowly, so it’s best to add them early in the composting process.

Pro Tip: Eggshells can also help deter pests like slugs and snails in the garden once the compost is applied.


5. Seaweed: Nutrient-Rich and Full of Trace Elements

Why It’s Beneficial:
Seaweed is packed with essential nutrients like potassium, nitrogen, phosphorus, and trace elements such as iodine, iron, and magnesium. These nutrients help enrich your compost, promoting better plant growth and improving soil health. Seaweed also helps retain moisture in the compost, which is essential for healthy decomposition.

How to Use It:

  • Add to Compost: You can add seaweed directly to your compost pile, whether it’s dried or fresh. If you’re using fresh seaweed, make sure to rinse it well to remove any salt that could harm your plants.
  • Amount: A few handfuls of seaweed are sufficient for a small compost pile. You can increase the amount for larger piles.
  • Timing: Seaweed can be added at any time and helps improve the overall quality of compost.

Pro Tip: Seaweed can be a great addition to composting systems in coastal areas, where it’s easy to collect.


6. Worm Castings: Natural Fertilizer and Microbe Booster

Why It’s Beneficial:
Worm castings, also known as vermicompost, are a nutrient-rich, natural fertilizer that enhances soil fertility. They are packed with beneficial microorganisms that break down organic matter and release essential nutrients. Adding worm castings to your compost helps improve the microbial activity in the pile, leading to faster and more efficient decomposition.

How to Use It:

  • Add to Compost: Mix worm castings into your compost pile to boost microbial activity and improve the quality of your compost.
  • Amount: A couple of handfuls of worm castings for every cubic foot of compost is sufficient.
  • Timing: Worm castings can be added at any stage of composting, and they will continue to work as the pile decomposes.

Pro Tip: If you don’t have access to worm castings, you can create your own worm bin to produce this valuable additive.


Conclusion

Supercharging your compost with natural additives can significantly improve its quality and accelerate the decomposition process. Bone meal, wood ash, coffee grounds, eggshells, seaweed, and worm castings are just a few of the powerful natural materials that can boost your compost and enhance its nutrient content. By incorporating these additives into your composting routine, you’ll be able to create richer, more fertile soil for your garden, reducing waste and supporting sustainable gardening practices. Happy composting!

5 Common Composting Mistakes and How to Avoid Them

Composting is an effective way to recycle organic waste and create nutrient-rich soil for your garden. However, even the most experienced composters can make mistakes that can slow down the decomposition process or affect the quality of the final product. If you’re new to composting, or even if you’ve been composting for a while, it’s important to avoid these common errors. Here are 5 common composting mistakes and how to avoid them for a successful, thriving compost pile.


1. Using the Wrong Materials

Mistake:
One of the most common mistakes beginners make is adding the wrong materials to their compost pile. While it’s tempting to throw in everything organic, not all materials are compost-friendly. Some items, like meat, dairy, oily foods, and pet waste, can cause unpleasant odors and attract pests, making your compost pile unmanageable.

How to Avoid It:

  • Do Add: Kitchen scraps like fruit and vegetable peels, coffee grounds, eggshells, and yard waste such as grass clippings and leaves. These provide the right balance of nitrogen (greens) and carbon (browns).
  • Don’t Add: Avoid adding meat, dairy products, pet waste, or anything oily. These can cause odors and invite pests into your compost bin.
  • Know the Balance: Aim for a good balance of “greens” (nitrogen-rich materials) and “browns” (carbon-rich materials). A 3:1 ratio of browns to greens is ideal.

2. Not Maintaining the Right Moisture Levels

Mistake:
Too much moisture or too little moisture can both be detrimental to your compost pile. If your compost is too dry, the microorganisms that break down the organic matter will be unable to thrive. On the other hand, if it’s too wet, the pile can become soggy, leading to a lack of oxygen and a slow decomposition process.

How to Avoid It:

  • Ideal Moisture: Your compost should be as moist as a wrung-out sponge — damp but not soaking.
  • How to Check: Squeeze a handful of compost. If water drips out, it’s too wet; if it crumbles, it’s too dry.
  • Fixing Too Wet: If your compost pile is too wet, add dry browns like shredded paper, cardboard, or leaves. Turn the pile to aerate it and help excess moisture evaporate.
  • Fixing Too Dry: If it’s too dry, water the pile gently with a hose or watering can until it reaches the right moisture level.

3. Not Turning the Pile Enough

Mistake:
Turning your compost pile is essential for promoting aeration and ensuring that the materials break down evenly. If you don’t turn your pile regularly, it can become compacted, restricting airflow and causing the pile to break down slowly or unevenly.

How to Avoid It:

  • Turn Regularly: Aim to turn your compost pile at least once every 2-3 weeks. This allows oxygen to reach the center of the pile and speeds up decomposition.
  • How to Turn: Use a pitchfork, compost aerator, or shovel to mix the compost. If the pile is too large, consider using a compost tumbler to make turning easier.
  • Avoid Over-Turning: While turning is important, don’t overdo it. Excessive turning can cause the pile to dry out or disrupt the microbial process.

4. Not Shredding or Chopping Materials

Mistake:
Adding large pieces of material to your compost pile can slow down the decomposition process. Larger items, like whole branches or uncut leaves, decompose much more slowly compared to smaller, shredded materials.

How to Avoid It:

  • Shred or Chop: Break down larger materials into smaller pieces before adding them to your compost bin. Use a shredder for leaves and paper or chop up branches and stems with pruning shears or a garden saw.
  • Smaller Pieces Decompose Faster: The smaller the material, the faster the microorganisms can break it down, helping your compost to mature more quickly.
  • Consider the Size of Your Bin: If you have a smaller compost bin, you may want to cut down materials to fit better and decompose faster.

5. Not Monitoring the Temperature

Mistake:
If you’re not paying attention to the temperature of your compost pile, you might miss the signs of poor decomposition. A pile that’s too cold can slow down or even stop the composting process, while a pile that’s too hot may lose beneficial microbes, making it difficult to break down materials.

How to Avoid It:

  • Ideal Temperature Range: The optimal composting temperature is between 130°F and 160°F (54°C to 71°C). This is when microorganisms are most active and break down materials quickly.
  • Use a Thermometer: Invest in a compost thermometer to monitor the temperature of your pile. If it’s too hot (above 160°F), turn the pile to cool it down. If it’s too cold (below 110°F), add more greens or turn the pile more frequently to help raise the temperature.
  • Insulate in Winter: If you live in a cold climate, consider insulating your compost pile with straw bales or placing it in a compost bin to retain heat during the winter months.

Conclusion

Composting is a straightforward process, but it does come with some potential pitfalls. By avoiding these 5 common mistakes — using the wrong materials, improper moisture levels, insufficient turning, not shredding or chopping materials, and ignoring temperature — you’ll be well on your way to creating a rich, healthy compost pile. A little attention and care can help you transform your organic waste into valuable, nutrient-dense compost for your garden, all while reducing your environmental impact. Happy composting!