Top 10 Tips for Raising Goats for Milk

Raising goats for milk can be a rewarding and fulfilling endeavor. Whether you are looking to start a small homestead or expand your farming operations, goats are excellent milk producers and can provide you with a consistent source of fresh, nutritious milk. However, like any livestock, they require proper care, management, and understanding of their needs to thrive. In this comprehensive guide, we will explore the top 10 tips for raising goats for milk, ensuring that you provide the best possible environment for your dairy goats.


1. Choose the Right Breed

Selecting the right breed is the foundation of successful goat farming. Different breeds have varying milk production capabilities, temperaments, and physical requirements. Some of the top dairy goat breeds include:

  • Nubian: Known for their high butterfat content in milk and friendly disposition.
  • Saanen: Large and prolific milk producers with a calm temperament.
  • Alpine: Hardy and adaptable, producing good quantities of milk with excellent quality.

Tip: Research each breed’s characteristics, milk yield, and suitability for your farming conditions to find the perfect fit for your goals.


2. Provide Adequate Space

Goats require sufficient space to roam, graze, and exercise. Crowded conditions can lead to stress, behavioral issues, and health problems.

Recommendations:

  • Allow at least 200 square feet of outdoor space per goat.
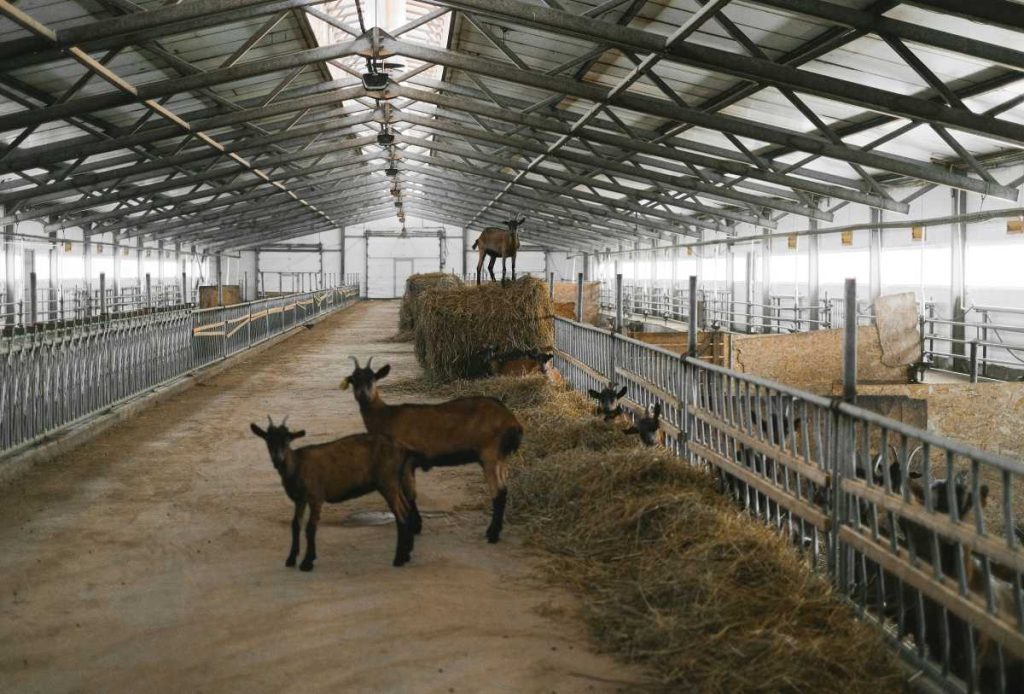
  • Create a secure and comfortable shelter that protects them from extreme weather conditions.

Tip: Design your goat pen with plenty of room for movement, along with areas for them to rest, play, and socialize.


3. Ensure Quality Nutrition

Proper nutrition is crucial for milk production and overall goat health. Goats require a balanced diet that includes:

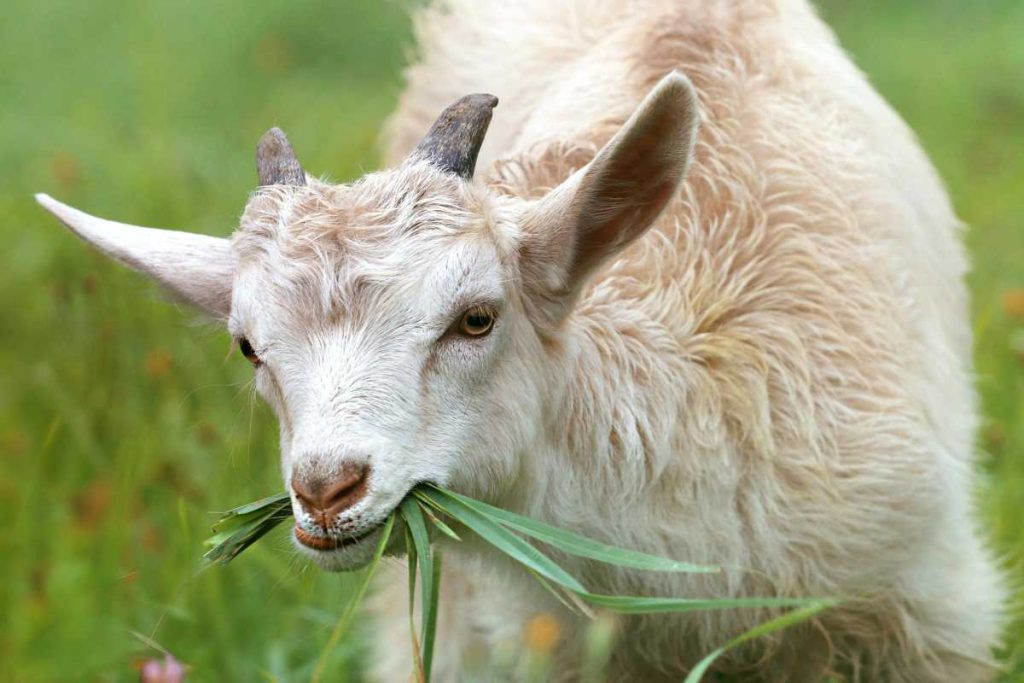
  • Forage: High-quality hay, pasture, and browse.
  • Grains: To supplement energy, especially for lactating does.
  • Minerals and Vitamins: Offer a mineral block or loose minerals to ensure they receive essential nutrients.

Tip: Consult with a veterinarian or an animal nutritionist to create a balanced diet tailored to your goats’ specific needs.

4. Maintain Cleanliness and Hygiene

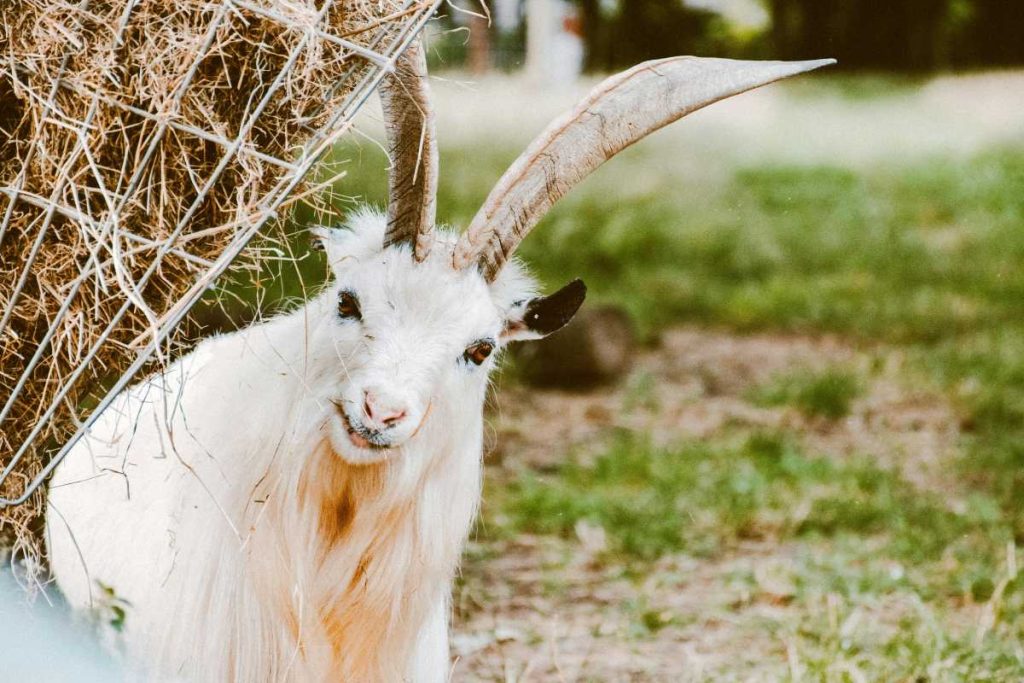
A clean environment is vital for the health and productivity of your dairy goats. Regularly cleaning the barn, feeding areas, and water troughs will help prevent the spread of diseases.

Recommendations:

  • Clean bedding regularly and replace it as needed.
  • Ensure feeding and watering equipment is washed frequently.

Tip: Implement a routine cleaning schedule to maintain hygiene and monitor your goats for signs of illness.


5. Monitor Health Regularly

Regular health check-ups are essential for maintaining your goats’ well-being. Common health issues in dairy goats include mastitis, parasites, and nutritional deficiencies.

Health Management Tips:

  • Conduct regular physical exams to check for signs of illness, such as weight loss, changes in appetite, or abnormal behavior.
  • Keep up with vaccinations and deworming schedules as recommended by your veterinarian.

Tip: Maintain detailed health records for each goat to track vaccinations, health issues, and treatments.


6. Implement a Milking Routine

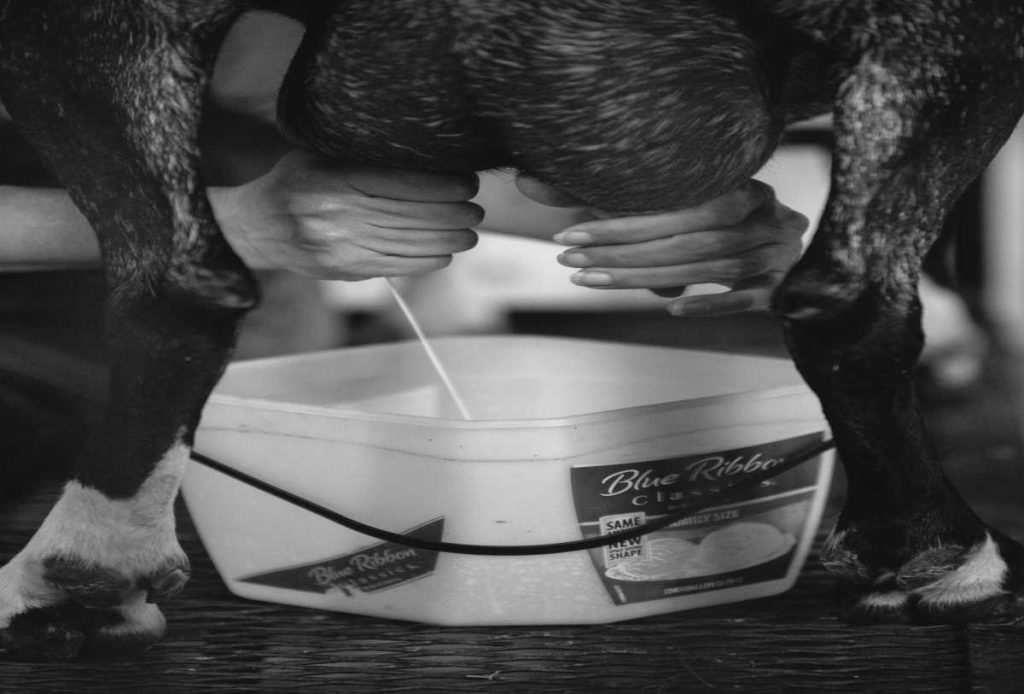
Establishing a consistent milking routine is crucial for maintaining milk production. Goats thrive on routine, and regular milking helps them feel secure and comfortable.

Milking Tips:

  • Aim to milk at the same times every day, ideally in the morning and evening.
  • Use clean equipment and maintain a calm environment during milking to reduce stress on the goats.

Tip: Consider training your goats to come to a specific location for milking, which can make the process smoother for both you and the goats.


7. Focus on Breeding

Breeding your dairy goats is essential for maintaining a steady supply of milk. Understand the breeding cycles and choose the right time to breed for optimal milk production.

Breeding Tips:

  • Monitor estrous cycles to determine the best time for breeding.
  • Consider breeding for specific traits, such as milk production or disease resistance.

Tip: Work with a knowledgeable breeder or veterinarian to ensure healthy breeding practices and genetic diversity.

8. Provide Adequate Water Supply

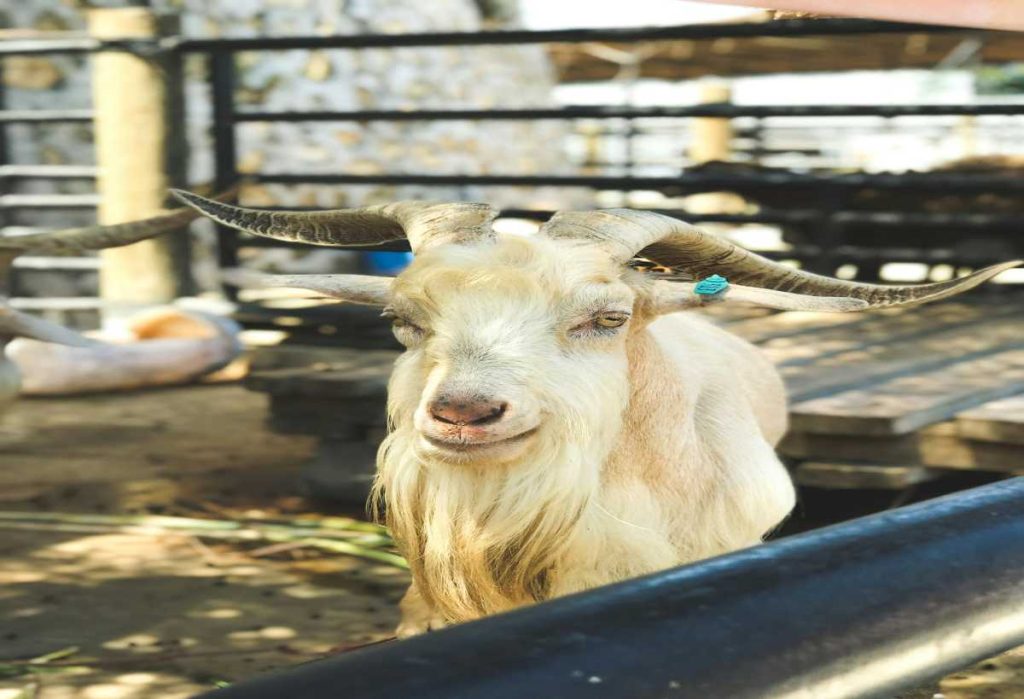
Access to clean, fresh water is critical for milk production and overall health. Goats need to drink plenty of water, especially when lactating.

Water Management Tips:

  • Provide fresh water daily and ensure troughs are cleaned regularly.
  • Monitor water intake, as decreased consumption may indicate health issues.

Tip: Consider installing automatic waterers or large troughs to ensure a constant supply of water.


9. Create a Stress-Free Environment

Stress can negatively impact milk production and overall health in goats. Creating a calm and peaceful environment is essential for their well-being.

Stress Management Tips:

  • Provide plenty of social interaction, as goats are herd animals and thrive in groups.
  • Avoid sudden changes in their environment or routine, and introduce new animals gradually.

Tip: Incorporate enrichment activities, such as climbing structures and toys, to keep goats engaged and mentally stimulated.


10. Educate Yourself Continually

The world of goat farming is constantly evolving, and staying informed about best practices, new research, and effective management strategies is vital for success.

Education Tips:

  • Attend workshops, seminars, and local farming events to connect with other goat farmers.
  • Read books, blogs, and articles dedicated to goat care and management.

Tip: Join online forums or social media groups for goat enthusiasts to share experiences, ask questions, and learn from others in the community.


Conclusion

Raising goats for milk can be a fulfilling and profitable venture when approached with the right knowledge and care. By following these top 10 tips—choosing the right breed, ensuring proper nutrition, maintaining cleanliness, and fostering a stress-free environment—you can create a thriving dairy goat operation.

With dedication and commitment, your goats will not only provide you with delicious, fresh milk but also enrich your life with their charming personalities. Enjoy your goat farming journey and the many rewards it brings!

Top 10 Goat Breeds for Goat Farming

Goat farming has gained popularity for its numerous benefits, including the production of milk, meat, and fiber, as well as the companionship they offer. Selecting the right breed is crucial for a successful goat farming venture. With various goat breeds available, each with unique characteristics and advantages, it’s essential to choose the ones that best suit your goals and farming conditions. In this comprehensive guide, we will explore the top 10 goat breeds for goat farming, detailing their key features, advantages, and suitability for different farming purposes.


1. Nubian Goats

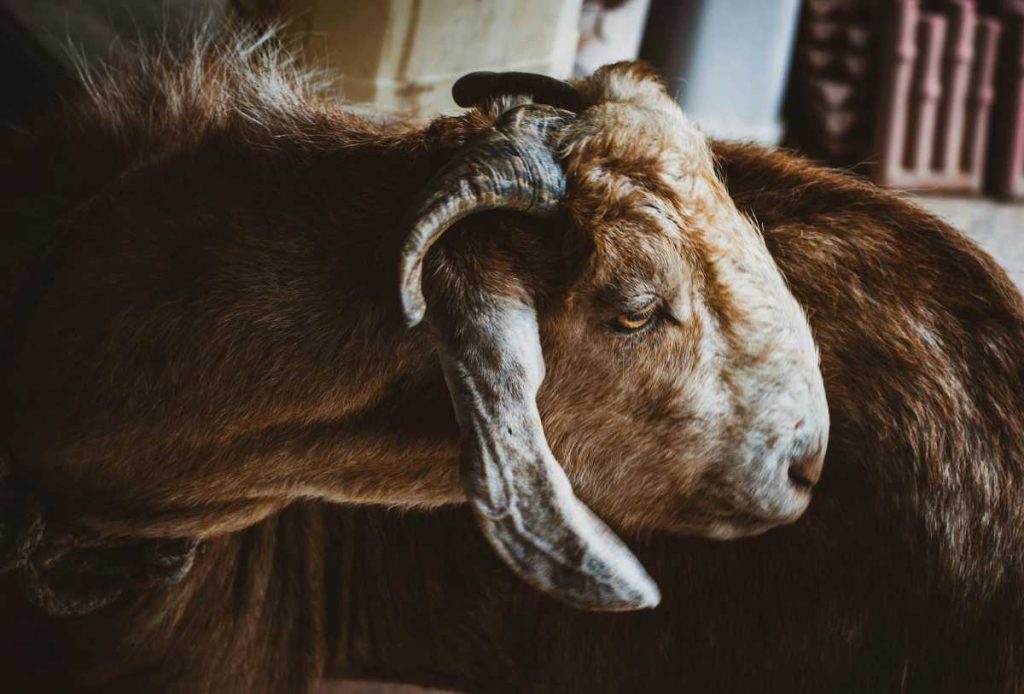
Overview: Nubian goats are known for their distinctive long, floppy ears and Roman noses. They are one of the most popular dairy breeds, recognized for their rich, high-butterfat milk.

Key Features:

  • Milk Production: Nubians produce an average of 1-3 gallons of milk per day.
  • Temperament: They are friendly, social, and easy to handle, making them excellent for family farms.

Advantages:

  • Adaptable to various climates.
  • Excellent foragers, which helps reduce feed costs.

Suitability: Ideal for dairy production and as companion animals.


2. Saanen Goats

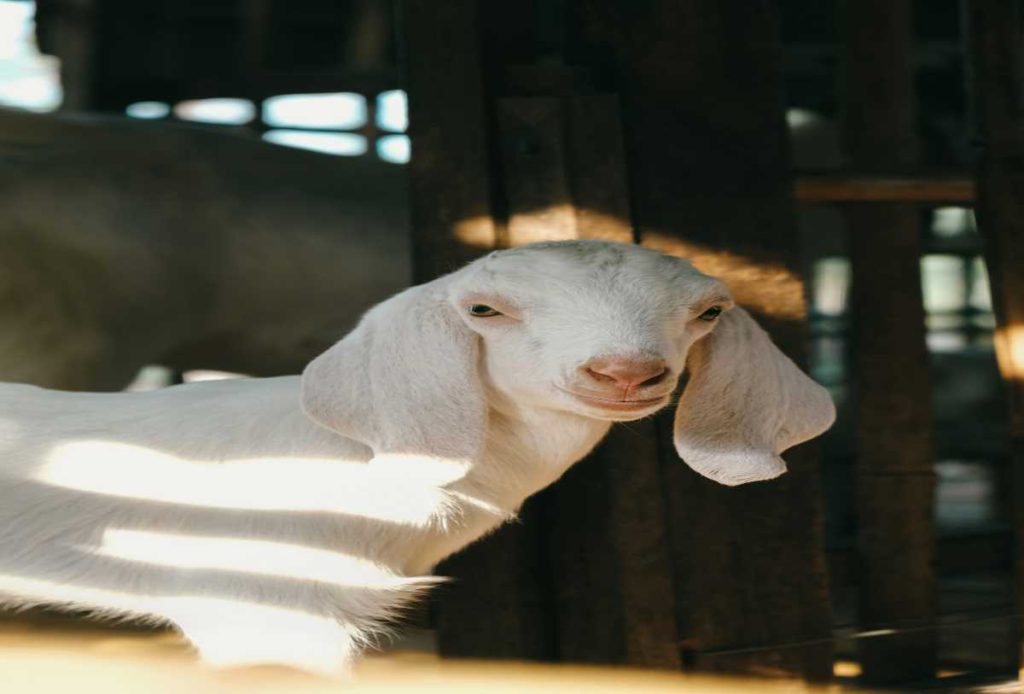
Overview: Saanen goats are one of the largest dairy breeds and are known for their striking white coats. They are highly productive milkers with a calm temperament.

Key Features:

  • Milk Production: Saanens can produce 2-4 gallons of milk per day.
  • Size: They are large goats, often weighing over 150 pounds.

Advantages:

  • High milk yield and quality.
  • Gentle and friendly, making them easy to manage.

Suitability: Perfect for commercial dairy farming.


3. Boer Goats

Overview: Boer goats are primarily raised for meat production. Known for their muscular build and fast growth rate, they are a popular choice among meat goat farmers.

Key Features:

  • Meat Production: They can reach market weight quickly, typically around 90-100 pounds by 6 months of age.
  • Appearance: Characterized by their white bodies and brown heads.

Advantages:

  • High feed conversion efficiency, meaning they require less feed to gain weight.
  • Excellent foragers, thriving in various environments.

Suitability: Best for meat production and crossbreeding to enhance meat quality.


4. Alpine Goats

Overview: Alpine goats are a versatile breed known for their strength and adaptability. They come in various colors and patterns and are known for their excellent milk production.

Key Features:

  • Milk Production: They produce 1-3 gallons of milk per day, depending on genetics and management.
  • Temperament: Alpines are friendly and social animals.

Advantages:

  • Hardy and adaptable to different climates.
  • Good foragers, helping to keep pasture healthy.

Suitability: Suitable for both dairy and fiber production.


5. Nigerian Dwarfs

Overview: Nigerian Dwarf goats are a miniature breed known for their playful personality and colorful coats. They are excellent for small farms or urban settings.

Key Features:

  • Size: They typically weigh between 50-75 pounds, making them manageable for smaller spaces.
  • Milk Production: Despite their size, they can produce 1-2 quarts of milk per day with a high butterfat content.

Advantages:

  • Great for families and children due to their friendly nature.
  • Low space and feed requirements.

Suitability: Ideal for small farms, urban homesteading, or as pets.


6. LaMancha Goats

Overview: LaManchas are easily recognizable for their unique “gopher” ears, which are very short. They are known for their high milk production and gentle disposition.

Key Features:

  • Milk Production: They produce 1-3 gallons of milk per day.
  • Temperament: Friendly and adaptable, making them great companions.

Advantages:

  • Excellent milk quality, with a higher butterfat content than many other breeds.
  • Low maintenance due to their short hair.

Suitability: Best for dairy farms and as family pets.


7. Toggenburg Goats

Overview: Toggenburg goats are one of the oldest dairy breeds and are known for their distinctive chocolate brown color with white markings. They are hardy and prolific milkers.

Key Features:

  • Milk Production: They typically produce 1-3 gallons of milk per day.
  • Appearance: They have a stocky build and are known for their strong legs.

Advantages:

  • Good adaptability to various climates.
  • Strong milk flavor and nutritional quality.

Suitability: Excellent for dairy production and small farms.


8. Kiko Goats

Overview: Kiko goats are a relatively new breed developed in New Zealand for meat production. They are known for their hardiness and excellent mothering ability.

Key Features:

  • Meat Production: They grow quickly and are known for their high-quality meat.
  • Temperament: Generally easygoing and adaptable.

Advantages:

  • High resistance to disease and parasites.
  • Efficient foragers, making them low-maintenance.

Suitability: Best for meat production and commercial farming.


9. Pygmy Goats

Overview: Pygmy goats are small, stocky, and friendly animals known for their playful nature. They make great pets and are also suitable for small-scale milk production.

Key Features:

  • Size: They typically weigh between 40-60 pounds.
  • Milk Production: They can produce small quantities of milk, about 1 quart per day, with a high butterfat content.

Advantages:

  • Excellent companions and great for children.
  • Require minimal space and are easy to handle.

Suitability: Ideal for urban farms and as pets.


10. Spanish Goats

Overview: Spanish goats are hardy and versatile animals primarily raised for meat production. They are known for their adaptability to harsh environments.

Key Features:

  • Meat Production: They can produce high-quality meat with good yields.
  • Appearance: They often have a mixed coat color and can be horned or polled.

Advantages:

  • Strong foragers that thrive on poor-quality forage.
  • Excellent maternal instincts and hardiness.

Suitability: Ideal for meat production in challenging climates.


Conclusion

Choosing the right goat breed is crucial for successful goat farming, whether you’re interested in milk, meat, fiber, or companionship. Each of the breeds listed above offers unique advantages, making them suitable for different farming goals and environments.

By understanding the characteristics and benefits of these top 10 goat breeds, you can make informed decisions that align with your farming aspirations. With proper care, management, and a suitable breed, you can enjoy the numerous benefits of goat farming and contribute to sustainable agricultural practices.

Happy goat farming! May your journey be filled with joyful bleats and bountiful harvests!

Pasteurizing Goat Milk and Keeping It Fresh

Pasteurizing goat milk is a crucial process for ensuring its safety and extending its shelf life. Goat milk is a nutritious and versatile alternative to cow’s milk, rich in vitamins, minerals, and beneficial fatty acids. However, because it can harbor harmful bacteria, it’s essential to understand how to properly pasteurize goat milk and keep it fresh. In this comprehensive guide, we will explore the importance of pasteurization, step-by-step instructions for the process, and tips for storing goat milk to maintain its quality.


The Importance of Pasteurization

Pasteurization is the process of heating milk to a specific temperature for a set period of time to kill harmful bacteria and pathogens. This is particularly important for raw goat milk, which can be a potential source of foodborne illnesses if not handled properly. Pasteurization not only helps ensure the safety of the milk but also extends its shelf life, allowing you to enjoy the rich, creamy taste of goat milk without the risks associated with raw milk.

Key Benefits of Pasteurizing Goat Milk:

  • Safety: Eliminates harmful bacteria like Salmonella, E. coli, and Listeria.
  • Shelf Life: Increases the milk’s freshness and allows for longer storage.
  • Flavor: Pasteurization can enhance the flavor by breaking down certain compounds in the milk.

Steps for Pasteurizing Goat Milk

Pasteurizing goat milk at home is a straightforward process, but it requires attention to detail to ensure safety and quality. Here’s a step-by-step guide to help you through the process:

Step 1: Gather Your Equipment

You will need the following items:

  • A large pot: Make sure it’s clean and suitable for stovetop use.
  • Thermometer: A food thermometer to monitor the temperature accurately.
  • Ladle or whisk: For stirring the milk.
  • Glass containers or bottles: For storing the pasteurized milk.
  • Ice bath (optional): A large bowl filled with ice and water for rapid cooling.

Step 2: Prepare the Milk

  1. Start with fresh goat milk: Ensure the milk is fresh, cold, and stored properly. If you’ve just milked your goats, chill the milk quickly before pasteurizing.
  2. Transfer the milk: Pour the goat milk into the large pot, filling it no more than two-thirds full to allow space for bubbling.

Step 3: Heat the Milk

  1. Slowly heat the milk: Place the pot on the stove over medium heat. Stir the milk gently to prevent scorching at the bottom.
  2. Monitor the temperature: Use your thermometer to keep track of the temperature. Heat the milk until it reaches at least 145°F (63°C).
  3. Hold the temperature: Once the milk reaches 145°F, maintain this temperature for 30 minutes. This low-temperature pasteurization method (also known as LTLT) is effective for killing bacteria while preserving the milk’s flavor and nutrients.

Step 4: Cool the Milk

  1. Rapidly cool the milk: After 30 minutes, it’s essential to cool the milk down quickly. You can either:
    • Remove the pot from the heat and place it in an ice bath, stirring gently to help it cool.
    • Pour the hot milk into smaller containers and place them in the ice bath to cool down more quickly.
  2. Cool to 40°F (4°C): Ensure the milk reaches this temperature as quickly as possible to prevent bacterial growth.

Step 5: Store the Milk

  1. Transfer to containers: Once the milk is cool, pour it into clean glass containers or bottles. Ensure the containers are sanitized to avoid contamination.
  2. Seal and label: Seal the containers tightly and label them with the date of pasteurization. This will help you keep track of freshness.
  3. Refrigerate immediately: Store the pasteurized goat milk in the refrigerator. It should remain fresh for about 7-10 days, but always check for signs of spoilage before consuming.

Keeping Goat Milk Fresh

Proper storage is key to maintaining the quality of your pasteurized goat milk. Here are some best practices for keeping your milk fresh:

1. Refrigeration

  • Always keep goat milk refrigerated at a temperature below 40°F (4°C). Use a thermometer to ensure your refrigerator is at the correct temperature.

2. Avoid Temperature Fluctuations

  • Minimize the opening of the refrigerator door to maintain a consistent temperature. Frequent temperature changes can encourage bacterial growth.

3. Use Clean Containers

  • Store the milk in clean, sanitized containers. Avoid using plastic containers that can leach chemicals into the milk over time.

4. Limit Exposure to Light

  • Store your goat milk in opaque containers or in a dark part of the fridge to limit exposure to light, which can degrade the milk’s quality.

5. Keep It Covered

  • Always keep the milk covered to prevent contamination from other foods and odors in the refrigerator.

6. Check for Spoilage

  • Before consuming, check for signs of spoilage, such as off odors, changes in color, or curdling. When in doubt, it’s best to discard the milk to avoid health risks.

Additional Tips for Goat Milk Handling

  • Regularly Clean Equipment: Ensure that all equipment used for milking and pasteurizing is thoroughly cleaned and sanitized to prevent contamination.
  • Keep Goats Healthy: Maintaining the health of your goats is essential for producing high-quality milk. Regular veterinary check-ups and proper nutrition contribute to their overall well-being.
  • Experiment with Flavors: Once you’re comfortable with pasteurizing goat milk, try experimenting with different flavors by adding vanilla, cocoa, or other flavorings during the pasteurization process.

Conclusion

Pasteurizing goat milk is a straightforward and essential process that enhances its safety and shelf life. By following the steps outlined above, you can enjoy the numerous benefits of goat milk while ensuring that it remains fresh and safe for consumption. With proper handling and storage techniques, you can savor the delicious, creamy goodness of goat milk for days to come.

Whether you’re using it in recipes, enjoying it plain, or making cheese, pasteurized goat milk offers a wealth of culinary possibilities. Embrace the joy of goat milk, and feel confident in your ability to keep it fresh and delicious!

Happy milking and enjoy your goat milk adventures!

What to Feed Your Goats

Feeding goats can be both a delightful and challenging experience for new and seasoned goat owners alike. These curious and intelligent animals have specific dietary needs that, when met, contribute to their health, happiness, and productivity. Whether you’re raising goats for milk, meat, fiber, or simply as pets, understanding what to feed your goats is essential. In this comprehensive guide, we will explore the nutritional requirements of goats, suitable feed options, and best practices for feeding to ensure your goats thrive.


Understanding Goat Nutrition

Before diving into the specifics of what to feed your goats, it’s essential to understand their nutritional needs. Goats are ruminants, which means they have a complex digestive system designed to break down fibrous plant material. Their diet should be balanced and provide the following key nutrients:

  1. Fiber: Goats require a high-fiber diet to support healthy digestion. This primarily comes from forages such as hay and pasture.
  2. Protein: Essential for growth, reproduction, and milk production, protein should be included in their diet, especially for young or lactating goats.
  3. Vitamins and Minerals: Goats need essential vitamins and minerals to support various bodily functions. A mineral supplement can help meet these needs.
  4. Water: Fresh and clean water is vital for goats, as they need it for digestion and overall health.

Types of Feed for Goats

Here are the primary types of feed suitable for goats:

1. Forage

Forage should be the primary component of a goat’s diet. This includes:

  • Hay: High-quality hay (such as alfalfa, clover, or timothy) is essential, especially in the winter months when fresh pasture is unavailable. Ensure the hay is free of mold and contaminants.
  • Pasture: Goats thrive on fresh pasture and will graze on grasses, legumes, and browse plants. Rotating pasture can help prevent overgrazing and ensure your goats have access to a variety of plants.
  • Browse: Goats love to browse shrubs, bushes, and trees. Allowing them access to browse can significantly contribute to their nutritional intake.

2. Grain and Concentrates

While forage should make up the bulk of their diet, grains and concentrates can be fed in moderation, especially for growing kids, pregnant, or lactating goats. Suitable grains include:

  • Barley
  • Oats
  • Corn

Ensure grains are given in limited amounts, as overfeeding can lead to digestive issues.

3. Commercial Goat Feed

Commercial goat feed is specially formulated to meet the nutritional requirements of goats. These feeds typically include a balanced mix of grains, protein, vitamins, and minerals. Look for feeds labeled for specific goat types, such as:

  • Dairy Goat Feed: Higher in protein and energy, suitable for lactating or breeding does.
  • Meat Goat Feed: Formulated for optimal growth rates in meat goats.

Always read the labels and choose a high-quality feed without fillers.

4. Mineral and Vitamin Supplements

Goats have specific vitamin and mineral needs, including calcium, phosphorus, magnesium, and trace minerals. A good quality mineral supplement specifically formulated for goats can help ensure they receive these essential nutrients.

  • Salt Blocks: Provide salt blocks to ensure goats have access to necessary sodium and chloride.
  • Trace Mineral Blocks: These blocks contain essential trace minerals that may be deficient in their diet.

Feeding Practices for Goats

To keep your goats healthy and happy, follow these feeding practices:

1. Establish a Feeding Schedule

Goats thrive on routine. Establish a consistent feeding schedule to help them feel secure and manage their feeding effectively. Most goats can be fed twice a day, but it’s essential to adjust based on their needs and the availability of pasture.

2. Monitor Body Condition

Keep an eye on your goats’ body condition to ensure they are receiving adequate nutrition. Healthy goats should have a moderate body condition, with visible ribs but a rounded appearance. Adjust their diet based on their body condition and production needs.

3. Avoid Sudden Diet Changes

Goats can be sensitive to changes in their diet, which can lead to digestive issues like bloat. Introduce new feeds gradually over several days to allow their digestive systems to adjust.

4. Provide Clean Water

Always provide access to fresh, clean water. Goats drink a significant amount of water, especially when consuming dry feed like hay and grain.

5. Limit Treats and Snacks

While goats love treats like fruits and vegetables, these should be given in moderation. Overindulging can lead to digestive upset or obesity. Safe treats include:

  • Apples (without seeds)
  • Carrots
  • Pumpkin

6. Observe for Signs of Nutritional Deficiencies

Regularly observe your goats for signs of nutritional deficiencies, such as poor coat condition, lethargy, or changes in appetite. Consult with a veterinarian if you notice any concerning symptoms.


Special Considerations for Goats

  1. Pregnant or Lactating Goats: Pregnant and nursing goats have increased nutritional needs. They require more protein and energy, so consider feeding them higher-quality hay and a concentrated feed during these times.
  2. Growing Kids: Kids require more protein for growth. Feeding a higher-protein grain or special goat starter feed can support their development.
  3. Weather Conditions: During colder months, goats may require more energy in their diet to maintain body heat. Ensure they have plenty of high-quality hay available.
  4. Health Issues: If goats have specific health issues, such as urinary calculi or obesity, consult with a veterinarian for tailored feeding recommendations.

Conclusion

Feeding your goats is a crucial part of their care and management. By understanding their nutritional needs and providing a balanced diet of forage, grains, and supplements, you can ensure your goats remain healthy and productive. Regular monitoring and adjustments based on their body condition and special needs will help you provide the best care for your herd. With proper nutrition, your goats will thrive, leading to happy and healthy animals that contribute to your farm or homestead in countless ways.

Happy goat-keeping! Enjoy the journey of raising these delightful creatures and all the joy they bring to your life.

How to Help a Goat Give Birth

Helping a goat through the birthing process, known as kidding, is a rewarding experience that requires knowledge, preparation, and a calm demeanor. Whether you’re a seasoned goat farmer or a first-time owner, understanding the stages of labor and how to assist your goat can make the process smoother and safer for both the mother and her kids. This guide will walk you through everything you need to know about assisting a goat during childbirth.


Understanding the Kidding Process

Kidding is the term used to describe the process of a goat giving birth. Goats typically have a gestation period of about 150 days, though this can vary slightly depending on the breed. Most goats will give birth to one or two kids at a time, though larger breeds can have triplets or more. Understanding the stages of labor will help you know when to intervene and when to let nature take its course.

Signs of Approaching Labor

Before you assist with the birthing process, you need to recognize the signs that your goat is about to give birth. Look for the following signs:

  1. Nesting Behavior: The doe may exhibit nesting behavior, such as pawing at the ground or moving to a secluded area.
  2. Restlessness: The goat may become restless, shifting positions frequently, or appearing uncomfortable.
  3. Enlarged Udder: The udder will swell as it fills with milk in preparation for feeding the kids.
  4. Relaxed Ligaments: The ligaments around the tail head will loosen, indicating that birth is imminent.
  5. Mucus Discharge: You may notice a clear or slightly cloudy mucus discharge from the vulva.

These signs usually occur within 24 hours of kidding, so keep a close eye on your doe during this time.

Preparing for Kidding

To ensure a safe and smooth delivery, it’s essential to prepare in advance:

  1. Create a Comfortable Environment: Provide a clean, dry, and quiet space for the goat to give birth. This could be a clean stall or a designated kidding pen. Ensure the area is free of drafts and has adequate bedding to keep the doe comfortable.
  2. Gather Supplies: Have the following items ready:
    • Clean towels for drying the kids
    • A pair of gloves
    • Clean scissors for cutting the umbilical cord (if necessary)
    • Iodine solution for disinfecting the cord
    • A bucket of warm, soapy water for cleaning up
    • A heat lamp or warming box (for cold weather)
  3. Monitor the Doe: During the final days of gestation, check on your doe frequently, especially during the night when most goats tend to give birth.

Assisting with the Kidding Process

When your goat shows signs of labor, it’s time to step in if necessary. Here’s how to assist during each stage of labor:

Stage 1: Early Labor

  • Observation: This stage can last from a few hours to over a day. Keep an eye on the doe, but give her space to move about.
  • Stay Calm: Your presence should be reassuring, but avoid startling her. Offer gentle encouragement if she seems anxious.

Stage 2: Delivery

  • Check for Progress: Once you see the doe straining, it’s time to monitor closely. If you notice that the doe is pushing but no kids are visible after 30 minutes, you may need to intervene.
  • Assistance with Presentation: Ideally, the first kid should present with its front feet and head coming out first. If the presentation is abnormal (e.g., back feet first or breech), you may need to help reposition the kid. In this case, wearing gloves and applying a lubricant can help you gently assist.
  • Use Towels: Once the kid’s head is visible, use clean towels to help pull it out gently while the doe is pushing. Be careful not to pull too hard, as this can cause injury to both the doe and the kid.

Stage 3: Afterbirth

  • Check the Kids: Once the kids are born, check to ensure they are breathing and moving. If a kid appears to be struggling, gently rub it with a towel to stimulate breathing.
  • Colostrum Intake: Ensure the kids start nursing within the first few hours, as colostrum is crucial for their immunity.
  • Monitor the Doe: After giving birth, the doe will deliver the placenta, usually within a few hours. Make sure she expels it completely, as retained placenta can lead to infections.

Post-Kidding Care

  1. Provide Nutrition: After kidding, the doe will need extra nutrition to recover. Offer high-quality hay, fresh water, and a balanced feed.
  2. Watch for Complications: Monitor the doe for any signs of distress, such as difficulty walking, excessive bleeding, or signs of infection. If any concerns arise, contact your veterinarian immediately.
  3. Check the Kids: Ensure that the kids are nursing well and that they are warm and dry. If it’s cold, provide a heat lamp or additional bedding to keep them warm.

Conclusion

Helping a goat give birth can be a rewarding experience, but it’s essential to be well-prepared and knowledgeable about the process. By understanding the stages of labor, recognizing the signs of impending kidding, and knowing how to assist, you can ensure a safe and successful birth for both the doe and her kids. With a bit of patience and care, you’ll be able to enjoy the miraculous moment of new life on your farm! Remember, if you’re ever unsure or if complications arise, don’t hesitate to reach out to a veterinarian for assistance. Happy kidding!

How to Milk a Goat for the First Time: A Step-by-Step Guide

Milking a goat for the first time can be an exciting yet daunting experience. Whether you’ve decided to raise goats for milk or are simply looking to help out a friend or neighbor, knowing the proper technique and approach is essential for both you and the goat. This guide will walk you through everything you need to know about milking a goat for the first time, ensuring a smooth and successful experience.


Understanding Goat Behavior

Before diving into the milking process, it’s essential to understand goat behavior. Goats are social animals, and their temperament can vary widely among breeds and individual animals. Here are a few things to keep in mind:

  • Calm Environment: Goats are sensitive creatures, so a calm and quiet environment is crucial for successful milking. Choose a time when the goat is relaxed, such as after feeding or when it is used to being handled.
  • Routine Matters: Goats thrive on routine. If you establish a consistent milking schedule, your goat will learn to anticipate the process and be more cooperative.

Preparation for Milking

  1. Gather Your Supplies:
    • Milking Bucket: A clean, stainless steel or food-grade plastic bucket is ideal.
    • Strainer: A fine mesh strainer or cheesecloth to filter out any debris or hair.
    • Cleaning Supplies: A bucket of warm soapy water, a separate bucket with clean rinse water, and towels or paper towels for drying.
    • Sanitizing Solution: A diluted iodine or another sanitizing solution to clean the udder.
  2. Choose the Right Location:
    • Find a clean, dry area with good lighting for milking. This could be a barn, milking parlor, or a well-lit outdoor space. Make sure the ground is level and safe for both you and the goat.
  3. Prepare the Goat:
    • Secure the Goat: Use a milking stand if you have one, or simply tie the goat to a post or sturdy structure to keep it steady during milking. Ensure it is comfortable and cannot escape.
    • Calm the Goat: Spend a few moments petting and talking to the goat to help it relax.

The Milking Process

  1. Wash Your Hands:
    • Always wash your hands thoroughly before milking to maintain hygiene.
  2. Clean the Udder:
    • Use warm, soapy water to gently wash the goat’s udder and teats. Rinse with clean water and pat dry with a towel. This step is crucial for preventing contamination and ensuring the milk is safe to drink.
  3. Stimulate Milk Letdown:
    • Gently massage the udder for a minute or two to encourage milk letdown. You can also offer the goat a small treat or grain to keep it focused and comfortable.
  4. Start Milking:
    • Grip Technique: Place your thumb and index finger around the base of the teat, squeezing gently to trap the milk. Then, use your other fingers to squeeze and pull down toward the udder, releasing the milk into the bucket. Repeat this motion rhythmically.
    • Practice Makes Perfect: Don’t worry if you don’t get it right immediately. It may take a few tries to find a comfortable rhythm and technique that works for you and the goat.
  5. Watch for Signs of Discomfort:
    • Pay attention to the goat’s body language. If it seems agitated or uncomfortable, stop milking and take a break. Make adjustments as needed to ensure the goat is at ease.
  6. Finish Up:
    • Once you’ve collected the desired amount of milk, gently wipe the teats with a clean cloth and apply a small amount of udder cream or a moisturizing solution if needed. This helps soothe the skin and prevents irritation.

After Milking Care

  1. Strain the Milk:
    • Immediately strain the milk through a fine mesh strainer or cheesecloth into a clean container to remove any impurities.
  2. Store the Milk:
    • Refrigerate the milk as soon as possible to maintain freshness. Raw goat milk can typically be stored in the refrigerator for about a week.
  3. Clean Up:
    • Clean all your milking equipment thoroughly with hot, soapy water and rinse well. Proper sanitation is key to preventing bacterial growth and ensuring the safety of the milk.

Tips for Successful Milking

  • Be Patient: It’s normal to feel nervous the first time you milk a goat. Take your time and stay calm. With practice, you will become more comfortable.
  • Stay Consistent: Establish a regular milking schedule to keep the goat accustomed to the process. Consistency helps with milk production and the goat’s comfort level.
  • Know Your Goat: Every goat has its own personality and comfort level. Get to know your goat’s preferences to make the milking experience enjoyable for both of you.

Conclusion

Milking a goat for the first time can be a rewarding experience that connects you to the animal and the process of food production. By following these steps and understanding your goat’s behavior, you can successfully milk your goat while ensuring its comfort and well-being. With practice, you will develop your technique, making the process smoother and more enjoyable. Enjoy the journey of goat milking and the delicious, nutritious milk that comes from your efforts!

What is Deworming? How Often to Deworm Goats?

Deworming is an essential practice in livestock management, particularly for goats, as it helps maintain their health and overall well-being. Parasites, especially gastrointestinal worms, can significantly impact a goat’s growth, productivity, and quality of life. In this blog, we’ll explore what deworming is, why it’s important for goats, and how often you should deworm them for optimal health.


What is Deworming?

Deworming is the process of administering anthelmintic medications to eliminate internal parasites, commonly known as worms, from an animal’s body. These parasites can include various species of gastrointestinal nematodes, such as Haemonchus contortus (barber pole worm), Teladorsagia circumcincta, and Trichostrongylus axei, among others. Deworming helps control these parasites, reducing their impact on the animal’s health, growth, and productivity.

Why is Deworming Important for Goats?

  1. Preventing Parasite Infestation: Goats are particularly susceptible to worm infestations, which can occur through contaminated pasture, feed, or water. Regular deworming helps prevent the buildup of parasite populations.
  2. Promoting Health and Growth: High parasite loads can lead to malnutrition, weight loss, anemia, and poor overall health. Deworming ensures that goats can absorb nutrients effectively, promoting healthy growth and optimal production.
  3. Improving Productivity: Healthy goats produce more milk, gain weight more efficiently, and are less likely to suffer from diseases related to parasitism. This is especially crucial for dairy and meat producers looking to maximize their yields.
  4. Enhancing Longevity: Regular deworming can contribute to a longer lifespan for goats by preventing the health complications associated with chronic parasite infestations.
  5. Reducing Environmental Contamination: Deworming goats can also help reduce the environmental load of parasite eggs, decreasing the likelihood of reinfestation on the pasture.

How Often to Deworm Goats

Determining the appropriate frequency for deworming goats can depend on several factors, including the specific parasites present, the goat’s age, their environment, and individual health conditions. Here are some general guidelines:

  1. Routine Deworming Schedule:
    • Young Goats (Kids): Kids should be dewormed at approximately 4 to 6 weeks of age, then again at 8 to 12 weeks. They may require additional treatments based on fecal egg counts and their living conditions.
    • Adult Goats: Adult goats can typically be dewormed every 6 to 12 months, but this may vary based on local parasite prevalence, environmental conditions, and individual health.
  2. Fecal Egg Count (FEC): Rather than relying solely on a fixed schedule, consider performing fecal egg counts to assess the parasite burden in your goats. This test measures the number of parasite eggs in a fecal sample, providing insight into whether deworming is necessary. Based on the results:
    • If FEC indicates a high parasite load, deworming should be done.
    • If the count is low, you may extend the interval between treatments.
  3. Environmental Factors: Goats raised in warmer, humid climates may be at higher risk for parasite infestations and might require more frequent deworming than those in cooler, drier environments. Pasture management practices also play a significant role. Rotational grazing and maintaining clean living conditions can help reduce parasite loads.
  4. Signs of Infestation: Be vigilant for signs of parasitism, such as:
    • Weight loss or poor body condition
    • Dull coat
    • Anemia (check the color of the gums)
    • Diarrhea
    • Weakness or lethargy

If you observe these symptoms, consult your veterinarian for advice and consider conducting a fecal exam.

Choosing the Right Dewormer

Selecting the appropriate anthelmintic is crucial for effective deworming. There are several classes of dewormers, including:

  • Benzimidazoles (e.g., Fenbendazole)
  • Macrocyclic Lactones (e.g., Ivermectin)
  • Imidazothiazoles (e.g., Levamisole)
  • Salicylanilides (e.g., Closantel)

It’s important to rotate dewormers from different classes to prevent the development of resistance in parasite populations. Consult your veterinarian for recommendations tailored to your specific herd and situation.

Conclusion

Deworming is a critical component of goat health management that can significantly impact the well-being and productivity of your herd. By understanding the importance of deworming, adhering to a regular schedule, and utilizing fecal egg counts, you can help ensure that your goats remain healthy, productive, and free from the burden of internal parasites. Remember, the guidance of a veterinarian is invaluable in developing an effective deworming plan tailored to your goats’ needs. By prioritizing goat health, you’ll set your farm up for success and enjoy the many benefits that come with raising these hardy, versatile animals.

What is Goat Farming? The Ultimate Guide to Starting Your Own Goat Farm

Goat farming is an increasingly popular agricultural venture that offers numerous benefits, from providing milk and meat to serving as effective land managers. Whether you’re considering raising goats as a hobby or looking to establish a commercial enterprise, this ultimate guide will walk you through the essentials of goat farming, including the benefits, types of goats, basic care, and how to start your own goat farm successfully.


Understanding Goat Farming

Goat farming involves the breeding and management of goats for various purposes, including milk, meat, fiber, and even as pets or for land management. Goats are known for their adaptability to different environments and their ability to thrive on less-than-ideal grazing conditions. This makes them an excellent choice for both novice and experienced farmers.

Benefits of Goat Farming

  1. Diverse Products: Goats provide a variety of products, including:
    • Milk: Goat milk is easier to digest than cow’s milk and is rich in nutrients. Many people prefer goat milk for its unique flavor and health benefits.
    • Meat: Goat meat, or chevon, is lean and considered a delicacy in many cultures.
    • Fiber: Certain breeds, such as Angora and Cashmere goats, produce high-quality fibers used in textiles.
    • Land Management: Goats are natural browsers, effectively managing weeds and brush in pastures and orchards.
  2. Low Maintenance: Compared to larger livestock, goats require less space and are easier to care for. They can thrive on pasture and forage, reducing feed costs.
  3. Adaptability: Goats are resilient animals that can adapt to a variety of climates and conditions. They can be raised in both rural and urban settings, making them accessible for many aspiring farmers.
  4. Sustainable Practices: Goat farming can be integrated into permaculture systems, contributing to soil health, pest management, and biodiversity.
  5. Community Engagement: Raising goats can be a fun and rewarding way to engage with your community, whether through farmers’ markets, educational programs, or goat-related events.

Types of Goats

Before starting a goat farm, it’s essential to understand the different types of goats and their purposes. Here are some common breeds:

  1. Dairy Goats:
    • Saanen: Known for high milk production and gentle temperament.
    • Nubian: Recognized for their rich milk and long ears, these goats have a sweet disposition.
    • Alpine: Hardy goats that produce a good quantity of milk, suitable for various climates.
  2. Meat Goats:
    • Boer: Renowned for their rapid growth and excellent meat quality.
    • Kiko: Resilient and hardy, these goats are well-suited for harsh environments.
  3. Fiber Goats:
    • Angora: Produce luxurious mohair fiber.
    • Cashmere: Known for their fine cashmere wool, these goats require specific management for fiber production.
  4. Pet Goats:
    • Miniature Breeds (e.g., Nigerian Dwarfs): Ideal for families and small farms, they are friendly and easy to handle.

Basic Care Requirements

Starting a goat farm involves understanding their basic care needs. Here’s a breakdown of essential requirements:

  1. Housing:
    • Provide a clean, dry shelter that protects goats from extreme weather conditions. Goats need proper ventilation and enough space to move around comfortably.
  2. Fencing:
    • Strong fencing is crucial, as goats are known to be escape artists. Stock fencing or goat-specific fencing can help keep them safe.
  3. Nutrition:
    • Goats require a balanced diet consisting of forage (hay, pasture), grains, and minerals. Ensure access to fresh water at all times. Consult a veterinarian or an animal nutritionist to create an appropriate feeding plan.
  4. Health Care:
    • Regular veterinary check-ups are essential to monitor health and vaccinations. Common health issues include parasites, respiratory infections, and hoof problems. Establish a deworming and vaccination schedule to maintain their health.
  5. Social Needs:
    • Goats are social animals that thrive in herds. It’s best to keep at least two goats together to prevent loneliness and stress.

Steps to Start Your Own Goat Farm

  1. Research and Planning:
    • Research different goat breeds and determine which suits your goals. Create a business plan outlining your objectives, budget, and target market.
  2. Select a Location:
    • Choose a suitable site with adequate space for grazing, shelter, and access to water. Consider zoning regulations and local ordinances regarding livestock.
  3. Purchase Goats:
    • Acquire healthy goats from reputable breeders or farms. Look for goats that are vaccinated, dewormed, and have health certifications.
  4. Set Up Infrastructure:
    • Build or renovate shelters and fencing. Create a feeding and watering system that meets your goats’ needs.
  5. Establish a Routine:
    • Develop daily routines for feeding, milking (if applicable), and health checks. Regular monitoring will help you spot any health issues early.
  6. Marketing and Sales:
    • If you plan to sell goat products, establish a marketing strategy. Consider farmers’ markets, local grocery stores, or online platforms to reach your customers.
  7. Continued Education:
    • Stay informed about best practices in goat farming through workshops, online courses, or local farming organizations. Join forums or groups to connect with other goat farmers for support and advice.

Conclusion

Goat farming can be a fulfilling and profitable venture for those willing to invest time and effort into understanding these incredible animals. With their numerous benefits, from milk and meat production to sustainable land management, goats offer a versatile addition to any farm. By following this ultimate guide, you can embark on your goat farming journey with confidence, creating a thriving farm that benefits both you and the environment. Whether you seek to raise goats for personal enjoyment or commercial success, the joy of goat farming is sure to enrich your life in many ways.

Top 5 Ways to Choose the Best Chicken Breed for Your Backyard

Raising chickens has become increasingly popular, whether in rural areas or urban settings. Some people do it for a steady supply of fresh eggs, while others enjoy it as a hobby. Small farmers may even see it as an opportunity to earn extra income. Regardless of your reasons, raising chickens can be a fulfilling experience. However, before diving in and building your coop, you’ll need to navigate the many chicken breeds available. Each breed has unique characteristics, which can make selecting the right one feel overwhelming.

In this guide, we’ll break down the top five factors to consider when choosing the perfect chicken breed for your needs. Whether you prioritize egg production, climate adaptability, temperament, space, or personal preferences like egg color, we’ve got you covered. Let’s explore the details!

1. Define Your Purpose: What Do You Want from Your Chickens?

The first step in selecting a chicken breed is understanding your purpose for raising them. Different breeds excel in various areas, so here are some common reasons people raise chickens and the breeds that suit each purpose:

  • Egg Production: If your primary goal is a steady supply of eggs, focus on prolific layers like Leghorns, Rhode Island Reds, and Sussex. For example, Leghorns can produce up to 300 eggs per year.
  • Meat Production: If you plan to raise chickens mainly for meat, opt for larger breeds like Cornish Cross or Brahmas. These breeds grow quickly and yield a good amount of tender meat.
  • Dual-Purpose Breeds: For those looking for both eggs and meat, dual-purpose breeds like Plymouth Rock or Orpingtons are ideal. They provide a decent egg yield and sufficient meat, making them excellent for small farms.
  • Ornamental or Show Breeds: If aesthetics are your focus or you wish to participate in poultry shows, consider breeds like Silkies and Polish chickens, known for their beautiful appearance and friendly nature.

Tip for Beginners: If you’re new to chicken-keeping, dual-purpose breeds are a great starting point. They are typically hardy and good-natured, making them easier to manage while providing both eggs and meat.

2. Climate Adaptability: Choose a Breed Suited for Your Environment

Different chicken breeds thrive in various climates. It’s crucial to consider the weather conditions in your area when selecting a breed:

  • Hot Climates: If you live in a warmer region, look for breeds that can handle heat well. Leghorns, Andalusians, and Fayoumis are excellent choices, as they have lighter body weights and larger combs that help them cool off.
  • Cold Climates: In colder areas, select breeds that can withstand freezing temperatures. Chickens with smaller combs, like Orpingtons, Wyandottes, and Plymouth Rocks, are better suited for cold weather as they have thick feathering for insulation.

Tip for Climate Consideration: Regardless of the breed, ensure your chickens have appropriate shelter. Provide shaded areas and ample water in hot climates, while ensuring your coop is well-insulated and free from drafts in cold climates.

3. Temperament: Consider the Behavior of the Breed

Chickens have distinct personalities, and their temperament is an essential factor, especially if you have children or other pets. Some breeds are friendlier and easier to handle than others:

  • Docile and Friendly Breeds: For friendly and manageable chickens, consider breeds like Buff Orpingtons, Australorps, or Silkies. These breeds are calm and great for families, as they can be easily handled.
  • Active or Flighty Breeds: Some breeds, like Leghorns and Anconas, are more active and independent. While they may be harder to handle, they thrive in free-range environments where they can explore.
  • Aggressive or Territorial Breeds: A few breeds, such as Rhode Island Reds, may exhibit aggressive tendencies, especially towards other chickens. Keep this in mind if you plan to have a mixed flock.

Tip for Mixed Flocks: When keeping multiple breeds, ensure they share similar temperaments. Mixing docile and aggressive breeds can lead to bullying and stress.

4. Space Availability: How Much Room Do You Have?

The space you have available for your chickens is a critical consideration, as different breeds require different amounts of space:

  • Small Space Breeds: If your backyard is limited, consider smaller breeds like Bantams, which require less space. Silkies and Bantam Cochins are ideal options for urban settings.
  • Free-Range or Larger Space Breeds: If you have ample land and want chickens for pest control, opt for breeds that thrive in open spaces. Rhode Island Reds, Sussex, and Barred Rocks are active foragers that do well with room to roam.

Tip for Housing: Regardless of the breed, each chicken needs about 3-4 square feet of coop space and 8-10 square feet of run space. Proper spacing helps prevent stress, fighting, and health issues.

5. Egg Color and Appearance: Personal Preference

While egg color doesn’t affect the egg’s quality, it matters to many backyard chicken owners. Different breeds lay various egg colors:

  • White Eggs: Breeds like Leghorns and Anconas are known for laying bright white eggs.
  • Brown Eggs: If you prefer brown eggs, consider Rhode Island Reds, Sussex, and Buff Orpingtons.
  • Blue or Green Eggs: For something unique, breeds like Ameraucana and Araucana lay blue or green eggs, adding variety to your collection.

Tip for Egg Colors: Many people enjoy keeping a mixed flock for a variety of egg colors. If you like this idea, include different breeds that lay white, brown, and blue/green eggs for a colorful basket.

Conclusion: Finding the Right Chicken Breed for Your Needs

Choosing the right chicken breed depends on various factors, including your purpose for raising chickens, local climate, available space, and personal preferences. Whether you seek a hardy egg layer, a beautiful show bird, or a friendly pet, there’s a chicken breed to meet your needs.

Consider all these factors carefully before making your decision. With the right breed, you’ll enjoy happy, healthy chickens that provide eggs, meat, or simply joy in your backyard.

How to Make Your Own Chicken Feed

 Raising chickens is a fulfilling experience, whether you’re doing it for fresh eggs, meat, or just as a hobby. One of the most important aspects of keeping your flock healthy and productive is providing them with a balanced diet.

While commercial chicken feed is convenient, making your own feed at home offers several advantages. You have control over the ingredients, ensure top-quality nutrition, and often save money in the process. In this detailed guide, we’ll cover everything you need to know about making your own chicken feed, from understanding their nutritional needs to sourcing ingredients and mixing your custom feed.

Why Make Your Own Chicken Feed?

Before we delve into the how-to, let’s discuss why you might want to make your own chicken feed in the first place.

  1. Cost Savings: Commercial chicken feed can be expensive, especially if you’re raising a large flock. By buying ingredients in bulk and mixing your own feed, you can often reduce your overall feed costs.
  2. Quality Control: When you make your own feed, you know exactly what’s going into it. This allows you to avoid additives, preservatives, and fillers that are often found in commercial feeds. You can also tailor the feed to the specific needs of your chickens.
  3. Customization: Chickens have different nutritional needs at various stages of their life. By making your own feed, you can customize the mix based on whether your chickens are chicks, layers, or broilers.
  4. Sustainability: Making your own feed can be a step towards a more sustainable and self-sufficient farming practice, especially if you grow some of the ingredients yourself.

Understanding Chickens’ Nutritional Needs

To create a balanced feed, it’s crucial to understand the basic nutritional needs of chickens. The key components of chicken feed include:

  1. Protein: Essential for growth, feather development, and egg production. Chickens typically require 16-20% protein in their diet, depending on their age and purpose (laying hens may need slightly more protein than broilers).
  2. Carbohydrates: Provide energy. Grains like corn, wheat, and barley are common sources of carbohydrates in chicken feed.
  3. Fats: Needed for energy and to help absorb fat-soluble vitamins. Sources include flaxseed, sunflower seeds, and fish oil.
  4. Vitamins and Minerals: Essential for bone health, eggshell formation, and overall well-being. Common supplements include oyster shell (for calcium), salt, and vitamin premixes.
  5. Fiber: Helps with digestion. Chickens get fiber from sources like alfalfa, grass clippings, and vegetable scraps.
  6. Water: Although not part of the feed mix, water is crucial for the health and productivity of chickens. Ensure they always have access to clean, fresh water.

Basic Ingredients for Homemade Chicken Feed

Here’s a list of ingredients commonly used in homemade chicken feed. You can adjust the proportions based on the specific needs of your flock.

  • Corn: Provides energy through carbohydrates. You can use cracked corn for easier digestion.
  • Wheat: Another excellent source of energy, with some protein content.
  • Barley: Adds fiber and energy to the mix.
  • Soybean Meal: High in protein, essential for growth and egg production.
  • Oats: Provides both fiber and energy, making it a good all-around ingredient.
  • Fish Meal: Adds protein and Omega-3 fatty acids, which are important for overall health and egg quality.
  • Alfalfa: High in fiber and provides essential vitamins.
  • Sunflower Seeds: Rich in fats and proteins.
  • Oyster Shell: A source of calcium, important for strong eggshells.
  • Salt: Necessary for maintaining mineral balance.
  • Grit: While not an ingredient in the feed itself, grit helps chickens digest their food.

Sample Chicken Feed Recipes

Here are a few sample recipes to get you started. Adjust the proportions based on the age and type of your chickens.

Recipe for Laying Hens (16% Protein)

  • 30% Corn
  • 30% Wheat
  • 20% Soybean Meal
  • 10% Oats
  • 5% Fish Meal
  • 3% Alfalfa
  • 2% Oyster Shell

This mix ensures that your laying hens get enough protein, calcium, and other essential nutrients for strong eggshells and consistent egg production.

Recipe for Broilers (20% Protein)

  • 40% Corn
  • 25% Wheat
  • 20% Soybean Meal
  • 10% Barley
  • 3% Sunflower Seeds
  • 2% Fish Meal

Broilers require a higher protein content to support rapid growth and muscle development. This recipe provides the necessary energy and protein for healthy broiler growth.

Recipe for Chicks (18-20% Protein)

  • 30% Corn
  • 25% Wheat
  • 25% Soybean Meal
  • 10% Oats
  • 5% Fish Meal
  • 3% Alfalfa
  • 2% Grit

Chicks need a high-protein diet to support their fast growth. This recipe also includes grit to help them digest their food effectively.

Sourcing Ingredients

When making your own chicken feed, sourcing high-quality ingredients is crucial. Here are some tips on where to find the necessary components:

  1. Local Farmers: If you live in a rural area, local farmers may be willing to sell you grains and other ingredients in bulk at a lower cost.
  2. Feed Stores: Many agricultural supply stores carry the individual ingredients needed to make chicken feed. Look for non-GMO and organic options if possible.
  3. Online Suppliers: Numerous websites offer bulk feed ingredients that can be shipped to your door. This is a convenient option if you don’t have access to local suppliers.
  4. Homegrown Ingredients: If you have the space, consider growing some of your own feed ingredients. Corn, sunflowers, and alfalfa can be grown in a home garden and used in your chicken feed.

Grinding and Mixing

Once you have your ingredients, the next step is to grind and mix them. Here’s how:

  1. Grinding: Some ingredients, like corn and grains, may need to be ground before being fed to chickens. You can use a grain mill or even a blender to grind the grains to the desired size. Chicks and young chickens require finer feed, while adults can handle coarser mixes.
  2. Mixing: After grinding, combine all the ingredients in a large container or feed mixer. Make sure the mixture is evenly blended so that your chickens get a balanced diet with each feeding.
  3. Storage: Store the feed in a cool, dry place in an airtight container to keep it fresh and prevent mold or pest infestations. Homemade feed, like any other feed, can go bad if not stored properly.

Feeding Your Chickens

With your homemade feed ready, it’s time to start feeding your flock. Here are a few tips:

  1. Start Slowly: If your chickens are used to commercial feed, introduce the homemade feed gradually. Mix it with their regular feed, slowly increasing the proportion of homemade feed over a week or two. This helps prevent digestive upset.
  2. Monitor Health: Keep an eye on your chickens’ health and productivity. If you notice any decline in egg production, weight loss, or other health issues, you may need to adjust the feed mix.
  3. Supplement with Greens: While your homemade feed should provide most of the nutrients your chickens need, it’s a good idea to supplement their diet with fresh greens, fruits, and vegetable scraps. This adds variety and additional nutrients to their diet.
  4. Provide Grit: Chickens need grit to help them grind and digest their food, especially if you’re feeding them whole grains. Make sure they have access to grit at all times.

Potential Challenges

While making your own chicken feed has many benefits, it’s not without challenges. Here are a few potential issues to be aware of:

  1. Time and Effort: Mixing your own feed requires time and effort. If you have a large flock, the process can be time-consuming, especially if you’re grinding grains by hand.
  2. Nutritional Balance: Ensuring your chickens get a balanced diet is critical. It’s easy to under- or over-supply certain nutrients, which can lead to health problems. Pay close attention to the nutritional content of your ingredients.
  3. Storage Issues: Homemade feed doesn’t contain preservatives, so it may spoil more quickly than commercial feed. Proper storage is essential to prevent mold and pest problems.
  4. Cost Fluctuations: The cost of raw ingredients can fluctuate based on factors like weather, demand, and location. This can affect the overall cost-effectiveness of making your own feed.

Conclusion

Making your own chicken feed is a rewarding and cost-effective way to ensure your flock gets the best possible nutrition. By understanding your chickens’ nutritional needs, sourcing high-quality ingredients, and carefully mixing your feed, you can provide a balanced diet tailored to your flock’s specific requirements. While it does require time and effort, the benefits of homemade feed—cost savings, quality control, and the satisfaction of self-sufficiency—make it well worth the investment.

Whether you have a small backyard flock or a larger operation, creating your own chicken feed can lead to healthier, happier chickens and better egg production.