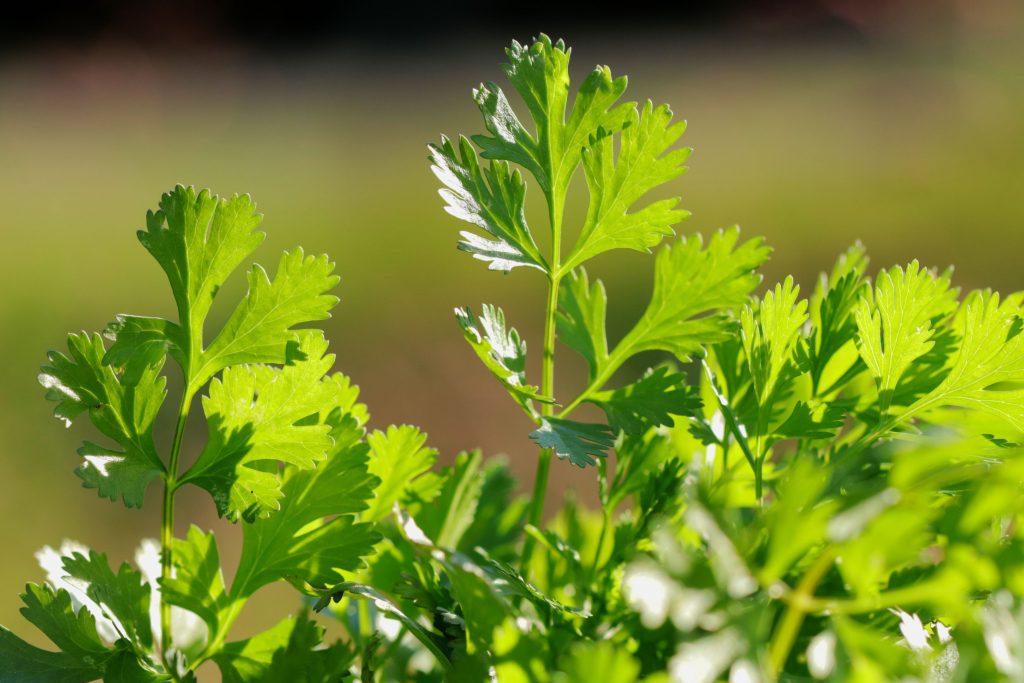
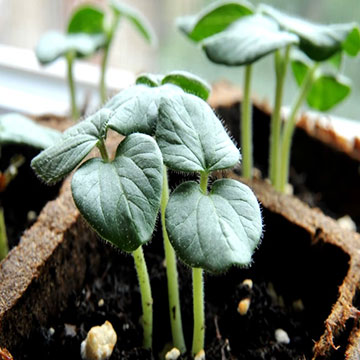
Cilantro is one of the most common herb used in kitchen. Cilantro basically means green leaves and stem of the plant and is also known as coriander. It is used as a common cooking spice in Asian, Middle Eastern, Mexican and African cuisines.
Coriander vs Cilantro
The stalks and leaves of Coriandrum sativum plant are known as cilantro in North America and the dried seeds are called coriander. Whereas in other parts of the world this plant is referred as coriander plant and the seeds as coriander seeds.
How to Grow Coriander From Seeds ?
The best time to plant cilantro is spring or early summer. Make sure that the soil is well drained and moist before sowing seeds.
The first and foremost thing to be done before sowing any seed is to prepare the planting area. This can be done by adding compost or other organic matter to the planting area.
Make the area smooth with the help of a rake. Sow the coriander seeds at least 2 inch deep into the soil, spaced about 6-8 inches apart. Provide water soluble fertilizer as well as plenty of moisture to cilantro plant.
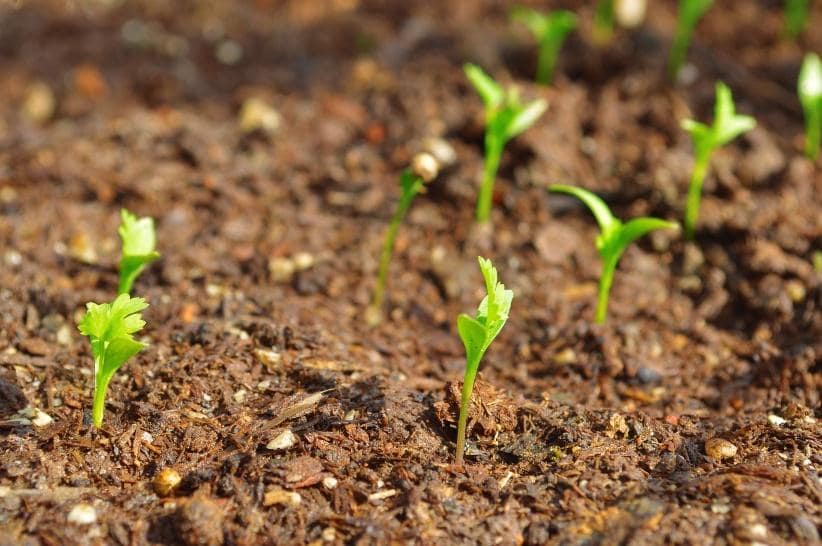
The next thing you will be concerned about after sowing seeds is, how long does it take for cilantro to germinate? Well, Cilantro grows very quickly, so you can make successive sowing of seeds every 2-3 weeks and get fresh leaves every time.
How Long Does Coriander Seeds Take To Germinate ?
The usual time of coriander seed germination is 2-3 weeks. Temperature also plays a major role on how long a seed takes to germinate. A moderate temperature of about 20 degree Celsius is required for coriander seeds to germinate.
Make sure to water the plants regularly and do not allow the soil to get dried up. You can get fresh supply of coriander leaves if you sow seeds every 3 weeks. If you notice the plant being suffered then do give organic feed to the plant.
Tips for Harvesting Cilantro
Cilantro gets ready within 2-3 weeks of sowing the seeds. Here are few tips that you need to follow while harvesting cilantro and coriander seeds.
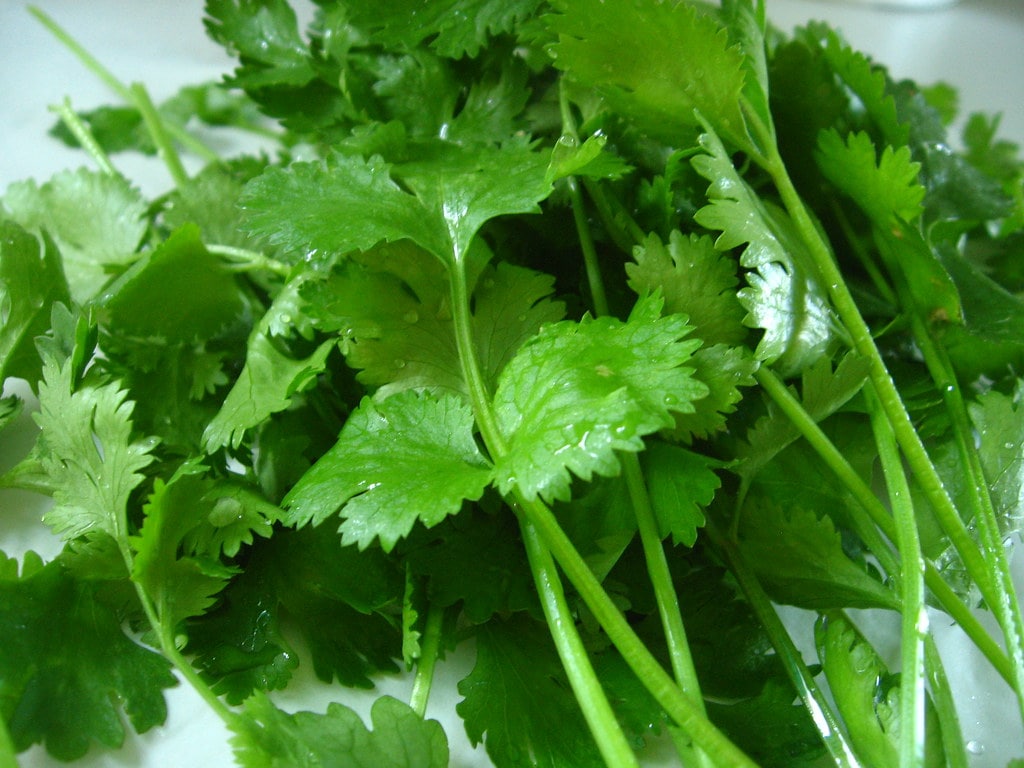
You need to harvest cilantro leaves once they are big enough to cut down.
Don’t be in a hurry to pluck them off.
Snip off the whole stem if you need it or you can just cut the leaves.
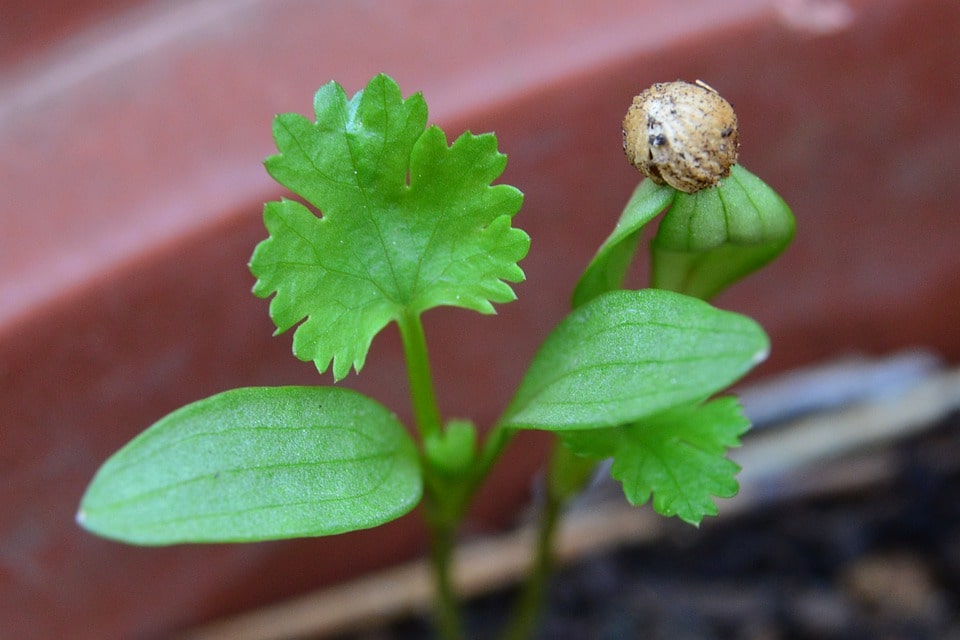
If you are growing cilantro for the seeds then wait till the flowers get dried up.
Cut the stems and place it in a paper bag, with the stems facing the opening of the bag.
Tie the stems with the bag in a bunch and hang it in a dry place.
When the flowers get completely dried up, you just need to shake the bag and the seeds will be collected at the bottom of the bag.
This will take about 2-3 weeks.
You can now use the seeds for further germination or you can use it in cooking as well.
If you are growing cilantro for leaves then as soon as the flower develops pluck them off as it will ensure that all the energy is given for the development of the leaves.
This little plant can give you the benefit of its leaves as well as its seeds. If you love cooking then this herb is a must in most of your dishes.
Cilantro can be grown in pots, container, on terrace, in backyard or even in balcony as the process of cilantro germination is very quick and easy.
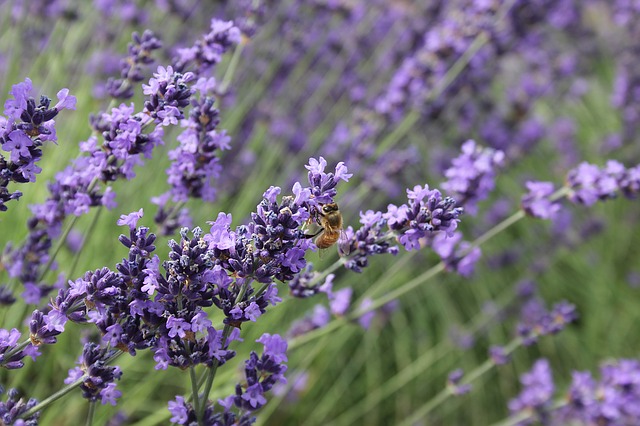
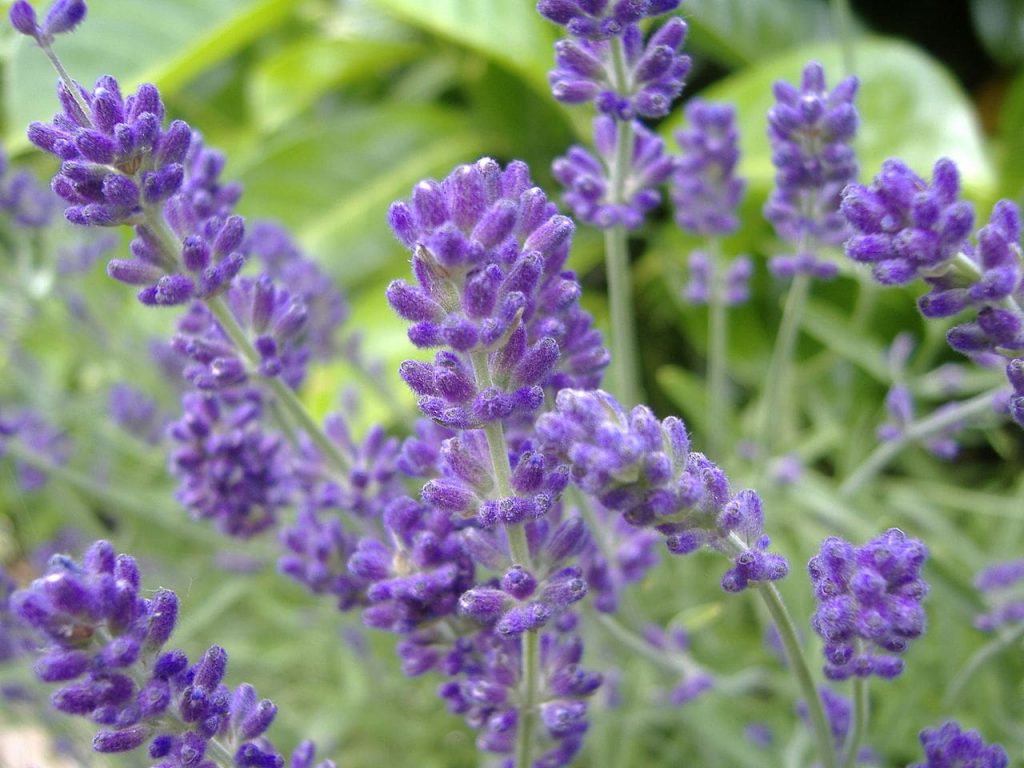
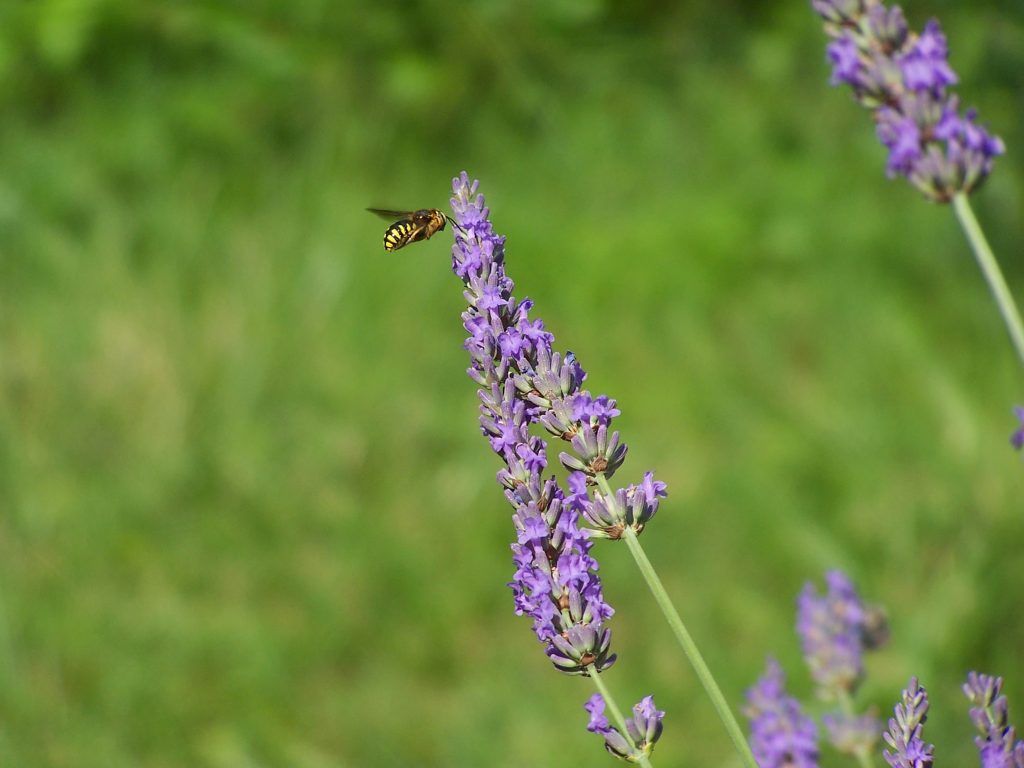
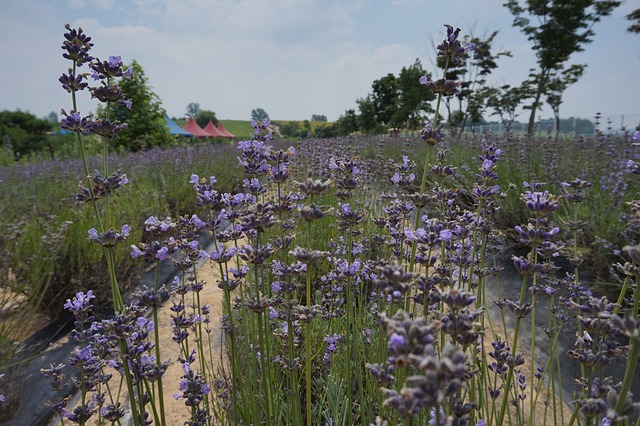
Lavender, also known as Lavandulaspica consists of 30known species of flowering plants in the entire mint family. Lavender is a beautifully aromatic and rustic shrub or herb that originated in the mountainous region of the Mediterranean and North Africa. The height of the herb is from 40-80 cm. The plant has oblong, linear, and opposite leaves consisting of small purple flowers.
Lavender farming is really easy and it only requires ideal growing conditions and extra space. Climate is a critical factor in growing the lavender plant. Lavender can be containers/pots, and backyards. Growing dozens of lavender plants in the backyard of the house can make an individual earn a high profit. If the lavender is cultivated commercially on a huge scale, it can fetch high profits.
Also, there are plenty of ways in which lavender farming can help an individual earn money. For example, lavender can be used in making lotions, soaps, essential oils, fragrant sachet, teas, medicines, and flavorings. Also, fresh or dried lavender can be sold to earn huge profits.
The Indian subcontinent cultivates lavender on the slopes of the hills of Uttar Pradesh and Himachal Pradesh and in regions experiencing scanty rainfall. Successful cultivation of the lavender crop is also seen in Kashmir valley.
Types of Lavender
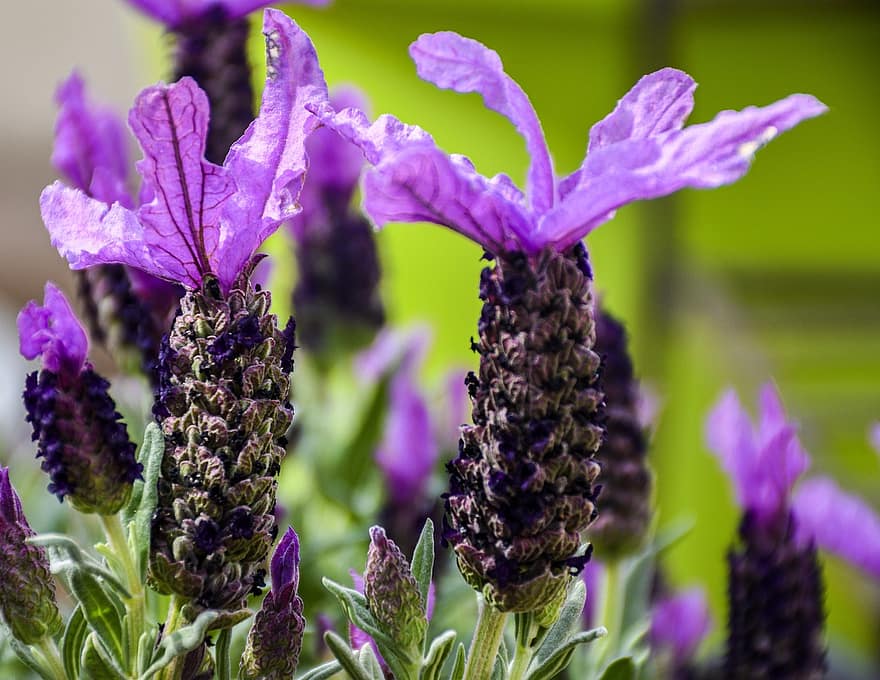
At a global level, there are five types of lavender varieties known in the market – French lavender, English lavender, Spanish lavender, Spike lavender, and, Lavandin
French lavender
French lavender or Lavanduladentata grows in warm climate and are extremely fragrant. This variety of lavender is grown annually in certain regions of the United States.
English lavender
English lavender, also known as Lavandulaaugustifolia is one of the popular species of lavender. This species is used in flavouring, oils, dried flowers, and perfumes. English lavender can be cultivated in warm regions where days are longer.
Spanish lavender
Spanish lavender or scientifically known as Lavandulastoechas blossoms in dark purple colour and are majorly used for dried flowers. Spanish lavender species are grown annually for decoration purposes.
Spike lavender
Spike lavender, also called as Lavandulalatifolia is grown to extract essential oils which is further used to make soaps. Spike lavender is also referred as Portuguese lavender and requires a Mediterranean climatic conditions.
Lavandin
Lavandin, also referred to as Lavandula x intermedia has a high oil and flower yield, however, the oil quality might not be of supreme quality as compared to the yield. The other name of Lavandin is Dutch lavender and this variety is a hybrid of Spike and English lavender.
In India, Spike lavender, Lavandin, True lavender (English lavender), and Sher-e-Kashmir varieties are grown.
Starting a Lavender Farm
Lavender flower farming should be on the top of a gardener’s list as it is a commercially profitable crop. The flower also adds more beauty to the garden. Although growing lavender on a farm is time-consuming and a risky business because the product may not be of preferred variety.
The transplants of lavender can be planted in small areas such as nurseries. To retain desired characteristics in the plant, growers opt for root divisions or cuttings. It is advisable to do a patch test in a small area to check the appropriate climatic conditions for the plant.
Lavender Propagation Techniques
In order to grow lavender for profit, cutting and planting through seedling is done. The sifted soil can be layered lightly. However, planting seeds need knowledge as well as effort. Beginners can start their journey of lavender cultivation by the cutting method. Tissue culture and layering can also be used for the propagation purpose of the plant.
Seedlings can be sowed directly in the area or in the trays. The germination time of lavender seeds is around 2-6 weeks. To plant the lavender plant by cutting (vegetative technique), it is essential to cut the stems which can be around 10 cm long. The leaves present in the lower region of the plant are removed. Slight humid soil is required in the cutting technique as excess water can cause decomposition. The spacing between each plant should be around 30-90 cm in the cutting method.
Tissue culture is preferred for mass production of the plant and to yield genetically identical and disease-free plants. The mother plants are selected and then cultured for bulk production. However, this technique is costly. On the other hand, layering method uses healthy stem from which a 12-15 cm foliage is removed.
This leaves a 10 cm foliage at the branch tip. The bare section is covered with moist soil. Once the new plants start to grow, they are separated from the mother plant. The new plants are then again planted in the field once the rooting starts. The roots in the plants take around 6-12 weeks to grow.
Spacing and Planting in Cultivation
Spring or Autumn is the best time for the transplantation of the seedling. The plant need plenty of room to grow. The lavender plant is planted 30-40 cm inside rows and are kept at a distance of 4 feet between rows. The highest yield should have plant density of 20,000/ha. For the proper root establishment of the plant, earthing up of soil is extremely essential.
Lavender can tolerate the drought situations. The water requirement of the plant is minimal and thus needs water every 2-3 weeks till the time the buds are formed. Later on, once or twice in a week is required until the harvesting is done.
Best Farming Conditions for Cultivation
Lavender plant being a Mediterranean plant grows best in the dry climatic conditions. The plant however can tolerate various temperature range. Cold or humid climate is not suitable for the proper plant development. Direct sunlight or sun exposure for approximately 6-8 hours is preferable for growing a healthy lavender plant.
Lavender grows best in a dry and warm environment, and in mild winters. Early years require pruning even during the mature stage as it makes the entire framework of the plant sturdy. Failing to do pruning an initial couple of years can result in woody stems subsequently affecting flowers and stem health.
In order to avoid humidity, a proper drainage system is preferred. As the rise in a humid environments increases the risk of fungal infections. Well-drained soil with pH in the range of 6-8 is used for the cultivation. A calcareous type of soil is ideal for lavender. The optimum temperature for lavender cultivation is in the range of 15-30 °C. The temperature of soil should be higher than 18 °Ctosupport proper growth. The product quality can be affected badly by overheating in summer.
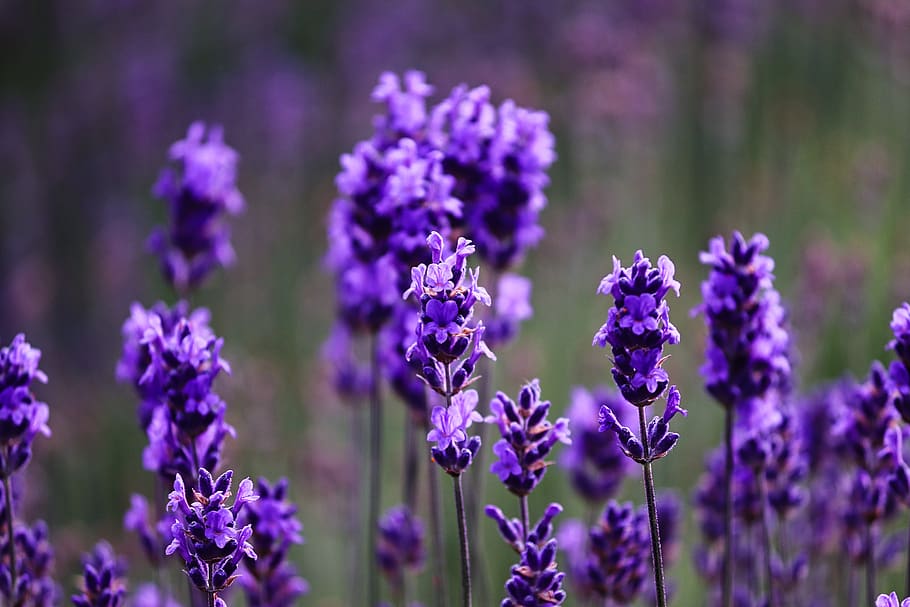
lavender farm-purple beauty plants
In India, the best climatic condition to grow lavender is autumn season. This helps in firm establishment of the plant before the cold winter. Spring season further will help the plant to grow quicker.
Global Cultivating Regions
Lavender can be easily grown in Canada, Africa, Indonesia, Japan, UK, India, Australia, New Zealand, and USA. Other regions producing the herb are Goodwin Creek, Central Mexico, Bulgaria, and Italy, Spain among others.
Irrigation in Cultivation
The commercial cultivation of lavender requires irrigation for initial 2 years so that the crop can be properly established. The regions experiencing low rainfall and has light soil need irrigation only at vital growth stages. Irrigation is must during the flower initiation stage. It is advised to avoid sprinkler irrigation system as that may elevate disease conditions in the crop. Drip irrigation is the preferred system as it aids in controlling weed and in saving water.
Drip Irrigation for Lavender Fields
As discussed earlier, excessive moisture is not good for lavender crops. It can cause a lot of problems and can disrupt the overall growth, and hence productivity. Aerial irrigation is not suitable too, as it causes leaves to spit in half. Lavender is also at risk of rotting, especially of the soil, remains moist for a long time. Hence, proper planning is required to ensure healthy and productive growth of lavender plants.
Talking to the experienced lavender farmers about “how to do lavender farming” is not a bad idea either. After all, there is no substitute for experience. And they already have learned a lot of lessons, you are now about to learn, and they can give you some valuable feedback!
As said repeatedly, lavender plants don’t require a lot of water, and you should stay at the shorter side while watering. These plants can even withstand droughts well enough. All you need to do is to maintain the moisture in the soil.
Essential Tools for Lavender Cultivation:
Like other crops, lavender cultivation also needs some equipment and tools. These are some essential tools commonly required while planting lavender.
Sharp Sickle
Steel Shank
Kneeling Pad
Lavender Sifter
Mini Plow
A folding hand saw
Washable gloves
Fertilizers and Manures for Lavender Cultivation
Once the lavender plant is established properly, there is no need of fertilizer. The new plants do need fertilizers as they can boost the plant growth. It is recommended to use P 40kg/ha, N 100kg/ha, and K 40kg/ha. The basal application needs complete dose of K2O and P2O5 but only 20 kg nitrogen is used. Rest of the nitrogen is used in the later stage.
Diseases and Pests in Lavender
Lavender is resistant to most common pests and insects. However, to be successful in the farming of lavender, it is essential to prevent these insects rather than curing them in the later stage. There are chances that the plant might be affected by Mites, Slugs, Con chinchillas, and Whiteflies.
Preparing the land and making the right soil
Lavender farming profitability depends a lot on the land and soil. A lot of successful lavender farmers do some research before finally starting, and there is no reason why you should not do the same.
Well-drained, gravel-laden, sandy soil with a pH between 6.5 and 7.5 is perfect for growing lavender. Dig the ground at least 18 to 24 inches deep and then add the soil to it. If you can mix the soil with a mixture of 1/3 clay, 1/3 loam, and 1/3 sand, the effectiveness of soil will be even better.
A lot of hybrid lavender species are known for producing sterile seeds. In such a scenario, you should use well-drained, light and moderately fertile soil.
How to Plant Lavender – Start Planting through Soft Cuttings
If you are a beginner, growing lavenders from seeds is not a good idea at all. Instead, start growing from soft cuttings, taking care of the resource links. Herbs grow from these links. Preparing the cuttings can be both frustrating and tedious. So, you should get some from a nearby nursery.
Leave a space of four feet between rows and 2½ feet between the two plants.
This type of spacing is ideal for growing approximately 4,000 plants per acre.
Ensure surrounding every plant with garden cloth, mulch the plats as well as rows to protect from weeds.
Add a light-colored hoop at the base of every plant, like gravel, sand, or a piece of marble. This will help the reflection of sunlight on the plants.
Prevent excessive moisture to keep your plants healthy.
When to Plant Lavender?
Planting lavender cuttings in the seedbed at the beginning of spring is the best idea. Lavender usually transplants in the autumn or winter. You can obtain a new lavender plant when it is grown a little, and the germination is started. The end of the summer is a suitable time to separate the branches. The flowering time will most probably end at that time.
Taking Care of Lavender Crops for High Yield and Profit
“Good care equals to good yield” suits very well to lavender farming as well. It needs a little bit of rain and a lot of direct sunlight. Furthermore, it can adapt to fall as well.
Removing invasive plants is recommended for proper lavender care. Invasive plants may take up the nutrients from the soil.
You should also remove the old branches at regular intervals. Because, old branches get woody, and may disrupt the growth of soft, younger plants.
You can divide the branches to reproduce new lavender.
Having good drainage for lavender is necessary to avoid puddles of water around the plant.
Pruning is suitable for lavender so that it can bloom the next year again.
Common Pests, Diseases, and their Management
Although, lavender is known as a repellent to most common insects and pests, controlling them is still a very important aspect of lavender care. The formula of “prevention is better than cure” suits the lavender crops best. Therefore, you should act before any sign of attack from pests or diseases.
You can keep a few lavender plants in pots and use them as a repellent spray to protect other plants. Basil and garlic are very effective to protect the plants from files, insects and some fungi.
Even after proper lavender care, plants may get the victim to different plagues. To avoid that, you would like to eliminate the dead or infected plants as soon as possible.
How to Harvest and store lavender?
It would help if you cut the entire branch with leaves and flowers while harvesting lavender. You can remove the leaves later. Use only sharp flower cutting tools to ensure maximum profit. Flowering begins in the first year itself, but the lavender gets ready for harvesting after one year of planting. So, you can start harvesting after 13 to 14 months of planting the cuttings.
Harvesting the lavender crops in the morning hours is ideal, as the oils are most concentrated at that time.
It would be best if you cut the stems as long as possible.
Gather them in bundles and use rubber bands for securing.
Hang them at a sheltered place for proper drying. A cool, dark place with good air circulation is recommended for drying.
Flowers will get dried after a few weeks, and you will be able to remove them by shaking the bundles gently. Shake them into lidded jars for a lot of uses!
The flowering process starts late in high slopes while it starts early in low altitude and warm regions. During the harvesting process, flowers are cut with 10 cm stem length. August or September is the ideal time for harvesting lavender in the Kashmir region.
The yield as well as the quality of the oil depends on various aspects such as the agro-climatic conditions, variety, process of distillation, planting, fertilization, and soil. A yield of 15kg/ha with oil content in the range of 1.2%-1.5% can be obtained under optimal herbal cultivation methods.
Now, lavender for marketing is ready. You can opt to trade in local markets or transport them to distant areas. You should get ready to get some decent money!
Lavender for Business
If you are planning for lavender farming, we would suggest you move ahead. But you will have to be a bit patient, at least in the first year, and you can, of course, afford it to become a successful lavender farmer.
Lavender is available in various fragrances and colours depending on the harvest. The family tree of lavender also constitutes widely known sage, Mediterranean herbs, thyme, and rosemary. The historical data suggests the use of lavender as a fragrant, medicinal, and culinary herb. Roman soldiers used the herb as a disinfectant while ancient Roman people scented their bath tubs using the plant.
The average life of productive and healthy lavender plant when used for commercial purpose is around 12 years. However, in certain cases steady produces are obtained for nearly 20 years. Planting lavender for gaining profit can be a perfect mode to transform the love for gardening and herbs into a method to earn money by selling the plants as well as the products. Various products can be made from the plant such as aromatherapy products, dried lavender bundles, herbal pillows, skin care products, lavender buds, tinctures, sachets, and oils. Manufacturing these products require less effort but are high in demand in the market.The herb is also used to increase the taste of honey. The baking process too uses lavender crop to enhance the taste.
Fresh bouquets also provide profit to the grower. A 20’x20’ area produces approximately 300 bunches/year which is of $1,800. The profit margin in large plots is even higher. For instance, a quarter acre area produces around 3,000 bunches which costs $18,000. The flower bunches that remains unsold can be dried and sold to florists, crafters, candle makers, beauty product manufacturers for various purposes.
The easy endeavor is to make soaps using the very simple melt and pour technique. These soaps are the best-selling gift items among the customers. Aromatherapy uses lavender oil as one of the most essential products. The distillation process helps in the extraction of lavender oil. The by-product obtained after the distillation process consists of the water-soluble products together with the oil and thus it is used in room fresheners and spritzers.
At a global level, a certain region of France has been involved in commercial lavender farming for centuries. North America has started to grow the crop on a commercial scale. The growers in these regions have started farming in the backyard as well as multi-acre farms. The knowledge is shared among the novice growers for better yield. Thus, lavender is considered a perfect cash crop for small growers to get substantial income.
Drying the Purple Herb
Once the process of harvesting is complete, the stems of the lavender bunches are tied with a strong rubber bands. The bunches are then transferred to the drying area as early as possible. The delay in transferring results in fading of the natural colour. The drying area should be well-ventilated, dry, and dark. Lavender bunches are hanged in upside-down direction for drying.
Advantages of Growing Lavender
The flowers of the crop are edible and the crop has an approximate life span of 10 years. The plant lavender can be grown without hassle but is a costly herb. The extracted oil has many health benefits such as preventing digestive issues, anti-inflammatory, reduces stress and anxiety, treats sleep issues, among others.
Thank you for reading this piece patiently! Hopefully, we have helped you at the beginning of your journey as a lavender farmer. If you have any questions, feel free to write to us. We will be more than happy to answer! And don’t forget to share with your friends and family members! Good Luck!
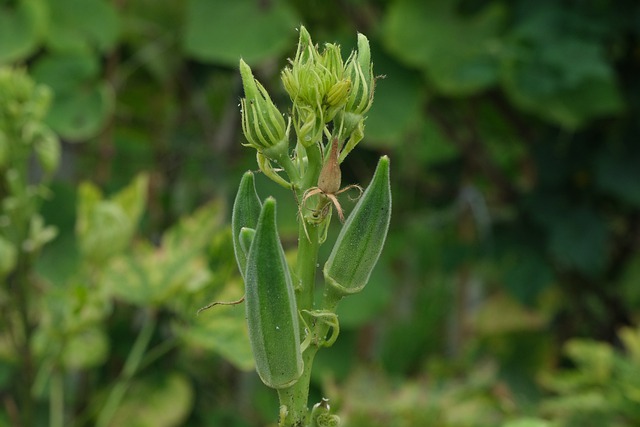
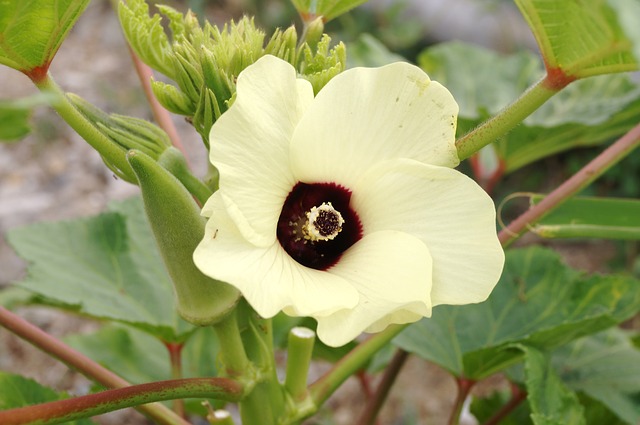
Okra is a vegetable commonly known as ladyfingers in many countries. These plants are very simple and easy to grow. Okro, gumbo, kopi, Arab, and bhindi are some other common names of okra pods.
This crop can be grown in different varieties of climate and soil. It requires plenty of sunlight. Also the roots should not remain wet for a long time. However, climate plays an important role in okra production. Cold climate is not very suitable for okra. They require proper temperature for germination of seeds.
To products a big crop yield you must be aware of how to increase production of okra?
Keep in mind the steps mentioned below to increase okra production.
Why are my okra plants not growing?
There can be a number of reasons for improper growth of your plants. Some of the common reasons for this are:
Lack of proper sunlight: sunlight is very important and main factor for growth of okra. It needs sun for 7-8 hours daily. Hence if the crop doesn’t get sufficient sunlight then it will not bloom.
Heat: Heat is very important for okra as cool climate will lead to rotting of the seeds. The temperature of soil should be at least 70° F. Therefore heat is necessary however if the plant doesn’t get sufficient heat then it may end up growing improperly. Hence it is said that areas having plenty of sunlight are most suitable for okra production.
Not getting enough water: Though okra is a plant that doesn’t need much water and can survive in less amount of that for a good and healthy plant it is important to water the plant from time to time.
Improper nutrition: It is clear that if a plant doesn’t get sufficient amounts of nutrients required then growth will definitely be affected. Hence to avoid this situation, one can add necessary fertilizers to the crop to fulfill the need of nutrients. For example, adding phosphorus is beneficial for flowering.
Right time: Usually the plant matures in 55-65 days but sometimes it may take a bit longer. Nothing can be done in this situation except wait. One should have patience and wait for flowering.
Wilted seeds are a common problem that you may often face. But it is not a big deal if you take necessary action on time. Keeping your crop hydrated can save them from wilting.
If you find that your plant is wilted then water it until the soil becomes moist. Then wait for about an hour and if you feel that the soil is dry then water it again.
Usually, in hot and dry climates the water gets evaporated very fast hence leads to wilted seeds. To treat this you need to water the plants at regular intervals. But before irrigation, put your finger in the soil 1-2 inches deep and check whether the soil is dry.
If the soil is dry then water it. On the other hand, if the soil has moisture then the reason for wilting is not lack of water. Excess sun or wind or any pest or disease may be responsible for this. So to avoid this change the position of the plant and shift it to an area where the sunlight is not direct or excess.
Next, if the problem is excess water then for that one can make some holes on the surfaces of soil, this will allow the water to penetrate to the soil. Also to avoid this one should check the soil before watering.
Along this remember that you don’t keep your plant in a pool of water as this can lead to yellow leaves.
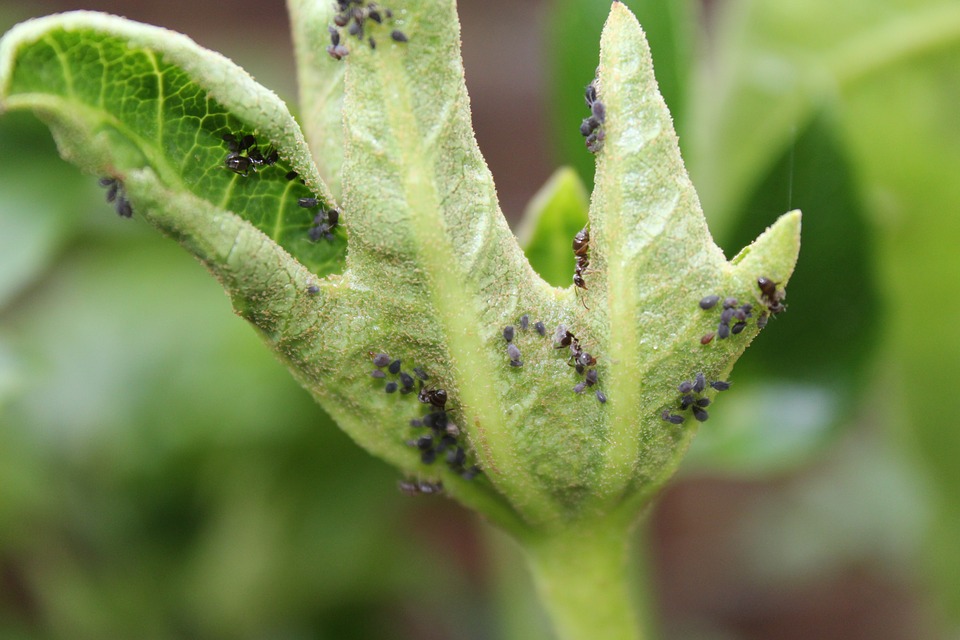
Firstly aphids are small-sized insects that feed on the plant and suck the nutrients. These insects cannot be recognized easily. They are very tiny in size and can not be easily seen with naked eyes.
Okra exists in a variety of colors like yellow, brown, light green, pink or black. They have a waxy or wool-like coating on the surface. They have long antennae on their pear-shaped body. There are different methods to control aphids like:
Aphids are not very friendly to cold water. Hence one you spray chilled water on the leaves, there is no coming back of aphids on the same plant.
Flour can be another cure to aphids. Flour constipates the aphids hence can be sprinkled on the plant
Neem oil also has properties to destroy aphids. Along this insecticidal soaps or any dish washer solution can also be used.
Diatomaceous earth is an organic material that will vanish the aphids without harming the plant.
Isopropyl alcohol can also be used to control aphids. Ethanol however is also a great option.
Why is my plant not Blooming?
There can be different reasons for this but insufficient water is one of the main and common reasons for not Blooming. Along with this improper sunlight also delays blooming. Pruning of the plant on time is very important in this cultivation.
Hence if you don’t do this activity on time, then plants may not show flowering. Hence one should take care of all the above-mentioned points so that your plant blooms on time.
Homemade fertilizers of okra plant:
You can prepare fertilizers for your okra plant at home and increase production of okra plants by multiple folds. Preparing fertilizers at home will surely improve the quality of it as well as will be organic. A list of homemade fertilizers is given below:
Compost:
Compost is very common as well as easy to prepare. It is used by many cultivators for all types of crops. To prepare this, dig up a big hole in the ground. Put a layer of soil mixed with dry leaves. Then you can add a lot of things like kitchen waste like vegetable and fruit peels or other kitchen waste, paper, clothing, etc.
After that again cover it with a layer of soil and leaves. You can add such types of waste products afterward also. Now leave this for 45 days and your compost is ready.
You can also make a very nutritional solution for your crop again using your kitchen products. You can use the left over water or water from the vegetables or water left after washing your cereals. Whether it is pasta or eggs you can use all of them. Collect all the water and let it cool and you can use it. Also you can use hot boiling water on weeds to destroy them
Eggs shells
Eggs shells can also provide some nutrients to the plant. You can use all the leftover eggshells. Dry them properly and then grind them. Hence they are ready to be used. These contain calcium carbonate that improves the fertility of the soil.
These are some of the homemade fertilizers that can be used for your crop
Bottom line:
okra crop is one of the easiest crops to grow. However similarly as other crops they need proper care. In this article you can learn about some facts and points that you should know if you are growing okra crops and wish for higher crop yield than usual.
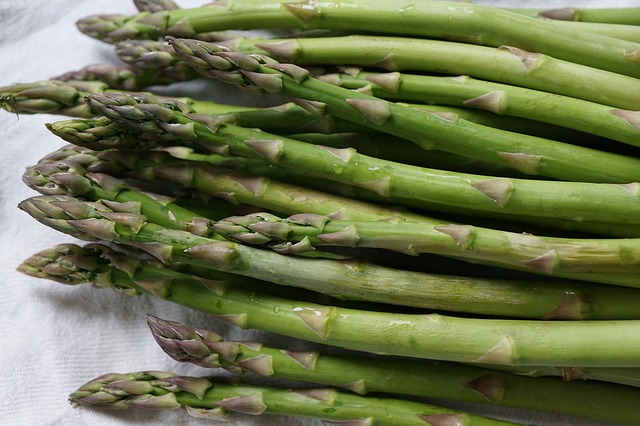
If you are looking around for a guide on “how to grow asparagus?”, here we are to help you! In this guide, we are going to talk about everything related to farming of asparagus from planting, caring, harvesting and storage. Let’s move on to find more.
Asparagus is among the first few plants that greet farmers in springtime. It is a perennial plant, which means, once you successfully start asparagus farming, you will earn decent benefits year after year. Also, to be healthy, low-calorie food, asparagus’s ferny foliage is used to make beautiful ornamental as well.
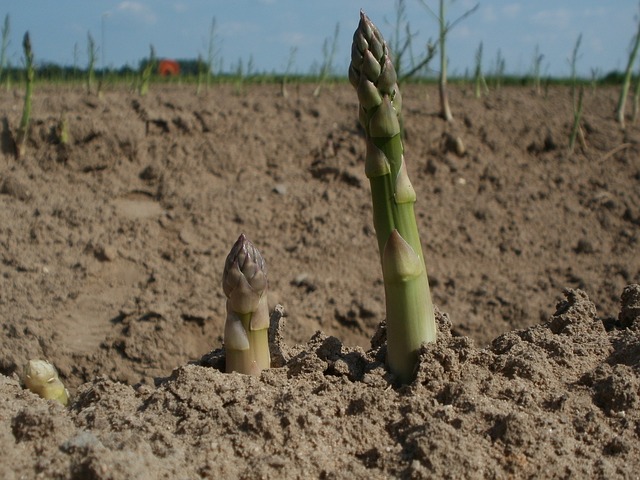
The whole of the USA is almost suitable for growing asparagus, but cooler regions with long winter season are perfect conditions for robust growth. Young stem shoot is the edible portion of the plant and starts emerging once the temperature of the soil increases more than 50°F in springs.
The most important factor you must have to know that, asparagus is “not harvested in the first couple of seasons”. The plants need a lot of time to get matured and you will have to be patient before you can finally harvest them. And you will surely get the rewards of your patience, as the asparagus field remains productive for 15 to 30 years!
In this asparagus planting guide, we will focus on all the important aspects of growing asparagus from choosing a planting site for harvesting and transporting. Let’s start our guide by knowing “when to start planting”.
When to start planting asparagus?
Early spring is the best time for planting. You can grow asparagus from one-year-old plants or “crowns”, both of which are easily available at garden centers and nurseries.
Growing asparagus from seeds is also popular in some parts of the country, but we recommend starting with crowns, as you can eliminate the long-year headache of weeding which is usually associated with seeds.
A few varieties like hybrid “sweet purple”, and open-pollinated “purple passion” are grown from the seeds. But you should try these varieties after gaining some experience of asparagus crops.
Choosing the right site for plantation
Given that asparagus takes at least a couple of years for proper growth, and comes back year after year for so long, you must have to decide, where is the best place to plant asparagus.
Choosing a site with at least partial sunlight is recommended.
If you are planning to grow some other crops, choose one side of the garden/field for placing the asparagus bed, so that it won’t be disturbed due to constant activities of planting or re-planting other crops.
Ensure the proper drainage of the asparagus bed without any pooling of water. Asparagus doesn’t like “wet feet”. If you are unable to find a site with decent enough drainage, you should consider raised beds for growing asparagus instead.
Neutral to slightly acidic soil with a pH of about 6.5 is suitable for asparagus growth.
Get rid of all weeds from the planting area by digging it placing a 2 to 4-inch layer of soil mix, aged manure, or compost.
Ensure that the soil is loosened enough to 12 to 15 inches in depth for proper rooting of asparagus crowns, and the roots are not disturbed by rocks and other obstacles.
How to plant asparagus roots?
The aim of planting crowns should be to protect them from various external obstacles, so plant them to ensure enough depth.
Dig a trench of 6 to 8 inches deep and about 12 to 18 inches wide. Keep a distance of at least 3 feet, if you are digging multiple trenches.
Don’t forget to soak asparagus crowns in water before planting.
Use soil to make a 2-inch high ridge right at the center of the trench. Place the crowns on top, ensuring roots are evenly spread.
Place the crowns 12-18 inches apart from each other inside the trench. Do the measurement from the tip of the root of one crown to the second and so on.
What after placing the crowns?
Placement of crowns keeping in mind the proper depth as well as distance is a very important part of asparagus cultivation. Here are the steps to follow once you are done with this important part.
You can either follow the “all-at-once” method or “little-by-little” method
Some farmers fill the trench directly with a mixture of soil and compost. Although other traditional “little-by-little” is considered as the best method, farmers found no problem whatsoever with this “all at once” method either. As long as the soil is free enough, you will get the desired crop even with this fairly easy method.
Little-by-little method
Burry the crowns two inches deep with the mixture of compost and soil, ensuring proper watering.
With the progress of the season, when the spears are 2 to 3 inches tall, add another 2-inch layer of soil, ensuring spears are not buried completely.
Once you notice further growth of spears again through the soil, add one more layer of soil. Keep doing this until the levels of the trench and the ground are the same. You can also add soil a couple of more times throughout the growing season.
After filling the trench, ensure molding the soil to avoid pooling around the trenches.
How to care for asparagus?
Once the trenches are full of soil, add a 5 to 6-inch layer of mulch.
Fighting with weeds, especially in the first couple of years is the biggest challenge while growing asparagus. You will have to keep the crop free from weeds, and that too, without disturbing their roots! So, pulling the weeds gently with hands is the only option. The problem of weeds will go away slowly with the growth of plants. So, mulch the surrounding of roots with compost or grass clippings to maintain moisture and to control the growth of weeds.
Asparagus plants require a couple of inches of water, especially in the first two years. So, if there is not enough rain, you will have to water them properly and regularly. And, the drip irrigation method is the best option for asparagus.
A proper supply of plant food is necessary for healthy and constant growth. So, prefer using the drip irrigation method for adequate and balanced watering of plants.
Some important points to remember before harvesting
Yes, it is important to know, when and how to harvest asparagus. But, before that, let’s discuss a few important pre-harvesting points.
Avoid harvesting the crop in the first season. But, for caring purposes, ensure side-dressing with compost, as well as cutting down the dead foliage, especially in late fall.
During the second season, start harvesting, but not more than 3 to 4 weeks. Ensure side-dressing with compost, especially in spring cutting down the dead ferns regularly, preferably in late fall. And of course, maintain the thickness of the bed with mulch.
You will notice the full production of asparagus bed in the third year, and you will then be able to harvest asparagus continuously in every season.
Transplanting Asparagus
Transplanting is also an important factor in asparagus farming. You should transplant the crowns early in the spring season when they remain dormant, or in the later stage of fall, after cutting down the foliage.
Use a garden fork to dig and lift the crowns, without disturbing the roots! Divide the clump into more than two pieces, and water the transplants properly. Avoid harvesting heavily in the following year to ensure good asparagus crops in the future.
Pests and diseases commonly affecting asparagus
As already mentioned, weeds are the most common problems related to asparagus crops. And regular hand pulling in early summer and spring is the best way to get rid of them. Prefer light cultivation to avoid damages to asparagus crop.
Here are some common diseases you may encounter during asparagus farming, and how you can control/prevent them.
Disease/Pest
Type
Symptoms
Control/Prevention
Asparagus Beetles
Insects
Spears start appearing brown and they convert into hook shape. Beetles can also cause damage and defoliation to the fruits
You can hand-pick the beetles and throw them away from the field. Disposing the plant matter, especially in the fall season.
Constant inspection and hand-removal is the best way to protect crops from cutworms.
Fusarium Crown Rot
Fungus
Wilted, stunted, yellow fruits, brownish or reddish spots on the stems, roots, or crowns, spears start rotting
This is quite a big challenge in asparagus farming. Destroying the infected plants is the only option. In addition, you will have to avoid planting asparagus around the infected areas for at least five years. Otherwise, using resistant varieties, disinfected tools, and avoid overharvesting are a few options.
Asparagus Rust
Fungus
Emerging spears are full of pale green spots, that become orange or yellow. If not cured in time, they will convert into reddish-brown blisters. There is defoliation, as well as reduced vigour.
Excessive moisture is responsible for spreading rust. So, avoid excessive watering, especially on the ferns or spears. Choose other resistant varieties, destroy infected plant matter, improve air circulation, and avoid growing plants around the infected area.
How to grow asparagus from seed?
Growing asparagus from seed is super easy and fun, but again, you will have to be very patient, as you can’t harvest asparagus for a couple of years, even if you are using seeds. Here are the steps on how to grow asparagus from seed:
Soak seeds for a couple of hours.
Use sterile soil, and plant each seed 1 cm deep in separate 5 cm pots.
You will notice sprouts coming out after a couple of weeks.
Seedlings take 10-12 weeks to grow properly.
Now, you can place the transplants just like we have discussed placing the asparagus crowns in the field. All the steps afterward are the same.
How to harvest asparagus
We have discussed it repeatedly that you should not harvest the asparagus for a couple of years in the beginning.
With young plants, the production period is usually 2 to 3 weeks. But established plants take up to 8 weeks for production.
Check your plants every second or third day to see if there are harvest-ready spears. The growth of spears is too quick, and they can convert into wooden structures in no time. And they’ll be too hard for eating, and hence, for marketing.
Spears are ready to harvest when they are 8 to 10 inches in height and ½ and ¾ inch thick. (Thinner and younger spears are usually more tender. So, keep in mind for your marketing purposes.
Cut the spears at ground level using a sharp knife or scissor.
When the diameter of spears is less than the size of a pencil, stop the harvest.
Harvesting is also an important part of asparagus farming, so keep all important points in mind.
Make sure, you don’t cut the asparagus ferns. Otherwise, your asparagus bed will be ruined completely. Give them enough time to get matured. They will replenish important nutrients in the asparagus bed for next season’s spear production.
Storage of asparagus
You can’t store asparagus for very long after harvesting. So, start marketing right from day one.
Remove any visible dirt, or wash them gently with cold water before storing. Don’t forget to dry them completely after washing, because any moisture will pave the way for molds.
Bundle the spears properly, use a moist paper towel to wrap the stem ends, and keep the bundles in a plastic bag. Place the bags in a refrigerator to maximize the freshness.
So, that’s all about our asparagus growing guide. Asparagus is full of nutrition and tastes very delicious too. It is an amazing source of fiber, minerals, vitamins, calories, and sodium, etc. When it comes to economic value, it can be a great source of income too.
You can increase your income by combining it with other crops, especially in a couple of non-harvesting seasons in the beginning. So, if you are thinking about growing asparagus for commercial purposes, you can surely be affirmative about it. All you need to do is to be very active and caring.
You will have to wait for a couple of seasons, but you will be amazed at the returns after that. After all, every good thing worth to wait.
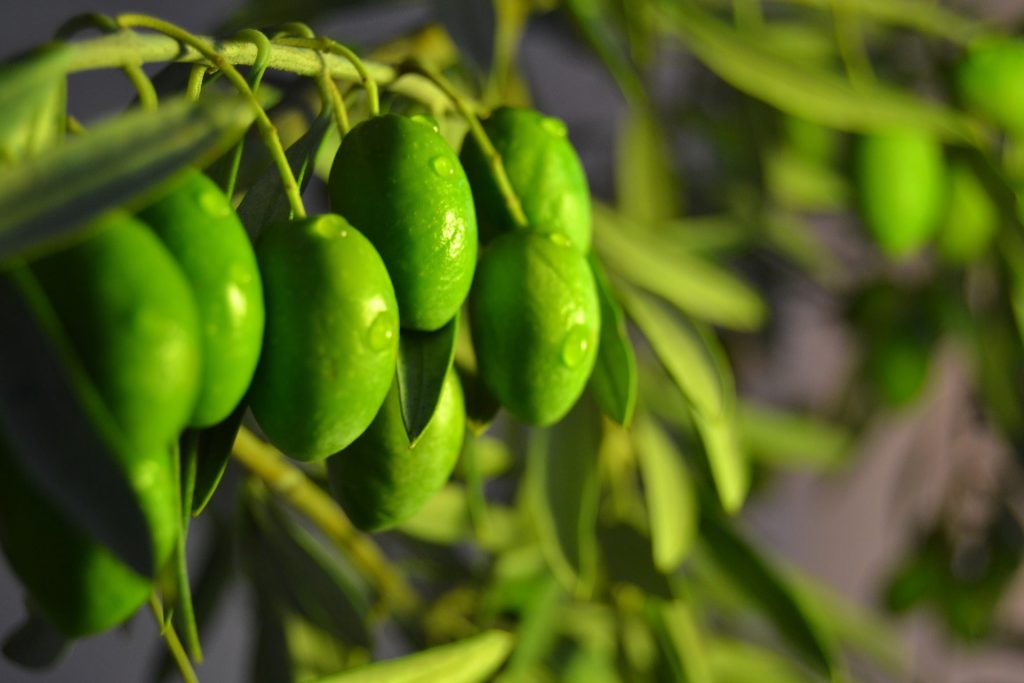
The olive is an evergreen tree basically found in Mediterranean regions, Asia and Africa. OliveFarming has been done throughout the world for centuries hence olive is one of the oldest fruits cultivated ever. Olive, the evergreen tree has been cultivated in the Mediterranean regions since about 3000 BC for edible purpose as well as was also a symbol of joy happiness and peace in Europe. Olives are one of the oldest known cultivated trees.
Olive is entirely cultivated for oils. These oils are very beneficial as along with its edible properties, it also has medicinal benefits. Olive oil has many health benefits like control cholesterol levels, regulate blood pressure and also prevent blood clots and cancer. Olive also helps in strengthening immunity.
Olive Trees: Olive (botanical name Olea) is a species of family Oleaceae found naturally in Mediterranean basin.
Basic requirements for olive farming:
Soil Requirement
Olive is cultivated in a wide range of soils although it needs deep, rich as well as well-drained loamy or clay loam soils for best yield. Pit size also depends on the soil type. For example for fertile loamy soil, the pit size should be 60cm×60cm however for poor soil the pit size required is 90cm×90cm.
The depth of oil should be at least 5 feet to assure of aeration of roots. The deeper layer of soil has more importance in comparison with upper layer for good growth. The suitable pH range for good quality and higher yeild of olive is 6-7.5. Other point to be kept in mind is that water stagnation can cause root in a prolonged period of waterlogging.
Climate Requirements:
Cultivation of olives need warm climactic conditions. The factor that has major impact on cultivation is ‘temperature’. So the best temperature range for its cultivation is 15°C -20°C. About 100cm of well distributed rainfall during its growth period is necessary. Frost conditions are not favorable for this crop.
Irrigation of olive farming:
Olive plants should be irrigated in hot and prolonged dry conditions. Irrigation has to be done 1 month before the flowering season. Next, the olive trees should be irrigated after about 2 weeks of blooming period. Irrigation has to be carried out the month after the fruit is set to stimulate the development of fruits.
However without rain irrigation of olive crop becomes a very stressful condition as the crop starts shrinking and dropping fruit’s although the irrigation done by own without rain gives us the power to control stress of water, amount of water.
Olive trees even react in very short span of time if adequate amount of water is supplied. Property waters olive plants have a very good growth and produce large sized fruits. But it is also to be kept in mind that how much water should be supplied.
In the initial years the tree needs water at least once a week but with time the irrigation period becomes once on month
Constant weeding and mulching activates are very important as this operation increase fruit yield and improve quality. Weedicides can also be used to control weeds effectively.
Some examples of the weedicides are glyphosate that should be sprayed at the rate of 0.18-0.36kg per hectare crop. It can be used 2-4 times during entire growth. And for perennial weed gramoxone can be used (2-3 liters per hectare crop ).
Pruning in Olive Farming:
Pruning is necessary to have even and balanced canopy. Because if a olive tree is left unpruned it grows very large which make it very difficult to harvest. Timings also hold importance in this activity. The perfect timing for hard pruning is when the olive tree has finished fruiting, which marks the end of autumn or start of winter season.
However the non-bearing olive tree can be pruned any time throughout the year. To keep a check on canopy it is better to give the tree a light prune each year. It is important to prune off the suckers as they steal the nutrients and water of the canopy.
It also removes dead damages or crossing branches. Olive trees need to be tied to a stake. This had to be done in such a way that it stands tightly. A soft gunny thread can be used to tie up for the first couple of years.
Pests and diseases in olive farming:
There are some diseases found in olive farming which are root rot, leave spot, peacock spot, olive knot , diplodia cancer ,phytophthora crown and more. Some insects and pests like Locusts can cause harm to olive trees. Preventive measures should be taken to avoid these problems.
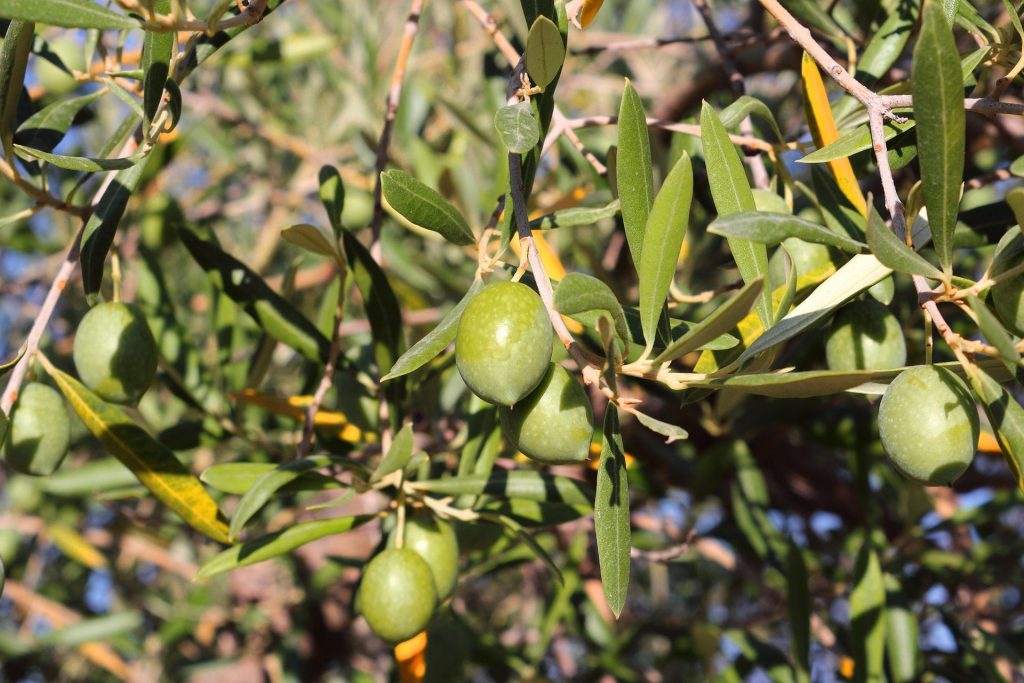
How long does it take olives to ripen:
The naturally black ripe olives ripen fully on the tree? They reach the dark red to black stage of color in about 3-4 months after the initial or green stage.
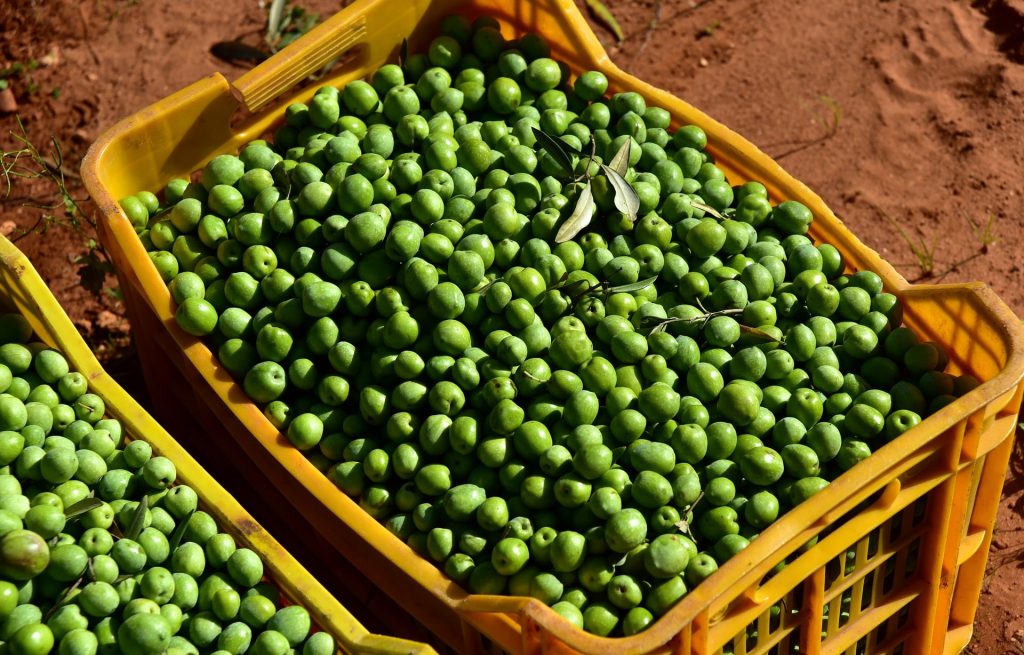
Harvesting in olive farming :
Harvesting is a very important phase of olive farming hence it should be done very carefully and at the right time due to the reason that the immature olives can decrease in both quality as well as quantity.
Even if the harvesting is delayed, it will produce the fruits with the oils of higher acidity. So the correct time for harvesting in olive farming begins in mid winters. Olive trees grow throughout the summer and autumn and ripe during mid winters harvesting depends upon desired ripeness, region and variety.
As olives serves couple of purpose like eating and processing the oil out of it so the state if ripeness matters. In the initial state the olives are green and with the time it becomes rosy and at the end finally black. Mostly the olives are ready to harvest at the green ripe, when the juice turns cloudy that is the stage in late September. Then they start ripening into uneven reddish brown olives through mid December, ending up darkening naturally black ripe stage towards end of, winters the stage in which it has high oil contents.
There are different ways to harvest olives. At first one need to place the traps under the trees and then with the help of a rake, gently dislodge the olives and then collect the olives from the trap. And if the olives are to be used for oil purpose, then follow the same steps of harvesting as above, and then gather up any strays on the ground.
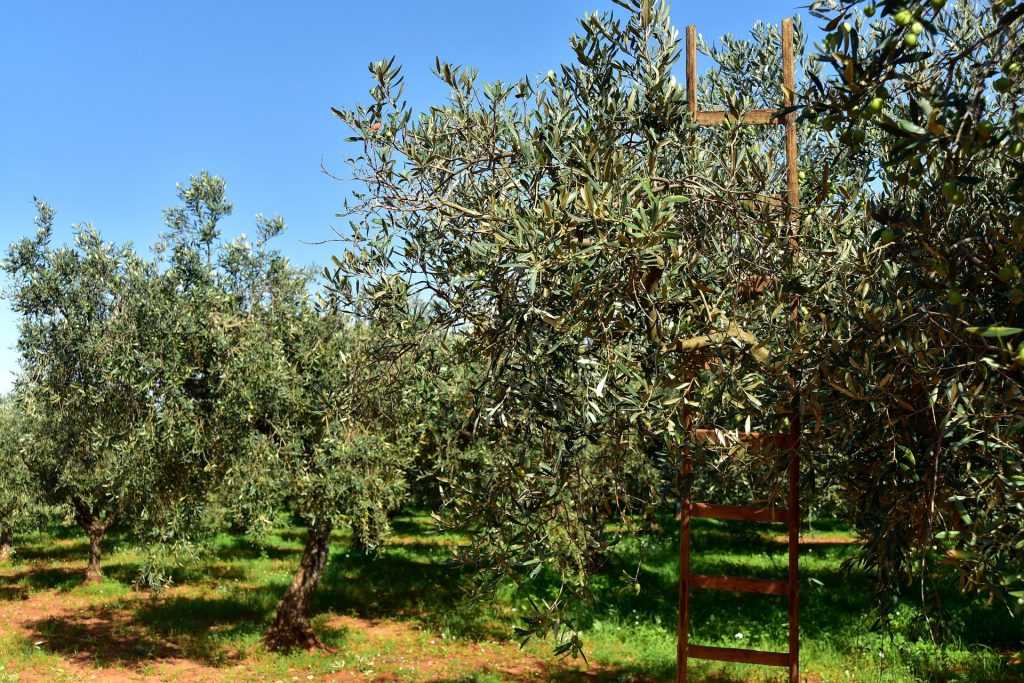
Either traditionally or commercially, handpicking is method applicable in both. Though handpicking is the most desirable method, on the other hand, it is also expensive and slow process that definitely affects the quality of olives.
But in today’s modernized world new technologies and machinery are use to harvest olives. In this, a long-handled vibrating tong is used that shake the olives from the branches that shed on the nets laid under the trees. Beside this the other modern method used for harvesting olives is tractor drawing shakers or the grape harvesting machinery used in high density orchards.
Since it’s not possible for everyone to own such machinery, harvesting olives at home still has to be done in old fashioned method. But before harvesting one must now that what flavor they want, like if you harvest it in earlier stages the olives will taste bitter, but as the olives mature , the flavor mellows. After harvesting the olives have to be used within 3 days otherwise the olives will oxidize as taste sour.
There are different maturity stages of olives and it is important to harvest at correct time for better yield and good quality.
Maturation stages of the fruit depends on different factors like the variety of olive , temperature, irrigation , sunlight etc. High temperature can make the fruit ripen quickly however low temperature can assure the green olive hanging on the tree well into winter. Coming on the other factor variety, some. Variety will ripen faster and other may take long time and these factors make the decision more complicated. One must also keep in mind that these Olives are not as sensitive as grapes hence you need not to get up at mid night and harvest them and put on the ice. All we need to do is proper planning for start to end.
Advantages of olives and olive oils : Olives and olive oil has very large list of advantages:
This oil is considered very good for skin and hair, it helps to improve the texture of skin , make skin glowing , prevents wrinkles and even helpful in some other skin problems. It is very helpful in increasing or improving the fertility. Olives may prevent cancer too. Beside these olives are great source of anti oxidants, vitamin C as well as a good source of dietry fiber. It helps to control as well as maintain cholesterol levels and blood pressure levels.
Yield of olives: Yield of olives depends on many different factors
These factors are crop management, method of planting, climatic conditions, cultivar etc.
Crop management further includes many different things like time to Time check on weeds as weeds can suck the nutrients making the quality bad. Irrigation has to be done time to time every factor has to be kept in mind during the whole cultivation period. Method of planting is also very important factor as If the olives Are not planted properly , the whole crop can suffer and we may not get good yield. Choosing the correct soil, staking the crop correctly, good climatic conditions and more and more these factors really affect the growth quality and yield of the crop.
Is olive farming profitable:
So the answer to this is definitely yes. Olive farming is of great profits as olives and olive oils have an excellent demand in international market. If the soil region and climatic conditions are suitable, the profits can be unremarkable.
Olives and olive oils has a number of health benefits Like olives controls and regulates blood pressure, olives Are a very good source of dietary fiber and also of vitamin E . Olive are very good antioxidants. Olives also prevent many diseases like cancer, blood clots and it helps in keeping the immunity strong and in this era health is a priority of almost everyone and hence olives having such great benefits of health is of great demand in the market and hence is very Profitable.
Talking about how much money can one make through this, if a person has 2.2 acres of space that is around 5m×8m one can grow 250 trees on that which would give 10,000 Kg ( ten tones ) of olives a year and at the rate 1$ per kg makes an annual income of 10000$.
But it also depends on the variety of olives that you choose for cultivation and the land that you have for its cultivation as the soil type is one of the major factor that affects the yield of the crop. Next if you take proper care of tour crop and keep each and every small factor in mind the crop quality can be really good and hence the only thing is that one needs to invest time and do a bit hard work for this profit
Conclusion:
Olives along with its other benefits is also one of the favorite thing to eat in one’s own way. One of the most loved ways to eat olives is put the olives into the jar with orange zest, crushed garlic cloves, crushed bay leaves with olive oil. Leave it for few hours after mixing well and its ready to searve. This can also be refrigerated for 2 weeks.
Hence in whatever way one eat olives, it’s one of the most healthy and delicious fruit to eat.
This crop has acquired commercial importance in the passage of time. If you are planning a business strategy by growing lettuce, surely will land towards wealth in your bag.
How grab a look!!!!!
Different types of lettuce
These nutrition ruched salad leaves have different species. Check them out:
Leaf Lettuce:
They are like a branch splashing out from the stalk. Red, green, and Oak in color. Leaf lettuce is the most delicate and short-lived. The red one has a mild flavor than the green one. While the oak one is the crunchiest and spiciest.
Romaine Lettuce:
Sweet in center and bitterly towards the tip, long and firm in appearance.
Iceberg lettuce:
It is crispy in taste and resembles cabbage. Unlike lettuce, it is not juicy. Can be refrigerated for 15 days in plastic bags.
Arugula Lettuce:
This is generally used in pizza toppings. Blends with pesto sauce so go well in sandwiches too.
Frisse:
It belongs to the radicchio family. Available in grocery stores are used as toppings.
Requirements for how to grow lettuce
For growing lettuce on your farm, these things should not be overlooked. Note the following:
Climate
Being a cool-headed crop thrives amazingly well at temperatures ranging between 15 to 18 degrees.
They are reluctant towards extremely hot temperatures. It can be cultivated throughout the year using shady or greenhouse effect in warmer climates.
They have a speedy growth. And performs well in the spring season. Ideally, the lettuce growing season is spring time before the onset of scorching heat.
Soil Required
Good organically rich soil is a perfect combo for Lettuce cultivation. The soil should excel in two things, water retention and good drainage.
This is a boon in disguise for farming. Highly allergic to acidic soil, better to choose a neutral one.
Prepare Land
The land needs good plowing till tilth. Plowing has to be carried out for successive 3-4 times.
Also, get the soil tested for productivity and if needed add some good organic manure to boost up the productivity.
Make necessary arrangements to flush out excessive water at frequent intervals.
Irrigation
Water supply should be maintained regularly. For this, you can water the plantation, once every 4 days. Extra water must be flushed out during excessive rains.
Fertilization
60 TO 65 KG of potash and phosphorus is needed by the lettuce crop. With good quantity of manure around 15 to 20 tonnes. It ensures healthy growth.
Pest and Disease Control
The pests are the disturbance-causing agent. They hamper the yield and have an adverse effect on lettuce cultivation.
Cutworms, bollworms, aphids are some of the enemies of the lettuce plantation. Soft rot, downy mildew are the diseases caused by these agents.
To curb their spread, you need to approach the horticulture department for some remedy.
Germination in lettuce seeds
Lettuce seed germination is an easy process. But you don’t have to be antsy. Pick the best quality seeds from the market or any other reliable source.
Now plant these seeds in the soil. The temperature of the place is the deciding factor to initiate lettuce seed germination.
Make sure the temperature is 20 degrees at least. Else, the seeds will enter a deep sleep mode.
During the entire sprouting time, these standards should be maintained. Ideal temperature, exposure to sunlight, and moisture laden soil is an explicit combo to trigger sprouting in seeds.
This has to be maintained for 7 to 10 days until the germination starts. You can see tiny tots emerging from the seeds.
How to grow lettuce from seeds
Propagation through seeds is easy. You can sow them directly into the soil. As an alternative, they can be planted in a nursery till germination.
After that, it can be translocated to the fields.
Mostly leafy varieties are cultivated by this method. Raised beds are prepared in the field. This ensures proper water drainage and air to the soil.
The seeds should be at least 12 to 15 mm deep. This is ideal, depth for a lettuce plantation.
A lettuce plant spacing should be done in rows 15 to 25 cms far from each other.
Leaf lettuce demands sunlight, although too much heat can be injurious. Causing bolting of leaves. As an introductory step, sow the seeds inside for about 4 weeks before the arrival of frost.
Amid springs, shift them outside in the fields. The purpose is to allow a shady and light sun area till the germination process pops up.
Do make a note sun is an essential element to instigate germination. So, don’t sow them very deeply. And cover with a thin layer of soil to allow the sunlight to reach them.
The soil quality of those freshly prepared beds should be highly productive and the PH between 6.2 to 6.8. Acid or lime soil burns the seeds. The soil must be moisture-laden to keep nurturing the seeds.
Spacing style is like one-inch gap between the seeds and a 12 to 18 inches gap between the soil beds or rows.
Before shifting the sprouting seeds allow the seeds to get harder by reducing the water content. Maintain the temperature of 20 degrees.
Then translocate them to their soil beds in fields. Water them and protect them from injuries by moths and bugs.
After some time they start growing, keeping mulching the soil to retain the fertility. Once lettuce farming starts flourishing, it’s time to remove them before the frost arrives.
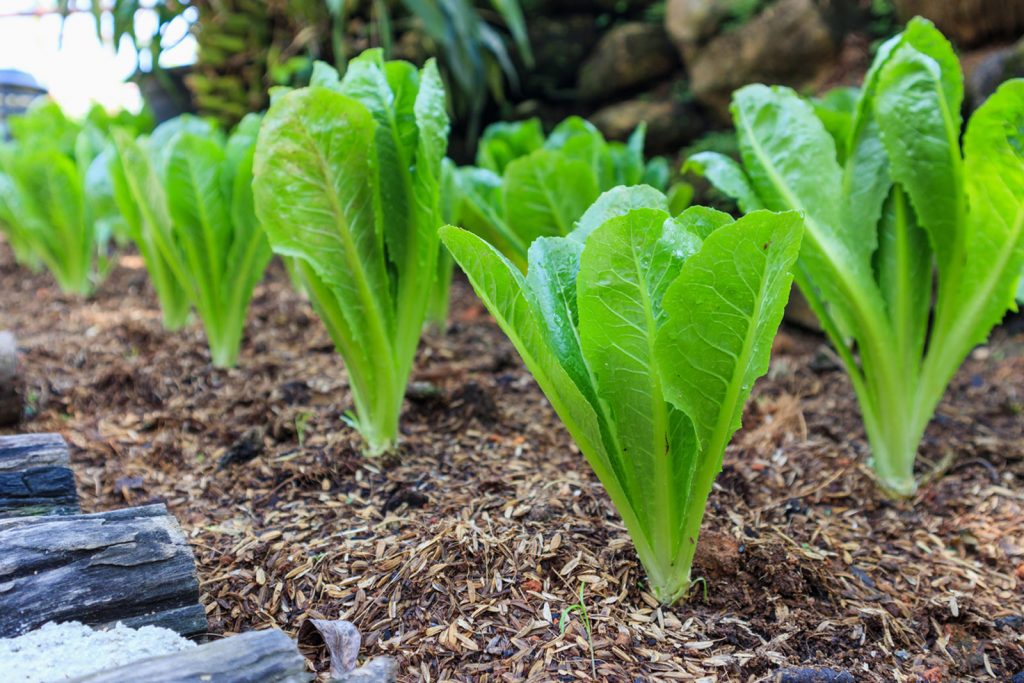
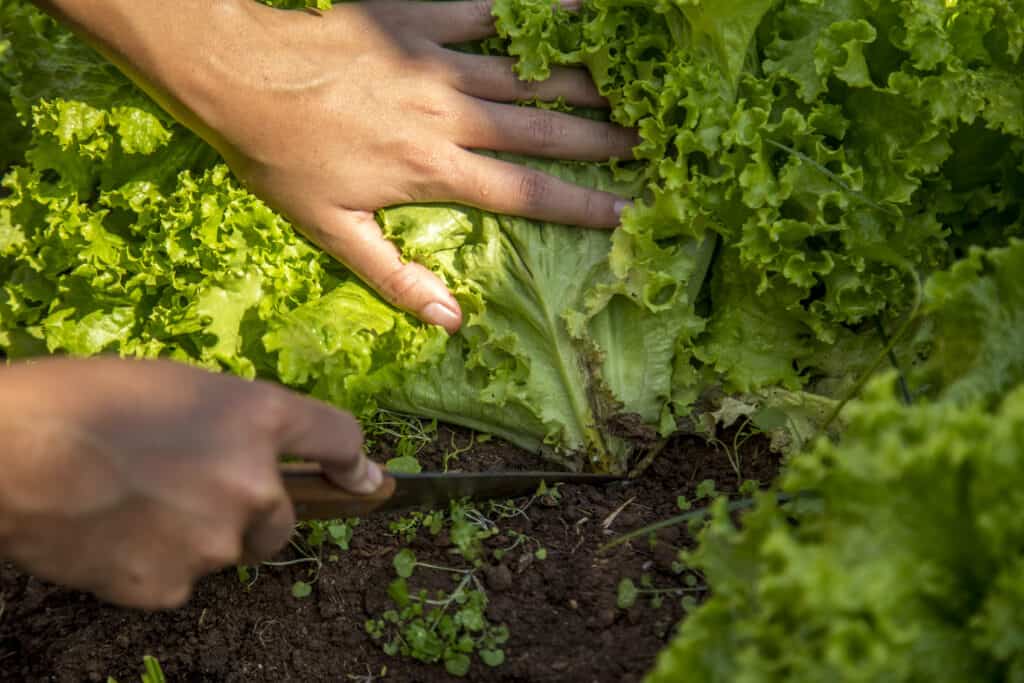
Harvesting lettuce
Such a delightful sight it is, to have those butter surfaced, big green crunch in the field waiting for you. Firstly, when to harvest lettuce is not restricted to the maturity stage.
Lettuce can be removed at any point in time. As it is consumable at every stage of growth. Even small leaves are demanded in the market for sandwiches, wraps, etc.
Always pluck lettuce in the early hours of the day before sunlight falling on them. To enjoy the lettuce thickens, pluck the early tiny leaves and allow the plant to grow densely.
Allow the plant to attain a bigger size. When to feel the firmness of leaves, then it’s perfect time to get the juicy leaves out. When and how to harvest lettuce is all about the firmness of the plant.
Peanuts are not only
good for your appetite but also your wellbeing. These are an outstanding source
of protein and are rich in various vitamins, minerals, and herbal compounds.
Peanut butter, produced from the selected pieces from the peanut farm, is an ideal way to incorporate quickly this type of protein in the everyday diet.
People are still
surprised to hear that peanuts are certainly not nuts.
This seed of legume
plant belongs to the family of peas and beans.
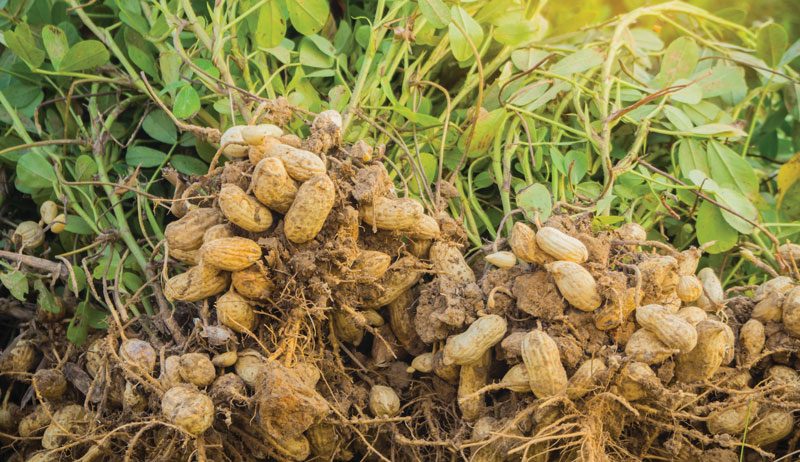
Growing peanut plants
A peanut farm gives a unique posture in terms of appearance as it is full of plants but there is no fruit to grasp. However, the peanut plant has real products deep inside in soil along with the roots.
And, interestingly, the flower of a peanut develops above the ground. Once pollinated, the stems lean down and push the pegs into the soil during the summer and they grow eventually.
As the ovary at the
end of each stem is underground, it develops into a pod carrying the peanuts.
This is the reason behind it brings the name groundnuts.
In a peanut farm, the peanuts start as a single seed and grow into a plant that can be turned into more than 50 peanuts in a period of four to five months under the soil.
During the peanut
crop, the process of sowing the seeds has its own requirements in terms of soil
quality, as fruits mature in the soils themselves.
Selection and preparation
of the soil
Sandy loams, crumbly and light-colored are perfect for groundnut cultivation.
A friable
sandy loam or clay loam subsoil provides essential nutrients as well as a
suitable climate to the peanut crop as well as a suitable climate.
The heavier soil can
be an option to get a higher yield. Such soils nevertheless tend to stick to
pods contributing to blot that decreases the quality of the peanut.
This decision can trigger a loss in the overall yield for a peanut farm. It is wise to avoid farming peanuts in fields with shallow topsoil or inadequately drained areas.
While growing
commercially, it is recommended to obtain a soil analysis so that you can have
test reports and can apply fertilizers accordingly.
During the planting,
the surface temperatures of peanuts should be at least 65 degrees Fahrenheit in
April and May after the last freeze.
Sowing the
seeds
Growers generally
use the peanut kernels as seeds that were cultivated particularly in the
previous year approximately 1 or 2 inches wide in the field. It is worth to
have the populations of plants range from sixty thousand to eighty thousand per
acre.
Typically, with improved seed count, there is little growth in production. So it is appropriate to not have a high density of plants for groundnut cultivation.
Generally, it
requires 140 to 150 days for a stable crop without any frost.
After the 10 days of harvest, peanut plants grow out of the soil. Generally, they are about 18 inches in length developing into a small, oval-shaped plant.
Yellow flowers occur
around 40 days after planting across the lower portion of the plant. The leaves
fall off as the peanut ovary starts to grow as soon as the peanut’s flowers
pollinate themselves.
Watering
The irrigation requirements of a peanut farm can vary throughout the growing season.
At the beginning of
the season, it is recommended to have a low frequency of watering. As the crop
approaches the midseason, it should be at the peak and then declines again as
the crop gets to maturity.
Moreover, the need
for water for a peanut crop depends on the growth process of the plants. The
water supply is essential during vegetative production, as well as flowering
and pod formation.
The adequate
rainfall and irrigation can encourage the vegetation as well as the yield of
the crop in the season end.
On the other hand,
during an extended drought, the formation of pods to vegetation would be not as
adequate as it should be.
Too much watering
encourages soil-borne diseases, flows some nutrients required for the proper
growth and production of pods. In the late season or during pod ripening, this
can trigger some maturing kernels to germinate, reducing the ratio of perfectly
formed kernels during harvest.
Once flower petals break apart in the groundnut farming, the peanut ovary grows and penetrates the earth. The fruiting cycle of the peanut plant is roughly two months.
The ovary, termed as a peg, enlarges and grows down. It is interesting to see that the plant forms a small stem that reaches the soil.
The peanut embryo
resides in this peg. Once, the peg gets into the soil, the embryo bends
horizontal to the soil surface and starts to mature into a peanut.
The peanuts have
their nitrogen supply. Thus, it is recommended to avoid fertilizers rich in
nitrogen that promote leaves and not fruits.
Eventually, the
plants get their resources from the well-prepared soil.
The peanut plant needs full sunlight to grow on a peanut farm in Virginia. In case you are growing peanuts in the hard soil, it is worth mixing enough organic matter to make the soil fertile and friable so that pegs can easily penetrate the soil surface and can go inside to turn into a peanut. Moreover, ensure that you have good soil drainage.
At the end of each
peg, peanut shapes. It is appropriate to put down thin mulch like straw and
grass cuts, such that the surface should not crust and the pegs can easily
reach the land.
Once the plants
reach six inches height, plow around them to make the soil loose so that pegs
can penetrate the surface easily.
Disease in the
peanuts
Young seedlings can
be under attack by the fungal species.
Shortly after germinations, plants can get diseased and never get out of the field or can die during the early growing season. Seedling signs differ because of multiple causes for peanut farm Georgia.
Verticillium and Fusarium Wilt
Soil-borne fungi
that penetrate plants from the roots are the cause of diseases of verticillium
and fusarium. They cause the plant to be sick by growing in the
water-conducting xylem tissue.
Verticillium wilt
(Verticillium wilted) is commonly found in cotton and potatoes. While Fusarium
Wilt is a vegetable disease.
In the case of a Fusarium or Verticillium, once an area has been contaminated, the bacterial spores survive for several years.
The crop rotation
can help for a bit to reduce the bacterial spores.
But in the case of groundnut farming, however, contaminated regions may not be suitable for producing peanuts.
There are no available
fungicides that adequately treat infected plants for any of the diseases or
reduce the number of spores present in the soil.
Pod Rots
More than one fungus
can be related to rotted conditions when pod rots occur. If a significant
infection is observed during the crop, it is worth to apply a fungicide that
guards the plant against further infection.
Pod rots do not have
any visible symptoms above ground, so it is necessary to uproot plants across
the whole field particularly after the pod formation. That is the only way to
spot rots of seeds.
Besides, sound
plants do not ensure healthy pods and peanuts under the soil automatically.
Nematodes
The plant parasites reside in the earth and infect plants. The problems are considered to be induced in two types in groundnut cultivation, root, and root-lesion nematodes. Usually, it is seen that only limited field areas are infected, however, if the expansion can destroy a crop.
The leaf spots may
be caused by irrigation followed by high humidity during the growing season.
Fungicides should be
used to combat leaf diseases as high humidity and moisture exist during the
growing season.
Typically,
fungicides used for the foliar diseases should be used on leaf surfaces and
will start according to the drug labeling until contagious spores settle.
Insects
Insects are usually
not a big concern in the processing of peanuts. It is assumed that the
regulation of thrips in peanuts allows plants to mature early, but there has
been no scientific evidence for such an event.
In some cases, armyworms may be an occasional concern on a peanut farm. Some of the peanut fields often get harm from grasshoppers. However, labeled insecticides manage both easily.
Once, the plant has
grown the grower checks if the field is too moist or too cold to dig.
If conditions are
correct, the peanut is ready to harvest. It is appropriate to uproot the entire
plant out of the ground with the pods. You can leave it into the sunlight to
dry out for a couple of days until the pods lose around a third of their
moisture.
It is noteworthy that not all pods grow equally. Once the highest number of pods matures, you should harvest your crop.
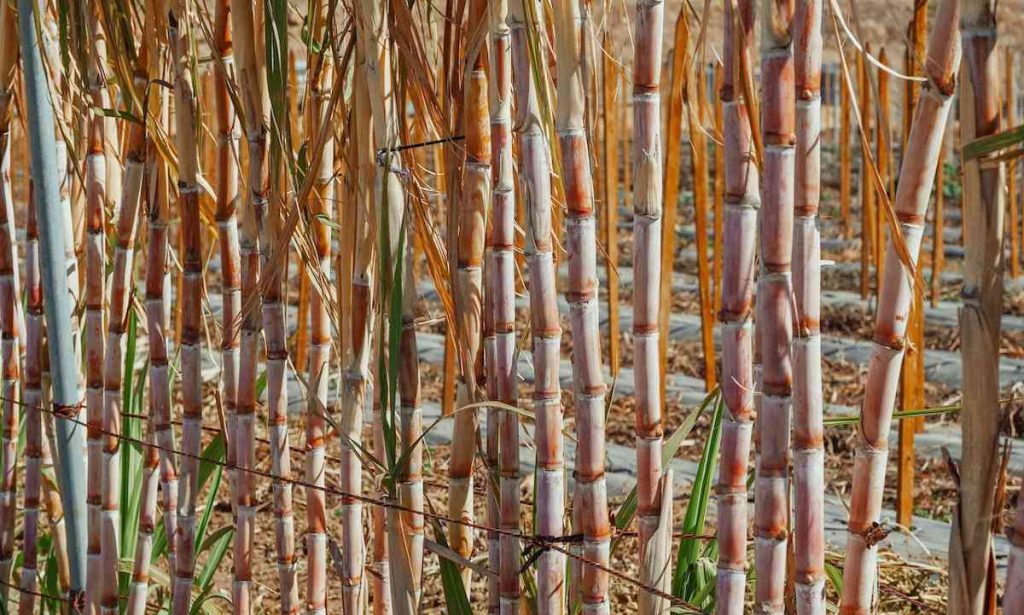
Sugarcane
is a high perpetual crop from South East Asia in parts of the South Pacific
region. It grows in warm temperate or tropical climates. The plant stalk’s
internodes are rich in sugar, and the plants can grow around two to six meters
above sea level.
A
complex hybrid between several species and subspecies is found in any crop of
commercially grown sugar cane. Sugarcane is one of the greenest cultivations
because it requires minimum nitrogen and pesticides. So, let’s see what are the
things to consider before planting sugarcane.
Climate
Although sugarcane can be grown in temperate climates, production in tropical climates is much higher. Short, sunny and hot (1100 to 1500 mm over the whole) and warm, colder (12 ° C to 14 ° C, 54 ° F to 57 ° F) harvest season, is suitable in combination with a medium to high rain docks (32 ° C to 38 ° C, 90 ° F to 100 ° F). The sugar produced during the dry weight of harvest varies greatly, and during the various phases of plant growth depends on the environment.
Soil Type
Sugarcane is cultivated in a range of habitats, such as red volcanic soils and alluvial river soils. The perfect ground is a combination of organic material sand, silt, and clay particles. The fields are plowed and left for a while before subsoiling is carried out. The plant needs well-drained soil, and drainages are made concerning the topographic conditions of the fields on the surface, endured, or both.
Sugarcane
can thrive in the soil of different kinds: acid and alkaline soils, sandy,
loamy, and rocky soils. A pH of approximately 6.5 well-drained loam is
perfectly suitable, but mechanical considerations, such as compaction, are far
more critical than soil composition and pH for cultivation.
Land Preparation For Sugarcane Farming
Deep
tillage is required for the sugarcane. Deep tillage consists of molding board
plastic, and farmers with no tractor use wood-based Sarkar tin. The sugar cane
consists of two types of sowing. Cannes are planted in the moist field because
the plant needs water. The width from the row is 3-5 ft.
Plowing
The
conventional method of preparing tillage is to plug the soil and tilt it.
Sprinkle with the tractor driven disks or triumph plow 2 to 4 times at a depth
of 50-60 cm.
Harrowing
In
the sugar cane field, the secondary tillage has used those pullovers, smooth,
and compacts the soil to retain humidity. Harrowing is carried out at a small
depth of 12-15 cm to crush disks or rotators the clods
Know-How To Plant Sugarcane
Sugarcane is planted by replanting the mature stem of the cane. Farmers then cut some of the fully grown cane stalks to 40 centimeters in size. Special agro machinery plants sugarcane stalks that drop them into furrows and apply nitrogen to cover them in the dirt.
Poor
sugar cane production results in reduced yields and a downward spiral of
productivity. Efficient sugarcane production would increase productivity and
levels of profit for a whole plant cycle over 5 to 7 years, as sugar cane is a
multi-year crop.
Think About Mechanized Way
The
average failure rate is 20–25 percent for mechanized sugarcane plantation.
Considering that the grower can fix 50% of sugar cane seed failure via a
secondary replant, up to 10-12% of the yield for all subsequent growing seasons
can be predicted.
Culture Planting
Cuttings
primarily propagate culture Sugarcane. The parts of the unmatured cane stalk,
which were used to grow, are called cane seed or cane sets and have three or
more buds (eyes). Seed cane in well-worked fields is cultivated. It is commonly
used to open furrow artificial trees, fertilize the cane, lower this, and cover
it with dirt.
Growing
Growing of Sugarcane requires 2,000 to 2,300 mm of water in the growing period to achieve good yields. If there is a lack of moisture, irrigation will account for the deficit by either watering or spreading water in furrows. In Texas, the USA, 8-9 months, 15 months, Japan, China, and 18–22 months, in Hawaii, South Africa, and Perú vary widely in the field. Thus, depending on the environment, growing sugarcane can take from 9 to 24 months for harvest.
One
main crop is planted, followed by 3-4’ ratoon,’ or re-growth harvests. In areas
with annual precipitation below 1500 millimeters, irrigation of the plant is
essential. The lowest temperature is about 20 ° C (68 ° F) for good cane plant
growth.
Continuous
cooling weather, as well as water retention, leads to cane maturation. In a
warm, relatively fresh season of the year, harvest and browning continue and
last five to six months.
From
the start of planting, but not during the ripening phase, the fertilizer will
be applied for sugar cane. Optimum fertilizer levels (nitrogen, phosphorus, and
potassium) are very different from soil types and the environment and the form
and length of the growth cycle.
Weeds
in cane fields must be destroyed to secure a good crop until the cane stuffing
establishes a healthy canopy to control the growth of plants. While mechanical
cinnamon weeders with rakes have been built, still mostly manual, are made with
a hoe. There is extensive use of chemical herbicides.
Ripening
Matured
for nearly three months, the stalk is dried out, and the sugar synthesis and
its preparation accelerates. Natural sugars such as fructose during maturation
are converted to sucrose. The application of foliar chemicals to increase the
sugar cane yield was proved useful.
Polaris
and Ethrelare commonly used in numerous chemistry tests. Spray Chemical
Balsario in 1000 liters of water at 4.5 kg per hectare. Sugarcane ripens 6-8
weeks earlier with the spray of this compound. Chemical mûrers such as Polaris
and Sodium Metasilicate, which are sprayed 6-8 weeks more first, boost sucrose
milk.
Save From Diseases
There
are many diseases in the sugarcane crop. Sarah is caused by an East Indian
virus and is blackening and degeneration of the fanlike tops. Infection by any
one of many illnesses is due to the mosaic that causes foliage mottling or
spotting and sometimes curling, dwarfing, and narrowing of the leaves.
Red
rot (essential in Indonesia and South Asia) has disrupted patches of red and
white inside the cane, with a foul alcoholic odor when opening the rod. Caused
by the Colletotrichumfalcatum fungus, red rot attracts attention by yellowing
and withering of the skin and finally dies of the whole plant.
Gummy
disease (important in New South Wales, Australia) is characterized by gummy
development, which is induced by cell degeneration, defective gum production
and by
Xanthomonas
vascular bacterial. Fiji disease, an infectious disease that first occurs on
Fiji Islands, has elongated white to brown swellings, followed by stunting and
decay on the bottom of the stems.
Ripening In A Nutshell
Incidence
of sunshine, temperature, and rainfall in sugarcane ripening (Saccharum spp.)
was investigated by picking five interspecific subtropical hybrids. Ripening
has been linked to sunshine and temperature events, but not precipitation.
Partial
observations confirmed the freedom of sunlight ripening; however, it revealed
that temperature ripening interactions had been falsified. The interacting
influence of sunlight and temperature on maturation differed with the cultivar
was also partly related. In the correlations between maturation and sample
time, there was a significant difference between varieties.
Harvest
Sugarcane
harvesting is one of the most important and exciting parts of the whole
cultivation process. As this is the time to see the results of your great work
and dedication. To raising the full stalks and cut them into smaller segments,
a cane harvester is used (approximately 30 cm). A cane transport that gathers
the billets is used to track the reaper. Whether manually and mechanically, the
mature cane is harvested. Any mechanical types of equipment can hack off or cut
the tops of erect plants, which are transported by a tractor or light railcar
into a bin trailer to the factory.
Sugarcane Farming In USA
Sugar has been a family business since its earliest days for most of the U.S. families. Today’s sugar family includes not only multigenerational farmers. The farmers who grow, harvest and care for sugar beets and or sugar cane, but also those truck drivers who transport the crops from the fields; the employees who work in factories, or processing plants and refineries.
As they collect, purify and store sugar; and all the people who work to get sugar from the packaging facilities to your table. And the best part is that Sugarcane Farming in the USA is seeing a hike. U.S. sugar industry grows sugar cane, and beets run sugar refineries and manufacture and sell refined sugars, sugar-sweetened foods, and other products.
Historically,
sugar production has been significant in slavery development in Louisiana and
Hawaii’s U.S. annexation. The Sugar Association is the U.S. sugar industry
trade association.
Areas Where Sugarcane Farming Happens in the USA
Through
the 2010s, sugar cane was produced commercially in Florida, Hawaii, Louisiana,
Texas, and Puerto Rico. Florida sugar cane production has increased
significantly since the United States stopped importing sugar from Cuba in
1960. Florida is America’s largest cane-producing region.
The majority of sugar cane is grown in organic soil along Lake Okeechobee, Southern Florida, which is situated on the southern and south-east coast of Lake Okeechobee. Sugarcane production was primarily limited to the Mississippi River Delta, which is the Northernmost cane-producing state of Louisiana, with fertile soils and warmer climates.
The
Louisianan sugar industry has grown into non-traditional sugarcane-growing
areas to the north and west. The bulk of sugarcane expansion happened when the
return on rival plants, including rice and soya, has declined. Louisiana has also
grown with investment in new mixed harvests as the launch of high-yield sugar
cane varieties has been implemented.
A Bit About Sugar Beet
The
other primary sugar source in the United States is sugar beets. This is a
versatile crop cultivated and planted annually in a wide range of temperate
climates. Sugar beets can be processed for a short time but must be handled
before sugar degradation. Genetically-modified crop varieties have recently
been introduced. GMO plants accounted for approximately 95% of crops in the
2009/10 harvest year, up from about 60% in 2008/2009.
To Sum Up
Therefore,
there is no denying the fact that the Sugarcane industry is at its peak. With
the continuous rise in demand for sugar and related products, this industry may
even see a boom. However, a proper sugarcane planting to harvest is required to
achieve the desired results. Or the results to be proud of. For that, some
traditions, along with a significant part of modern cultivation techniques,
should be used.
All right, you want to know more about “How to plant Spinach?”
As both cold weather and long days cause spinach to grow
easily, the trick to progress with such a plant is to start planting seeds as
early as possible in spring; make low, regular plantings in delayed spring and
summer; and focus on fall as the main crop season.
The key to success with this crop has been to start sowing
grains in spring as soon as possible and to make small regular plantings in
late spring and summer and focus on falling as a season for the main crop.
Because hot and long days lead to fast spinach to bolt.
Spinach rose in the seventh century in China and spread to
the Middle East and Europe. If you talk about salads, fresh spinach leaves are
perfect and older spinach leaves are used in sandwiches or soups, along with
stir-fry.
Spinach, a super-green leafy plant, is a common plant that can be planted in certain places in spring, autumn, and winter.
Spinach has standard growth requirements and criteria, and
is more flexible in raw or fried feeding and drinking. This is richer in
magnesium, calcium, and vitamins than other greens and one of vitamin A, B, and
C’s best sources.
Unlike other fresh seasonal vegetables, spinach is a
“spring ephemeral,” beginning as a low rosette. Spinach thrives at
cold temperatures; however, “bolts” or sends a stalk as summer
temperatures increase.
There is a fleeting opportunity everywhere it grows as
spring advances into summer, where spinach flourishes and spinach becomes
effortless.
Long-regions, fortunate farmers have a second chance at
dropping spinach.
Spinach Spring may be planted as long as the fertilizer
functions correctly. Spinach will seed as soon as possible for six weeks of
cold weather from seed to harvest.
For optimal germination, the soil should not reach 70oF (21
° C).
• Every two weeks, there will be successive spring
plantations.
• In northern climates, gardeners harvest spinach in early
spring while they are planted in autumn just before cold weather. Cover young
plants in winter, use a cold frame or dense mulch, and eliminate protection
when soil temperatures reach 40 ° F in your region (5 ° F).
• You may also plant in fall if you live in a place with
mild winters (for summer harvest, consider New Zealand Spinach or Malabar
Spinach, two related heat-leafy greens). Wait until the planting area is cold
enough.
Choose any place with full sun (or partial sun) and
well-soil.
Start to prepare the growing field with aged manure around a
week before planting. Or you might be prepared to sow seeds outside early
spring when the soil thaws.
How To Plant Spinach And Garden Preparation
We are still answering your question “How To Plant Spinach?” Meantime, let’s also take into
consideration another related question with our topic and that is “How to Grow
Spinach Plants?”
Spinach grows well in every fast-garden loam. It thrives in
fertile soil as long as it is not too acidic. Incorporate 3″(8 cm) compost
into bed during planting.
Put 2 pounds (2 kg) of alfalfa meal in the field (per 100
square feet—9 square meters) for spring and summer season planting privileges.
Mix fishmeal with 1 lb (1/2 kg) or some other cool-nitrogen from livestock for
autumn and winter crops.
Spinach thrives in a more significant alkaline soil than
other plants (pH 6.5-). Use finely broken shells of eggs, ground lobster
covers, or woods ash when it is acidic. For most garden soils, 1-lbs (1/2-kg)
per 100 square meters is enough.
See Adjusting soil pH for other ways to increase soil ph.
Spinach Planting
• While seed that starts at home, seedlings are not
recommended because they are difficult to transplant.
• Seeds will be 1⁄2-inch thick, slightly soil-. Sow about 12
grains, or scatter over long lines or fields.
Until now, you might have got the answer to your question of “How To Plant Spinach?” coming up next is the steps to keep the proper spacing between Spinach plants.
Spinach Plant Spacing And Growing
1. Because of slow growth, fertilize only if needed, or use as a replacement if your soil pH is insufficient.
2. When seedlings grow to around 2 “thin to 3-” apart.
3. No planting beyond thinning. Roots are fragile, easily destroyed.
4. Mulching soil hot
5. Regular water
Spinach can withstand rain, can withstand frost and time to
15 ° F(-9 ° C). Spinach happens to be more tender, so cover if it expects
cold weather.
Spinach Plant Spacing
This step is more an answer to your question “How to plant Spinach?” So let’s begin.
· Sow medium, or small, 1⁄2 “(1.3 cm) of deep seeds per 6”
(15 cm) along the way or sow more seeds. Fill 1⁄2 “(1.3 cm) fine mulch
· Sow in 3-4 “(7-10 cm) 3⁄4” (2 cm) baby spinach centers,
40-50 seeds per foot—harvesting 3-5 weeks
Watering
In the next step of this guide on “How to plant Spinach?” we’ll explain to you all the things. Promise, nothing will be left! So, get ready.
Spinach Growing requires daily irrigation, especially with
heat waves in the spring. Drip irrigation works very well, but when the leaves
get muddy, most spring ephemerals work better.
During a humid day, a spray of overhead water cools the
leaves and the vegetation in the afternoon under the plant and reduces the
overnight temperature to 60-70 ° C (15-21 ° F).
Spinach Plant Spacing – For Garden
Before you begin for anything. You first need to understand
the area, so you know whether it’s for you. When it comes to a garden, it
may stretch from a small part of your yard to a vast plot of land.
However, the size of your rows can vary based on your
planting, repair, and harvesting equipment needs. So, it’s good, to begin
with, a smaller garden field.
Spinach seed kits have been designed for medium-sized
gardens and large farms. The specifications that are usually defined here
would be suitable for your room.
You want to plant each seed about 3 to 6 inches apart.
The explanation this has a variety is because the scale of the spinach plant
growing varies.
You will notice that most of the spinach plants have a
diameter of around 4-5 inches. This can be noticed when the spinach is ready
for harvesting.
For baby spinach, you should grow spinach plants early so
that it can be smaller in diameter.
A classic farm or a decent size garden plot would need to
have perfect rows of the distance between the spinach plants. A row is
required to cultivate, grow, water, and harvest your spinach plants safely.
The soil where spinach plants will stay remarkably
undisturbed. It is better than the soil is almost loose and shallow to ensure
the roots of spinach plants grow efficiently.
Getting large enough rows allows you the requisite exposure
to the spinach plants. Most of the gardeners prefer the average row width
of spinach plants in between 12 and 18 inches.
Square foot planting is something that gardeners love in
2020. A square foot garden is a way of utilizing a square foot area for
every herb. Let’s presume you’ve got a garden area measuring 4 feet by 4
feet. You’d have 16 square feet or 16
micro square areas to grow your vegetables.
If we talk about per square foot, then the landscape area is
12 inches by 12 inches. Spacing recommendation for planting the spinach
requires you to plant a total of 9 spinach plants in a growing square-foot
field.
You leave a spacing of approximately 4 inches in diameter
between each plant.
The most simple and easy way is to draw two horizontal and
two vertical lines to get the spinach plant room correct in the square foot.
Remember, the lines should be evenly spaced. It will provide you with an
option of nine mini squares to plant your spinach seeds.
You each spinach seed in the center of this mini squares.
Gardeners or planters consider this method to be one of the
best and easiest ways as you can draw these grid lines.
Don’t forget that you ought to be prepared to cultivate, to grow, and to harvest your spinach plants. We will talk in detail about How to harvest spinach later in this article. Before that don’t miss the fact that
To harvest your spinach plants you can only have a limit of
4 square feet if you can reach them on opposite sides.
This will differ because you can just achieve this level, so
bear this in mind when designing your square foot garden field.
Spinach Plant Spacing – For A Container
Should you want to appreciate the delicious food, planting
spinach in a pot is a perfect way. With a few basic guidelines, you can
quickly find out the place for your jar.
Bear in mind that such instructions are focused on our knowledge.
However, container gardening can be a little different based on your needs, so
use these tips as a reference.
The depth of your container will eventually decide how many
spinach plants you should bring there. You would need to plant the spinach
plant in a way to give it a distance of around 3-5 inches in diameter.
How To Harvest Spinach?
The trick to harvesting spinach leaves is to collect leaves
from outside the plant to enable the centers to develop larger. It helps the
plants alive so that they can start growing more seeds.
If you want baby spinach leaves, collect them when they are
around 2 inches wide. Usually, baby spinach is eaten raw or sautéed
gently since it is delicate. If you’re
trying to prepare or freeze spinach, you’ll get more solid yields if you’re
waiting for larger-4 inches or longer plants. Many leaves reach 6 inches
or longer, depending on the type.
Usually, while processing spinach, you may pinch the leaf at
the stems with a fingernail. You may also use scissors or kitchen shears
to cut the seeds. Only make sure you
have the entire blade and a little bit of the plant. If you cut off a
leaf without a base, it’s going to go pretty quickly.
The spinach plants continue to grow in the morning.
Bolting is where they continue sending a seed stalk and
finally fruit. Unless you allow that to happen, the leaves can turn
acidic and nearly inedible. When you observe that the mature plants are
developing taller in a short period, it is a warning that a seed stalk is
growing. At this stage, pull the whole plant up and pick all the leaves.
How To Harvest Spinach Plant – Know-How
During the autumn, mature spinach plants should hang on to
sharp frosts. If you find out or expect that the temperatures seem like
they’re going to drop below 30 degrees F at night, go ahead and dig out the
plants and pick all the leaves you can find.
We recommend freezing spinach for long-term
preservation. To extract some soil or dust, wash the leaves. Instead, you can blanch them while plunging
them in boiling water for at least 1 minute.
Then pull them out and dive them into an ice-cold bath to
cool off. It will allow them to maintain their vivid green hue. When the spinach leaves get cold, drain them
quickly on the paper towels.
So, bring together a couple of leaves to turn them into a
ball-we want ours about the size of a baseball. Squeeze the ball to wrong as
much water as you can.
Then, cover the spinach ball in plastic wrap and place it in
an airtight bag and lock it in the freezer.
You can put a few spinach balls into a 1-gallon jar. The
spinach can last up to a year in the fridge.
Conclusion
We are sure that the steps are given above present to you a clear idea from Planting Spinach to its harvesting and so on. Using this guide, you can grow the perfect spinach. You need to follow all the detailed steps wisely and strictly adhere to them.
Cucumbers are worthy of each salad courtesy it’s health benefits. Cucumbers have a mild, refreshing flavor and a high amount of water. You will also feel dehydrate and enjoy eating them in hot weather. Generally, most of the diet conscious people use cucumber in their diets.
Moreover, it has a variety of applications in several beauty
products due to its richness of vitamins and minerals.
Growing Fresh and Crunchy Cucumbers
The fresh cucumbers have a special crunch with every bite. Cucumber farmingwould be a different experience.
Whatever the space you have, you can grow cucumbers. They can be cultivated in pots, bags or directly on the field successfully.
Two main types of cucumber are outdoor and greenhouse. Plants of
greenhouse cucumber make long, smooth fruit similar to those sold in the
supermarket.
On the other hand, others are called ridge cucumbers. It’s
usually shorter and covered with red skin.
Crunchy cucumbers, fresh from the garden are in a league of
their own, so if you’re wondering whether to grow them or not, the answer
should be a resounding yes.
Some of the cucumber varieties are more suitable forcucumber farming in the UK, either outdoors or in the greenhouse.
Generally, the outdoor cucumbers also called ‘ridge cucumbers’ have
resistance to the cooler climates and are often spiked or rough to the touch.
Greenhouse cucumbers are a bit smoother fruits but do need that extra warmth to
grow to the full capacity.
Some varieties prefer sheltered environments just like a greenhouse and others mature better out, in a sunny environment.
How
to Sow Cucumbers
The mid-spring is the ideal time to sow the cucumber seeds into
small pots with a general-purpose potting mix. Sowing depth of cucumber seeds
is about an inch 3 cm deep.
Cucumbers germinate at least 20 degrees. This usually takes 7-10
days. Thus, you have to wait for a launch at the end of the spring.
After germination, you should transfer seedlings to the
place which has good sunlight and put them there until these are sufficiently
large to transplant it.
Once the seedlings start to appear, for better growth of a
healthy plant remove the weakest from the pot and leave one per pot.
The liquid fertilizer is better for cucumber farming. Thus, a liquid fertilizer high in potassium is the initial diet plant within every two weeks that keep these hungry plants moist most of the time.
Greenhouse cucumbers can be transplanted into beds, large containers
of potting soil. The other way to set the plant to grow is by setting two
cucumbers per bag into bottomless pots set on top of the growing bag.
These will help to trap moisture and ensure cucumber plant careevery time you water, instead of it running off over the surface.
Put in place supports such as bamboo canes, vertical wires,
strong netting or trellis. Train vines up their supports then pinch out the
growing tips when they reach the top to encourage side shoots. Take out the
tips of side shoots to leave two leaves beyond each fruit.
Feed plants every two weeks with a liquid fertilizer that’s high
in potassium and keeps these thirsty plants moist at all times.
You can exclude all male flowers from greenhouse cucumbers. This
prevents bitter-tasting fruits. It’s effortless to identify female flowers by
the slight swelling of the embryonic fruit behind each bloom.
Growing
Outdoor Cucumbers
When the soil warms in late spring or early summer, outdoor cucumbers should be planted. For the perfect plantation, accustom the plant to a newer climate for a week or two preparations slowly for a week or two.
On the other hand, you could sow seeds directly to their actual
rising places in warmer climates.
Cucumber farming considers the healthy, fertile soil just like other plants. Thus before planting, you can collect plenty of well-rotted organic matter such as manure.
It is ideal to set the plants at about 18 inches apart when you
raise your cucumbers upward using supports like a trellis. Alternatively,
position them about three feet from each other if you let them scatter over the
soil surface.
The outdoor cucumber needs insect pollination. Therefore, the
plant needs the involvement of male and female flowers. Thus, you should not
remove the male flowers. There is no need to remove male flowers as
greenhouse cucumbers. It is important to have this marriage for better and high
yields.
Cucumbers are typically grown at the same location as other
vegetables in the case of a greenhouse. And, in this case, farmers usually use
the same feed for all vegetables.
In the case of the cucumbers are provided the more effective and
balanced fertilizer. The yield is higher.
High nitrogen requirement in cucumber feed
A small cucumber plant has a larger leaf that is even greater
than the leaves of other plants.
As nitrogen is the fuel for flower growth. Cucumbers need more
nitrogen than other major nutrients such as magnesium, calcium, iron, and
manganese.
In the case of organic, the high liquid nitrogen feed would benefit cucumber farmingto the full capacity.
Cucumber Plant Diseases
1. Powdery Mildew
The fungus emerges first as several white spots on the cucumber
leaves and grows quickly as very small, threadlike powdery areas. It seems like
a cotton-dumpling demon that absorbs plant nutrients, so if you don’t handle
it, it can contribute to a serious infestation. The yield will be greatly
affected, even if they mature.
When you just begin to see the mold on the leaves of the
cucumber or if you had previous problems and want the chance of powdery mildew
to be reduced, milk is an all-natural effective barrier to funguses. Dilute and
spray the milk on the plants in the ratio of 10 parts water to 1 part milk.
Baking soda has solid household applications and can be applied
to this list as “treating powdery mildew.” A 1 tablespoon soda
solution in a gallon of water is adequate to be successful, but a soap or dish
soap would need as an additive. Some growers often add oil, neem or standard
cooking oil.
Sprinkle the mixture again early in the day, and then rinse in
the evening. The persuasive mildew requires a very favorable pH to survive and
baking soda is enough essential to render the leaves desolate.
2. Bacterial Wilt
Bacterial wilt affects the fruits in cucumber farming more intensely. Infection is recognized with often witty and dried branches, often even overnight.
One simple way to prevent bacterial wilt is by cutting off a
wilted stem at the base and rubbing the cut with your fingertip.
If you take off your finger gradually, the plants have
bacterial wilting threads out of the cut. There is no remedy for this cucumber
decay.
3. Fusarium wilt
Fusarium wilt is another issue with the cucumber plant which is a difficulty to treat and overcome. In dry climates, the pathogen is much more widespread and can damage, in addition to cucumber, a wide variety of vegetables.
The dropping leaves is the beginning of this disease. This can be identified by the slicing the main trunk of an infected fusarium wilt vine. If it’s the base is spotted with dark stripes. The fungicidal soil drenches the remedy of this infection while treating the soils before plantation can prevent the unfortunate loss.
4. Cucumber Mosaic
At any stage, this disease will invade cucumber plants and the
virus spreads systemically in the plant once the plant is infected.
Symptoms appear 7 to 14 days after infection and develop most
quickly at low temperatures.
A pale or dark green mosaic or mottling develops first on
the youngest leaves. The outer borders curl inward. New leaves are stunted and
twisted.
Flowers can exhibit strange properties like green petals. The
fruit of contaminated plants is often smaller and somewhat skewed, and display
light and dark green mosaic patterns on the surface.
In this case, it is important to buy the treated seeds for
cucumber farming that often highlighted at the label.
Harvesting the right cucumber
The cucumbers are best plucked before their seeds become hard as
they are preferred eating as immature.
While a yellow and mature cucumber is of the highest quality
when it is uniformly green, firm, and crisp.
Cucumbers that are left on the vine for a longer period would
get tough skins and eventually lower plant productivity.
You should collect fruits during thecucumber cultivation every few days at full harvest time as they grow rapidly once at the peak.
Storage of Mature Cucumber
Although a fresh cucumber has the highest level of water content
and crunchiness.
Cucumbers are over 90 percent water. This is ideal to store them wrapped tightly in plastic wrap to retain moisture. if there is a need to store them for a longer time, you will keep them for a week to 10 days when stored properly in the refrigerator.