10 Creative Uses for Finished Compost: Putting Your Nutrient-Rich Soil to Work

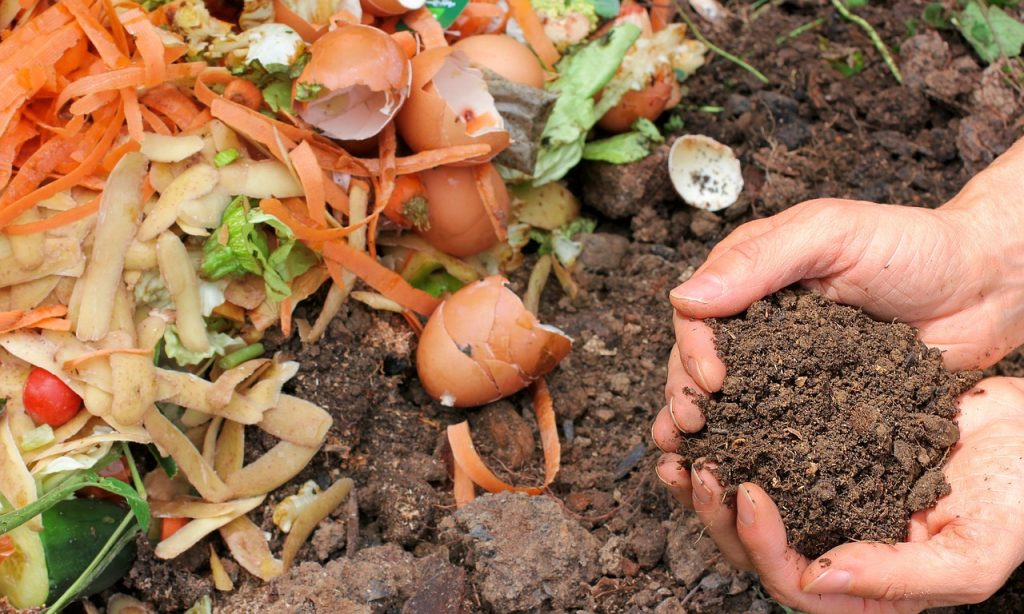
Finished compost is one of the best natural fertilizers available, and it’s a great way to recycle organic waste into valuable nutrients for your plants and garden. But once you’ve created your rich, dark, crumbly compost, you might wonder: How can I put it to best use? The possibilities are endless! Here are 10 creative uses for your finished compost that will enhance your garden, home, and more.


1. Improve Soil Quality in Your Garden

Why it helps: Compost is rich in nutrients that plants need to grow, such as nitrogen, phosphorus, and potassium. It also enhances the soil structure, improves drainage, and supports healthy root development.

How to use it:

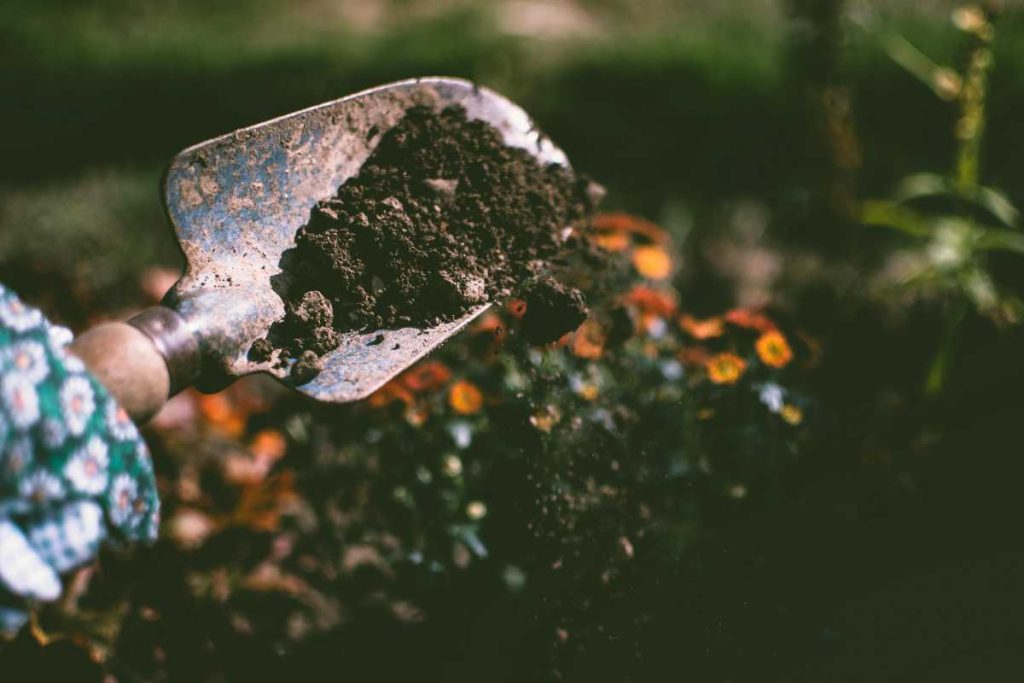
  • Spread a layer of compost on your garden beds before planting, or mix it into the soil to improve its texture and fertility. Use it for vegetables, flowers, shrubs, and trees.

2. Create Compost Tea for Plants

Why it helps: Compost tea is a nutrient-rich liquid that you can use to feed plants and enhance soil health. It’s packed with beneficial microorganisms that can boost plant growth and help protect against diseases.

How to use it:

  • Place a small amount of finished compost in a mesh bag or cheesecloth, then steep it in water for a few days. Once the liquid turns brown and fragrant, strain out the solids and use the tea as a natural fertilizer for your plants.

3. Mulch for Your Garden Beds

Why it helps: Compost can act as a natural mulch that retains moisture, prevents weeds, and regulates soil temperature. Plus, as it decomposes, it continues to enrich the soil beneath it.

How to use it:

  • Apply a 2- to 3-inch layer of compost on top of your garden soil as mulch. This will keep your plants hydrated and suppress weed growth throughout the growing season.

4. Boost Lawn Health

Why it helps: Compost improves the texture and structure of your lawn’s soil, helping grass roots penetrate deeper and grow stronger. It also enhances the overall health of the lawn by providing essential nutrients.

How to use it:

  • Spread a thin layer (around ¼ inch) of finished compost over your lawn and rake it in. This will provide your grass with the nutrients it needs to thrive and help combat compaction.

5. Enhance Your Composting Pile

Why it helps: Adding a small amount of finished compost to your new compost pile helps introduce beneficial microorganisms that aid in breaking down organic matter more quickly.

How to use it:

  • When starting a new compost pile, sprinkle a layer of finished compost over the materials. This will help jumpstart the decomposition process by introducing microbes that are already active in the finished compost.

6. Potting Mix for Container Plants

Why it helps: Finished compost is a great addition to potting soil because it helps retain moisture, adds nutrients, and improves drainage in containers.

How to use it:

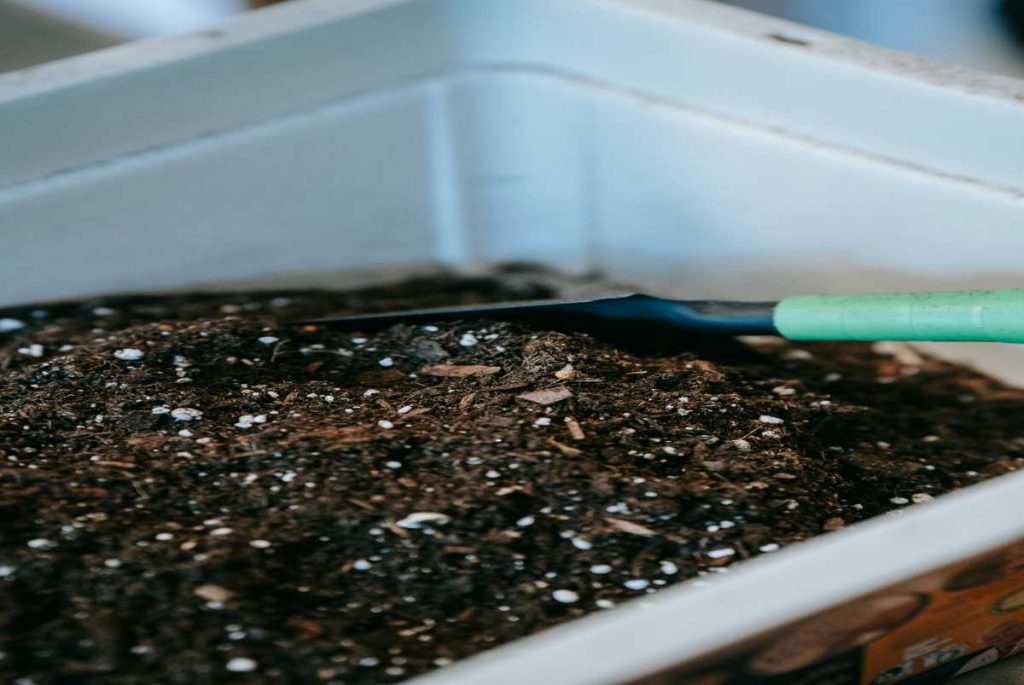
  • Mix finished compost with perlite or vermiculite (to improve aeration) and some garden soil to create a well-draining potting mix. Use this mixture to repot or plant in containers, baskets, or pots.

7. Use in Raised Garden Beds

Why it helps: Raised garden beds often need a soil boost, especially when they are newly established. Finished compost improves the soil’s nutrient profile and supports plant growth in these beds.

How to use it:

  • Add a generous amount of finished compost to the soil mix for your raised garden beds. This will provide immediate nourishment for your plants and create a healthy growing environment.

8. Enhance Your Vegetable Garden

Why it helps: Compost is especially beneficial for vegetable gardens, as it provides essential nutrients while also improving soil structure, which leads to healthier, higher-yielding plants.

How to use it:

  • Mix compost into the soil of your vegetable garden before planting to create rich, fertile ground for your crops. You can also side-dress around the base of growing plants to provide additional nutrients as needed.

9. Top-Dress Fruit Trees

Why it helps: Fruit trees require nutrient-rich soil to produce high-quality fruit. Compost improves soil health by providing the right balance of nutrients and moisture, helping trees grow strong and produce abundant fruit.

How to use it:

  • Spread a layer of compost around the base of fruit trees (but not directly against the trunk) and lightly rake it in. This will provide nutrients and improve the tree’s access to moisture and minerals.

10. Improve Flower Beds and Landscaping

Why it helps: Whether you’re growing flowers, shrubs, or ornamental plants, compost helps to ensure healthy, vibrant blooms. It encourages strong root systems and lush foliage.

How to use it:

  • Work finished compost into the soil of flower beds, or use it as a mulch around plants to keep them nourished throughout the season.

Conclusion

Finished compost is a powerful, all-natural tool for improving the health and vitality of your garden and plants. From enriching your soil to making compost tea or boosting the health of your lawn, the possibilities for using finished compost are endless. By putting your nutrient-rich soil to work, you’ll create a healthier, more productive garden that thrives season after season.

How to Start a Vermicomposting Bin with Red Worms

Vermicomposting is a fantastic way to recycle kitchen scraps and other organic materials into rich, nutrient-dense compost using red worms. It’s simple, eco-friendly, and perfect for small spaces like apartments or urban gardens. Here’s a step-by-step guide to setting up and maintaining your own vermicomposting bin.


What is Vermicomposting?

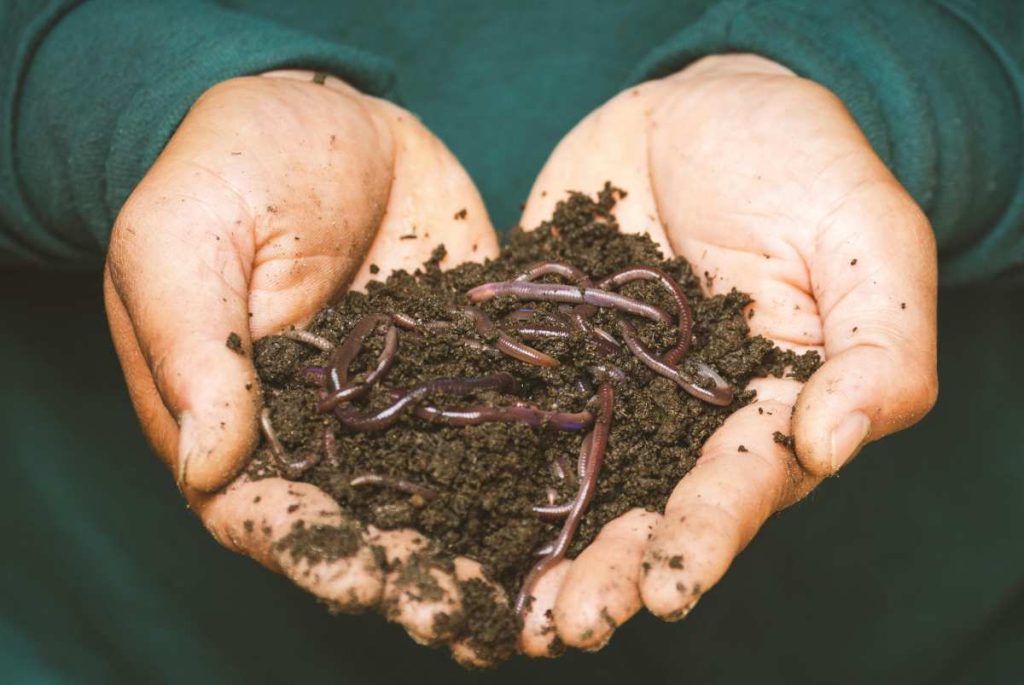
Vermicomposting uses red worms (typically Eisenia fetida) to break down organic waste into castings, which are nutrient-rich fertilizers. It’s an odor-free, compact system that can be kept indoors or outdoors.


What You’ll Need to Start

1. A Composting Bin

  • Material: Plastic or wood.
  • Size: A bin about 8–12 inches deep works well for most beginners.
  • Lid: Ensure it has a lid to retain moisture and keep pests out.

2. Bedding Material

  • Shredded newspaper, cardboard, coconut coir, or dried leaves.

3. Red Worms

  • Opt for Eisenia fetida (red wigglers), as they thrive in composting environments.

4. Food Scraps

  • Vegetable peels, fruit scraps, coffee grounds, and eggshells (crushed).

5. Optional Tools

  • A moisture meter or spray bottle to manage moisture levels.
  • Gloves or a small garden fork for turning the bin.

Setting Up the Vermicomposting Bin

Step 1: Prepare the Bin

  1. Drill holes in the sides and bottom of the bin for ventilation and drainage.
  2. Place a tray or pan beneath the bin to collect excess liquid (worm tea).

Step 2: Add Bedding

  1. Fill the bin about halfway with shredded paper, coconut coir, or leaves.
  2. Dampen the bedding material with water until it’s moist but not soggy.

Step 3: Introduce the Worms

  • Spread the worms evenly over the bedding. Let them burrow naturally to escape light.

Step 4: Add Food Scraps

  1. Bury small amounts of food scraps in the bedding.
  2. Rotate feeding spots to avoid attracting pests or creating an imbalance.

Step 5: Cover with More Bedding

  • Add a thin layer of damp bedding on top to control odors and maintain moisture.

Feeding Your Worms

What to Feed

  • Fruit and vegetable scraps.
  • Coffee grounds and filters.
  • Crushed eggshells.
  • Tea bags (ensure they are biodegradable).

What to Avoid

  • Meat, fish, or dairy (attracts pests and creates odors).
  • Greasy or oily foods.
  • Citrus fruits and onion/garlic (can harm worms).

Maintaining Your Vermicomposting Bin

1. Moisture

  • Keep bedding moist but not wet. Add water if it dries out, or mix in dry bedding if it’s too wet.

2. Aeration

  • Turn or fluff the bedding every few weeks to prevent compaction and allow airflow.

3. Temperature

  • Keep the bin in a cool, shaded area between 55°F–77°F (13°C–25°C). Avoid extreme heat or freezing temperatures.

4. Harvesting Compost

  1. After 2–3 months, push the contents of the bin to one side.
  2. Add fresh bedding and food to the empty side, encouraging worms to migrate.
  3. Remove the finished compost after 1–2 weeks.

5. Collecting Worm Tea

  • Drain the liquid from the tray below and dilute it with water (10:1 ratio) to use as a fertilizer.

Common Vermicomposting Problems and Solutions

1. Bad Odors

  • Cause: Overfeeding or too much moisture.
  • Solution: Remove excess food and mix in dry bedding.

2. Worms Escaping

  • Cause: Environment too dry, wet, or hot.
  • Solution: Check moisture, temperature, and bedding conditions.

3. Fruit Flies or Pests

  • Cause: Exposed food scraps.
  • Solution: Always bury food under bedding. Add a layer of dry material on top.

4. Slow Decomposition

  • Cause: Overfeeding or imbalance in greens and browns.
  • Solution: Feed less and ensure a good mix of bedding and scraps.

Using the Finished Compost

  • Mix worm castings into potting soil for houseplants.
  • Add directly to garden beds or sprinkle around the base of plants.
  • Use worm tea as a liquid fertilizer for an extra nutrient boost.

Benefits of Vermicomposting

  1. Reduces household waste.
  2. Produces high-quality compost.
  3. Compact and ideal for small spaces.
  4. Easy to maintain with minimal odor or mess.

FAQs

1. How many worms should I start with?

  • Start with 1 pound (about 1,000 worms) for every ½ pound of daily food scraps.

2. Can I keep the bin indoors?

  • Yes! Vermicomposting bins are odor-free and perfect for kitchens or basements.

3. How long does it take to get compost?

  • Typically, 2–3 months, depending on the bin size, worm population, and amount of waste.

Conclusion

Starting a vermicomposting bin is an easy, sustainable way to recycle organic waste and create nutrient-rich compost. With the right setup and a little maintenance, you can enjoy the benefits of vermicomposting year-round. Happy composting!

Tips for Speeding Up the Composting Process

Composting is an excellent way to recycle organic waste, improve soil health, and reduce landfill waste. However, the process can sometimes take months or even years to fully break down materials, especially if conditions aren’t ideal. Fortunately, there are several ways to speed up composting and get nutrient-rich humus for your garden faster. Here are 9 effective tips to accelerate the composting process.


1. Maintain the Right Balance of Green and Brown Materials

Composting works best when there’s a proper balance between nitrogen-rich green materials (such as kitchen scraps, grass clippings, and coffee grounds) and carbon-rich brown materials (such as dry leaves, cardboard, and straw).

  • How it helps: The right balance of greens and browns provides the microorganisms with the nutrients they need to break down organic matter quickly.
  • Tip: Aim for a ratio of about 3:1 (brown to green) for optimal composting speed.

2. Chop or Shred Larger Materials

Larger pieces of organic matter like branches, fruit peels, or vegetable scraps take longer to break down. To speed up the process, chop or shred larger materials into smaller pieces.

  • How it helps: Smaller pieces provide a larger surface area for microorganisms to break down, speeding up the decomposition process.
  • Tip: Use a compost shredder or simply chop materials with a garden shears or knife.

3. Turn the Pile Regularly

Turning the compost pile helps introduce oxygen, which is essential for aerobic bacteria that break down organic matter more quickly.

  • How it helps: Regularly turning the pile promotes aeration, prevents odors, and speeds up the decomposition process by ensuring bacteria can work efficiently.
  • Tip: Turn the pile once a week or more, especially when the temperature starts to drop or if the pile seems to slow down.

4. Maintain the Right Moisture Level

Composting requires moisture to keep the microorganisms active. However, too much moisture can create anaerobic conditions that slow down decomposition, while too little moisture will cause the pile to dry out and halt the process.

  • How it helps: Moisture activates and sustains beneficial microbes that decompose organic material.
  • Tip: Keep the pile as moist as a wrung-out sponge—damp but not soggy. If it’s too dry, add water; if it’s too wet, add more brown materials to absorb excess moisture.

5. Add Compost Accelerator or Activator

Compost accelerators are commercially available products containing beneficial microbes and enzymes that can help jumpstart the composting process.

  • How it helps: Accelerators introduce or stimulate microorganisms that can speed up decomposition.
  • Tip: You can also create your own “compost starter” by adding some already finished compost to the pile to introduce active microbes.

6. Ensure Proper Pile Size and Structure

The size of your compost pile can affect its temperature and speed of decomposition. A pile that’s too small won’t generate enough heat, while a pile that’s too large can become compacted and lack airflow.

  • How it helps: A pile that is about 3 feet by 3 feet in size is optimal for composting, as it can retain heat and maintain aeration while still breaking down material efficiently.
  • Tip: Keep your compost pile in a manageable size to maintain the right temperature and airflow.

7. Increase the Pile’s Temperature

A hot compost pile breaks down organic material much faster than a cool one. The ideal temperature for composting is between 130°F and 160°F (54°C to 71°C), which is hot enough to encourage microbial activity but not so hot that it kills the beneficial organisms.

  • How it helps: Heat speeds up the process by promoting faster microbial breakdown.
  • Tip: If your pile isn’t hot enough, add more green materials like fresh grass clippings or manure to raise the temperature.

8. Use Aerobic Methods

Using aerobic composting methods, which rely on oxygen-loving bacteria, can significantly speed up the breakdown process compared to anaerobic composting (which takes much longer).

  • How it helps: Aerobic bacteria work faster and more efficiently to break down organic materials.
  • Tip: Avoid compacting the pile, and make sure to aerate it regularly by turning or stirring to introduce oxygen.

9. Avoid Adding Certain Materials

Some materials slow down the composting process or create problems in your pile. Avoid adding large quantities of meat, dairy, fats, and oils, as they can attract pests and slow decomposition.

  • How it helps: By excluding slow-decomposing or problematic materials, you ensure a quicker and more efficient composting process.
  • Tip: Stick to plant-based materials, and if you add any animal products, do so sparingly.

Conclusion

By following these 9 tips, you can significantly speed up the composting process and enjoy richer, healthier soil in a shorter amount of time. Remember that composting is an ongoing process that benefits from attention and care, but with the right techniques, you’ll be able to reduce waste and nourish your garden with nutrient-dense compost in no time.

6 ways to Supercharge Your Compost

Composting is a natural process that transforms organic waste into nutrient-rich soil, but sometimes it can use a little extra help. Whether you want to speed up the decomposition, increase the nutrient value, or simply improve the overall health of your compost, natural additives can work wonders. These additives are easy to find, eco-friendly, and effective in giving your compost pile or bin the boost it needs. Here are six natural additives to supercharge your compost and make it even more beneficial for your garden.


1. Compost Activators

Why it’s beneficial: Compost activators are typically high-nitrogen materials that help jumpstart the composting process. They introduce beneficial microbes and bacteria into the pile, speeding up decomposition and increasing the overall efficiency of the compost.

How to use it:

  • You can purchase commercial compost activators or make your own by adding green materials like fresh grass clippings, kitchen scraps, or manure.
  • If you’re making your own compost activator, ensure that it’s rich in nitrogen, which encourages microbial activity and accelerates the breakdown of organic material.

2. Worm Castings

Why it’s beneficial: Worm castings, also known as vermicompost, are packed with beneficial microorganisms and essential nutrients, including nitrogen, phosphorus, and potassium. They are natural fertilizers that can significantly enhance the quality of your compost.

How to use it:

  • Simply add a few handfuls of worm castings to your compost pile every few weeks. You can even set up a worm bin to harvest the castings.
  • These castings help to increase microbial activity and nutrient content, making your compost richer and more effective in nourishing your plants.

3. Wood Ash

Why it’s beneficial: Wood ash is rich in potassium, calcium, and other trace minerals that can help balance the pH levels of your compost. It also adds carbon to the compost, which helps create the ideal carbon-to-nitrogen ratio needed for proper decomposition.

How to use it:

  • Add wood ash in small amounts (a handful or two) every few weeks to your compost pile. Be cautious, as too much ash can make your compost too alkaline, which may inhibit certain microbial activity.
  • It’s a great way to neutralize overly acidic compost and boost the overall nutrient content.

4. Coffee Grounds

Why it’s beneficial: Coffee grounds are an excellent source of nitrogen, one of the key components needed for efficient composting. They also contain micronutrients like magnesium and copper, which help promote healthy soil and plant growth.

How to use it:

  • Add coffee grounds directly to your compost pile or bin. They should be mixed with other materials (like leaves, straw, or paper) to balance the carbon-to-nitrogen ratio.
  • Coffee grounds can also help absorb excess moisture in a damp compost pile, making them a great addition for maintaining the right moisture levels.

5. Seaweed or Kelp

Why it’s beneficial: Seaweed and kelp are loaded with trace minerals, micronutrients, and growth-promoting compounds like hormones that benefit soil and plant health. These marine plants also help improve the structure of your compost, promoting better aeration and water retention.

How to use it:

  • Collect seaweed or kelp from clean coastal areas (if available), or purchase dried seaweed at garden centers.
  • Chop or shred the seaweed into smaller pieces before adding it to your compost. It’s especially effective in boosting the mineral content of your compost, making it more nutrient-dense.

6. Compost Tea

Why it’s beneficial: Compost tea is a liquid made by steeping compost in water. The result is a nutrient-rich, microorganism-filled liquid that can be added directly to your compost to boost microbial life and accelerate decomposition. It’s also a powerful natural fertilizer for your plants.

How to use it:

  • Make compost tea by soaking mature compost in water for a few days (usually 1-2 parts compost to 5 parts water).
  • After straining, pour the tea directly into your compost pile to increase microbial activity.
  • You can also use compost tea as a liquid fertilizer for your garden, promoting healthy plant growth and enhancing soil quality.

Conclusion

By incorporating these natural additives into your compost, you can improve decomposition, enhance nutrient content, and create richer soil for your garden. Whether you’re using coffee grounds for nitrogen, worm castings for added nutrients, or wood ash to balance pH, these simple yet effective materials will take your composting game to the next level. The best part? These additives are all eco-friendly, sustainable, and easily accessible. Start supercharging your compost today and watch your garden thrive!

Natural Additives ways to charge Your Compost

Boosting your compost with natural additives can enhance its decomposition process, nutrient content, and overall quality. These additions can speed up the breakdown of organic matter, improve the balance of nutrients, and provide beneficial microbes that enrich the soil. Here are six natural ingredients to take your compost to the next level.


1. Coffee Grounds

Why They Work:
Coffee grounds are rich in nitrogen, a key component for healthy compost. They also improve the texture of the compost, making it easier to mix.

How to Use Them:

  • Add used coffee grounds in moderation to avoid creating an acidic compost pile.
  • Mix with “brown” materials like dry leaves to maintain a balanced carbon-to-nitrogen ratio.

Pro Tip: Include paper coffee filters—they decompose easily and add more carbon.


2. Crushed Eggshells

Why They Work:
Eggshells provide calcium, an essential nutrient for plant growth. Over time, they also help balance the pH of your compost.

How to Use Them:

  • Rinse and crush the shells to speed up their decomposition.
  • Spread evenly throughout the pile to prevent clumping.

Pro Tip: Don’t worry about the smell—cleaned eggshells won’t attract pests.


3. Wood Ash

Why They Work:
Wood ash is rich in potassium and calcium carbonate, making it a fantastic addition for nutrient enrichment. It also helps neutralize overly acidic compost piles.

How to Use Them:

  • Sprinkle a thin layer of ash occasionally; too much can make your compost too alkaline.
  • Avoid ashes from treated or painted wood, which can introduce harmful chemicals.

Pro Tip: Use wood ash from a natural fireplace or wood-burning stove for the best results.


4. Seaweed and Kelp

Why They Work:
Seaweed and kelp are loaded with micronutrients like magnesium, potassium, and iodine. They also contain alginates, which improve soil structure by helping it retain water.

How to Use Them:

  • Rinse seaweed to remove excess salt before adding it to your compost.
  • Chop or shred it into smaller pieces to speed up decomposition.

Pro Tip: Collect seaweed responsibly and ensure it’s allowed in your area.


5. Banana Peels

Why They Work:
Banana peels are rich in potassium, phosphorus, and other trace minerals essential for plant growth. They break down quickly and release nutrients into the compost.

How to Use Them:

  • Chop banana peels into smaller pieces to accelerate their breakdown.
  • Mix them evenly with other materials to prevent clumping.

Pro Tip: Avoid adding too many peels at once, as they can attract pests if not properly buried in the pile.


6. Manure from Herbivores

Why It Works:
Manure from animals like cows, horses, rabbits, and chickens is a powerhouse of nitrogen and beneficial microbes that jumpstart decomposition.

How to Use It:

  • Add well-aged manure to avoid introducing harmful pathogens. Fresh manure can be too “hot” and damage plants.
  • Mix thoroughly with “browns” to balance the pile and reduce odors.

Pro Tip: Avoid using manure from meat-eating animals like cats or dogs, as it may contain harmful bacteria.


Conclusion

Incorporating these six natural additives into your compost can dramatically improve its quality, nutrient content, and effectiveness. By using coffee grounds, crushed eggshells, wood ash, seaweed, banana peels, and herbivore manure, you’ll enrich your compost and create a valuable resource for your garden. Experiment with these ingredients to find the perfect combination for your composting goals, and watch your plants thrive with the nutrient-packed results!

9 Tips for Speeding Up the Composting Process

Composting is a fantastic way to reduce waste and create rich, fertile soil for your garden. However, the process can sometimes take longer than expected, especially if conditions aren’t ideal. Fortunately, there are several tips and techniques you can use to speed up decomposition and get nutrient-rich compost in less time. If you’re looking to speed up your composting process, here are nine effective tips to help you out.


1. Maintain the Right Carbon-to-Nitrogen Ratio

Why It’s Important:
Composting requires a balance of “greens” (nitrogen-rich materials) and “browns” (carbon-rich materials). Too much carbon slows down decomposition, while too much nitrogen can cause your pile to become too wet and smelly. The ideal carbon-to-nitrogen (C) ratio is 30:1, meaning 30 parts carbon to 1 part nitrogen.

How to Speed Up Composting:

  • Add More Greens: If your compost pile is too slow, increase the nitrogen by adding kitchen scraps, grass clippings, or coffee grounds.
  • Add More Browns: If your pile is too wet and doesn’t break down, balance it with dry materials like leaves, cardboard, or straw.

2. Turn the Pile Frequently

Why It’s Important:
Turning your compost pile introduces oxygen, which is necessary for the microbes that break down organic matter. Without oxygen, your compost can become compacted and anaerobic, leading to slower decomposition.

How to Speed Up Composting:

  • Turn Regularly: Aim to turn your compost pile every 2-3 weeks to keep the decomposition process active.
  • Use a Pitchfork or Compost Aerator: These tools make it easier to aerate the pile and ensure that the materials decompose evenly.

3. Shred or Chop Larger Materials

Why It’s Important:
Larger pieces of organic material, like whole leaves or branches, take much longer to break down. Shredding or chopping materials into smaller pieces increases the surface area, allowing microorganisms to break them down faster.

How to Speed Up Composting:

  • Shred Leaves: Use a lawnmower, garden shredder, or hand tools to chop up leaves and larger plant material before adding them to the compost pile.
  • Chop Up Kitchen Scraps: Cutting vegetable scraps, eggshells, and other kitchen waste into smaller pieces helps them decompose faster.

4. Maintain the Right Moisture Level

Why It’s Important:
Moisture is crucial for composting, as it helps keep the microorganisms hydrated and active. Too much moisture can make your compost pile soggy and anaerobic, while too little moisture can slow down microbial activity.

How to Speed Up Composting:

  • Moisture Level: Aim for the compost to be as damp as a wrung-out sponge — not too dry, not too wet.
  • Water as Needed: If the pile is too dry, add water to it, especially in dry climates. If it’s too wet, add more carbon-rich materials (like dry leaves or straw) to help absorb excess moisture.

5. Use a Composting Accelerator or Activator

Why It’s Important:
Composting accelerators are products that contain beneficial bacteria, fungi, and enzymes that help break down organic material more quickly. They can speed up the decomposition process, especially if your pile is sluggish.

How to Speed Up Composting:

  • Add a Compost Accelerator: These are available in both liquid and granular form and can be found at most garden centers.
  • Look for Natural Activators: Many gardeners use natural ingredients like comfrey, alfalfa, or seaweed as compost accelerators. These materials provide extra nutrients to the microbes in your pile.

6. Keep the Pile Warm

Why It’s Important:
Microbial activity speeds up in warmer temperatures, so keeping your compost pile warm can drastically speed up the decomposition process. A well-maintained compost pile can reach temperatures of 130-160°F (54-71°C), where decomposition happens most efficiently.

How to Speed Up Composting:

  • Insulate the Pile: In colder climates, consider insulating your compost pile with straw bales or placing it in a compost bin to retain heat.
  • Monitor Temperature: Use a compost thermometer to ensure the pile stays within the ideal temperature range for composting.

7. Use a Compost Tumbler

Why It’s Important:
Compost tumblers are enclosed bins that make it easy to turn your compost. The mechanical turning helps oxygenate the pile, promotes even decomposition, and speeds up the process.

How to Speed Up Composting:

  • Turn Regularly: With a compost tumbler, you can turn your pile every 2-3 days, which helps aerate it and prevent compaction.
  • Aerate the Pile: Tumblers also allow for better oxygen circulation, which helps accelerate microbial activity.

8. Add Manure to the Pile

Why It’s Important:
Animal manure, especially from herbivores like cows, chickens, and horses, is rich in nitrogen and beneficial microorganisms that can jump-start the composting process. Manure acts as a natural accelerator and helps balance the carbon-to-nitrogen ratio.

How to Speed Up Composting:

  • Add Fresh Manure: Mix fresh manure into your compost pile, but be sure to use it in moderation, as too much can make your pile too hot or smelly.
  • Compost with Caution: Ensure that manure is well-composted before using it in your garden, as fresh manure can burn plants.

9. Keep the Pile Aerated

Why It’s Important:
Aeration is key to speeding up decomposition. Without enough oxygen, the compost pile can become anaerobic, leading to unpleasant odors and slow breakdown. Proper aeration helps create the ideal environment for beneficial microbes to thrive.

How to Speed Up Composting:

  • Use a Compost Aerator: This tool allows you to poke holes in the pile, helping air reach the center.
  • Add More Air: If your compost pile is dense or compact, manually fluff it up by turning it or mixing it with a pitchfork to improve airflow.

Conclusion

Speeding up the composting process requires a combination of the right ingredients, the proper conditions, and regular maintenance. By following these nine tips — balancing your carbon-to-nitrogen ratio, turning your pile frequently, chopping up materials, and maintaining the right moisture and temperature — you can create nutrient-rich compost more quickly. With these strategies in place, you’ll have healthier soil and a thriving garden in no time!

6 Natural Additives to Supercharge Your Compost

Composting is an excellent way to recycle organic waste and enrich your garden soil, but did you know that certain natural additives can supercharge your compost and speed up the decomposition process? By incorporating specific materials into your compost, you can balance the carbon-to-nitrogen ratio, enhance microbial activity, and accelerate the breakdown of organic matter. If you’re looking to take your composting game to the next level, here are six natural additives that can work wonders for your compost pile.


1. Bone Meal: A Boost of Phosphorus

Why It’s Beneficial:
Bone meal is made from finely ground bones and is an excellent source of phosphorus, a vital nutrient for healthy root development in plants. Adding bone meal to your compost pile ensures that your final compost is rich in phosphorus, which is essential for plant growth, especially for promoting root systems.

How to Use It:

  • Add to Compost: Sprinkle bone meal throughout your compost pile, mixing it in to evenly distribute the phosphorus.
  • Amount: Use it in moderation—about 1 to 2 cups of bone meal per compost bin is sufficient.
  • Timing: Bone meal breaks down slowly, so adding it early in the composting process is ideal.

Pro Tip: Bone meal also helps balance the pH of your compost, especially if it’s too acidic.


2. Wood Ash: Boosts Potassium and Raises pH

Why It’s Beneficial:
Wood ash is a rich source of potassium and calcium, which are essential for healthy plant growth. Potassium helps plants resist diseases and promotes strong stems and roots. Wood ash can also help raise the pH of acidic compost, making it more neutral and plant-friendly.

How to Use It:

  • Add to Compost: Sprinkle wood ash on top of your compost pile, mixing it in gently. Be cautious not to add too much, as excessive wood ash can make your compost too alkaline.
  • Amount: A handful of wood ash every week should be enough.
  • Timing: Wood ash works well throughout the composting process.

Pro Tip: Wood ash should be used sparingly, especially if you live in an area with naturally alkaline soil, as it could make the compost too basic.


3. Coffee Grounds: A Nitrogen Boost

Why It’s Beneficial:
Coffee grounds are rich in nitrogen, making them an excellent addition to your compost pile to help balance the carbon-to-nitrogen ratio. They also contain micronutrients like magnesium, calcium, and potassium, which enhance soil fertility. Coffee grounds provide the necessary nitrogen to speed up decomposition and enrich the final compost.

How to Use It:

  • Add to Compost: Add coffee grounds directly to the compost pile or spread them on the surface and turn them in.
  • Amount: You can add coffee grounds freely, but it’s best to mix them with carbon-rich materials like leaves to prevent them from compacting and forming clumps.
  • Timing: Coffee grounds break down quickly, so they can be added at any time during the composting process.

Pro Tip: Used coffee filters can be composted too, making them a great addition to your pile along with the grounds.


4. Eggshells: Source of Calcium and Trace Minerals

Why It’s Beneficial:
Eggshells are an excellent source of calcium, which is essential for strong plant cell walls and overall plant health. Calcium also helps neutralize acidic soil, improving the pH balance in your compost. In addition, eggshells provide trace minerals that help plants thrive.

How to Use It:

  • Add to Compost: Crush eggshells before adding them to your compost pile to help them break down faster.
  • Amount: You can add several dozen crushed eggshells over time, depending on your compost needs.
  • Timing: Eggshells decompose slowly, so it’s best to add them early in the composting process.

Pro Tip: Eggshells can also help deter pests like slugs and snails in the garden once the compost is applied.


5. Seaweed: Nutrient-Rich and Full of Trace Elements

Why It’s Beneficial:
Seaweed is packed with essential nutrients like potassium, nitrogen, phosphorus, and trace elements such as iodine, iron, and magnesium. These nutrients help enrich your compost, promoting better plant growth and improving soil health. Seaweed also helps retain moisture in the compost, which is essential for healthy decomposition.

How to Use It:

  • Add to Compost: You can add seaweed directly to your compost pile, whether it’s dried or fresh. If you’re using fresh seaweed, make sure to rinse it well to remove any salt that could harm your plants.
  • Amount: A few handfuls of seaweed are sufficient for a small compost pile. You can increase the amount for larger piles.
  • Timing: Seaweed can be added at any time and helps improve the overall quality of compost.

Pro Tip: Seaweed can be a great addition to composting systems in coastal areas, where it’s easy to collect.


6. Worm Castings: Natural Fertilizer and Microbe Booster

Why It’s Beneficial:
Worm castings, also known as vermicompost, are a nutrient-rich, natural fertilizer that enhances soil fertility. They are packed with beneficial microorganisms that break down organic matter and release essential nutrients. Adding worm castings to your compost helps improve the microbial activity in the pile, leading to faster and more efficient decomposition.

How to Use It:

  • Add to Compost: Mix worm castings into your compost pile to boost microbial activity and improve the quality of your compost.
  • Amount: A couple of handfuls of worm castings for every cubic foot of compost is sufficient.
  • Timing: Worm castings can be added at any stage of composting, and they will continue to work as the pile decomposes.

Pro Tip: If you don’t have access to worm castings, you can create your own worm bin to produce this valuable additive.


Conclusion

Supercharging your compost with natural additives can significantly improve its quality and accelerate the decomposition process. Bone meal, wood ash, coffee grounds, eggshells, seaweed, and worm castings are just a few of the powerful natural materials that can boost your compost and enhance its nutrient content. By incorporating these additives into your composting routine, you’ll be able to create richer, more fertile soil for your garden, reducing waste and supporting sustainable gardening practices. Happy composting!

5 Common Composting Mistakes and How to Avoid Them

Composting is an effective way to recycle organic waste and create nutrient-rich soil for your garden. However, even the most experienced composters can make mistakes that can slow down the decomposition process or affect the quality of the final product. If you’re new to composting, or even if you’ve been composting for a while, it’s important to avoid these common errors. Here are 5 common composting mistakes and how to avoid them for a successful, thriving compost pile.


1. Using the Wrong Materials

Mistake:
One of the most common mistakes beginners make is adding the wrong materials to their compost pile. While it’s tempting to throw in everything organic, not all materials are compost-friendly. Some items, like meat, dairy, oily foods, and pet waste, can cause unpleasant odors and attract pests, making your compost pile unmanageable.

How to Avoid It:

  • Do Add: Kitchen scraps like fruit and vegetable peels, coffee grounds, eggshells, and yard waste such as grass clippings and leaves. These provide the right balance of nitrogen (greens) and carbon (browns).
  • Don’t Add: Avoid adding meat, dairy products, pet waste, or anything oily. These can cause odors and invite pests into your compost bin.
  • Know the Balance: Aim for a good balance of “greens” (nitrogen-rich materials) and “browns” (carbon-rich materials). A 3:1 ratio of browns to greens is ideal.

2. Not Maintaining the Right Moisture Levels

Mistake:
Too much moisture or too little moisture can both be detrimental to your compost pile. If your compost is too dry, the microorganisms that break down the organic matter will be unable to thrive. On the other hand, if it’s too wet, the pile can become soggy, leading to a lack of oxygen and a slow decomposition process.

How to Avoid It:

  • Ideal Moisture: Your compost should be as moist as a wrung-out sponge — damp but not soaking.
  • How to Check: Squeeze a handful of compost. If water drips out, it’s too wet; if it crumbles, it’s too dry.
  • Fixing Too Wet: If your compost pile is too wet, add dry browns like shredded paper, cardboard, or leaves. Turn the pile to aerate it and help excess moisture evaporate.
  • Fixing Too Dry: If it’s too dry, water the pile gently with a hose or watering can until it reaches the right moisture level.

3. Not Turning the Pile Enough

Mistake:
Turning your compost pile is essential for promoting aeration and ensuring that the materials break down evenly. If you don’t turn your pile regularly, it can become compacted, restricting airflow and causing the pile to break down slowly or unevenly.

How to Avoid It:

  • Turn Regularly: Aim to turn your compost pile at least once every 2-3 weeks. This allows oxygen to reach the center of the pile and speeds up decomposition.
  • How to Turn: Use a pitchfork, compost aerator, or shovel to mix the compost. If the pile is too large, consider using a compost tumbler to make turning easier.
  • Avoid Over-Turning: While turning is important, don’t overdo it. Excessive turning can cause the pile to dry out or disrupt the microbial process.

4. Not Shredding or Chopping Materials

Mistake:
Adding large pieces of material to your compost pile can slow down the decomposition process. Larger items, like whole branches or uncut leaves, decompose much more slowly compared to smaller, shredded materials.

How to Avoid It:

  • Shred or Chop: Break down larger materials into smaller pieces before adding them to your compost bin. Use a shredder for leaves and paper or chop up branches and stems with pruning shears or a garden saw.
  • Smaller Pieces Decompose Faster: The smaller the material, the faster the microorganisms can break it down, helping your compost to mature more quickly.
  • Consider the Size of Your Bin: If you have a smaller compost bin, you may want to cut down materials to fit better and decompose faster.

5. Not Monitoring the Temperature

Mistake:
If you’re not paying attention to the temperature of your compost pile, you might miss the signs of poor decomposition. A pile that’s too cold can slow down or even stop the composting process, while a pile that’s too hot may lose beneficial microbes, making it difficult to break down materials.

How to Avoid It:

  • Ideal Temperature Range: The optimal composting temperature is between 130°F and 160°F (54°C to 71°C). This is when microorganisms are most active and break down materials quickly.
  • Use a Thermometer: Invest in a compost thermometer to monitor the temperature of your pile. If it’s too hot (above 160°F), turn the pile to cool it down. If it’s too cold (below 110°F), add more greens or turn the pile more frequently to help raise the temperature.
  • Insulate in Winter: If you live in a cold climate, consider insulating your compost pile with straw bales or placing it in a compost bin to retain heat during the winter months.

Conclusion

Composting is a straightforward process, but it does come with some potential pitfalls. By avoiding these 5 common mistakes — using the wrong materials, improper moisture levels, insufficient turning, not shredding or chopping materials, and ignoring temperature — you’ll be well on your way to creating a rich, healthy compost pile. A little attention and care can help you transform your organic waste into valuable, nutrient-dense compost for your garden, all while reducing your environmental impact. Happy composting!

Can Worms Eat Potato Peels?

Yes, worms can eat potato peels. Potato peels are an excellent source of nutrition for worms and can be a great addition to your composting.

Worms, also known as earthworms, play a vital role in the ecosystem by breaking down organic matter and turning it into nutrient-rich soil. This process is called composting. Not only this helps to reduce waste also, gives a natural fertilizer for plants. Feed your worms food scraps, and with this, you’re benefiting both the environment and your garden.

Potato peels are a great food source for worms. They are high in starch, which provides energy for the worms, and also contain essential nutrients such as potassium and phosphorus. But make sure to prepare the potato peels rightly before giving them to your worms so they can digest them easily.

Can worms eat potato peels?

Worms can indeed eat potato peels, and they can be an excellent addition to their diet. 

Potato peels are a great source of nutrition for worms, as they are rich in starch, and can provide energy to the worms.

Prepare potato peels properly before feeding them to your worms. Potato peels can be quite tough and difficult for worms to break down on their own. Make sure the peels are easy for worms to digest, it’s best to chop them up into small pieces before adding them to the compost bin. That will help to speed up the composting process.

Moreover, worms can eat a wide variety of other food scraps, including fruit and vegetable scraps, coffee grounds, tea leaves, and even eggshells. The key is to provide a balanced diet that includes a variety of different food sources. This will help to ensure that the worms are getting all the nutrients they need to thrive and produce high-quality compost.

Also Read: How to Use Worm Castings in Vegetable Garden?

Preparing potato peels for worms

Make sure worms can easily digest potato peels by cutting them properly. As mentioned earlier, potato peels can be tough and difficult for worms to break down on their own. Therefore, it’s important to follow these simple steps to prepare potato peels before adding them to your worm bin –

Chop the peels into small pieces – To make potato peels more manageable for worms, it’s best to chop them up into small pieces. You can use a kitchen knife or a food processor to do this. Smaller pieces will break down more easily and quickly in the compost bin.

Let the peels dry out – Potato peels can be quite wet and slimy, which can slow down the composting process. To avoid this, it’s a good idea to let the peels dry out for a day or two before adding them to your worm bin. This will help to remove excess moisture and make the peels more edible for the worms.

Mix the peels with other food scraps – Worms need a balanced diet that includes a variety of different food sources. To ensure that they are getting all the nutrients they need, it’s best to mix the potato peels with other food scraps such as fruit and vegetable scraps, coffee grounds, and tea leaves.

Check this out: Are Worm Castings Good for Tomatoes?

How to feed potato peels to worms?

Feeding potato peels to worms is a great way to recycle food waste and produce high-quality compost for your garden. Here are the steps to follow when feeding potato peels to your worms.

  • Prepare the potato peels before feeding them to your worms. Chop them into small pieces and let them dry out for a day or two to remove excess moisture.
  • Once the potato peels are ready, it’s time to add them to your worm bin. Mix them with other food scraps such as fruits, vegetable scraps, coffee grounds, and tea leaves.
  • Keep an eye on your worm bin to make sure that the worms are healthy and thriving. If the compost starts to smell bad, it’s a sign that there may be too much food waste in the bin. In this case, reduce the amount of food you’re feeding the worms and add more bedding material such as shredded newspaper or cardboard.

How fast will worms eat potato peels?

Worms can eat potato peels relatively quickly, usually within a few weeks. The speed at which they consume them depends on the size of the peels, the number of worms in your bin, and the weather. 

Worms tend to eat more quickly in warmer temperatures during the summer season, while their eating habits may slow down in colder temperatures during winter. If you want to speed up the process, try chopping the peels into small pieces, adding more worms to the bin.

Also Read: Is Chicken Manure Good for Potatoes?

What should you not feed to your worms?

While worms can eat potato peels, there are some things that you should never feed them. Here are some items to avoid when feeding your worms –

  • Meat, dairy, and oily foods – Worms are not able to digest meat, dairy products, or oily foods like cheese, butter, and salad dressings. These items can also attract pests and cause unpleasant odors in your worm bin.
  • Citrus fruits – While small amounts of citrus fruits like oranges and lemons are okay, avoid feeding your worms large quantities of citrus. The acid in these fruits can harm the worms and make the compost too acidic.
  • Onions and garlic – These items contain sulfur, which can repel worms and harm their delicate skin.
  • Spicy or salty foods – Foods that are too spicy or salty can also harm your worms and disrupt the balance of your compost bin.
  • Pet waste – Pet waste can contain harmful bacteria and parasites that can harm your worms and make your compost unsafe for use in your garden.

Some Tips for Feeding Potato Peels to Worms

Here are some other tips – 

  • Don’t overload your worm bin.
  • Once you know what to feed your worms, it’s vital to take care of how often they should be fed.
  • Mix potato peels with other types of food.
  • Avoid feeding cooked or processed potatoes.
  • Cut the potato peels into smaller pieces.
  • Check the worm bin whether there is an unwanted odor coming from it.

Conclusion

Worms are excellent composters and can consume a wide variety of food waste, including potato peels. However, it’s important to feed them potato peels in moderation and to mix the peels with other types of food to ensure a balanced diet.

Chopping the peels into small pieces and avoiding cooked or processed potatoes can also help to speed up the composting process.

By feeding potato peels and other food waste to your worms, you can help to reduce your household waste, while also producing rich compost that can be used to fertilize your garden. With a little bit of care and attention, you can create a healthy and thriving worm bin that will provide you with nutrient-rich compost.

6 Amazing Composting Ways Everyone Should Try, No Matter Where You Live

Composting is a simple and effective way to reduce waste and create nutrient-rich soil for your garden. Not only is it good for the environment, but it also saves you money on fertilizer and helps reduce your carbon footprint.

Composting is a sustainable practice that not only reduces household waste but also enriches soil and benefits the environment. Whether you live in an urban apartment or a rural farm, there’s a composting method that’s perfect for you.

We’ll dive into 6 amazing composting techniques that will take your gardening game to the next level. From vermicomposting to composting in a bin, we’ll cover everything you need to know to get started on your composting journey.

1. Composting with a Tumbler

Composting with a Tumbler is a convenient and efficient method of composting for those who want to speed up the composting process and make it easier to turn the compost.

A compost tumbler is a rotating drum that is mounted on a stand. As the drum rotates, it aerates the compost and helps to mix and distribute moisture evenly, which speeds up the composting process.

One of the key benefits of composting with a tumbler is that it allows for composting in a small space. Tumblers come in a variety of sizes, making them suitable for urban dwellers with limited outdoor space.

They are also easy to use, simply add your compost ingredients to the tumbler and give it a turn every few days to aerate the compost.

2. Vermicomposting

Vermicomposting is a method of composting that uses red wigglers, also known as red earthworms, to break down organic material into nutrient-rich compost. This method of composting is ideal for those who want to compost indoors or who have limited outdoor space.

Vermicomposting starts with a bin that contains bedding material, such as shredded newspaper or coir, and a population of red wigglers.

Kitchen scraps and other organic waste are added to the bin, and the worms feed on the waste, breaking it down into compost. As the worms consume the organic matter, they produce castings, which are nutrient-rich and can be used as a soil amendment.

This method can be performed outdoors, in basements, attached garages or even in a 15-gallon container under the kitchen sink, no matter where you live.

3. Composting in an open Bin

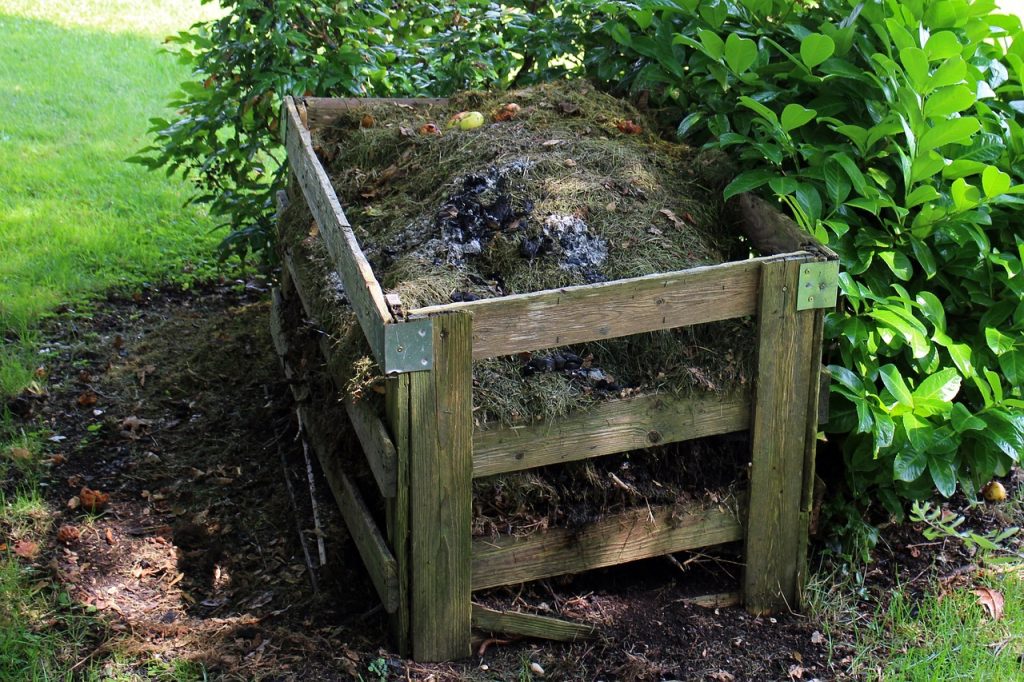
Composting in an open bin is a traditional and simple method of composting that involves creating a compost pile in a designated area of your yard.

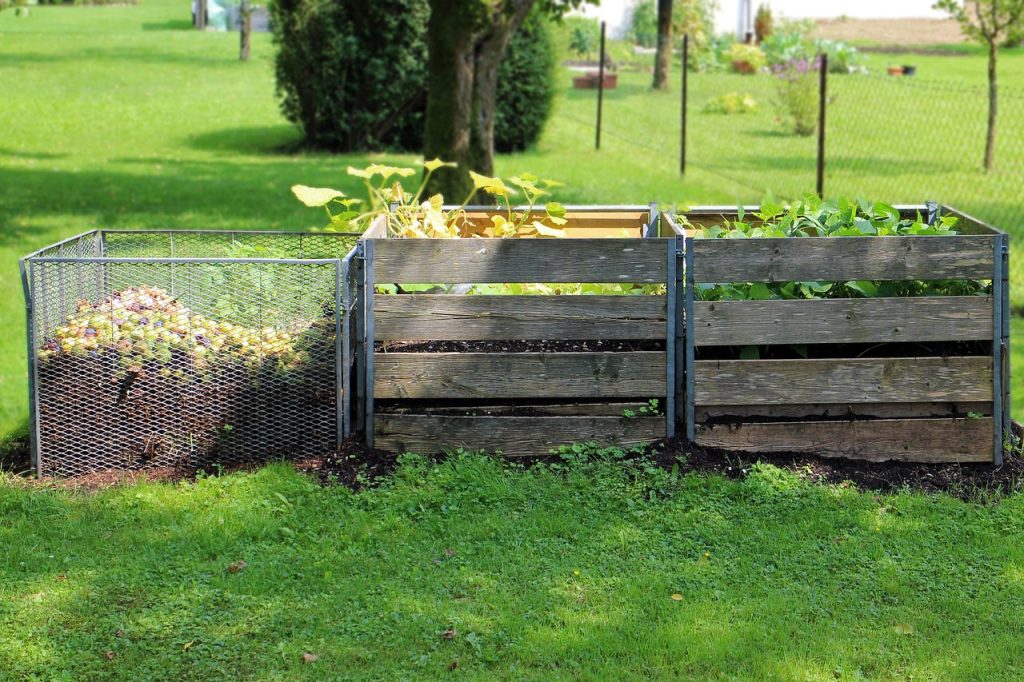
Open bins offer versatility for both hot and cold composting, making them a great choice. This method of composting is ideal for those who have ample outdoor space, as the compost pile can be quite large.

To start, you’ll need a compost bin or simply designate a space in your yard for your compost pile. You can build a bin using wooden pallets or purchase a ready-made bin.

Once you have your bin, you can start adding organic waste to the pile. This can include kitchen scraps, leaves, grass clippings, and other yard waste.

One of the advantages of composting in an open bin is that it’s easy to add waste to the pile, and it’s simple to turn the compost. This method is also ideal for those who want to compost a large quantity of waste, as the bin can be as large as needed. 

4. Pit Composting

Pit composting involves digging holes or trenches and burying organic waste within them. This composting method involves minimal effort as you simply need to dig the pit, add the waste, and let it decompose over a period of several months to a year. 

During this time, the organic materials will break down naturally and eventually turn into nutrient-rich compost. Pit composting is a low-maintenance method that’s perfect for those who want a simple and hands-off approach to composting.

5. Bokashi Composting

Bokashi composting is a unique method of composting that uses beneficial microorganisms to ferment organic waste. Unlike traditional composting methods, Bokashi composting doesn’t rely on air, heat, or moisture to break down the organic waste. 

To start Bokashi composting, you’ll need a Bokashi bin and the inoculant. You can add all types of organic waste, including meat, dairy, and cooked food, which are typically not suitable for traditional composting methods. 

Once the bin is full, the organic waste will ferment for approximately two weeks, during which time the beneficial microorganisms will break down the organic waste, producing a nutrient-rich compost.

After the two-week fermentation period, the Bokashi compost can be added directly to your garden or potted plants, where it will continue to break down and provide vital nutrients to the plants. 

Bokashi composting is an ideal method for those who have limited space, as the Bokashi bin can be kept indoors, and it’s also a great solution for those who want to compost all types of organic waste, including meat and dairy.

6. Combination Composting

Combination composting is a method that combines different composting techniques to create a more efficient and effective composting process.

This method is ideal for those who have a large amount of organic waste and want to compost it quickly and efficiently.

Combination composting involves two or more of the following methods: hot composting, cold composting, vermicomposting, or Bokashi composting.

You can Compost all of your kitchen waste, not just a portion of it. This method can be more complex than other methods, but it can also produce compost more quickly, and it’s ideal for those who have a large amount of organic waste and want to compost it efficiently.

Conclusion

Composting is a simple and effective way to reduce waste, improve soil health, and help the environment. With six amazing composting methods to choose from, there is a solution that is perfect for everyone, no matter where they live.

You can compost food waste, yard waste, and other organic materials in a way that is safe, sustainable, and effective.

From vermicomposting to open-bin composting, each method has its own unique benefits, and by choosing the method that is right for you, you can start composting and making a positive impact on the environment today.