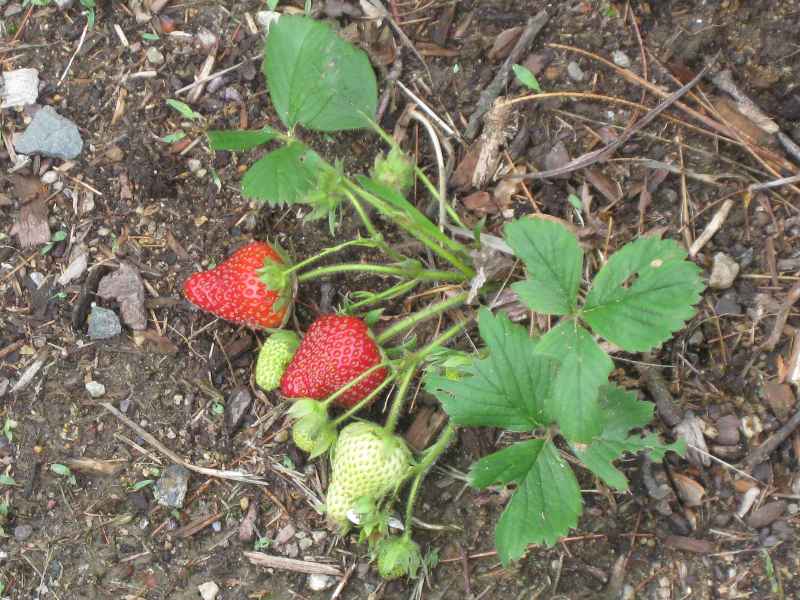
Can Worms Eat Potato Peels?

Yes, worms can eat potato peels. Potato peels are an excellent source of nutrition for worms and can be a great addition to your composting.

Worms, also known as earthworms, play a vital role in the ecosystem by breaking down organic matter and turning it into nutrient-rich soil. This process is called composting. Not only this helps to reduce waste also, gives a natural fertilizer for plants. Feed your worms food scraps, and with this, you’re benefiting both the environment and your garden.

Potato peels are a great food source for worms. They are high in starch, which provides energy for the worms, and also contain essential nutrients such as potassium and phosphorus. But make sure to prepare the potato peels rightly before giving them to your worms so they can digest them easily.

Can worms eat potato peels?

Worms can indeed eat potato peels, and they can be an excellent addition to their diet. 

Potato peels are a great source of nutrition for worms, as they are rich in starch, and can provide energy to the worms.

Prepare potato peels properly before feeding them to your worms. Potato peels can be quite tough and difficult for worms to break down on their own. Make sure the peels are easy for worms to digest, it’s best to chop them up into small pieces before adding them to the compost bin. That will help to speed up the composting process.

Moreover, worms can eat a wide variety of other food scraps, including fruit and vegetable scraps, coffee grounds, tea leaves, and even eggshells. The key is to provide a balanced diet that includes a variety of different food sources. This will help to ensure that the worms are getting all the nutrients they need to thrive and produce high-quality compost.

Also Read: How to Use Worm Castings in Vegetable Garden?

Preparing potato peels for worms

Make sure worms can easily digest potato peels by cutting them properly. As mentioned earlier, potato peels can be tough and difficult for worms to break down on their own. Therefore, it’s important to follow these simple steps to prepare potato peels before adding them to your worm bin –

Chop the peels into small pieces – To make potato peels more manageable for worms, it’s best to chop them up into small pieces. You can use a kitchen knife or a food processor to do this. Smaller pieces will break down more easily and quickly in the compost bin.

Let the peels dry out – Potato peels can be quite wet and slimy, which can slow down the composting process. To avoid this, it’s a good idea to let the peels dry out for a day or two before adding them to your worm bin. This will help to remove excess moisture and make the peels more edible for the worms.

Mix the peels with other food scraps – Worms need a balanced diet that includes a variety of different food sources. To ensure that they are getting all the nutrients they need, it’s best to mix the potato peels with other food scraps such as fruit and vegetable scraps, coffee grounds, and tea leaves.

Check this out: Are Worm Castings Good for Tomatoes?

How to feed potato peels to worms?

Feeding potato peels to worms is a great way to recycle food waste and produce high-quality compost for your garden. Here are the steps to follow when feeding potato peels to your worms.

  • Prepare the potato peels before feeding them to your worms. Chop them into small pieces and let them dry out for a day or two to remove excess moisture.
  • Once the potato peels are ready, it’s time to add them to your worm bin. Mix them with other food scraps such as fruits, vegetable scraps, coffee grounds, and tea leaves.
  • Keep an eye on your worm bin to make sure that the worms are healthy and thriving. If the compost starts to smell bad, it’s a sign that there may be too much food waste in the bin. In this case, reduce the amount of food you’re feeding the worms and add more bedding material such as shredded newspaper or cardboard.

How fast will worms eat potato peels?

Worms can eat potato peels relatively quickly, usually within a few weeks. The speed at which they consume them depends on the size of the peels, the number of worms in your bin, and the weather. 

Worms tend to eat more quickly in warmer temperatures during the summer season, while their eating habits may slow down in colder temperatures during winter. If you want to speed up the process, try chopping the peels into small pieces, adding more worms to the bin.

Also Read: Is Chicken Manure Good for Potatoes?

What should you not feed to your worms?

While worms can eat potato peels, there are some things that you should never feed them. Here are some items to avoid when feeding your worms –

  • Meat, dairy, and oily foods – Worms are not able to digest meat, dairy products, or oily foods like cheese, butter, and salad dressings. These items can also attract pests and cause unpleasant odors in your worm bin.
  • Citrus fruits – While small amounts of citrus fruits like oranges and lemons are okay, avoid feeding your worms large quantities of citrus. The acid in these fruits can harm the worms and make the compost too acidic.
  • Onions and garlic – These items contain sulfur, which can repel worms and harm their delicate skin.
  • Spicy or salty foods – Foods that are too spicy or salty can also harm your worms and disrupt the balance of your compost bin.
  • Pet waste – Pet waste can contain harmful bacteria and parasites that can harm your worms and make your compost unsafe for use in your garden.

Some Tips for Feeding Potato Peels to Worms

Here are some other tips – 

  • Don’t overload your worm bin.
  • Once you know what to feed your worms, it’s vital to take care of how often they should be fed.
  • Mix potato peels with other types of food.
  • Avoid feeding cooked or processed potatoes.
  • Cut the potato peels into smaller pieces.
  • Check the worm bin whether there is an unwanted odor coming from it.

Conclusion

Worms are excellent composters and can consume a wide variety of food waste, including potato peels. However, it’s important to feed them potato peels in moderation and to mix the peels with other types of food to ensure a balanced diet.

Chopping the peels into small pieces and avoiding cooked or processed potatoes can also help to speed up the composting process.

By feeding potato peels and other food waste to your worms, you can help to reduce your household waste, while also producing rich compost that can be used to fertilize your garden. With a little bit of care and attention, you can create a healthy and thriving worm bin that will provide you with nutrient-rich compost.

Can Goats Eat Plastic?

Yes, goats can eat plastic, but it doesn’t mean they should eat it. Plastic consumption can lead to serious health problems for goats. So, before you let your goats roam free around any plastic waste, it’s essential to know the risks and potential dangers.

But why do goats eat plastic? Well, goats are curious creatures, and they often find something to be taken in their mouth. If they come across something that smells interesting, they may try to eat it. And unfortunately, plastic waste is often found in or near areas where goats graze, making it easy for them to consume it.

Be sure to dispose of any plastic items in your surroundings properly. This can help prevent your goats from coming into contact with this dangerous health hazard.

Can Goats Digest Plastic?

While goats may be able to eat plastic, they can’t digest it. In fact, plastic consumption can cause a variety of health problems for goats, including digestive issues, internal bleeding, and blockages.

The digestive system of a goat is designed to break down and digest plant matter, such as grass and hay. However, plastic is not a natural food source for goats, and their digestive systems are not equipped to process it. 

Also, plastic can gather in a goat’s digestive system, causing blockages that can be fatal if left untreated.

Moreover, some types of plastic can leach harmful chemicals into a goat’s digestive system, leading to further health issues.

So, while goats may be able to eat plastic, it’s important to prevent them from doing so whenever possible. 

Also Read: Can Goats Eat Cabbage – Is It Safe?

What happens if a goat eats plastic?

If a goat eats plastic, it can cause a range of health problems, some of which can be life-threatening. The health issues depend on the type of plastic consumed and how much amount they have consumed.

One of the main issues that can occur if a goat eats plastic is digestive problems. Plastic is not a natural food source for goats, and their digestive systems are not equipped to break it down properly. This can cause blockages in the digestive system, leading to constipation, diarrhoea, and abdominal pain.

Also, some types of plastic can release toxic chemicals into a goat’s digestive system, causing further health issues. Goats can consume low-density plastics such as plastic bags as well as high-density plastics.

If left untreated, plastic consumption can be fatal for goats. The blockages caused by plastic can lead to internal damage and eventually death. Even if the goat survives, it may suffer from long-term health problems such as malnutrition, loss of appetite, and infrequent stooling.

How to prevent goats from eating plastic?

Preventing goats from eating plastic for their health and well-being. Here are some steps you can take to keep your goats safe and healthy –

1. Proper disposal – Properly dispose of the area where goats might go and consume plastic there. This includes plastic bags, packaging materials, and any other plastic items that may be lying around.

2. Clean grazing areas – Keep your goats’ grazing areas clean and free of any bad things, including plastic waste. Make sure to regularly check the area for any plastic waste.

3. Provide nutrition – Make sure your goats are getting enough food and nutrients in their diet. If they are not getting the right nutrition, they may be more likely to try and eat non-food items such as plastic.

4. Use bitter-tasting solution – Some farmers have had success using taste deterrents to prevent goats from eating plastic. Such as hanging shiny objects in the grazing area or spraying a bitter-tasting solution on plastic items.

5. Supervision – keeping an eye on your goats while they are grazing can help prevent plastic consumption. If you notice your goat trying to eat plastic, remove the plastic from its reach.

By taking these steps, you can help prevent your goats from eating plastic and keep them healthy and happy.

Check this: What do you feed baby Quail?

What to do if your goat eats plastic?

If your goat has ingested plastic, act quickly to minimize the possible health risks. Here are some steps you can take if you suspect your goat has eaten plastic –

1. Check your goat – Keep a close eye on your goat’s behaviour and health. Look out for any signs of distress such as vomiting, diarrhoea, or loss of appetite.

2. Contact a veterinarian – If you suspect that your goat has eaten plastic, contact a veterinarian immediately. They can provide guidance on what to do next and may recommend bringing the goat in for an examination.

3. Provide supportive care – In some cases, the veterinarian may recommend providing supportive care such as fluids or medications to help the goat pass the plastic through its system. Follow their instructions closely and provide the necessary care to help your goat recover.

Once your goat recovers, take steps to prevent them from consuming plastic in the future. Properly dispose of plastic waste and regularly monitor the grazing areas.

Conclusion

Goats are known to be hardy and adaptable animals, and consuming plastic can be harmful to their health and well-being. Low-density plastics such as plastic bags, cellophane, and thin plastic can be particularly dangerous and can lead to a range of health problems if consumed.

Proper disposal of plastic waste, keeping grazing areas clean, providing adequate nutrition, and using bitter taste solutions are all effective ways to prevent goats from consuming plastic. Also, monitoring your goats while they graze and taking quick action if they do eat plastic can help minimize any potential health risks.

When Can Chicks Go Outside in the Coop?

Keeping chickens in a coop can be a great way to bring some entertainment and excitement to your backyard. And if you’re a first-time chicken owner, you might be wondering when it’s safe to let your chicks outside to explore their new surroundings.

Well, timing is everything. Knowing when to let your chicks outside can have a significant impact on their health and safety, as well as their growth.

So, when can chicks go outside in the coop?

Chicks can typically go outside in the coop once they are about 6 weeks old and fully feathered.

However, it’s vital to consider other factors, such as weather conditions and predators in the area, before letting them outside. 

Factors to Consider Before Letting Chicks Outside

Here are some factors to keep in mind – 

1. Age of Chicks

  • One of the most important factors to consider when letting your chicks outside is their feather growth. Chicks need their feathers to keep them warm and protect them from the weather, as well as to help control their body temperature. Fully feathered chicks are better prepared to go outdoors. While newly hatched chicks needed 95F.
  • The age at which chicks have full feathers can differ depending on their breed, and most chicks can safely go outside in the coop between 4-8 weeks of age.

2. Weather Conditions

  • When letting chicks outside for the first time, wait for warm and dry weather. Chicks can easily become sick if they are exposed to cold, wet conditions. It’s also necessary to confirm that the outdoor temperature is right for the breed of chicks you have.
  • Keep an eye on the weather and be ready to bring your chicks inside if the weather suddenly becomes wet or cold.

3. Security

Chicks are weak to a variety of predators, even during the daytime. Make sure your outside area is secure for the chicks. Your outside area should be surrounded by a fence or wire mesh to keep predators out.

4. Behavior and development

  • Before letting chicks outside for the first time, observe their behavior to ensure they are healthy and active. Sick or weak chicks should be kept inside until they are fully recovered for the outside view.
  • Start with short periods of time when you are allowing chicks to go outside for the first time. Slowly increase the length of time they spend outside each day. Thar will help them adjust according to their new surroundings and reduce the risk of stress or illness.

Best times of day to let chicks outside

Chicks are most comfortable when temperatures are mild and moderate. As such, the best times of day to let them outside are typically during the early morning or late afternoon when temperatures are cooler. Avoid letting chicks outside during the hottest part of the day, as they may become overheated and dehydrated.

Furthermore, chicks require sunlight to stay healthy and grow properly. However, too much direct sunlight can be harmful to them, causing sunburn and heatstroke. It is recommended to let chicks outside when the sun is less intense. You can go in the early morning or late afternoon when the sun’s rays are not strong.

Preparing the Coop for Chicks to Go Outside

1. Cleaning

Before letting chicks outside, it’s vital to entirely clean and disinfect the coop and outside run. That will help prevent the spread of disease and parasites, and create a healthier environment for your chicks.

Remove any old bedding and debris, and scrub the walls and floors with a non-toxic disinfectant. Allow the coop to dry completely before adding new bedding.

2. Safety

Ensure that the coop and run are secure and free from any possible risks. This includes repairing any holes or gaps in the walls or fencing, and ensuring that there are no exposed wires or sharp objects that could harm your chicks.

3. Food and Water

Make sure that your chicks have access to fresh water and food in the coop and run. Moreover, keep the food and water containers clean and free from debris, as this can attract pests and bacteria.

4. Temperature

Chicks are sensitive to temperature changes and require a warm environment for their growth. Ensure that the coop and run are at the right temperature for your chicks, especially during the first few weeks after they are allowed outside. You can use heat lamps or a heating pad to maintain the temperature in the coop.

Benefits of Letting Chicks Outside

  • Chicks that are allowed to go outside have more space to explore and get exercise, which is vital for their physical and mental well-being. Outdoor space allows chicks to engage in natural behaviours.
  • When you let chicks go outside, they get to breathe in the fresh air and soak up the sun’s rays. This can help make their immune system stronger and help them grow healthy and strong. Just like fresh air and sunlight are good for us, they can be good for chicks too! Sunlight is also important for vitamin D production, which is essential for healthy bones and immune function.
  • When chicks are allowed to go outside, they have the opportunity to socialize with other birds, which can help reduce stress and promote healthy social behaviour. This is especially important for chicks that will eventually be introduced to a flock of adult birds.
  • Outdoor environments provide a wealth of sights, sounds, and smells that can give a mental push to chicks, which can improve their overall health and well-being.

Conclusion

Allowing chicks to spend time outside in their coop is an essential aspect of their health and growth. However, it’s vital to ensure that the chicks are of the right age, the coop is properly prepared, and the surrounding is safe. By following these factors, you can help your chicks enjoy the benefits of fresh air and natural light while taking care of them.

Remember that each chick is unique, and some may take longer to adjust to outdoor life than others. Be patient and take the time to observe their behavior.

Moreover, providing a safe and suitable outdoor environment can encourage healthy growth and socialization. With proper preparation and care, your chicks can thrive and grow into happy, healthy adult birds.

How Much Sunlight Does a Cucumber Need?

Cucumbers are one of the most popular vegetables in the world. People love cucumber for their crisp texture and refreshing taste. If you’re growing cucumbers in your own garden, then understand how much sunlight they need in order to thrive well. 

Sunlight is essential for photosynthesis, the process by which plants convert light into energy. Without enough sunlight, cucumbers may not grow properly, which can result in stunted growth, poor yields, and even plant death.

Cucumber plants need a great amount of sunlight to thrive. Cucumbers need at least 5 to 6 hours of direct sunlight daily. Regular and uninterrupted direct sunlight is required for cucumbers to grow and yield fully.

If cucumber plants don’t receive sufficient sunlight, they may grow slowly, produce fewer fruits, and can be exposed more to diseases and pests. However, if cucumber plants receive too much sunlight, they may become stressed and experience sunburn.

Importance of Sunlight for Cucumbers Growth

Cucumber farming

Sunlight is a vital component for the growth of cucumbers. Cucumbers are a type of plant that requires a lot of direct sunlight for photosynthesis, the process by which they convert sunlight into energy to fuel their growth. Without sufficient sunlight exposure, cucumbers may not grow properly, resulting in stunted growth and poor yields.

One of the essential functions of sunlight for cucumbers is that it helps them produce chlorophyll. On the other hand, if cucumber plants receive too much sunlight, it can lead to problems such as sunburn and stress. Sunburn can cause the leaves and fruits of cucumber plants to turn yellow or brown and become dry and brittle. 

This can make them more exposed to pests and diseases. Stress from excessive direct sunlight exposure can also cause cucumber plants to become weak and vulnerable to pests and diseases.

Also Read: Why You Should Not Plant Cucumbers Near Tomatoes?

Ideal sunlight conditions for cucumber plants

  • Cucumber plants need at least 5-6 hours of direct sunlight per day to grow well.
  • Morning sunlight is preferred as it allows the plants to soak up the light they need before the heat of the day sets in.
  • Afternoon sunlight can be too intense for cucumber plants, especially in hot climates. So, provide some shade during the hottest part of the day if necessary.
  • Cucumber plants should be planted in an area that receives full sun for most of the day.
  • Check the amount of direct sunlight that your cucumber plants are receiving and change the direction of your plant if required.
  • You can use shade to provide safety from excessive heat and light during the hottest parts of the day to your plant.
  • Provide sufficient water and nutrients to your cucumber plant to grow and thrive in ideal sunlight conditions.
  • In cooler climates, it’s vital to ensure that cucumber plants receive enough sunlight to grow properly, and planting them in a location that receives the most sunlight is recommended.
  • Cucumber plants grown in containers or indoors can require sufficient artificial light to balance the lack of natural sunlight. A grow light or other types of artificial lighting can be used to provide sufficient light for indoor or container-grown cucumber plants.

Location for growing cucumbers

Choosing the right location for growing cucumbers is necessary for a successful harvest. Here are some important factors to consider when selecting a location for your cucumber plants.

Sunlight – As mentioned earlier, cucumbers require at least 5-6 hours of direct sunlight per day. Therefore, it’s vital to choose a location that receives full sun for most of the day. The location should receive morning sunlight and have some protection from extreme afternoon sunlight.

Soil – Cucumbers grow best in well-draining, nutrient-rich soil. The soil should be loose, with good water retention capabilities. The ideal pH range for growing cucumbers is between 5.5 and 7.0.

Temperature – Cucumbers prefer warm temperatures between 70-85°F (21-29°C). Cooler temperatures can slow down their growth, while too-hot temperatures can stress the plants.

Watering cucumber Cucumber plants require consistent moisture to grow and produce fruit.

Space – Cucumber plants require a lot of space to grow and produce fruit. They also require support, such as a trellis or fence, to prevent them from spreading all over the ground.

Pest and disease – It’s vital to choose a location that’s relatively pest and disease-free. Avoid areas with a history of fungal or bacterial diseases or infestations.

Common Mistakes to Avoid

Growing cucumbers can be a rewarding experience, but it’s vital to avoid common mistakes that can lead to poor growth and reduced yields.

Planting too early – Cucumber plants are sensitive to cold temperatures, so planting them too early can lead to stunted growth and poor yields. Wait until the soil has warmed up to at least 60°F (16°C) before planting cucumber seeds or transplanting them.

Overcrowding – Cucumber plants require a lot of space to grow and produce fruit. Overcrowding them can lead to poor air circulation, increased humidity, and increased risk of pest and disease problems. Plant cucumber seeds or transplants at least 12-18 inches (30-45 cm) apart in rows that are 3-4 feet (0.9-1.2 m) apart.

Overwatering or underwatering – Cucumber plants require consistent moisture to grow and produce fruit, but overwatering or underwatering can lead to poor growth and reduced yields. Water cucumber plants deeply once a week, or more frequently during hot, dry weather. Avoid overhead watering, as it can increase the risk of fungal diseases.

Poor soil – Cucumber plants require well-draining, nutrient-rich soil to grow and produce fruit. Before planting, amend the soil with compost or well-rotted manure to improve soil structure and fertility. Test the soil pH and adjust it and ensure that it’s in the ideal range of 6.0-7.0.

Also Read: Is Chicken Manure Good for Cucumbers?

Lack of support – Cucumber plants require support, such as a trellis or fence, to prevent them from sprawling on the ground. Without support, the plants can become tangled and more prone to pest and disease problems.

Failure to control pests and diseases – Cucumber plants are susceptible to a variety of pests and diseases, such as cucumber beetles, aphids, and powdery mildew. Watch your plant regularly for signs of damage or disease, and take proper actions to control them.

Also Read: How Deep Should a Raised Bed Be for Cucumbers?

Conclusion

Sunlight is an important factor in the growth and development of cucumber plants. By providing cucumber plants with sufficient sunlight, you can help ensure that they grow well, produce high yields, and fight pests and diseases.

However, it’s vital to choose a suitable location for growing cucumbers, prepare the soil properly, and avoid common mistakes such as overcrowding and overwatering.

With proper care and attention, you can grow healthy and productive cucumber plants that will provide you with fresh and delicious cucumbers throughout the growing season. Remember to monitor the plants regularly for signs of stress or disease, and take appropriate actions to address any issues that occur.

How Long Can Goats Be Left Alone?

Goats are intelligent and social animals that are often kept as pets and for their milk, meat, and wool. They need regular care and attention to stay healthy and happy. However, as a goat owner, you may be thinking about how long your goats can be left alone without risking their well-being.

Well, this will depend on several things, such as the age and health of the goats, as well as the availability of food, water, and shelter.

Adult goats can normally be left alone for up to 24 hours without any problems. But, you make sure they have access to sufficient food, water, and shelter.

However, it is not recommended to leave them alone for long. If you plan to be away for long then it is advisable to arrange for someone to check on your goats or hire a pet sitter to care for them in your absence.

On the other hand, baby goats, or kids, require more frequent care and attention than adult goats. They need to be fed every few hours and kept warm and dry.

How long can goats be left alone?

There are many things to be kept in mind while allowing goats to be left alone – 

1. Age of goats – Younger goats, such as kids or newborn goats, need more regular care and attention as compared to adult goats. Thus, they should not be left alone for more than a few hours at a time, while adult goats can be left alone for up to 24 hours without any problems.

2. The health of goats – Sick or injured goats need more care. It is not advisable to leave them alone for an extended period of time, as their condition may worsen without proper care and attention.

3. Availability of food and water – Goats require access to fresh water and food at all times to stay healthy and hydrated. The length of time they can be left alone may depend on the amount of food and water available to them.

4. Shelter and living conditions – Goats need a safe and comfortable environment to live in. The type of shelter they have and the living conditions they are in can affect how long they can be left alone.

5. Climate and weather – Extreme weather conditions, such as heat waves or cold snaps, may affect how long goats can be left alone. In hot weather, they need access to shade and cool water, while in cold weather, they require adequate shelter to stay warm.

6. Predator risk – Goats are vulnerable to predators. If there is a high risk of predator attack in your area, it may not be safe to leave goats alone for long periods of time.

Also Read: Can Goats Eat Cabbage – Is It Safe?

How long can baby goats be left alone?

Baby goats are typically more delicate and vulnerable than adult goats, which means they need more frequent care and attention. The newborn goats should not be left alone for more than 2-3 hours, while older kids (1-2 months old) can be left alone for some more time.

Baby goats need to be fed regularly to ensure they receive enough nutrition to grow properly. They should be fed milk every 2-4 hours, depending on their age and weight. If you plan to leave baby goats alone, make sure you fed and hydrated them.

Moreover, they need to be kept warm and comfortable, provided with fine bedding, and have access to a secure shelter. Also, they require interaction with other goats or humans to help them develop properly.

Baby goats that are habitual to being left alone or are well-socialized with other animals may be able to handle longer periods of solitude than those that are not used to it.

Also Read: What do you feed baby Quail?

How to train goats to be left alone?

Here are some tips to train goats to be left alone – 

1. Start with short periods – Begin by leaving your goats alone for just a few minutes at a time, and then increase the time further.

2. Give a reward for their good behavior – Reward your goats with treats when they are calm and relaxed while alone.

3. Make the environment comfortable – Ensure the environment in which you leave your goats is familiar and comfortable for them. This will help to reduce any stress or anxiety they may feel while alone.

4. Provide entertainment – Provide your goats with toys or activities to keep them occupied and prevent boredom.

5. Socialize your goats – Ensure that your goats have regular interaction with other goats or humans to help them develop properly and feel more comfortable when left alone.

Also Read: Biofloc Fish Farming – A Complete Guide

Common mistakes to avoid when leaving goats alone

  • One of the most common mistakes when leaving goats alone is leaving them for too long. Goats should not be left alone for more than a day, as they need regular interaction with other goats or humans.
  • Ensure that your goats have enough food and water before leaving them alone.
  • Goats can be playful and curious animals, so make sure the environment in which you leave them is safe and free from any risks that could harm them.
  • Take into account the weather conditions when leaving goats alone. Ensure that they are protected from extreme heat or cold and that they have access to shade and shelter if needed.

Check this out: Can Goats Eat Plastic?

Conclusion

Goats can be left alone for a short period of time, but it is vital to consider some things before doing so. The length of time that goats can be left alone depends on their age, health, and general living conditions. Also, avoid common mistakes, such as leaving them for too long or in an unsafe environment.

If you need to leave your goats alone, it is recommended to slowly train them to be comfortable with being alone for short periods of time.

Can Goats Eat Cabbage – Is It Safe?

If you are a goat owner, you may have wondered whether or not it is safe to feed goats cabbage. As goats are known to have a desirous appetite and will eat almost anything, it is vital to know what foods are safe for them to consume.

Cabbage is a popular vegetable that is often consumed by humans, but can it be safely given to goats? Yes, goats can eat cabbage, but it should be given in moderation. Cabbage is a nutritious vegetable that contains essential vitamins and minerals which can benefit them. However, it is essential to know what foods are safe for your goats to eat and what foods should be avoided. 

Benefits of giving Cabbage to your Goats

Cabbage is a nutritious vegetable that can be a healthy addition to a goat’s diet. It is high in essential vitamins and minerals that surely be beneficial to your goat.

1. Rich in Vitamin C – Cabbage is an excellent source of vitamin C, which is necessary for maintaining a healthy immune system in goats. Vitamin C helps to protect the body from infections and diseases.

2. Fiber – Cabbage containing fibre can aid in digestion and prevent constipation in goats. It can also help to maintain a healthy weight in your goats.

3. Low in Calories – Cabbage is a low-calorie vegetable, which can be beneficial for goats that are overweight or at risk of obesity. Feeding cabbage as a treat or supplement can help to provide essential nutrients without adding excess calories to their diet.

Can Goats Eat Cabbage?

Yes, goats can eat cabbage, and it can be a healthy addition to their diet. However, keep in mind that cabbage should be fed in moderation and not as the primary source of nutrition for your goats.

Cabbage is a member of the Brassica family, which includes other vegetables such as broccoli, cauliflower, and kale. These vegetables contain compounds called glucosinolates, which can be toxic in large quantities. When goats consume large amounts of glucosinolates, it can cause digestive upset, including bloating, gas, and diarrhea.

To avoid these risks, it is recommended to feed cabbage to goats in small quantities and as a supplement to their regular diet. This can help to provide them with essential nutrients without the risk of over consumption of glucosinolates.

Moreover, some goats may be more sensitive to cabbage than others. If you notice any signs of digestive upset or other health issues after feeding your goat’s cabbage, you should stop feeding it to them and consult with your veterinarian.

Also Read: What do you feed baby Quail?

Possible Health Problems of Giving Cabbage to Your Goats

While cabbage can provide several nutritional benefits to your goats, there are also some possible health problems that can occur from feeding cabbage to them. Here are some of the potential health problems of giving cabbage to your goats –

1. Digestive Upset – Cabbage contains complex carbohydrates and fibre that can be challenging for goats to digest. Feeding too much cabbage to your goats can cause digestive upset, including bloating, gas, and diarrhea.

2. Reduced Calcium Absorption – Cabbage contains oxalates, which can interfere with calcium absorption in goats. Feeding too much cabbage to your goats can lead to calcium deficiency, which can cause health problems such as weak bones and poor muscle function.

3. Allergic Reactions – Some goats may be allergic to cabbage or other vegetables. Allergic reactions can cause symptoms such as skin rashes, itching, and swelling of the face or throat.

To avoid these health problems, feed cabbage to your goats in moderation and as part of a balanced diet. It is recommended to introduce new foods gradually and monitor your goats for any signs of digestive upset or allergic reactions.

Other Vegetables that Goats can Eat

There are several other vegetables that goats can safely eat as part of a healthy and balanced diet. Here are some of the vegetables that goats can eat –

  • Carrots – Carrots are a great source of beta-carotene, fiber, and vitamin A, which can help to support the immune system, skin, and vision of your goats. Chopped the carrots into small pieces for their easier digestion and feed them.
  • Lettuce – Lettuce is a leafy green vegetable that is low in calories and high in fiber. It also has vitamin C and potassium. Fed them by chopping them into small pieces for easier digestion.
  • Spinach – Spinach is another leafy green vegetable that is high in vitamins A and C, as well as iron and fibre. Feed them in moderation.
  • Celery – Celery is a crunchy vegetable that is low in calories and high in fiber. It is also a good source of vitamin K and potassium. Cut into small pieces for easier digestion.
  • Pumpkin – Pumpkin is a nutritious vegetable that is rich in fiber, vitamin A, and potassium. Feed them raw, and the seeds can also be fed to goats as a source of protein.
  • Squash – Squash is a low-calorie vegetable that is high in vitamins A and C, as well as fiber. Cut into small pieces for easier digestion.
  • Zucchini – Zucchini is a type of summer squash that is high in vitamins A and C, as well as potassium and fiber. Feed them raw and chopped into small pieces for easier digestion.

Tips for Feeding Goats

Feeding goats can be a rewarding experience, but ensuring that they receive a healthy and balanced diet can be a difficult thing. Here are some tips for feeding goats –

Provide plenty of fresh, clean water to your goats. They need clean and fresh water all times. Make sure that their water source is kept clean and that it is located in a shaded area during hot weather.

Hay is an important part of a goat’s diet and should make up the majority of their food intake. Good quality hay should be clean, dry, and free from mold or dust.

Goats may also require a small amount of grain as a supplement. Grain can be fed in small quantities as a treat or as a supplement to hay. However, don’t overfeed grain, as it can lead to digestive problems.

Goats require a variety of minerals in their diet to maintain good health. A mineral supplement that is specifically designed for goats can help to ensure that they receive the essential nutrients.

When introducing new foods to your goats, it is important to do so gradually. Sudden dietary changes can cause digestive upset, so new foods should be introduced slowly over a period of several days.

Goats are sensitive to spoiled or moldy food and can become ill if they consume it. Make sure that all food is fresh and free from mold or spoilage.

Conclusion

Goats can eat cabbage, but it should be fed in moderation and as part of a balanced diet. While cabbage offers many potential health benefits for goats, it can also cause health problems if fed more than usual.

When feeding goats, remember to provide them with plenty of fresh, clean water, good-quality hay, and a balanced diet that includes mineral supplements, if necessary. Introducing new foods gradually and avoiding spoiled or moldy food can also help to ensure the health and well-being of your goats.

By following these tips for feeding goats, you can help to ensure that your goats are happy, healthy, and growing well. 

How to Use Cow Manure for Vegetable Garden?

With increasing use of chemical fertilizers in vegetables, more people are turning towards starting container gardening.

There are many types of fertilizers you can use. Cow manure is a good choice because it works well and it is not too expensive.

Cow manure can help your vegetable garden grow. It gives the plants the nutrition they need to stay healthy and strong.

In this article, we will discuss the essential benefits of fertilizing your vegetable garden with cow manure to ensure that your plants become strong and flourishing.

Why You Should Fertilize Your Vegetable Garden?

Adding balanced fertilizers will enrich the growing soil with essential nutrients that eventually encourage the plant to produce quality yield.

Through fertilizers, your garden will get the essential nutrients like nitrogen, phosphorus, and potassium which helps promote strong roots and stems as well as an abundance of foliage.

Vegetables need plenty of these vital elements to grow properly; without proper amounts they may be unable to produce healthy fruit or vegetables.

What’s more, insufficient levels can make them vulnerable to various illnesses or even pests that could harm your entire plot.

Also Read: Is Chicken Manure Good for Vegetable Garden?

Cow Manure for Vegetable Garden

Cow manure is the best way to help your vegetable garden grow. Packed with essential nutrients such as nitrogen for lush foliage, phosphorus and potassium for robust root development and flower/fruit production, this organic fertilizer is a key factor in achieving success in your gardening endeavors.

  1. Cow manure is full of helpful things for growing vegetables. These things help the plants grow, like nitrogen, phosphorus and potassium.
  2. Nitrogen helps plants make leaves and grow bigger. It also helps them make chlorophyll, which is like food for the plant.
  3. Phosphorus helps plants grow roots and make flowers and fruit. It helps the plant get food so it can be strong and healthy.
  4. Potassium helps plants stay healthy. It helps them use water and make food from the sun. It also makes sure that their stems are strong.
  5. Cow manure has a lot of organic matter. This helps the soil keep water and not get too wet. It also helps tiny organisms that help plants grow and stay healthy.

Furthermore, it bolsters the population of helpful microorganisms in the earth – further enhancing plant health and growth.

How to Use Cow Manure for Vegetable Garden?

If you want to use cow manure in your vegetable garden, make sure you do it correctly. Below mentioned are some tips to do.

#1 Use Aged Manure

Fresh cow manure has a lot of nitrogen. If you put it directly on your plants, it can hurt them. To be safe, use old cow poop. Old cow manure has had time to break down so it is not as strong and won’t hurt your plants.

#2 Apply in the Fall or Spring

Applying cow manure to your garden in either the fall or spring offers a plethora of benefits. If you use fertilizer in the fall, it will break down over the winter and give your plants lots of food when they start to grow again in spring.

Conversely, applying it when things begin blooming outside ensures that your vegetation will have all essential elements available for them to become strong and healthy throughout their lifetime.

Check this: How to Use Cow Manure for Potatoes?

#3 Mix with Soil

For your plants to absorb the nourishment from the cow manure, you should combine it with your garden’s soil. Utilizing a tiller or gardening fork, stir in the cow dung into the dirt up to six inches deep for maximum absorption by vegetation.

#4 Use Sparingly

Cow manure is a excellent fertilizer, yet it’s important not to overdo its use. Too much nitrogen can lead to an abundance of leaves without the desired flower/fruit production.

Therefore, sparingly spread cow manure around your garden and then incorporate it into the soil for optimal growth results!

#5 Keep it Away from Edibles

Cow manure is safe to use in a vegetable garden. But, do not put it near plants that are close to the ground like lettuce or strawberries. Cow manure could have harmful bacteria that could make you sick if you eat it.

Check this: Is Cow Manure good for tomatoes?

Conclusion

If you want to ensure lush, thriving vegetable gardens, cow manure is the ideal fertilizer. Fertilizer has important vitamins like nitrogen, phosphorus, and potassium. It helps plants to grow bigger. It also makes the soil better so that water can stay in the ground longer and drain out more easily. Cow manure truly is a gardener’s best friend.

The use of cow manure can greatly benefit the health and growth of your vegetable garden by promoting a larger population of helpful microorganisms in the soil.

For successful utilization, however, it’s essential to take some necessary precautions – from applying aged manure to mixing it with soil to using it judiciously and distancing any edible plants near ground level.

If you follow these steps, you will get the benefits from using natural fertilizer.

Cow manure can help your vegetable garden grow healthy and yummy vegetables. If you want to give your garden food, think about using cow manure instead of something else. It is natural and it works.

How Much Sunlight Does Garlic Need – Full Sun or Shade?

After hearing reaping health benefits of garlic, as a gardener you might want to grow this vegetable in your backyard or container.

Cultivating a successful garlic plant demands careful thought and consideration of various elements, including the quality of soil, frequency of watering, and exposure to sunlight.

Gardeners often want to know how much sunlight does garlic plant need to grow?

Most garlic varieties do need full sunlight of 6-8 hours. But, there are few garlic types that does well under 4-6 hours of sun exposure.

Depending on climatic conditions in your region and the spot where you want to grow you should choose appropriate garlic variety.

You can grow this root vegetable indoors with minimal sunlight. However, with partial sunlight the plant may produce smaller garlic bulbs.

Sunlight Requirements of Garlic Plant

Sunlight is important for garlic plants to grow and be healthy. Sunlight helps the plant get bigger and makes it possible to harvest the bulbs. Sunlight also helps the plant make energy which helps it grow. Finally, sunlight makes it stronger so that bugs or diseases don’t hurt it.

  • Garlic plants need to be in the sun for 6 hours each day. This will help them grow better and give you a good harvest.
  • Garlic plants need sunlight to grow. Without enough sunlight, the garlic plants will not get big and might not make any garlic bulbs.
  • Planting garlic requires the right soil conditions in order to thrive. To ensure this, it’s essential that you have well-drained soil and incorporate organic matter before planting your cloves.
  • Plant garlic in the spring or fall when it is cool outside. Planting garlic too late in the summer or early winter can significantly reduce its yield since you are cutting into a shorter growing season.

Some garlic plants can grow even if there is not a lot of light. ‘Inchelium Red’, ‘Music’, and ‘Chesnok Red’ are some popular types. Other kinds that don’t need a lot of light are ‘Krasnodar’ and ‘Khabarovsky’.

How Much Sunlight Does Garlic Need?

Garlic needs sunlight to grow the best. Make sure it gets enough sunlight each day.

Most types require at least 6-8 hours of direct sun exposure daily; for an optimal outcome, find a location in your garden or yard that yields full sunshine most of the day and faces south or westward.

On the other hand, any area with less than adequate light can affect growth rate and result in diminished yield.

To get good plants, pick ones that can survive in the amount of light you have where you live.

If you give garlic plants lots of care, they will grow even if the weather or soil is not perfect.

When growing garlic in hot climates, make sure the soil stays wet. Mulch or put something over the garlic plants to keep them cool and stop water from evaporating. Water your garlic deeply once a week to keep it watered.

Put up a shade cloth over your garlic plants to protect them from the sun. This will help keep the temperature lower and stop the garlic from getting sunburn.

Even if your garlic doesn’t get much sunlight, it can still grow well with good care. But you may not get as many garlic as you would in full sunlight.

Also Read: Best Homemade Fertilizer for Garlic

Does garlic need full sun?

Most types of garlic need lots of sunlight to grow well and give you a good harvest. To maintain luscious growth and vigor, these plants must bask in minimum of six hours of direct sunlight daily.

Sunlight is very important for garlic to grow. Without enough sunlight, the garlic will not grow as big and it won’t make as many bulbs.

Garlic grows best in full sun. If it is not sunny in your area, you will need to give the garlic some shade or pick a type that can handle less sunlight.

Even if your garden is lacking in the sunlight department, with careful selection of garlic and attentive cultivation you can still yield a bountiful harvest. But the garlic will not be as much as if it grew in full sunlight.

Can garlic grow in shade?

Some types of garlic plants can grow in areas with 4 hours of sunlight. But, you won’t get a good harvest if you plant the garlic in full shade.

When growing garlic, pick a kind that can handle the amount of light in your area. You might need to give some shade or pick a type that can grow in less light. If you pay close attention, you can get some garlic even if there isn’t much light. But it won’t be as good as if there is more light.

Signs that Garlic Plant Getting Too Much Sunlight

  • If the leaves of your garlic plant turn yellow or brown, it might mean that the plant is getting too much sun. Check the plant carefully to make sure there are no bugs or diseases.
  • If your garlic plant does not grow very tall, it might be getting too much sunlight. The plant may dry up and stay small if it is in the sun too long.
  • Garlic plants need both sunlight and shade. Too much sun can make them wilt and the bulbs will be small and not taste very good. The right balance of sun and shade helps garlic grow healthy and delicious.

What Happens when garlic plant gets no sunlight?

Garlic plants need 6 hours of sunlight each day. Without any sun, the garlic plants will not grow and will not make bulbs.

Garlic plants need enough light to grow well. If you live in a place with less sun, you may need to put something over the garlic plants or pick a type of garlic that doesn’t need as much light.

Check this out: When Is It Too Late to Plant Garlic and Harvest?

Can you grow garlic plant indoors?

It is possible to grow garlic inside your home. But it is hard to make the right conditions for it. Garlic needs at least 6 hours of sunshine each day to be healthy and give you a good harvest.

Garlic needs light to grow. If your garlic is not in a place with enough light, it won’t grow as much. Also, the temperature can change too much and that is bad for garlic.

If you want to grow garlic indoors, you need extra lighting. Keep the temperature consistent and choose a type of garlic that can handle low light.

Growing Garlic in full sun

For an abundant and vigorous garlic harvest, bask your plants in full sun! When you plant your crop in the sun, here are some tips to help you get a good result:

First, pick the type of garlic that will grow best in your area. Some types can handle hot weather better. Others are better for places with more humidity or a shorter growing season.

When planting garlic, make sure the soil has good drainage and is of high quality. To cultivate the finest garlic, it is paramount to ensure that your soil’s pH ranges between 6.0 and 7.5 – a number of key minerals are essential for successful growth, so be sure to use plenty of organic matter as well!

After planting, be sure to water your garlic plants frequently during periods of intense sunlight to avoid them drying out. Furthermore, fertilize your crops periodically with a balanced fertilizer to ensure they reach their full potential and produce bountiful yields!

To defend your garlic crop from excessive temperatures, use shade cloths or other forms of shelter when needed. If you adhere to these simple tips, it will guarantee an abundant and prosperous yield of garlic.

Also Read: How to: Growing Turnips in Containers?

Conclusion

Garlic plants need 6 hours of sunlight every day to grow well. Garlic is a tasty ingredient in many different meals and it can be grown in the sun, shade or even inside.

Selecting the correct variety of garlic for your local climate is essential. With regular tending, your garden will yield a bountiful harvest. With enough work and planning, you can have a great garlic harvest no matter what the weather is like.

Best Homemade Fertilizer for Garlic – Organic, Liquid Fertilizers

Fertilizing your garlic plant at the right time will gift you back the bountiful harvest. During the growing season, enrich your garlic with nitrogen rich fertilizer.

Most gardeners opt not to use chemical incorporated fertilizer for their garden. Fortunately, there are organic fertilizer available in the market.

You can also homemade fertilizers for garlic plant, that is rich in nitrogen, phosphorus and potassium.

Does garlic need fertilizer?

Garlic needs fertilizer to help it grow. Fertilizer gives garlic important nutrients like nitrogen, phosphorus and potassium. Fertilizer will help the garlic plant grow bigger and make more garlic.

Organic fertilizer can help garlic plants grow strong and healthy. It gives the plants important nutrients like nitrogen, phosphorus, and potassium.

Nitrogen helps plants capture energy from the sun. It does this by helping the plant make chlorophyll. Chlorophyll lets plants use more of the sun’s energy for food.

Phosphorus helps plants grow bigger roots and makes the stems stronger. Potassium helps the soil keep more water and keeps it at a balanced pH level.

You can make your own fertilizer for garlic plants. Mix composted manure or hay with minerals like kelp meal, rock phosphate, or greensand. It is easy and not very expensive.

Mixing certain things together can make a good fertilizer for garlic plants. This helps the plants to grow really well.

It is important to give your garlic plant some fertilizer, but be careful not to put too much. Too much fertilizer can hurt the roots of your plant. Put just a small amount of fertilizer on the ground. Read the directions on the package to make sure you use it correctly.

Check this out: How Much Water Does Garlic Need?

How often to Fertilize Garlic Plant?

Every 4 to 6 weeks during the growing season, garlic plants need fertilizer. For regular garden soil use 1 lb for every 100 square feet of soil. For sandy soil, use 0.5 lb for every 100 square feet.

It is important to remember that garlic plants do not need fertilizer all the time. Too much fertilizer can hurt the plant. It can make the roots weak and cause problems with nutrients in the soil.

When growing garlic, it is important to adjust your fertilizer schedule based on the type of soil. Some soils need more fertilizer, some need less.

If you don’t know which fertilizer to use for your garlic plants, ask someone who knows about gardening. A garden center or an agricultural office can help you choose the right fertilizer that works best with the soil and weather in your area.

Also Read: When Is It Too Late to Plant Garlic and Harvest?

Best Homemade Fertilizer for Garlic

Making your own fertilizer is a good idea for garlic plants. It is natural and not bad for the environment like chemical fertilizers.

Homemade fertilizer can make the soil better, so that it has more nutrients for the plant to use. This helps the garlic plant grow bigger and stronger. It also helps sandy soils hold onto water better, which makes them better places to grow things.

Composted Manure or Hay

Manure or hay that has been composted is great for garlic plants. It gives the plant extra nutrients like nitrogen, phosphorus, and potassium which helps them grow.

Compost also makes the soil better for growing by making it easier for water to stay in the ground.

Kelp Meal

Kelp meal is good for helping garlic plants grow. It has lots of important vitamins like calcium, magnesium and phosphorus. It also has nitrogen, potassium and iron which are all necessary for healthy growth. Plus, kelp meal can help the soil stay wet during dry times.

Rock Phosphate

Rock phosphate is a good fertilizer for garlic plants. It helps make the roots grow more and helps the plant absorb nutrients from the soil.

It also adds important vitamins like iron, magnesium, calcium and potassium to the soil which makes it healthier for growing plants.

Greensand

Greensand is a good fertilizer for garlic plants. It makes the soil better and adds minerals like iron, potassium, magnesium, and calcium. It also helps the soil store more water which can be helpful during dry times.

When making fertilizer for garlic plants, use organic materials instead of chemicals. Chemicals can hurt the environment and be dangerous for people and animals. Follow the directions on any packages when using fertilizer to get the best results.

Blood meal for garlic

Blood meal makes plants grow healthy and strong. It adds nitrogen to the soil which helps roots grow. Apply blood meal at least twice a year for the best results.

Homemade liquid fertilizer for garlic

To make liquid fertilizer for garlic, mix one part fish or seaweed with nine parts water. Add 1 tablespoon of Epsom salt and 1 tablespoon of molasses to the mix.

Use this mixture every two weeks during the growing season to help your garlic plants stay strong and healthy. You can also use a weaker solution of compost tea instead of liquid fertilizer. Remember to give your garlic plants lots of water all through the growing season.

Garlic Growing Tips

  • When you are growing garlic, use organic fertilizer. Do not use chemical fertilizers or pesticides. These can harm the environment and be dangerous for people and animals.
  • Garlic plants need to be fertilized every 4-6 weeks while they are growing. If you have regular garden soil, use 1 pound of fertilizer for every 100 square feet. For sandy soils, use 1.5 pounds of fertilizer for every 100 square feet.
  • Water garlic plants often so the soil is moist. Don’t water too much. Too much water can make the roots rot and cause diseases.
  • If you have garlic plants, spread organic materials like grass clippings or leaves around them. This will help keep the soil moist and stop weeds from growing.
  • Wait 6-8 months after planting your garlic bulbs to harvest them. This will give you the best flavor and make sure they are healthy.
  • Harvested garlic can be stored in a cool and dry place for up to one year. You can use it in your cooking or you can save it for later.
  • Plant different types of garlic for the best possible growth. Plant garlic cloves or seeds in soil that has good drainage and the right pH level for your area.
  • Plant your garlic in a different spot each year. This will keep the soil healthy and strong.
  • Plant garlic in the fall, about 2 weeks before it gets cold. Harvest it by the middle of summer. Use organic fertilizer made for garlic plants. It has better nutrients than chemical fertilizer.
  • When you make your garlic garden, pick a spot that gets lots of sunshine and has soil that water can drain through easily. This will help the garlic grow the best it can.
  • Look for weeds and bugs often. They can hurt your plants. Make sure there is enough space between the plants so that air can flow around them. Cut off any dead or broken leaves and stems.

Conclusion

Garlic is easy to grow and it tastes good. It also has lots of nutrition. If you take care of it, you can get garlic for up to a year! You need sunshine, soil that water won’t stay in and fertilizer.

Try to use organic fertilizer if possible. Change where you plant your garlic each year so it will be healthy and give a lot of garlic. Follow these tips and you’ll have success with growing garlic.

How to: Growing Turnips in Containers?

Container gardening is becoming very popular. It has lots of advantages over soil-based gardening. With indoor gardening, you’ll have the power to cultivate your own lush greenery without demanding too much in terms of space.

Growing turnips in containers is better than the regular way. When you opt for container gardening, you gain full authority over the water, lighting, and temperature needs of your plants.

Gardeners can control how fast their turnips grow. They can change the conditions to make sure their turnips grow just the way they want.

Container gardening takes up less space than using soil. If you have limited outdoor space but still dream of harvesting your own turnips, this is the perfect solution for you.

Things to consider while growing turnips in pots

When growing turnips in a container, make sure it has holes so that water can escape. Put soil that is good for turnips in the container. Place the container in a spot with lots of sunshine and enough room for the turnips to grow.

It is important to take good care of your turnip garden. Check it often for bugs or diseases. Make sure the soil has enough water and give the plants fertilizer regularly. If you take care of them, turnips grown in containers will do just as well as turnips grown in the ground.

Also Read: Why Are My Beets Growing above Ground?

Step-by-step Guide to Grow Turnips in Container

You can grow turnips in a container. Choose a big enough container and use the right soil and fertilizer to help them grow well. This will give you lots of yummy turnips with not much effort.

1. Choose a pot for your turnips. The pot should have a depth of 8 inches and span 10 inches in width. Make sure the pot has holes in the bottom so that water can come out.

2. Fill the container with soil that has lots of nutrients. Add some organic fertilizer too. Make sure the soil is wet, but not too wet or else the turnips’ roots could rot. Turnips like soil that is slightly acidic with a pH between 6 and 7.

3.Put the turnip seedlings in the container. Space them out so they have room to grow. Put several seeds in each hole because not all of them will start growing. Put each seedling one inch deep into the soil and cover it with soil afterward.

4. Water your turnip plants every week. Give them about 1 inch of water. If your soil is dry, it’s essential to give your plants more water. To ensure that the earth stays moist and nourished, be sure to check for signs of wilting; if present, drench with additional H2O.

5. Put some mulch around your turnip plants. This will help them stay moist and stop weeds from growing too close. You can use straw or grass clippings for the mulch. The straw and clippings will break down over time and add nutrients to the soil.

6. When your turnip plants are 4 inches tall, use scissors or shears to cut off some of the seedlings that are too close together. Cut them at the base. Leave 4 inches between each plant. This will help them grow and make good roots that you can harvest later.

7 . Give your turnip plants fertilizer every few weeks. Use a special kind of fertilizer for growing vegetables in containers. This will help the plants stay healthy and grow big! Make sure to routinely check up on your plants in order to avoid any pesky pests or diseases that could potentially harm them. If you find any, use insecticidal soap to treat the affected plant.

8 . It is time to get your turnips. When they have been growing for 3-4 months, you can pick them with a knife or garden shears. Put the turnips in a cool place so they stay fresh for several weeks.

Best Soil for Growing Turnips in Container

To grow turnips in a container, use soil that has lots of nutrients. The best pH level is between 6 and 7. To make the soil better for growing turnips, add compost or manure.

To ensure vigorous plant growth, it’s important to keep the soil from becoming overly wet or retaining too much moisture. Use mulch around the turnips to help keep in moisture and stop weeds from growing.

If you take good care of your turnips, put them in the right kind of soil, and give them the right amount of maintenance – they will taste really yummy.

Check this out: Can You Plant Lettuce and Carrots Together?

Container to grow turnips

To cultivate turnips, ensure that you have a planter with an 8-inch depth and 10 inches in width. To grow a flourishing garden, you may want to consider investing in a larger planter.

To ensure that your plant’s root system thrives, select a pot with holes at the base. This helps water come out of the pot and not stay in the soil. Clay or ceramic pots are great for this because they let air get to the soil and help water flow away.

If you want something cheaper, plastic planters are a good choice. Pick a planter that is the right size for turnips and their roots.

Harvesting Turnips from Containers

When your turnips are ready, it is time to cut them. Use a sharp knife or garden shears and cut the turnips at their base. Cut carefully so you don’t damage the turnips. To guarantee their original flavor and texture, keep them in a chilled atmosphere to maintain maximum freshness for up to multiple weeks!

Pests and Diseases

When you grow turnips in a container, watch for pests and diseases. Aphids, mites, white-flies, and powdery mildew can hurt your turnips. If you see any of them on your plants, do something quickly.

To get rid of bugs, you can use insecticidal soap. To stop and treat powdery mildew, use a sulfur-based fungicide. If you take good care of your turnips, you can have a successful harvest.

You don’t need to be scared to grow turnips in a container. You just need the right dirt, pot, and bug/disease protection. Then you can have a good harvest soon.

Check this out: How Much Water Does Garlic Need?

Important Tips Growing Turnips in Container

1. Make sure your container is big enough. In order to cultivate the amount of flora you intend on growing, your garden should be at least 8 inches deep and 10 inches wide for optimum success.

2. Use soil that is full of good things for your plants. To grow strong, healthy plants, the soil should have a slightly acidic pH between 6 and 7. You can add compost or animal poop to make the soil even better for growing plants.

3. Make sure the pot you use to grow turnips has holes in the bottom. Adding a layer of mulch to the beds can help retain moisture, resulting in healthier plants.

4. Look carefully for bugs and diseases that could hurt your crop. If you find any, use insecticidal soap to help the plants.

5. Cut the turnips out of the ground using a sharp knife or garden shears. Make sure to be careful so you do not damage them.

6. Keep your turnips in a cool place after you pick them. When appropriately taken care of, they can remain fresh for weeks.

These tips can help you grow turnips in containers. Don’t wait! Start today and enjoy the delicious taste of your own turnips.

Conclusion

You can grow turnips in a container. With just soil, a pot and your dedication, it is easy to cultivate thriving plants. Then you can have fresh turnips soon.

If you see any pests or diseases, take action right away. This can hurt your plants. For a successful turnip harvest, use either sharp knife or garden shears to sever the vegetables at their leaf base. With these tips and some work, you can enjoy yummy turnips from your own garden.